Easy Ham and Cheese Sliders

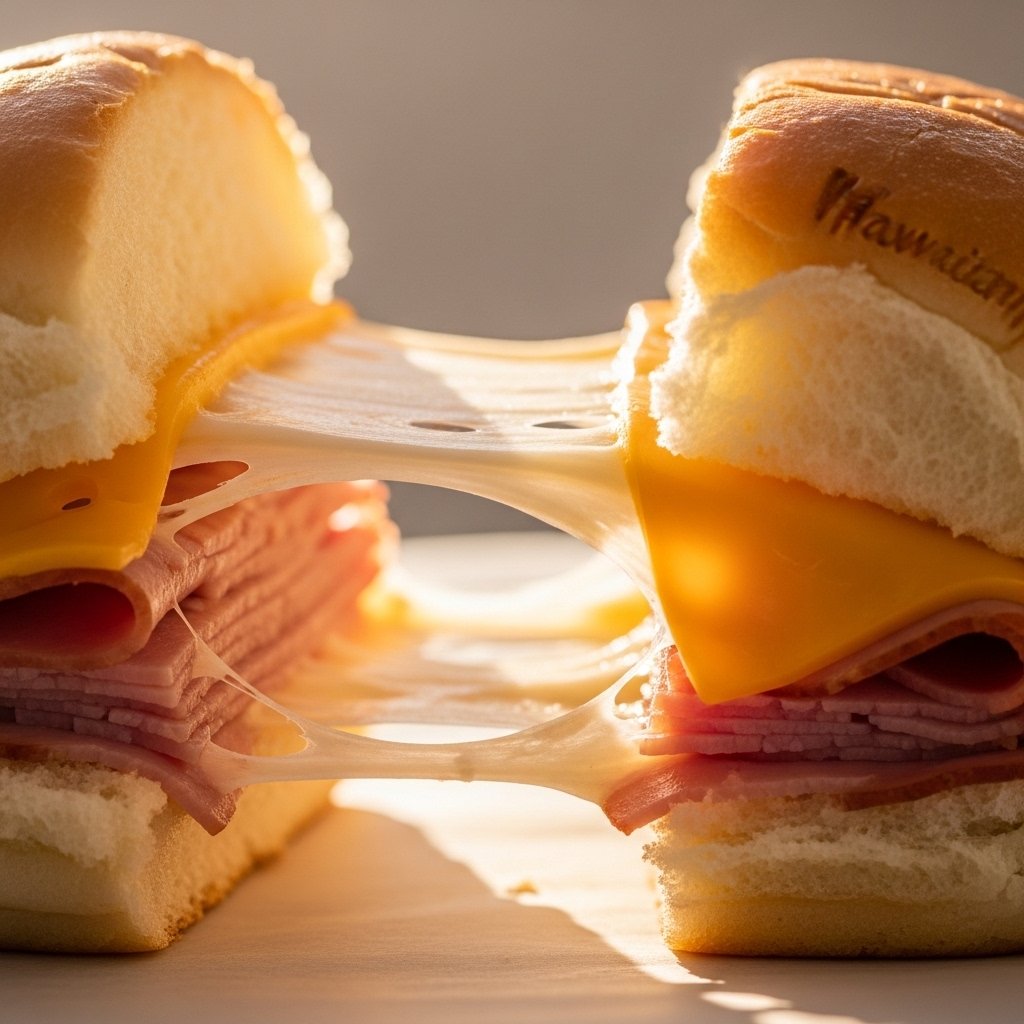
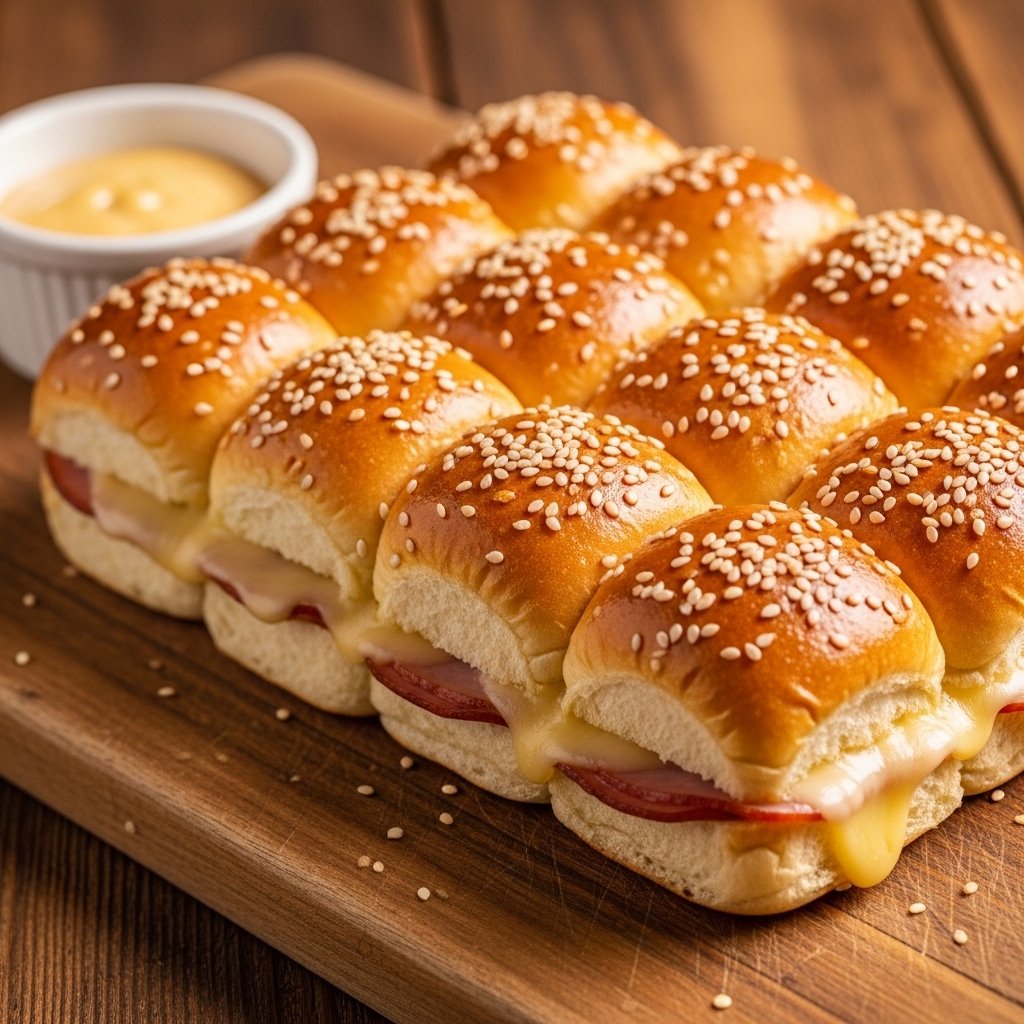
If you’re searching for the ultimate crowd-pleasing appetizer or a quick weeknight dinner idea, these Easy Ham and Cheese Sliders are exactly what you need. Soft Hawaiian rolls, layers of savory ham and melted cheese, and a buttery glaze baked until golden—this recipe is comfort food at its best.

Cheese Sliders

What makes these sliders so popular is their simplicity. With just a handful of ingredients, you can create something that feels indulgent, satisfying, and perfect for sharing at parties, game day gatherings, or even a quick family dinner.

Why You’ll Love This Recipe

These Easy Ham and Cheese Sliders are a go-to recipe for busy cooks who want maximum flavor with minimal effort.

  • Quick and simple preparation in under 30 minutes
  • Perfect for feeding a crowd at parties or events
  • Melty cheese and savory ham in every bite
  • Buttery, golden tops with incredible flavor
  • Easy to customize with different fillings

Ingredients

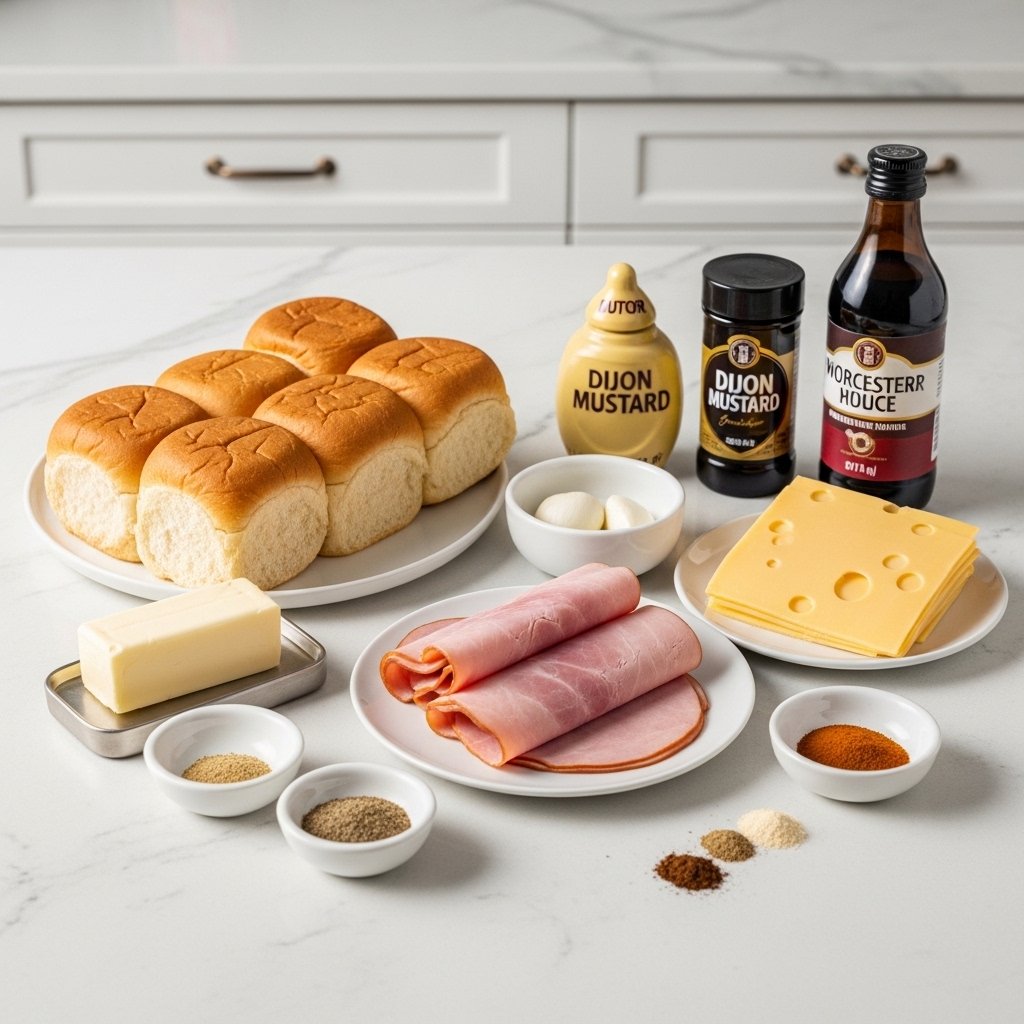
To make these delicious Easy Ham and Cheese Sliders, you’ll need:

  • 1 package Hawaiian sweet rolls (12 count)
  • ½ pound sliced ham
  • 6–8 slices Swiss cheese (or cheddar)
  • ¼ cup unsalted butter (melted)
  • 1 tablespoon Dijon mustard
  • 1 tablespoon Worcestershire sauce
  • 1 teaspoon poppy seeds
  • 1 teaspoon garlic powder
  • 1 teaspoon onion powder

Ingredient Notes

The key to the best Easy Ham and Cheese Sliders is using soft Hawaiian rolls—they add a subtle sweetness that pairs perfectly with salty ham and melted cheese. Swiss cheese is traditional, but cheddar or provolone also work beautifully.

The buttery glaze mixture is what takes these sliders to the next level, infusing every bite with rich, savory flavor.

Step-by-Step Instructions

1. Preheat Oven

Preheat your oven to 350°F and lightly grease a baking dish.
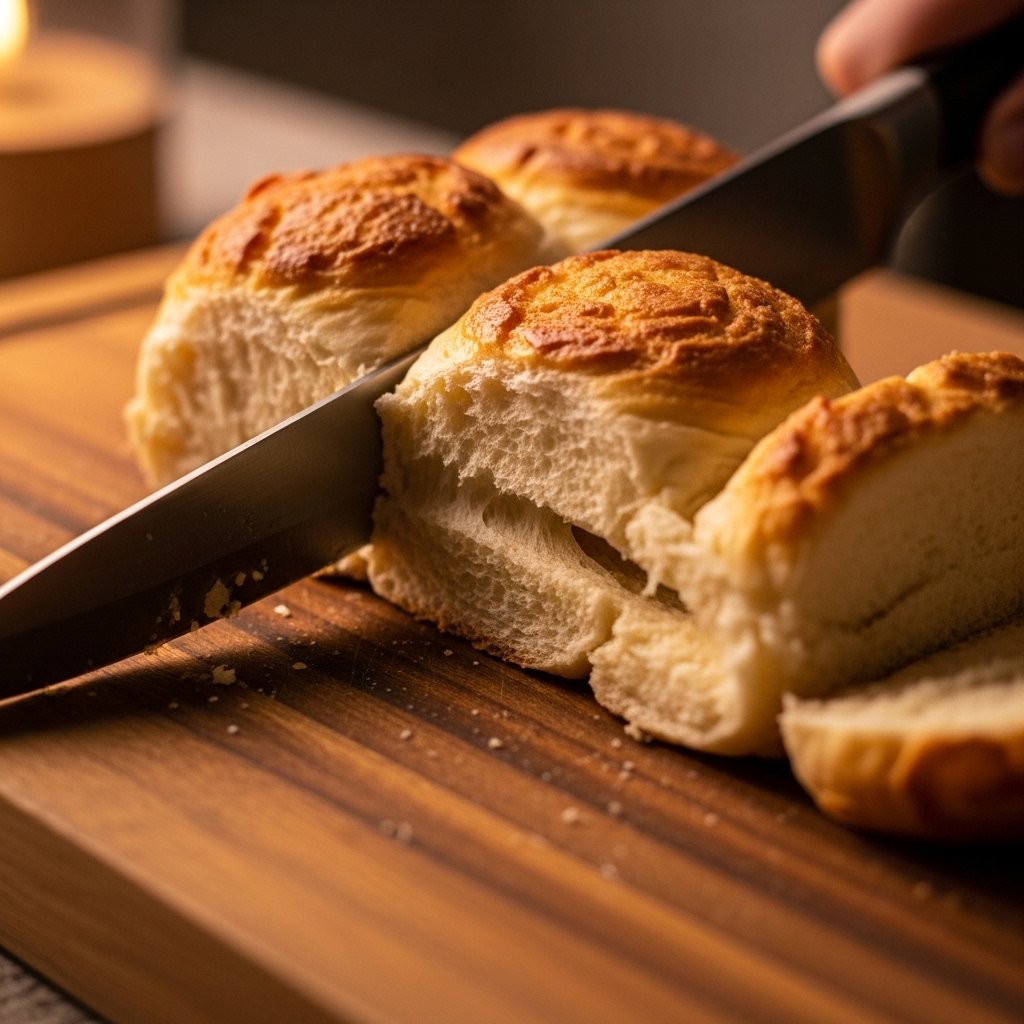
2. Slice the Rolls

Without separating them, slice the entire pack of rolls horizontally.

3. Layer Ingredients

Place the bottom half in the baking dish, layer ham and cheese evenly, then place the top half back on.

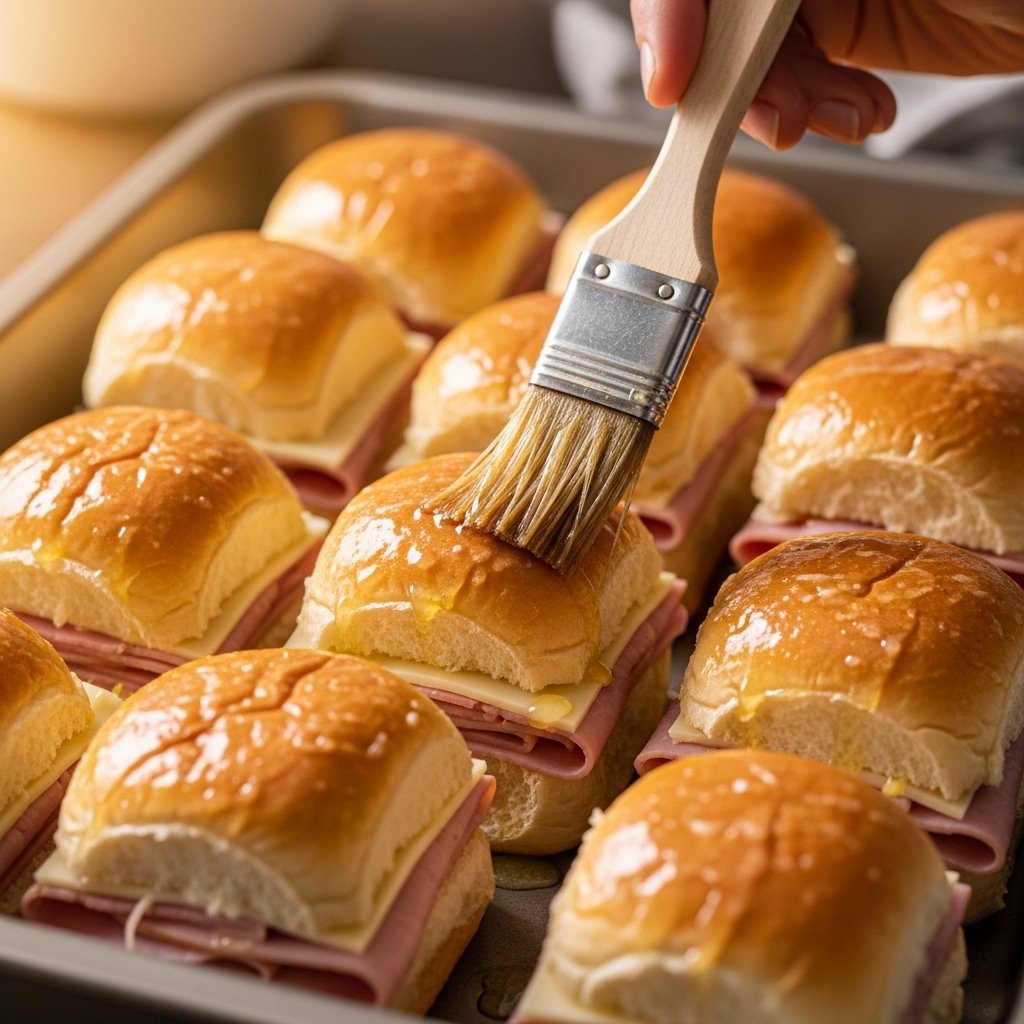
4. Make the Butter Glaze

Mix melted butter, Dijon mustard, Worcestershire sauce, garlic powder, onion powder, and poppy seeds.

5. Brush and Bake

Pour and brush the glaze evenly over the rolls, cover with foil, and bake for 15 minutes. Remove foil and bake an additional 5–7 minutes until golden.

Tips for Perfect Results

To make the best Easy Ham and Cheese Sliders, keep these tips in mind:

  • Don’t skip the glaze—it adds essential flavor
  • Cover while baking first to keep sliders soft
  • Use freshly sliced deli ham for best texture
  • Brush glaze evenly so every bite is flavorful

These simple steps guarantee bakery-level sliders every time.

Variations

One of the best things about Easy Ham and Cheese Sliders is how easy they are to customize:

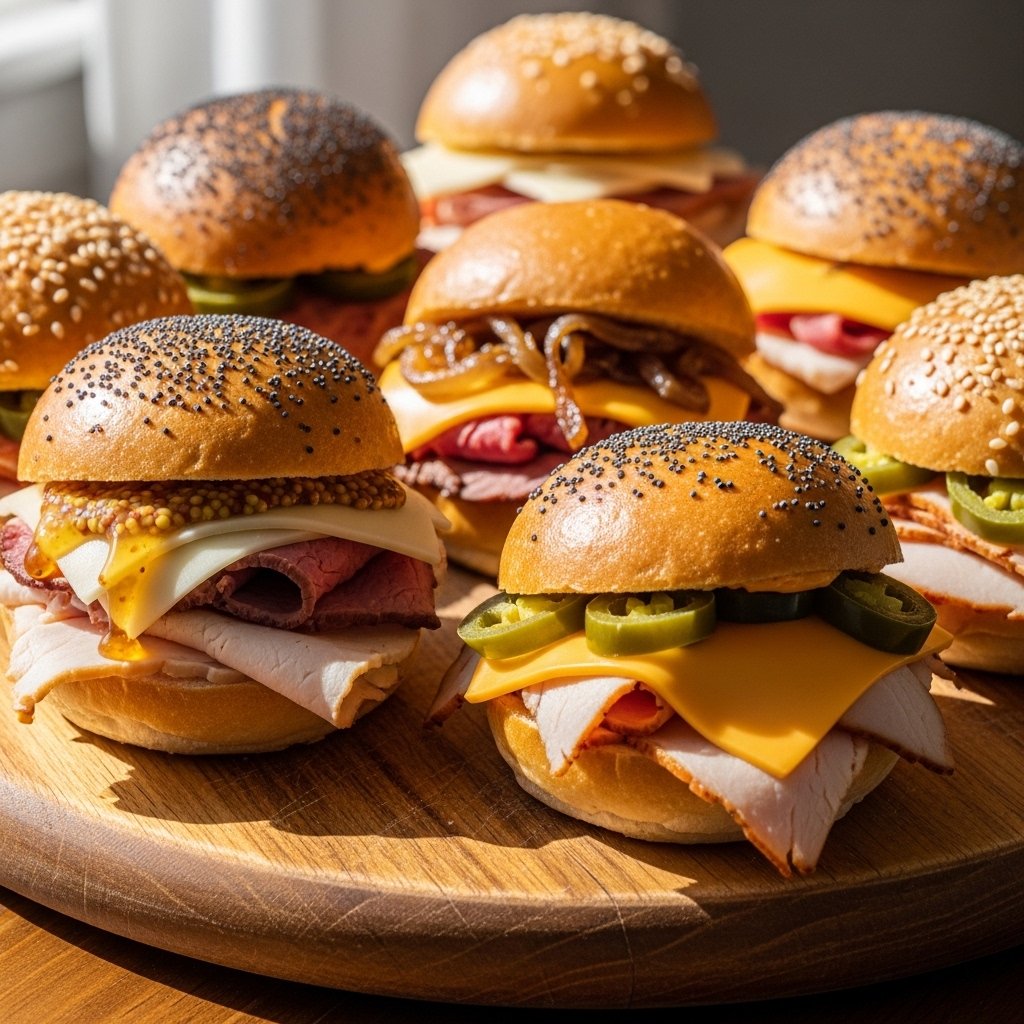
  • Swap ham for turkey or roast beef
  • Use pepper jack cheese for a spicy kick
  • Add pickles or caramelized onions
  • Spread a layer of honey mustard or mayo inside

What to Serve With It

These sliders pair perfectly with:

  • French fries or sweet potato fries
  • Coleslaw or potato salad
  • Soup like tomato or chicken noodle
  • Chips and dipping sauces

They’re ideal for game day spreads or casual dinners.

Storage & Reheating

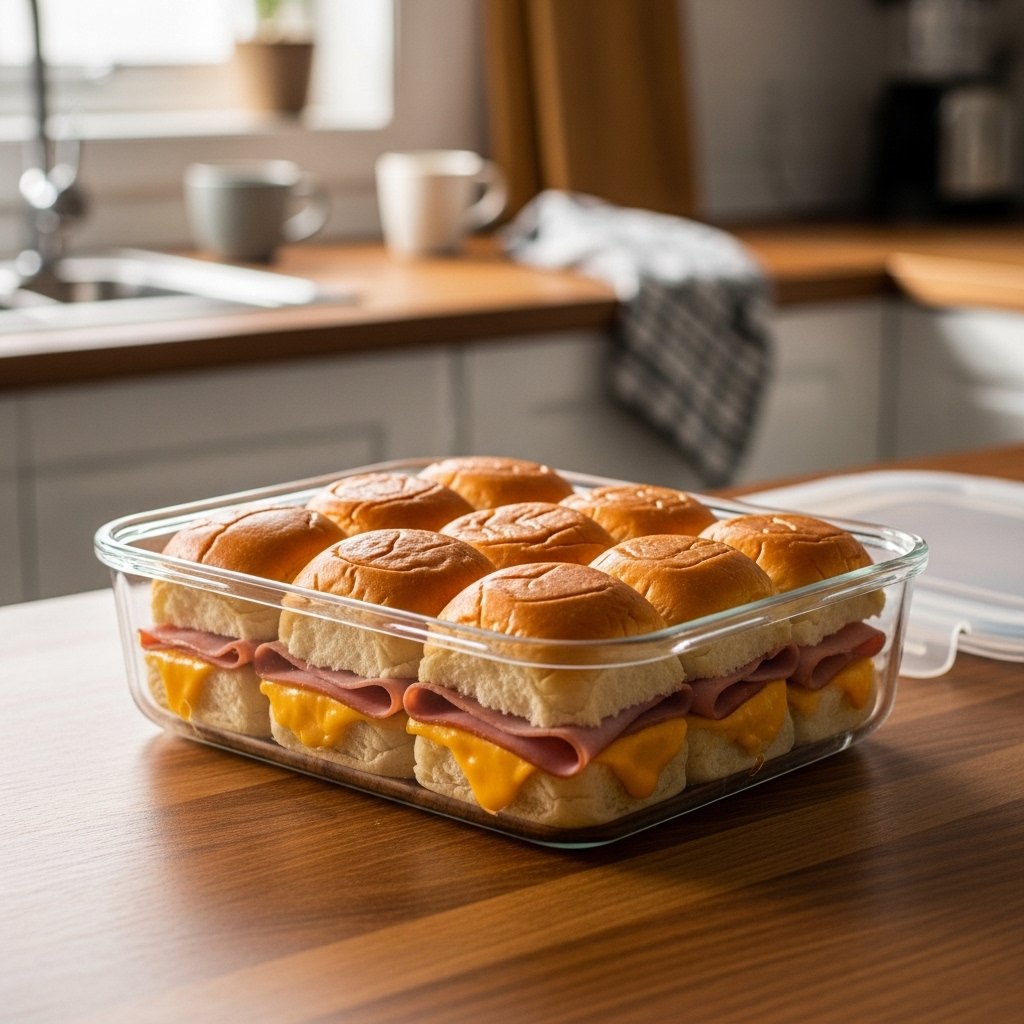
Store leftover Easy Ham and Cheese Sliders in an airtight container:

  • Refrigerator: up to 3 days
  • Freezer: up to 2 months

To reheat:

  • Oven: 325°F for 10 minutes
  • Microwave: 20–30 seconds per slider

Common Mistakes to Avoid

  • Skipping the butter glaze (reduces flavor)
  • Overbaking and drying out the rolls
  • Using dry or low-quality ham
  • Not covering during initial baking

Avoid these mistakes for perfectly soft and flavorful sliders.

FAQs

1. Can I make ham and cheese sliders ahead of time?

Yes! Assemble them and refrigerate until ready to bake.

2. Can I freeze sliders?

Absolutely—freeze before or after baking.

3. What cheese works best?

Swiss is classic, but cheddar, provolone, or mozzarella also work well.

4. How do I keep sliders from getting soggy?

Bake uncovered at the end to crisp the tops slightly.

Final Thoughts

These Easy Ham and Cheese Sliders are the perfect combination of simplicity and flavor. Soft rolls, savory ham, melted cheese, and buttery glaze make them irresistible for any occasion.

Whether you’re hosting a party or need a quick family meal, this recipe is guaranteed to disappear fast.

Baked Egg White & Vegetable Cups

If you’re looking for a quick, healthy, and protein-packed breakfast option, these Baked Egg White & Vegetable Cups are about to become your new favorite meal prep recipe. Light, fluffy, and loaded with colorful vegetables, they’re the perfect way to start your day without feeling weighed down.

These little egg cups are not only nutritious but also incredibly versatile. Whether you’re following a low-carb diet, eating clean, or just need something easy for busy mornings, this recipe delivers convenience without sacrificing flavor.

Why You’ll Love This Recipe

These Baked Egg White & Vegetable Cups are a game-changer for anyone who wants a healthy breakfast ready to go.

  • High-protein and low-calorie breakfast option
  • Perfect for meal prep and grab-and-go mornings
  • Customizable with any vegetables you like
  • Naturally gluten-free and low-carb
  • Quick to prepare and bake

They’re ideal for busy weekdays, post-workout meals, or even a light lunch paired with a salad.

Ingredients

To make these Baked Egg White & Vegetable Cups, you’ll need simple, fresh ingredients:

Main Ingredients:

  • 8–10 egg whites (or liquid egg whites)
  • 1/2 cup diced bell peppers
  • 1/2 cup spinach (chopped)
  • 1/4 cup diced onions
  • 1/4 cup cherry tomatoes (halved)
  • Salt and black pepper to taste

Optional Add-ins:

  • Feta cheese or shredded cheddar
  • Mushrooms, zucchini, or broccoli
  • Fresh herbs like parsley or chives

Ingredient Notes

The beauty of Baked Egg White & Vegetable Cups is their flexibility. Egg whites provide lean protein while allowing the vegetables to shine. Using fresh vegetables ensures the best texture and flavor.

If you want more richness, you can add a whole egg or a sprinkle of cheese, but the recipe is just as satisfying in its clean, simple form.

Step-by-Step Instructions

1. Preheat Oven

Preheat your oven to 350°F and lightly grease a muffin tin or use silicone molds.

2. Prepare Vegetables

Chop all vegetables into small, even pieces for consistent baking.

3. Mix Egg Whites

Whisk egg whites lightly with salt and pepper until slightly frothy.

4. Assemble Cups

Divide vegetables evenly into muffin cups, then pour egg whites over them.

5. Bake

Bake for 18–22 minutes until set and lightly golden on top.

6. Cool and Serve

Let cool slightly before removing from the pan.

Tips for Perfect Results

To make the best Baked Egg White & Vegetable Cups, follow these tips:

  • Don’t overfill muffin cups to avoid spilling
  • Chop vegetables small for even cooking
  • Use silicone molds for easy removal
  • Bake until just set to avoid rubbery texture

These simple steps ensure fluffy, flavorful egg cups every time.

Variations

One of the best things about Baked Egg White & Vegetable Cups is how easy they are to customize:

  • Add turkey bacon or ham for extra protein
  • Use different cheese options for richness
  • Add spicy jalapeños for heat
  • Make them Mediterranean-style with olives and feta

What to Serve With It

These egg white cups pair perfectly with:

  • Whole grain toast or avocado toast
  • Fresh fruit salad
  • Greek yogurt with honey
  • Smoothies for a balanced breakfast

They also work great as a protein side for lunch or dinner.

Storage & Reheating

Store Baked Egg White & Vegetable Cups in an airtight container:

  • Refrigerator: up to 4 days
  • Freezer: up to 2 months

To reheat:

  • Microwave for 20–30 seconds
  • Or warm in the oven at low heat

Common Mistakes to Avoid

  • Overbaking (makes them rubbery)
  • Using too many watery vegetables without draining
  • Not greasing the muffin tin properly
  • Overfilling cups

Avoiding these mistakes ensures perfect texture every time.

FAQs

1. Can I use whole eggs instead of egg whites?

Yes, you can substitute whole eggs for a richer texture.

2. Are these good for meal prep?

Absolutely! They store and reheat very well.

3. Can I freeze egg white cups?

Yes, freeze them individually and reheat when needed.

4. Why are my egg cups watery?

Vegetables like tomatoes release moisture—be sure to drain excess liquid.

Final Thoughts

These Baked Egg White & Vegetable Cups are the perfect healthy breakfast solution—light, protein-packed, and incredibly easy to make.

Whether you’re meal prepping for the week or looking for a quick grab-and-go option, this recipe is a simple way to stay healthy without sacrificing flavor.

The Best Cinnamon Rolls

There’s something magical about waking up to the smell of freshly baked cinnamon rolls. These The Best Cinnamon Rolls are everything you want in a homemade treat—pillowy soft dough, a rich cinnamon-sugar swirl, and a luscious cream cheese frosting that melts into every layer. Whether you’re making them for a holiday breakfast, weekend brunch, or just because, this recipe delivers bakery-quality results right in your own kitchen.

The Best Cinnamon

What makes these cinnamon rolls truly special is the perfect balance of sweetness, spice, and texture. Once you try them, you’ll never go back to store-bought again.

Why You’ll Love This Recipe

These The Best Cinnamon Rolls stand out for their irresistible texture and flavor. They’re soft, fluffy, and packed with gooey goodness in every bite.

  • Ultra soft dough that stays tender for days
  • Rich cinnamon filling with the perfect sweetness
  • Creamy frosting that melts beautifully
  • Make-ahead friendly for stress-free mornings
  • Perfect for special occasions or everyday treats

Ingredients

To make The Best Cinnamon Rolls, you’ll need:

For the Dough:

  • 4 cups all-purpose flour
  • 1 cup warm milk
  • 2 ¼ teaspoons active dry yeast
  • ½ cup granulated sugar
  • ⅓ cup melted butter
  • 2 eggs
  • 1 teaspoon salt

For the Filling:

  • 1 cup brown sugar
  • 2 ½ tablespoons cinnamon
  • ⅓ cup softened butter

For the Frosting:

  • 4 oz cream cheese
  • ¼ cup butter
  • 1 cup powdered sugar
  • 1 teaspoon vanilla extract

Ingredient Notes

Using high-quality ingredients makes a noticeable difference in The Best Cinnamon Rolls. Fresh yeast ensures a proper rise, while whole milk adds richness to the dough. The combination of brown sugar and cinnamon creates that classic gooey filling everyone loves.

For the frosting, full-fat cream cheese delivers the best flavor and texture—don’t substitute if you want that signature creamy finish.

Image Prompt: Close-up of cinnamon and brown sugar mixture in a bowl with a spoon, warm tones, natural lighting, shallow depth of field, ultra realistic, 4k

Step-by-Step Instructions

1. Activate the Yeast

Combine warm milk and yeast with a pinch of sugar. Let sit until foamy.

2. Make the Dough

Mix flour, sugar, eggs, butter, and salt with the yeast mixture. Knead until smooth and elastic.

3. Let It Rise

Place dough in a greased bowl, cover, and let rise until doubled in size.

4. Roll and Fill

Roll out dough into a rectangle, spread butter, and sprinkle cinnamon-sugar mixture evenly.

5. Shape the Rolls

Roll tightly into a log and cut into equal pieces. Place in a baking dish.

6. Second Rise

Let rolls rise again until puffy.

7. Bake

Bake at 350°F for 20–25 minutes until golden brown.

8. Frost and Serve

Spread cream cheese frosting over warm rolls.

Tips for Perfect Results

To achieve The Best Cinnamon Rolls, keep these tips in mind:

  • Use warm—not hot—milk to avoid killing the yeast
  • Don’t rush the rise time for fluffy rolls
  • Roll dough evenly for consistent baking
  • Frost while warm so it melts perfectly

These tips ensure soft, bakery-style cinnamon rolls every time.

Variations

Customize your The Best Cinnamon Rolls with these ideas:

  • Add chopped pecans or walnuts for crunch
  • Mix in raisins or dried cranberries
  • Use a maple glaze instead of cream cheese frosting
  • Add orange zest for a citrus twist

What to Serve With It

These cinnamon rolls pair perfectly with:

  • Freshly brewed coffee or espresso
  • Hot chocolate or latte
  • Fresh fruit or yogurt
  • A full brunch spread with eggs and bacon

They’re the centerpiece of any cozy breakfast table.

Storage & Reheating

Store The Best Cinnamon Rolls in an airtight container:

  • Room temperature for up to 2 days
  • Refrigerate for up to 5 days
  • Freeze for up to 2 months

Reheat in the microwave for 15–20 seconds or warm in the oven for best results.

Common Mistakes to Avoid

  • Using milk that’s too hot (kills yeast)
  • Overbaking (dries out rolls)
  • Skipping the second rise
  • Not sealing the roll tightly

Avoid these pitfalls for consistently amazing results.

FAQs

1. Can I make cinnamon rolls ahead of time?

Yes! Prepare them the night before and bake in the morning.

2. Why didn’t my dough rise?

Your yeast may be expired or the milk was too hot.

3. Can I freeze cinnamon rolls?

Absolutely—freeze before or after baking.

4. How do I keep them soft?

Store properly and avoid overbaking.

Final Thoughts

These The Best Cinnamon Rolls are the ultimate homemade treat—soft, gooey, and topped with a rich frosting that takes them over the top.

Once you make them from scratch, you’ll see why they truly deserve the title of “the best.”

Irresistible Banana Crumb Muffins Topped with a Delicious Sweet Vanilla Glaze

There’s nothing quite like the smell of freshly baked muffins filling your kitchen, especially when ripe bananas are involved. These Irresistible Banana Crumb Muffins Topped with a Delicious Sweet Vanilla Glaze are the ultimate comfort bake—soft, moist, and layered with flavor from the tender banana base to the buttery crumb topping and silky glaze.

Banana Crumb Muffins

Perfect for breakfast, brunch, or a midday treat, these muffins bring bakery-quality results right into your home kitchen. If you’ve got overripe bananas sitting on your counter, this recipe is exactly what you need.

Why You’ll Love This Recipe

These banana crumb muffins with vanilla glaze are a step above your average muffin. They combine rich banana flavor with a sweet crunch and a smooth finishing drizzle.

  • Incredibly moist texture from ripe bananas
  • Buttery crumb topping adds irresistible crunch
  • Sweet vanilla glaze enhances every bite
  • Simple ingredients you likely already have
  • Great for meal prep or freezing

Ingredients

Here’s what you’ll need to make these bakery-style muffins:

For the Muffins:

  • 1 ½ cups all-purpose flour
  • 3 ripe bananas (mashed)
  • ¾ cup granulated sugar
  • ½ cup melted butter
  • 2 eggs
  • 1 teaspoon vanilla extract
  • 1 teaspoon baking soda
  • ½ teaspoon salt

For the Crumb Topping:

  • ½ cup brown sugar
  • ⅓ cup flour
  • 1 teaspoon cinnamon
  • ¼ cup cold butter (cubed)

For the Vanilla Glaze:

  • 1 cup powdered sugar
  • 2–3 tablespoons milk
  • 1 teaspoon vanilla extract

Ingredient Notes

The secret to the best banana crumb muffins with vanilla glaze lies in using very ripe bananas—the darker, the better. They bring natural sweetness and moisture, reducing the need for excess sugar.

For the crumb topping, cold butter is essential to create that signature crumble. And when it comes to the glaze, real vanilla extract adds a rich, aromatic finish that ties everything together beautifully.

Step-by-Step Instructions

1. Preheat and Prepare

Preheat your oven to 350°F and line a muffin tin with paper liners.

2. Make the Muffin Batter

In a large bowl, mash bananas, then mix in melted butter, sugar, eggs, and vanilla extract until smooth.

3. Add Dry Ingredients

Stir in flour, baking soda, and salt until just combined—do not overmix.

4. Prepare the Crumb Topping

Combine brown sugar, flour, and cinnamon, then cut in butter until crumbly.

5. Assemble

Fill muffin cups about ¾ full and generously sprinkle crumb topping over each.

6. Bake

Bake for 18–22 minutes or until a toothpick inserted comes out clean.

7. Add the Glaze

Once cooled, drizzle vanilla glaze over the muffins.

Tips for Perfect Results

To make flawless banana crumb muffins with vanilla glaze, follow these tips:

  • Use very ripe bananas for best flavor
  • Avoid overmixing to keep muffins light
  • Chill crumb topping briefly for better texture
  • Let muffins cool before glazing

These small steps ensure bakery-quality muffins every time.

Variations

Want to switch things up? Try these variations:

  • Add chocolate chips for extra sweetness
  • Mix in chopped walnuts or pecans
  • Use a cream cheese glaze instead of vanilla
  • Add a pinch of nutmeg or cinnamon to the batter

What to Serve With It

These banana crumb muffins with vanilla glaze pair wonderfully with:

  • Freshly brewed coffee or cappuccino
  • A glass of cold milk
  • Greek yogurt and fresh fruit
  • Smoothies for a balanced breakfast

They’re perfect for both casual mornings and special brunch spreads.

Storage & Reheating

Store muffins in an airtight container at room temperature for up to 3 days or refrigerate for up to 5 days.

  • Reheat in the microwave for 10–15 seconds
  • Freeze for up to 2 months
  • Glaze fresh after thawing for best texture

Common Mistakes to Avoid

  • Using underripe bananas (less flavor and sweetness)
  • Overbaking (leads to dry muffins)
  • Skipping the crumb topping
  • Adding glaze while muffins are still hot

Avoid these mistakes for consistently perfect results.

FAQs

1. Can I make these muffins ahead of time?

Yes, they store well and can be made a day or two in advance.

2. Can I freeze banana crumb muffins?

Absolutely. Freeze without glaze and add it after reheating.

3. How ripe should bananas be?

Very ripe with brown spots for maximum sweetness and flavor.

4. Can I make them gluten-free?

Yes, substitute with a 1:1 gluten-free flour blend.

Final Thoughts

These Irresistible Banana Crumb Muffins Topped with a Delicious Sweet Vanilla Glaze are everything you want in a homemade treat—soft, flavorful, and topped with layers of sweetness and texture.

Whether you’re baking for your family or treating yourself, this recipe is guaranteed to become a go-to favorite.

Easy Pumpkin Streusel Muffins Perfect for Cozy Breakfasts

There’s something undeniably comforting about baking during the cooler months, and these Easy Pumpkin Streusel Muffins Perfect for Cozy Breakfasts capture that feeling in every bite. Warm spices, rich pumpkin flavor, and a buttery crumb topping come together to create a bakery-style treat you can easily make at home. Whether you’re sipping coffee on a crisp morning or prepping snacks for the week, these muffins deliver both flavor and convenience.

Easy Pumpkin Streusel

These muffins are not just delicious—they’re also incredibly easy to prepare, making them ideal for beginner bakers and seasoned pros alike.

Why You’ll Love This Recipe

These easy pumpkin streusel muffins are a must-try for so many reasons. They strike the perfect balance between soft, moist cake and crunchy topping, offering texture and flavor in every bite.

  • Super moist texture thanks to pumpkin puree
  • Warm fall spices like cinnamon and nutmeg
  • Buttery streusel topping adds irresistible crunch
  • Quick and simple—ready in under 40 minutes
  • Perfect for meal prep and freezing

Ingredients

To make these cozy muffins, you’ll need simple pantry staples:

For the Muffins:

  • 1 ¾ cups all-purpose flour
  • 1 cup pumpkin puree
  • ¾ cup granulated sugar
  • ½ cup brown sugar
  • ½ cup vegetable oil
  • 2 large eggs
  • 1 teaspoon vanilla extract
  • 1 teaspoon baking soda
  • ½ teaspoon baking powder
  • 1 teaspoon cinnamon
  • ½ teaspoon nutmeg
  • ½ teaspoon salt

For the Streusel Topping:

  • ½ cup all-purpose flour
  • ⅓ cup brown sugar
  • 1 teaspoon cinnamon
  • ¼ cup cold butter (cubed)

Ingredient Notes

The star of these easy pumpkin streusel muffins is, of course, the pumpkin puree. Make sure you’re using pure pumpkin and not pumpkin pie filling, which already contains added sugar and spices. The combination of brown sugar and granulated sugar adds depth and moisture, while oil keeps the muffins tender for days.

For the streusel, cold butter is key—it creates that crumbly texture that melts beautifully as the muffins bake.

Step-by-Step Instructions

1. Preheat and Prep

Preheat your oven to 350°F and line a muffin tin with paper liners.

2. Mix the Wet Ingredients

In a large bowl, whisk together pumpkin puree, eggs, oil, vanilla extract, and sugars until smooth.

3. Combine Dry Ingredients

In another bowl, mix flour, baking soda, baking powder, salt, and spices.

4. Make the Batter

Gradually add the dry ingredients to the wet mixture, stirring until just combined.

5. Prepare the Streusel

Mix flour, brown sugar, and cinnamon, then cut in cold butter until crumbly.

6. Assemble and Bake

Fill muffin cups ¾ full, sprinkle streusel on top, and bake for 18–22 minutes.

Tips for Perfect Results

Getting bakery-quality easy pumpkin streusel muffins at home is all about technique:

  • Don’t overmix the batter to keep muffins soft
  • Use room temperature eggs for better blending
  • Fill muffin cups evenly for consistent baking
  • Check with a toothpick to avoid overbaking

These small details make a big difference in texture and flavor.

Variations

Want to customize your muffins? Try these creative ideas:

  • Add chocolate chips for a sweeter twist
  • Mix in chopped pecans or walnuts for crunch
  • Use cream cheese filling for a rich center
  • Add a drizzle of maple glaze on top

What to Serve With It

These easy pumpkin streusel muffins pair perfectly with:

  • Freshly brewed coffee or latte
  • Hot tea or chai
  • Greek yogurt and fruit
  • A cozy breakfast spread with eggs and bacon

They’re versatile enough for breakfast, brunch, or even dessert.

Storage & Reheating

Store muffins in an airtight container at room temperature for up to 3 days, or refrigerate for up to 5 days.

  • Reheat in the microwave for 10–15 seconds
  • Freeze for up to 2 months
  • Thaw overnight or warm in the oven

Common Mistakes to Avoid

  • Using pumpkin pie filling instead of puree
  • Overmixing the batter (leads to dense muffins)
  • Skipping the streusel topping
  • Overbaking and drying out the muffins

Avoiding these ensures perfect results every time.

FAQs

1. Can I make these muffins ahead of time?

Yes! They store well and taste great even the next day.

2. Can I freeze pumpkin streusel muffins?

Absolutely—just wrap them individually and freeze for later.

3. Can I make them gluten-free?

Yes, use a 1:1 gluten-free flour substitute.

4. How do I keep the streusel crunchy?

Store muffins uncovered for a few hours before sealing to maintain texture.

Final Thoughts

These Easy Pumpkin Streusel Muffins Perfect for Cozy Breakfasts are everything you want in a fall treat—soft, flavorful, and topped with a delicious crumble. They’re simple enough for everyday baking yet impressive enough to share with guests.

Once you try them, they’ll quickly become a seasonal favorite in your kitchen.

Shredded Brussels Sprouts Salad

If you think Brussels sprouts are only meant to be roasted or sautéed, it’s time to rethink everything. This Shredded Brussels Sprouts Salad is crisp, vibrant, and packed with flavor, offering a refreshing twist on a classic vegetable. With finely sliced sprouts, a tangy dressing, and a mix of textures, this salad transforms humble ingredients into something truly irresistible.

Shredded Brussels

This salad has quickly become a staple in many American kitchens—and for good reason. It’s nutritious, easy to prepare, and incredibly versatile, making it perfect for everything from weekday lunches to holiday gatherings.

Why You’ll Love This Recipe

This Shredded Brussels Sprouts Salad stands out because it balances crunch, tang, and subtle sweetness in every bite. Unlike traditional leafy salads, Brussels sprouts hold up beautifully to dressing, meaning no soggy leftovers.

Here’s why you’ll keep coming back to it:

  • Crisp texture that stays fresh longer than lettuce
  • Bold flavor from a simple homemade dressing
  • Quick prep time—ready in under 20 minutes
  • Highly customizable with endless add-ins
  • Perfect for meal prep and make-ahead meals

Ingredients

To make this fresh and flavorful salad, gather the following:

For the Salad:

  • 1 lb Brussels sprouts (shredded)
  • 1/3 cup dried cranberries
  • 1/3 cup toasted almonds or pecans
  • 1/4 cup shaved Parmesan cheese

For the Dressing:

  • 3 tablespoons olive oil
  • 2 tablespoons apple cider vinegar
  • 1 tablespoon Dijon mustard
  • 1 tablespoon honey
  • Salt and pepper to taste

Ingredient Notes

The key to a great Shredded Brussels Sprouts Salad starts with fresh, firm Brussels sprouts. Look for bright green heads with tightly packed leaves. You can shred them using a sharp knife, mandoline, or food processor for convenience.

Using high-quality olive oil and freshly shaved Parmesan makes a noticeable difference in flavor. Toasting your nuts before adding them enhances their crunch and brings out a deeper, nuttier taste.

Step-by-Step Instructions

1. Prepare the Brussels Sprouts

Trim the ends and remove any outer leaves. Thinly slice the sprouts or use a food processor to shred them.

2. Make the Dressing

In a small bowl, whisk together olive oil, apple cider vinegar, Dijon mustard, honey, salt, and pepper until well combined.

3. Assemble the Salad

In a large bowl, combine shredded Brussels sprouts, cranberries, nuts, and Parmesan cheese.

4. Toss and Serve

Pour the dressing over the salad and toss well to coat evenly. Let it sit for 5–10 minutes before serving to allow flavors to meld.

Tips for Perfect Results

To make the best Shredded Brussels Sprouts Salad, keep these tips in mind:

  • Slice thinly for the best texture
  • Massage the sprouts lightly to soften them
  • Balance flavors by adjusting sweetness or acidity
  • Let it rest briefly before serving for better flavor

These small steps elevate your salad from good to unforgettable.

Variations

One of the best things about this salad is how easy it is to customize. Try these variations:

  • Add crispy bacon bits for a savory twist
  • Include thinly sliced apples for extra freshness
  • Swap cranberries for pomegranate seeds
  • Add grilled chicken for a protein-packed meal

What to Serve With It

This Shredded Brussels Sprouts Salad pairs beautifully with a variety of dishes:

  • Grilled chicken or steak
  • Roasted salmon
  • Holiday mains like turkey or ham
  • Sandwiches or wraps

Its crisp texture and tangy flavor make it the perfect contrast to rich, hearty meals.

Storage & Reheating

Store leftovers in an airtight container in the refrigerator for up to 3 days. Unlike leafy salads, this one holds up well without wilting.

  • No reheating needed—serve chilled or at room temperature
  • If needed, refresh with a splash of dressing before serving

Common Mistakes to Avoid

  • Cutting sprouts too thick (results in tough texture)
  • Overdressing the salad (can overpower flavors)
  • Skipping the resting time (flavors won’t develop fully)
  • Using old Brussels sprouts (affects taste and texture)

Avoiding these mistakes ensures your salad turns out perfectly every time.

FAQs

1. Can I make this salad ahead of time?

Yes! It actually tastes better after sitting for a bit, making it perfect for meal prep.

2. How do I shred Brussels sprouts easily?

Use a food processor or mandoline for quick and even slicing.

3. Is this salad healthy?

Absolutely. It’s packed with fiber, vitamins, and healthy fats.

4. Can I make it vegan?

Yes—just omit the Parmesan or use a plant-based alternative.

Final Thoughts

This Shredded Brussels Sprouts Salad is proof that simple ingredients can create something truly special. With its crisp texture, balanced flavors, and easy preparation, it’s a recipe you’ll turn to again and again.

Whether you’re serving it as a side dish or enjoying it as a light main course, this salad delivers freshness and flavor in every bite. Give it a try—you might just find your new favorite salad.

Southern Style Creamy Parmesan Chicken Pasta

If you’re craving a comforting, indulgent meal that feels like a warm Southern hug, this Southern Style Creamy Parmesan Chicken Pasta is exactly what you need. Combining tender, seasoned chicken with a rich, velvety Parmesan cream sauce and perfectly cooked pasta, this dish delivers bold flavor with minimal effort. It’s the kind of recipe that turns an ordinary weeknight into something special.

Southern Style Creamy

This recipe is inspired by classic Southern comfort food traditions—rich sauces, hearty portions, and unforgettable flavor. Whether you’re cooking for your family or hosting friends, this pasta dish is guaranteed to impress.

Why You’ll Love This Recipe

There are countless pasta recipes out there, but this one stands out for several reasons:

  • Ultra creamy texture thanks to a homemade Parmesan sauce
  • Juicy, well-seasoned chicken that’s pan-seared to perfection
  • Quick and easy—ready in under 40 minutes
  • Family-friendly flavors that everyone will love
  • Perfect for leftovers and meal prep

This Southern Style Creamy Parmesan Chicken Pasta brings together comfort and convenience in one irresistible dish.

Ingredients

To make this flavorful dish, you’ll need:

For the Chicken:

  • 2 large chicken breasts (boneless, skinless)
  • 1 teaspoon garlic powder
  • 1 teaspoon onion powder
  • 1 teaspoon paprika
  • Salt and black pepper to taste
  • 2 tablespoons olive oil

For the Pasta & Sauce:

  • 12 oz fettuccine or penne pasta
  • 2 tablespoons butter
  • 4 cloves garlic (minced)
  • 2 cups heavy cream
  • 1 cup freshly grated Parmesan cheese
  • 1/2 cup chicken broth
  • 1 teaspoon Italian seasoning
  • Fresh parsley (for garnish)

Ingredient Notes

Using high-quality ingredients makes a big difference in this recipe. Freshly grated Parmesan melts better and gives a smoother sauce compared to pre-shredded cheese. Heavy cream is essential for achieving that signature creamy texture—don’t substitute with milk if you want the full Southern-style richness.

Step-by-Step Instructions

1. Cook the Pasta

Bring a large pot of salted water to a boil and cook the pasta according to package instructions. Drain and set aside.

2. Season and Cook Chicken

Season chicken breasts with garlic powder, onion powder, paprika, salt, and pepper. Heat olive oil in a skillet over medium heat and cook chicken for 5–7 minutes per side until golden and fully cooked. Remove and slice.

3. Make the Creamy Parmesan Sauce

In the same skillet, melt butter and sauté garlic until fragrant. Add heavy cream and chicken broth, then stir in Parmesan cheese and Italian seasoning. Simmer until thick and creamy.

4. Combine Everything

Add cooked pasta to the sauce and toss until well coated. Top with sliced chicken and garnish with parsley.

Tips for Perfect Results

  • Don’t overcook the chicken—it should stay juicy and tender
  • Salt your pasta water generously for better flavor
  • Use low heat when adding cheese to avoid clumping
  • Reserve pasta water to adjust sauce consistency if needed

These small techniques make a big difference in achieving restaurant-quality results at home.

Variations

Want to customize your Southern Style Creamy Parmesan Chicken Pasta? Try these ideas:

  • Add spinach or mushrooms for extra nutrition
  • Swap chicken for shrimp or sausage
  • Use gluten-free pasta if needed
  • Add a pinch of red pepper flakes for heat

What to Serve With It

This dish pairs beautifully with:

  • Garlic bread or buttery dinner rolls
  • A fresh Caesar salad
  • Roasted vegetables like broccoli or asparagus
  • A glass of chilled white wine

The richness of the pasta balances perfectly with lighter sides.

Storage & Reheating

Store leftovers in an airtight container in the refrigerator for up to 3 days. When reheating:

  • Add a splash of cream or milk to loosen the sauce
  • Warm gently on the stove or microwave in short intervals

Avoid overheating, as the sauce can separate.

Common Mistakes to Avoid

  • Using pre-shredded cheese (can cause grainy sauce)
  • Cooking sauce on high heat (leads to separation)
  • Overcooking pasta (should be al dente)
  • Skipping seasoning on chicken

Being mindful of these ensures your dish turns out perfectly every time.

FAQs

1. Can I make this ahead of time?

Yes, but it’s best fresh. If making ahead, store sauce and pasta separately for best texture.

2. Can I use milk instead of heavy cream?

You can, but the sauce will be thinner and less rich.

3. What pasta works best?

Fettuccine, penne, or linguine all work great for holding the creamy sauce.

4. How do I thicken the sauce?

Let it simmer longer or add more Parmesan cheese.

Final Thoughts

This Southern Style Creamy Parmesan Chicken Pasta is the ultimate comfort food—rich, creamy, and full of flavor. It’s a reliable go-to for busy nights, special occasions, or whenever you want something truly satisfying. With simple ingredients and easy steps, you’ll have a restaurant-quality meal right in your own kitchen.

Once you try it, this recipe is bound to become a regular favorite in your meal rotation.

Caramelized Wild Mushroom Pappardelle Pasta Recipe: Rich, Earthy, and Irresistibly Creamy

If you’re craving a comforting yet elegant pasta dish, this Caramelized Wild Mushroom Pappardelle pasta recipe is exactly what you need. With its rich, earthy flavors and silky texture, this dish feels like something straight out of a cozy Italian restaurant—yet it’s surprisingly simple to make at home.

The magic of this recipe lies in the caramelized mushrooms. When cooked properly, they develop deep, savory notes that pair beautifully with wide, ribbon-like pappardelle pasta. Add a touch of cream, garlic, and herbs, and you’ve got a restaurant-quality meal in under an hour.

Caramelized Wild Mushroom

Why You’ll Love This Caramelized Wild Mushroom Pappardelle Pasta Recipe

This Caramelized Wild Mushroom Pappardelle pasta recipe is a must-try for pasta lovers.

  • Deep, rich flavor: Thanks to perfectly caramelized mushrooms
  • Restaurant-quality dish: Elegant yet easy to prepare
  • Vegetarian-friendly: Hearty and satisfying without meat
  • Comfort food upgrade: Creamy and indulgent
  • Perfect for any occasion: Weeknight dinners or special meals

It’s a dish that feels both comforting and sophisticated.

Ingredients

To make the best Caramelized Wild Mushroom Pappardelle pasta recipe, you’ll need:

Main Ingredients:

  • Pappardelle pasta
  • Mixed wild mushrooms (cremini, shiitake, oyster)
  • Garlic (minced)
  • Shallots (optional)
  • Olive oil and butter

For the Sauce:

  • Heavy cream or half-and-half
  • Parmesan cheese (grated)
  • Fresh thyme or parsley
  • Salt and black pepper

Optional Additions:

  • White wine
  • Truffle oil
  • Spinach

Ingredient Notes

The key to a perfect Caramelized Wild Mushroom Pappardelle pasta recipe is using a mix of mushrooms. Each type adds a unique flavor and texture, creating a more complex dish.

Pappardelle is ideal because its wide noodles hold onto the creamy sauce beautifully. Parmesan adds depth and saltiness, while fresh herbs bring brightness to balance the richness.

If you want to elevate the dish even further, a splash of white wine or a drizzle of truffle oil adds incredible aroma.

Step-by-Step Instructions

Step 1: Cook the Pasta

Boil pappardelle in salted water until al dente. Reserve some pasta water before draining.

Step 2: Caramelize the Mushrooms

Heat olive oil and butter in a pan. Add mushrooms and cook undisturbed until golden brown, then stir and continue cooking until deeply caramelized.

Step 3: Add Aromatics

Stir in garlic and shallots, cooking until fragrant.

Step 4: Build the Sauce

Add cream and parmesan, stirring until smooth and slightly thickened.

Step 5: Combine

Toss cooked pasta into the sauce, adding reserved pasta water if needed.

Step 6: Finish

Top with fresh herbs and extra parmesan before serving.

Tips for Perfect Results

To master this Caramelized Wild Mushroom Pappardelle pasta recipe, follow these tips:

  • Don’t overcrowd mushrooms—they need space to caramelize
  • Cook mushrooms without stirring initially for better browning
  • Use pasta water to adjust sauce consistency
  • Season gradually for balanced flavor
  • Serve immediately for best texture

These tips ensure maximum flavor and perfect texture.

Variations

This Caramelized Wild Mushroom Pappardelle pasta recipe is easy to customize:

Vegan Version

  • Use plant-based cream and skip parmesan

Protein Boost

  • Add grilled chicken or shrimp

Spicy Version

  • Add red pepper flakes

Truffle Upgrade

  • Drizzle truffle oil before serving

What to Serve With It

This dish pairs beautifully with:

  • Garlic bread
  • Simple green salad
  • Roasted vegetables
  • White wine
  • Sparkling water with lemon

These sides complement the creamy richness of the pasta.

Storage & Reheating

  • Refrigerate: Store leftovers up to 3 days
  • Reheat: Warm gently on stovetop with a splash of cream or water
  • Avoid overheating to maintain creamy texture
  • Freezing not recommended due to cream sauce

Proper storage keeps the dish enjoyable even the next day.

Common Mistakes to Avoid

Avoid these mistakes when making Caramelized Wild Mushroom Pappardelle pasta recipe:

  • Overcrowding mushrooms (prevents browning)
  • Skipping seasoning layers
  • Overcooking pasta
  • Using low-quality parmesan
  • Adding too much cream (overpowers flavor)

Attention to these details makes all the difference.

FAQs

1. Can I use regular mushrooms instead of wild mushrooms?

Yes, cremini or button mushrooms work well.

2. What pasta can I use instead of pappardelle?

Fettuccine or tagliatelle are great alternatives.

3. Can I make this dish ahead of time?

It’s best fresh, but you can reheat gently.

4. Is this recipe vegetarian?

Yes, as long as parmesan used is vegetarian-friendly.

Final Thoughts

This Caramelized Wild Mushroom Pappardelle pasta recipe is the perfect combination of comfort and elegance. With its rich, creamy sauce and deeply flavorful mushrooms, it’s a dish that feels indulgent yet simple to prepare.

Whether you’re cooking for yourself, your family, or guests, this recipe is guaranteed to impress. Once you try it, it’s sure to become a favorite in your kitchen.

Roasted Butternut Squash and Sun-Dried Tomato Chicken: A Cozy, Flavor-Packed One-Pan Dinner

If you’re looking for a comforting, flavor-rich dinner that’s both nourishing and easy to prepare, this Roasted Butternut Squash and Sun-Dried Tomato Chicken is exactly what your weeknight menu needs. This dish combines juicy roasted chicken with sweet caramelized butternut squash and tangy sun-dried tomatoes for a perfect balance of flavors.

What makes this recipe so appealing is its simplicity. Everything cooks together on one pan, allowing the ingredients to blend beautifully while keeping cleanup minimal. It’s hearty enough for a family dinner yet elegant enough to serve guests.

Roasted Butternut Squash

Why You’ll Love This Roasted Butternut Squash and Sun-Dried Tomato Chicken

This Roasted Butternut Squash and Sun-Dried Tomato Chicken is packed with benefits that make it a go-to recipe.

  • One-pan convenience: Easy cooking and cleanup
  • Balanced flavors: Sweet, savory, and tangy
  • Healthy ingredients: Lean protein and vegetables
  • Perfect for meal prep: Stores well for leftovers
  • Seasonal comfort food: Ideal for fall and winter

It’s a dish that feels both wholesome and indulgent at the same time.

Ingredients

To make the best Roasted Butternut Squash and Sun-Dried Tomato Chicken, you’ll need:

Main Ingredients:

  • Boneless, skinless chicken breasts or thighs
  • Butternut squash (peeled and cubed)
  • Sun-dried tomatoes (oil-packed preferred)
  • Garlic (minced)
  • Olive oil

Seasoning:

  • Italian seasoning
  • Paprika
  • Salt and pepper
  • Red pepper flakes (optional)

Optional Additions:

  • Spinach
  • Parmesan cheese
  • Fresh herbs like parsley or thyme

Ingredient Notes

The key to a perfect Roasted Butternut Squash and Sun-Dried Tomato Chicken lies in quality ingredients. Butternut squash becomes naturally sweet and slightly crispy when roasted, adding depth to the dish.

Sun-dried tomatoes bring a concentrated tangy flavor that contrasts beautifully with the sweetness of the squash. Using oil-packed sun-dried tomatoes adds extra richness and helps coat the chicken and vegetables.

Chicken thighs tend to be juicier, while chicken breasts offer a leaner option—both work wonderfully in this recipe.

Step-by-Step Instructions

Step 1: Preheat the Oven

Preheat your oven to 400°F (200°C) and line a sheet pan with parchment paper.

Step 2: Prepare Ingredients

Cube the butternut squash and slice the chicken if needed.

Step 3: Season Everything

In a large bowl, toss chicken, squash, sun-dried tomatoes, garlic, olive oil, and spices until well coated.

Step 4: Arrange on Sheet Pan

Spread everything evenly on the pan in a single layer.

Step 5: Roast

Bake for 25–30 minutes until chicken is cooked through and squash is tender.

Step 6: Finish and Serve

Top with fresh herbs or parmesan if desired.

Tips for Perfect Results

To get the best Roasted Butternut Squash and Sun-Dried Tomato Chicken, keep these tips in mind:

  • Cut squash into even pieces for consistent cooking
  • Don’t overcrowd the pan for better roasting
  • Use high heat to achieve caramelization
  • Stir halfway through cooking for even browning
  • Add fresh herbs after baking for brightness

These small adjustments make a big difference in flavor and texture.

Variations

This Roasted Butternut Squash and Sun-Dried Tomato Chicken is easy to customize:

Creamy Version

  • Add a splash of cream or a dollop of cream cheese

Low-Carb Version

  • Replace squash with zucchini or cauliflower

Mediterranean Style

  • Add olives and feta cheese

Spicy Version

  • Increase red pepper flakes or add chili paste

What to Serve With It

This dish pairs beautifully with:

  • Rice or quinoa
  • Garlic mashed potatoes
  • Crusty bread
  • Simple green salad
  • Roasted vegetables

These sides complement the rich flavors perfectly.

Storage & Reheating

  • Refrigerate: Store in airtight container for up to 4 days
  • Freeze: Freeze for up to 2 months
  • Reheat: Warm in oven or skillet for best texture
  • Avoid microwaving too long to prevent dryness

It’s a great recipe for meal prep and leftovers.

Common Mistakes to Avoid

Avoid these mistakes when making Roasted Butternut Squash and Sun-Dried Tomato Chicken:

  • Overcrowding the pan (causes steaming)
  • Undercooking squash (leaves it too firm)
  • Overcooking chicken (makes it dry)
  • Skipping seasoning (reduces flavor depth)

Paying attention to these ensures perfect results every time.

FAQs

1. Can I use frozen butternut squash?

Yes, but thaw and pat dry before roasting.

2. What cut of chicken works best?

Both chicken breasts and thighs work well.

3. Can I make this ahead of time?

Yes, it reheats well and is great for meal prep.

4. Is this recipe healthy?

Yes, it’s high in protein and packed with nutrients.

Final Thoughts

This Roasted Butternut Squash and Sun-Dried Tomato Chicken is the perfect combination of comfort, flavor, and simplicity. With just one pan and a handful of ingredients, you get a delicious, well-balanced meal that feels both hearty and elegant.

Whether you’re cooking for your family or prepping meals for the week, this recipe delivers on every level. Once you try it, it’s sure to become a staple in your kitchen.

Easy Sugar Cookie Christmas Fudge: A Festive No-Bake Holiday Treat

If you’re looking for a quick, festive dessert that captures the magic of the holidays, this Easy Sugar Cookie Christmas Fudge is exactly what you need. It combines the classic flavor of sugar cookies with the creamy, melt-in-your-mouth texture of fudge—no oven required.

This recipe is perfect for busy holiday schedules. Whether you’re making treats for a party, cookie exchange, or edible gifts, this fudge comes together in minutes and looks absolutely stunning with colorful sprinkles. It’s simple, fun, and guaranteed to bring holiday cheer.

Easy Sugar Cookie

Why You’ll Love This Easy Sugar Cookie Christmas Fudge

This Easy Sugar Cookie Christmas Fudge is a holiday favorite for so many reasons:

  • No baking required: Perfect for quick preparation
  • Festive appearance: Bright sprinkles make it holiday-ready
  • Creamy texture: Smooth and rich in every bite
  • Kid-friendly: Fun and easy to make together
  • Perfect for gifting: Beautiful and delicious

It’s one of those recipes that feels special without requiring hours in the kitchen.

Ingredients

To make the best Easy Sugar Cookie Christmas Fudge, you’ll need:

Main Ingredients:

  • White chocolate chips
  • Sweetened condensed milk
  • Sugar cookie mix
  • Butter
  • Vanilla extract

Decorations:

  • Holiday sprinkles (red, green, white)

Ingredient Notes

The key to perfect Easy Sugar Cookie Christmas Fudge is high-quality white chocolate chips. They create the smooth, creamy base of the fudge.

Sugar cookie mix adds that classic cookie flavor without extra effort. Sweetened condensed milk helps bind everything together while keeping the texture soft and rich.

Sprinkles are what make this fudge festive, so don’t skip them—they add both color and a fun crunch.

Step-by-Step Instructions

Step 1: Prepare the Pan

Line a square baking dish with parchment paper.

Step 2: Melt Ingredients

In a saucepan or microwave-safe bowl, melt white chocolate chips, butter, and condensed milk until smooth.

Step 3: Add Flavor

Stir in sugar cookie mix and vanilla extract until fully combined.

Step 4: Pour and Decorate

Spread mixture evenly into prepared pan and top with sprinkles.

Step 5: Chill

Refrigerate for 2–3 hours until set, then cut into squares.

Tips for Perfect Results

To make the best Easy Sugar Cookie Christmas Fudge, follow these tips:

  • Use low heat when melting chocolate to avoid burning
  • Stir constantly for a smooth texture
  • Press mixture evenly into pan for clean cuts
  • Chill fully before slicing
  • Use a sharp knife for neat squares

These small steps make your fudge look as good as it tastes.

Variations

This Easy Sugar Cookie Christmas Fudge can be customized in fun ways:

Chocolate Swirl Fudge

  • Swirl melted milk chocolate into the mixture

Peppermint Version

  • Add crushed candy canes for a holiday twist

Funfetti Style

  • Mix sprinkles directly into the fudge

Nutty Version

  • Add chopped almonds or pecans

What to Serve With It

This fudge pairs perfectly with:

  • Hot cocoa
  • Coffee or latte
  • Holiday cookies platter
  • Eggnog
  • Milk

These pairings make it even more festive and enjoyable.

Storage Tips

  • Refrigerator: Store in airtight container for up to 1 week
  • Freezer: Freeze for up to 2 months
  • Room temperature: Keep in cool place for short periods
  • Tip: Separate layers with parchment paper

Proper storage keeps your fudge fresh and creamy.

Common Mistakes to Avoid

Avoid these mistakes when making Easy Sugar Cookie Christmas Fudge:

  • Overheating chocolate (causes grainy texture)
  • Not lining the pan (makes removal difficult)
  • Skipping chilling time
  • Using low-quality chocolate
  • Uneven spreading

Attention to detail ensures perfect fudge every time.

FAQs

1. Can I make this fudge ahead of time?

Yes, it’s perfect for making a few days in advance.

2. Can I use homemade sugar cookie dough?

This recipe works best with dry cookie mix for texture.

3. How do I cut fudge cleanly?

Use a sharp knife and wipe it between cuts.

4. Can I add food coloring?

Yes, you can tint the fudge for extra festive color.

Final Thoughts

This Easy Sugar Cookie Christmas Fudge is the ultimate holiday treat—simple, festive, and absolutely delicious. With its creamy texture and sweet sugar cookie flavor, it’s perfect for sharing, gifting, or enjoying with family.

Whether you’re new to baking or an experienced home cook, this recipe makes it easy to create something beautiful and memorable during the holiday season.