Cheesy Garlic Chicken Wraps (Easy Dinner Recipe You’ll Crave Every Week!)

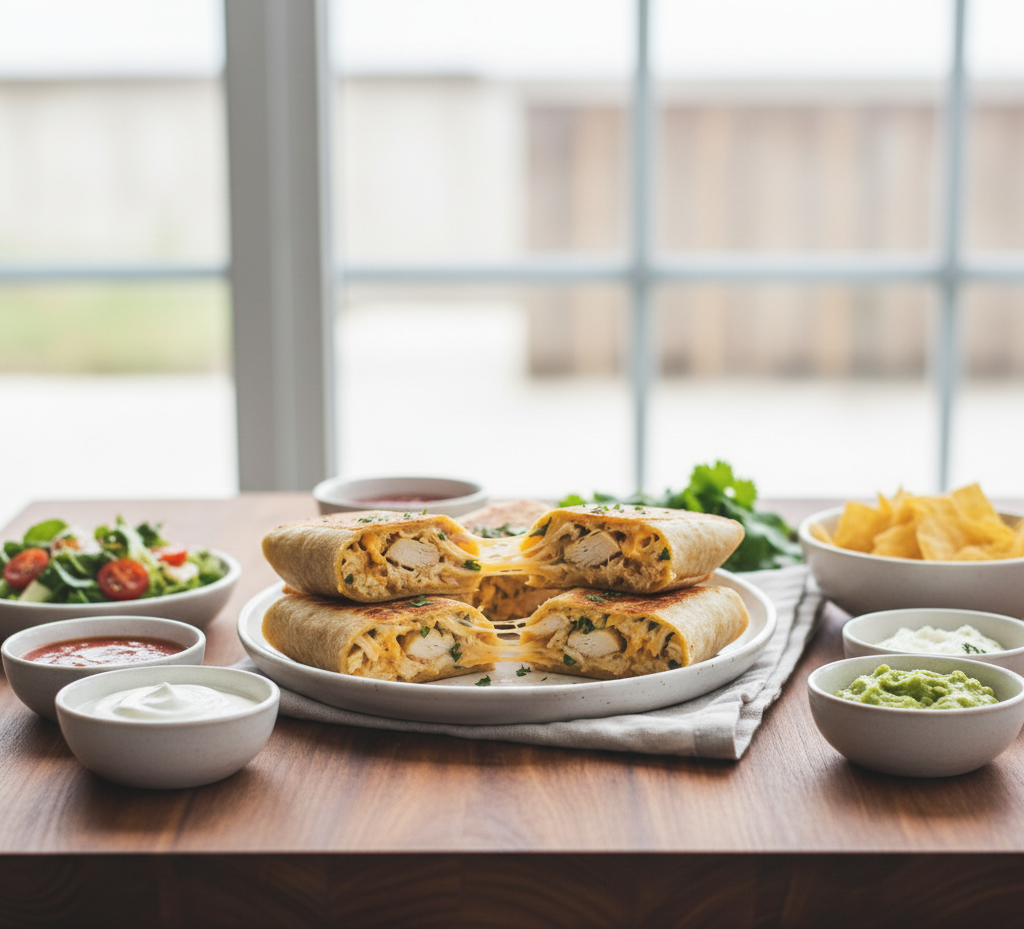
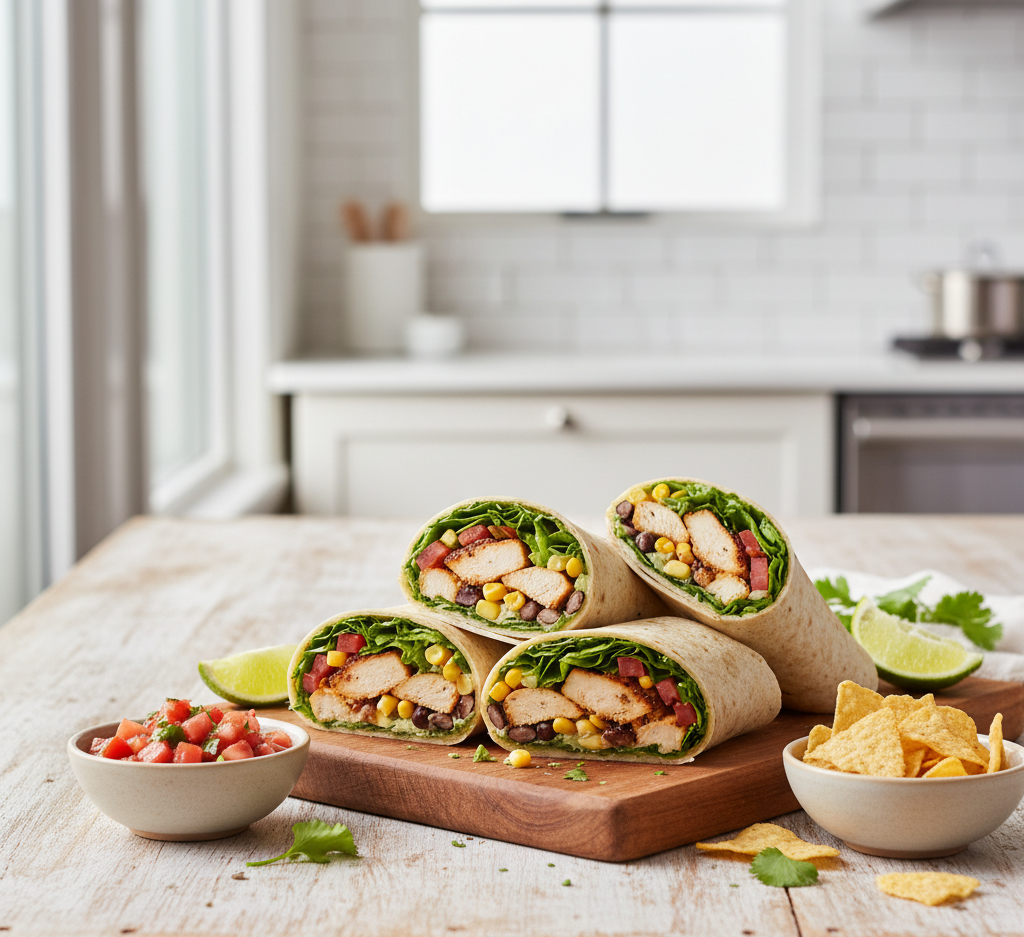
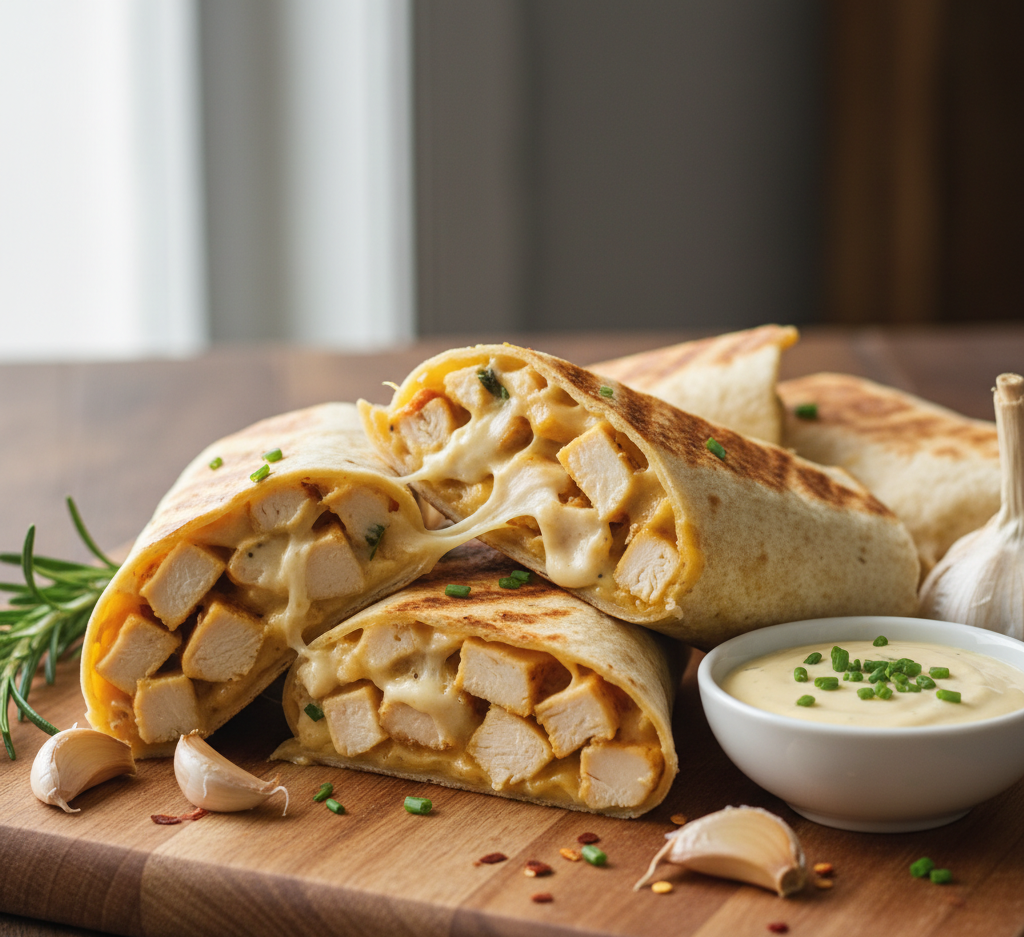
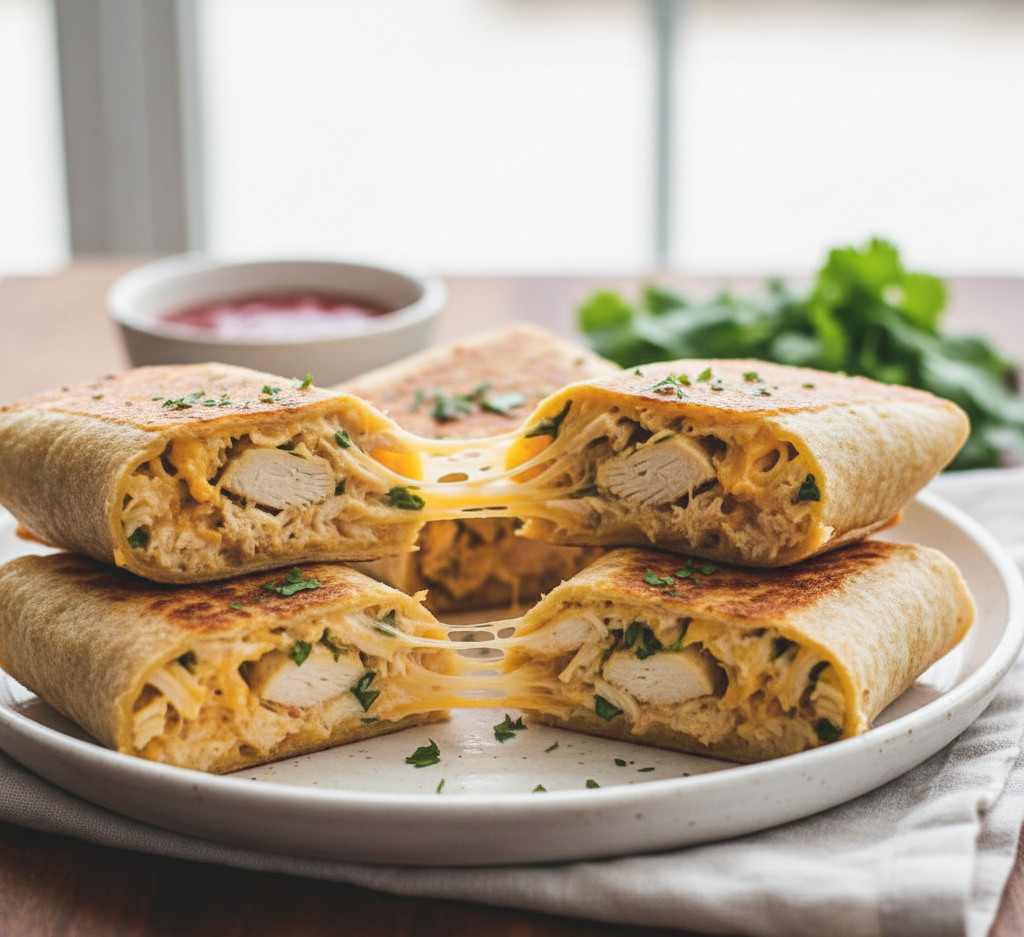
If you’re searching for a quick, satisfying meal that’s bursting with flavor, these cheesy garlic chicken wraps are about to become your new favorite dinner. Loaded with tender chicken, gooey melted cheese, and a rich garlic-infused sauce, this recipe delivers comfort food vibes in a convenient, handheld wrap.

Perfect for busy weeknights, casual family dinners, or even meal prep, these wraps are easy to customize and come together in no time. Whether you’re cooking for picky eaters or food lovers, this dish hits all the right notes—creamy, savory, and irresistibly cheesy.

Cheesy Garlic Chicken

Why You’ll Love These Cheesy Garlic Chicken Wraps

These cheesy garlic chicken wraps are everything you want in an easy dinner recipe.

Here’s why they’re a must-try:

  • Ready in under 30 minutes
  • Packed with bold garlic flavor
  • Loaded with melty cheese
  • Perfect for meal prep
  • Family-friendly and customizable
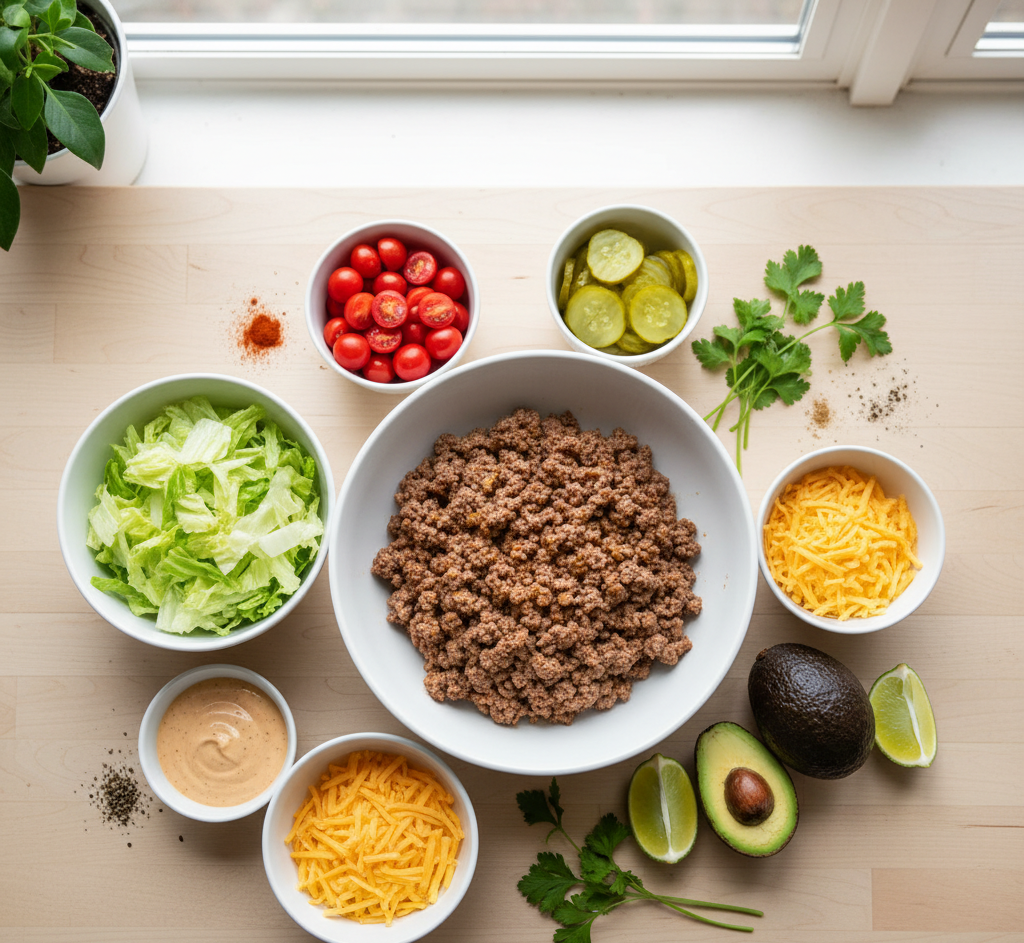
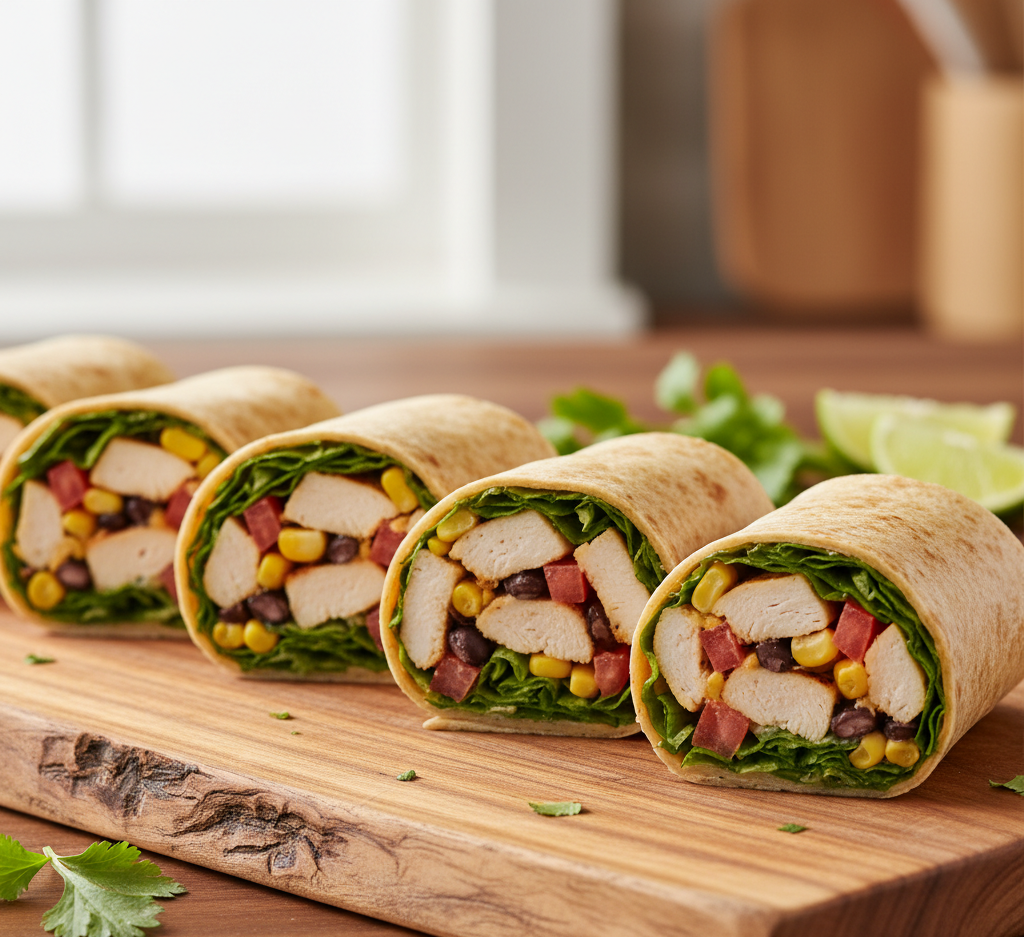
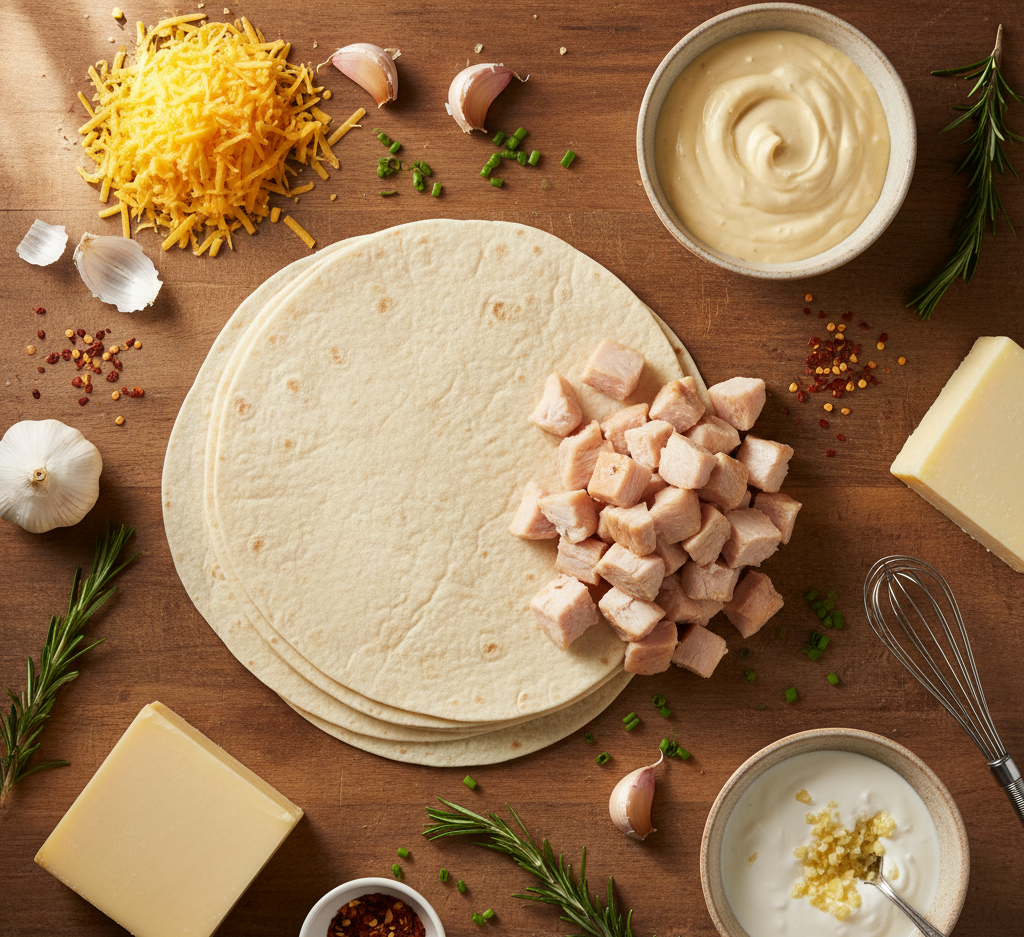
Ingredients

To make these cheesy garlic chicken wraps, you’ll need:

For the Chicken:

  • 2 cups cooked chicken (grilled, baked, or shredded)
  • 1 tablespoon olive oil
  • 3 cloves garlic, minced
  • 1 teaspoon Italian seasoning
  • Salt and pepper to taste

For the Wraps:

  • 4 large flour tortillas
  • 1 1/2 cups shredded mozzarella or cheddar cheese
  • 1/2 cup cream cheese (softened)
  • 1/4 cup sour cream or Greek yogurt
  • 1 tablespoon butter (for toasting wraps)

Ingredient Notes

The secret to the best cheesy garlic chicken wraps is layering flavors. Using pre-cooked chicken (like rotisserie) saves time, while fresh garlic creates that bold, irresistible aroma.

Cream cheese adds richness and helps bind everything together, while shredded cheese melts beautifully, giving you that gooey, satisfying texture in every bite.

Step-by-Step Instructions

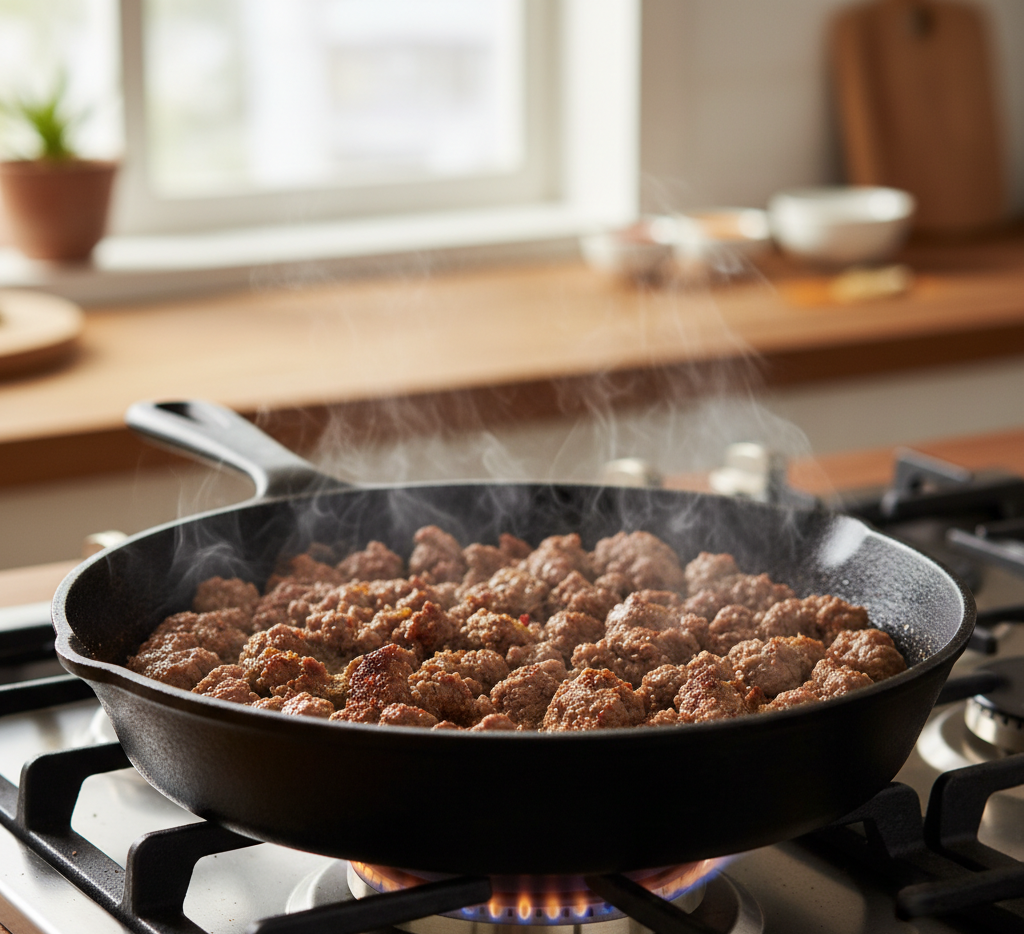
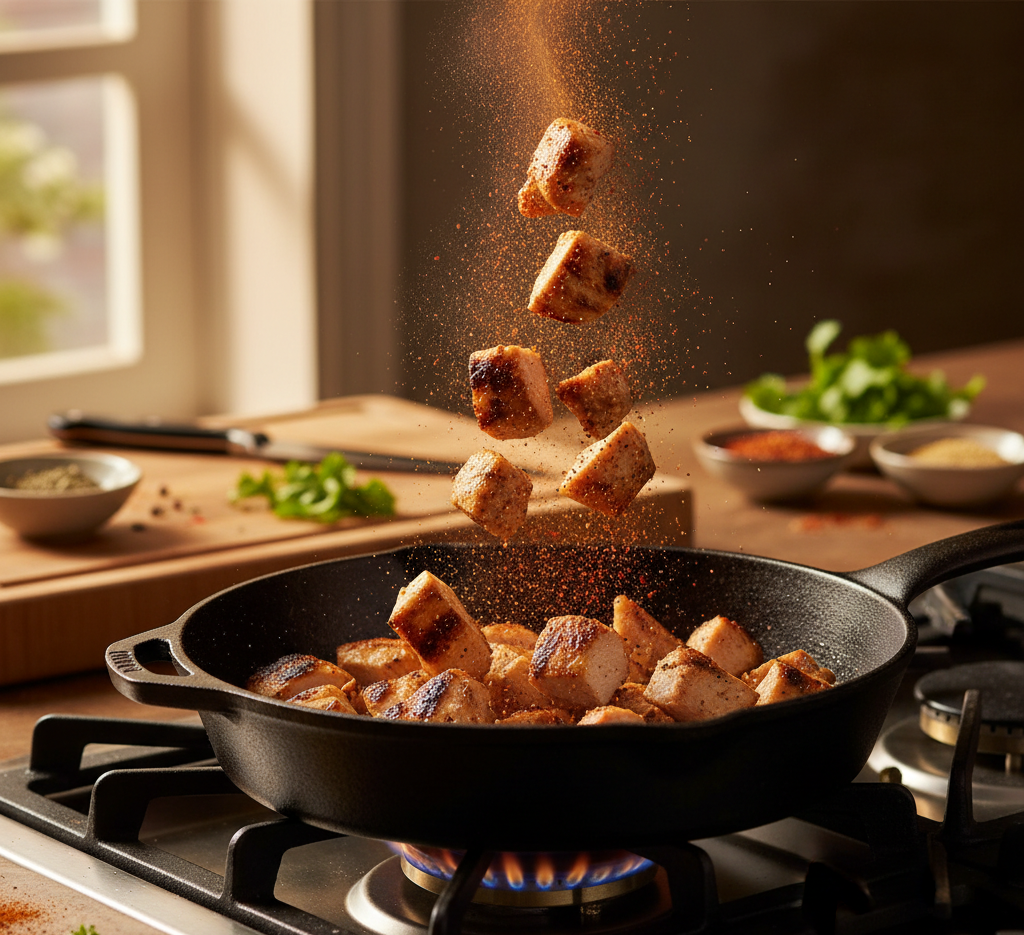
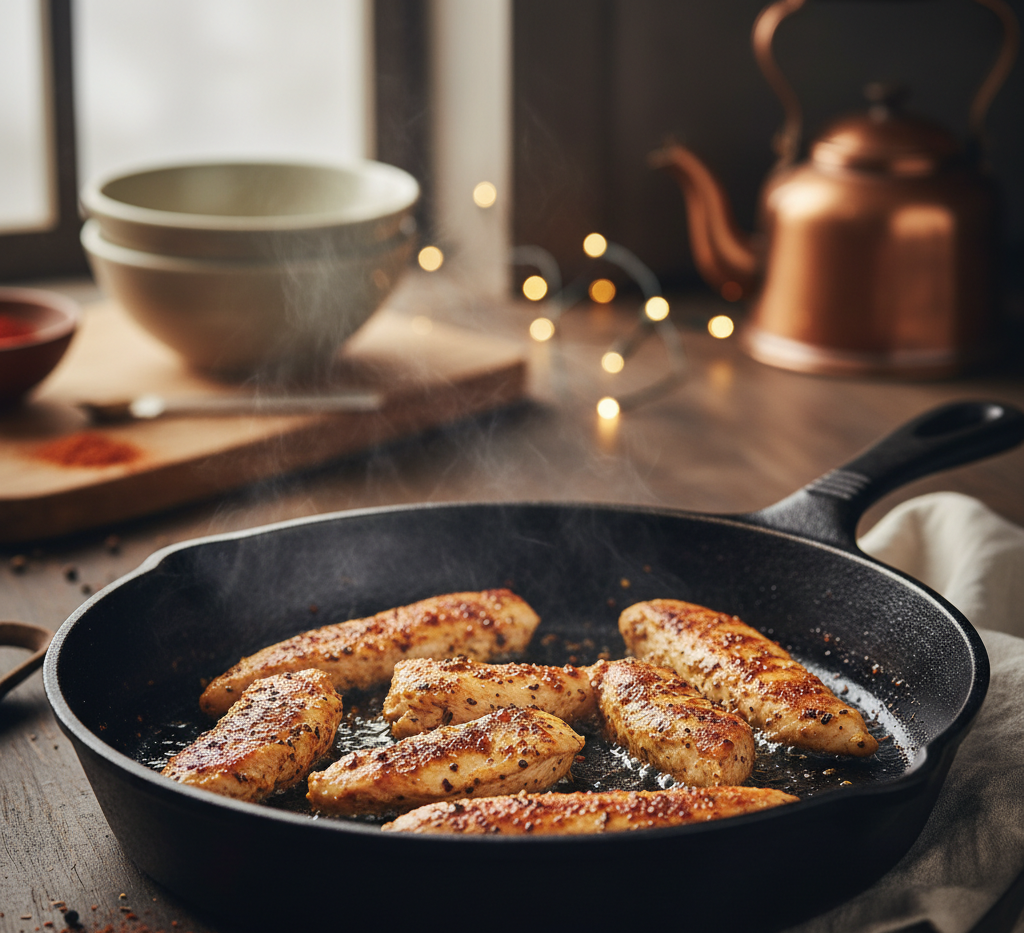
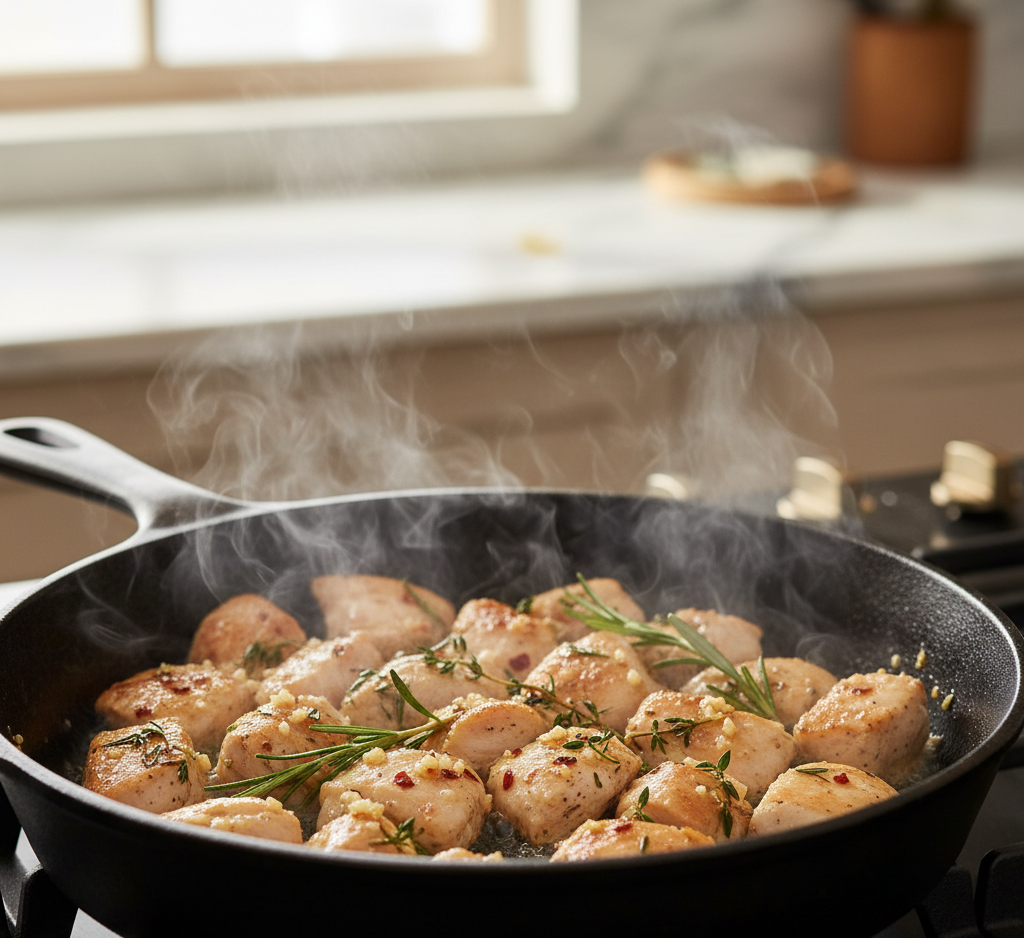
1. Prepare the Garlic Chicken

Heat olive oil in a skillet over medium heat. Add garlic and sauté until fragrant, then stir in the cooked chicken, Italian seasoning, salt, and pepper. Cook for a few minutes until heated through.

2. Make the Creamy Filling

In a bowl, mix cream cheese and sour cream until smooth and creamy.

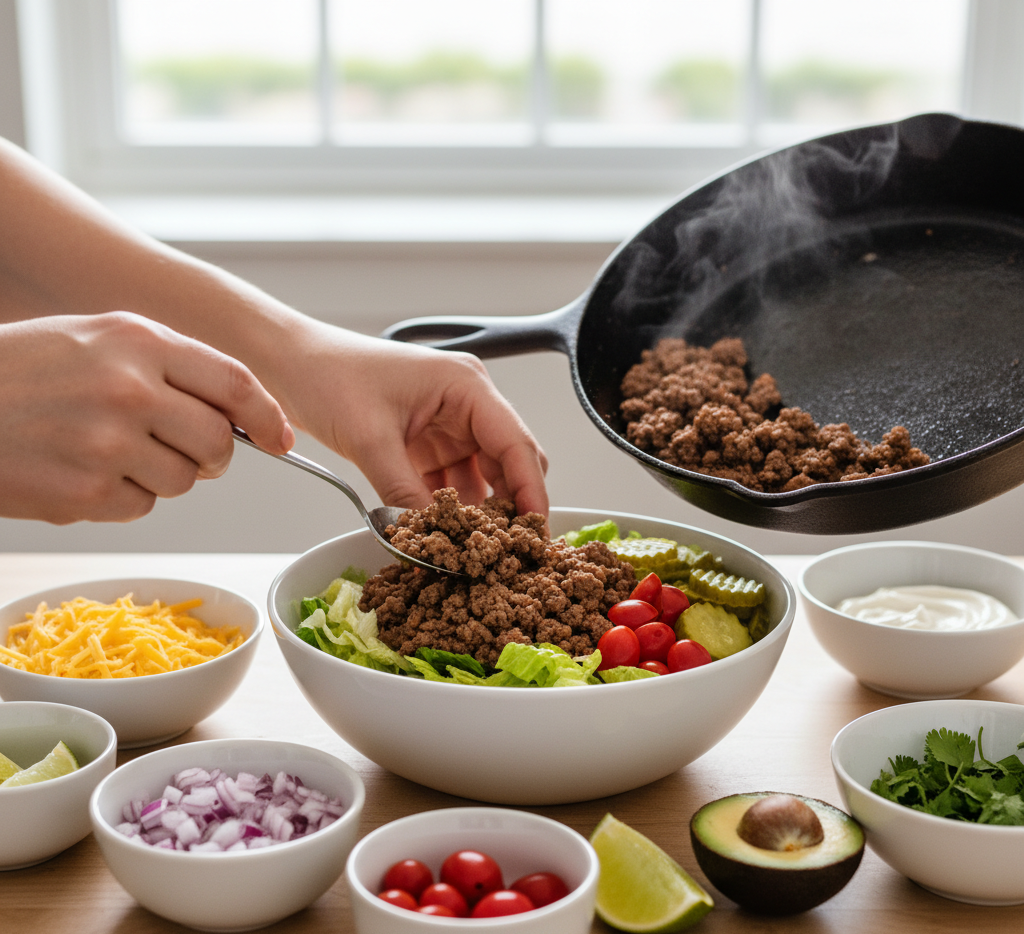
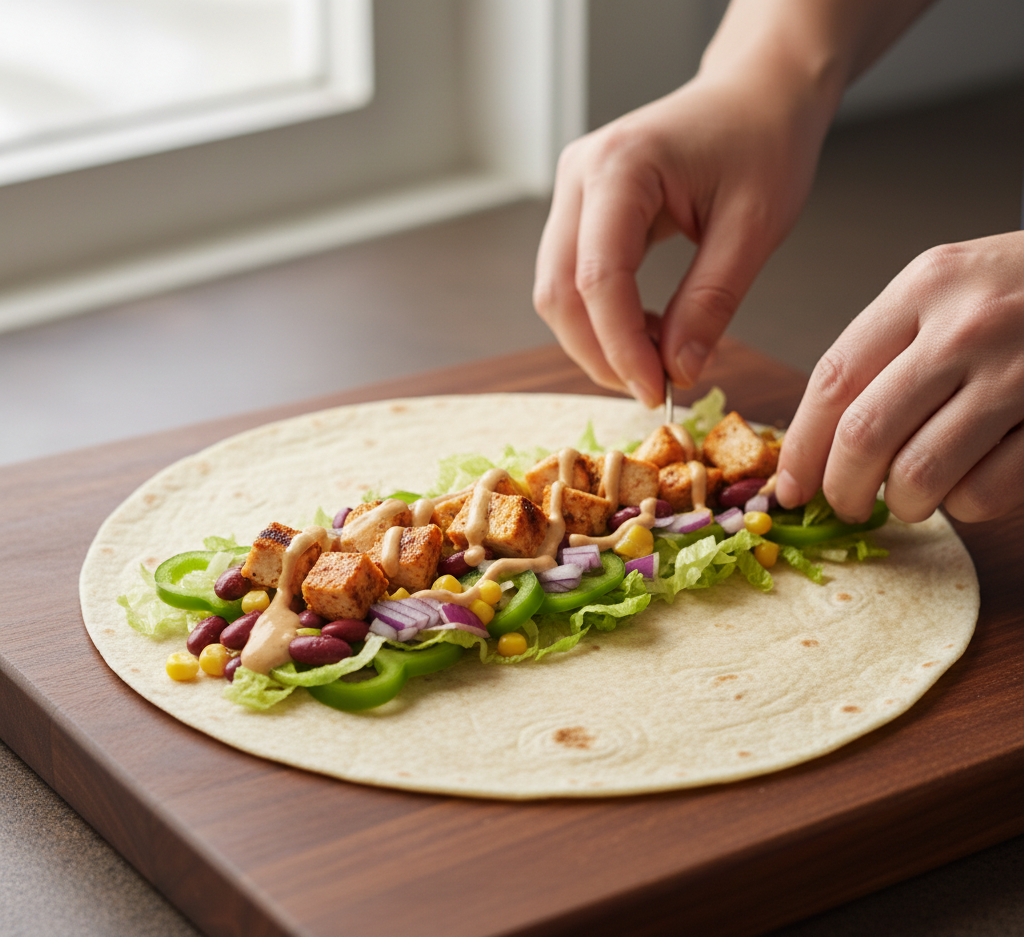
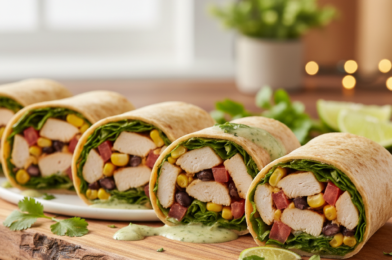
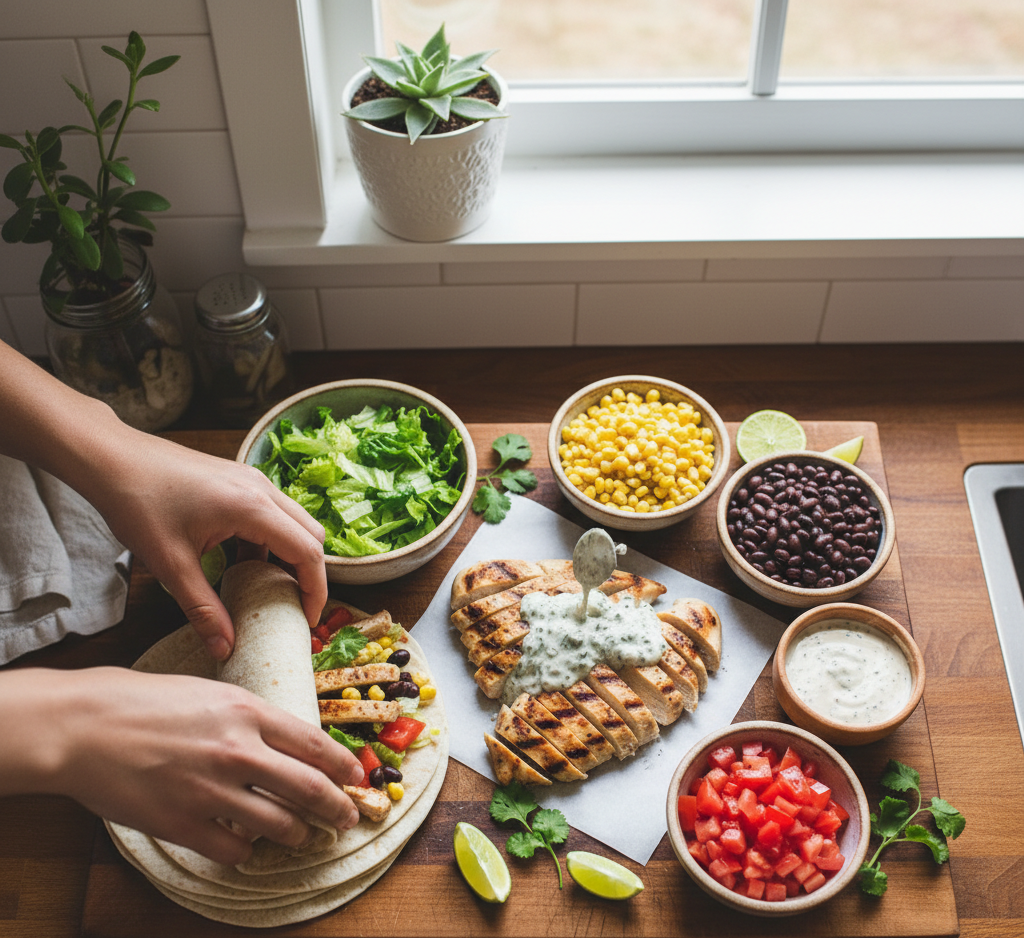
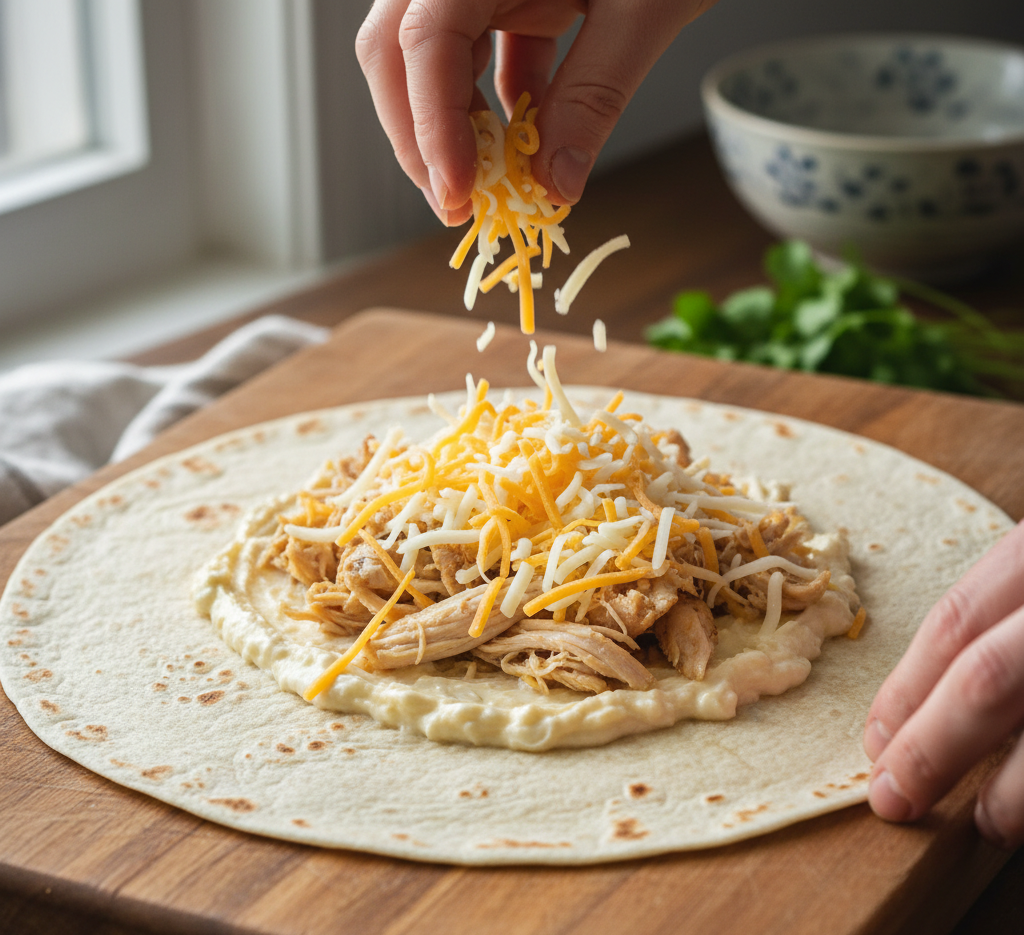
3. Assemble the Wraps

Lay out tortillas and spread a layer of the cream cheese mixture. Add garlic chicken and sprinkle generously with shredded cheese.

4. Fold and Toast

Fold the wraps tightly, then place them in a skillet with butter. Cook until golden brown and crispy on both sides.
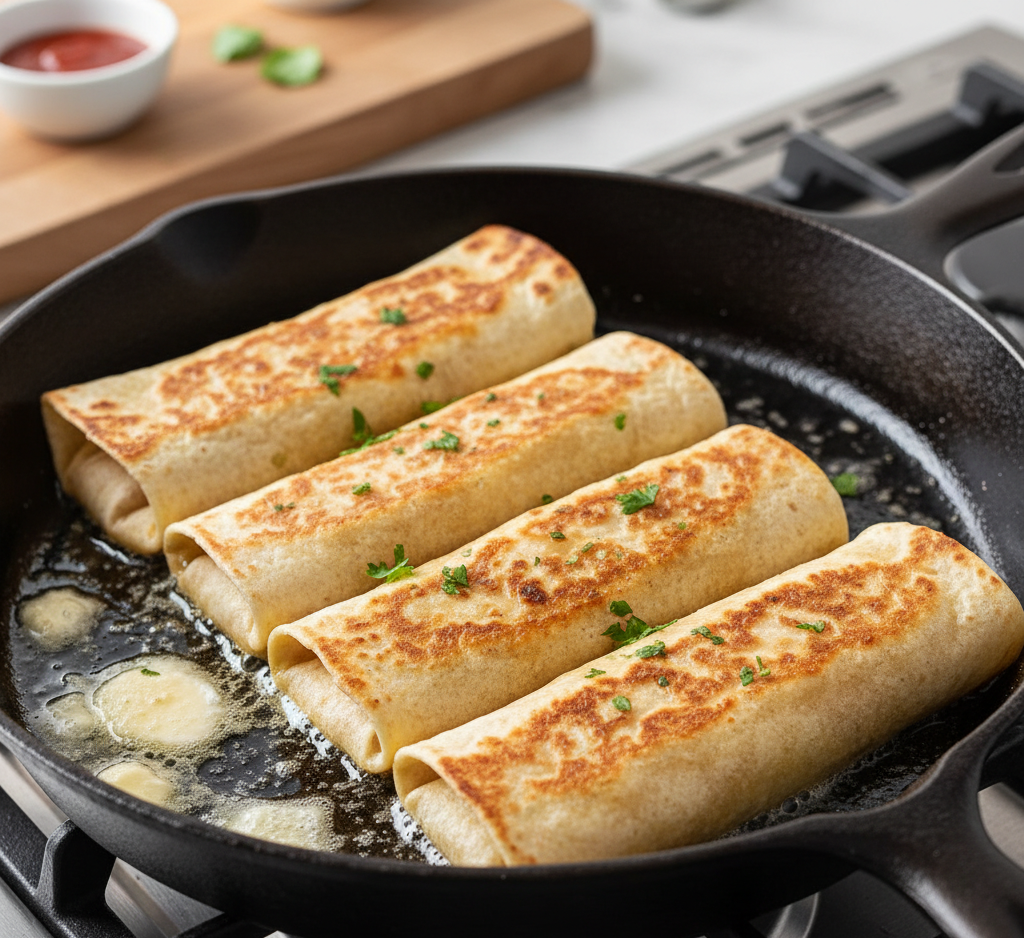
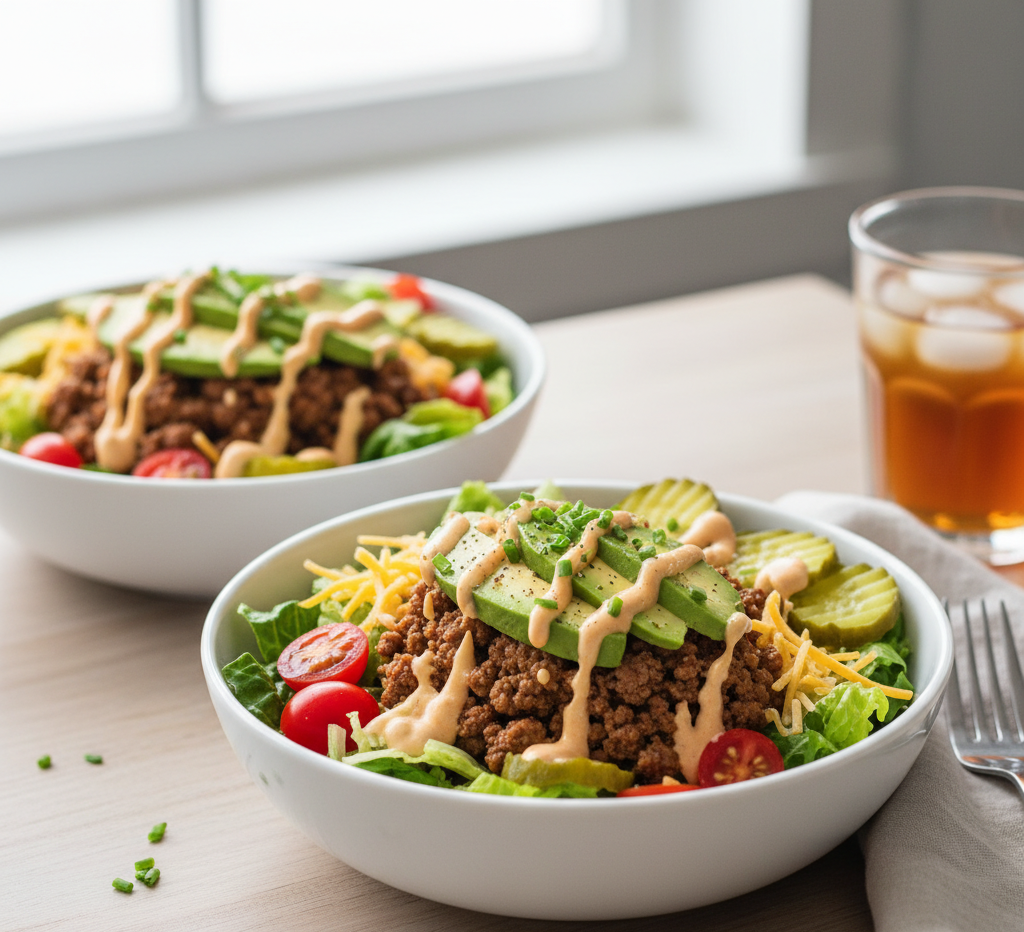
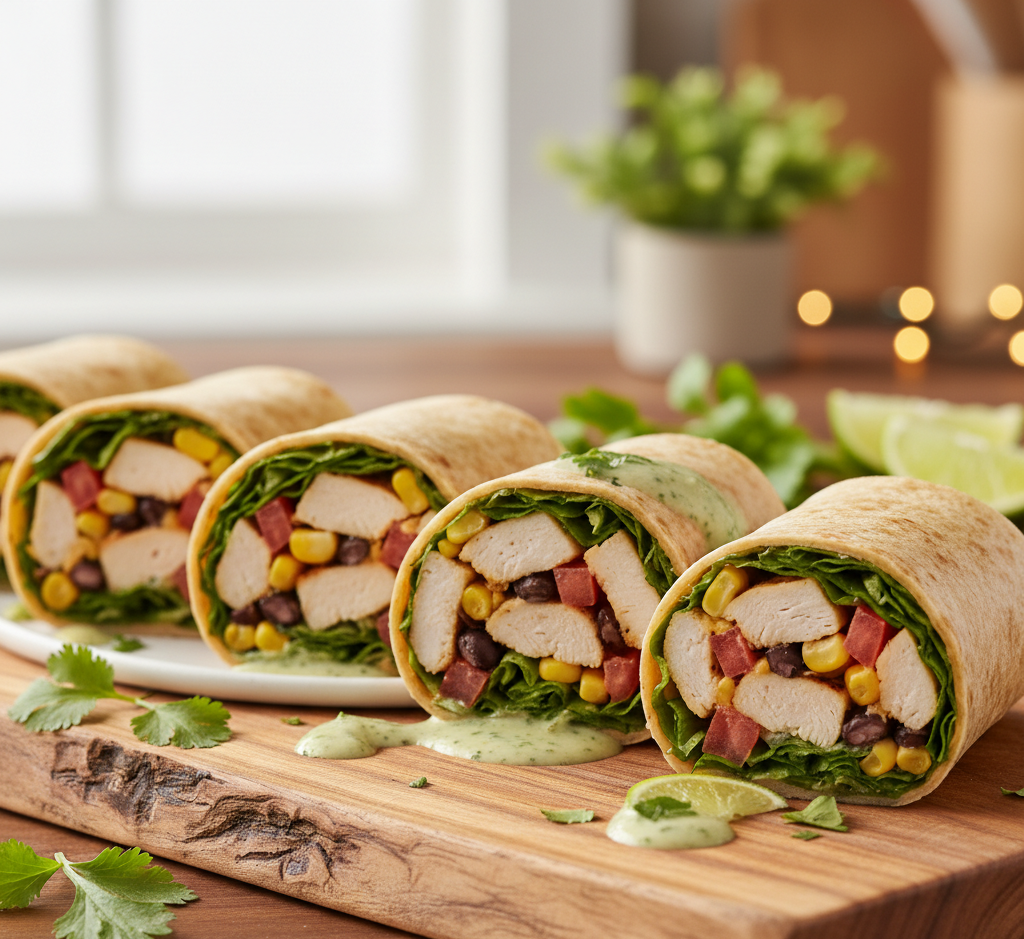
5. Slice and Serve

Remove from skillet, slice in half, and serve warm while the cheese is melted and gooey.

Tips for Perfect Results

To make the best cheesy garlic chicken wraps, keep these tips in mind:

  • Use freshly minced garlic for maximum flavor
  • Don’t overfill wraps to avoid tearing
  • Toast wraps slowly for even crispiness
  • Use a mix of cheeses for better melt and flavor

Variations

Switch things up with these tasty variations:

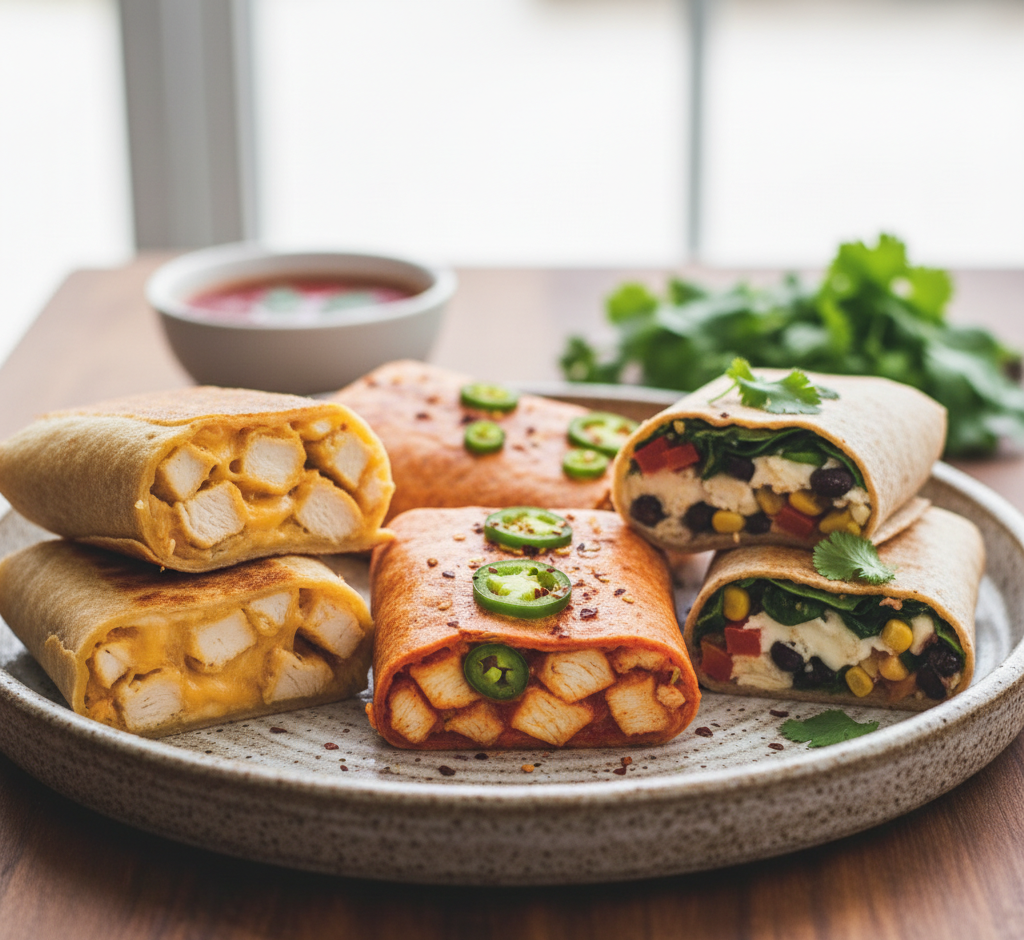
  • Spicy Version: Add crushed red pepper or hot sauce
  • Veggie Add-In: Include spinach or sautéed peppers
  • Low-Carb Option: Use low-carb tortillas
  • Buffalo Style: Toss chicken in buffalo sauce

What to Serve With It

These cheesy garlic chicken wraps pair well with:

  • French fries or sweet potato fries
  • Side salad
  • Coleslaw
  • Dipping sauces like ranch or garlic aioli

This creates a complete and satisfying meal.

Storage & Reheating

For your cheesy garlic chicken wraps:

  • Refrigerate: Store in an airtight container for up to 3 days
  • Reheat: Warm in a skillet or oven for best texture
  • Avoid microwaving if you want to keep the wrap crispy

Common Mistakes to Avoid

Avoid these common issues:

  • Using too much filling
  • Not sealing wraps properly
  • Overcooking the chicken
  • Skipping the toasting step

These small mistakes can affect texture and flavor.

FAQs

Can I use rotisserie chicken?

Yes, it’s a great time-saving option.

What cheese works best?

Mozzarella, cheddar, or a blend works perfectly.

Can I make these ahead of time?

Yes, assemble and refrigerate, then toast before serving.

Can I freeze these wraps?

Yes, wrap tightly and freeze for up to 2 months.

Final Thoughts

These cheesy garlic chicken wraps are the perfect combination of convenience and indulgence. With their crispy exterior, creamy filling, and bold garlic flavor, they’re guaranteed to become a regular in your dinner rotation.

Whether you’re feeding your family or just craving something comforting and quick, this recipe delivers every time. Once you try it, you’ll wonder how you ever lived without it!

Stunning Rice Bowl Recipes You’ll Love | Easy, Flavorful & Aesthetic Meals

If you’re looking for meals that are equal parts delicious, nutritious, and visually appealing, these stunning rice bowl recipes you’ll love | easy, flavorful & aesthetic meals are exactly what you need. Rice bowls have taken the food world by storm—and for good reason. They’re versatile, customizable, and perfect for busy lifestyles.

Whether you’re craving something savory, spicy, fresh, or comforting, rice bowls allow you to mix and match ingredients to create a satisfying meal in one dish. From vibrant veggie-packed bowls to protein-rich options, these recipes bring together bold flavors and beautiful presentation.

Stunning Rice Bowl Recipes

Why You’ll Love These Rice Bowl Recipes

These stunning rice bowl recipes you’ll love | easy, flavorful & aesthetic meals are designed to simplify your cooking while maximizing flavor and presentation.

Here’s why they’re so popular:

  • Easy to customize with your favorite ingredients
  • Perfect for meal prep and leftovers
  • Balanced with protein, carbs, and veggies
  • Great for quick lunches or dinners
  • Visually stunning and Instagram-worthy

Essential Ingredients for Rice Bowls

Creating the perfect rice bowl starts with a few staple components:

Base:

  • White rice, brown rice, jasmine rice, or cauliflower rice

Protein:

  • Grilled chicken, shrimp, tofu, beef, or salmon

Vegetables:

  • Avocado, cucumbers, carrots, broccoli, edamame

Toppings & Sauces:

  • Soy sauce, teriyaki, spicy mayo, sesame dressing

Ingredient Notes

The beauty of these stunning rice bowl recipes you’ll love | easy, flavorful & aesthetic meals lies in flexibility. You can easily adapt ingredients based on dietary needs or what you have on hand.

Using fresh, colorful vegetables not only enhances flavor but also makes your bowl visually appealing. A balance of textures—crunchy, creamy, and tender—is key to a great rice bowl.

Step-by-Step Instructions for Building the Perfect Rice Bowl

1. Cook the Rice

Prepare your rice according to package instructions. Fluff and set aside.

2. Prepare Your Protein

Cook your chosen protein using your preferred method—grilling, sautéing, or baking.

3. Chop Fresh Vegetables

Slice and prepare vegetables for easy assembly and vibrant presentation.

4. Assemble the Bowl

Start with a base of rice, then layer protein, vegetables, and toppings.

5. Add Sauce and Garnish

Drizzle your favorite sauce and finish with herbs or seeds.

Tips for Perfect Results

To master these stunning rice bowl recipes you’ll love | easy, flavorful & aesthetic meals, keep these tips in mind:

  • Use warm rice for better flavor absorption
  • Balance textures (crunchy, creamy, soft)
  • Don’t overload with too many toppings
  • Use contrasting colors for visual appeal

Popular Rice Bowl Variations

Here are some delicious variations to try:

  • Chicken Teriyaki Bowl: Sweet and savory classic
  • Spicy Shrimp Bowl: Bold and flavorful
  • Veggie Buddha Bowl: Packed with nutrients
  • Beef and Broccoli Bowl: Comfort food favorite

What to Serve With Rice Bowls

Rice bowls are often a complete meal, but you can pair them with:

  • Miso soup
  • Side salad
  • Spring rolls
  • Fresh fruit

These additions make your meal even more satisfying.

Storage & Reheating

For your stunning rice bowl recipes you’ll love | easy, flavorful & aesthetic meals:

  • Refrigerate: Store components separately for up to 4 days
  • Reheat: Warm rice and protein before assembling
  • Meal Prep Tip: Keep sauces separate to maintain freshness

Common Mistakes to Avoid

Avoid these common mistakes:

  • Overcooking rice
  • Using bland, unseasoned protein
  • Adding too much sauce
  • Skipping texture variety

Paying attention to these details makes a big difference.

FAQs

What type of rice is best for rice bowls?

Jasmine and brown rice are popular choices, but any rice works.

Can I make rice bowls ahead of time?

Yes, they’re excellent for meal prep.

Are rice bowls healthy?

Absolutely—they can be balanced with protein, veggies, and healthy fats.

How do I keep rice bowls from getting soggy?

Store sauces separately and add just before serving.

Final Thoughts

These stunning rice bowl recipes you’ll love | easy, flavorful & aesthetic meals are the ultimate solution for quick, customizable, and visually beautiful meals. They’re perfect for busy lifestyles, healthy eating goals, and anyone who loves bold flavors in a simple format.

Once you start making rice bowls at home, you’ll realize how easy it is to create restaurant-quality meals with minimal effort. Mix, match, and enjoy endless combinations that keep your meals exciting and satisfying.

Savory Burger Bowls: A Healthy Twist on Your Favorite Meal!

If you love burgers but want a lighter, more nutritious option, these Savory Burger Bowls: A Healthy Twist on Your Favorite Meal! are about to become your new go-to. All the classic burger flavors you crave—juicy beef, crisp lettuce, tangy pickles, and creamy sauce—are transformed into a satisfying, low-carb bowl.

This recipe is perfect for anyone looking to eat healthier without sacrificing flavor. Whether you’re meal prepping for the week or whipping up a quick dinner, burger bowls offer a customizable, wholesome alternative that’s just as indulgent as your favorite burger.

Savory Burger Bowls

Why You’ll Love These Savory Burger Bowls

These savory burger bowls a healthy twist on your favorite meal are packed with benefits that make them irresistible.

Here’s why you’ll love them:

  • Low-carb and keto-friendly
  • Quick and easy to prepare
  • Fully customizable
  • Great for meal prep
  • Loaded with fresh, wholesome ingredients

Ingredients

To make these savory burger bowls, you’ll need:

For the Beef:

  • 1 lb ground beef
  • 1 teaspoon garlic powder
  • 1 teaspoon onion powder
  • Salt and pepper to taste

For the Bowl:

  • 4 cups chopped romaine or iceberg lettuce
  • 1 cup cherry tomatoes, halved
  • 1/2 cup sliced pickles
  • 1/4 cup red onion, thinly sliced
  • 1 cup shredded cheddar cheese
  • 1 avocado, sliced

For the Sauce:

  • 1/2 cup mayonnaise
  • 2 tablespoons ketchup
  • 1 tablespoon mustard
  • 1 tablespoon pickle juice

Ingredient Notes

The beauty of these savory burger bowls a healthy twist on your favorite meal is their flexibility. Ground beef provides that classic burger flavor, but you can easily swap in ground turkey or chicken for a leaner option.

The sauce mimics a classic burger spread—creamy, tangy, and slightly sweet—while fresh veggies add crunch and balance. Using high-quality ingredients makes a noticeable difference in flavor.

Step-by-Step Instructions

1. Cook the Beef

In a skillet over medium heat, cook the ground beef with garlic powder, onion powder, salt, and pepper until browned and fully cooked.

2. Prepare the Sauce

In a small bowl, whisk together mayonnaise, ketchup, mustard, and pickle juice until smooth.

3. Assemble the Bowls

Start with a base of lettuce, then add cooked beef, tomatoes, pickles, onion, cheese, and avocado slices.

4. Add the Sauce

Drizzle the prepared sauce generously over each bowl.

5. Serve and Enjoy

Serve immediately while the beef is warm and the veggies are fresh.

Tips for Perfect Results

To make the best savory burger bowls a healthy twist on your favorite meal, keep these tips in mind:

  • Use freshly cooked, hot beef for the best flavor
  • Chop veggies evenly for balanced bites
  • Don’t skip the sauce—it ties everything together
  • Season generously for that classic burger taste

Variations

These burger bowls are incredibly versatile. Try these variations:

  • Cheeseburger Bowl: Add extra cheese and crispy bacon
  • Low-Fat Version: Use ground turkey and light mayo
  • Spicy Burger Bowl: Add jalapeños or hot sauce
  • BBQ Style: Swap sauce for BBQ dressing

What to Serve With It

Pair these bowls with:

  • Sweet potato fries
  • Roasted vegetables
  • Fresh fruit
  • Sparkling water or iced tea

This keeps your meal balanced and satisfying.

Storage & Reheating

For your savory burger bowls a healthy twist on your favorite meal:

  • Refrigerate: Store components separately for up to 4 days
  • Reheat: Warm beef before assembling
  • Meal Prep Tip: Keep sauce in a separate container

Common Mistakes to Avoid

Avoid these common issues:

  • Overcooking the beef
  • Using too much sauce
  • Skipping seasoning
  • Assembling too early (can make veggies soggy)

Keeping everything fresh and balanced is key.

FAQs

Can I make burger bowls ahead of time?

Yes! Store ingredients separately and assemble when ready.

Are burger bowls healthy?

Yes, they’re lower in carbs and packed with nutrients.

Can I use a different protein?

Absolutely—chicken, turkey, or plant-based options work great.

What’s the best lettuce to use?

Romaine or iceberg for crunch, but any greens will work.

Final Thoughts

These Savory Burger Bowls: A Healthy Twist on Your Favorite Meal! prove that you don’t need a bun to enjoy all the delicious flavors of a classic burger. They’re fresh, filling, and incredibly easy to make.

Whether you’re looking to eat healthier, save time, or simply try something new, these burger bowls deliver on all fronts. Once you try them, you might never go back to traditional burgers again!

Southwest Chicken Wraps: Easy & Healthy Lunch Recipes (Fresh, Flavorful & Meal-Prep Friendly)

When it comes to quick, nutritious meals that don’t sacrifice flavor, these Southwest Chicken Wraps: Easy & Healthy Lunch Recipes truly deliver. Loaded with seasoned chicken, crisp vegetables, hearty beans, and a creamy, zesty dressing, these wraps bring bold Southwest-inspired flavors into a convenient, handheld meal.

Perfect for busy weekdays, school lunches, or light dinners, this recipe is designed to keep you satisfied without weighing you down. The combination of lean protein, fiber-rich ingredients, and vibrant textures makes these wraps both wholesome and incredibly delicious.

Southwest Chicken

Why You’ll Love These Southwest Chicken Wraps

These Southwest chicken wraps easy & healthy lunch recipes are a go-to for anyone who wants something quick, fresh, and satisfying.

Here’s why they stand out:

  • Ready in under 30 minutes
  • Packed with protein and nutrients
  • Perfect for meal prep
  • Easy to customize
  • Great for both lunch and light dinners

Ingredients

To make these Southwest chicken wraps, you’ll need:

For the Chicken:

  • 2 cooked chicken breasts (grilled, baked, or rotisserie)
  • 1 teaspoon chili powder
  • 1/2 teaspoon cumin
  • 1/2 teaspoon smoked paprika
  • Salt and pepper to taste

For the Wrap Filling:

  • 4 large flour tortillas
  • 1 cup romaine lettuce, chopped
  • 1/2 cup corn (fresh, canned, or grilled)
  • 1/2 cup black beans, rinsed and drained
  • 1/2 cup cherry tomatoes, halved
  • 1/4 cup red onion, thinly sliced
  • 1/2 cup shredded cheddar or Mexican blend cheese

For the Creamy Dressing:

  • 1/2 cup Greek yogurt or sour cream
  • 1 tablespoon lime juice
  • 1 teaspoon taco seasoning

Ingredient Notes

The secret to amazing Southwest chicken wraps easy & healthy lunch recipes is balancing flavors and textures. The seasoned chicken provides savory depth, while the beans and corn add heartiness and fiber.

Greek yogurt keeps the dressing light and tangy, making this a healthier alternative to heavy sauces. Fresh lime juice brightens the entire dish, giving it that signature Southwest flair.

Step-by-Step Instructions

1. Season and Prepare the Chicken

Slice or shred your cooked chicken and toss it with chili powder, cumin, paprika, salt, and pepper. Warm it slightly for the best flavor.

2. Make the Dressing

In a small bowl, combine Greek yogurt, lime juice, and taco seasoning. Mix until smooth and creamy.

3. Prepare the Fillings

Chop the lettuce, slice the tomatoes, and prep all vegetables so everything is ready for assembly.

4. Assemble the Wraps

Lay each tortilla flat and layer with chicken, lettuce, corn, beans, tomatoes, onion, and cheese. Drizzle with the creamy dressing.

5. Roll and Slice

Fold in the sides and roll tightly into a wrap. Slice in half and serve immediately or wrap for later.

Tips for Perfect Results

To get the best results from your Southwest chicken wraps easy & healthy lunch recipes, keep these tips in mind:

  • Warm tortillas to prevent cracking
  • Don’t overfill to keep wraps easy to roll
  • Use freshly squeezed lime juice
  • Add dressing just before serving to avoid sogginess

Variations

These wraps are incredibly versatile. Try these variations:

  • Spicy Southwest Wrap: Add jalapeños or hot sauce
  • Low-Carb Version: Use lettuce wraps instead of tortillas
  • Vegetarian Option: Swap chicken for grilled veggies or tofu
  • Avocado Lover’s Wrap: Add sliced avocado or guacamole

What to Serve With It

These wraps pair beautifully with:

  • Tortilla chips and salsa
  • Fresh fruit or fruit salad
  • Light coleslaw
  • Sparkling water or iced tea

This creates a balanced and refreshing meal.

Storage & Reheating

For your Southwest chicken wraps easy & healthy lunch recipes:

  • Refrigerate: Store wraps tightly wrapped for up to 3 days
  • Meal Prep Tip: Keep ingredients separate until ready to assemble
  • Reheat: Warm chicken separately if desired
  • Avoid soggy wraps by adding dressing last

Common Mistakes to Avoid

Avoid these common pitfalls:

  • Overstuffing wraps
  • Skipping seasoning on the chicken
  • Using cold, stiff tortillas
  • Adding too much dressing

Keeping everything balanced ensures a better texture and flavor.

FAQs

Can I make these wraps ahead of time?

Yes, but store the dressing separately until serving.

What type of chicken works best?

Grilled, baked, or rotisserie chicken all work well.

Are these wraps good for weight loss?

They can be, especially when using Greek yogurt and fresh ingredients.

Can I freeze these wraps?

It’s not recommended due to fresh vegetables and texture changes.

Final Thoughts

These Southwest Chicken Wraps: Easy & Healthy Lunch Recipes are the perfect combination of convenience, nutrition, and bold flavor. They’re quick to make, easy to customize, and ideal for anyone looking to enjoy a healthy meal without sacrificing taste.

Whether you’re meal prepping for the week or whipping up a fast lunch, these wraps deliver fresh, satisfying goodness in every bite. Once you try them, they’re sure to become a staple in your kitchen.

Garlic Butter Shrimp Angel Hair Pasta (Quick, Elegant & Flavor-Packed)

If you’re looking for a fast, flavorful meal that feels restaurant-worthy, this Garlic Butter Shrimp Angel Hair Pasta is exactly what you need. It’s light yet satisfying, loaded with tender shrimp, delicate angel hair pasta, and a rich garlic butter sauce that comes together in no time.

This dish is perfect for busy weeknights, date nights at home, or when you want something impressive without spending hours in the kitchen. With simple ingredients and a quick cooking process, you’ll have a stunning pasta dish ready in under 30 minutes.

Garlic Butter Shrimp Angel

Why You’ll Love This Garlic Butter Shrimp Angel Hair Pasta

This garlic butter shrimp angel hair pasta is a favorite for so many reasons.

Here’s why it deserves a spot in your rotation:

  • Ready in under 30 minutes
  • Light yet rich and satisfying
  • Packed with garlic butter flavor
  • Perfect for weeknights or entertaining
  • Uses simple, easy-to-find ingredients

Ingredients

To make this garlic butter shrimp angel hair pasta, you’ll need:

  • 8 oz angel hair pasta
  • 1 lb large shrimp, peeled and deveined
  • 4 tablespoons unsalted butter
  • 4 cloves garlic, minced
  • 1/4 teaspoon red pepper flakes (optional)
  • 1/2 cup chicken broth or white wine
  • Juice of 1 lemon
  • 1/4 cup grated Parmesan cheese
  • 2 tablespoons fresh parsley, chopped
  • Salt and pepper to taste

Ingredient Notes

The beauty of this garlic butter shrimp angel hair pasta lies in its simplicity. Fresh garlic is essential for bold flavor, while butter creates that rich, silky sauce.

Angel hair pasta cooks quickly and pairs perfectly with shrimp because it doesn’t overpower the dish. A splash of lemon juice adds brightness, balancing the richness of the butter.

Step-by-Step Instructions

1. Cook the Pasta

Bring a large pot of salted water to a boil and cook angel hair pasta according to package instructions. Drain and set aside.

2. Cook the Shrimp

In a large skillet, melt 2 tablespoons of butter over medium heat. Add shrimp, season with salt and pepper, and cook for 2–3 minutes per side until pink and opaque. Remove and set aside.

3. Make the Garlic Butter Sauce

In the same skillet, add remaining butter and garlic. Sauté until fragrant, then stir in red pepper flakes and broth or wine.

4. Add Lemon and Combine

Add lemon juice and let the sauce simmer for a few minutes to develop flavor.

5. Toss Everything Together

Return shrimp to the pan, add cooked pasta, and toss until everything is coated in the garlic butter sauce.

6. Finish with Cheese and Herbs

Sprinkle Parmesan and parsley over the pasta and gently toss before serving.

Tips for Perfect Results

To get the best garlic butter shrimp angel hair pasta, follow these tips:

  • Don’t overcook shrimp—they cook quickly
  • Salt your pasta water for better flavor
  • Use fresh lemon juice for brightness
  • Reserve some pasta water to adjust sauce consistency

Variations

Switch up your garlic butter shrimp angel hair pasta with these ideas:

  • Creamy Version: Add a splash of heavy cream
  • Spicy Kick: Increase red pepper flakes
  • Veggie Boost: Add spinach or cherry tomatoes
  • Garlic Lovers: Double the garlic

What to Serve With It

This dish pairs beautifully with:

  • Garlic bread
  • Caesar salad
  • Roasted asparagus
  • A glass of white wine or sparkling water

These sides complement the light, buttery flavors.

Storage & Reheating

For your garlic butter shrimp angel hair pasta:

  • Refrigerate: Store in airtight container for up to 3 days
  • Reheat: Warm gently on stovetop with a splash of broth
  • Avoid overcooking shrimp when reheating

Common Mistakes to Avoid

Avoid these common issues:

  • Overcooking shrimp (they become rubbery)
  • Using too much pasta without enough sauce
  • Burning garlic
  • Skipping lemon juice

Attention to these details ensures perfect results.

FAQs

Can I use frozen shrimp?

Yes, just thaw and pat dry before cooking.

What can I substitute for angel hair pasta?

Spaghetti or linguine works well too.

Can I make this dairy-free?

Yes, use olive oil instead of butter.

How do I keep the pasta from drying out?

Add reserved pasta water or extra sauce when reheating.

Final Thoughts

This Garlic Butter Shrimp Angel Hair Pasta is the perfect combination of simplicity and elegance. It’s quick enough for busy nights yet impressive enough for special occasions.

With its buttery garlic sauce, tender shrimp, and light pasta, this recipe delivers big flavor with minimal effort. Once you try it, it’s sure to become one of your go-to meals for any occasion.

One Pot Million Dollar Spaghetti Recipe for Easy Weeknight Dinners (Rich, Creamy & Family-Approved)

If you’re searching for the ultimate comfort food that’s quick, satisfying, and incredibly easy to make, this One Pot Million Dollar Spaghetti Recipe for Easy Weeknight Dinners is exactly what your kitchen needs. It combines rich meat sauce, creamy cheese layers, and perfectly cooked pasta—all made in one pot for minimal cleanup.

This dish gets its “million dollar” name from its indulgent, creamy texture and bold flavor that tastes like it came from a restaurant. But the best part? It’s simple enough for busy weeknights and guaranteed to become a family favorite.

One Pot Million Dollar

Why You’ll Love This One Pot Million Dollar Spaghetti Recipe

This one pot million dollar spaghetti recipe for easy weeknight dinners checks all the boxes for a perfect meal.

Here’s why it stands out:

  • One pot means less cleanup
  • Creamy, cheesy, and ultra comforting
  • Perfect for feeding a family
  • Quick and easy to prepare
  • Great for leftovers and meal prep

Ingredients

To make this one pot million dollar spaghetti recipe, you’ll need:

  • 12 oz spaghetti
  • 1 lb ground beef (or Italian sausage)
  • 1 jar (24 oz) marinara sauce
  • 2 cups chicken or beef broth
  • 1/2 cup heavy cream
  • 4 oz cream cheese, softened
  • 1 cup shredded mozzarella cheese
  • 1/2 cup grated Parmesan cheese
  • 1 teaspoon garlic powder
  • 1 teaspoon Italian seasoning
  • Salt and pepper to taste

Ingredient Notes

The magic of this one pot million dollar spaghetti recipe for easy weeknight dinners lies in the combination of cheeses. Cream cheese creates a velvety base, while mozzarella and Parmesan add richness and stretch.

Using broth instead of water infuses the pasta with flavor as it cooks. You can also substitute ground turkey or plant-based meat for a lighter option.

Step-by-Step Instructions

1. Brown the Meat

In a large pot, cook ground beef over medium heat until browned. Drain excess grease if needed.

2. Add Sauce and Broth

Stir in marinara sauce, broth, garlic powder, and Italian seasoning. Bring to a simmer.

3. Add the Spaghetti

Break spaghetti in half and add to the pot, ensuring it’s submerged in liquid.

4. Cook Until Tender

Cover and cook for 12–15 minutes, stirring occasionally, until pasta is cooked through.

5. Add Creamy Ingredients

Stir in cream cheese and heavy cream until fully melted and smooth.

6. Add Cheese and Finish

Sprinkle mozzarella and Parmesan on top, cover briefly until melted, then stir gently.

Tips for Perfect Results

To master this one pot million dollar spaghetti recipe for easy weeknight dinners, follow these tips:

  • Stir occasionally to prevent sticking
  • Use freshly grated cheese for better melting
  • Adjust liquid if pasta absorbs too much
  • Let it rest for a few minutes before serving

These tips ensure the perfect creamy consistency.

Variations

Customize your one pot million dollar spaghetti recipe with these ideas:

  • Spicy Version: Add red pepper flakes
  • Vegetarian: Use mushrooms or plant-based meat
  • Extra Cheesy: Add ricotta or more mozzarella
  • Healthier Option: Use whole wheat pasta

What to Serve With It

Pair this dish with:

  • Garlic bread
  • Side salad
  • Roasted vegetables
  • A glass of iced tea or soda

These sides complement the richness of the pasta perfectly.

Storage & Reheating

For your one pot million dollar spaghetti recipe for easy weeknight dinners:

  • Refrigerate: Store in airtight container for up to 4 days
  • Freeze: Freeze portions for up to 2 months
  • Reheat: Warm on stovetop with a splash of broth or milk

Common Mistakes to Avoid

Avoid these common pitfalls:

  • Not stirring pasta while cooking
  • Using too little liquid
  • Overcooking pasta
  • Adding cheese too early

Paying attention to timing is key for perfect results.

FAQs

Can I use a different type of pasta?

Yes, but cooking time may vary.

Can I make this ahead of time?

Absolutely—it reheats very well.

How do I make it less rich?

Use less cream cheese or substitute with Greek yogurt.

Can I double the recipe?

Yes, just use a larger pot and adjust liquid accordingly.

Final Thoughts

This One Pot Million Dollar Spaghetti Recipe for Easy Weeknight Dinners is everything you want in a comfort meal—rich, creamy, flavorful, and incredibly easy to make. With just one pot and simple ingredients, you can create a dish that feels indulgent without the hassle.

Whether you’re feeding your family or looking for a cozy dinner after a long day, this recipe delivers every time. Once you try it, it’s guaranteed to earn a permanent spot in your weekly meal rotation.

Southwest Chicken Wraps: Easy & Healthy Lunch Recipes

If you’re looking for a quick, satisfying, and nutritious meal, these Southwest Chicken Wraps: Easy & Healthy Lunch Recipes are exactly what you need. Packed with bold Southwest flavors, juicy chicken, crisp veggies, and a creamy dressing, these wraps strike the perfect balance between healthy and delicious.

Whether you’re meal prepping for the week, packing lunch for work, or making a light dinner, these wraps are incredibly versatile. They come together fast, require simple ingredients, and deliver big flavor in every bite—making them a staple in any busy kitchen.

Southwest Chicken


Why You’ll Love These Southwest Chicken Wraps

These Southwest chicken wraps easy & healthy lunch recipes are perfect for anyone who wants a wholesome meal without sacrificing flavor.

Here’s why they’re a favorite:

  • Quick and easy to prepare
  • Packed with protein and fiber
  • Fresh, vibrant ingredients
  • Perfect for meal prep
  • Customizable to your taste

Ingredients

To make these Southwest chicken wraps, you’ll need:

For the Chicken:

  • 2 cooked chicken breasts (grilled or shredded)
  • 1 teaspoon chili powder
  • 1/2 teaspoon cumin
  • 1/2 teaspoon paprika
  • Salt and pepper to taste

For the Wrap Filling:

  • 4 large flour tortillas
  • 1 cup romaine lettuce, chopped
  • 1/2 cup corn (fresh or canned)
  • 1/2 cup black beans, drained and rinsed
  • 1/2 cup cherry tomatoes, halved
  • 1/4 cup red onion, thinly sliced
  • 1/2 cup shredded cheese

For the Dressing:

  • 1/2 cup Greek yogurt or sour cream
  • 1 tablespoon lime juice
  • 1 teaspoon taco seasoning

Ingredient Notes

The success of these Southwest chicken wraps easy & healthy lunch recipes comes from fresh, high-quality ingredients. Grilled chicken adds smoky flavor, while black beans and corn provide texture and nutrition.

Greek yogurt makes the dressing lighter while still creamy, and lime juice brightens everything up. You can easily swap ingredients based on what you have on hand.

Step-by-Step Instructions

1. Prepare the Chicken

Season cooked chicken with chili powder, cumin, paprika, salt, and pepper. Warm slightly if needed.

2. Make the Dressing

In a small bowl, mix Greek yogurt, lime juice, and taco seasoning until smooth.

3. Prep the Fillings

Chop lettuce, slice tomatoes, and prepare all vegetables so everything is ready to assemble.

4. Assemble the Wraps

Lay out tortillas and layer chicken, lettuce, corn, beans, tomatoes, onion, cheese, and drizzle with dressing.

5. Roll and Serve

Fold in the sides and roll tightly into wraps. Slice in half and serve immediately.

Tips for Perfect Results

To get the best results from these Southwest chicken wraps easy & healthy lunch recipes, follow these tips:

  • Warm tortillas before assembling for easier rolling
  • Don’t overfill wraps to prevent tearing
  • Use fresh lime juice for better flavor
  • Chill wraps slightly for cleaner slicing

These small details make a big difference.

Variations

Switch things up with these variations:

  • Spicy Version: Add jalapeños or hot sauce
  • Low-Carb: Use lettuce wraps instead of tortillas
  • Vegetarian: Replace chicken with grilled veggies or tofu
  • Avocado Boost: Add sliced avocado or guacamole

What to Serve With It

These wraps pair perfectly with:

  • Tortilla chips and salsa
  • Fresh fruit salad
  • Light coleslaw
  • Iced tea or sparkling water

They create a balanced and refreshing meal.

Storage & Reheating

For storing your Southwest chicken wraps easy & healthy lunch recipes:

  • Refrigerate: Wrap tightly and store up to 3 days
  • Meal Prep: Store fillings separately for freshness
  • Reheat: Warm chicken separately before assembling
  • Avoid sogginess by adding dressing just before eating

Common Mistakes to Avoid

Avoid these common issues:

  • Overfilling wraps
  • Using cold tortillas
  • Skipping seasoning on chicken
  • Adding too much dressing

Keeping everything balanced ensures the best texture and flavor.

FAQs

Can I make these wraps ahead of time?

Yes, but store dressing separately to keep wraps fresh.

What’s the best chicken to use?

Grilled or rotisserie chicken works great.

Can I freeze these wraps?

It’s not recommended due to fresh vegetables.

Are these wraps healthy?

Yes, they’re packed with lean protein, fiber, and fresh ingredients.

Final Thoughts

These Southwest Chicken Wraps: Easy & Healthy Lunch Recipes are the perfect solution for anyone looking for a quick, flavorful, and nutritious meal. They’re easy to make, endlessly customizable, and ideal for busy days when you still want something delicious.

Once you try these wraps, they’ll quickly become part of your regular meal rotation—simple, satisfying, and full of bold Southwest flavor.

Unique Winter Comfort Food Recipes Ebook (Cozy, Hearty & Flavor-Packed Ideas)

There’s something magical about cozying up with warm, hearty meals during the colder months—and that’s exactly what this Unique Winter Comfort Food Recipes Ebook is all about. Whether you’re craving rich soups, creamy casseroles, or indulgent desserts, this collection is designed to bring warmth and flavor to your kitchen all winter long.

This isn’t just another recipe roundup—it’s a thoughtfully curated ebook packed with creative, comforting dishes that go beyond the basics. From elevated classics to unique twists, every recipe is crafted to deliver maximum flavor with approachable ingredients and easy-to-follow instructions.

Unique Winter Comfort

Why You’ll Love This Unique Winter Comfort Food Recipes Ebook

This unique winter comfort food recipes ebook is perfect for anyone who loves cozy meals with a creative twist.

Here’s what makes it special:

  • A mix of classic comfort foods and unique recipes
  • Easy-to-follow instructions for all skill levels
  • Perfect for family dinners or entertaining
  • Includes hearty meals, sides, and desserts
  • Designed to save time while maximizing flavor

What You’ll Find Inside the Ebook

This unique winter comfort food recipes ebook includes a wide variety of dishes to keep your winter menu exciting.

Hearty Main Dishes

  • Creamy chicken pot pie with flaky crust
  • Slow-cooked beef stew with root vegetables
  • Cheesy baked pasta with rich tomato sauce

Cozy Soups & Stews

  • Butternut squash soup with warm spices
  • Creamy potato leek soup
  • Spicy lentil and sausage stew

Comforting Sides

  • Garlic mashed potatoes
  • Roasted winter vegetables
  • Cheesy baked mac and cheese

Decadent Desserts

  • Warm chocolate lava cake
  • Apple crumble with cinnamon
  • Bread pudding with vanilla sauce

Ingredient Philosophy

One of the highlights of this unique winter comfort food recipes ebook is its focus on simple, accessible ingredients. You won’t need specialty items or hard-to-find components—just pantry staples and seasonal produce.

Think:

  • Root vegetables like carrots, potatoes, and squash
  • Proteins like chicken, beef, and legumes
  • Dairy for richness and comfort
  • Warm spices like cinnamon, nutmeg, and paprika

This approach makes it easy to cook delicious meals without stress.

Step-by-Step Cooking Approach

Each recipe in the unique winter comfort food recipes ebook is designed with clarity and ease in mind.

1. Prep Ingredients

Start by organizing and prepping all ingredients to streamline the cooking process.

2. Build Layers of Flavor

Many recipes use techniques like sautéing aromatics, slow simmering, and roasting to develop deep, rich flavors.

3. Cook Low and Slow

Comfort food often benefits from longer cooking times, allowing flavors to fully develop and textures to become tender.

4. Finish with Fresh Elements

Adding herbs, citrus, or a drizzle of cream at the end elevates each dish.

Tips for Perfect Winter Comfort Food

To get the most out of this unique winter comfort food recipes ebook, keep these tips in mind:

  • Use fresh, seasonal ingredients for best flavor
  • Don’t rush cooking times—slow cooking enhances taste
  • Taste and adjust seasoning throughout
  • Invest in quality cookware for even heat distribution

Variations & Customizations

One of the best parts of this unique winter comfort food recipes ebook is how adaptable the recipes are.

Try these variations:

  • Vegetarian Options: Swap meat for beans or lentils
  • Gluten-Free: Use alternative flours or pasta
  • Low-Carb: Focus on protein and vegetable-heavy dishes
  • Spicy Twist: Add chili flakes or hot sauce

What to Serve with Winter Comfort Meals

Pairing your dishes properly enhances the experience. This unique winter comfort food recipes ebook also inspires great combinations:

  • Crusty bread with soups
  • Fresh green salads with rich mains
  • Warm beverages like tea or hot chocolate
  • Light desserts after heavy meals

Storage & Reheating Tips

Comfort food often tastes even better the next day. Here’s how to store recipes from your unique winter comfort food recipes ebook:

  • Refrigerate: Store leftovers for up to 4 days
  • Freeze: Soups and stews freeze well for up to 3 months
  • Reheat: Use stovetop for best texture and flavor
  • Avoid overheating to preserve texture

Common Mistakes to Avoid

Even the best recipes can go wrong without attention to detail:

  • Overcooking vegetables until mushy
  • Under-seasoning dishes
  • Skipping resting time for baked items
  • Cooking at too high heat

Avoiding these ensures consistently delicious results.

FAQs

Is this ebook beginner-friendly?

Yes! Every recipe is written with clear, easy-to-follow steps.

Can I meal prep with these recipes?

Absolutely—many dishes are perfect for make-ahead meals.

Are the ingredients easy to find?

Yes, most recipes use common grocery store ingredients.

Are there healthy options included?

Yes, the ebook includes lighter and balanced comfort food recipes.

Final Thoughts

This Unique Winter Comfort Food Recipes Ebook is your ultimate guide to staying warm, satisfied, and inspired all season long. With its mix of hearty meals, creative twists, and easy instructions, it’s perfect for anyone who loves cooking during the colder months.

Whether you’re feeding your family, hosting guests, or simply enjoying a quiet night at home, these recipes bring comfort, flavor, and joy to every meal. Once you start cooking from this collection, you’ll wonder how you ever got through winter without it.

Jalapeño Honey Drenched Crispy Fried Chicken Sandwich (Sweet, Spicy & Irresistible)

If you love bold flavors that hit every taste bud, this Jalapeño Honey Drenched Crispy Fried Chicken Sandwich is about to become your new favorite. It’s the perfect combination of crispy, juicy fried chicken, sweet golden honey, and a spicy kick from fresh jalapeños—all stacked on a soft, toasted bun.

This sandwich delivers everything you want in a comfort food classic, but with a gourmet twist. Whether you’re cooking for a weekend indulgence, game day, or a casual dinner, this recipe brings restaurant-quality flavor straight to your kitchen.

Jalapeño Honey

Why You’ll Love This Jalapeño Honey Drenched Crispy Fried Chicken Sandwich

This jalapeño honey drenched crispy fried chicken sandwich is all about contrast—sweet, spicy, crunchy, and juicy in every bite.

Here’s why it stands out:

  • Perfect balance of sweet honey and spicy jalapeños
  • Ultra crispy, golden fried chicken
  • Juicy and tender inside
  • Easy to customize with toppings
  • Better than takeout

Ingredients

To make this jalapeño honey drenched crispy fried chicken sandwich, you’ll need:

For the Chicken:

  • 2 large chicken breasts (halved)
  • 1 cup buttermilk
  • 1 cup all-purpose flour
  • 1/2 cup cornstarch
  • 1 teaspoon paprika
  • 1 teaspoon garlic powder
  • 1/2 teaspoon cayenne pepper
  • Salt and pepper to taste
  • Oil for frying

For the Jalapeño Honey:

  • 1/2 cup honey
  • 1–2 fresh jalapeños, sliced
  • 1 teaspoon red pepper flakes (optional)

For Assembly:

  • Brioche buns
  • Lettuce
  • Pickles
  • Mayonnaise or aioli

Ingredient Notes

The secret to a standout jalapeño honey drenched crispy fried chicken sandwich lies in layering flavor. Buttermilk tenderizes the chicken while adding subtle tang, and cornstarch ensures a crisp, crunchy coating.

Fresh jalapeños bring a bright heat, while honey adds a rich sweetness that perfectly balances the spice. Brioche buns are ideal because their slight sweetness complements the bold flavors.

Step-by-Step Instructions

1. Marinate the Chicken

Place chicken in buttermilk and refrigerate for at least 30 minutes (or overnight for deeper flavor).

2. Prepare the Coating

In a bowl, mix flour, cornstarch, paprika, garlic powder, cayenne, salt, and pepper.

3. Bread the Chicken

Remove chicken from buttermilk and dredge in the flour mixture, pressing firmly for a thick coating.

4. Fry Until Crispy

Heat oil to 350°F and fry chicken for 6–8 minutes until golden brown and fully cooked.

5. Make Jalapeño Honey

Warm honey in a small pan and stir in sliced jalapeños and red pepper flakes. Let it infuse for a few minutes.

6. Assemble the Sandwich

Toast buns, spread mayo or aioli, add fried chicken, drizzle with jalapeño honey, and top with lettuce and pickles.

Tips for Perfect Results

To master this jalapeño honey drenched crispy fried chicken sandwich, follow these tips:

  • Double dredge for extra crunch
  • Keep oil temperature consistent
  • Let chicken rest after frying
  • Adjust spice level to taste

These tips ensure a crispy, flavorful sandwich every time.

Variations

Try these variations for your jalapeño honey drenched crispy fried chicken sandwich:

  • Extra Spicy: Add hot sauce to the marinade
  • Grilled Version: Swap fried chicken for grilled
  • Cheesy Upgrade: Add pepper jack cheese
  • Southern Style: Add coleslaw for crunch

What to Serve With It

Pair this sandwich with:

  • French fries or waffle fries
  • Coleslaw
  • Corn on the cob
  • Lemonade or iced tea

These sides complement the bold sweet and spicy flavors.

Storage & Reheating

For your jalapeño honey drenched crispy fried chicken sandwich:

  • Refrigerate: Store chicken separately for up to 3 days
  • Reheat: Use oven or air fryer for crispiness
  • Avoid microwaving to prevent soggy coating

Common Mistakes to Avoid

Avoid these common pitfalls:

  • Frying at incorrect temperature
  • Skipping the marinade
  • Overcrowding the pan
  • Adding honey too early (can burn)

Attention to these details ensures perfect results.

FAQs

How spicy is this sandwich?

It has a mild-to-medium heat, but you can adjust jalapeños and spices.

Can I make it ahead of time?

You can prep components ahead, but assemble fresh for best texture.

Can I bake instead of fry?

Yes, but the texture won’t be as crispy.

What’s the best oil for frying?

Use neutral oils like vegetable or canola oil.

Final Thoughts

This Jalapeño Honey Drenched Crispy Fried Chicken Sandwich is the ultimate combination of sweet, spicy, and crunchy. It’s bold, satisfying, and surprisingly easy to make at home.

Whether you’re cooking for friends, family, or just treating yourself, this sandwich delivers big flavor with every bite. Once you try it, it’s sure to become a standout favorite in your recipe collection.

Pool Party Hot Dogs Recipe (Easy Crowd-Pleaser with Perfect Summer Sides)

When it comes to effortless summer entertaining, nothing beats a classic Pool Party Hot Dogs Recipe. It’s simple, customizable, and guaranteed to keep everyone happy—from kids splashing in the pool to adults relaxing with a cold drink in hand.

This recipe isn’t just about hot dogs—it’s about creating a fun, build-your-own experience with toppings, sides, and flavors that scream summer. Whether you’re hosting a backyard bash or a casual family gathering, this guide will help you serve up hot dogs that are anything but boring.

Pool Party Hot Dogs

Why You’ll Love This Pool Party Hot Dogs Recipe

This pool party hot dogs recipe is designed for ease, flavor, and fun.

Here’s why it’s a must for summer:

  • Quick and easy to prepare
  • Perfect for feeding a crowd
  • Endless topping combinations
  • Kid-friendly and adult-approved
  • Pairs perfectly with summer sides

Ingredients

To make this pool party hot dogs recipe, you’ll need:

For the Hot Dogs:

  • 8–12 hot dogs (beef, turkey, or plant-based)
  • 8–12 hot dog buns
  • Butter or oil for toasting buns

Toppings Bar Ideas:

  • Ketchup and mustard
  • Relish
  • Diced onions
  • Shredded cheese
  • Jalapeños
  • Coleslaw
  • Chili
  • Pickles

Optional Summer Sides:

  • Potato salad
  • Pasta salad
  • Corn on the cob
  • Watermelon slices

Ingredient Notes

The beauty of a pool party hot dogs recipe is its flexibility. You can use classic beef hot dogs or opt for turkey or plant-based versions to suit dietary needs.

Fresh buns make a big difference—soft on the inside and lightly toasted on the outside. Offering a variety of toppings allows guests to customize their own creations, turning a simple meal into a memorable experience.

Step-by-Step Instructions

1. Preheat the Grill

Heat your grill to medium-high. A hot grill ensures those classic grill marks and smoky flavor.

2. Grill the Hot Dogs

Place hot dogs on the grill and cook for 5–7 minutes, turning occasionally until heated through and slightly charred.

3. Toast the Buns

Lightly butter the buns and toast them on the grill for 1–2 minutes until golden.

4. Set Up a Toppings Bar

Arrange all toppings in bowls so guests can build their own hot dogs.

5. Assemble and Serve

Place hot dogs in buns and let everyone customize with their favorite toppings.

Tips for Perfect Results

To make the best pool party hot dogs recipe, follow these tips:

  • Don’t overcook—keep hot dogs juicy
  • Rotate frequently for even grilling
  • Toast buns for extra flavor
  • Keep toppings chilled in hot weather

These simple steps elevate your hot dog game instantly.

Variations

Make your pool party hot dogs recipe even more exciting with these ideas:

  • Chili Cheese Dogs: Add warm chili and shredded cheese
  • Hawaiian Style: Top with pineapple and teriyaki sauce
  • Spicy Kick: Add jalapeños and hot sauce
  • Chicago-Style: Load up with pickles, tomatoes, and mustard

What to Serve With It

A great pool party hot dogs recipe shines even more with the right sides:

  • Fresh fruit salad
  • Chips and dips
  • Grilled vegetables
  • Lemonade or iced tea

These sides keep the meal light, refreshing, and perfect for summer.

Storage & Reheating

If you have leftovers from your pool party hot dogs recipe:

  • Refrigerate: Store cooked hot dogs in airtight container for up to 3 days
  • Reheat: Warm on grill or stovetop for best texture
  • Avoid microwaving buns to prevent sogginess

Common Mistakes to Avoid

Avoid these common issues:

  • Overcooking hot dogs until dry
  • Skipping bun toasting
  • Not offering enough toppings
  • Letting food sit too long in the heat

Keeping everything fresh ensures a great experience for guests.

FAQs

Can I cook hot dogs without a grill?

Yes! You can boil, pan-fry, or use an air fryer.

How many hot dogs should I plan per person?

Plan for 1–2 per person, depending on appetite and sides.

Can I prepare toppings ahead of time?

Absolutely—prep and refrigerate them before the party.

What’s the best way to keep hot dogs warm?

Use a slow cooker or keep them on low heat on the grill.

Final Thoughts

This Pool Party Hot Dogs Recipe is the ultimate summer solution for easy, fun, and delicious entertaining. With juicy grilled hot dogs, endless topping options, and refreshing sides, it’s a guaranteed hit for any gathering.

Whether you’re hosting a big party or a casual weekend cookout, this recipe makes it simple to serve something everyone will love. Fire up the grill, set up your toppings bar, and enjoy the perfect summer feast.