Eggs Benedict Casserole Recipe (Easy Overnight Brunch Favorite!)

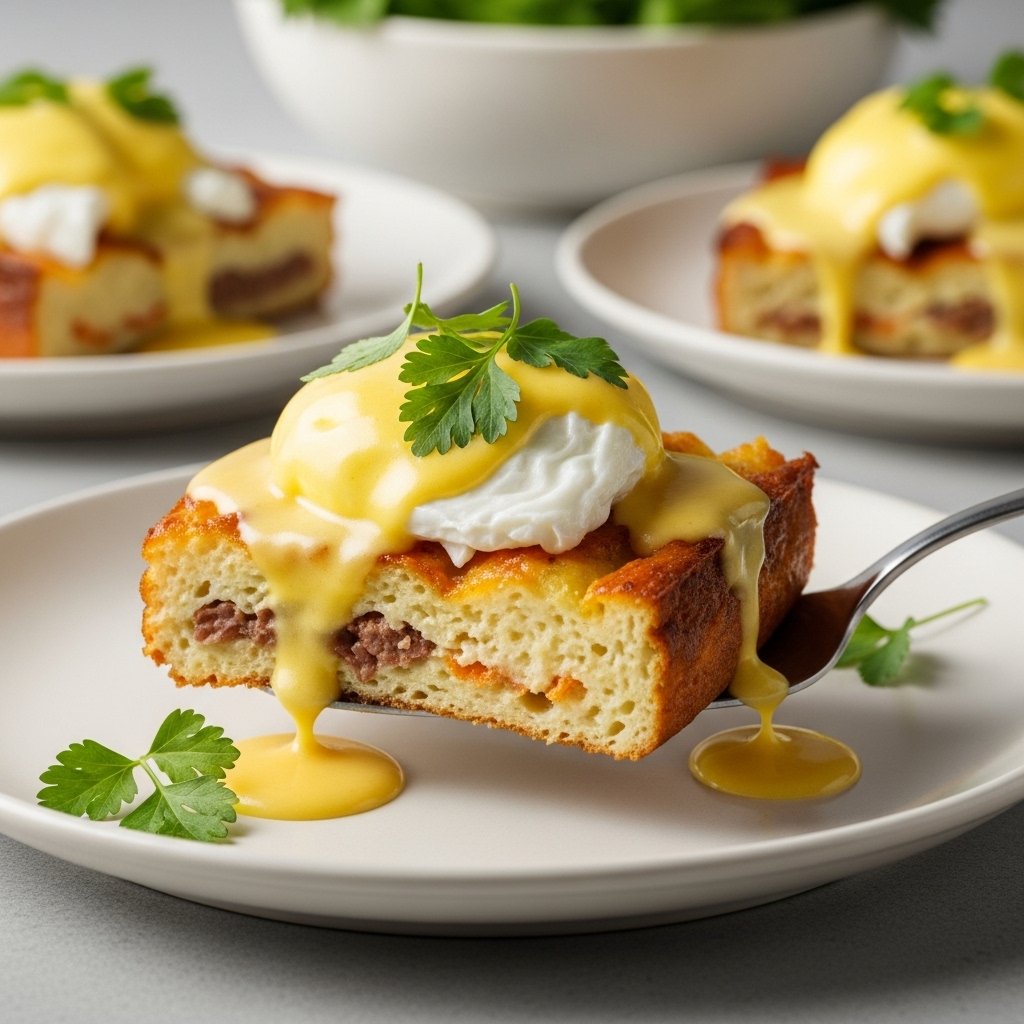
If you love classic brunch flavors but want something easier to prepare for a crowd, this Eggs Benedict Casserole Recipe is about to become your new go-to. It takes everything you adore about traditional Eggs Benedict—savory ham, soft eggs, toasted English muffins, and rich hollandaise sauce—and transforms it into a simple, make-ahead casserole.

Perfect for holidays, weekend brunches, or feeding a hungry family, this dish eliminates the stress of poaching eggs while still delivering that signature flavor. The best part? You can prep it the night before and simply bake it in the morning.

Why You’ll Love This Recipe

This Eggs Benedict Casserole Recipe is a brunch game-changer. It combines convenience with incredible flavor, making it ideal for both beginners and experienced home cooks.

Here’s why it stands out:

  • Easy make-ahead breakfast or brunch
  • No need to poach eggs individually
  • Feeds a crowd effortlessly
  • Rich, creamy, and satisfying
  • Customizable with your favorite ingredients

Whether you’re hosting guests or just treating yourself, this casserole delivers comfort and elegance in every bite.
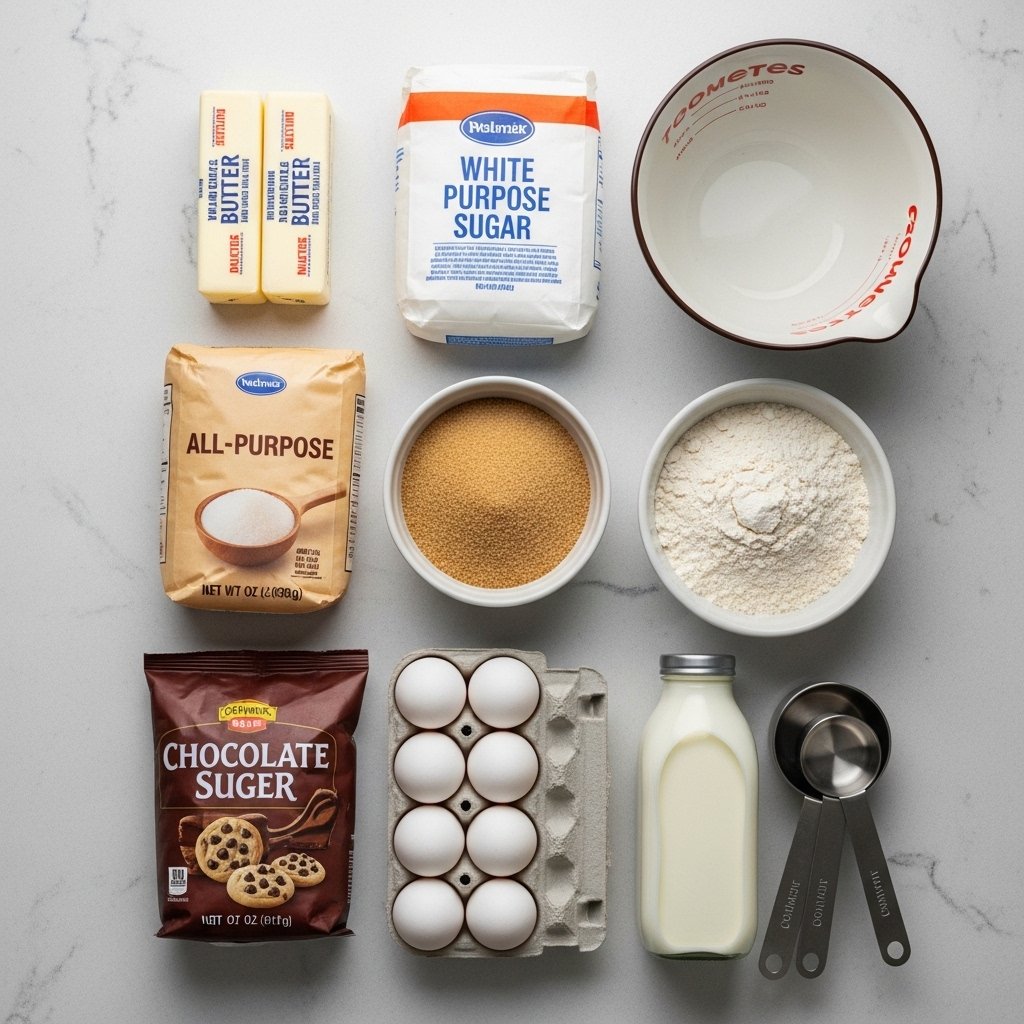
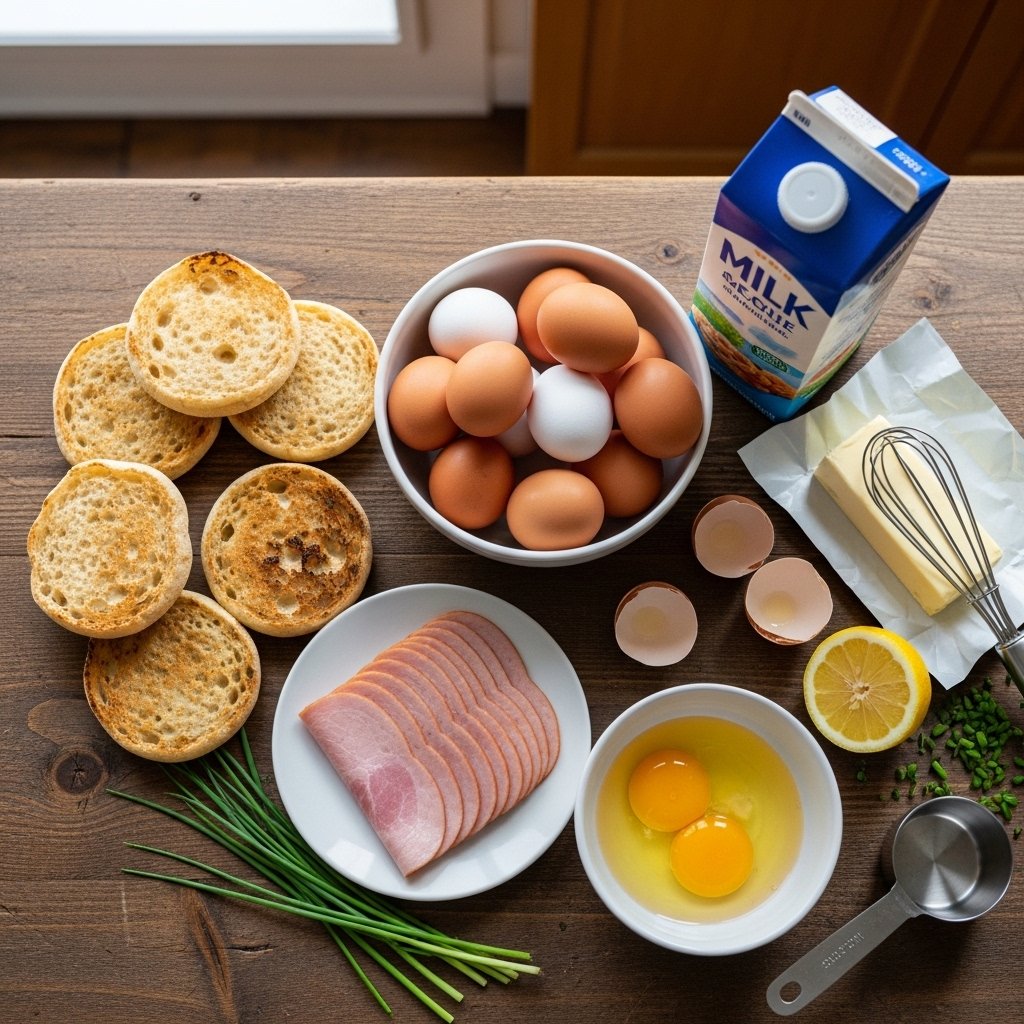
Ingredients

To make this delicious Eggs Benedict Casserole Recipe, you’ll need:

For the Casserole:

  • 6 English muffins, cut into cubes
  • 2 cups cooked ham, diced
  • 8 large eggs
  • 2 cups milk
  • 1 teaspoon onion powder
  • 1/2 teaspoon paprika
  • Salt and black pepper to taste

For the Hollandaise Sauce:

  • 3 egg yolks
  • 1/2 cup unsalted butter (melted)
  • 1 tablespoon lemon juice
  • Pinch of salt

Optional Garnish:

  • Fresh parsley or chives

Ingredient Notes

For the best Eggs Benedict Casserole Recipe, use fresh, slightly stale English muffins—they absorb the egg mixture better without becoming too soggy. You can substitute Canadian bacon for traditional ham if you want a more authentic Eggs Benedict flavor.

When it comes to hollandaise, freshly squeezed lemon juice adds brightness and balances the richness of the butter and egg yolks beautifully.

Step-by-Step Instructions

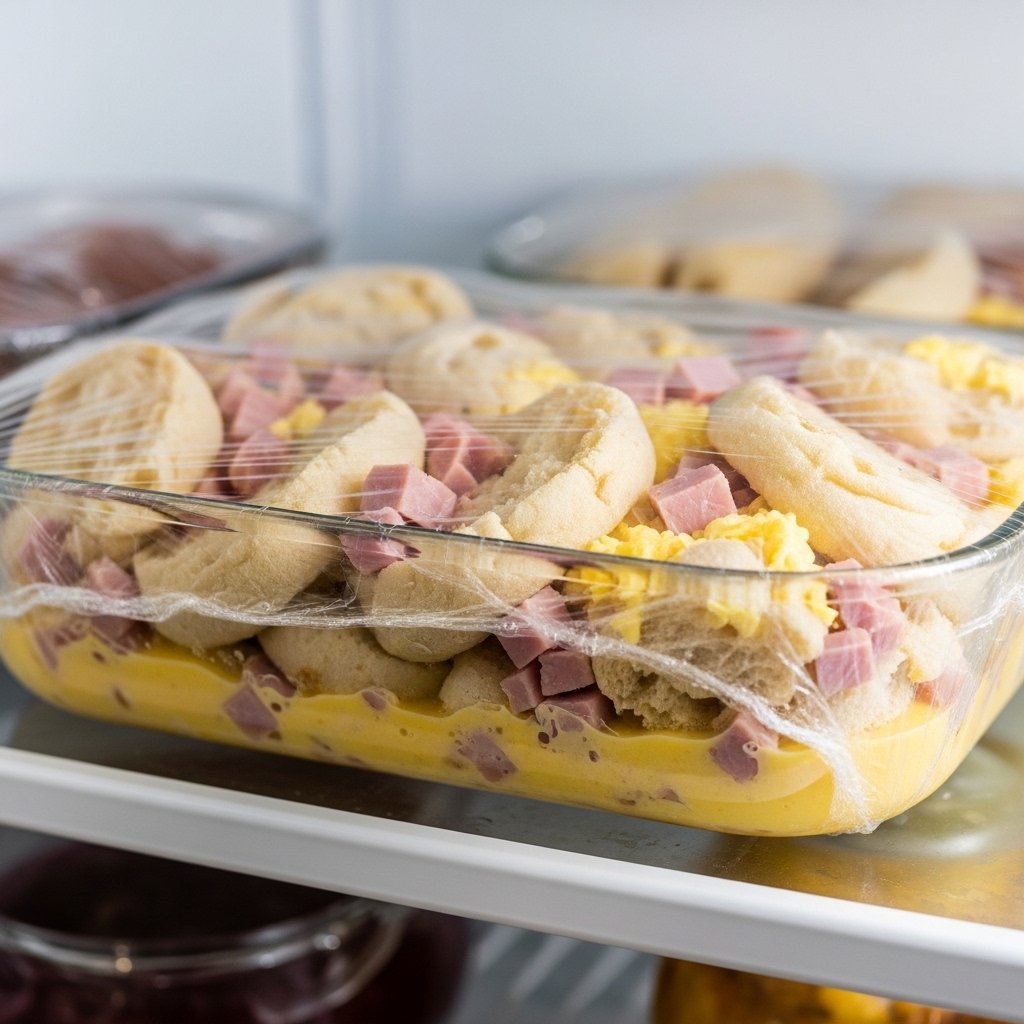
1. Assemble the Base

Grease a baking dish and spread the cubed English muffins evenly across the bottom. Sprinkle diced ham over the top.

2. Prepare Egg Mixture

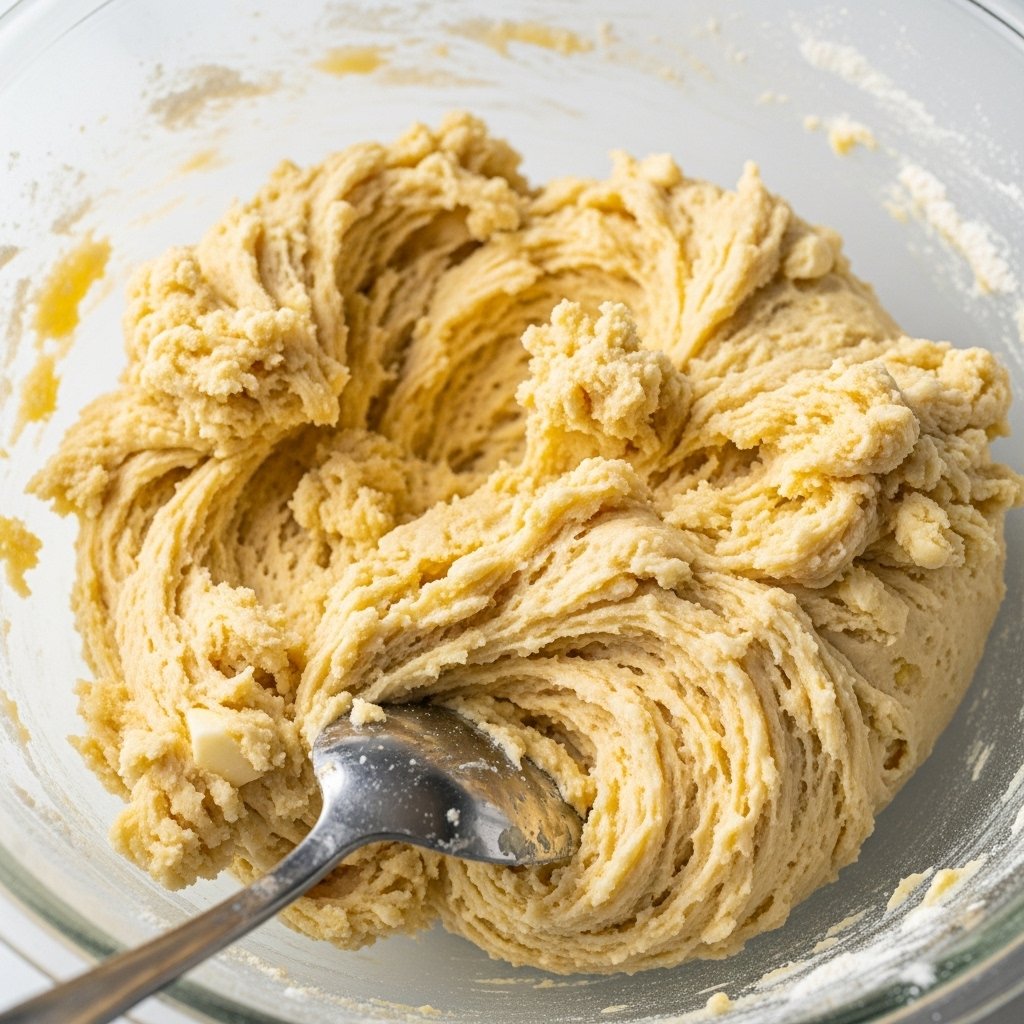
In a large bowl, whisk together eggs, milk, onion powder, paprika, salt, and pepper.

3. Combine and Chill

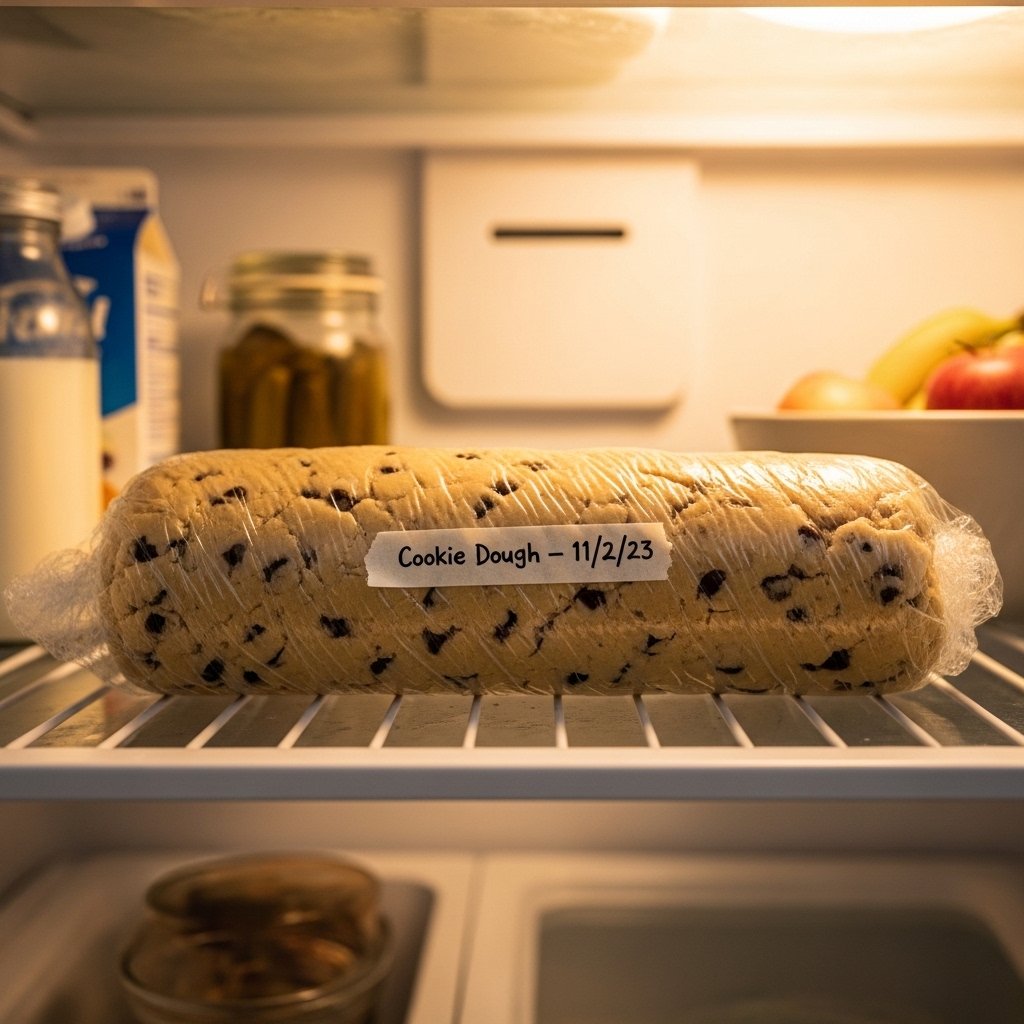
Pour the egg mixture over the muffins and ham, ensuring everything is evenly coated. Cover and refrigerate overnight (or at least 4 hours).

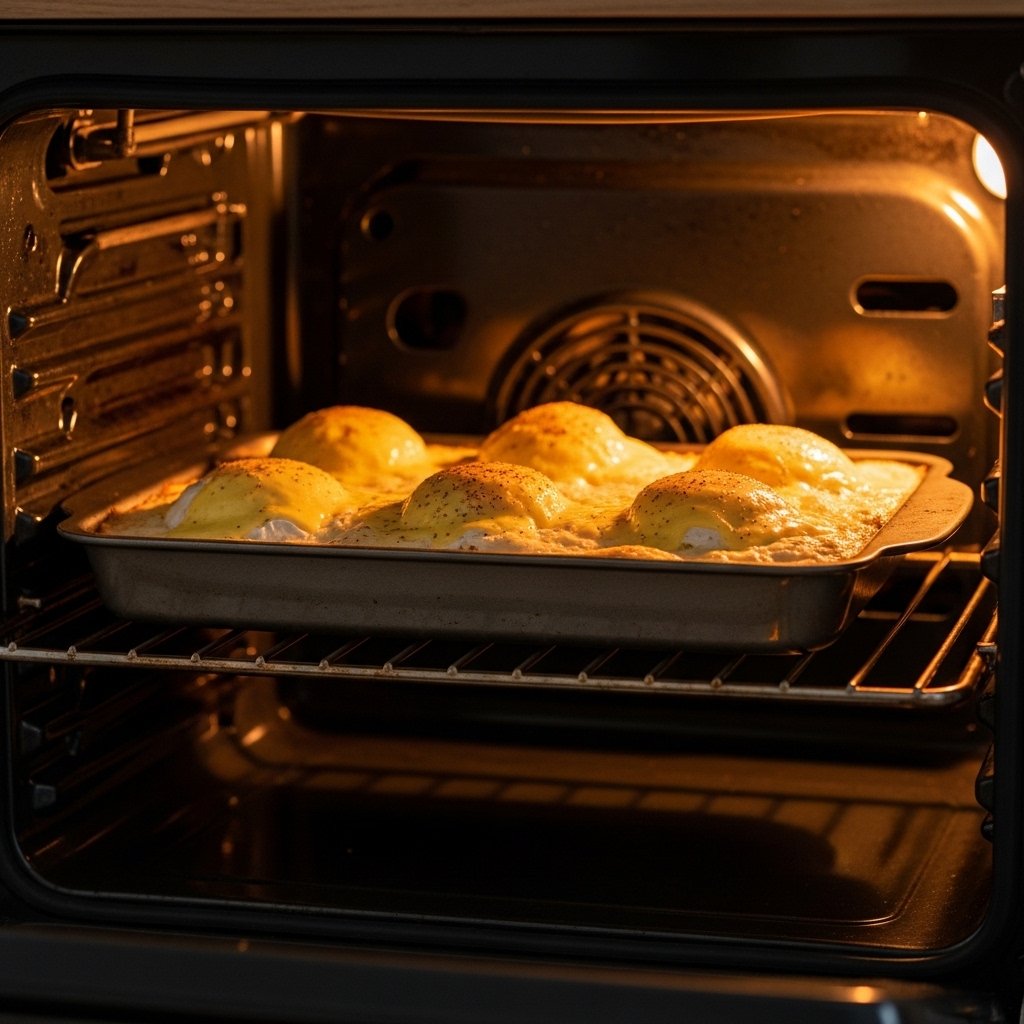
4. Bake the Casserole

Preheat oven to 375°F (190°C). Bake uncovered for 40–45 minutes, or until the center is set and the top is golden brown.

5. Make the Hollandaise Sauce

Whisk egg yolks and lemon juice in a bowl over simmering water. Slowly add melted butter while whisking continuously until thickened.

6. Serve

Drizzle the warm hollandaise sauce over the baked casserole and garnish with herbs before serving.

Tips for Perfect Results

To make the most of your Eggs Benedict Casserole Recipe, follow these tips:

  • Let the casserole soak overnight for best texture
  • Use high-quality ham or Canadian bacon
  • Whisk hollandaise constantly to prevent curdling
  • Bake until just set to avoid dryness
  • Rest the casserole for 5–10 minutes before serving

Variations

This Eggs Benedict Casserole Recipe is easy to customize:

  • Vegetarian: Skip the ham and add sautéed spinach or mushrooms
  • Spicy: Add a dash of hot sauce or red pepper flakes
  • Cheesy: Sprinkle shredded cheddar or Swiss cheese on top
  • Low-Carb: Use low-carb bread alternatives

What to Serve With It

Pair your casserole with these delicious sides:

  • Fresh fruit salad
  • Roasted breakfast potatoes
  • Mixed green salad
  • Fresh orange juice or mimosas

Storage & Reheating

This Eggs Benedict Casserole Recipe stores beautifully:

  • Refrigerate: Store leftovers for up to 4 days
  • Freeze: Freeze without sauce for up to 2 months
  • Reheat: Warm in oven at 325°F or microwave individual portions
  • Store hollandaise separately and reheat gently

Common Mistakes to Avoid

Avoid these pitfalls for the best results:

  • Skipping the soaking time
  • Overbaking (leads to dryness)
  • Rushing the hollandaise sauce
  • Using too much liquid

FAQs

Can I make this casserole ahead of time?

Yes! It’s designed to be prepped the night before for easy baking in the morning.

Can I use store-bought hollandaise sauce?

Absolutely, though homemade provides the best flavor.

What’s the best bread to use?

English muffins are traditional, but you can substitute with crusty bread.

How do I know when it’s done?

The center should be set and not jiggly when gently shaken.

Final Thoughts

This Eggs Benedict Casserole Recipe is the ultimate solution for stress-free brunching. It delivers all the rich, comforting flavors of a classic Eggs Benedict without the hassle, making it perfect for gatherings, holidays, or even a cozy weekend breakfast at home.

Once you try this recipe, you’ll wonder how you ever hosted brunch without it. It’s simple, elegant, and absolutely delicious—everything a great recipe should be.

Lemon Blueberry Loaf Cake with Glaze (Moist, Bright & Bakery-Style!)

There’s something truly special about a Lemon Blueberry Loaf Cake with Glaze—it’s bright, fresh, and perfectly balanced between sweet and tangy. Whether you’re baking for a weekend brunch, afternoon treat, or a simple dessert, this loaf cake delivers bakery-quality results right from your kitchen.

The combination of juicy blueberries and zesty lemon creates a refreshing flavor profile that feels light yet indulgent. Topped with a smooth, citrusy glaze, every slice is soft, moist, and absolutely irresistible.

Why You’ll Love This Recipe

This Lemon Blueberry Loaf Cake with Glaze is a go-to recipe for both beginner and experienced bakers. It’s easy to make, incredibly flavorful, and visually stunning.

Here’s why you’ll keep coming back to it:

  • Moist and tender crumb every time
  • Bursting with fresh blueberries
  • Bright lemon flavor that isn’t overpowering
  • Simple ingredients you likely already have
  • Perfect for breakfast, brunch, or dessert

It’s the kind of recipe that feels comforting yet elegant—ideal for any occasion.

Ingredients

To make this delicious Lemon Blueberry Loaf Cake with Glaze, gather the following ingredients:

For the Loaf Cake:

  • 1 1/2 cups all-purpose flour
  • 1 teaspoon baking powder
  • 1/2 teaspoon salt
  • 1/2 cup unsalted butter (softened)
  • 1 cup granulated sugar
  • 2 large eggs
  • 1/2 cup milk
  • 2 tablespoons lemon juice
  • 1 tablespoon lemon zest
  • 1 teaspoon vanilla extract
  • 1 cup fresh or frozen blueberries

For the Glaze:

  • 1 cup powdered sugar
  • 2–3 tablespoons lemon juice

Ingredient Notes

For the best Lemon Blueberry Loaf Cake with Glaze, use fresh lemon juice and zest whenever possible—it makes a huge difference in flavor. If using frozen blueberries, don’t thaw them first to prevent excess moisture in the batter.

Tossing the blueberries in a little flour before folding them into the batter helps keep them evenly distributed throughout the loaf instead of sinking to the bottom.

Step-by-Step Instructions

1. Preheat and Prepare

Preheat your oven to 350°F (175°C) and line a loaf pan with parchment paper or lightly grease it.

2. Mix Dry Ingredients

In a bowl, whisk together flour, baking powder, and salt.

3. Cream Butter and Sugar

In a separate bowl, beat the butter and sugar until light and fluffy. Add eggs one at a time, mixing well after each addition.

4. Add Wet Ingredients

Mix in milk, lemon juice, lemon zest, and vanilla extract until well combined.

5. Combine and Fold

Gradually add the dry ingredients to the wet mixture. Gently fold in the blueberries.

6. Bake

Pour the batter into the prepared pan and bake for 50–60 minutes, or until a toothpick inserted in the center comes out clean.

7. Prepare the Glaze

Mix powdered sugar with lemon juice until smooth and pourable.

8. Glaze the Cake

Once the loaf has cooled, drizzle the glaze generously over the top.

Tips for Perfect Results

To achieve the perfect Lemon Blueberry Loaf Cake with Glaze, follow these expert tips:

  • Use room temperature ingredients for better mixing
  • Don’t overmix the batter to keep it tender
  • Check for doneness with a toothpick
  • Let the cake cool before glazing
  • Add extra lemon zest for a stronger citrus flavor

Variations

This Lemon Blueberry Loaf Cake with Glaze is easy to customize:

  • Healthier Version: Substitute half the flour with whole wheat flour
  • Berry Swap: Use raspberries or blackberries
  • Extra Moist: Add a tablespoon of sour cream or Greek yogurt
  • Crunchy Top: Sprinkle sugar on top before baking

What to Serve With It

This loaf cake pairs beautifully with:

  • Hot coffee or tea
  • Fresh fruit salad
  • Whipped cream or vanilla yogurt
  • A light citrus salad

Storage & Reheating

Your Lemon Blueberry Loaf Cake with Glaze stores wonderfully:

  • Room Temperature: Store in an airtight container for up to 3 days
  • Refrigerate: Keeps fresh for up to 1 week
  • Freeze: Wrap tightly and freeze for up to 2 months
  • Reheat: Warm slices slightly for a fresh-baked feel

Common Mistakes to Avoid

Avoid these common baking mistakes:

  • Overmixing the batter
  • Using too much liquid with frozen berries
  • Skipping parchment paper (can cause sticking)
  • Glazing while the cake is still warm

FAQs

Can I use frozen blueberries?

Yes! Just add them straight from the freezer and toss in flour first.

How do I make the glaze thicker?

Add more powdered sugar until you reach your desired consistency.

Why did my blueberries sink?

They may not have been coated in flour or the batter was too thin.

Can I make this dairy-free?

Yes, substitute butter with plant-based butter and use dairy-free milk.

Final Thoughts

This Lemon Blueberry Loaf Cake with Glaze is the perfect blend of bright citrus and sweet berry flavors in a soft, moist loaf. It’s simple enough for everyday baking yet impressive enough to serve to guests.

Once you take that first bite—bursting with juicy blueberries and zesty lemon—you’ll understand why this recipe deserves a permanent spot in your baking rotation. It’s fresh, flavorful, and absolutely unforgettable.

Crispy Coconut Crusted Tofu Bowl Recipe (Healthy, Flavorful & Easy!)

If you’re looking for a vibrant, satisfying, and plant-based meal, this Crispy Coconut Crusted Tofu Bowl Recipe is about to become your new favorite. It combines crunchy, golden tofu coated in coconut with fresh veggies, fluffy rice, and a drizzle of irresistible sauce for a balanced bowl that hits every craving.

This recipe is perfect for busy weeknights, meal prep, or when you want something wholesome yet exciting. Even if you’re not usually a tofu fan, the crispy coconut coating transforms it into something truly crave-worthy.

Why You’ll Love This Recipe

There are so many reasons to fall in love with this Crispy Coconut Crusted Tofu Bowl Recipe. It’s not only delicious but also incredibly versatile and nourishing.

Here’s what makes it stand out:

  • Perfectly crispy texture with a tender interior
  • Naturally vegetarian and easily vegan
  • Loaded with fresh, wholesome ingredients
  • Customizable with your favorite grains and veggies
  • Great for meal prep and leftovers

The combination of crunchy tofu and fresh toppings makes every bite exciting and satisfying.

Ingredients

To make this flavorful Crispy Coconut Crusted Tofu Bowl Recipe, you’ll need:

For the Coconut Tofu:

  • 1 block extra-firm tofu (pressed and cubed)
  • 1/2 cup all-purpose flour
  • 1/2 cup plant-based milk
  • 3/4 cup shredded coconut (unsweetened)
  • 1/2 cup panko breadcrumbs
  • 1 teaspoon garlic powder
  • 1/2 teaspoon salt
  • 1/2 teaspoon black pepper
  • Oil for frying or baking

For the Bowl:

  • Cooked jasmine rice or brown rice
  • Sliced avocado
  • Shredded carrots
  • Cucumber slices
  • Red cabbage
  • Fresh cilantro

Optional Sauce:

  • Sweet chili sauce or peanut sauce

Ingredient Notes

The key to a successful Crispy Coconut Crusted Tofu Bowl Recipe starts with choosing the right tofu. Extra-firm tofu works best because it holds its shape and crisps up beautifully. Pressing the tofu beforehand removes excess moisture, helping achieve that perfect crunchy coating.

Unsweetened shredded coconut is ideal for a balanced flavor, while panko breadcrumbs add extra crispiness. You can also swap white rice for quinoa or cauliflower rice if you prefer a lower-carb option.

Step-by-Step Instructions

1. Prepare the Tofu

Start by pressing the tofu for at least 15–20 minutes. Once pressed, cut it into evenly sized cubes to ensure consistent cooking.

2. Set Up Breading Station

Create three bowls: one with flour, one with plant-based milk, and one with a mixture of shredded coconut, panko, and seasonings.

3. Coat the Tofu

Dip each tofu cube into the flour, then the milk, and finally coat it thoroughly in the coconut mixture.

4. Cook Until Crispy

Pan-fry, bake, or air-fry the tofu until golden brown and crispy on all sides. This usually takes about 10–15 minutes depending on your method.

5. Assemble the Bowl

Add rice to a bowl, top with crispy tofu, fresh veggies, and drizzle with your favorite sauce.

Tips for Perfect Results

To make the best Crispy Coconut Crusted Tofu Bowl Recipe, keep these tips in mind:

  • Always press tofu well to remove moisture
  • Don’t overcrowd the pan when cooking
  • Use panko for extra crunch
  • Flip tofu gently to keep coating intact
  • Serve immediately for maximum crispiness

Variations

This Crispy Coconut Crusted Tofu Bowl Recipe is incredibly adaptable:

  • Spicy Version: Add cayenne pepper or hot sauce
  • Tropical Twist: Include mango or pineapple chunks
  • Low-Carb Option: Swap rice for cauliflower rice
  • Gluten-Free: Use gluten-free breadcrumbs

Feel free to mix and match ingredients to suit your taste.

What to Serve With It

While this bowl is a complete meal, you can elevate it even more with:

  • Miso soup
  • Fresh spring rolls
  • Edamame with sea salt
  • Iced green tea or lemonade

Storage & Reheating

This Crispy Coconut Crusted Tofu Bowl Recipe stores well with a few adjustments:

  • Refrigerate: Store components separately for up to 4 days
  • Reheat: Reheat tofu in an oven or air fryer to maintain crispiness
  • Avoid microwaving tofu if you want to keep it crunchy

Common Mistakes to Avoid

Avoid these common pitfalls when making your tofu bowl:

  • Not pressing tofu (leads to soggy texture)
  • Skipping the coating steps
  • Overcrowding during cooking
  • Using sweetened coconut (can overpower flavor)

FAQs

Can I bake instead of fry the tofu?

Yes! Bake at 400°F for about 25–30 minutes, flipping halfway through.

Is this recipe vegan?

Absolutely—just ensure all ingredients, including sauces, are plant-based.

How do I keep the tofu crispy?

Serve immediately and avoid covering it, which traps steam.

Can I make this ahead of time?

Yes, prep the components ahead, but cook tofu fresh for best texture.

Final Thoughts

This Crispy Coconut Crusted Tofu Bowl Recipe is everything you want in a modern, healthy meal—crunchy, fresh, flavorful, and incredibly satisfying. It’s proof that plant-based eating can be exciting, indulgent, and easy to prepare at home.

Whether you’re meal prepping for the week or whipping up a quick dinner, this recipe delivers every single time. Once you try it, don’t be surprised if it becomes a staple in your kitchen rotation!

Slow Cooker Honey Garlic Butter Pork Chops (Easy, Juicy & Flavor-Packed!)

If you’re craving a comforting, no-fuss dinner that delivers big flavor with minimal effort, these Slow Cooker Honey Garlic Butter Pork Chops are exactly what you need. This recipe combines tender pork chops with a rich, sweet, and savory sauce that slowly infuses every bite with irresistible flavor.

Whether you’re feeding a busy family on a weeknight or just want a cozy, satisfying meal, this dish is a total game-changer. The magic happens in the slow cooker, where simple ingredients transform into a restaurant-quality dinner with almost no hands-on time.

Why You’ll Love This Recipe

These Slow Cooker Honey Garlic Butter Pork Chops are a must-try for so many reasons. First, they’re incredibly easy to prepare—just a few minutes of prep and your slow cooker does the rest. Second, the flavor is absolutely next-level, with the perfect balance of sweet honey, rich butter, and bold garlic.

Here’s why this recipe stands out:

  • Minimal prep time (under 10 minutes!)
  • Ultra tender, fall-apart pork chops
  • Family-friendly and picky-eater approved
  • Perfect for meal prep and leftovers
  • Rich, comforting, and deeply satisfying

Ingredients

To make these flavorful Slow Cooker Honey Garlic Butter Pork Chops, you’ll need simple pantry staples:

  • 4 bone-in or boneless pork chops
  • 3 tablespoons butter
  • 4 cloves garlic, minced
  • 1/3 cup honey
  • 1/4 cup soy sauce
  • 1 teaspoon paprika
  • Salt and black pepper to taste
  • 1 tablespoon olive oil
  • Fresh parsley (optional, for garnish)

Ingredient Notes

Choosing the right ingredients makes a big difference in this Slow Cooker Honey Garlic Butter Pork Chops recipe. Opt for thicker pork chops (about 1 inch thick) to ensure they stay juicy during the slow cooking process.

Fresh garlic is highly recommended for maximum flavor, and real butter gives the sauce its rich, velvety finish. If you prefer a slightly lighter option, you can reduce the butter slightly—but trust me, it’s worth it!

Step-by-Step Instructions

1. Sear the Pork Chops

Heat olive oil in a skillet over medium-high heat. Season the pork chops with salt, pepper, and paprika, then sear for 2–3 minutes per side until golden brown.

2. Prepare the Sauce

In a small bowl, mix together honey, soy sauce, and minced garlic. This combination creates that signature sweet and savory flavor.

3. Add to Slow Cooker

Place the seared pork chops in the slow cooker. Pour the honey garlic mixture over them and add butter on top.

4. Cook Low and Slow

Cover and cook on LOW for 6–7 hours or HIGH for 3–4 hours until the pork is tender and fully cooked.

5. Serve and Enjoy

Spoon the sauce over the pork chops before serving and garnish with fresh parsley.

Tips for Perfect Results

Getting the best results with Slow Cooker Honey Garlic Butter Pork Chops is easy with these tips:

  • Always sear the pork chops first for deeper flavor
  • Don’t skip the butter—it enhances richness
  • Avoid overcooking to keep the meat juicy
  • Use a meat thermometer (145°F internal temp)
  • Let the pork rest briefly before serving

Variations

This recipe is super versatile, so feel free to customize your Slow Cooker Honey Garlic Butter Pork Chops:

  • Spicy Kick: Add red pepper flakes or sriracha
  • Herb Twist: Mix in thyme or rosemary
  • Low-Sodium: Use reduced-sodium soy sauce
  • Extra Sauce: Double the sauce ingredients for serving over rice

What to Serve With It

These pork chops pair beautifully with a variety of sides. Try serving them with:

  • Creamy mashed potatoes
  • Steamed rice or garlic rice
  • Roasted vegetables
  • Buttered green beans
  • Fresh dinner rolls

Storage & Reheating

Leftovers of Slow Cooker Honey Garlic Butter Pork Chops store wonderfully, making them perfect for meal prep.

  • Refrigerate: Store in an airtight container for up to 4 days
  • Freeze: Freeze for up to 2 months
  • Reheat: Warm gently on the stovetop or microwave with extra sauce to prevent drying

Common Mistakes to Avoid

Even simple recipes can go wrong without a few precautions. Avoid these mistakes:

  • Skipping the sear (loses flavor depth)
  • Using thin pork chops (they dry out quickly)
  • Overcooking (results in tough meat)
  • Not enough seasoning

FAQs

Can I use frozen pork chops?

Yes, but it’s best to thaw them first for even cooking and better texture.

Can I make this recipe without searing?

You can, but searing adds a rich, caramelized flavor that’s hard to beat.

How do I thicken the sauce?

Mix 1 tablespoon cornstarch with 2 tablespoons water, then stir into the sauce and heat until thickened.

Can I use chicken instead?

Absolutely! Chicken thighs or breasts work well with the same honey garlic butter sauce.

Final Thoughts

These Slow Cooker Honey Garlic Butter Pork Chops are the definition of comfort food made easy. With minimal prep and maximum flavor, this dish is perfect for busy weeknights, cozy weekends, or anytime you want a reliable, crowd-pleasing meal.

Once you try this recipe, it’s bound to become a regular in your dinner rotation. The combination of tender pork, rich butter, sweet honey, and bold garlic is simply unforgettable—and your kitchen will smell amazing while it cooks!

Healthy One-Pan Garlic Butter Shrimp and Broccoli (Low Carb)

When you need a fast, wholesome dinner that doesn’t sacrifice flavor, this Healthy One-Pan Garlic Butter Shrimp and Broccoli (Low Carb) is exactly what you’re looking for. It’s light, satisfying, and comes together in just one pan—making cleanup almost effortless.

This recipe combines tender, juicy shrimp with crisp-tender broccoli, all coated in a rich garlic butter sauce that’s simple yet incredibly delicious. Whether you’re following a low-carb lifestyle or just want something quick and nourishing, this dish checks all the boxes. It’s the kind of meal that feels indulgent but is actually packed with nutrients and lean protein.

Why You’ll Love This Recipe

This healthy one-pan garlic butter shrimp and broccoli recipe is a total weeknight hero. It’s designed for busy schedules without compromising on taste or quality.

  • Ready in under 20 minutes
  • Made in just one pan for easy cleanup
  • Naturally low carb and keto-friendly
  • Packed with protein and nutrients
  • Fresh, bold flavors with minimal ingredients

It’s a perfect balance of convenience and flavor, making it a go-to recipe you’ll want to make again and again.

Ingredients

Here’s everything you need to make this healthy one-pan garlic butter shrimp and broccoli:

  • 1 lb large shrimp, peeled and deveined
  • 3 cups broccoli florets
  • 3 tablespoons butter
  • 4 cloves garlic, minced
  • 2 tablespoons olive oil
  • Juice of ½ lemon
  • Salt and black pepper to taste
  • ½ teaspoon red pepper flakes (optional)
  • Fresh parsley for garnish

Ingredient Notes

The key to making the best healthy one-pan garlic butter shrimp and broccoli is using fresh, high-quality ingredients. Choose large shrimp for a juicy bite, and make sure they’re peeled and deveined to save time.

Fresh broccoli works best for that perfect crisp-tender texture, but frozen can be used in a pinch—just thaw and pat dry first. The garlic butter sauce is simple, so fresh garlic is highly recommended for maximum flavor. A squeeze of lemon at the end brightens the entire dish beautifully.

Step-by-Step Instructions

Step 1: Prepare the Ingredients

Pat the shrimp dry and season lightly with salt and pepper. Cut broccoli into bite-sized florets.

Step 2: Cook the Broccoli

Heat olive oil in a large skillet over medium heat. Add broccoli and sauté for 5–6 minutes until tender but still crisp. Remove and set aside.

Step 3: Cook the Shrimp

In the same pan, melt butter and add minced garlic. Cook for about 30 seconds until fragrant. Add shrimp and cook for 2–3 minutes per side until pink and opaque.

Step 4: Combine Everything

Return the broccoli to the pan. Toss everything together with lemon juice and red pepper flakes.

Step 5: Garnish and Serve

Sprinkle with fresh parsley and serve immediately.

Tips for Perfect Results

To make sure your healthy one-pan garlic butter shrimp and broccoli turns out perfectly every time, follow these tips:

  • Don’t overcook the shrimp—they cook very quickly
  • Cut broccoli evenly for consistent cooking
  • Use medium heat to avoid burning the garlic
  • Add lemon juice at the end for freshness
  • Keep everything moving in the pan for even cooking

These simple techniques will help you achieve the best flavor and texture.

Variations

This healthy one-pan garlic butter shrimp and broccoli recipe is incredibly flexible. Try these variations to mix things up:

  • Add zucchini or bell peppers for extra veggies
  • Swap butter for ghee or a dairy-free alternative
  • Add a splash of soy sauce or coconut aminos for an umami boost
  • Toss in cooked cauliflower rice for a fuller meal
  • Spice it up with extra chili flakes or hot sauce

Each variation keeps the dish exciting while staying healthy and low carb.

What to Serve With It

This healthy one-pan garlic butter shrimp and broccoli is satisfying on its own, but you can pair it with a few sides for a complete meal:

  • Cauliflower rice for a low-carb option
  • Brown rice or quinoa for added grains
  • A fresh green salad
  • Garlic bread (if not strictly low carb)

It’s versatile enough to fit into any meal plan or dietary preference.

Storage & Reheating

Leftovers of this healthy one-pan garlic butter shrimp and broccoli store well and make great next-day meals.

  • Store in an airtight container in the fridge for up to 3 days
  • Reheat gently in a skillet over low heat
  • Avoid microwaving too long to prevent rubbery shrimp

For best results, enjoy it fresh, but it’s still delicious reheated properly.

Common Mistakes to Avoid

Even simple recipes can go wrong if you’re not careful. Avoid these common pitfalls:

  • Overcooking the shrimp (they become tough)
  • Burning the garlic (it turns bitter)
  • Using too much liquid (can make the dish soggy)
  • Skipping seasoning

Keeping these in mind ensures your dish turns out flavorful and perfectly cooked.

FAQs

Is this recipe באמת low carb?

Yes! This healthy one-pan garlic butter shrimp and broccoli is naturally low in carbohydrates and perfect for keto diets.

Can I use frozen shrimp?

Absolutely—just thaw and pat them dry before cooking.

How do I know when shrimp are cooked?

Shrimp turn pink and opaque when fully cooked, usually within a few minutes.

Can I make this dairy-free?

Yes, simply substitute butter with olive oil or a plant-based alternative.

Final Thoughts

This Healthy One-Pan Garlic Butter Shrimp and Broccoli (Low Carb) is proof that healthy eating doesn’t have to be complicated or boring. With just one pan, a handful of fresh ingredients, and less than 20 minutes, you can create a meal that’s both nourishing and incredibly satisfying.

Perfect for busy weeknights, meal prep, or anyone looking for a quick and delicious low-carb option, this recipe is one you’ll keep in your regular rotation. Once you try it, you’ll see just how easy healthy cooking can be!

Crispy Air Fryer Chicken Thighs (Juicy Inside, Perfectly Crispy Every Time)

If you’re searching for a foolproof dinner that delivers big flavor with minimal effort, these Crispy Air Fryer Chicken Thighs are about to become your new obsession. With irresistibly crispy skin and juicy, tender meat, this recipe transforms simple ingredients into a restaurant-quality meal right in your own kitchen.

Air frying has completely changed the game for home cooks, and chicken thighs are one of the best things you can make in it. They cook faster than in the oven, require less oil, and still deliver that golden, crispy finish we all love. Whether you’re cooking for your family or meal prepping for the week, this crispy air fryer chicken thighs recipe is a total winner.

Why You’ll Love This Recipe

There are so many reasons to love these crispy air fryer chicken thighs. Not only are they incredibly easy to make, but they also turn out perfectly every single time.

  • Ready in under 30 minutes
  • Crispy skin without deep frying
  • Juicy and flavorful inside
  • Budget-friendly and family-approved
  • Perfect for meal prep

The air fryer locks in moisture while creating that irresistible crispiness on the outside, making this recipe both convenient and delicious.

Ingredients

To make these crispy air fryer chicken thighs, you’ll need simple pantry staples:

  • 4 bone-in, skin-on chicken thighs
  • 1 tablespoon olive oil
  • 1 teaspoon garlic powder
  • 1 teaspoon paprika
  • ½ teaspoon onion powder
  • ½ teaspoon dried thyme or Italian seasoning
  • Salt and black pepper to taste

Optional:

  • A pinch of cayenne pepper for heat
  • Lemon wedges for serving

Ingredient Notes

For the best crispy air fryer chicken thighs, bone-in, skin-on thighs are essential. The skin crisps up beautifully in the air fryer, while the bone helps retain moisture and flavor during cooking.

You can customize the seasoning blend to your taste, but a mix of garlic powder, paprika, and herbs creates a balanced, savory profile. Smoked paprika is a great option if you want an extra layer of flavor.

Step-by-Step Instructions

Step 1: Prep the Chicken

Pat the chicken thighs dry with paper towels. This step is crucial for achieving crispy skin.

Step 2: Season Generously

Rub the chicken with olive oil, then coat evenly with all the spices, salt, and pepper.

Step 3: Preheat the Air Fryer

Preheat your air fryer to 400°F for about 3–5 minutes.

Step 4: Cook the Chicken

Place the chicken thighs skin-side down in the air fryer basket. Cook for 10 minutes, then flip and cook for another 10–12 minutes until the skin is crispy and the internal temperature reaches 165°F.

Step 5: Rest and Serve

Let the chicken rest for 3–5 minutes before serving to lock in the juices.

Tips for Perfect Results

Getting the perfect crispy air fryer chicken thighs is all about technique. Here are some expert tips:

  • Always pat the chicken dry before seasoning
  • Don’t overcrowd the air fryer basket
  • Flip halfway through cooking for even crispiness
  • Use a meat thermometer for accuracy
  • Let the chicken rest before serving

These tips ensure your chicken turns out crispy on the outside and juicy on the inside every time.

Variations

One of the best things about crispy air fryer chicken thighs is how versatile they are. You can easily switch up the flavors:

  • BBQ Style: Brush with barbecue sauce during the last few minutes
  • Lemon Herb: Add fresh lemon zest and herbs
  • Spicy Kick: Increase cayenne or add chili powder
  • Garlic Parmesan: Toss in garlic butter and grated parmesan after cooking

Each variation gives this classic recipe a whole new twist.

What to Serve With It

These crispy air fryer chicken thighs pair well with a wide variety of sides, making them perfect for any meal.

  • Roasted vegetables
  • Mashed potatoes or rice
  • Fresh salads
  • Corn on the cob
  • Dinner rolls or crusty bread

You can keep it simple for a weeknight dinner or dress it up for a more complete meal.

Storage & Reheating

If you have leftovers, these crispy air fryer chicken thighs store and reheat beautifully.

  • Store in an airtight container in the fridge for up to 4 days
  • Reheat in the air fryer at 375°F for 4–5 minutes to restore crispiness
  • Avoid microwaving if possible, as it can make the skin soggy

You can also freeze cooked chicken thighs for up to 2 months.

Common Mistakes to Avoid

Even a simple recipe like this can go wrong if you’re not careful. Avoid these common mistakes:

  • Skipping the drying step
  • Overcrowding the air fryer
  • Not preheating the air fryer
  • Undercooking or overcooking the chicken

Paying attention to these details will guarantee perfect results every time.

FAQs

How long do you cook chicken thighs in the air fryer?

Typically, 20–22 minutes at 400°F, depending on size.

Can I use boneless chicken thighs?

Yes, but reduce the cooking time slightly since they cook faster.

How do I make the skin extra crispy?

Pat the chicken dry thoroughly and avoid overcrowding the basket.

Do I need to flip the chicken?

Yes, flipping halfway ensures even cooking and crispiness.

Final Thoughts

These Crispy Air Fryer Chicken Thighs are everything you want in a quick and easy meal—crispy, juicy, flavorful, and incredibly satisfying. With just a few simple ingredients and minimal prep, you can create a dish that feels both comforting and impressive.

Whether you’re cooking for your family, meal prepping, or just craving something delicious, this recipe is one you’ll turn to again and again. Once you master it, you’ll never go back to boring chicken dinners!

Easy Peach Burrata Salad (10-Minutes)

There’s something magical about recipes that come together in minutes yet feel like something you’d order at a high-end restaurant. This Easy Peach Burrata Salad (10-Minutes) is exactly that kind of dish—effortless, elegant, and bursting with fresh summer flavor.

Juicy, ripe peaches paired with rich, creamy burrata create a perfect balance of sweetness and indulgence. Add a drizzle of olive oil, a splash of balsamic, and a handful of fresh herbs, and you’ve got a salad that’s as beautiful as it is delicious. Whether you’re hosting guests or just treating yourself, this easy peach burrata salad delivers every single time.

Why You’ll Love This Recipe

This easy peach burrata salad is a must-try for so many reasons. It’s one of those recipes that looks impressive but requires almost no effort.

  • Ready in just 10 minutes
  • Perfect for summer entertaining
  • Sweet, savory, and creamy in every bite
  • No cooking required
  • Naturally gluten-free and customizable

The combination of fresh fruit and creamy cheese makes this salad feel indulgent while still being light and refreshing.

Ingredients

To make this easy peach burrata salad, you’ll only need a handful of fresh, high-quality ingredients:

  • 3 ripe peaches, sliced
  • 2 balls of burrata cheese
  • 2 tablespoons extra virgin olive oil
  • 1–2 tablespoons balsamic glaze
  • Fresh basil leaves
  • Salt and freshly cracked black pepper

Optional additions:

  • Arugula or mixed greens
  • Prosciutto slices
  • Toasted pine nuts or walnuts

Ingredient Notes

The key to an unforgettable easy peach burrata salad is using the freshestingredients possible. Choose peaches that are ripe but still slightly firm—they should be juicy without falling apart when sliced.

Burrata is the star here, with its creamy center adding richness that pairs beautifully with the peaches. If you can’t find burrata, fresh mozzarella is a decent substitute, though it won’t be quite as luxurious. Fresh basil adds a fragrant, slightly peppery note that ties everything together.

Step-by-Step Instructions

Step 1: Slice the Peaches

Wash and slice your peaches into wedges, removing the pit.

Step 2: Arrange the Base

Place the peach slices on a serving platter or shallow bowl.

Step 3: Add Burrata

Tear or place whole burrata balls over the peaches.

Step 4: Garnish

Scatter fresh basil leaves over the top.

Step 5: Drizzle and Season

Drizzle with olive oil and balsamic glaze, then sprinkle with salt and freshly cracked pepper.

Serve immediately and enjoy!

Tips for Perfect Results

Making the perfect easy peach burrata salad is all about balance and simplicity. Here are a few expert tips:

  • Use room temperature burrata for maximum creaminess
  • Don’t overdress—the ingredients should shine
  • Slice peaches just before serving to keep them fresh
  • Use high-quality olive oil for the best flavor
  • Add a pinch of flaky sea salt for a gourmet touch

These small details elevate the dish from simple to unforgettable.

Variations

This easy peach burrata salad is incredibly versatile. You can easily customize it to suit your taste or what you have on hand:

  • Add arugula for a peppery bite
  • Include prosciutto for a savory, salty contrast
  • Swap peaches for nectarines or plums
  • Drizzle with honey for extra sweetness
  • Add toasted nuts for crunch

Each variation brings a new dimension to this already delicious salad.

What to Serve With It

This easy peach burrata salad pairs beautifully with a variety of dishes, making it perfect for any occasion.

  • Grilled chicken or steak
  • Crusty artisan bread
  • Light pasta dishes
  • Chilled white wine or sparkling water

It works equally well as an appetizer, side dish, or even a light main course on warm days.

Storage & Reheating

This salad is best enjoyed fresh, but if you have leftovers, store them properly:

  • Keep in an airtight container in the refrigerator
  • Consume within 1 day for best quality
  • Avoid reheating—this dish is meant to be served cold or at room temperature

If prepping ahead, keep components separate and assemble just before serving.

Common Mistakes to Avoid

Even though this recipe is simple, a few common mistakes can impact the final result:

  • Using underripe or overripe peaches
  • Overloading with dressing
  • Serving burrata too cold
  • Skipping seasoning

Pay attention to these details to ensure your easy peach burrata salad turns out perfectly every time.

FAQs

Can I make this salad ahead of time?

You can prep the ingredients ahead, but assemble the salad just before serving for the best texture and flavor.

What is burrata cheese?

Burrata is a fresh Italian cheese with a soft outer shell and a creamy, rich center.

Can I use canned peaches?

Fresh peaches are highly recommended for this recipe, but in a pinch, well-drained canned peaches can work.

Is this salad healthy?

Yes! This easy peach burrata salad is made with fresh, wholesome ingredients and offers a great balance of nutrients.

Final Thoughts

This Easy Peach Burrata Salad (10-Minutes) is proof that simple recipes can be truly extraordinary. With just a handful of ingredients and minimal effort, you can create a dish that’s fresh, flavorful, and visually stunning.

Perfect for summer gatherings, quick lunches, or elegant dinners, this salad is one you’ll find yourself making again and again. Once you try it, it’s guaranteed to become a staple in your recipe collection.

Easy Strawberry Spinach Salad (15-Minutes)

If you’re looking for a fresh, vibrant dish that comes together in no time, this Easy Strawberry Spinach Salad (15-Minutes) is about to become your new go-to recipe. It’s the perfect balance of sweet, savory, and tangy flavors, combining juicy strawberries, tender spinach, and a simple homemade dressing that ties everything together beautifully.

Whether you need a quick lunch, a light dinner, or a crowd-pleasing side dish, this easy strawberry spinach salad delivers big flavor with minimal effort. It’s especially popular during spring and summer when strawberries are at their peak, but honestly, it’s delicious year-round.

Why You’ll Love This Recipe

This easy strawberry spinach salad isn’t just quick—it’s incredibly satisfying and versatile. Here’s why it stands out:

  • Ready in just 15 minutes
  • Naturally healthy and nutrient-rich
  • Perfect balance of sweet and savory flavors
  • Easily customizable with your favorite toppings
  • Ideal for meal prep or entertaining

The combination of fresh ingredients and a light dressing makes this salad feel refreshing yet filling. It’s one of those recipes you’ll keep coming back to again and again.


Ingredients

For the Salad:

  • 6 cups fresh baby spinach
  • 1 ½ cups fresh strawberries, sliced
  • ¼ cup red onion, thinly sliced
  • ½ cup crumbled feta or goat cheese
  • ¼ cup sliced almonds or pecans

For the Dressing:

  • 3 tablespoons olive oil
  • 2 tablespoons balsamic vinegar
  • 1 tablespoon honey
  • 1 teaspoon Dijon mustard
  • Salt and pepper to taste

Ingredient Notes

The beauty of this easy strawberry spinach salad lies in its simplicity, but a few ingredient choices can elevate it even further. Use fresh, ripe strawberries for the best sweetness and flavor. Baby spinach is ideal because it’s tender and mild, but you can also use mixed greens if you prefer.

For cheese, feta adds a salty bite, while goat cheese gives a creamy tang. Nuts provide crunch—toast them lightly for extra flavor. And don’t skip the honey in the dressing—it balances the acidity perfectly.

Step-by-Step Instructions

Step 1: Prepare the Ingredients

Wash and dry the spinach thoroughly. Slice the strawberries and thinly slice the red onion.

Step 2: Make the Dressing

In a small bowl or jar, whisk together olive oil, balsamic vinegar, honey, Dijon mustard, salt, and pepper until well combined.

Step 3: Assemble the Salad

In a large bowl, combine spinach, strawberries, red onion, cheese, and nuts.

Step 4: Toss and Serve

Drizzle the dressing over the salad just before serving and toss gently to combine.

Tips for Perfect Results

To make the best easy strawberry spinach salad every time, keep these tips in mind:

  • Dress just before serving to avoid soggy greens
  • Slice strawberries evenly for balanced bites
  • Use chilled ingredients for a refreshing taste
  • Toast nuts lightly to enhance their flavor
  • Don’t overdress—start with a little and add more if needed

These small details make a big difference in flavor and texture.

Variations

One of the best things about this easy strawberry spinach salad is how adaptable it is. Try these variations:

  • Add grilled chicken for a protein-packed meal
  • Swap strawberries for blueberries or raspberries
  • Use candied pecans for extra sweetness
  • Add avocado for creaminess
  • Try a poppy seed dressing instead of balsamic

Each variation gives the salad a unique twist while keeping it delicious.

What to Serve With It

This easy strawberry spinach salad pairs wonderfully with a variety of dishes. Here are some great options:

  • Grilled chicken or salmon
  • Pasta dishes like creamy Alfredo or pesto
  • Sandwiches or wraps
  • Light soups for a balanced meal

It also works beautifully as a refreshing side dish at barbecues or family gatherings.

Storage & Reheating

This salad is best enjoyed fresh, but you can prep components ahead of time. Store the ingredients separately:

  • Spinach: in an airtight container in the fridge
  • Dressing: in a sealed jar for up to 5 days
  • Pre-sliced strawberries: best used within 1–2 days

Avoid storing the salad fully dressed, as it will wilt quickly.

Common Mistakes to Avoid

Even a simple recipe like this can go wrong if you’re not careful. Avoid these common mistakes:

  • Overdressing the salad
  • Using unripe or bland strawberries
  • Skipping seasoning in the dressing
  • Not drying spinach properly (leads to watery salad)

Pay attention to these details, and your salad will turn out perfect every time.

FAQs

Can I make this salad ahead of time?

Yes, but keep the dressing separate until just before serving to maintain freshness.

What’s the best cheese for strawberry spinach salad?

Feta and goat cheese are both excellent choices, depending on your flavor preference.

Can I use frozen strawberries?

Fresh strawberries are highly recommended for the best texture and flavor.

How can I make this salad vegan?

Simply omit the cheese or use a plant-based alternative, and swap honey for maple syrup.

Final Thoughts

This Easy Strawberry Spinach Salad (15-Minutes) proves that simple ingredients can create something truly special. It’s fresh, flavorful, and incredibly easy to make—perfect for busy days when you still want something healthy and delicious on the table.

Whether you’re serving it as a quick lunch, a light dinner, or a beautiful side dish, this salad is guaranteed to impress. Once you try it, don’t be surprised if it becomes a regular in your weekly meal rotation!

Chocolate Chip Cookie Sandwiches (Soft, Chewy & Filled with Creamy Goodness)

If you’re a fan of classic chocolate chip cookies, get ready to take things to the next level with these Chocolate Chip Cookie Sandwiches. Imagine two soft, chewy cookies filled with a creamy frosting or ice cream center—basically everything you love about cookies, doubled and made even better.

These cookie sandwiches are perfect for parties, bake sales, birthdays, or simply treating yourself after a long day. They’re fun to customize, easy to assemble, and guaranteed to impress anyone who takes a bite.

Why You’ll Love These Chocolate Chip Cookie Sandwiches

These Chocolate Chip Cookie Sandwiches are a dessert dream come true.

Here’s why you’ll love them:

  • Soft and chewy homemade chocolate chip cookies
  • Creamy filling that melts in your mouth
  • Easy to customize with flavors and mix-ins
  • Perfect for parties, holidays, or gifting
  • Freezer-friendly for make-ahead desserts

Ingredients

To make these chocolate chip cookie sandwiches, you’ll need:

For the Cookies:

  • 1 cup unsalted butter (softened)
  • 3/4 cup brown sugar
  • 1/2 cup granulated sugar
  • 2 large eggs
  • 2 teaspoons vanilla extract
  • 2 1/2 cups all-purpose flour
  • 1 teaspoon baking soda
  • 1/2 teaspoon salt
  • 2 cups chocolate chips

For the Filling:

  • 1/2 cup unsalted butter (softened)
  • 1 1/2 cups powdered sugar
  • 1 teaspoon vanilla extract
  • 2–3 tablespoons heavy cream or milk

Ingredient Notes

The key to perfect Chocolate Chip Cookie Sandwiches is soft, slightly underbaked cookies. This keeps them chewy even after assembling.

For the filling, a simple buttercream works best, but you can also use cream cheese frosting or even ice cream for a frozen version.

Step-by-Step Instructions

1. Make Cookie Dough

Cream butter and sugars together until light and fluffy. Add eggs and vanilla, mixing until smooth.

2. Add Dry Ingredients

Mix in flour, baking soda, and salt until just combined. Fold in chocolate chips.

3. Scoop and Bake

Scoop dough onto baking sheet and bake at 350°F (175°C) for 10–12 minutes until edges are golden but centers are soft.

4. Cool Cookies

Let cookies cool completely before assembling sandwiches.

5. Make Filling

Beat butter, powdered sugar, vanilla, and cream until smooth and fluffy.

6. Assemble Sandwiches

Spread filling on one cookie and top with another to form a sandwich.

7. Chill and Serve

Chill sandwiches slightly for cleaner bites or serve immediately for softer texture.

Tips for Perfect Results

To make the best Chocolate Chip Cookie Sandwiches, follow these tips:

  • Slightly underbake cookies for softness
  • Let cookies cool fully before assembling
  • Use room-temperature butter for smooth filling
  • Don’t overfill or sandwiches may slide

Variations

Try these fun ideas:

  • Ice Cream Sandwiches: Replace frosting with vanilla ice cream
  • Peanut Butter Filling: Swap buttercream for peanut butter frosting
  • Double Chocolate Version: Add cocoa powder to cookie dough
  • Holiday Twist: Add sprinkles or crushed candy

What to Serve With It

These cookie sandwiches pair perfectly with:

  • Cold milk
  • Hot coffee
  • Milkshakes
  • Hot chocolate

They’re also great for dessert platters and parties.

Storage & Reheating

For your Chocolate Chip Cookie Sandwiches:

  • Room Temperature: Store up to 2 days in airtight container
  • Refrigerator: Keeps fresh for 5–7 days
  • Freezer: Freeze up to 2 months
  • Reheating: No reheating needed, but let frozen sandwiches thaw

Common Mistakes to Avoid

Avoid these issues:

  • Overbaking cookies (makes sandwiches dry)
  • Using warm cookies for assembly
  • Overfilling frosting
  • Not chilling before storing

FAQs

Can I use store-bought cookies?

Yes, but homemade cookies taste much better.

Can I freeze cookie sandwiches?

Absolutely—wrap individually and freeze.

What filling works best?

Buttercream or ice cream both work great.

Can I make them ahead of time?

Yes, they store well for several days.

Final Thoughts

These Chocolate Chip Cookie Sandwiches are the ultimate dessert upgrade—soft, chewy cookies filled with creamy sweetness in every bite. They’re fun to make, endlessly customizable, and perfect for sharing.

Whether you’re baking for a celebration or just craving something indulgent, this recipe delivers bakery-level results right from your kitchen.

Chocolate Orange Shortbread Cookies (Buttery, Citrusy & Chocolate-Dipped Delight)

If you love classic shortbread cookies but want something a little more exciting, these Chocolate Orange Shortbread Cookies are about to become your new favorite treat. They’re buttery, tender, and delicately crisp with bright orange zest and rich chocolate in every bite.

This flavor combination—chocolate and orange—is timeless for a reason. The citrus lifts the richness of the shortbread while the chocolate adds depth and indulgence, making these cookies perfect for holidays, gifting, or everyday coffee breaks.

Why You’ll Love These Chocolate Orange Shortbread Cookies

These Chocolate Orange Shortbread Cookies are simple yet incredibly elegant.

Here’s why they’re a must-bake:

  • Buttery, melt-in-your-mouth shortbread texture
  • Bright citrus flavor from fresh orange zest
  • Rich chocolate coating for extra indulgence
  • Perfect for holiday cookie trays or gifting
  • Simple ingredients with gourmet results

Ingredients

To make these chocolate orange shortbread cookies, you’ll need:

  • 1 cup unsalted butter (softened)
  • 1/2 cup powdered sugar
  • 2 cups all-purpose flour
  • 1/4 teaspoon salt
  • 1 tablespoon orange zest (freshly grated)
  • 1 teaspoon vanilla extract
  • 1/2 cup dark or semi-sweet chocolate (melted for dipping)

Ingredient Notes

The key to perfect Chocolate Orange Shortbread Cookies is using high-quality butter and fresh orange zest. The butter gives richness, while the zest infuses the dough with bright citrus oils.

Shortbread relies on simplicity, so don’t overwork the dough—this keeps the cookies tender and crumbly instead of tough.

Step-by-Step Instructions

1. Cream Butter and Sugar

Beat softened butter and powdered sugar together until light and fluffy.

2. Add Flavoring

Mix in vanilla extract and fresh orange zest until evenly distributed.

3. Add Dry Ingredients

Gradually add flour and salt, mixing until a soft dough forms.

4. Chill Dough

Wrap dough and refrigerate for at least 30–60 minutes.

5. Shape Cookies

Roll dough out and cut into desired shapes or slice into rounds.

6. Bake

Bake at 325°F (165°C) for 12–15 minutes until edges are lightly golden.

7. Dip in Chocolate

Melt chocolate and dip half of each cooled cookie. Let set on parchment paper.

Tips for Perfect Results

To make the best Chocolate Orange Shortbread Cookies, follow these tips:

  • Don’t overmix dough—keep it tender
  • Chill dough for clean shapes
  • Use fresh orange zest, not bottled flavoring
  • Let cookies cool completely before dipping

Variations

Try these delicious twists:

  • Milk Chocolate Version: Swap dark chocolate for milk chocolate
  • White Chocolate Dip: For a sweeter finish
  • Spiced Orange: Add cinnamon or cardamom
  • Nutty Shortbread: Add finely chopped almonds

What to Serve With It

These cookies pair perfectly with:

  • Hot tea (Earl Grey or chamomile)
  • Coffee or espresso
  • Hot chocolate
  • Dessert wine

They’re ideal for afternoon treats or holiday cookie exchanges.

Storage & Reheating

For your Chocolate Orange Shortbread Cookies:

  • Room Temperature: Store in airtight container for up to 1 week
  • Refrigerator: Keeps fresh for up to 2 weeks
  • Freezer: Freeze baked cookies up to 2 months
  • Reheat: No reheating needed, but can be warmed slightly

Common Mistakes to Avoid

Avoid these issues:

  • Overmixing dough (leads to tough cookies)
  • Skipping chilling step
  • Using too much flour
  • Dipping chocolate before cookies are fully cooled

FAQs

Can I use orange extract instead of zest?

Yes, but fresh zest gives better flavor.

Can I make these gluten-free?

Yes, use a 1:1 gluten-free flour blend.

Why are my shortbread cookies crumbly?

That’s normal, but too much flour can make them overly dry.

Can I freeze the dough?

Absolutely—freeze and bake when needed.

Final Thoughts

These Chocolate Orange Shortbread Cookies are the perfect balance of buttery richness, bright citrus flavor, and smooth chocolate indulgence. They’re simple enough for everyday baking but elegant enough for special occasions.

Once you try them, they’ll quickly become a staple in your cookie rotation—especially during the holidays when chocolate and orange flavors shine the brightest.