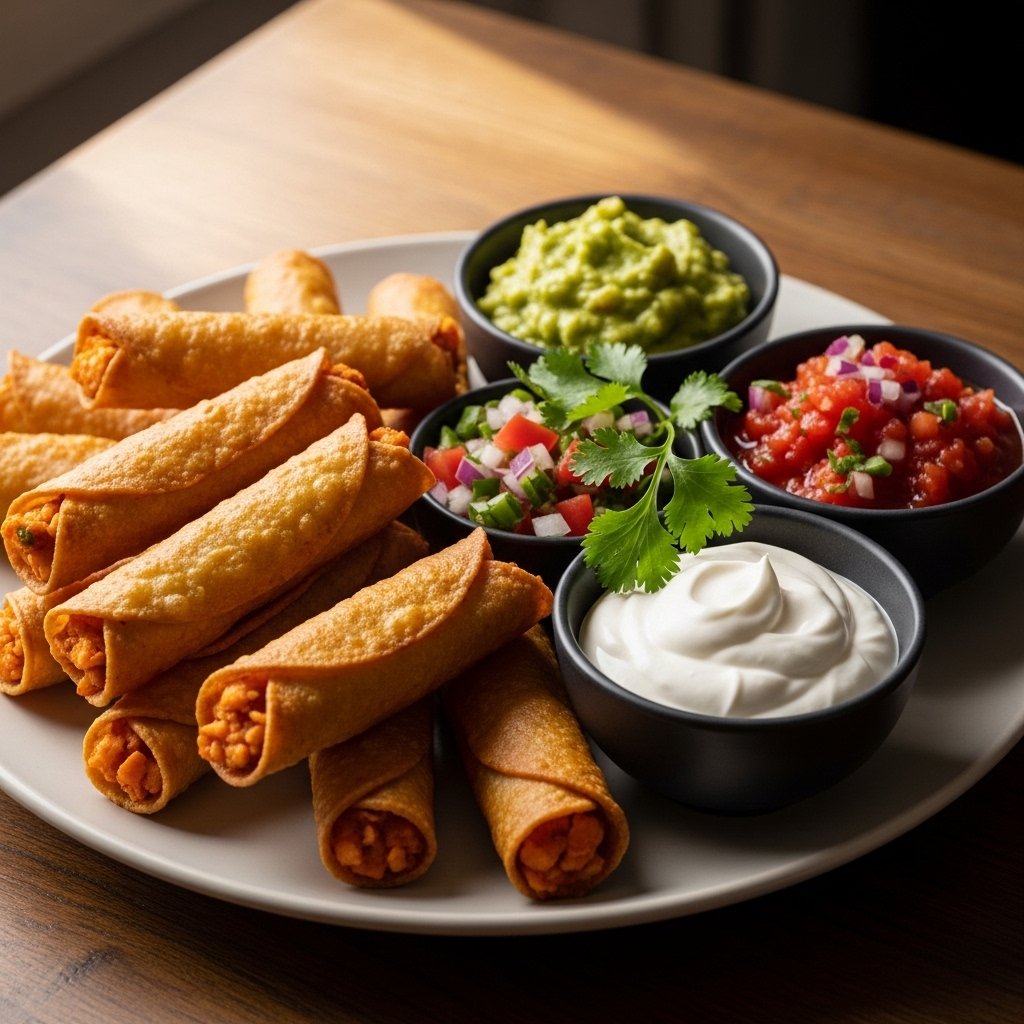
If you’re craving something crunchy, flavorful, and totally satisfying, these Crispy Chicken Taquitos – Snack Recipe are going to hit the spot. They’re golden on the outside, filled with seasoned shredded chicken, and baked or fried until perfectly crispy.
This crispy chicken taquitos recipe is a favorite for game days, parties, or even quick weeknight dinners. They’re easy to make, freezer-friendly, and endlessly customizable, making them a go-to snack in many American kitchens.

Why You’ll Love This Crispy Chicken Taquitos Recipe
These crispy chicken taquitos are everything you want in a snack.
- Crunchy, golden tortilla exterior
- Juicy, seasoned chicken filling
- Easy to bake or fry
- Perfect for dipping and sharing
- Freezer-friendly for meal prep
They’re simple, fast, and always a crowd favorite.
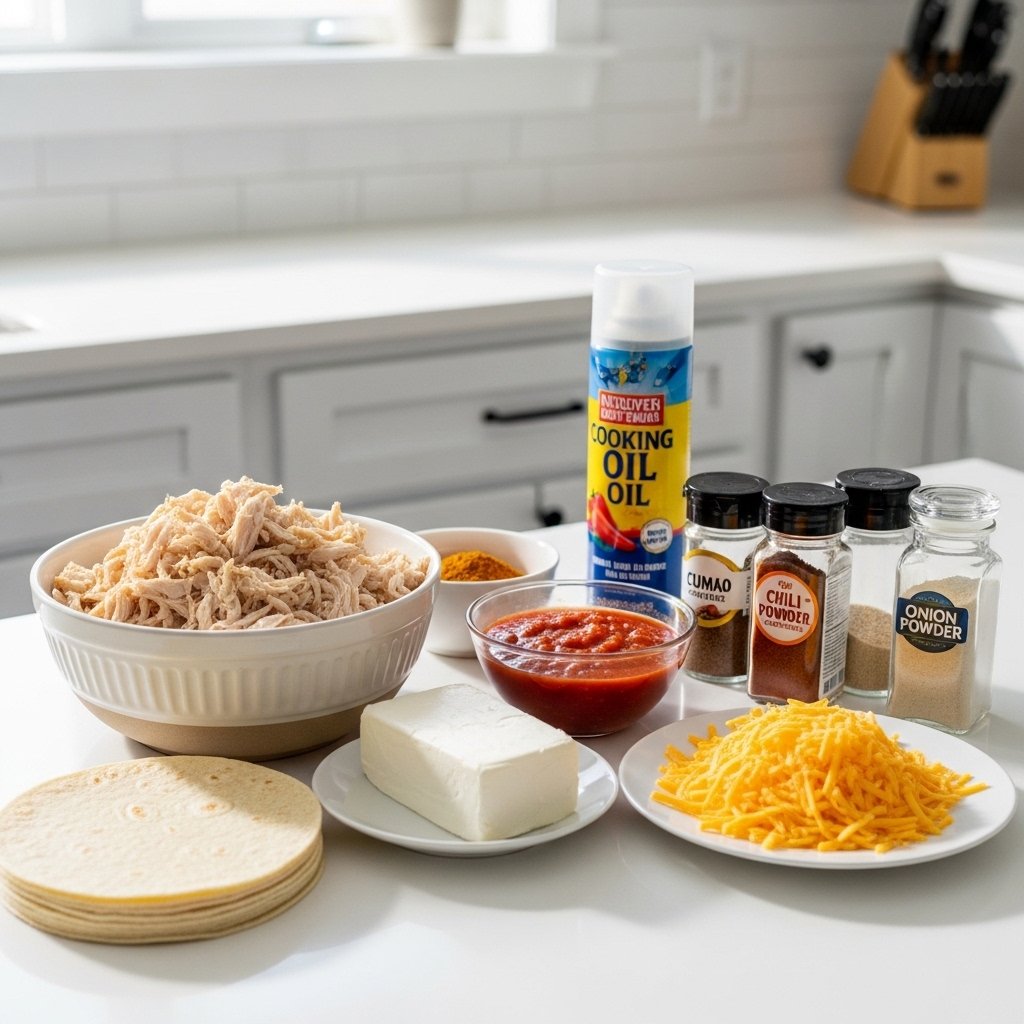
Ingredients
To make this crispy chicken taquitos recipe, you’ll need:
- 2 cups cooked shredded chicken
- 1/2 cup cream cheese (softened)
- 1/2 cup shredded cheddar cheese
- 1/4 cup salsa
- 1 teaspoon garlic powder
- 1 teaspoon chili powder
- 1/2 teaspoon cumin
- Salt and pepper to taste
- 10–12 small flour or corn tortillas
- Cooking spray or oil for baking/frying
Ingredient Notes
Chicken Options
Rotisserie chicken works perfectly for this crispy chicken taquitos recipe because it’s flavorful and saves time.
Tortilla Choice
Corn tortillas give authentic crunch, while flour tortillas are softer and easier to roll.
Cheese Blend
Cheddar adds sharpness, while cream cheese keeps the filling creamy.
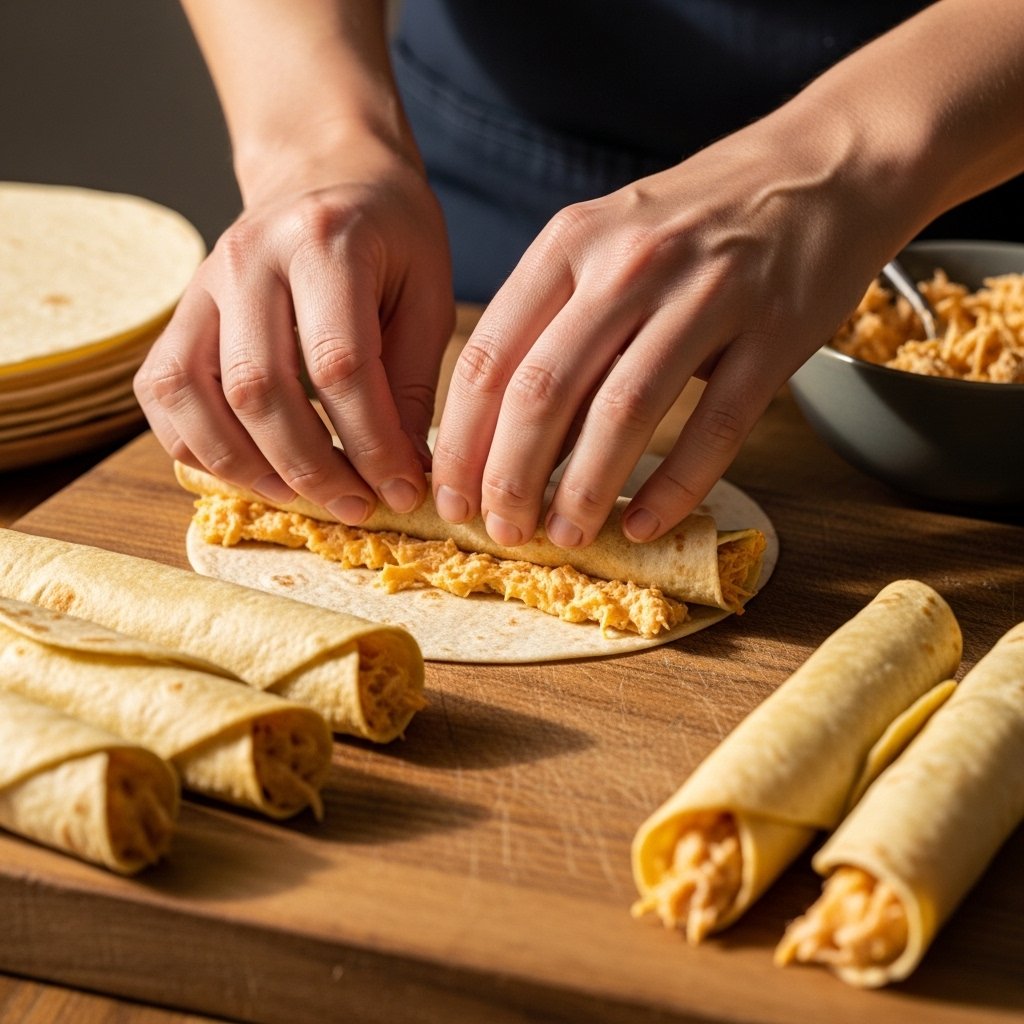
Step-by-Step Instructions
1. Prepare Filling
Mix shredded chicken, cream cheese, cheddar, salsa, and spices in a bowl.
2. Warm Tortillas
Heat tortillas slightly so they don’t crack when rolling.
3. Fill and Roll
Add filling to each tortilla and roll tightly.
4. Bake or Fry
Bake at 425°F (220°C) for 15–20 minutes or fry until golden and crispy.
5. Serve Hot
Let cool slightly and serve with dips.
Tips for Perfect Results
To make the best crispy chicken taquitos recipe, follow these tips:
- Don’t overfill tortillas
- Warm tortillas before rolling
- Use toothpicks if needed to hold shape
- Spray lightly with oil for extra crispiness
- Don’t overcrowd baking tray
These tips help achieve perfect crunch every time.
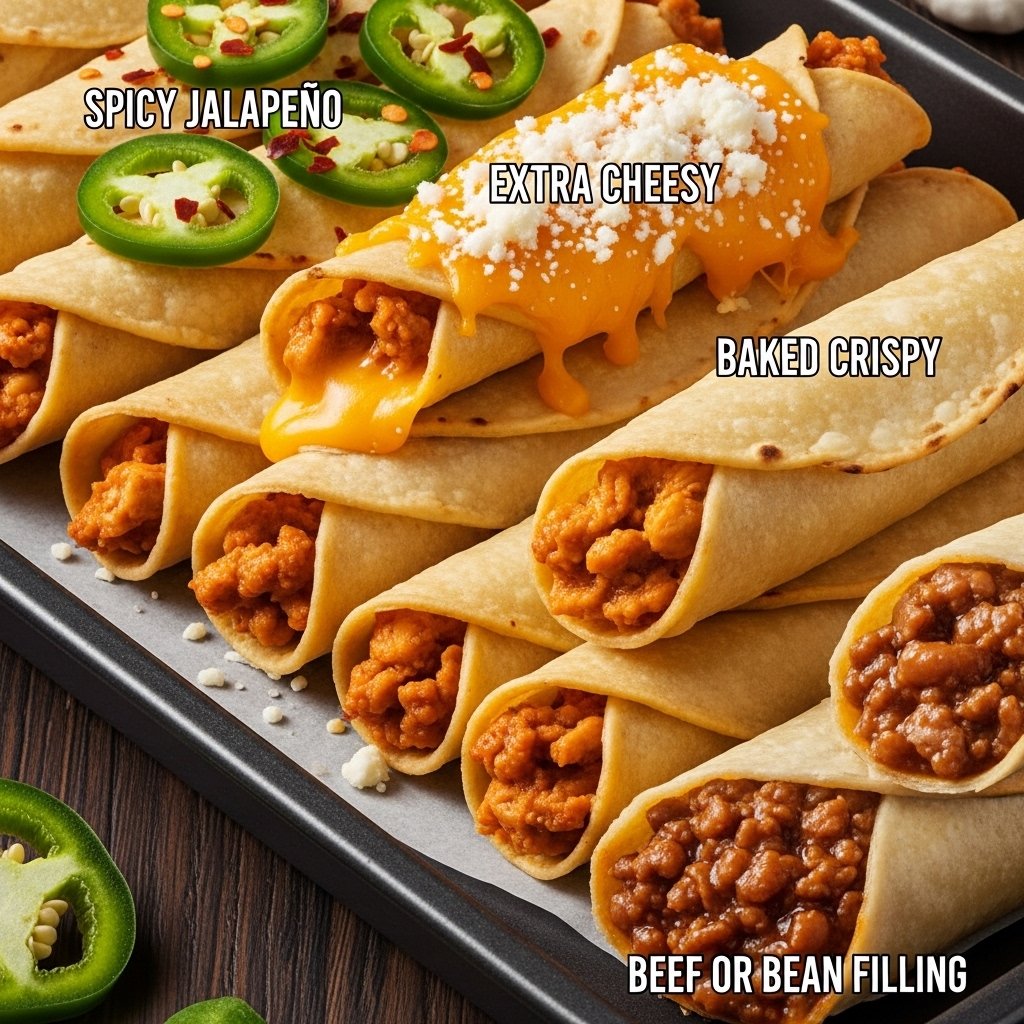
Variations
This crispy chicken taquitos recipe is easy to customize:
Spicy Version
Add jalapeños or hot sauce to filling.
Cheesy Overload
Use extra cheese for gooey center.
Healthy Version
Bake instead of frying.
Beef or Veggie Version
Swap chicken for ground beef or beans.
What to Serve With Them
These crispy chicken taquitos pair perfectly with:
- Guacamole
- Sour cream
- Salsa or pico de gallo
- Cheese dip
- Mexican rice
They’re great for dipping and sharing.
Storage & Reheating
- Refrigerator: Store up to 3 days
- Freezer: Freeze unbaked or baked up to 2 months
- Reheat: Bake or air fry until crispy again
Avoid microwaving for best texture.
Common Mistakes to Avoid
When making crispy chicken taquitos recipe, avoid:
- Overfilling tortillas (they may burst)
- Not warming tortillas before rolling
- Skipping oil spray when baking
- Overcrowding pan during cooking
These mistakes can affect crispiness.
FAQs
Can I make taquitos ahead of time?
Yes, assemble and freeze before cooking.
Can I air fry taquitos?
Yes, air fryer works great for extra crispiness.
What tortillas work best?
Corn tortillas give best crunch, but flour works too.
Can I use leftover chicken?
Yes, leftover or rotisserie chicken is perfect.
Final Thoughts
These Crispy Chicken Taquitos – Snack Recipe are crunchy, flavorful, and incredibly easy to make. Whether baked, fried, or air-fried, they deliver that perfect crispy bite every time.
Great for parties, snacks, or quick dinners, this recipe is one you’ll keep coming back to. Once you try them, they’ll become a regular favorite in your kitchen.