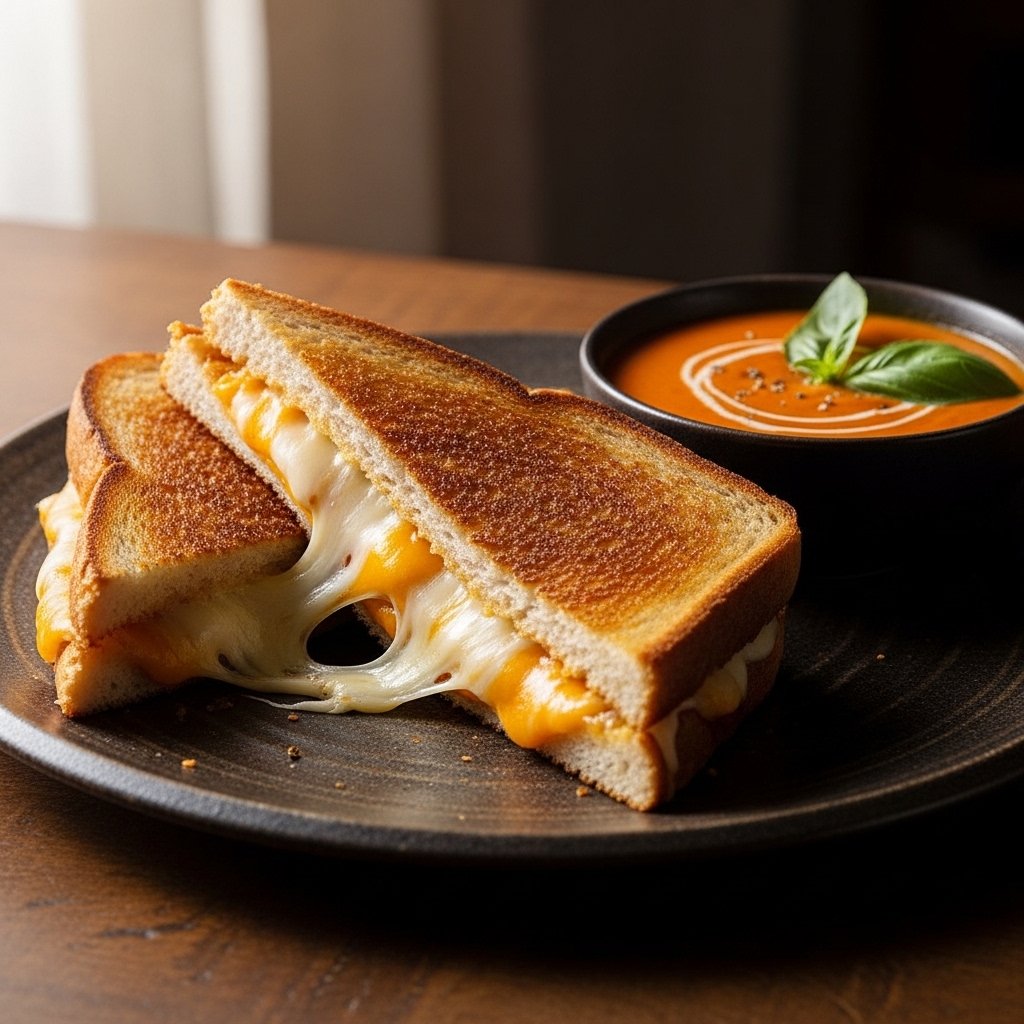
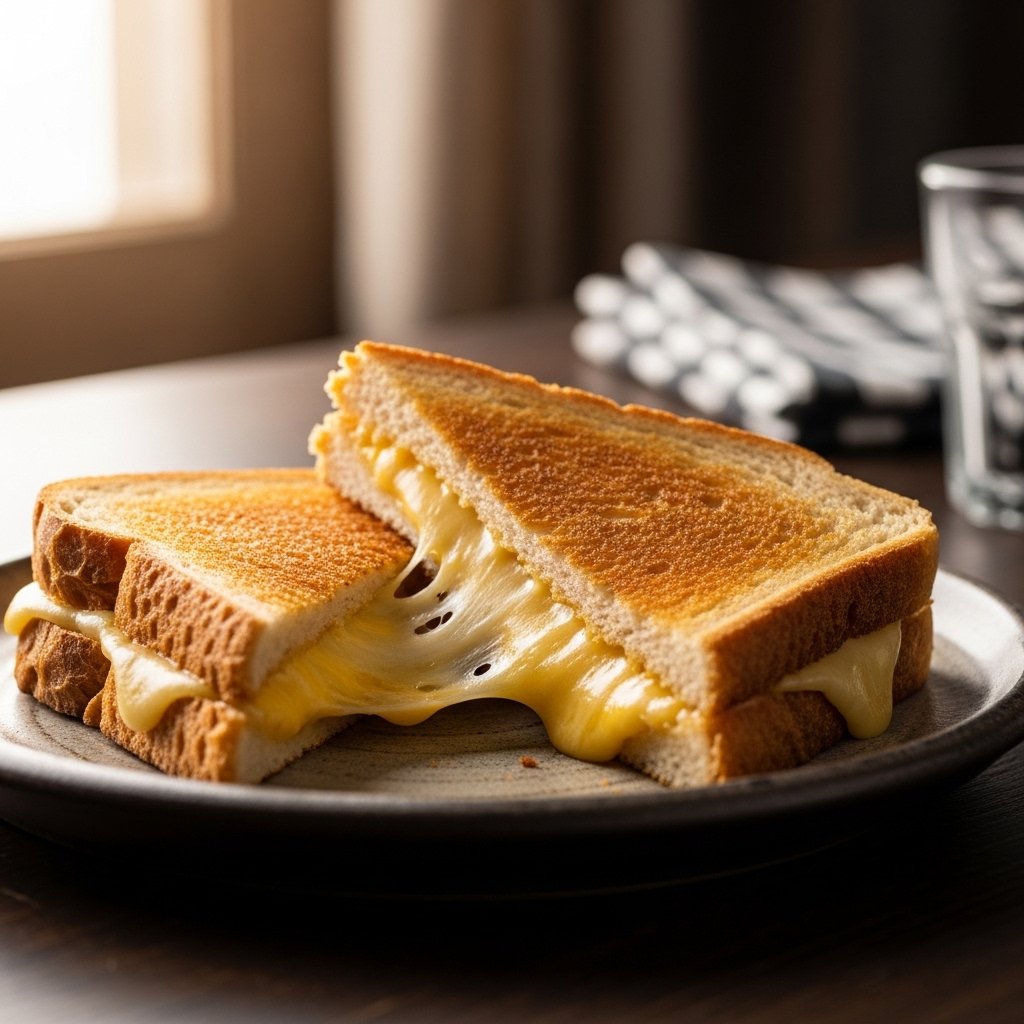
There’s grilled cheese… and then there’s the Ultimate Four Cheese Grilled Cheese Sandwich. This is not your average sandwich—it’s a next-level comfort food experience packed with layers of rich, melty cheese and perfectly golden, crispy bread.
If you’re craving something indulgent yet easy to make, this four cheese grilled cheese sandwich delivers everything you want. It’s creamy, gooey, crunchy, and unbelievably satisfying in every bite.
Why You’ll Love This Ultimate Four Cheese Grilled Cheese Sandwich
This Ultimate Four Cheese Grilled Cheese Sandwich is a dream for cheese lovers.
- Extra cheesy and ultra gooey
- Crispy, buttery golden crust
- Simple ingredients with big flavor
- Ready in under 15 minutes
- Perfect comfort food for any time
It’s everything you love about grilled cheese—just better.
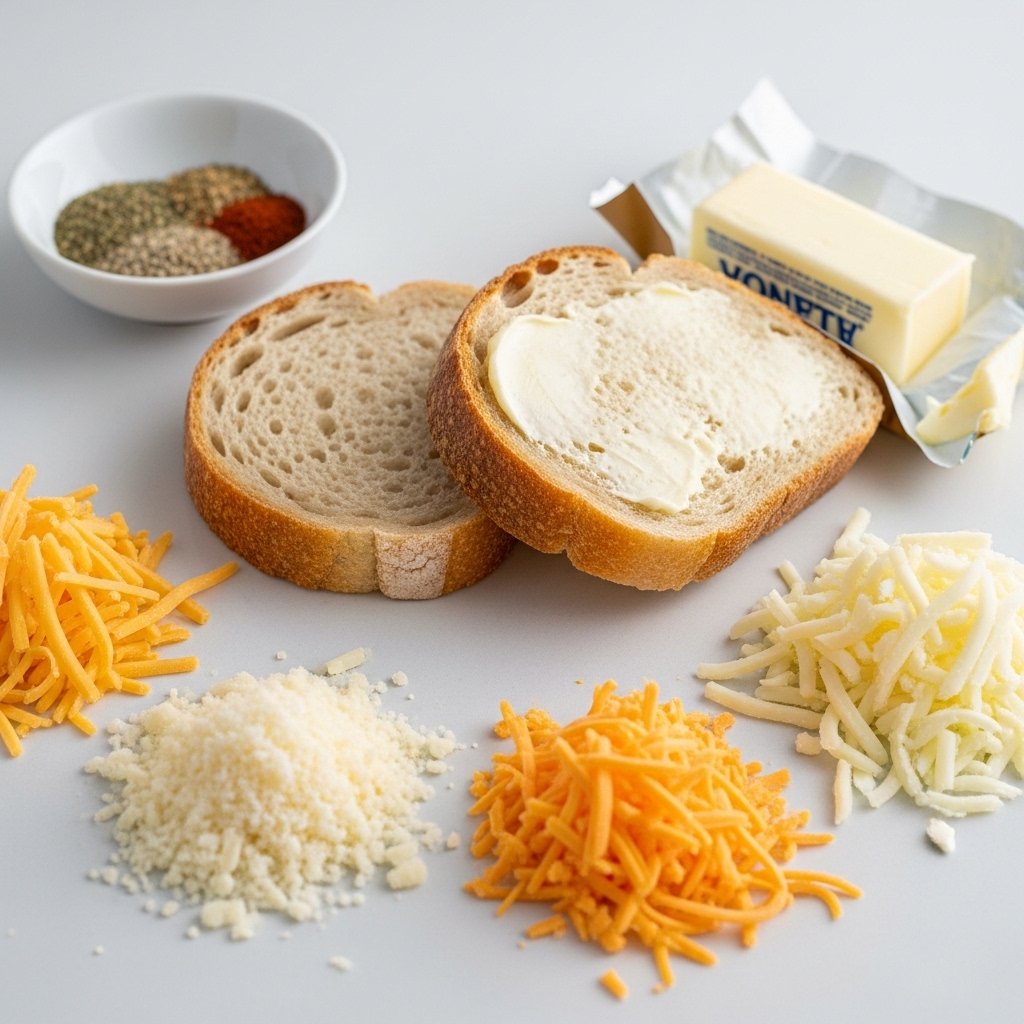
Ingredients
Here’s what you’ll need for the ultimate four cheese grilled cheese sandwich:
- 2 slices of thick bread (sourdough or white)
- 1 tablespoon butter (softened)
- 1/4 cup shredded cheddar cheese
- 1/4 cup shredded mozzarella
- 1/4 cup shredded Monterey Jack
- 1/4 cup grated Parmesan cheese
Optional:
- Garlic powder
- Fresh herbs
- Tomato slices
Ingredient Notes
Cheese Blend
The magic of this four cheese grilled cheese sandwich comes from combining cheeses:
- Cheddar for sharp flavor
- Mozzarella for stretchiness
- Monterey Jack for creaminess
- Parmesan for depth and saltiness
Bread Choice
Use sturdy bread that can hold the melted cheese without getting soggy.
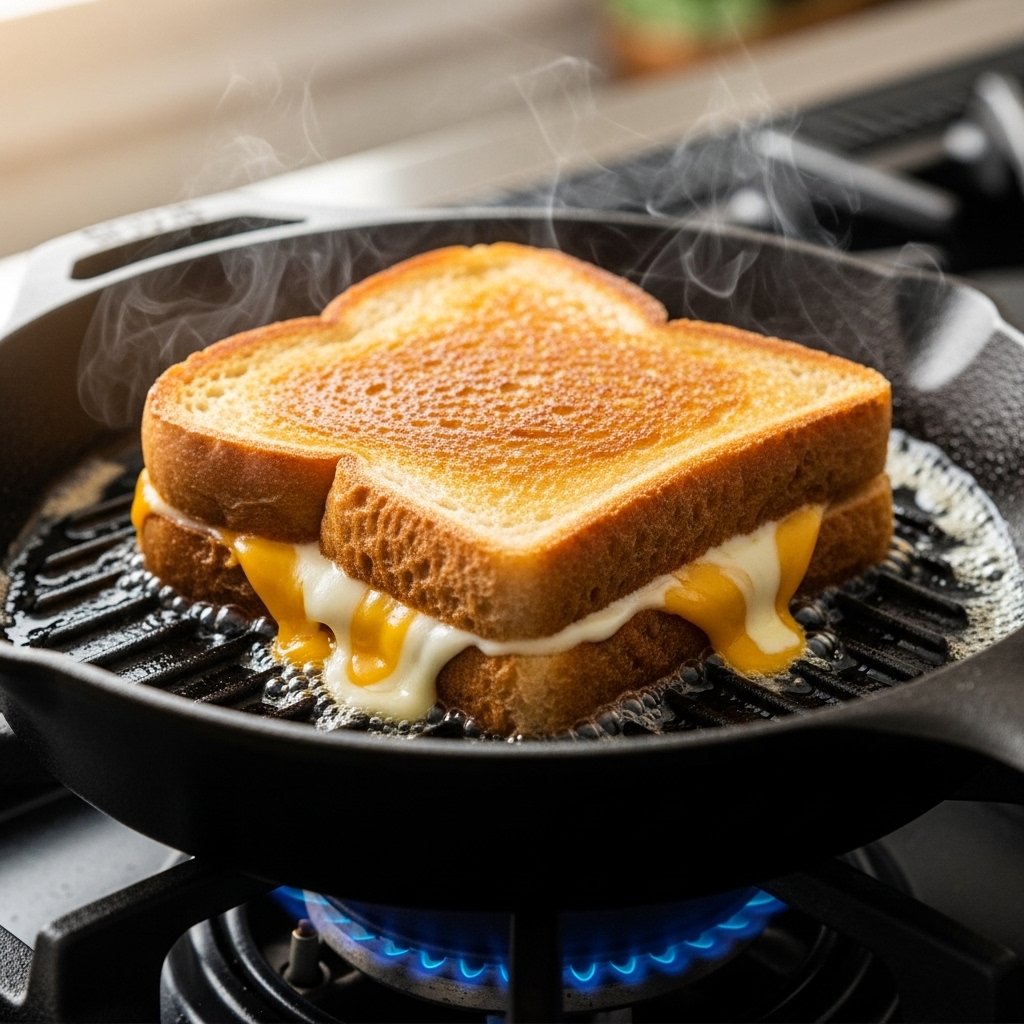
Step-by-Step Instructions
1. Prep the Bread
Spread butter evenly on one side of each slice.
2. Add Cheese
Layer all four cheeses evenly on the unbuttered side.
3. Assemble Sandwich
Place slices together, buttered sides out.
4. Cook
Cook on medium heat until golden brown and cheese melts.
5. Flip Carefully
Flip once and cook the other side until crispy.
Tips for Perfect Results
To make the best Ultimate Four Cheese Grilled Cheese Sandwich, follow these tips:
- Cook on medium-low heat to melt cheese evenly
- Use freshly shredded cheese for better melt
- Press lightly with a spatula for even browning
- Don’t rush—slow cooking creates perfect texture
- Let sandwich rest briefly before slicing
These tips ensure a crispy outside and gooey inside.
Variations
This four cheese grilled cheese sandwich is easy to customize:
Garlic Butter Version
Add garlic to the butter for extra flavor.
Tomato Melt
Add sliced tomatoes for freshness.
Bacon Grilled Cheese
Add crispy bacon for a smoky twist.
Spicy Version
Add jalapeños or hot sauce.

What to Serve With It
This Ultimate Four Cheese Grilled Cheese Sandwich pairs perfectly with:
- Tomato soup
- French fries
- Pickles
- Side salad
- Chips
It’s a classic comfort meal combo.
Storage & Reheating
- Refrigerator: Store up to 2 days
- Reheating: Use a skillet or oven for crispiness
- Avoid Microwave: It makes bread soggy
Fresh is always best, but reheating properly helps maintain texture.
Common Mistakes to Avoid
When making a four cheese grilled cheese sandwich, avoid:
- Using heat that’s too high
- Not enough butter
- Overloading with cheese
- Using weak bread
These mistakes can ruin the texture and flavor.
FAQs
What’s the best cheese combo for grilled cheese?
Cheddar, mozzarella, Monterey Jack, and Parmesan work perfectly.
Can I use pre-shredded cheese?
Yes, but freshly shredded melts better.
What bread works best?
Sourdough or thick white bread is ideal.
How do I make it extra crispy?
Use butter generously and cook slowly.
Final Thoughts
This Ultimate Four Cheese Grilled Cheese Sandwich takes a simple classic and turns it into something truly special. With its crispy golden crust and rich, melty center, it’s comfort food at its finest.
Whether for lunch, dinner, or a quick snack, this sandwich is guaranteed to satisfy every cheese craving.