Rainbow M&M Cookies (Easy Recipe) – Soft, Chewy & Colorful Treats

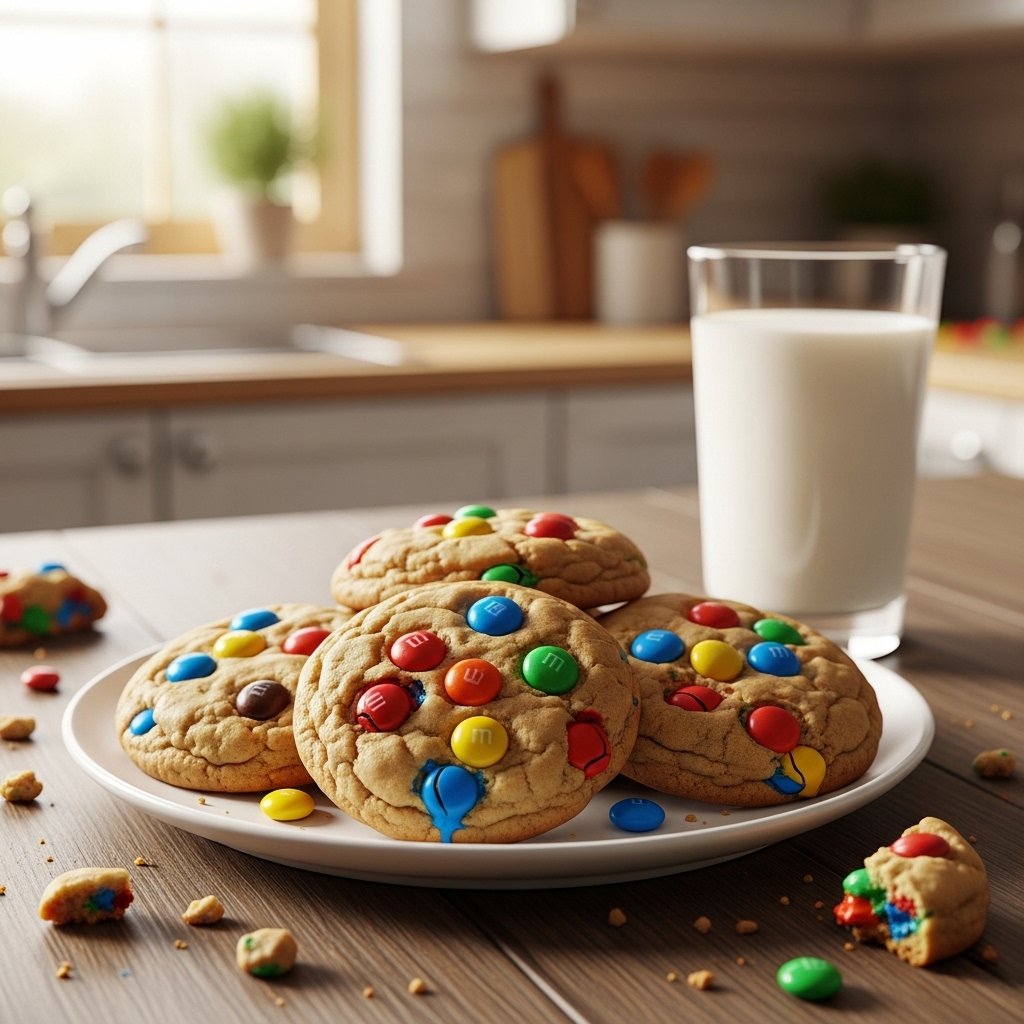
If you’re looking for a cheerful, crowd-pleasing dessert, these Rainbow M&M Cookies (Easy Recipe) are exactly what you need. Packed with colorful candy-coated chocolate pieces and baked to soft, chewy perfection, these cookies are as fun to look at as they are to eat.

What makes these rainbow M&M cookies stand out is their simplicity. With just a handful of pantry staples and minimal prep time, you can create bakery-style cookies that are perfect for birthdays, holidays, or just a sweet afternoon treat.

Why You’ll Love These Rainbow M&M Cookies

These rainbow M&M cookies (easy recipe) are a must-bake for so many reasons:

  • Bright, colorful, and visually appealing
  • Soft centers with slightly crisp edges
  • Easy to make in under 30 minutes
  • Perfect for kids and adults alike
  • Great for holidays, parties, and gifting

They’re guaranteed to bring smiles with every bite.
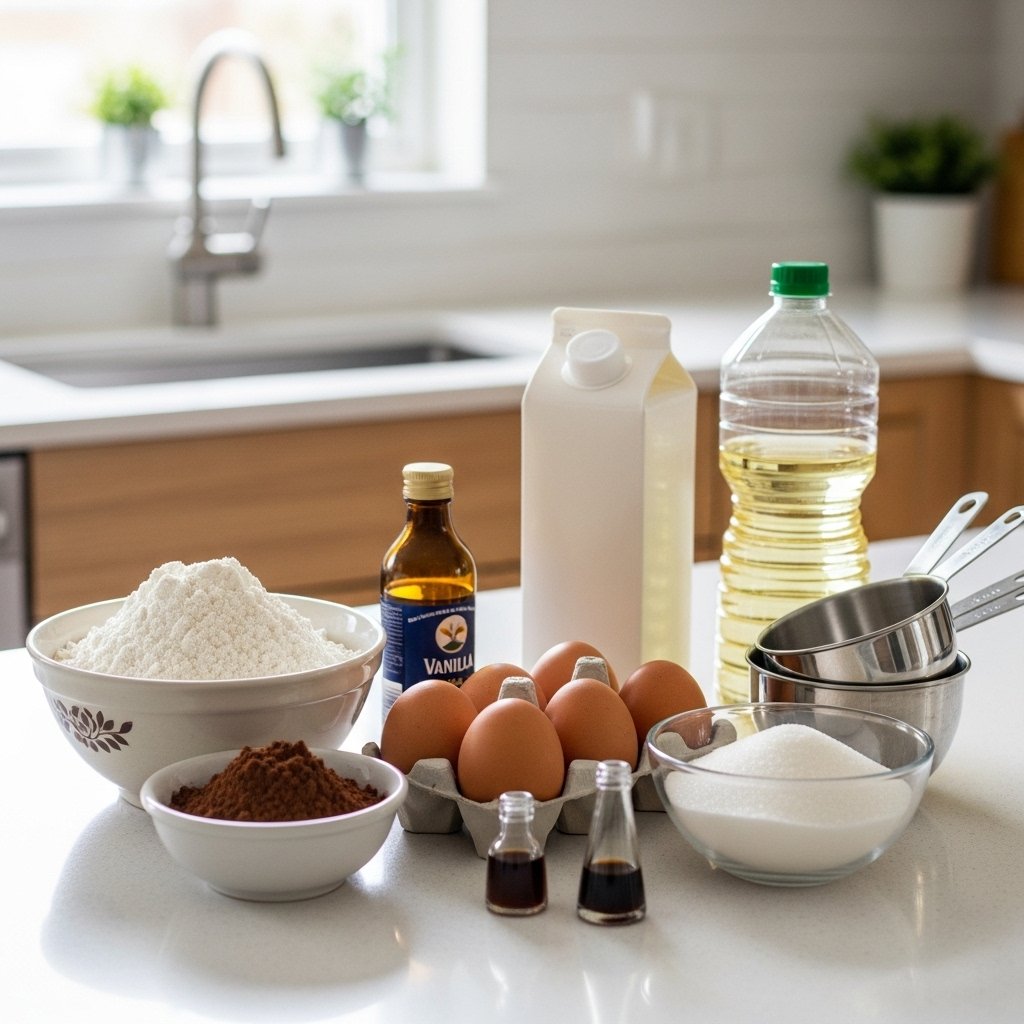
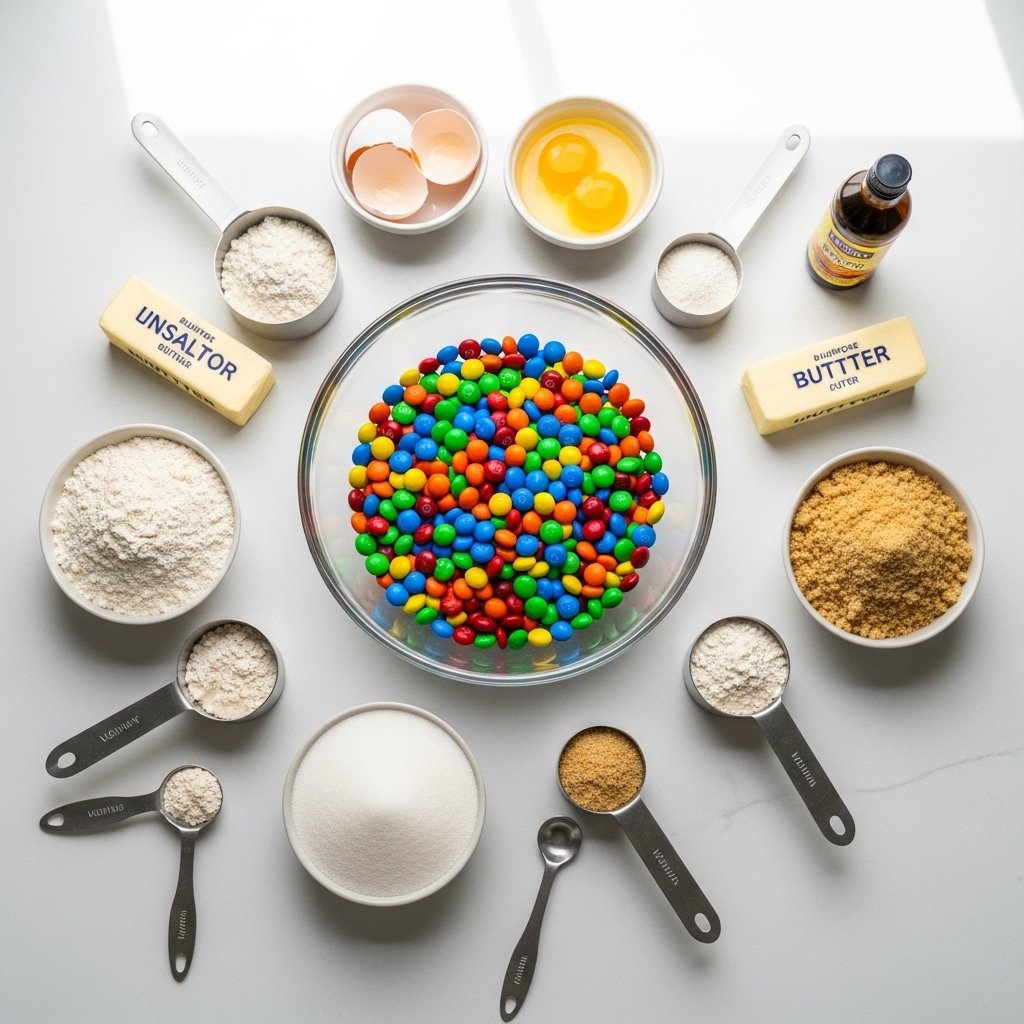
Ingredients

To make these rainbow M&M cookies, you’ll need:

  • 2 ¼ cups all-purpose flour
  • 1 tsp baking soda
  • ½ tsp salt
  • ¾ cup unsalted butter (softened)
  • ¾ cup brown sugar
  • ½ cup granulated sugar
  • 2 large eggs
  • 2 tsp vanilla extract
  • 1 ½ cups rainbow M&M candies

Ingredient Notes

Butter

Use softened butter for a smooth, creamy dough.

Brown Sugar

Adds moisture and creates a chewy texture.

M&M Candies

Use classic or seasonal colors for different occasions.

Step-by-Step Instructions

1. Preheat Oven

Set oven to 350°F and line baking sheets with parchment paper.

2. Mix Dry Ingredients

In a bowl, whisk together flour, baking soda, and salt.

3. Cream Butter and Sugars

Beat butter, brown sugar, and granulated sugar until light and fluffy.

4. Add Eggs and Vanilla

Mix in eggs one at a time, then add vanilla extract.

5. Combine

Gradually add dry ingredients to wet mixture.

6. Fold in M&Ms

Gently stir in rainbow M&M candies.

7. Bake

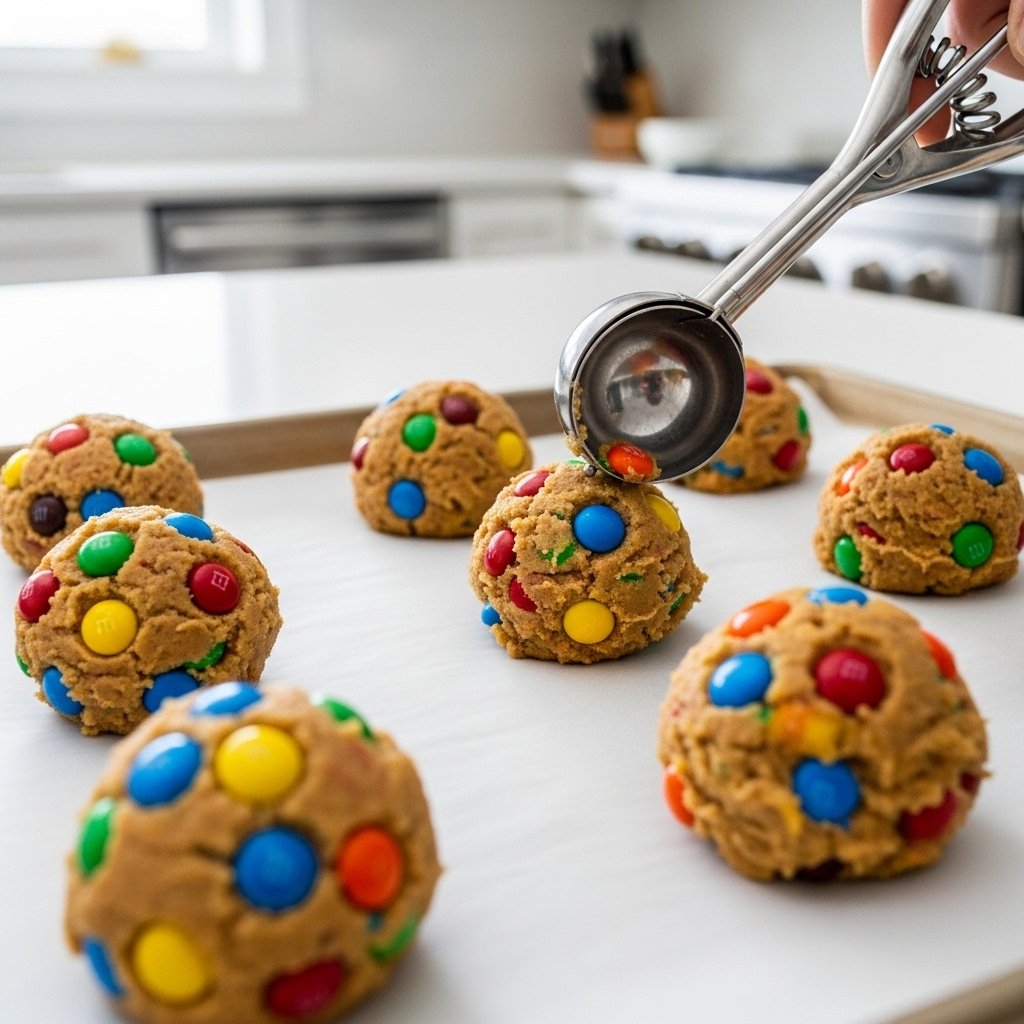
Scoop dough onto baking sheets and bake for 10–12 minutes.

8. Cool

Let cookies cool on the pan before transferring.

Tips for Perfect Results

To make the best rainbow M&M cookies, follow these tips:

  • Don’t overbake—centers should look slightly underdone
  • Chill dough for thicker cookies
  • Press extra M&Ms on top before baking
  • Use a cookie scoop for even sizes
  • Let cookies rest on the pan for perfect texture

These simple tricks elevate your cookies to bakery quality.
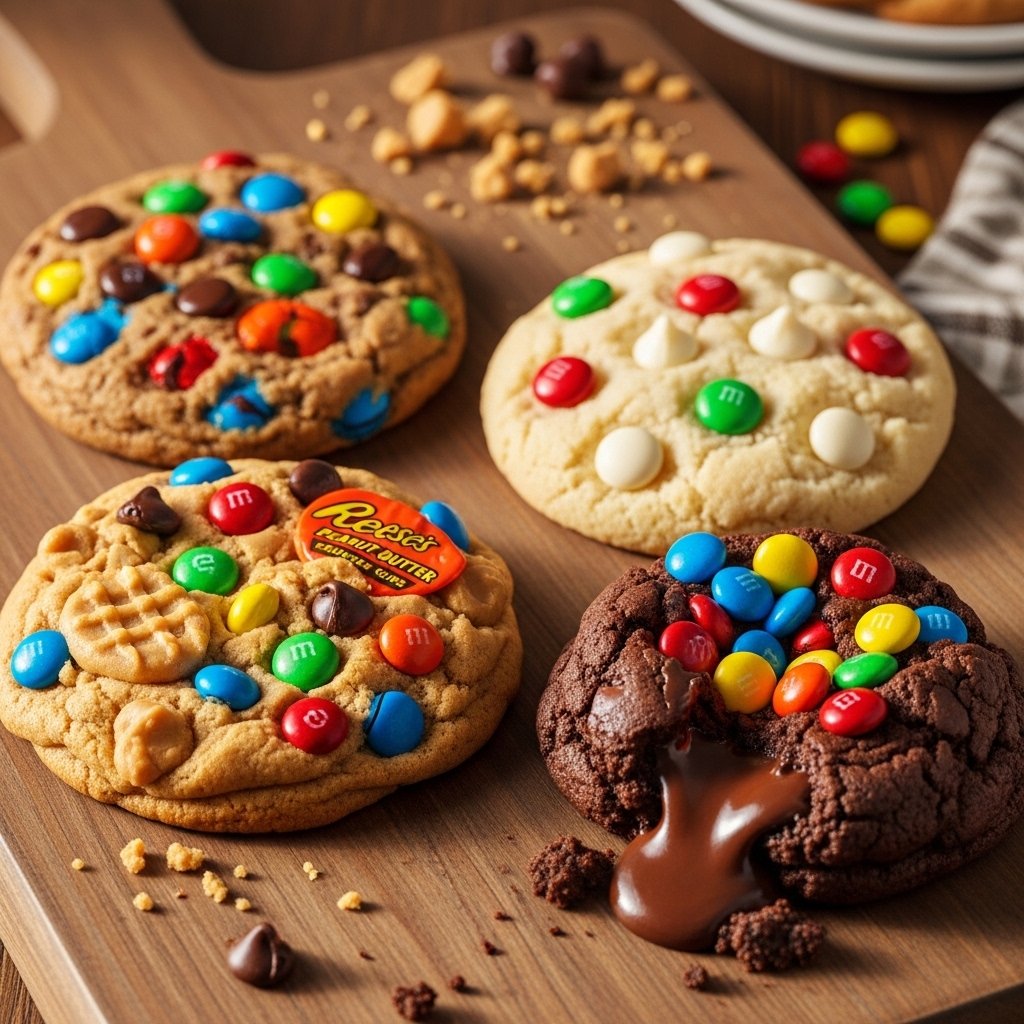
Variations

Switch up your rainbow M&M cookies (easy recipe) with these ideas:

Chocolate Chip Combo

Add chocolate chips for extra richness.

Holiday-Themed Cookies

Use seasonal M&M colors for festive treats.

Peanut Butter Version

Replace part of the butter with peanut butter.

Stuffed Cookies

Add a chocolate center for a surprise filling.

What to Serve With It

These rainbow M&M cookies pair perfectly with:

  • Cold milk
  • Hot coffee
  • Hot chocolate
  • Ice cream

They’re a versatile treat for any time of day.

Storage & Reheating

  • Room temperature: Store in airtight container up to 5 days
  • Freezer: Freeze baked cookies or dough up to 2 months
  • Reheating: Warm in microwave for 10 seconds

This keeps your cookies soft and fresh.

Common Mistakes to Avoid

When making rainbow M&M cookies, avoid:

  • Overmixing the dough
  • Overbaking
  • Using cold butter
  • Skipping parchment paper

Avoiding these ensures perfect cookies every time.

FAQs

Can I make the dough ahead of time?

Yes, refrigerate for up to 48 hours.

Why are my cookies flat?

Butter may be too soft or dough wasn’t chilled.

Can I freeze cookie dough?

Yes, scoop into balls and freeze.

Can I use mini M&Ms?

Absolutely, they work great in this recipe.

Final Thoughts

These Rainbow M&M Cookies (Easy Recipe) are the perfect combination of fun, flavor, and simplicity. Whether you’re baking for a party or just craving something sweet, these cookies deliver every time.

Once you try them, they’ll quickly become a favorite in your baking rotation.

Simple Homemade Chocolate Cake – Moist, Rich & Foolproof Recipe

There’s something incredibly comforting about a simple homemade chocolate cake. It’s the kind of dessert that brings people together—whether it’s for a birthday, a family dinner, or just because you’re craving something sweet and chocolatey. This recipe delivers everything you want: a moist crumb, deep chocolate flavor, and a soft, tender texture that melts in your mouth.

What makes this simple homemade chocolate cake truly special is how easy it is to prepare. No fancy techniques, no complicated steps—just straightforward baking that results in a bakery-quality cake right from your own kitchen.

Why You’ll Love This Simple Homemade Chocolate Cake

This simple homemade chocolate cake is a go-to recipe for so many reasons:

  • Made with pantry staples
  • Perfectly moist and fluffy texture
  • Rich, deep chocolate flavor
  • Easy for beginners
  • Versatile for any occasion

Whether you’re baking for a celebration or a cozy night in, this cake never disappoints.

Ingredients

To make this simple homemade chocolate cake, you’ll need:

  • 1 ¾ cups all-purpose flour
  • 1 ¾ cups sugar
  • ¾ cup unsweetened cocoa powder
  • 2 tsp baking soda
  • 1 tsp baking powder
  • 1 tsp salt
  • 2 eggs
  • 1 cup milk
  • ½ cup vegetable oil
  • 2 tsp vanilla extract
  • 1 cup hot water or coffee

Ingredient Notes

Cocoa Powder

Use high-quality unsweetened cocoa powder for a richer flavor.

Hot Liquid

Hot water or coffee helps bloom the cocoa and intensifies the chocolate taste.

Oil vs Butter

Oil keeps the cake extra moist compared to butter.

Step-by-Step Instructions

1. Preheat and Prep

Preheat your oven to 350°F and grease your cake pans.

2. Mix Dry Ingredients

In a large bowl, whisk together flour, sugar, cocoa powder, baking soda, baking powder, and salt.

3. Add Wet Ingredients

Add eggs, milk, oil, and vanilla. Mix until smooth.

4. Add Hot Liquid

Slowly stir in hot water or coffee. The batter will be thin.

5. Bake

Pour into pans and bake for 30–35 minutes.

6. Cool and Frost

Let cool completely before frosting.

Tips for Perfect Results

For the best simple homemade chocolate cake, follow these tips:

  • Don’t overmix the batter
  • Use room temperature ingredients
  • Measure flour correctly
  • Check doneness with a toothpick
  • Let cake cool fully before frosting

These small details make a big difference in texture and flavor.

Variations

Customize your simple homemade chocolate cake with these ideas:

Chocolate Chip Cake

Add chocolate chips for extra richness.

Layer Cake

Double the recipe for a tall layered cake.

Cupcakes

Turn the batter into cupcakes for easy serving.

Dairy-Free Option

Use plant-based milk alternatives.

What to Serve With It

This simple homemade chocolate cake pairs beautifully with:

  • Vanilla ice cream
  • Fresh berries
  • Whipped cream
  • Coffee or espresso

It’s a versatile dessert that fits any occasion.

Storage & Reheating

  • Room temperature: Store covered for up to 3 days
  • Refrigerator: Up to 5 days
  • Freezer: Freeze slices for up to 2 months
  • Reheating: Microwave briefly for a warm treat

Proper storage keeps your cake moist and delicious.

Common Mistakes to Avoid

When making a simple homemade chocolate cake, avoid:

  • Overbaking the cake
  • Using cold ingredients
  • Skipping sifting dry ingredients
  • Frosting while warm

Avoiding these ensures perfect results every time.

FAQs

Can I make this cake ahead of time?

Yes, it stays moist for days and can be made in advance.

Can I use butter instead of oil?

Yes, but oil gives a softer, more moist texture.

Why is my cake dry?

It may be overbaked or have too much flour.

Can I make this gluten-free?

Yes, use a gluten-free flour blend.

Final Thoughts

This simple homemade chocolate cake is everything a classic dessert should be—easy, rich, moist, and incredibly satisfying. It’s the kind of recipe you’ll come back to again and again because it just works.

Whether you’re baking for a celebration or simply treating yourself, this cake delivers every single time.

Brown Sugar Pecan Pie Brownies – The Ultimate Gooey Holiday Dessert

If you’ve ever struggled to choose between brownies and pecan pie, these Brown Sugar Pecan Pie Brownies are the perfect solution. This indulgent dessert layers a rich, chocolatey brownie base with a sticky, caramel-like pecan pie topping made with brown sugar.

These brown sugar pecan pie brownies are ideal for holidays, potlucks, or anytime you want to impress guests with something extra special. The contrast between the dense brownie and the crunchy, nutty topping is absolutely irresistible.

Why You’ll Love These Brown Sugar Pecan Pie Brownies

These brown sugar pecan pie brownies are everything you want in a dessert:

  • Two classic desserts in one bite
  • Rich, gooey, and perfectly textured
  • Easy to make with simple ingredients
  • Perfect for holidays and special occasions
  • Crowd-pleasing and visually stunning

They’re guaranteed to disappear fast!

Ingredients

To make these brown sugar pecan pie brownies, you’ll need:

For the Brownie Layer:

  • 1/2 cup butter
  • 1 cup sugar
  • 2 eggs
  • 1 tsp vanilla extract
  • 1/3 cup cocoa powder
  • 1/2 cup flour
  • 1/4 tsp salt

For the Pecan Pie Topping:

  • 1 cup chopped pecans
  • 1/2 cup brown sugar
  • 1/3 cup corn syrup
  • 2 tbsp butter
  • 1 egg
  • 1 tsp vanilla extract

Ingredient Notes

Brown Sugar

Adds deep caramel flavor to the pecan topping.

Pecans

Use fresh pecans for the best crunch and taste.

Cocoa Powder

Choose high-quality cocoa for rich brownie flavor.

Step-by-Step Instructions

1. Make the Brownie Batter

Mix melted butter, sugar, eggs, and vanilla. Stir in cocoa, flour, and salt.

2. Bake the Base

Pour into a lined pan and bake partially.

3. Prepare the Topping

Mix brown sugar, corn syrup, butter, egg, vanilla, and pecans.

4. Add Topping

Pour over partially baked brownies.

5. Bake Again

Return to oven until topping is set and glossy.

6. Cool and Slice

Let cool completely before cutting into squares.

Tips for Perfect Results

To make the best brown sugar pecan pie brownies, follow these tips:

  • Don’t overbake the brownie layer initially
  • Use room temperature eggs
  • Let brownies cool completely before slicing
  • Line pan with parchment for easy removal
  • Toast pecans for extra flavor

These tips ensure perfect texture and flavor balance.

Variations

You can customize these brown sugar pecan pie brownies:

Chocolate Chip Version

Add chocolate chips to the brownie batter.

Bourbon Twist

Add a splash of bourbon to the pecan topping.

Nut Mix Version

Combine pecans with walnuts or almonds.

Gluten-Free Version

Use gluten-free flour.

What to Serve With It

These brown sugar pecan pie brownies pair perfectly with:

  • Vanilla ice cream
  • Whipped cream
  • Coffee or espresso
  • Caramel drizzle

They make a stunning dessert centerpiece.

Storage & Reheating

  • Room temperature: Store up to 3 days
  • Refrigerator: Up to 5 days
  • Freezer: Freeze up to 2 months
  • Reheating: Warm slightly for gooey texture

Store in an airtight container for freshness.

Common Mistakes to Avoid

When making brown sugar pecan pie brownies, avoid:

  • Overbaking the brownies
  • Using stale nuts
  • Cutting before fully cooled
  • Skipping parchment paper

These mistakes can affect texture and presentation.

FAQs

Can I make these ahead of time?

Yes, they taste even better the next day.

Can I use store-bought brownie mix?

Absolutely, for a quicker version.

Why is my topping too runny?

It may need more baking time to set.

Can I freeze these brownies?

Yes, they freeze very well.

Final Thoughts

These Brown Sugar Pecan Pie Brownies are the ultimate dessert mashup—rich, gooey, and packed with flavor. Whether for holidays or everyday indulgence, they deliver bakery-quality results right at home.

Once you try them, they’ll become a staple in your dessert rotation.

20 Christmas Sweet Treats (Cookies, Cakes, Drinks, & More!) – Festive Holiday Favorites

The holiday season just isn’t complete without a table full of irresistible desserts, and these 20 Christmas sweet treats (cookies, cakes, drinks, & more!) are here to make your celebrations unforgettable. From classic cookies to cozy drinks and show-stopping cakes, this collection brings together everything you need to satisfy your sweet tooth.

Whether you’re baking for a party, gifting homemade goodies, or simply enjoying time at home, these Christmas sweet treats are easy, festive, and full of holiday cheer.

Why You’ll Love These Christmas Sweet Treats

These 20 Christmas sweet treats (cookies, cakes, drinks, & more!) are perfect for the season:

  • Wide variety of desserts for every taste
  • Easy recipes for beginners and experienced bakers
  • Perfect for gifting and parties
  • Festive presentation ideas included
  • Classic and modern holiday flavors

You’ll find something for everyone on your holiday menu.

Ingredients

Since this is a collection of Christmas sweet treats, ingredients vary, but common staples include:

  • Flour, sugar, butter
  • Eggs and milk
  • Chocolate chips and cocoa powder
  • Vanilla extract and spices (cinnamon, nutmeg)
  • Cream cheese and whipped cream
  • Seasonal fruits like cranberries and oranges

Ingredient Notes

Holiday Spices

Cinnamon, nutmeg, and cloves bring warm seasonal flavor.

Chocolate

Use high-quality chocolate for richer desserts.

Butter

Real butter enhances flavor and texture in baked goods.

20 Christmas Sweet Treats to Try

Here are the stars of this Christmas sweet treats collection:

Cookies

  • Classic sugar cookies
  • Gingerbread cookies
  • Chocolate crinkle cookies
  • Peanut butter blossoms
  • Shortbread cookies

Cakes & Bars

  • Red velvet cake
  • Yule log cake
  • Chocolate fudge brownies
  • Cheesecake bars
  • Cranberry orange loaf

Drinks & No-Bake Treats

  • Hot chocolate
  • Eggnog
  • Peppermint bark
  • Chocolate truffles
  • Rice crispy treats

Extra Festive Ideas

  • Cupcakes with holiday frosting
  • Donuts with glaze
  • Caramel popcorn
  • Marshmallow treats
  • Candy fudge

Tips for Perfect Results

To make the best Christmas sweet treats, keep these tips in mind:

  • Measure ingredients accurately
  • Don’t overmix batters
  • Preheat your oven properly
  • Use fresh ingredients
  • Decorate once desserts are fully cooled

Consistency is key for holiday baking success.

Variations

You can customize these 20 Christmas sweet treats (cookies, cakes, drinks, & more!):

Healthier Options

Use less sugar or alternative sweeteners.

Gluten-Free Version

Use gluten-free flour blends.

Vegan Options

Replace dairy and eggs with plant-based alternatives.

Flavor Twists

Add peppermint, caramel, or citrus flavors.

What to Serve With It

These Christmas sweet treats pair perfectly with:

  • Coffee or tea
  • Hot chocolate
  • Mulled wine
  • Ice cream

Create a dessert table that guests will love.

Storage & Reheating

  • Cookies: Store in airtight containers up to 1 week
  • Cakes: Refrigerate up to 5 days
  • Freezing: Most baked goods freeze well
  • Drinks: Best served fresh

Proper storage keeps your treats tasting fresh.

Common Mistakes to Avoid

When making Christmas sweet treats, avoid:

  • Overbaking cookies
  • Using expired ingredients
  • Skipping chilling steps when needed
  • Decorating too early

Attention to detail ensures perfect results.

FAQs

Can I make these treats ahead of time?

Yes, many can be made days in advance.

What are the easiest Christmas desserts?

Cookies, fudge, and no-bake treats are the easiest.

How do I store holiday cookies?

Keep them in airtight containers at room temperature.

Can I freeze Christmas desserts?

Yes, most cookies and cakes freeze very well.

Final Thoughts

These 20 Christmas sweet treats (cookies, cakes, drinks, & more!) are everything you need to create a magical holiday season. With a mix of classics and creative ideas, you’ll have plenty of inspiration to bake, share, and celebrate.

So grab your apron, turn on some holiday music, and start baking your way to a sweeter Christmas!

Roasted Peanut Kale Crunch Salad Recipe – A Pinch of Yum Inspired Healthy Favorite

If you’re searching for a salad that’s anything but boring, this Roasted Peanut Kale Crunch Salad Recipe from Pinch of Yum is exactly what you need. It’s crunchy, nutty, slightly sweet, and packed with fresh textures that make every bite exciting.

This kale crunch salad recipe is inspired by the popular Pinch of Yum style of cooking—simple ingredients, bold flavors, and effortless prep. The roasted peanuts bring depth and richness, while the kale holds everything together with its hearty bite.

Why You’ll Love This Roasted Peanut Kale Crunch Salad Recipe

This roasted peanut kale crunch salad recipe from Pinch of Yum is a must-try for salad lovers:

  • Packed with crunchy textures and bold flavor
  • Healthy and nutrient-rich ingredients
  • Easy to prepare in under 20 minutes
  • Perfect for meal prep and lunches
  • Inspired by a fan-favorite food blog

It’s a salad that actually keeps you full and satisfied.

Ingredients

To make this roasted peanut kale crunch salad recipe, you’ll need:

  • 1 bunch kale, chopped
  • 1 cup shredded cabbage (green or purple)
  • 1 cup carrots, shredded
  • 1/2 cup roasted peanuts
  • 2 green onions, sliced
  • 1/4 cup cilantro, chopped
  • 2 tbsp sesame seeds

Dressing:

  • 3 tbsp peanut butter
  • 2 tbsp soy sauce
  • 1 tbsp rice vinegar
  • 1 tbsp honey or maple syrup
  • 1 tsp sesame oil
  • 1–2 tbsp warm water (to thin)

Ingredient Notes

Kale

Massage kale lightly to soften its texture and reduce bitterness.

Roasted Peanuts

Add crunch, protein, and deep nutty flavor.

Peanut Dressing

Creamy, salty, and slightly sweet—this ties everything together.

Step-by-Step Instructions

1. Prep the Kale

Wash, chop, and massage kale until tender.

2. Mix Vegetables

Combine kale, cabbage, carrots, green onions, and cilantro.

3. Make Dressing

Whisk peanut butter, soy sauce, vinegar, honey, sesame oil, and water.

4. Combine Salad

Pour dressing over salad and toss well.

5. Add Peanuts

Sprinkle roasted peanuts and sesame seeds on top.

6. Serve

Enjoy immediately or chill for later.

Tips for Perfect Results

To make the best roasted peanut kale crunch salad recipe from Pinch of Yum, follow these tips:

  • Massage kale for better texture
  • Thin dressing gradually for smooth consistency
  • Add peanuts last to keep crunch
  • Chill salad for deeper flavor
  • Use fresh vegetables for best taste

These small steps make a big difference.

Variations

You can customize this kale crunch salad recipe easily:

Protein Boost Version

Add grilled chicken or tofu.

Spicy Version

Add chili flakes or sriracha to dressing.

Asian-Inspired Version

Add edamame and sesame oil.

Citrus Version

Add lime juice for brightness.

What to Serve With It

This roasted peanut kale crunch salad recipe pairs well with:

  • Grilled chicken or salmon
  • Rice bowls
  • Noodles
  • Spring rolls

It also works great as a standalone meal.

Storage & Reheating

  • Refrigerator: Store up to 3 days
  • Best practice: Keep dressing separate if meal prepping
  • Do not freeze

The salad actually tastes better after a few hours in the fridge.

Common Mistakes to Avoid

When making this kale crunch salad recipe, avoid:

  • Not massaging kale
  • Overdressing the salad
  • Using stale peanuts
  • Skipping texture balance

These mistakes can affect overall flavor and crunch.

FAQs

Can I use spinach instead of kale?

Yes, but kale holds dressing better.

Is this salad good for meal prep?

Yes, it stays crunchy for days.

Can I make it nut-free?

Yes, use sunflower seeds instead.

What protein works best?

Chicken, tofu, or shrimp all work well.

Final Thoughts

This Roasted Peanut Kale Crunch Salad Recipe from Pinch of Yum is fresh, crunchy, and incredibly satisfying. It’s the perfect balance of healthy and flavorful, making it ideal for lunches, dinners, or meal prep.

Once you try it, it will easily become a go-to salad in your kitchen.

Sticky Gochujang Tofu with Herbs and Peanuts – Sweet, Spicy & Ultra Flavorful

If you’re craving something bold, spicy, slightly sweet, and deeply satisfying, this Sticky Gochujang Tofu with Herbs and Peanuts is exactly what you need. It’s crispy on the outside, tender on the inside, and coated in a glossy gochujang sauce that clings perfectly to every bite.

This sticky gochujang tofu recipe is inspired by Korean flavors and is perfect for weeknight dinners when you want something fast but exciting. Fresh herbs and crunchy peanuts bring balance and texture, making every bite unforgettable.

Why You’ll Love This Sticky Gochujang Tofu with Herbs and Peanuts

This sticky gochujang tofu with herbs and peanuts is a total flavor bomb:

  • Crispy, chewy, and sticky texture combination
  • Sweet, spicy, and savory Korean-inspired sauce
  • Quick and easy 30-minute recipe
  • Naturally vegan and protein-packed
  • Perfect for rice bowls or lettuce wraps

It’s the kind of dish that makes tofu absolutely irresistible.

Ingredients

To make this sticky gochujang tofu with herbs and peanuts, you’ll need:

  • 14 oz firm or extra-firm tofu
  • 2 tbsp cornstarch
  • 2 tbsp oil (for frying)
  • 2 tbsp gochujang (Korean chili paste)
  • 1 tbsp soy sauce
  • 1 tbsp maple syrup or honey
  • 1 tbsp rice vinegar
  • 1 tsp sesame oil
  • 2 cloves garlic, minced
  • 1 tsp grated ginger
  • Fresh cilantro or Thai basil
  • 2 tbsp crushed peanuts
  • Cooked rice (for serving)

Ingredient Notes

Gochujang

This Korean chili paste is the heart of the dish, giving it sweet heat and depth.

Tofu

Use extra-firm tofu for best crispiness and texture.

Peanuts

Add crunch and contrast to the sticky sauce.

Step-by-Step Instructions

1. Prepare the Tofu

Press tofu and cut into cubes.

2. Coat the Tofu

Toss tofu with cornstarch until lightly coated.

3. Pan-Fry

Fry tofu in hot oil until golden and crispy on all sides.

4. Make the Sauce

Mix gochujang, soy sauce, maple syrup, vinegar, garlic, and ginger.

5. Combine

Pour sauce into pan and toss tofu until fully coated and sticky.

6. Serve

Top with herbs and crushed peanuts over rice.

Tips for Perfect Results

To make the best sticky gochujang tofu with herbs and peanuts, follow these tips:

  • Press tofu well to remove moisture
  • Don’t overcrowd the pan when frying
  • Cook sauce just until it thickens
  • Toss tofu gently to avoid breaking
  • Add herbs at the end for freshness

These steps guarantee perfect texture and flavor.

Variations

You can customize this sticky gochujang tofu recipe easily:

Extra Spicy Version

Add chili flakes or extra gochujang.

Peanut Sauce Version

Add peanut butter for a creamy twist.

Vegetable Version

Add broccoli, bell peppers, or snap peas.

Low-Sugar Version

Replace maple syrup with a sugar-free alternative.

What to Serve With It

This sticky gochujang tofu with herbs and peanuts pairs well with:

  • Steamed jasmine rice
  • Brown rice or quinoa
  • Lettuce wraps
  • Pickled vegetables

It also works great in meal prep bowls.

Storage & Reheating

  • Refrigerator: Store up to 4 days
  • Freezer: Not ideal due to texture changes
  • Reheating: Warm in skillet with a splash of water

Keep herbs and peanuts fresh by adding them after reheating.

Common Mistakes to Avoid

When making sticky gochujang tofu with herbs and peanuts, avoid:

  • Skipping tofu pressing
  • Using low heat when frying
  • Overcooking sauce until it burns
  • Adding herbs too early

These mistakes can affect texture and freshness.

FAQs

Can I bake the tofu instead of frying?

Yes, bake at 400°F until crispy.

Is gochujang very spicy?

It has mild to medium heat with sweetness.

Can I make it gluten-free?

Yes, use gluten-free soy sauce.

What protein can replace tofu?

Chicken, shrimp, or tempeh work well.

Final Thoughts

This Sticky Gochujang Tofu with Herbs and Peanuts is bold, satisfying, and packed with flavor. The combination of crispy tofu, sticky sauce, fresh herbs, and crunchy peanuts makes it an unforgettable meal.

Once you try it, it will become a regular favorite in your kitchen.

Roasted Corn and Fried Egg Taco Recipe – A Pinch of Yum Inspired Breakfast Favorite

If you’re looking for a bold, satisfying breakfast that feels both comforting and exciting, this Roasted Corn and Fried Egg Taco Recipe from Pinch of Yum is exactly what you need. It combines sweet roasted corn, crispy tortillas, and perfectly fried eggs for a simple but unforgettable meal.

These roasted corn and fried egg tacos are inspired by the popular food blog Pinch of Yum, known for fresh, approachable recipes. This version brings that same energy into your kitchen with minimal effort and maximum flavor.

Why You’ll Love This Roasted Corn and Fried Egg Taco Recipe

This roasted corn and fried egg taco recipe is a breakfast game-changer:

  • Quick and easy to prepare in under 30 minutes
  • Sweet, smoky, and savory flavor combination
  • Perfect use for fresh or frozen corn
  • Budget-friendly ingredients
  • Great for breakfast, brunch, or even dinner

It’s the kind of recipe you’ll keep coming back to.

Ingredients

To make these roasted corn and fried egg tacos, you’ll need:

  • 2 cups corn kernels (fresh or frozen)
  • 4 eggs
  • 6 small corn or flour tortillas
  • 2 tbsp olive oil
  • Salt and pepper to taste
  • 1 tsp chili powder or smoked paprika
  • 1 avocado, sliced
  • Fresh cilantro
  • Lime wedges
  • Optional: cotija cheese or feta

Ingredient Notes

Roasted Corn

Roasting brings out sweetness and adds a smoky flavor that elevates the tacos.

Fried Eggs

Runny yolks create a rich sauce that ties everything together.

Tortillas

Corn tortillas add authenticity, but flour works for a softer bite.

Step-by-Step Instructions

1. Roast the Corn

Heat a skillet and cook corn until golden and slightly charred.

2. Season Corn

Add salt, pepper, and chili powder.

3. Fry the Eggs

Cook eggs in a separate pan to your preferred doneness.

4. Warm Tortillas

Lightly heat tortillas until soft and pliable.

5. Assemble Tacos

Add roasted corn, fried egg, avocado, and toppings.

6. Finish

Squeeze fresh lime over tacos before serving.

Tips for Perfect Results

To make the best roasted corn and fried egg tacos, follow these tips:

  • Don’t overcrowd the pan when roasting corn
  • Use fresh eggs for best texture
  • Warm tortillas right before serving
  • Season every layer for balanced flavor
  • Add lime juice at the end for freshness

These small details make a big difference.

Variations

You can easily customize this roasted corn and fried egg taco recipe:

Spicy Version

Add jalapeños or hot sauce.

Cheesy Version

Sprinkle cotija or shredded cheddar.

Vegan Version

Replace eggs with tofu scramble.

Protein Boost

Add black beans or grilled chicken.

What to Serve With It

These roasted corn and fried egg tacos pair well with:

  • Fresh fruit salad
  • Breakfast potatoes
  • Green salsa or pico de gallo
  • Smoothies or fresh juice

Perfect for a full brunch spread.

Storage & Reheating

  • Corn mixture: Store up to 3 days in fridge
  • Eggs: Best cooked fresh
  • Tortillas: Reheat in skillet before serving
  • Assembled tacos: Not recommended for storage

Keep components separate for best texture.

Common Mistakes to Avoid

When making roasted corn and fried egg tacos, avoid:

  • Overcooking eggs until dry
  • Skipping corn roasting step
  • Using cold tortillas
  • Under-seasoning corn

Balance and timing are key.

FAQs

Can I use canned corn?

Yes, but fresh or frozen gives better flavor.

Can I make this ahead of time?

You can prep corn ahead, but cook eggs fresh.

What’s the best tortilla type?

Corn tortillas are most traditional.

Can I make it spicy?

Yes, add chili powder, hot sauce, or jalapeños.

Final Thoughts

This Roasted Corn and Fried Egg Taco Recipe from Pinch of Yum is the perfect mix of simple ingredients and bold flavor. It’s quick, satisfying, and endlessly customizable.

Once you try these tacos, they’ll likely become a regular part of your breakfast rotation.

Curry Chicken Lemongrass Bowls for Weeknight Dinners – Fresh, Fragrant & Easy

When it comes to busy weeknights, nothing beats a quick, flavorful, and nourishing meal like these Curry Chicken Lemongrass Bowls for Weeknight Dinners. Packed with tender chicken, aromatic lemongrass, creamy coconut curry sauce, and fresh toppings, this dish brings restaurant-quality flavor straight to your kitchen in under 30 minutes.

This curry chicken lemongrass bowl recipe is inspired by Southeast Asian flavors, combining warmth, spice, and freshness in every bite. It’s comforting yet light, making it perfect for any night of the week.

Why You’ll Love These Curry Chicken Lemongrass Bowls for Weeknight Dinners

This Curry Chicken Lemongrass Bowls for Weeknight Dinners recipe is a game-changer for busy households:

  • Quick and ready in under 30 minutes
  • Packed with bold, aromatic flavors
  • Healthy and balanced meal in one bowl
  • Easy to customize with vegetables or proteins
  • Perfect for meal prep and leftovers

It’s the kind of dinner you’ll crave again and again.

Ingredients

To make these curry chicken lemongrass bowls for weeknight dinners, you’ll need:

  • 1 lb chicken breast or thighs, sliced
  • 1 can coconut milk
  • 1 stalk lemongrass (crushed)
  • 2 tbsp curry paste (yellow or red)
  • 2 cloves garlic, minced
  • 1 tbsp ginger, grated
  • 1 tbsp soy sauce
  • 1 tbsp lime juice
  • 1 tbsp oil
  • Cooked jasmine rice (for serving)
  • Fresh cilantro, basil, and lime wedges

Optional vegetables:

  • Bell peppers
  • Snap peas
  • Carrots

Ingredient Notes

Lemongrass

Lemongrass gives the dish its signature citrusy aroma and fresh flavor.

Coconut Milk

Creates a creamy, rich curry sauce that balances the spices.

Curry Paste

Use red for heat or yellow for a milder, earthy flavor.

Step-by-Step Instructions

1. Sauté Aromatics

Heat oil and cook garlic, ginger, and lemongrass until fragrant.

2. Cook Chicken

Add chicken and sear until lightly browned.

3. Add Curry Base

Stir in curry paste and cook for 1–2 minutes.

4. Add Coconut Milk

Pour in coconut milk and simmer until chicken is tender.

5. Season

Add soy sauce and lime juice for balance.

6. Serve

Spoon over rice and top with fresh herbs.

Tips for Perfect Results

To make the best curry chicken lemongrass bowls for weeknight dinners, follow these tips:

  • Crush lemongrass to release flavor
  • Don’t overcook chicken to keep it tender
  • Simmer gently for creamy sauce
  • Taste and adjust seasoning before serving
  • Use fresh herbs for brightness

These steps enhance both flavor and texture.

Variations

You can easily customize this curry chicken lemongrass bowl recipe:

Vegetarian Version

Swap chicken for tofu or chickpeas.

Spicy Version

Add extra chili or chili oil.

Veggie-Packed Version

Add broccoli, spinach, or bell peppers.

Peanut Curry Twist

Add peanut butter for a richer sauce.

What to Serve With It

These curry chicken lemongrass bowls for weeknight dinners pair well with:

  • Steamed jasmine rice
  • Naan or flatbread
  • Fresh cucumber salad
  • Pickled vegetables

They create a balanced and satisfying meal.

Storage & Reheating

  • Refrigerator: Store up to 4 days
  • Freezer: Freeze curry (without rice) up to 2 months
  • Reheating: Warm gently on stovetop or microwave

Add a splash of coconut milk when reheating for creaminess.

Common Mistakes to Avoid

When making curry chicken lemongrass bowls for weeknight dinners, avoid:

  • Skipping lemongrass prep
  • Overcooking chicken
  • Boiling coconut milk too hard
  • Under-seasoning curry

These mistakes can affect flavor and texture.

FAQs

Can I use store-bought curry paste?

Yes, it makes this recipe even easier.

Can I make it ahead of time?

Absolutely, it’s great for meal prep.

What protein can I use instead of chicken?

Shrimp, tofu, or beef work well.

Is lemongrass necessary?

It adds signature flavor, but ginger and lime can substitute.

Final Thoughts

These Curry Chicken Lemongrass Bowls for Weeknight Dinners are flavorful, comforting, and incredibly easy to make. With creamy coconut curry, fragrant lemongrass, and fresh herbs, they turn a simple dinner into something special.

Once you try them, they’ll become a regular part of your weeknight rotation.

Beet and Burrata Salad with Fried Bread – Fresh, Elegant & Flavor-Packed

If you’re looking for a salad that feels both elegant and satisfying, this Beet and Burrata Salad with Fried Bread is exactly what you need. It combines earthy roasted beets, creamy burrata cheese, and crispy golden fried bread for a perfect balance of textures and flavors.

This beet and burrata salad with fried bread is ideal for entertaining, light lunches, or as a stunning appetizer. It’s simple to prepare but looks like something you’d order at a high-end restaurant.

Why You’ll Love This Beet and Burrata Salad with Fried Bread

This beet and burrata salad with fried bread stands out for many reasons:

  • Beautiful, restaurant-quality presentation
  • Creamy, crunchy, and earthy flavor combination
  • Simple ingredients with gourmet results
  • Perfect for entertaining guests
  • Naturally colorful and healthy

It’s a salad that truly impresses without being complicated.

Ingredients

To make this beet and burrata salad with fried bread, you’ll need:

  • 3–4 medium beets (red and golden if available)
  • 1–2 balls fresh burrata cheese
  • 2 slices rustic bread (for frying)
  • 2 tbsp olive oil
  • 1 tbsp butter
  • Salt and pepper to taste
  • Fresh herbs (basil or parsley)
  • Optional: balsamic glaze

Ingredient Notes

Beets

Roasting brings out their natural sweetness and deep earthy flavor.

Burrata Cheese

Creamy burrata adds richness and balances the earthy beets.

Fried Bread

Crispy fried bread adds crunch and texture contrast.

Step-by-Step Instructions

1. Roast the Beets

Wrap beets in foil and roast until tender, then slice.

2. Prepare Fried Bread

Cut bread into cubes and fry in olive oil and butter until golden.

3. Assemble Salad

Arrange beet slices on a plate.

4. Add Burrata

Place burrata in the center and gently tear it open.

5. Add Fried Bread

Scatter crispy bread pieces over the salad.

6. Finish

Drizzle olive oil, season, and add herbs or balsamic glaze.

Tips for Perfect Results

To make the best beet and burrata salad with fried bread, follow these tips:

  • Roast beets until fully tender
  • Let beets cool before slicing
  • Use fresh burrata for creaminess
  • Fry bread just before serving
  • Season lightly but thoughtfully

These steps bring out the best flavor and texture.

Variations

You can easily customize this beet and burrata salad with fried bread:

Citrus Version

Add orange segments for brightness.

Nutty Version

Top with walnuts or pistachios.

Honey Drizzle

Add honey or balsamic glaze for sweetness.

Greens Addition

Serve over arugula or spinach.

What to Serve With It

This beet and burrata salad with fried bread pairs well with:

  • Grilled chicken or fish
  • Crusty bread
  • Light soups
  • White wine

It works as both a starter or a light main dish.

Storage & Reheating

  • Beets: Store roasted beets up to 4 days
  • Assembled salad: Best eaten fresh
  • Fried bread: Store separately in airtight container

Avoid assembling too early to keep textures crisp.

Common Mistakes to Avoid

When making beet and burrata salad with fried bread, avoid:

  • Overcooking or undercooking beets
  • Using cold burrata straight from fridge
  • Adding fried bread too early
  • Overdressing the salad

Balance is key for best results.

FAQs

Can I use pre-cooked beets?

Yes, but roasting gives better flavor.

What can I use instead of burrata?

Fresh mozzarella or ricotta works well.

Can I make this ahead of time?

Yes, but assemble just before serving.

Is fried bread necessary?

It adds crunch, but croutons can be substituted.

Final Thoughts

This Beet and Burrata Salad with Fried Bread is a stunning combination of flavors and textures. Earthy beets, creamy burrata, and crispy bread come together in a dish that feels both simple and gourmet.

It’s perfect for impressing guests or treating yourself to something special at home.

Easy Lemon Poppy Seed Muffins – Soft, Moist & Bakery-Style Treat

If you love bright, citrusy baked goods, these Easy Lemon Poppy Seed Muffins will quickly become a favorite in your kitchen. They’re soft, fluffy, and perfectly balanced with fresh lemon flavor and a subtle crunch from poppy seeds.

This lemon poppy seed muffins recipe is simple enough for beginners yet tastes like something straight from a bakery. Whether you’re making them for breakfast, brunch, or an afternoon snack, they deliver a refreshing burst of flavor in every bite.

Why You’ll Love These Easy Lemon Poppy Seed Muffins

These Easy Lemon Poppy Seed Muffins are a must-bake for several reasons:

  • Soft, moist, and fluffy texture
  • Bright and refreshing lemon flavor
  • Simple pantry ingredients
  • Ready in under 30 minutes
  • Perfect for breakfast or snacking

They’re the kind of muffins that disappear fast!

Ingredients

To make these lemon poppy seed muffins, you’ll need:

  • 2 cups all-purpose flour
  • 3/4 cup granulated sugar
  • 2 tbsp poppy seeds
  • 2 tsp baking powder
  • 1/2 tsp salt
  • 1 cup milk
  • 1/3 cup vegetable oil or melted butter
  • 2 large eggs
  • 2 tbsp lemon zest
  • 1/4 cup fresh lemon juice
  • 1 tsp vanilla extract

Optional glaze:

  • 1 cup powdered sugar
  • 2–3 tbsp lemon juice

Ingredient Notes

Fresh Lemon is Key

Fresh lemon juice and zest give these muffins their bright, natural citrus flavor.

Poppy Seeds

They add a slight crunch and classic bakery-style texture.

Oil vs Butter

Oil makes the muffins extra moist, while butter adds richness—both work well.

Step-by-Step Instructions

1. Preheat Oven

Preheat oven to 375°F and line a muffin pan with liners.

2. Mix Dry Ingredients

In a bowl, whisk flour, sugar, baking powder, salt, and poppy seeds.

3. Mix Wet Ingredients

In another bowl, whisk milk, oil, eggs, lemon juice, zest, and vanilla.

4. Combine

Gently mix wet and dry ingredients until just combined.

5. Fill Muffin Cups

Divide batter evenly into muffin liners.

6. Bake

Bake for 18–22 minutes or until golden and set.

Tips for Perfect Results

To make the best Easy Lemon Poppy Seed Muffins, follow these tips:

  • Don’t overmix the batter
  • Use fresh lemon juice for best flavor
  • Fill muffin cups 2/3 full
  • Let muffins cool before glazing
  • Use room-temperature eggs for better texture

These small steps ensure soft, bakery-quality muffins.

Variations

You can easily customize this lemon poppy seed muffins recipe:

Lemon Blueberry Muffins

Add fresh or frozen blueberries.

Glazed Lemon Muffins

Top with a sweet lemon glaze.

Yogurt Version

Replace milk with Greek yogurt for extra moisture.

Whole Wheat Option

Substitute half the flour for whole wheat flour.

What to Serve With Them

These Easy Lemon Poppy Seed Muffins pair perfectly with:

  • Hot coffee or tea
  • Fresh fruit salad
  • Yogurt parfait
  • Scrambled eggs for breakfast

They’re great for both sweet and balanced meals.

Storage & Reheating

  • Room temperature: 2–3 days in airtight container
  • Refrigerator: up to 5 days
  • Freezer: up to 2 months
  • Reheat: microwave for 10–15 seconds

They stay soft and delicious when stored properly.

Common Mistakes to Avoid

When making lemon poppy seed muffins, avoid:

  • Overmixing the batter
  • Skipping lemon zest
  • Overbaking (dry muffins)
  • Not measuring flour correctly

These mistakes can affect texture and flavor.

FAQs

Can I make lemon poppy seed muffins ahead of time?

Yes, they store well and can be made a day or two in advance.

Can I freeze them?

Absolutely, they freeze beautifully.

Can I skip poppy seeds?

Yes, but they add texture and classic flavor.

How do I keep muffins moist?

Don’t overbake and store them in an airtight container.

Final Thoughts

These Easy Lemon Poppy Seed Muffins are soft, fluffy, and full of bright citrus flavor. They’re simple to make, perfect for any occasion, and guaranteed to impress.

Once you try them, they’ll become a regular part of your baking routine.