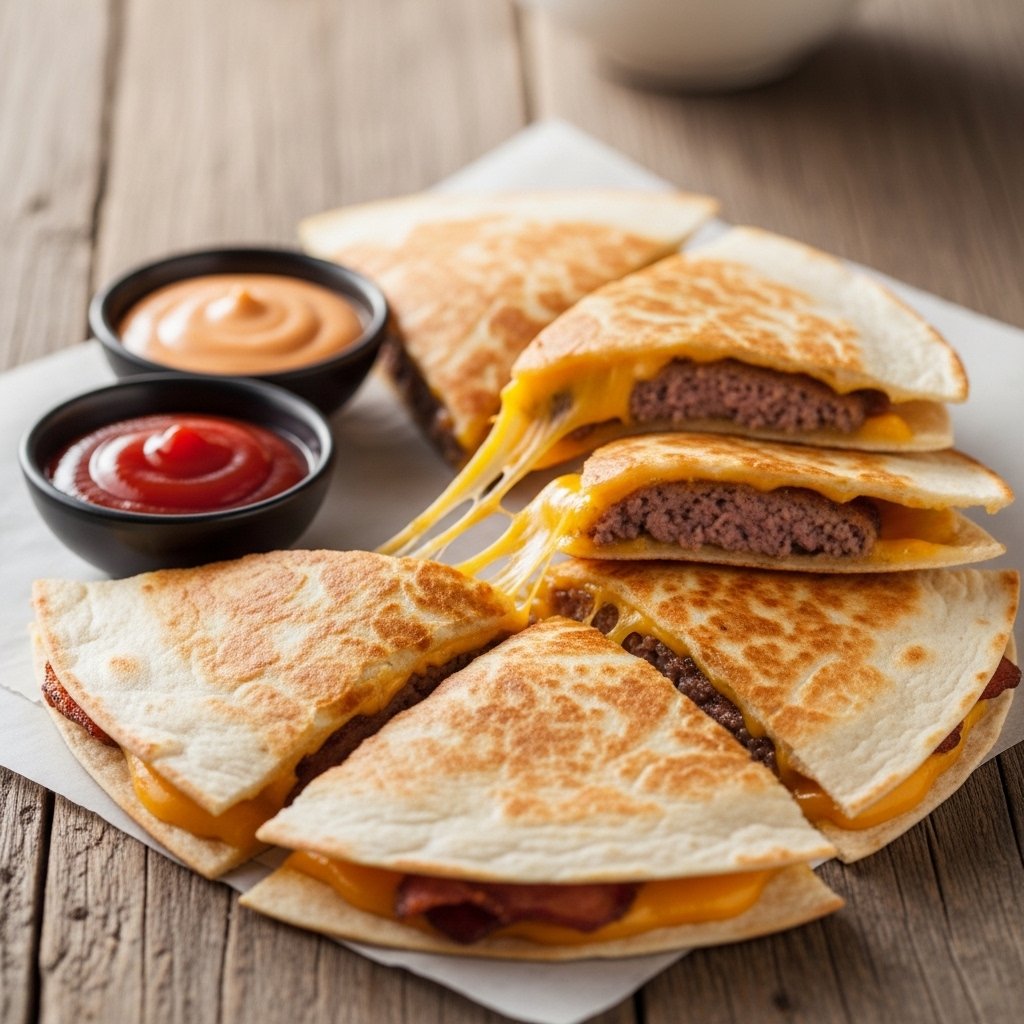
If you love both cheeseburgers and quesadillas, this Bacon Cheeseburger Quesadillas recipe is about to become your new favorite comfort food mashup. It combines juicy seasoned ground beef, crispy bacon, melted cheese, and classic burger flavors all tucked inside a golden, crispy tortilla.
This recipe is perfect for busy weeknights, game day snacks, or whenever you’re craving something indulgent and satisfying. It’s fast, simple, and delivers all the flavors of a bacon cheeseburger—without needing a grill or buns.
Why You’ll Love These Bacon Cheeseburger Quesadillas
These Bacon Cheeseburger Quesadillas are the ultimate comfort food upgrade:
- Crispy outside with gooey melted cheese inside
- All the flavors of a bacon cheeseburger in one bite
- Quick and easy—ready in under 30 minutes
- Perfect for kids and adults alike
- Great for lunch, dinner, or snacks
Once you try them, they’ll become a regular in your meal rotation.
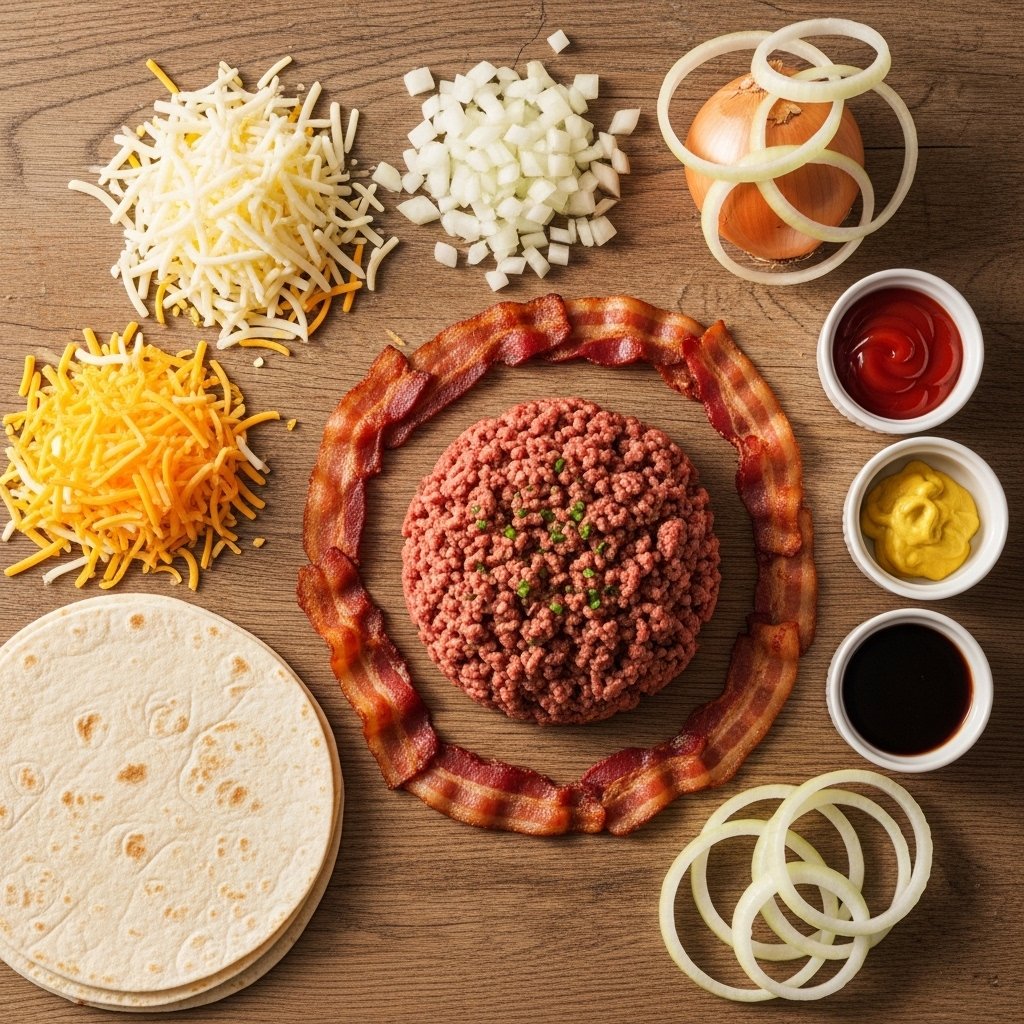
Ingredients
To make the best Bacon Cheeseburger Quesadillas, you’ll need:
- 1 lb ground beef
- 6 slices bacon, cooked and chopped
- 1 cup shredded cheddar cheese
- 1/2 cup shredded mozzarella cheese
- 1/2 small onion, finely chopped
- 1 tablespoon ketchup
- 1 tablespoon mustard
- 1 teaspoon Worcestershire sauce
- Salt and pepper to taste
- 4 large flour tortillas
- 1 tablespoon butter or oil (for cooking)
Ingredient Notes
Each ingredient in Bacon Cheeseburger Quesadillas plays an important role:
- Ground Beef: Use 80/20 for juicy flavor
- Bacon: Adds smoky crunch and richness
- Cheese: Cheddar gives sharpness, mozzarella adds meltiness
- Ketchup & Mustard: Bring classic burger flavor
- Tortillas: Large flour tortillas work best for folding and crisping
For extra flavor, you can add pickles or burger sauce.
Step-by-Step Instructions
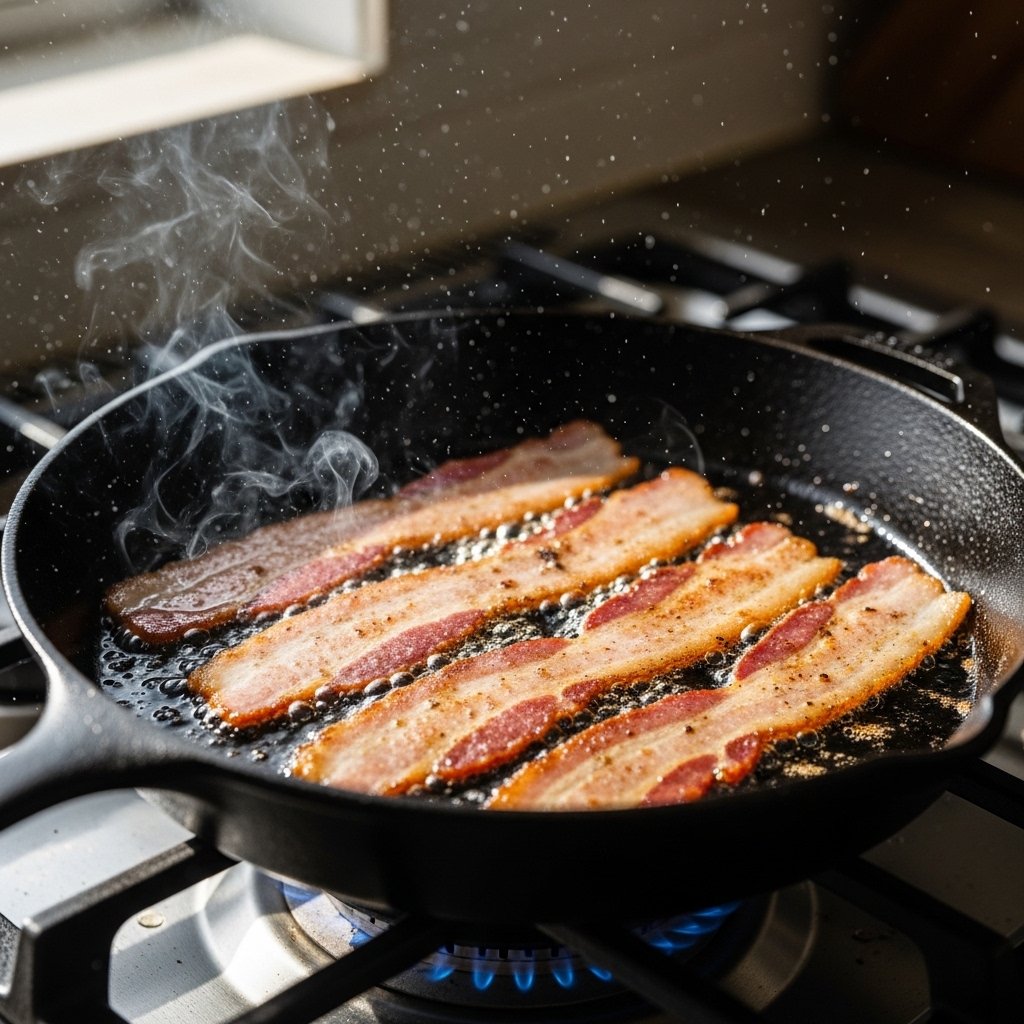
1. Cook the Bacon
Fry bacon until crispy, then chop into small pieces.
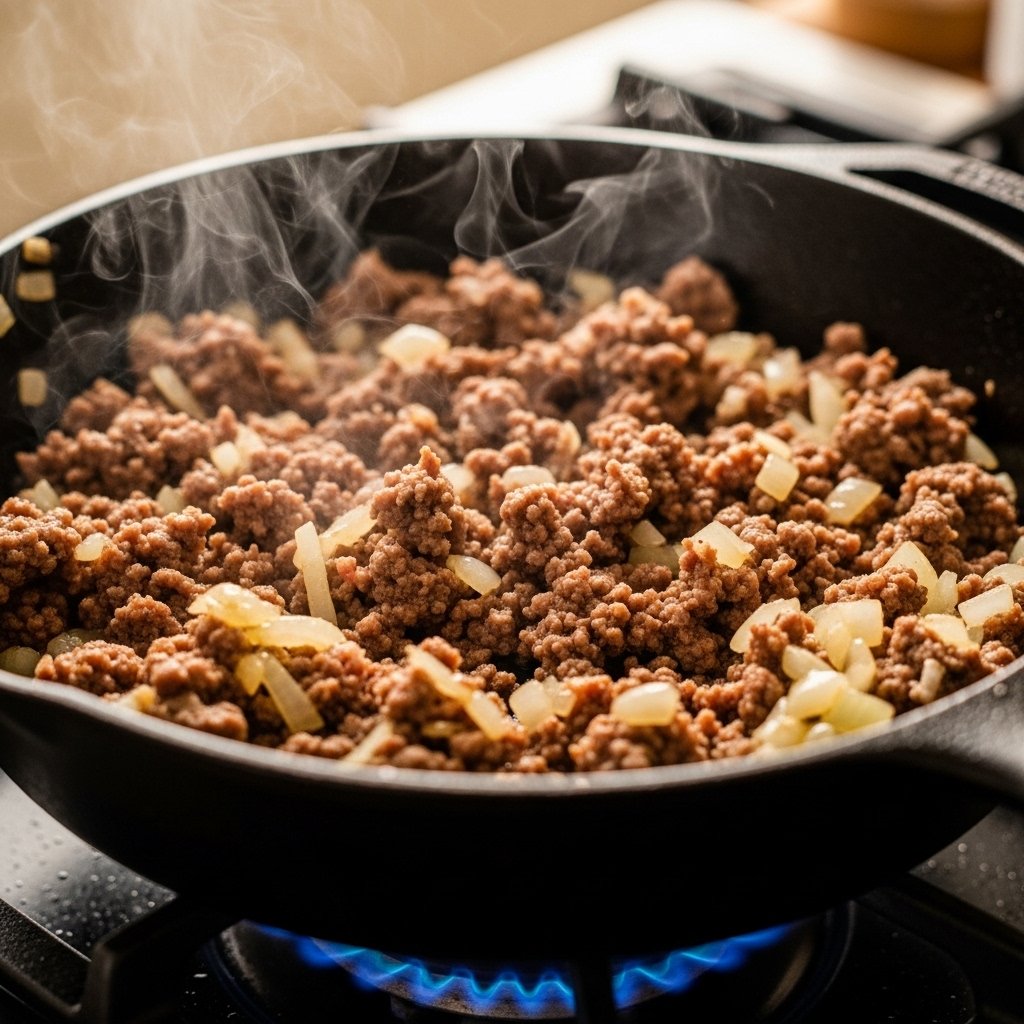
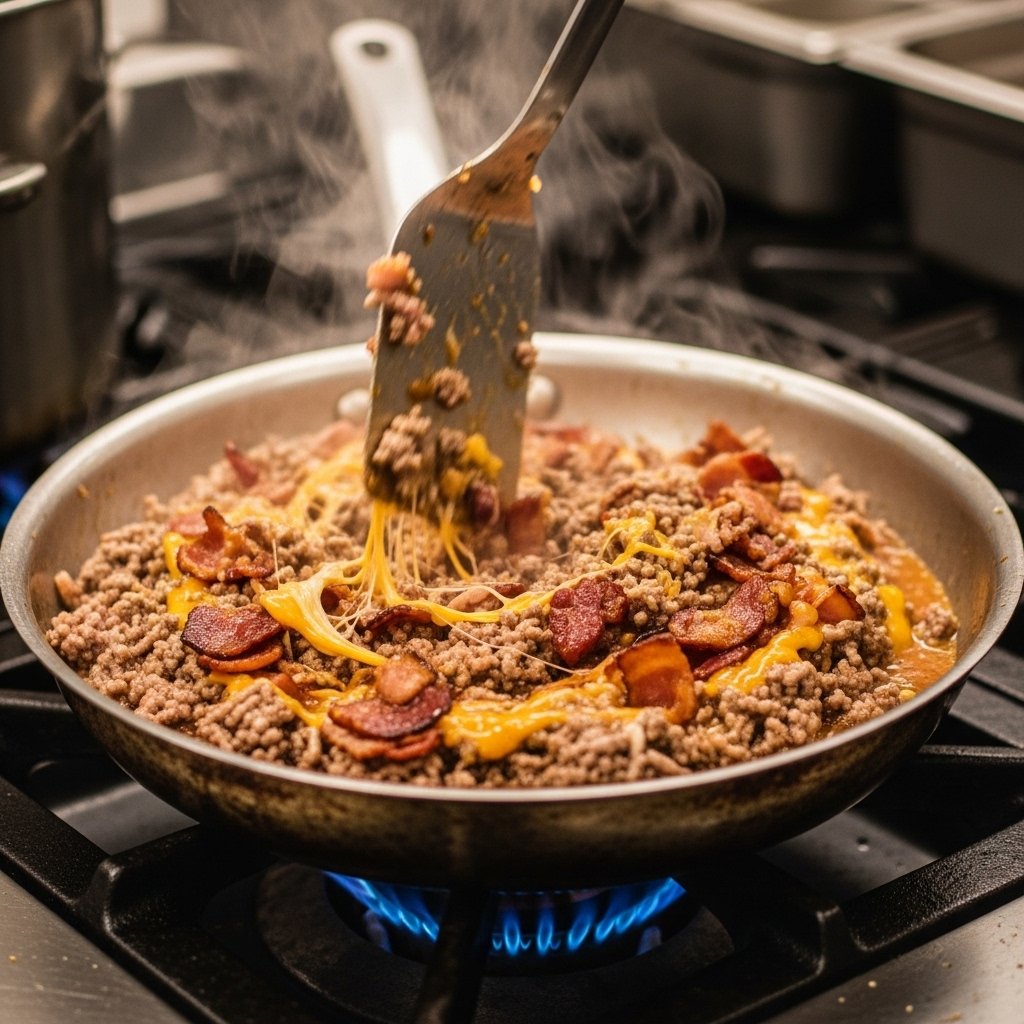
2. Cook the Beef
In the same pan, cook ground beef with onion, salt, and pepper until browned. Stir in ketchup, mustard, and Worcestershire sauce.
3. Combine Filling
Mix cooked bacon into the beef mixture and remove from heat.
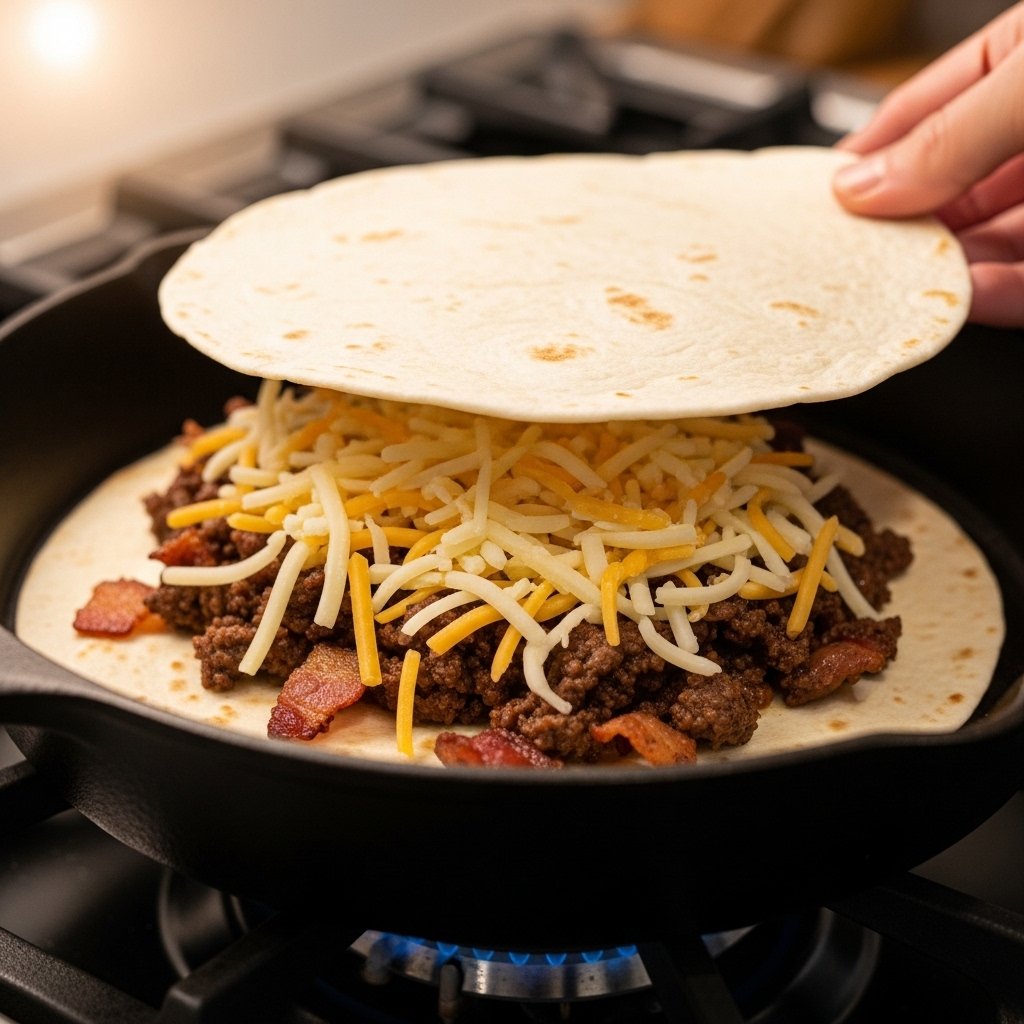
4. Assemble Quesadillas
Place tortilla in a pan, add cheese, beef mixture, more cheese, and top with another tortilla or fold.
5. Cook Until Crispy
Cook on medium heat with butter until golden brown on both sides and cheese is melted.
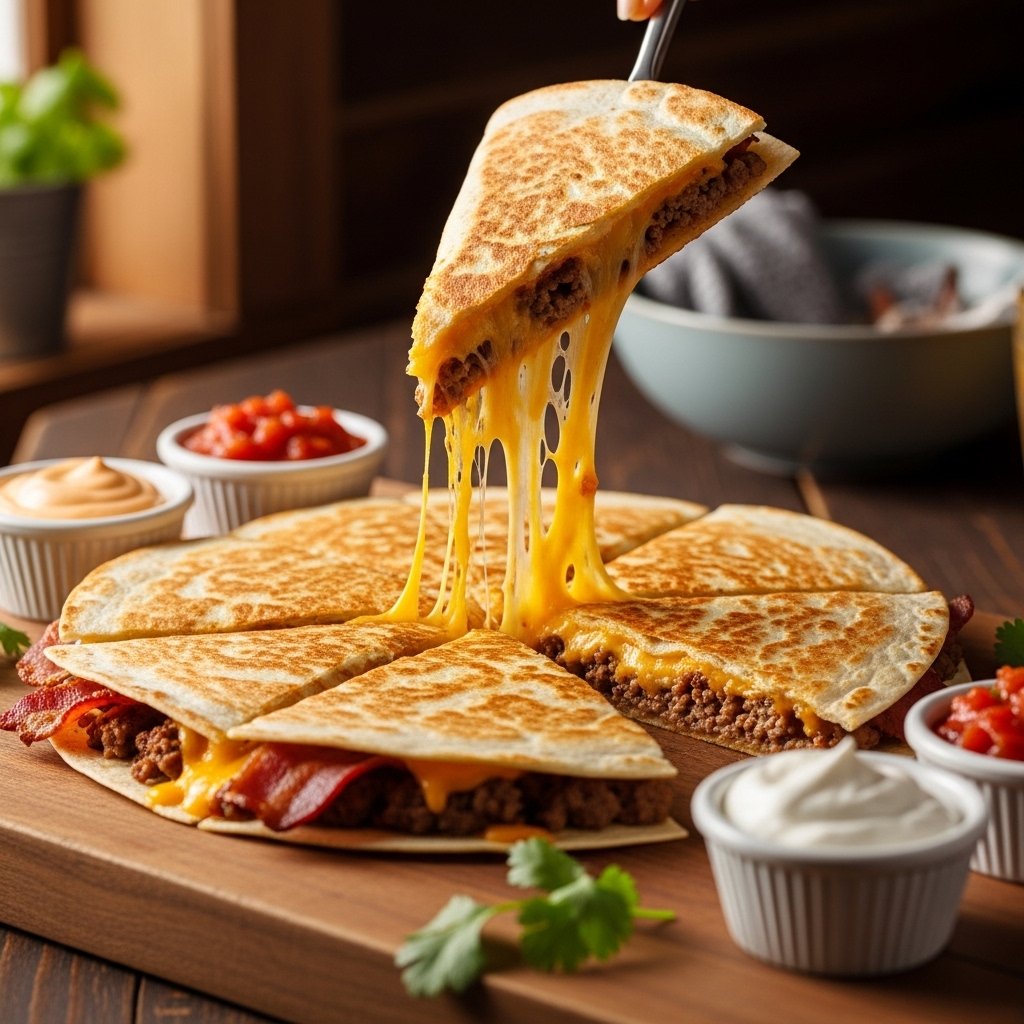
6. Slice and Serve
Cut into triangles and serve warm with dipping sauces.
Tips for Perfect Results
- Don’t overfill tortillas or they’ll break
- Use medium heat to avoid burning the outside
- Press lightly with a spatula for even crisping
- Let rest for 1–2 minutes before slicing
These tips ensure your Bacon Cheeseburger Quesadillas turn out perfectly crispy and cheesy.
Variations
Try these fun twists:
- Spicy Version: Add jalapeños or hot sauce
- BBQ Bacon Quesadilla: Swap ketchup for BBQ sauce
- Double Cheese: Use pepper jack for extra flavor
- Low-Carb Option: Use low-carb tortillas
What to Serve With It
These Bacon Cheeseburger Quesadillas pair perfectly with:
- French fries or sweet potato fries
- Coleslaw
- Pickles and dipping sauces
- Onion rings
They’re also great as party food or game-day snacks.
Storage & Reheating
- Store leftovers in airtight container for up to 3 days
- Reheat in skillet for best crispiness
- Avoid microwave if possible (makes tortillas soft)
- Can be frozen and reheated in oven
Common Mistakes to Avoid
- Overstuffing quesadillas
- Cooking on high heat (burns tortilla before cheese melts)
- Not draining excess grease
- Skipping resting time before slicing
Avoid these for the best results every time.
FAQs
1. Can I use turkey instead of beef?
Yes, ground turkey works well as a lighter option.
2. What cheese is best for quesadillas?
Cheddar and mozzarella combination gives the best melt and flavor.
3. Can I make these ahead of time?
Yes, assemble and refrigerate, then cook when ready.
4. Are Bacon Cheeseburger Quesadillas freezer-friendly?
Yes, wrap tightly and freeze for up to 2 months.
Final Thoughts
These Bacon Cheeseburger Quesadillas are the perfect blend of crispy, cheesy, and savory flavors. They take everything you love about a classic burger and transform it into a quick, handheld meal that’s perfect for any day of the week.
Once you try them, you’ll see why this recipe is a guaranteed crowd-pleaser that everyone will request again and again.