Easy Chicken Pesto Pasta Salad (25-Minutes) – Fresh, Quick & Flavor-Packed Meal

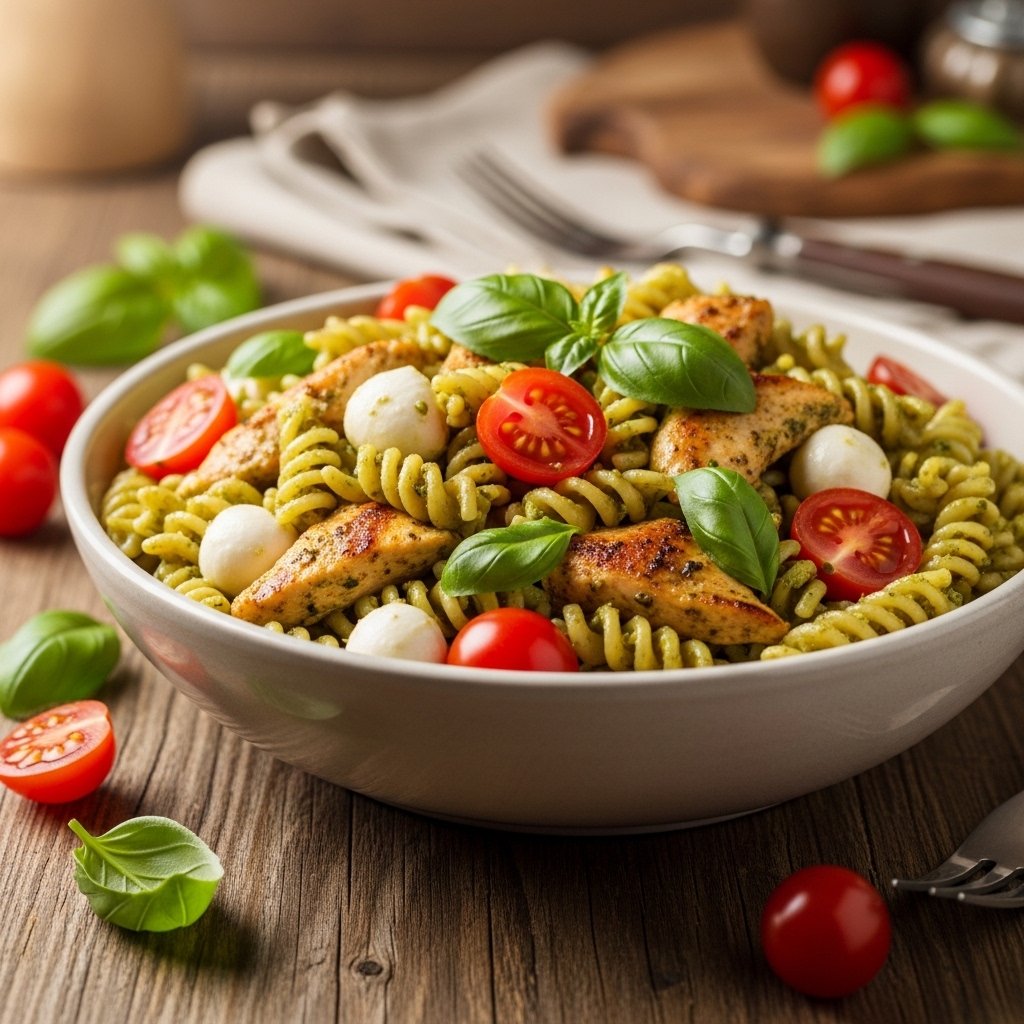
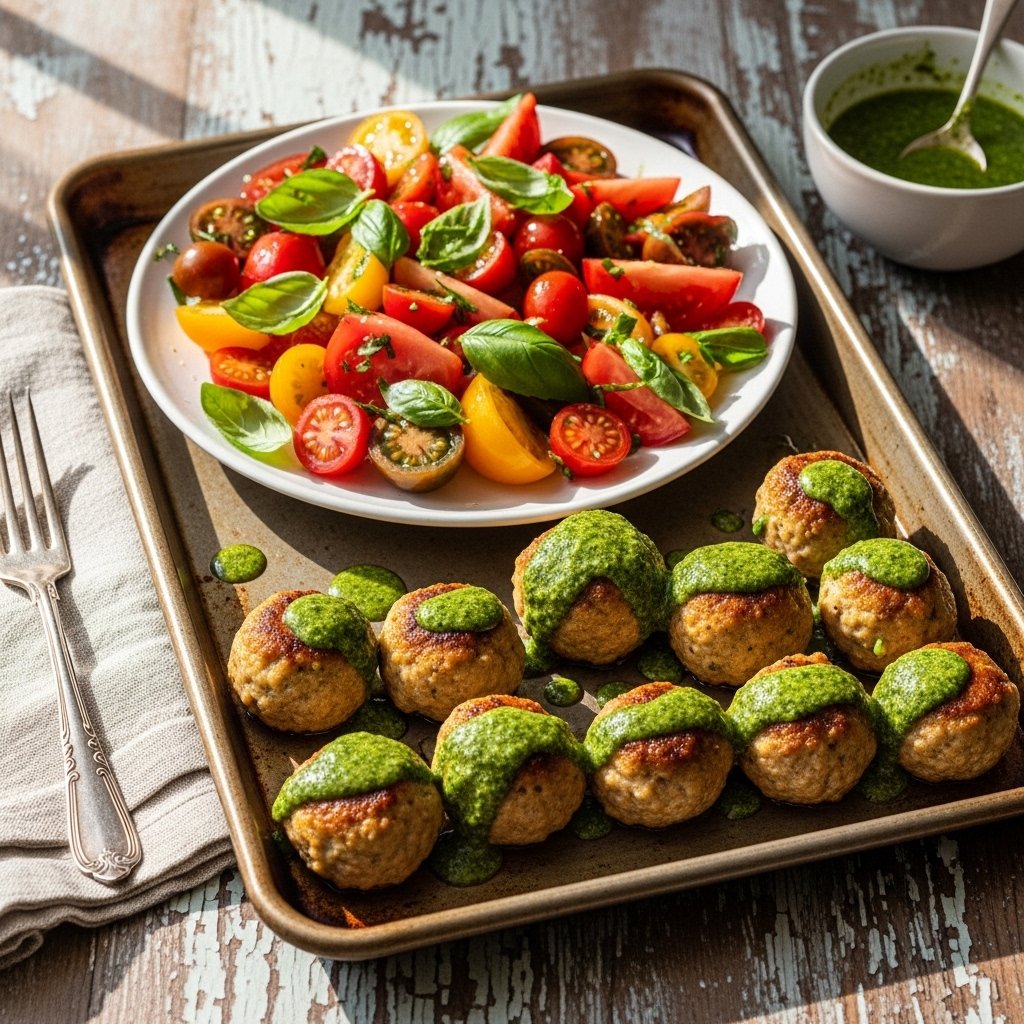
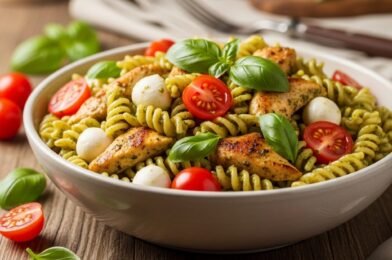
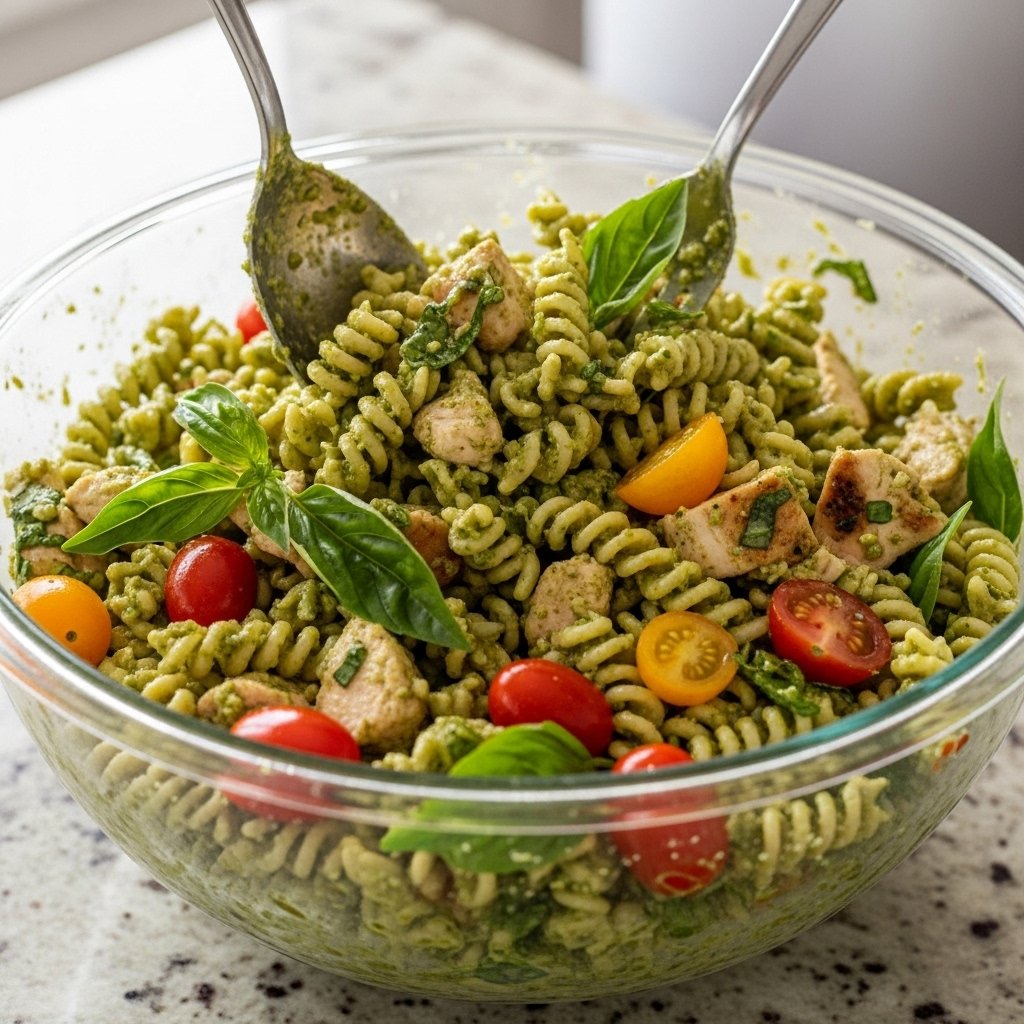
If you’re looking for a quick, flavorful, and satisfying meal that doesn’t require hours in the kitchen, this Easy Chicken Pesto Pasta Salad (25-Minutes) is exactly what you need. It’s fresh, creamy, protein-packed, and bursting with herby basil pesto flavor in every bite.

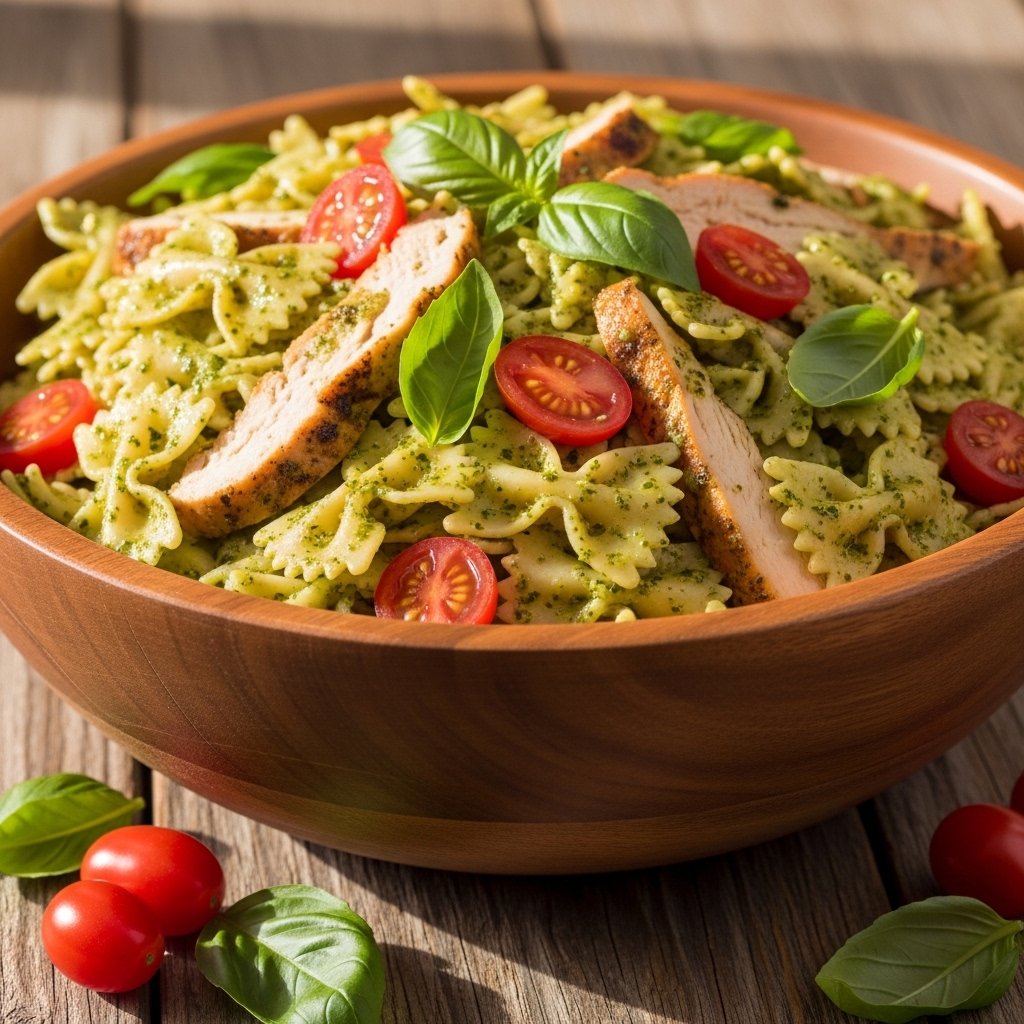
What makes this chicken pesto pasta salad so special is its perfect balance of textures and flavors—tender pasta, juicy chicken, crisp vegetables, and a rich pesto dressing that ties everything together. It’s the kind of recipe that works just as well for a busy weekday lunch as it does for a summer picnic or meal prep for the week ahead.

Why You’ll Love This Easy Chicken Pesto Pasta Salad

This Easy Chicken Pesto Pasta Salad (25-Minutes) is a true time-saver without sacrificing flavor or nutrition. It’s one of those recipes you’ll keep coming back to again and again.

  • Ready in just 25 minutes
  • Perfect for meal prep and leftovers
  • Packed with protein and fresh ingredients
  • Great warm or cold
  • Easy to customize with what you have

It’s simple, delicious, and incredibly versatile for any season.
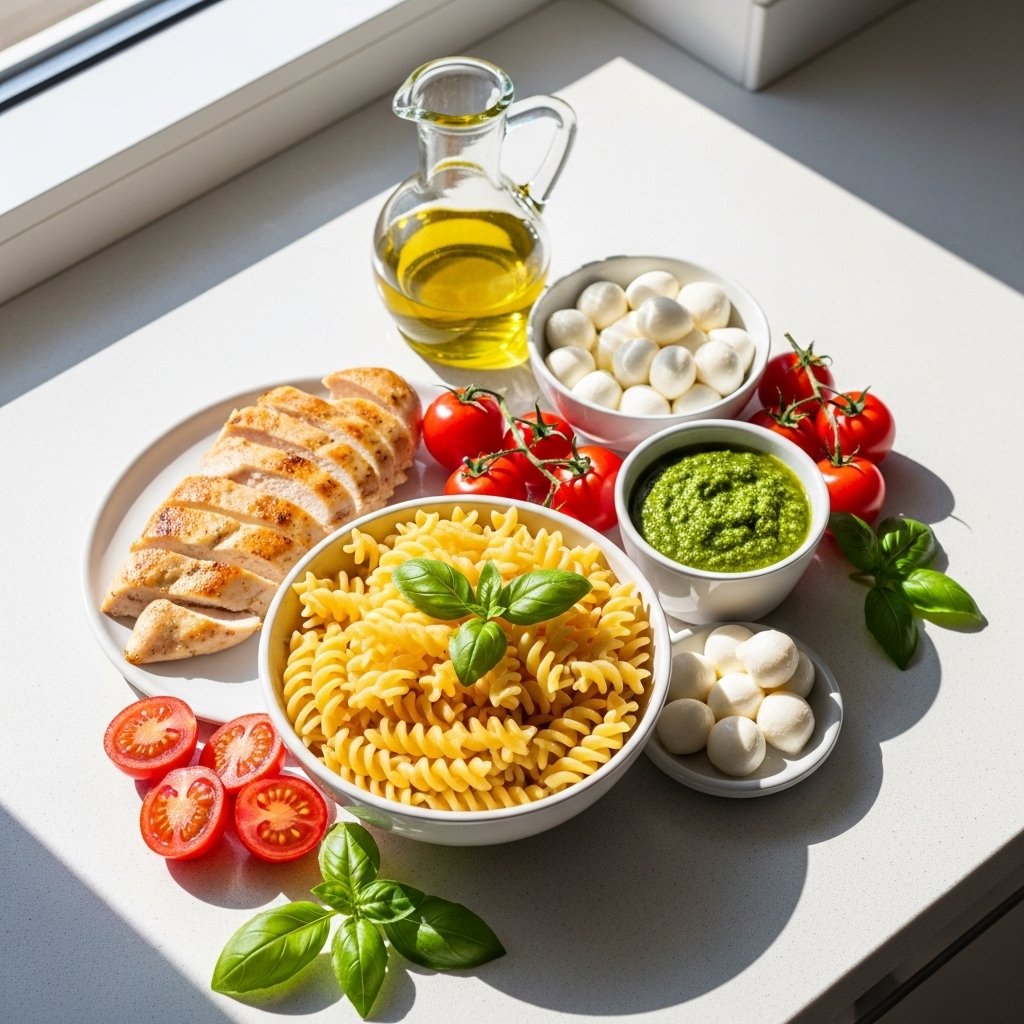
Ingredients

To make this chicken pesto pasta salad, you’ll need:

  • 2 cups cooked pasta (penne, rotini, or bowtie)
  • 2 cups cooked chicken breast (grilled or shredded)
  • 1/2 cup basil pesto
  • 1 cup cherry tomatoes (halved)
  • 1/2 cup mozzarella balls or shredded mozzarella
  • 2 tablespoons olive oil
  • Salt and black pepper to taste
  • Optional: fresh basil leaves, parmesan cheese

Ingredient Notes

Choosing the Pasta

Short pasta like rotini or bowtie works best for Easy Chicken Pesto Pasta Salad (25-Minutes) because it holds onto the pesto sauce better.

Chicken Options

You can use grilled, baked, or even rotisserie chicken for convenience. Leftover chicken works perfectly in this recipe.

Pesto Selection

Fresh basil pesto gives the best flavor, but store-bought pesto works great for saving time.

Step-by-Step Instructions

1. Cook the Pasta

Boil pasta according to package instructions until al dente. Drain and cool slightly.

2. Prepare the Chicken

Slice or shred cooked chicken into bite-sized pieces.

3. Mix Ingredients

In a large bowl, combine pasta, chicken, cherry tomatoes, and mozzarella.

4. Add Pesto

Add basil pesto and olive oil, then toss until everything is evenly coated.

5. Season and Serve

Add salt, pepper, and fresh basil if desired. Serve warm or chilled.

Tips for Perfect Results

To make the best chicken pesto pasta salad, keep these tips in mind:

  • Don’t overcook pasta—it should be slightly firm
  • Let pasta cool slightly before mixing with pesto
  • Add pesto gradually to control flavor intensity
  • Use freshly cooked or high-quality chicken
  • Chill before serving for a refreshing salad

These small steps make a big difference in texture and taste.

Variations

This Easy Chicken Pesto Pasta Salad (25-Minutes) is very flexible:

Creamy Version

Add a spoonful of Greek yogurt or mayonnaise for a creamier texture.

Vegetarian Option

Skip chicken and add chickpeas or roasted vegetables.

Low-Carb Version

Use zucchini noodles or gluten-free pasta.

Extra Protein Boost

Add boiled eggs or extra chicken breast.

What to Serve With It

This chicken pesto pasta salad pairs well with:

  • Garlic bread or toasted baguette
  • Grilled vegetables
  • Fresh green salad
  • Lemon water or iced tea

It also works great as a stand-alone meal.

Storage & Reheating

  • Refrigerator: Store in airtight container for up to 3–4 days
  • Meal prep tip: Keep pesto separate for fresher flavor
  • Reheating: Optional—best served cold or at room temperature

Add a drizzle of olive oil before serving if it feels dry.

Common Mistakes to Avoid

When making Easy Chicken Pesto Pasta Salad (25-Minutes), avoid:

  • Overcooking pasta (it becomes mushy)
  • Adding too much pesto at once
  • Not seasoning properly
  • Serving immediately without letting flavors combine

Proper balance ensures the best flavor.

FAQs

Can I make this pasta salad ahead of time?

Yes, it’s perfect for meal prep and tastes even better after chilling.

Can I use store-bought pesto?

Absolutely, it saves time and still tastes great.

Is this recipe served hot or cold?

It can be served either way, but it’s best chilled.

What pasta works best?

Short pasta like rotini, penne, or bowtie works best.

Final Thoughts

This Easy Chicken Pesto Pasta Salad (25-Minutes) is the perfect combination of convenience, freshness, and bold flavor. It’s quick enough for busy weeknights yet delicious enough to serve at gatherings or meal prep for the week.

With tender chicken, vibrant pesto, and fresh vegetables, every bite feels satisfying and refreshing. Once you try it, it will quickly become a staple in your kitchen rotation.

Sheet Pan Meatballs with Tomato Salad and Green Sauce – Easy, Fresh & Flavor-Packed Dinner

If you’re looking for a dinner that’s easy, colorful, and packed with bold flavor, these sheet pan meatballs with tomato salad and green sauce are going to become a regular in your meal rotation. This recipe brings together juicy oven-baked meatballs, a bright and fresh tomato salad, and a vibrant herb green sauce that ties everything together beautifully.

What makes this dish special is the balance: warm, savory meatballs paired with cool, refreshing tomatoes and a zesty sauce that adds freshness to every bite. It’s a complete meal made on a single sheet pan, making cleanup just as easy as cooking.

Why You’ll Love These Sheet Pan Meatballs with Tomato Salad and Green Sauce

This sheet pan meatballs with tomato salad and green sauce recipe is designed for busy home cooks who still want restaurant-quality flavor.

  • One-pan cooking means minimal cleanup
  • Juicy, flavorful meatballs baked to perfection
  • Fresh tomato salad adds brightness and balance
  • Green herb sauce brings everything together
  • Great for meal prep or family dinners

It’s simple, satisfying, and surprisingly fresh for a baked meatball dish.

Ingredients

To make these sheet pan meatballs with tomato salad and green sauce, you’ll need:

For the Meatballs:

  • 1 lb ground beef or ground turkey
  • 1/2 cup breadcrumbs
  • 1 egg
  • 2 cloves garlic (minced)
  • 1/4 cup grated Parmesan
  • 1 teaspoon salt
  • 1/2 teaspoon black pepper
  • 1 teaspoon Italian seasoning

For the Tomato Salad:

  • 2 cups cherry tomatoes
  • 2 tablespoons olive oil
  • Salt and pepper to taste
  • Fresh basil leaves

For the Green Sauce:

  • 1 cup fresh parsley or cilantro
  • 1/2 cup olive oil
  • 1 clove garlic
  • 1 tablespoon lemon juice
  • Salt to taste

Ingredient Notes

Choosing the Meat

You can use beef, turkey, or even chicken for your sheet pan meatballs with tomato salad and green sauce. Turkey creates a lighter option, while beef gives richer flavor.

Fresh Herbs Matter

The green sauce relies heavily on fresh herbs. Parsley gives a clean flavor, while cilantro adds a slightly citrusy note.

Tomatoes for Freshness

Cherry tomatoes are ideal because they are naturally sweet and hold their shape well when lightly roasted or served fresh.

Step-by-Step Instructions

1. Prepare the Meatballs

In a bowl, mix ground meat, breadcrumbs, egg, garlic, Parmesan, and seasonings until just combined.

2. Shape the Meatballs

Roll into evenly sized balls and place on a baking sheet.

3. Bake

Bake at 400°F (200°C) for about 20–25 minutes until golden and cooked through.

4. Prepare Tomato Salad

Toss cherry tomatoes with olive oil, salt, pepper, and basil.

5. Make Green Sauce

Blend herbs, olive oil, garlic, lemon juice, and salt until smooth.

6. Assemble and Serve

Plate meatballs with tomato salad and drizzle generously with green sauce.

Tips for Perfect Results

To make the best sheet pan meatballs with tomato salad and green sauce, follow these tips:

  • Don’t overmix meat or meatballs will be dense
  • Use a cookie scoop for even sizing
  • Roast meatballs until just golden for juiciness
  • Add green sauce just before serving for freshness
  • Let meatballs rest for a few minutes after baking

These small details make a big difference in flavor and texture.

Variations

This sheet pan meatballs with tomato salad and green sauce recipe is very flexible:

Spicy Version

Add chili flakes or hot sauce to the meat mixture.

Mediterranean Style

Use feta cheese and oregano in the meatballs.

Low-Carb Option

Skip breadcrumbs and use almond flour instead.

Dairy-Free Version

Omit Parmesan or replace with nutritional yeast.

What to Serve With It

These sheet pan meatballs with tomato salad and green sauce pair well with:

  • Rice or quinoa
  • Warm pita bread
  • Roasted vegetables
  • Simple green salad

They also work great in wraps or sandwiches.

Storage & Reheating

  • Refrigerator: Store for up to 4 days in an airtight container
  • Freezer: Freeze meatballs for up to 2 months
  • Reheating: Warm in oven or skillet for best texture

Keep the green sauce separate for freshness.

Common Mistakes to Avoid

When making sheet pan meatballs with tomato salad and green sauce, avoid:

  • Overcooking meatballs (they become dry)
  • Skipping seasoning in the meat mixture
  • Blending green sauce too thick or too oily
  • Adding tomato salad too early (it loses freshness)

Proper timing keeps everything balanced.

FAQs

Can I make these meatballs ahead of time?

Yes, you can prepare and refrigerate them before baking.

Can I use store-bought green sauce?

Absolutely, pesto works as a quick substitute.

Are these freezer-friendly?

Yes, baked meatballs freeze very well.

Can I use other vegetables?

Yes, zucchini or peppers also work great on the sheet pan.

Final Thoughts

These sheet pan meatballs with tomato salad and green sauce are the perfect combination of ease, freshness, and bold flavor. They’re simple enough for a weeknight dinner but flavorful enough to impress guests.

With juicy baked meatballs, a bright tomato salad, and a vibrant herb sauce, this dish delivers a complete, satisfying meal with minimal effort and maximum taste. Once you try it, it’s sure to become a staple in your kitchen.

Mint Chocolate Milkshake – Creamy, Refreshing & Ultra Indulgent Dessert Drink

If you love the refreshing coolness of mint paired with rich, decadent chocolate, this milkshake mint chocolate recipe is going to become one of your all-time favorites. It’s thick, creamy, and perfectly balanced between sweet chocolate indulgence and refreshing mint flavor, making it a dessert drink that feels both refreshing and luxurious.

This mint chocolate milkshake is inspired by classic ice cream shop flavors but made easily at home in just a few minutes. Whether you’re craving something cold on a hot day or want a fun dessert for guests, this recipe delivers café-style quality with minimal effort.

Why You’ll Love This Mint Chocolate Milkshake

This milkshake mint chocolate recipe stands out because it combines refreshing mint with rich chocolate in a perfectly creamy texture. It’s the kind of treat that feels indulgent without being too heavy.

  • Cool, refreshing mint flavor balanced with chocolate richness
  • Thick, creamy texture like a classic milkshake shop drink
  • Quick and easy—ready in under 5 minutes
  • Perfect for kids, adults, and special occasions
  • Customizable with toppings and mix-ins

It’s a dessert drink that feels nostalgic yet elevated at the same time.

Ingredients

To make this delicious mint chocolate milkshake, you’ll need:

  • 2 cups chocolate ice cream
  • 1/2 cup milk
  • 1/4 teaspoon peppermint extract (adjust to taste)
  • 2 tablespoons chocolate syrup
  • 6–8 chocolate sandwich cookies (optional)
  • A few drops green food coloring (optional for classic look)

Optional toppings:

  • Whipped cream
  • Chocolate drizzle
  • Crushed cookies
  • Fresh mint leaves

Image Prompt: Ingredients for mint chocolate milkshake arranged on a kitchen counter: chocolate ice cream scoops, milk in a glass, chocolate syrup, chocolate cookies, peppermint extract, and fresh mint leaves, clean modern kitchen, natural lighting, shallow depth of field, realistic food photography, 4k resolution.

Ingredient Notes

Chocolate Ice Cream Base

The foundation of a great milkshake mint chocolate is rich chocolate ice cream. It provides depth and sweetness that pairs perfectly with mint.

Peppermint Extract

A little goes a long way. Start with a small amount and adjust to avoid overpowering the chocolate flavor.

Cookies for Texture

Chocolate sandwich cookies add crunch and enhance the cookies-and-cream feel of this milkshake.

Step-by-Step Instructions

Making this mint chocolate milkshake is quick and beginner-friendly.

1. Add Ingredients to Blender

Combine chocolate ice cream, milk, peppermint extract, and chocolate syrup in a blender.

2. Blend Until Smooth

Blend until creamy and fully combined.

3. Add Cookie Pieces

Add chocolate cookies and pulse lightly for texture.

4. Prepare the Glass

Drizzle chocolate syrup inside the glass for a decorative effect.

5. Pour and Top

Pour the milkshake into the glass and top with whipped cream, cookie crumbs, and mint leaves.

6. Serve Immediately

Enjoy while cold and thick.

Tips for Perfect Results

To make your milkshake mint chocolate absolutely perfect, follow these tips:

  • Use high-quality chocolate ice cream for richer flavor
  • Add peppermint extract gradually to control intensity
  • Chill your glass before serving for best texture
  • Don’t over-blend after adding cookies
  • Use crushed ice cream instead of ice for creaminess

These small details help create a professional-quality milkshake at home.

Variations

This mint chocolate milkshake can be easily customized:

Ultra Chocolate Version

Add extra chocolate syrup or fudge sauce.

Oreo Mint Shake

Use extra chocolate sandwich cookies for a cookies-and-cream twist.

Protein Mint Shake

Add chocolate or vanilla protein powder.

Dairy-Free Version

Use plant-based ice cream and almond or oat milk.

What to Serve With It

This milkshake mint chocolate pairs perfectly with:

  • Brownies or chocolate cake
  • Chocolate chip cookies
  • Ice cream sundaes
  • Light salty snacks like pretzels

It’s a versatile dessert drink that fits many occasions.

Storage & Reheating

Milkshakes are best fresh, but here’s how to store them:

  • Refrigerator: Up to 12 hours (shake before serving)
  • Freezer: Freeze and re-blend later

Avoid reheating—this drink is meant to be cold and refreshing.

Common Mistakes to Avoid

When making a milkshake mint chocolate, avoid these issues:

  • Using too much peppermint extract (can taste medicinal)
  • Over-blending cookies into powder
  • Adding too much milk, making it thin
  • Skipping toppings that enhance flavor and presentation

Precision is key for the perfect balance.

FAQs

Can I make this without ice cream?

Yes, use frozen bananas and yogurt for a lighter version.

How do I make it thicker?

Reduce milk or add more ice cream.

Can I skip food coloring?

Absolutely—it only affects appearance, not flavor.

Is this recipe kid-friendly?

Yes, just reduce peppermint extract for a milder taste.

Final Thoughts

This milkshake mint chocolate recipe is the perfect blend of refreshing mint and rich chocolate indulgence. It’s creamy, satisfying, and incredibly easy to make at home in just minutes.

Whether you’re serving it for guests, enjoying it as a dessert, or simply treating yourself, this milkshake delivers bold flavor and nostalgic comfort in every sip. Once you try it, it’s sure to become a repeat favorite.

Vanilla Caramel Milkshake – Creamy, Sweet & Irresistibly Smooth

If you’re craving a dessert drink that feels like pure comfort in a glass, this milkshake vanilla caramel recipe is exactly what you need. It combines the silky sweetness of vanilla ice cream with rich, buttery caramel sauce to create a thick, creamy milkshake that tastes like something straight out of a gourmet diner.

What makes this vanilla caramel milkshake so special is its simplicity. With just a few ingredients and a blender, you can create a café-style treat in under five minutes. It’s perfect for warm afternoons, weekend desserts, or anytime you want something sweet, smooth, and satisfying.

Why You’ll Love This Vanilla Caramel Milkshake

This milkshake vanilla caramel recipe is a true crowd-pleaser because it balances richness and sweetness perfectly. It’s indulgent without being overwhelming and simple without sacrificing flavor.

  • Creamy, smooth texture with rich caramel flavor
  • Quick and easy—ready in minutes
  • Perfect for kids and adults
  • Uses simple pantry ingredients
  • Customizable with toppings and mix-ins

It’s the kind of dessert that feels both comforting and a little luxurious at the same time.

Ingredients

To make this delicious vanilla caramel milkshake, you’ll need:

  • 2 cups vanilla ice cream
  • 1/2 cup milk (whole milk recommended)
  • 3 tablespoons caramel sauce
  • 1/2 teaspoon vanilla extract
  • Pinch of salt (optional, enhances caramel flavor)

Optional toppings:

  • Whipped cream
  • Extra caramel drizzle
  • Sea salt flakes
  • Crushed cookies or nuts

Ingredient Notes

Vanilla Ice Cream Matters

For the best milkshake vanilla caramel, use high-quality vanilla ice cream. It creates a rich, creamy base that enhances the caramel flavor.

Choosing Caramel Sauce

You can use store-bought caramel sauce for convenience or homemade caramel for a deeper, buttery flavor.

Milk Selection

Whole milk creates the creamiest texture, but you can substitute with almond or oat milk if preferred.

Step-by-Step Instructions

Making this vanilla caramel milkshake is quick and beginner-friendly.

1. Add Ingredients to Blender

Place vanilla ice cream, milk, caramel sauce, vanilla extract, and a pinch of salt into a blender.

2. Blend Until Smooth

Blend until thick, creamy, and fully combined.

3. Prepare Your Glass

Drizzle caramel sauce inside the glass for a decorative swirl effect.

4. Pour and Garnish

Pour the milkshake into the glass and top with whipped cream and extra caramel drizzle.

5. Serve Immediately

Enjoy right away while cold and creamy.

Tips for Perfect Results

To make your milkshake vanilla caramel absolutely perfect, follow these expert tips:

  • Slightly soften ice cream before blending
  • Use thick caramel sauce for better texture
  • Chill your glass beforehand
  • Don’t over-blend or it may become too thin
  • Add a pinch of salt to enhance caramel depth

These small steps elevate the flavor and presentation significantly.

Variations

This vanilla caramel milkshake can easily be customized:

Salted Caramel Version

Add extra sea salt for a sweet-and-salty twist.

Coffee Caramel Milkshake

Add a shot of espresso for a caffeinated dessert drink.

Chocolate Caramel Twist

Blend in chocolate syrup for a richer flavor profile.

Dairy-Free Option

Use plant-based ice cream and almond milk.

What to Serve With It

This milkshake vanilla caramel pairs perfectly with:

  • Chocolate chip cookies
  • Brownies or blondies
  • Pancakes or waffles
  • Light salty snacks like pretzels

It also works beautifully as a standalone dessert drink.

Storage & Reheating

Milkshakes are best enjoyed fresh, but here are some tips:

  • Refrigerator: Store up to 12 hours (stir before serving)
  • Freezer: Freeze and re-blend later for best texture

Avoid reheating—this drink is meant to stay cold and creamy.

Common Mistakes to Avoid

When making a milkshake vanilla caramel, avoid these mistakes:

  • Adding too much milk (makes it watery)
  • Using thin caramel sauce
  • Over-blending and losing thickness
  • Skipping toppings that enhance flavor

Small adjustments make a big difference in quality.

FAQs

Can I make this without ice cream?

Yes, you can use frozen bananas and yogurt as a lighter alternative.

How do I make it thicker?

Use less milk or add more ice cream.

Can I use homemade caramel?

Absolutely—it will make the flavor even richer.

Is this recipe kid-friendly?

Yes, this milkshake vanilla caramel is perfect for all ages.

Final Thoughts

This milkshake vanilla caramel recipe is everything a dessert drink should be—creamy, sweet, rich, and incredibly easy to make. It’s perfect for satisfying cravings, impressing guests, or simply treating yourself after a long day.

Once you try it, you’ll see why this combination of vanilla and caramel is a timeless favorite. It’s simple, luxurious, and always delicious.

Rocky Road Milkshake – Rich Chocolate Marshmallow Delight

If you’re craving something decadent, chocolatey, and packed with texture, this Rocky Road milkshake is exactly what you need. Inspired by the classic ice cream flavor, this milkshake blends rich chocolate, fluffy marshmallows, and crunchy nuts into one irresistible drink. It’s indulgent, satisfying, and perfect for those moments when only a truly luxurious treat will do.

What makes this recipe so special is how easily it comes together. With just a few ingredients and a blender, you can recreate that nostalgic Rocky Road flavor at home—no ice cream shop required. Whether you’re making it for a weekend treat, a party dessert, or just to satisfy your sweet tooth, this milkshake never disappoints.

Why You’ll Love This Rocky Road Milkshake

This Rocky Road milkshake is a true crowd-pleaser, combining creamy and crunchy textures in every sip. It’s the perfect balance of indulgence and fun.

  • Rich chocolate flavor with a creamy base
  • Fun mix of textures from marshmallows and nuts
  • Quick and easy to make at home
  • Perfect for dessert, parties, or special treats
  • Customizable to suit your taste preferences

It’s a dessert drink that feels both nostalgic and elevated at the same time.

Ingredients

To make this delicious Rocky Road milkshake, gather the following:

  • 2 cups chocolate ice cream
  • 1/2 cup milk
  • 2 tablespoons chocolate syrup
  • 1/4 cup mini marshmallows
  • 2 tablespoons chopped almonds or walnuts
  • 1/2 teaspoon vanilla extract

Optional toppings:

  • Whipped cream
  • Extra marshmallows
  • Chocolate drizzle
  • Crushed nuts

Ingredient Notes

Chocolate Ice Cream

The base of your Rocky Road milkshake should be high-quality chocolate ice cream for the richest flavor. This sets the tone for the entire drink.

Marshmallows

Mini marshmallows work best because they blend easily and also make great toppings. You can lightly toast them for added flavor.

Nuts for Crunch

Almonds or walnuts are traditional, but you can use pecans or even skip nuts if you prefer a smoother texture.

Step-by-Step Instructions

Making this Rocky Road milkshake is quick and simple.

1. Add Ingredients to Blender

Place chocolate ice cream, milk, chocolate syrup, and vanilla extract into your blender.

2. Blend Until Smooth

Blend until creamy and smooth.

3. Add Mix-Ins

Add marshmallows and nuts, then pulse briefly to keep some texture.

4. Prepare Your Glass

Drizzle chocolate syrup inside the glass for a decorative touch.

5. Pour and Garnish

Pour the milkshake into the glass and top with whipped cream, marshmallows, and nuts.

6. Serve Immediately

Enjoy your milkshake fresh and cold.

Tips for Perfect Results

To make the best Rocky Road milkshake, follow these expert tips:

  • Use slightly softened ice cream for easier blending
  • Don’t over-blend after adding mix-ins
  • Adjust milk to control thickness
  • Chill your serving glass beforehand
  • Toast marshmallows for extra depth of flavor

These small details can take your milkshake to the next level.

Variations

This Rocky Road milkshake is easy to customize based on your preferences.

Extra Chocolate Version

Add chocolate chips or brownie pieces for an even richer drink.

Peanut Butter Twist

Blend in a spoonful of peanut butter for a nutty upgrade.

Dairy-Free Option

Use plant-based ice cream and milk alternatives.

Frozen Dessert Style

Add crushed cookies or fudge chunks for a more indulgent texture.

What to Serve With It

This Rocky Road milkshake pairs perfectly with:

  • Chocolate brownies or cake
  • Fresh cookies
  • Light salty snacks like pretzels
  • Classic diner foods like burgers and fries

It’s a versatile dessert drink that complements many meals.

Storage & Reheating

Milkshakes are best enjoyed fresh, but here are some storage tips:

  • Refrigerator: Store for up to 12 hours (stir before serving)
  • Freezer: Freeze and re-blend when ready

Avoid reheating—this drink is meant to stay cold and creamy.

Common Mistakes to Avoid

When making a Rocky Road milkshake, avoid these pitfalls:

  • Adding too much milk, making it thin
  • Over-blending mix-ins and losing texture
  • Using low-quality ice cream
  • Skipping toppings that enhance flavor and presentation

Attention to detail makes all the difference.

FAQs

Can I make this without nuts?

Yes, simply omit the nuts for a nut-free version.

How do I make it thicker?

Use less milk or add more ice cream.

Can I use regular marshmallows?

Yes, just chop them into smaller pieces before blending.

Is this milkshake kid-friendly?

Absolutely! This Rocky Road milkshake is perfect for all ages.

Final Thoughts

This Rocky Road milkshake is the ultimate indulgent treat—rich, creamy, and packed with flavor and texture. It brings together everything you love about the classic ice cream flavor in a fun, drinkable form that’s easy to make at home.

Whether you’re treating yourself or sharing with friends and family, this milkshake is guaranteed to impress. Once you try it, it’s sure to become a favorite in your dessert rotation.

Milkshake Oreo – The Ultimate Creamy Cookies & Cream Treat

If you’re a fan of cookies and cream desserts, this milkshake Oreo recipe is about to become your go-to indulgence. Thick, creamy, and loaded with crushed chocolate sandwich cookies, this milkshake delivers that perfect balance of sweetness and texture in every sip. It’s the kind of treat that feels both nostalgic and irresistible—like something straight from your favorite diner.

Whether you’re craving a quick dessert, planning a fun gathering, or just looking to cool down on a warm day, this Oreo milkshake is incredibly easy to make and guaranteed to impress. With just a few simple ingredients and a blender, you can whip up a café-style drink right in your own kitchen.

Why You’ll Love This Milkshake Oreo Recipe

This milkshake Oreo recipe stands out because it’s both simple and incredibly satisfying. It combines the crunch of cookies with the smoothness of ice cream for a dessert that feels luxurious without being complicated.

  • Rich and creamy texture with cookie crunch
  • Ready in under 5 minutes
  • Perfect for kids and adults alike
  • Customizable with endless variations
  • Ideal for parties, desserts, or late-night cravings

It’s one of those recipes that never goes out of style and always delivers big flavor with minimal effort.

Ingredients

To make the perfect milkshake Oreo, you’ll need:

  • 2 cups vanilla ice cream
  • 1/2 cup milk
  • 6–8 Oreo cookies
  • 1/2 teaspoon vanilla extract (optional)

Optional toppings:

  • Whipped cream
  • Crushed Oreo cookies
  • Chocolate syrup

Ingredient Notes

Choosing the Right Cookies

Classic Oreo cookies are perfect for this milkshake Oreo recipe, but you can experiment with flavored varieties like double-stuffed or chocolate cream for extra richness.

Ice Cream Quality

Using high-quality vanilla ice cream will significantly improve the flavor and texture of your milkshake. It creates that thick, creamy base that makes the drink irresistible.

Milk Options

Whole milk gives the richest texture, but you can use almond, oat, or skim milk depending on your preference.

Step-by-Step Instructions

Making this milkshake Oreo is quick and foolproof.

1. Add Ingredients to Blender

Place the vanilla ice cream, milk, Oreo cookies, and vanilla extract into your blender.

2. Blend to Desired Texture

Blend until smooth but slightly chunky if you like cookie bits.

3. Prepare Your Glass

Drizzle chocolate syrup inside the glass for a decorative touch.

4. Pour and Garnish

Pour the milkshake into the glass and top with whipped cream and crushed Oreos.

5. Serve Immediately

Enjoy your milkshake while it’s cold and creamy.

Tips for Perfect Results

To get the best milkshake Oreo every time:

  • Use slightly softened ice cream for easier blending
  • Don’t over-blend if you want cookie chunks
  • Adjust milk for thickness preference
  • Chill your glass before serving
  • Add extra cookies for a stronger flavor

These small tips can take your milkshake from good to amazing.

Variations

The versatility of this milkshake Oreo recipe makes it even more exciting.

Chocolate Oreo Milkshake

Add chocolate ice cream or cocoa powder for a richer taste.

Mint Oreo Version

Use mint-flavored cookies for a refreshing twist.

Peanut Butter Oreo Shake

Blend in a spoonful of peanut butter for added depth.

Vegan Oreo Milkshake

Use dairy-free ice cream and plant-based milk.

What to Serve With It

This milkshake Oreo pairs perfectly with:

  • Burgers and fries for a diner-style meal
  • Brownies or chocolate cake
  • Cookies and dessert platters
  • Salty snacks like pretzels

It’s a versatile drink that complements both sweet and savory dishes.

Storage & Reheating

Milkshakes are best fresh, but here’s how to handle leftovers:

  • Refrigerator: Store up to 12 hours (stir before drinking)
  • Freezer: Freeze and re-blend for later use

Avoid reheating—this treat is meant to be enjoyed cold.

Common Mistakes to Avoid

When making a milkshake Oreo, watch out for these common issues:

  • Adding too much milk, making it watery
  • Over-blending and losing texture
  • Using low-quality ice cream
  • Skipping toppings that enhance presentation

Paying attention to these details ensures the best results.

FAQs

Can I make this milkshake Oreo without ice cream?

Yes, use frozen bananas and a bit of yogurt for a lighter version.

How do I make it thicker?

Use less milk or add more ice cream and cookies.

Can I use different cookies?

Absolutely! Any chocolate sandwich cookie works well.

Is this recipe kid-friendly?

Yes, this milkshake Oreo is perfect for all ages.

Final Thoughts

This milkshake Oreo recipe is everything you want in a dessert drink—creamy, rich, and packed with cookies and cream flavor. It’s quick to make, easy to customize, and guaranteed to satisfy your sweet tooth.

Whether you’re making it for yourself or sharing with friends and family, this milkshake delivers that perfect balance of indulgence and comfort. Once you try it, it’s sure to become a staple in your dessert rotation.

Banana Split Milkshakes Recipe – Creamy, Indulgent, and Irresistible

If you’ve ever craved a classic banana split but wanted something even more indulgent and sippable, this Banana Split Milkshakes recipe is about to become your new favorite treat. It transforms the iconic ice cream dessert into a thick, creamy milkshake loaded with banana, chocolate, strawberry, and vanilla flavors—all blended into one irresistible glass.

This recipe is perfect for summer days, weekend treats, or anytime you want to impress guests with something fun and nostalgic. The beauty of this milkshake is that it captures all the flavors and textures of a traditional banana split while being incredibly easy to make at home with just a blender.

Why You’ll Love This Banana Split Milkshakes Recipe

This Banana Split Milkshakes recipe is more than just a dessert—it’s a full-on experience in a glass. It’s rich, colorful, and packed with layers of flavor that make every sip exciting.

  • Combines three classic ice cream flavors in one drink
  • Thick, creamy, and ultra-satisfying
  • Perfect for parties, gatherings, or family treats
  • Easy to customize with toppings and mix-ins
  • Ready in just minutes

It’s the kind of recipe that brings out everyone’s inner kid while still delivering gourmet-level flavor.

Ingredients

To make this delicious Banana Split Milkshakes recipe, you’ll need:

  • 2 ripe bananas
  • 2 cups vanilla ice cream
  • 1/2 cup milk
  • 2 tablespoons chocolate syrup
  • 2 tablespoons strawberry syrup
  • 1/2 teaspoon vanilla extract

Optional toppings:

  • Whipped cream
  • Maraschino cherries
  • Crushed nuts
  • Extra chocolate or strawberry drizzle

Ingredient Notes

Choosing the Right Bananas

For the best Banana Split Milkshakes recipe, use ripe bananas with brown spots. They’re naturally sweeter and blend more smoothly, enhancing the overall flavor.

Ice Cream Matters

High-quality vanilla ice cream makes a huge difference. It creates that rich, creamy base that ties all the flavors together beautifully.

Syrups for Flavor

Chocolate and strawberry syrups are essential for recreating the authentic banana split taste. You can also use homemade versions for a more natural option.

Step-by-Step Instructions

Making this Banana Split Milkshakes recipe is quick and foolproof.

1. Add Base Ingredients

Place bananas, vanilla ice cream, milk, and vanilla extract into your blender.

2. Add Flavor Layers

Drizzle in chocolate syrup and strawberry syrup.

3. Blend Until Smooth

Blend on high until thick, creamy, and fully combined.

4. Prepare Glass

Drizzle extra chocolate and strawberry syrup inside the glass for a decorative effect.

5. Pour and Garnish

Pour the milkshake into the glass and top with whipped cream, cherries, and nuts.

6. Serve Immediately

Enjoy right away while it’s cold and creamy.

Tips for Perfect Results

To make your Banana Split Milkshakes recipe absolutely perfect:

  • Use slightly frozen bananas for extra thickness
  • Adjust milk quantity for desired consistency
  • Blend in short bursts to maintain thickness
  • Chill your glass beforehand
  • Add toppings just before serving for best presentation

These small techniques can elevate your milkshake from simple to spectacular.

Variations

This Banana Split Milkshakes recipe is highly customizable.

Chocolate Lover’s Version

Add chocolate ice cream or cocoa powder for a richer taste.

Strawberry Boost

Blend in fresh strawberries for a fruitier flavor.

Protein Shake Twist

Add a scoop of vanilla or chocolate protein powder.

Dairy-Free Option

Use dairy-free ice cream and plant-based milk.

What to Serve With It

This Banana Split Milkshakes recipe pairs perfectly with:

  • Burgers and fries for a classic diner combo
  • Chocolate brownies or cookies
  • Light snacks like popcorn
  • Party desserts and treats

It’s a standout addition to any casual gathering or celebration.

Storage & Reheating

Milkshakes are best enjoyed fresh, but here are some options:

  • Refrigerator: Store for up to 12 hours (may lose thickness)
  • Freezer: Freeze and re-blend before serving

Avoid reheating—this treat is meant to be cold and refreshing.

Common Mistakes to Avoid

Even a simple Banana Split Milkshakes recipe can go wrong:

  • Adding too much milk, making it thin
  • Using underripe bananas (less flavor)
  • Over-blending, which melts the ice cream
  • Skipping toppings that enhance the experience

Pay attention to these details for the best results.

FAQs

Can I make this without ice cream?

Yes, substitute with frozen bananas and a bit of yogurt for a lighter version.

How do I make it thicker?

Use less milk or add more ice cream or frozen banana.

Can I prepare it ahead of time?

It’s best fresh, but you can store and re-blend if needed.

What toppings work best?

Whipped cream, cherries, nuts, and syrup drizzles are classic choices.

Final Thoughts

This Banana Split Milkshakes recipe is the ultimate blend of nostalgia and indulgence. It takes everything you love about the classic dessert and turns it into a creamy, drinkable treat that’s easy to make and impossible to resist.

Whether you’re serving it at a party, enjoying it as a weekend treat, or simply satisfying a sweet craving, this milkshake delivers on every level. Once you try it, it’s guaranteed to become a go-to favorite in your recipe collection.

Apple Pie Smoothie – Cozy, Healthy Fall-Inspired Drink

If you love the comforting flavors of homemade apple pie but want something quicker, healthier, and sip-able, this Apple Pie Smoothie is exactly what you need. It captures everything you adore about the classic dessert—sweet apples, warm cinnamon, creamy texture—and transforms it into a nourishing smoothie you can enjoy any time of day.

Perfect for busy mornings, post-workout fuel, or even a guilt-free dessert, this smoothie brings together wholesome ingredients in a way that feels indulgent yet balanced. It’s one of those recipes that instantly makes your kitchen smell like fall, no matter the season.

Why You’ll Love This Apple Pie Smoothie

This Apple Pie Smoothie isn’t just delicious—it’s incredibly practical and versatile. Whether you’re trying to eat healthier or simply craving something comforting, this recipe delivers.

  • Tastes like dessert but made with wholesome ingredients
  • Quick and easy—ready in under 5 minutes
  • Naturally sweetened with fruit
  • Packed with fiber, vitamins, and optional protein
  • Perfect for breakfast, snack, or dessert

The balance of creamy and spiced flavors makes it feel like a treat, while the nutritional benefits make it something you can enjoy regularly without hesitation.

Ingredients

To make this flavorful Apple Pie Smoothie, you’ll need simple pantry staples:

  • 1 medium apple (peeled, chopped, or unpeeled for extra fiber)
  • 1/2 frozen banana
  • 1/2 cup vanilla yogurt (or plain)
  • 1/2 cup milk (dairy or non-dairy)
  • 1/4 cup rolled oats
  • 1/2 teaspoon ground cinnamon
  • 1/8 teaspoon nutmeg
  • 1/2 teaspoon vanilla extract
  • 1–2 teaspoons maple syrup or honey (optional)
  • 1/2 cup ice

Ingredient Notes

Best Apples to Use

For the best Apple Pie Smoothie, choose naturally sweet and crisp apples like Fuji, Honeycrisp, or Gala. These varieties provide the perfect balance of sweetness and tartness.

Oats for Heartiness

Rolled oats add thickness and make the smoothie more filling. They also give that subtle “pie crust” vibe that really brings the apple pie flavor together.

Spice Blend Matters

Cinnamon is essential, but a pinch of nutmeg or even allspice enhances the warm, cozy flavor profile that defines a true apple pie experience.

Step-by-Step Instructions

Making this Apple Pie Smoothie is incredibly simple and beginner-friendly.

1. Prep Your Ingredients

Wash, core, and chop your apple. If you prefer a smoother texture, peel it first.

2. Add to Blender

Place the apple, banana, yogurt, milk, oats, spices, vanilla, and sweetener into your blender.

3. Add Ice

Add ice for that refreshing, chilled texture.

4. Blend Until Smooth

Blend on high until creamy and well combined. Make sure the oats are fully broken down.

5. Taste and Adjust

Adjust sweetness or spices as needed, then blend again briefly.

6. Serve Immediately

Pour into a glass and enjoy fresh for the best flavor and texture.

Tips for Perfect Results

To make your Apple Pie Smoothie absolutely perfect every time, keep these tips in mind:

  • Use frozen banana for a creamier consistency
  • Soak oats for 5 minutes if you want an ultra-smooth texture
  • Add more milk gradually to control thickness
  • Blend longer than you think to fully incorporate oats
  • Chill your ingredients beforehand for a colder smoothie

Small details like these can elevate your smoothie from good to café-quality.

Variations

One of the best parts about this Apple Pie Smoothie is how customizable it is.

Dairy-Free Option

Use almond milk and dairy-free yogurt for a completely plant-based version.

Protein-Packed Version

Add a scoop of vanilla or unflavored protein powder.

Green Apple Twist

Use tart green apples for a more tangy flavor profile.

Dessert Smoothie

Add a scoop of vanilla ice cream or whipped cream on top for a treat-like version.

What to Serve With It

This Apple Pie Smoothie pairs beautifully with:

  • Whole grain toast or bagels
  • Scrambled eggs or omelets
  • Granola bars or muffins
  • Fresh fruit platters

It’s also satisfying enough to enjoy on its own as a quick meal replacement.

Storage & Reheating

While this smoothie is best fresh, you can store leftovers:

  • Refrigerator: Store in an airtight container for up to 24 hours
  • Freezer: Freeze into cubes and re-blend later

Give it a good shake or stir before drinking, as separation may occur.

Common Mistakes to Avoid

Even a simple Apple Pie Smoothie can go wrong without proper attention:

  • Using too much ice, which dilutes flavor
  • Skipping spices, resulting in a bland smoothie
  • Not blending oats thoroughly
  • Adding too much liquid, making it watery

Avoid these pitfalls for the best results every time.

FAQs

Can I make this smoothie without banana?

Yes, you can substitute banana with yogurt, avocado, or even frozen cauliflower for creaminess.

Is this Apple Pie Smoothie healthy?

Absolutely. It’s packed with fiber, vitamins, and can be adjusted to fit your dietary needs.

Can I prepare it ahead of time?

Yes, but it’s best consumed fresh. If storing, keep it refrigerated and shake well before drinking.

What type of milk works best?

Any milk works! Almond, oat, dairy, or coconut milk all pair well with the apple pie flavors.

Final Thoughts

This Apple Pie Smoothie is the perfect way to enjoy the comforting flavors of a classic dessert in a healthier, more convenient form. It’s creamy, spiced, naturally sweet, and endlessly customizable—making it a staple recipe you’ll want to keep on repeat.

Whether you’re blending it up for breakfast, a snack, or a cozy treat, this smoothie delivers that nostalgic apple pie flavor in every sip. Once you try it, it might just replace your dessert cravings altogether.

Creamsicle Slushy – Smoothie Recipe (Refreshing Orange Vanilla Treat)

If you’ve ever loved the nostalgic flavor of an orange creamsicle popsicle, this Creamsicle slushy smoothie recipe is about to become your new obsession. It’s bright, citrusy, creamy, and incredibly refreshing—perfect for hot summer days or whenever you need a quick, feel-good treat. The combination of sweet orange and smooth vanilla creates a dreamy balance that tastes indulgent but can easily be made healthy.

This recipe isn’t just delicious—it’s also incredibly simple to make with just a handful of ingredients. Whether you’re whipping it up for breakfast, an afternoon pick-me-up, or a light dessert, this smoothie delivers both flavor and satisfaction in every sip.

Why You’ll Love This Creamsicle Slushy Smoothie

This Creamsicle slushy smoothie recipe is more than just a drink—it’s an experience. Here’s why it stands out:

  • Refreshing and hydrating thanks to citrus and ice
  • Naturally sweet and creamy without needing heavy cream
  • Quick and easy—ready in under 5 minutes
  • Customizable for different dietary needs
  • Kid-friendly and adult-approved

It’s also a great way to sneak in vitamin C while enjoying something that feels like a treat rather than a health food.

Ingredients

To make this dreamy Creamsicle slushy smoothie recipe, you’ll need:

  • 1 cup fresh orange juice (or freshly squeezed oranges)
  • 1/2 cup vanilla yogurt (Greek or regular)
  • 1 cup ice cubes
  • 1/2 frozen banana (for creaminess)
  • 1/2 teaspoon vanilla extract
  • 1–2 tablespoons honey or maple syrup (optional)
  • 1/4 cup milk (dairy or non-dairy)

Ingredient Notes

Choosing the Best Oranges

Freshly squeezed orange juice will always give your Creamsicle slushy smoothie recipe the brightest and most vibrant flavor. If you’re using store-bought juice, opt for one without added sugars.

Yogurt Matters

Vanilla yogurt adds both sweetness and creaminess. Greek yogurt makes the smoothie thicker and adds protein, while regular yogurt keeps it lighter.

Banana for Texture

The frozen banana is the secret weapon here—it creates that silky, milkshake-like consistency without needing ice cream.

Step-by-Step Instructions

Making this Creamsicle slushy smoothie recipe couldn’t be easier:

1. Add Ingredients to Blender

Place the orange juice, yogurt, frozen banana, vanilla extract, milk, and sweetener (if using) into your blender.

2. Add Ice

Toss in the ice cubes to give it that slushy texture.

3. Blend Until Smooth

Blend on high speed until the mixture is creamy and smooth with no ice chunks remaining.

4. Taste and Adjust

Taste your smoothie and adjust sweetness or vanilla flavor if needed.

5. Serve Immediately

Pour into a chilled glass and enjoy right away for the best texture.

Tips for Perfect Results

To elevate your Creamsicle slushy smoothie recipe, keep these expert tips in mind:

  • Use frozen fruit instead of fresh for a thicker consistency
  • Don’t skip the vanilla extract—it’s key to that creamsicle flavor
  • Blend in stages if your blender struggles with ice
  • Chill your glass beforehand for an extra refreshing experience
  • Adjust liquid gradually to control thickness

These small tweaks can make a noticeable difference in flavor and texture.

Variations

One of the best things about this Creamsicle slushy smoothie recipe is how versatile it is.

Dairy-Free Version

Use coconut yogurt and almond milk for a completely dairy-free option.

Protein Boost

Add a scoop of vanilla protein powder to turn it into a post-workout smoothie.

Tropical Twist

Blend in some pineapple or mango for a tropical creamsicle vibe.

Dessert Style

Add a scoop of vanilla ice cream for a richer, dessert-like version.

What to Serve With It

This Creamsicle slushy smoothie recipe pairs beautifully with:

  • Light breakfast items like toast or muffins
  • Granola or overnight oats
  • Fresh fruit bowls
  • Brunch spreads with eggs and pastries

It also works great as a standalone snack when you need something quick and energizing.

Storage & Reheating

While this smoothie is best enjoyed fresh, you can store it if needed:

  • Refrigerator: Store in an airtight container for up to 24 hours (shake before drinking)
  • Freezer: Freeze in popsicle molds for a fun frozen treat

Avoid reheating—this is meant to be enjoyed cold and refreshing.

Common Mistakes to Avoid

Even a simple Creamsicle slushy smoothie recipe can go wrong if you’re not careful:

  • Too much ice: Can water down the flavor
  • Skipping sweetness balance: Oranges vary in sweetness
  • Not blending long enough: Leaves icy chunks
  • Overloading liquid: Results in a runny smoothie

Pay attention to these details to get perfect results every time.

FAQs

Can I make this smoothie without banana?

Yes! Substitute with frozen mango or a bit of avocado for creaminess.

Is this smoothie healthy?

Absolutely. This Creamsicle slushy smoothie recipe can be very nutritious, especially if you control the sweeteners and use natural ingredients.

Can I use bottled orange juice?

Yes, but fresh juice will give you a brighter, more authentic flavor.

How can I make it thicker?

Use less liquid or add more frozen fruit like banana or ice.

Final Thoughts

This Creamsicle slushy smoothie recipe is the perfect blend of nostalgia and nutrition. It’s refreshing, creamy, and incredibly easy to make, making it a go-to recipe for busy mornings, hot afternoons, or even a light dessert. With endless customization options and simple ingredients, it’s a recipe you’ll come back to again and again.

Once you try it, don’t be surprised if it becomes a staple in your kitchen—because few things are as satisfying as that perfect orange-vanilla swirl in a cold, creamy sip.

Easy Chocolate Cherry Smoothie Recipe (Rich, Creamy & Naturally Sweet)

If you’re craving something chocolatey but still want to keep things on the healthier side, this Easy Chocolate Cherry Smoothie Recipe is about to become your new favorite. It’s rich, creamy, slightly indulgent, and packed with the natural sweetness of cherries—making it feel like dessert in a glass.

This smoothie blends the bold flavor of cocoa with juicy cherries to create a perfectly balanced drink. Whether you’re starting your day or treating yourself after dinner, it’s a delicious option you can feel good about.

Why You’ll Love This Easy Chocolate Cherry Smoothie Recipe

This Easy Chocolate Cherry Smoothie Recipe is simple, satisfying, and versatile.

  • Rich chocolate flavor without being overly heavy
  • Naturally sweet from cherries and fruit
  • Quick and easy—ready in minutes
  • Perfect for breakfast, snacks, or dessert
  • Customizable with healthy add-ins

Ingredients

For the Smoothie:

  • 1 cup frozen cherries
  • 1 banana
  • 1 cup milk (dairy or plant-based)
  • 1 tablespoon unsweetened cocoa powder
  • ½ cup Greek yogurt (optional)
  • 1 teaspoon honey or maple syrup (optional)
  • ½ cup ice cubes (if needed)

Ingredient Notes

The magic of this Easy Chocolate Cherry Smoothie Recipe comes from the combination of tart cherries and rich cocoa powder. Frozen cherries are ideal because they create a thick, frosty texture.

Banana adds natural sweetness and creaminess, while yogurt boosts protein and gives the smoothie a velvety consistency. You can easily adjust sweetness depending on your taste.

Step-by-Step Instructions

1. Add Ingredients to Blender

Combine cherries, banana, milk, cocoa powder, yogurt, and sweetener.

2. Blend Until Smooth

Blend on high until creamy and fully combined.

3. Adjust Consistency

Add more milk for a thinner smoothie or ice for thickness.

4. Serve Immediately

Pour into a glass and enjoy fresh.

Tips for Perfect Results

To make the best Easy Chocolate Cherry Smoothie Recipe, keep these tips in mind:

  • Use frozen cherries for a thicker texture
  • Choose high-quality cocoa powder for better flavor
  • Blend thoroughly for a smooth consistency
  • Taste and adjust sweetness as needed

These tips help you achieve a perfectly balanced smoothie every time.

Variations

Switch things up with these creative ideas:

  • Add protein powder for a post-workout boost
  • Use almond or oat milk for a dairy-free version
  • Add spinach for a hidden nutrient boost
  • Blend in peanut butter for extra richness

What to Serve With It

This Easy Chocolate Cherry Smoothie Recipe pairs well with:

  • Granola or oatmeal
  • Toast with nut butter
  • Breakfast muffins
  • Light brunch dishes

It’s a great addition to any balanced meal.

Storage & Reheating

This smoothie is best enjoyed fresh, but you can store it:

  • Refrigerator: up to 24 hours (shake before drinking)
  • Freezer: freeze into smoothie cubes or popsicles

Common Mistakes to Avoid

  • Adding too much liquid (makes it watery)
  • Not blending long enough
  • Using low-quality cocoa powder
  • Skipping frozen ingredients for thickness

Avoid these for the best results.

FAQs

1. Can I use fresh cherries?

Yes, but add ice to maintain thickness.

2. Is this smoothie healthy?

Yes, especially when made without added sugar.

3. Can I make it vegan?

Absolutely—use plant-based milk and skip yogurt or use a dairy-free version.

4. Can I add protein powder?

Yes, it’s a great addition for extra nutrition.

Final Thoughts

This Easy Chocolate Cherry Smoothie Recipe is rich, creamy, and incredibly satisfying. It’s the perfect blend of indulgence and nutrition in one simple drink.

Once you try it, you’ll love how easy it is to enjoy a chocolatey treat that’s also good for you.