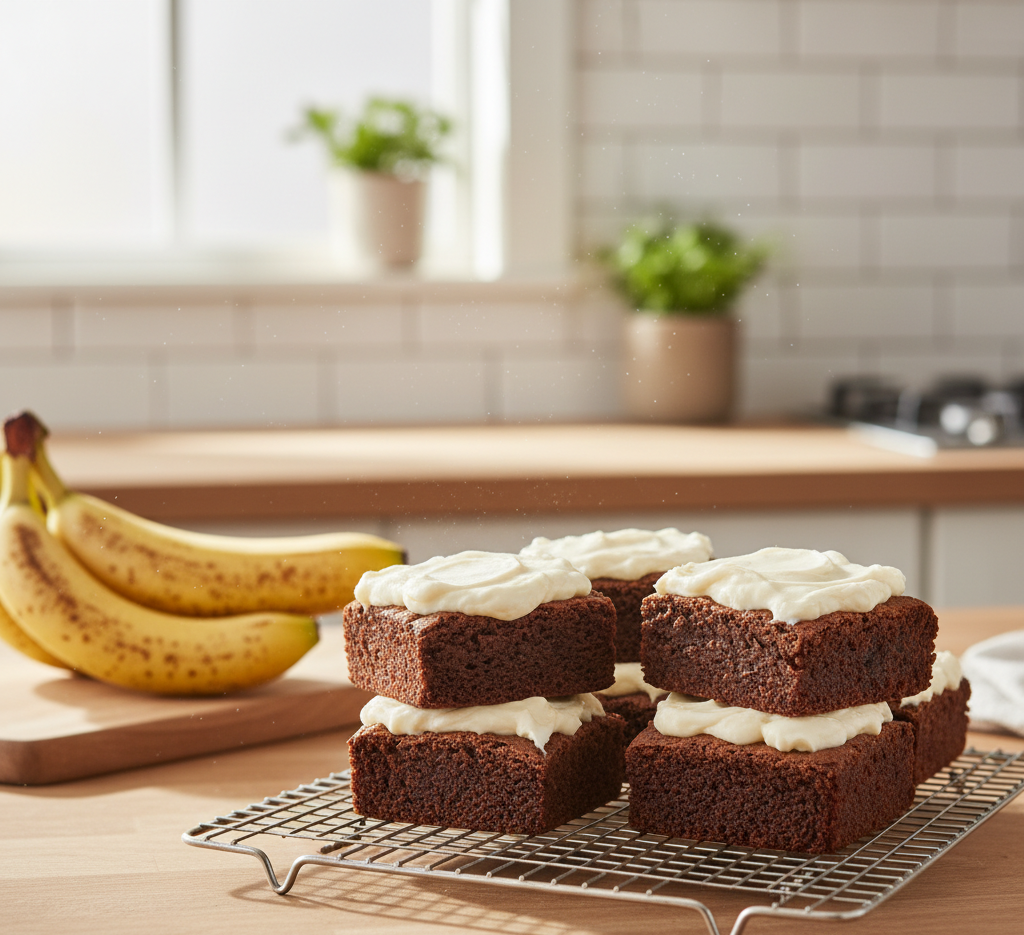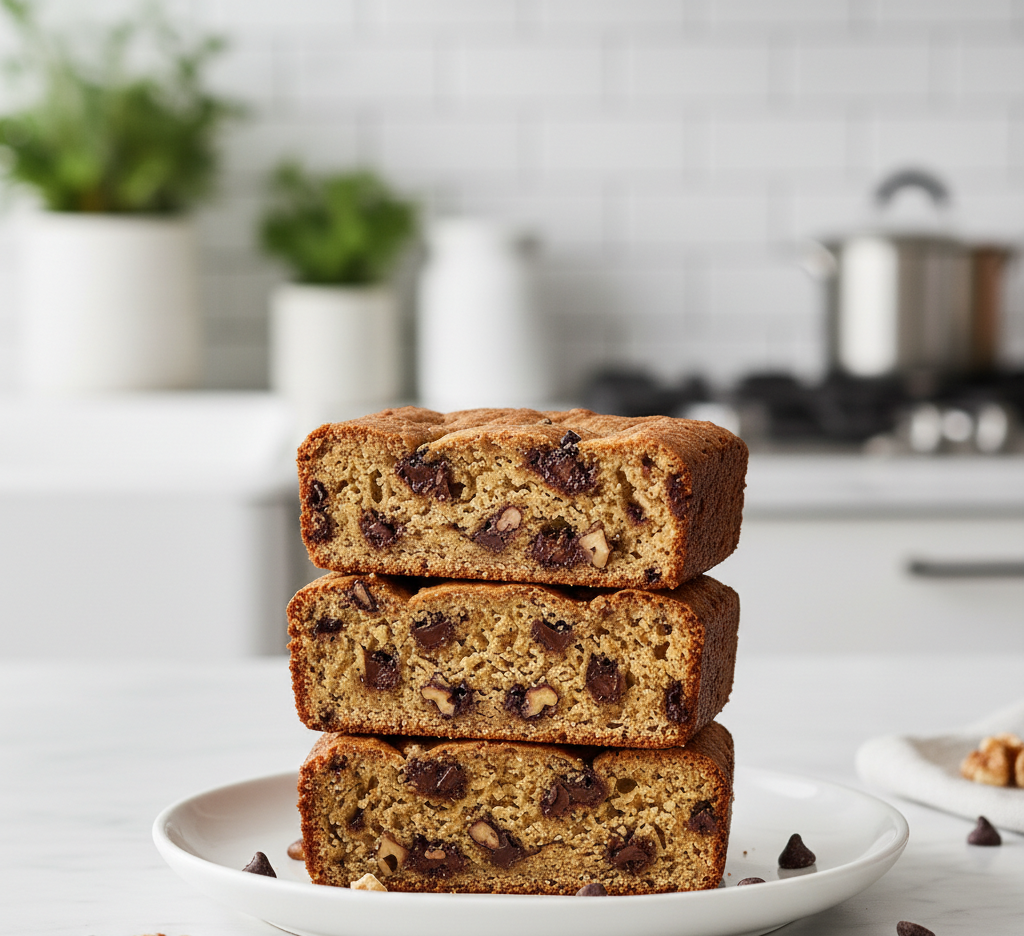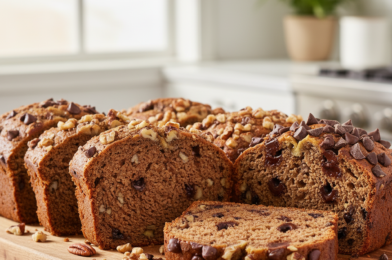
If you love classic banana bread but want to take it to the next level, this Chocolate Peanut Butter Banana Bread is about to become your new obsession. Imagine ultra-moist banana bread infused with rich cocoa flavor and swirled with creamy peanut butter — it’s basically dessert and comfort food wrapped into one irresistible loaf.
As a longtime home baker, I can confidently say that Chocolate Peanut Butter Banana Bread is one of those recipes that disappears fast. It’s perfect for breakfast, an afternoon snack, or even dessert. The sweet bananas keep the loaf tender, the chocolate adds indulgent depth, and the peanut butter swirl creates a creamy, nutty contrast that makes every slice unforgettable.
Why You’ll Love This Chocolate Peanut Butter Banana Bread
There are plenty of banana bread recipes out there, but this Chocolate Peanut Butter Banana Bread stands out for its bold flavor and moist texture.
Here’s why this recipe works so beautifully:
-
Ultra-moist texture from ripe bananas
-
Rich chocolate flavor without being overly sweet
-
Creamy peanut butter swirl in every bite
-
Simple pantry ingredients
-
Perfect for using up overripe bananas
This recipe delivers bakery-style results right from your home kitchen.
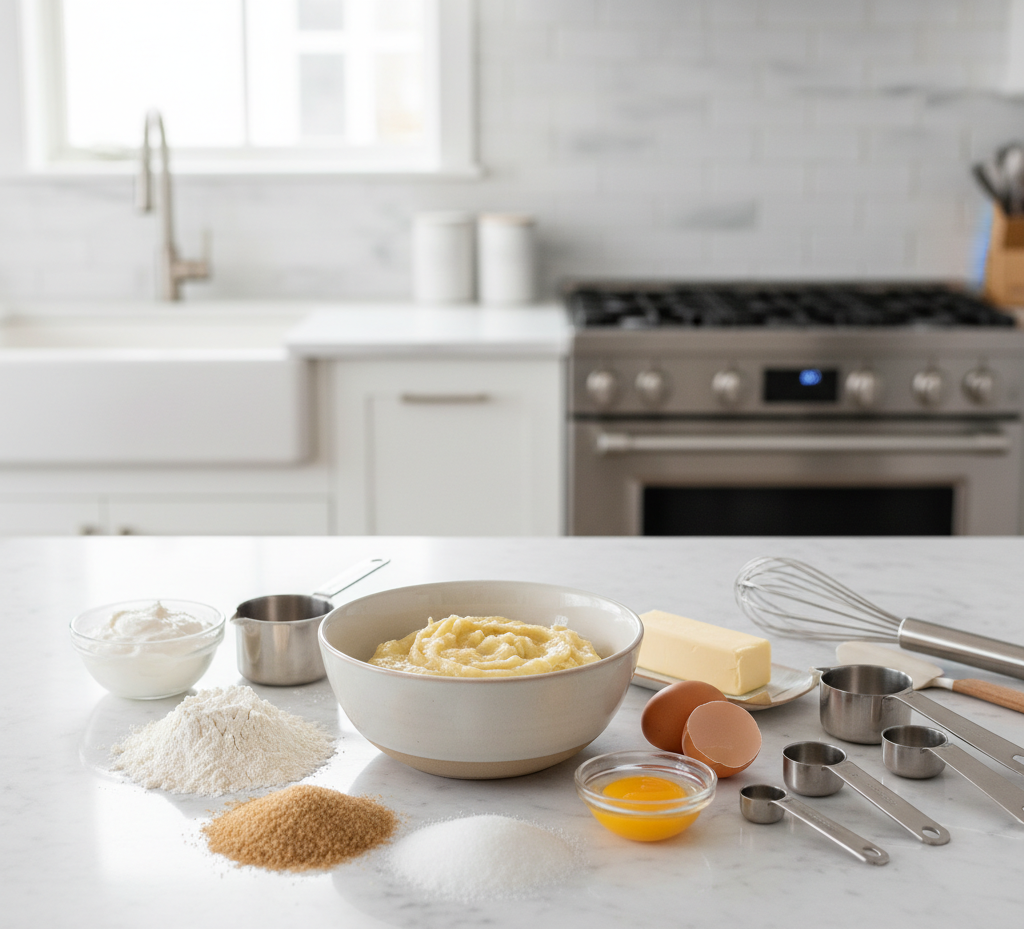
Ingredients for Chocolate Peanut Butter Banana Bread
To make this decadent loaf, you’ll need:
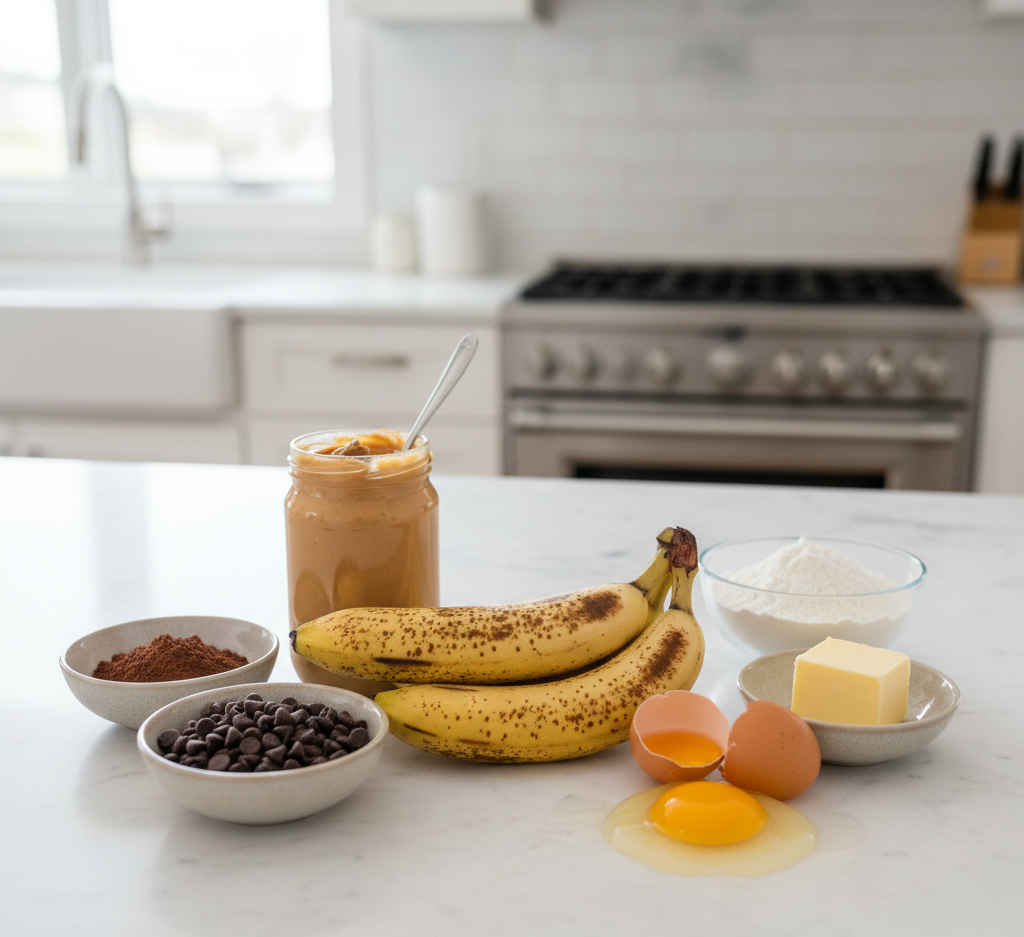
-
3 very ripe bananas, mashed
-
½ cup creamy peanut butter
-
½ cup unsalted butter, melted
-
¾ cup brown sugar
-
¼ cup granulated sugar
-
2 large eggs
-
1 teaspoon vanilla extract
-
1 ½ cups all-purpose flour
-
⅓ cup unsweetened cocoa powder
-
1 teaspoon baking soda
-
½ teaspoon salt
-
½ cup sour cream or Greek yogurt
-
¾ cup semi-sweet chocolate chips
Ingredient Notes for Best Results
Use Very Ripe Bananas
The darker and spottier the bananas, the better. Overripe bananas provide natural sweetness and moisture, which is essential for soft Chocolate Peanut Butter Banana Bread.
Creamy vs. Chunky Peanut Butter
Creamy peanut butter creates a smooth swirl, but chunky adds texture. Either works depending on your preference.
Sour Cream for Moisture
Sour cream (or Greek yogurt) keeps the loaf incredibly tender and prevents dryness.
Step-by-Step Instructions
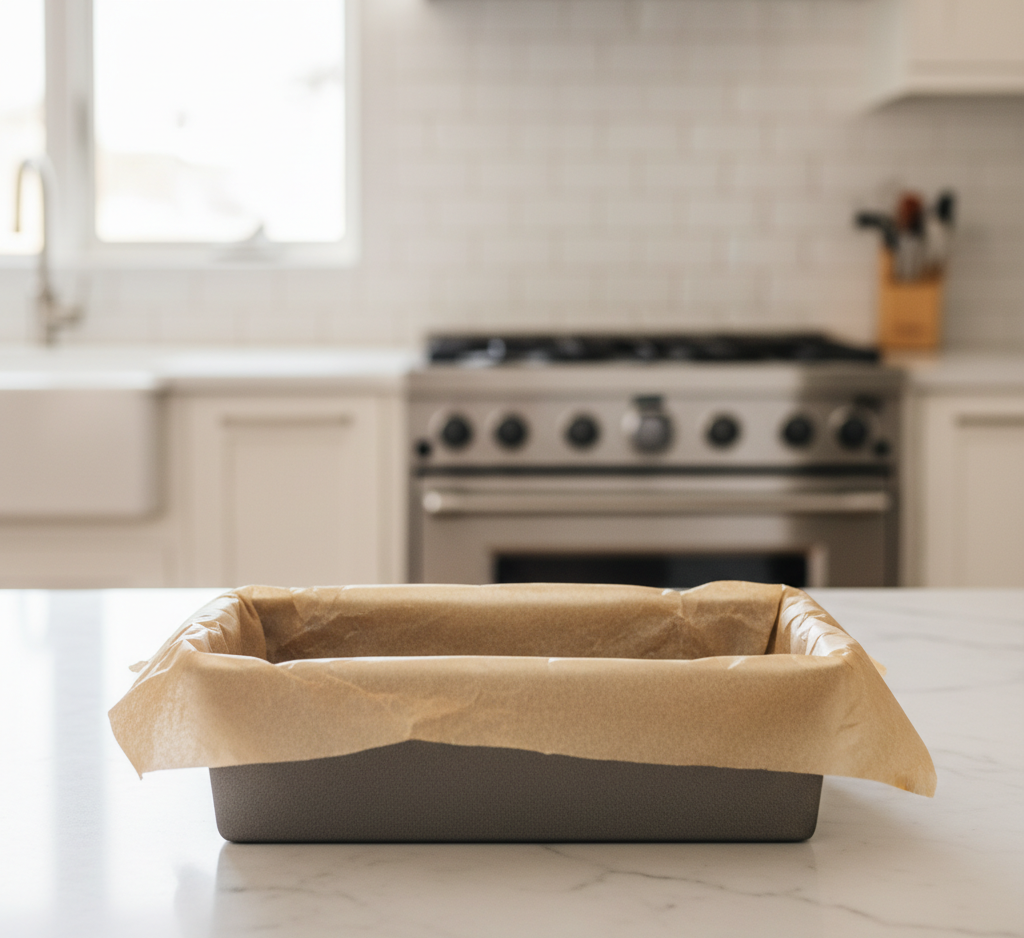
1. Prepare the Pan
Preheat your oven to 350°F. Grease and line a 9×5-inch loaf pan with parchment paper for easy removal.
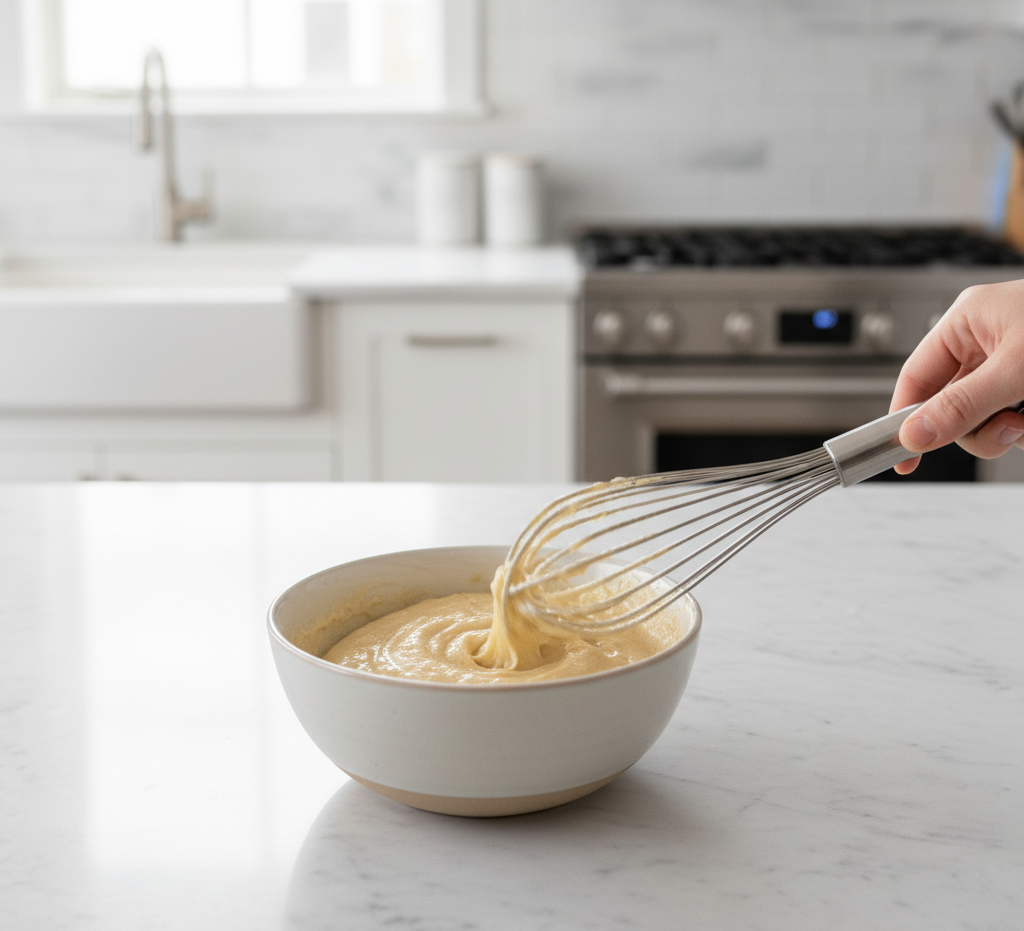
2. Mix the Wet Ingredients
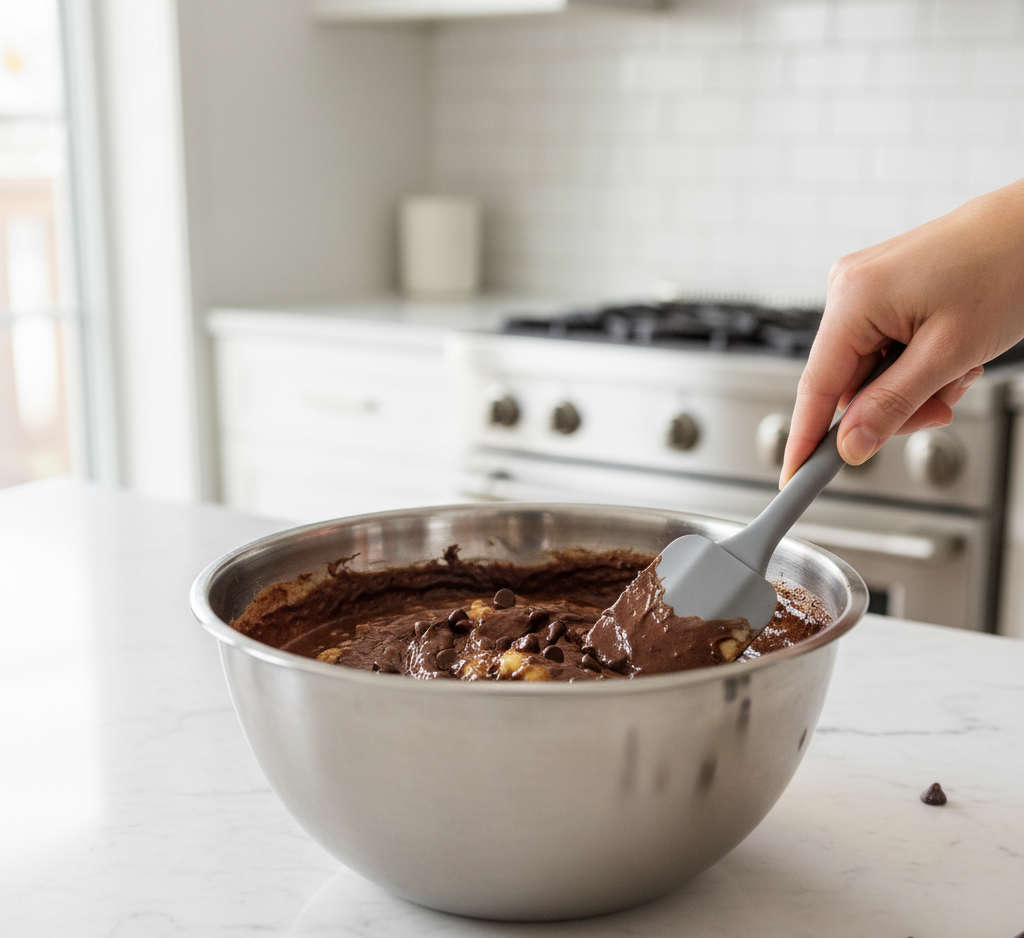
In a large bowl, whisk together melted butter, brown sugar, and granulated sugar. Add mashed bananas, eggs, vanilla extract, and sour cream. Stir until smooth and well combined.
The mixture should be thick, glossy, and fragrant with banana aroma.
3. Combine the Dry Ingredients
In a separate bowl, whisk flour, cocoa powder, baking soda, and salt. Gradually fold the dry mixture into the wet ingredients, mixing just until combined. Avoid overmixing to keep the bread tender.
Fold in chocolate chips for extra richness.
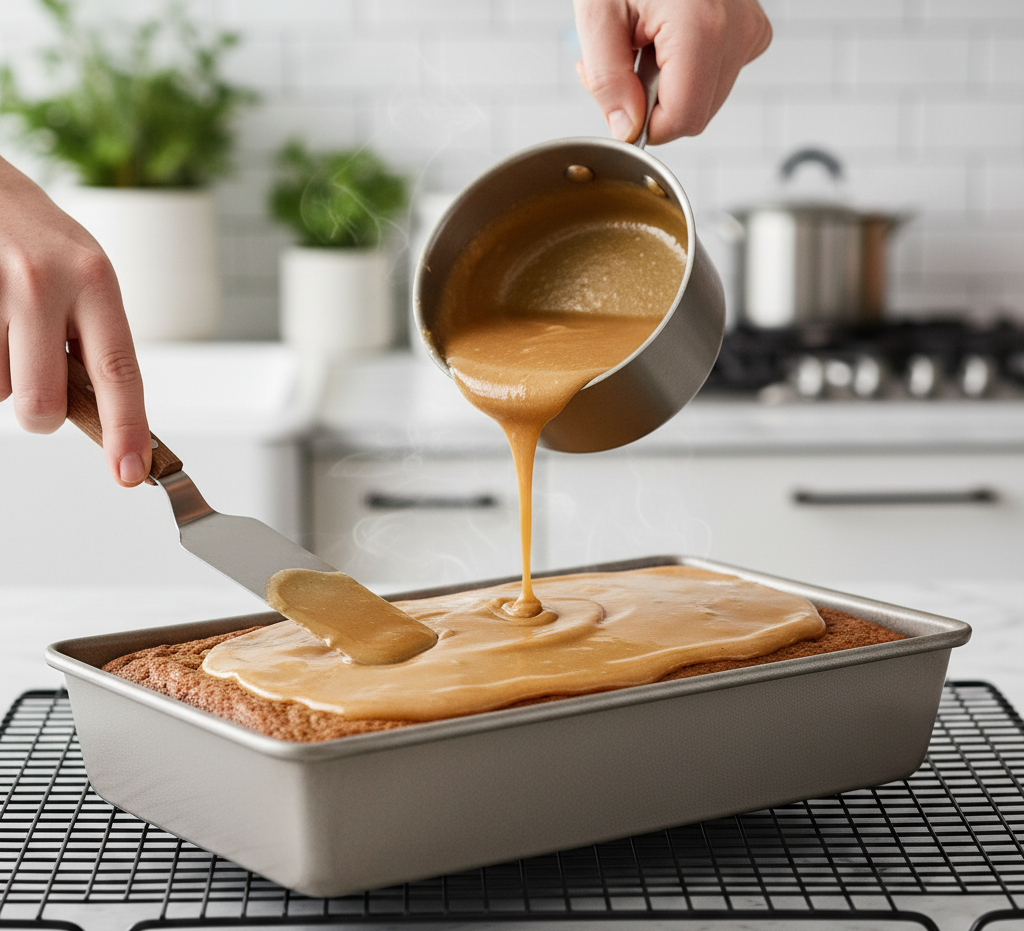
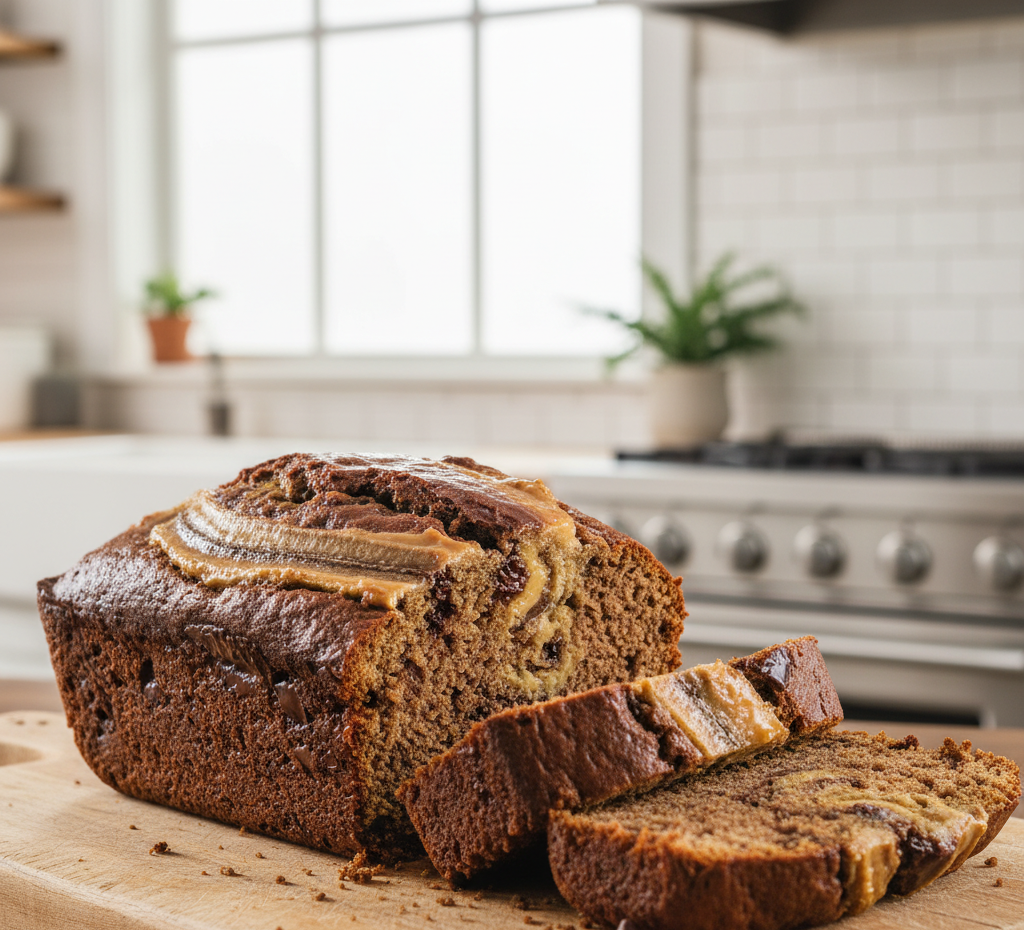
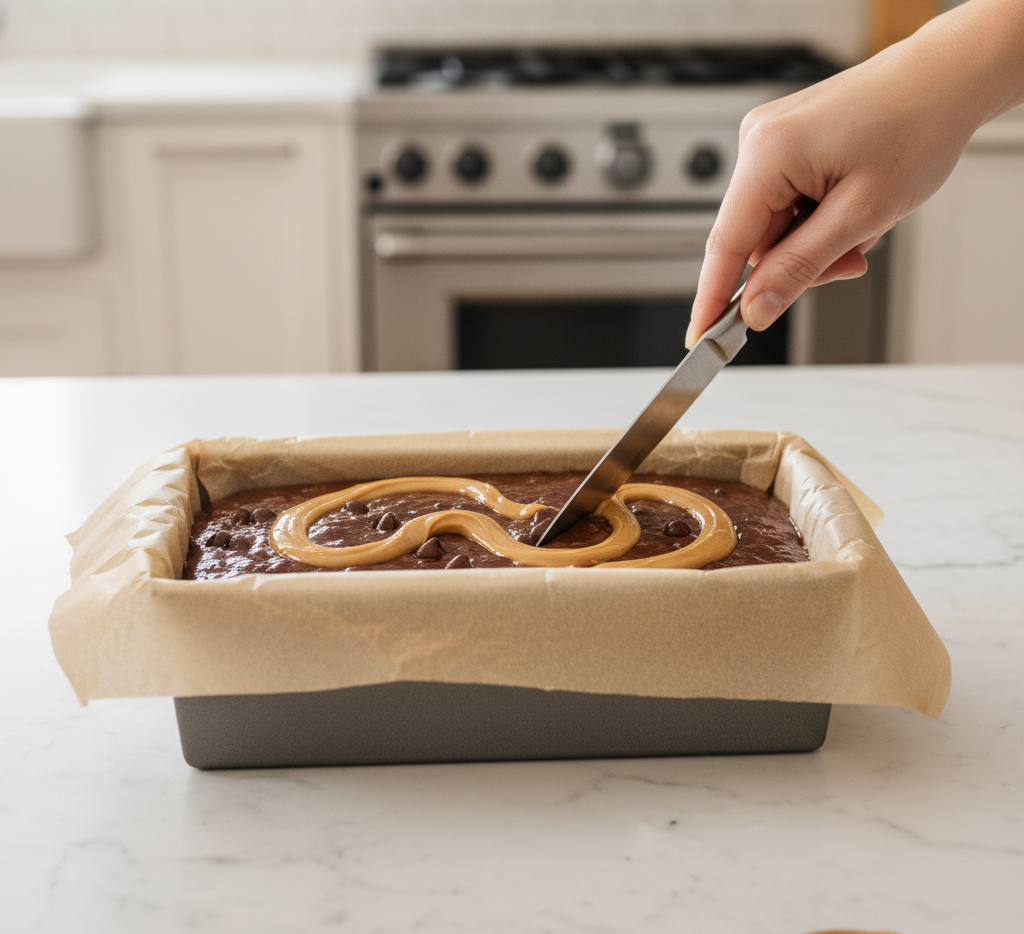
4. Swirl in the Peanut Butter
Pour half the batter into the prepared loaf pan. Drop spoonfuls of peanut butter over the batter and swirl with a knife. Add remaining batter and repeat the swirl technique on top.
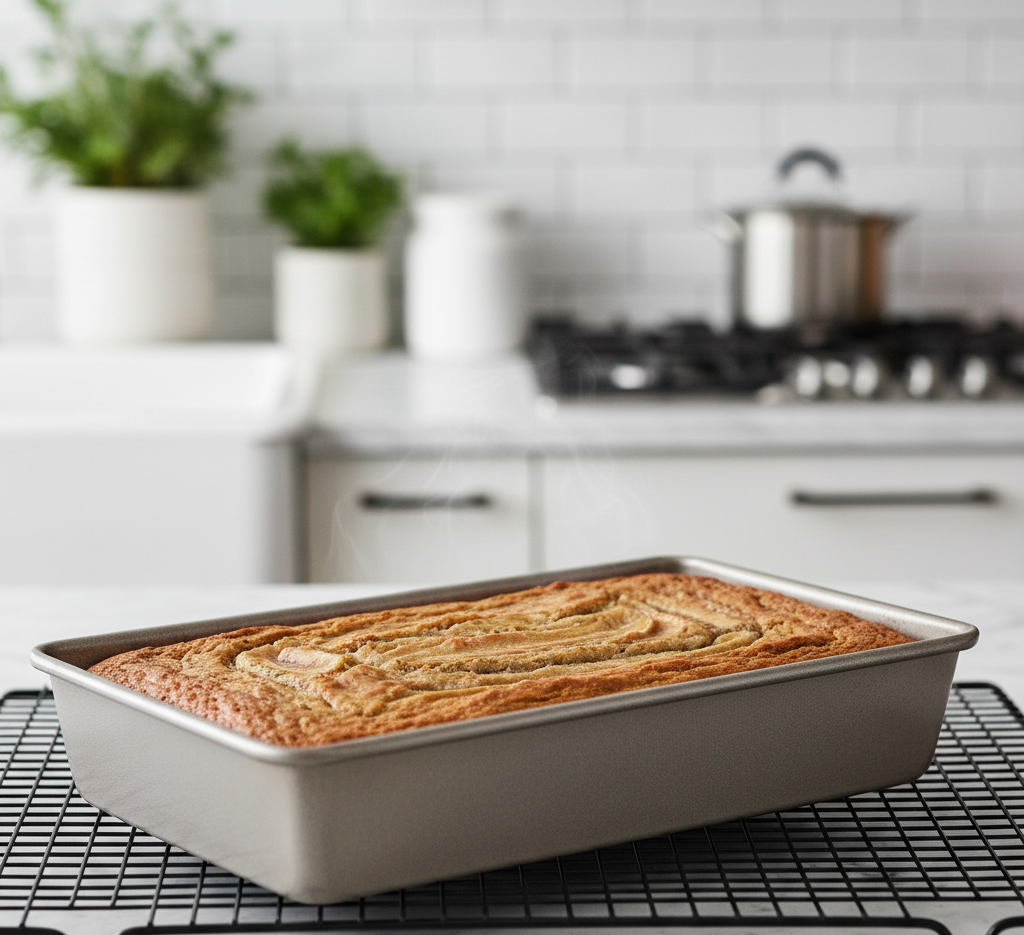
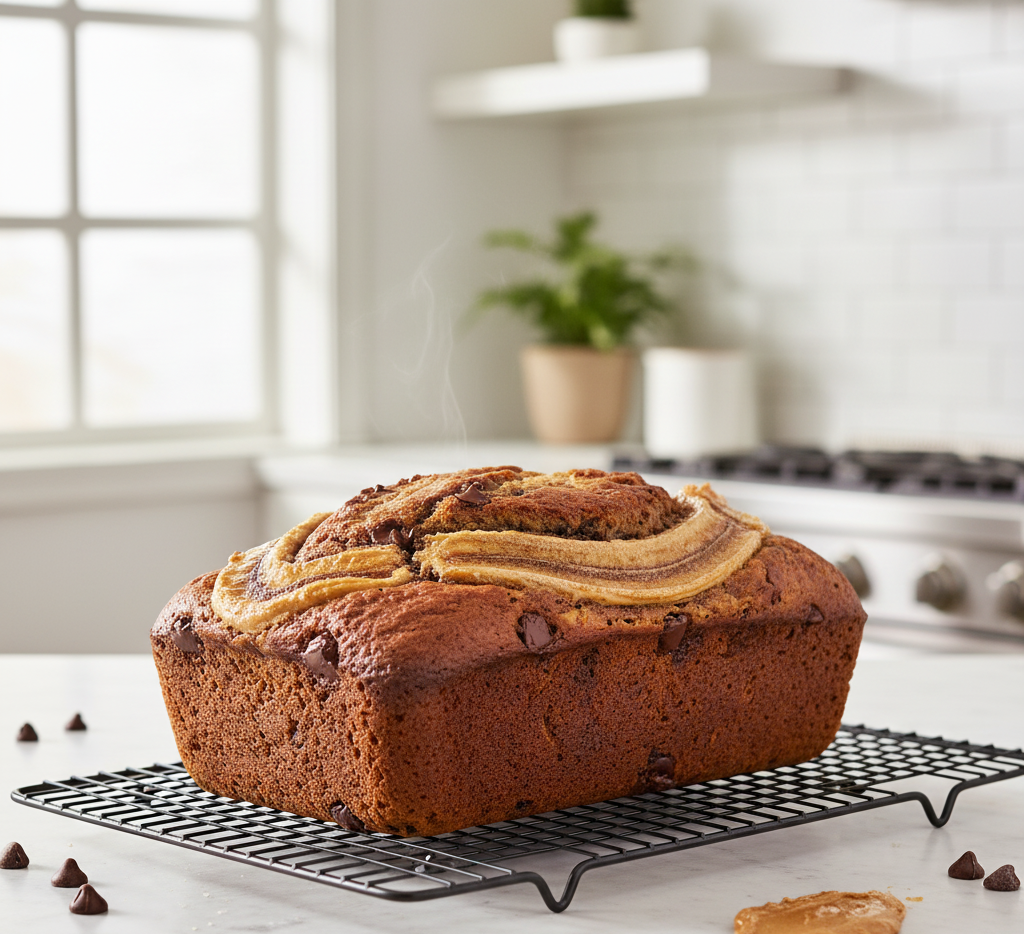
5. Bake to Perfection
Bake for 55–65 minutes, or until a toothpick inserted in the center comes out with just a few moist crumbs. Let cool in the pan for 10–15 minutes before transferring to a wire rack.
Tips for Perfect Chocolate Peanut Butter Banana Bread
-
Don’t overmix the batter — it can make the bread dense.
-
Tent with foil if the top browns too quickly.
-
Let the bread cool completely before slicing for clean cuts.
-
Measure flour correctly using the spoon-and-level method.
-
For deeper chocolate flavor, use dark cocoa powder.
Following these tips ensures your Chocolate Peanut Butter Banana Bread turns out moist and flavorful every time.
Delicious Variations
Want to customize your loaf? Try these ideas:
Peanut Butter Chocolate Chip Boost
Add extra peanut butter chips for more nutty flavor.
Nutty Crunch
Stir in chopped walnuts or pecans.
Healthier Twist
Swap half the flour for whole wheat flour and reduce sugar slightly.
Double Chocolate Version
Increase cocoa powder slightly and add dark chocolate chunks.

What to Serve with Chocolate Peanut Butter Banana Bread
This loaf pairs beautifully with:
-
A hot cup of coffee
-
Cold milk
-
Vanilla latte
-
Fresh berries
-
A scoop of vanilla ice cream
For breakfast, toast a slice and spread a little extra peanut butter on top for an indulgent treat.
Storage & Freezing Tips
Store Chocolate Peanut Butter Banana Bread in an airtight container at room temperature for up to 4 days.
For longer storage:
-
Wrap tightly in plastic wrap and freeze for up to 3 months.
-
Slice before freezing for easy grab-and-go portions.
-
Thaw at room temperature or warm gently in the microwave.
Proper storage keeps the loaf moist and delicious.
Common Mistakes to Avoid
-
Using underripe bananas
-
Overbaking the loaf
-
Overmixing the batter
-
Skipping parchment paper
-
Adding too much peanut butter (it can sink)
Avoiding these mistakes ensures consistent results every time you bake Chocolate Peanut Butter Banana Bread.
Frequently Asked Questions
1. Can I make this recipe gluten-free?
Yes! Use a 1:1 gluten-free flour blend designed for baking.
2. Can I use natural peanut butter?
You can, but stir it thoroughly first. Very runny peanut butter may affect the swirl.
3. Why is my banana bread dense?
Overmixing or too much flour can cause density. Measure carefully and mix gently.
4. Can I turn this into muffins?
Absolutely. Divide batter into muffin tins and bake for 18–22 minutes.
5. How do I know when it’s done?
Insert a toothpick into the center — it should come out with a few moist crumbs, not wet batter.
Final Thoughts
This Chocolate Peanut Butter Banana Bread is the perfect blend of sweet bananas, rich chocolate, and creamy peanut butter. It’s comforting, indulgent, and surprisingly easy to make with simple pantry ingredients.
Whether you’re baking to use up overripe bananas or craving a chocolatey twist on a classic loaf, this recipe delivers moist texture, bold flavor, and beautiful swirls every time. One slice is never enough — and don’t be surprised if your kitchen smells absolutely amazing while it bakes.
Trust me, once you try this Chocolate Peanut Butter Banana Bread, it will become a permanent favorite in your baking rotation. 🍫🍌🥜