Irresistible Chopped Chicken Bacon Ranch Sandwich Bliss

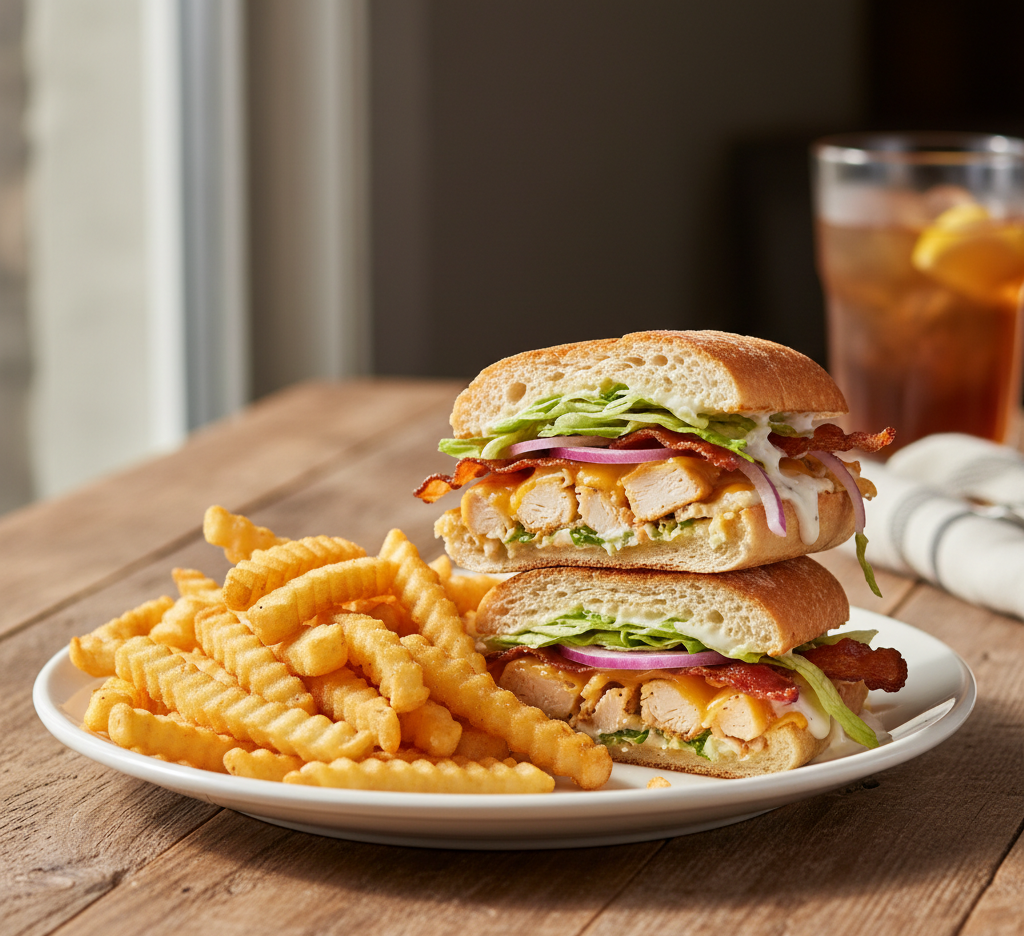
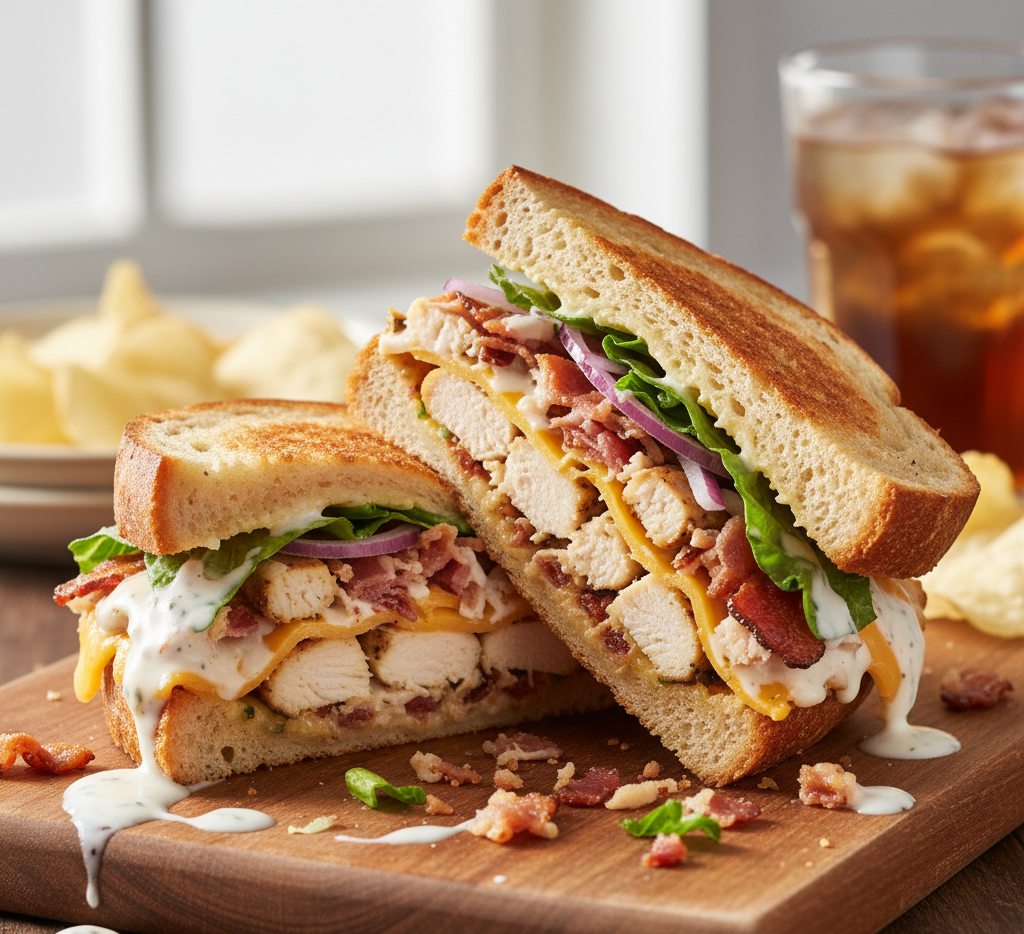
If you’re craving a sandwich that’s bold, hearty, and completely satisfying, this Irresistible Chopped Chicken Bacon Ranch Sandwich Bliss is about to become your new favorite. Packed with juicy chicken, crispy bacon, creamy ranch dressing, and gooey melted cheese, this sandwich delivers a perfect balance of textures and flavors in every bite.

What makes this recipe stand out is the chopped filling—everything is finely diced and mixed together, ensuring you get a little bit of everything in each mouthful. Whether you’re making lunch, dinner, or a quick comfort meal, this chopped chicken bacon ranch sandwich truly lives up to its name.

Irresistible Chopped

Why You’ll Love This Recipe

There are so many reasons to love this Irresistible Chopped Chicken Bacon Ranch Sandwich Bliss:

  • Packed with bold, savory flavors
  • Perfectly balanced textures—crispy, creamy, and juicy
  • Quick and easy to prepare
  • Great for lunch, dinner, or meal prep
  • Customizable with your favorite toppings

This is comfort food at its absolute best.
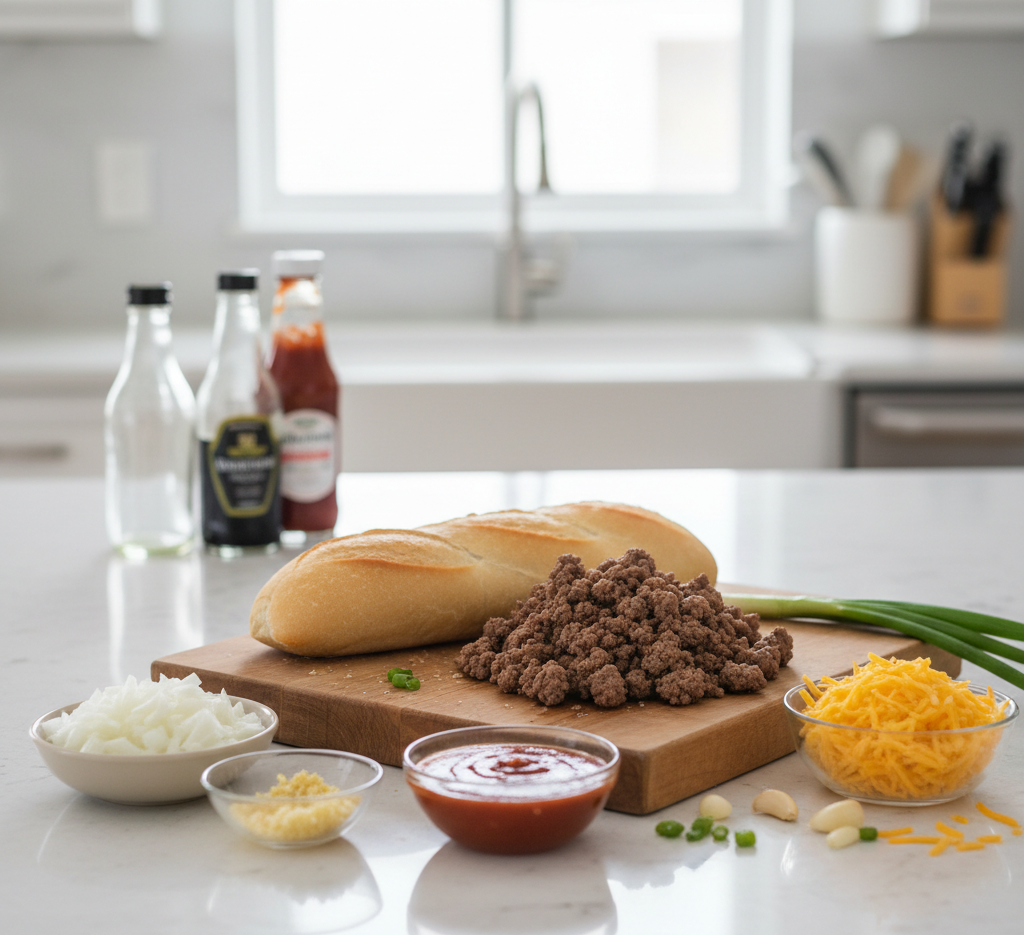
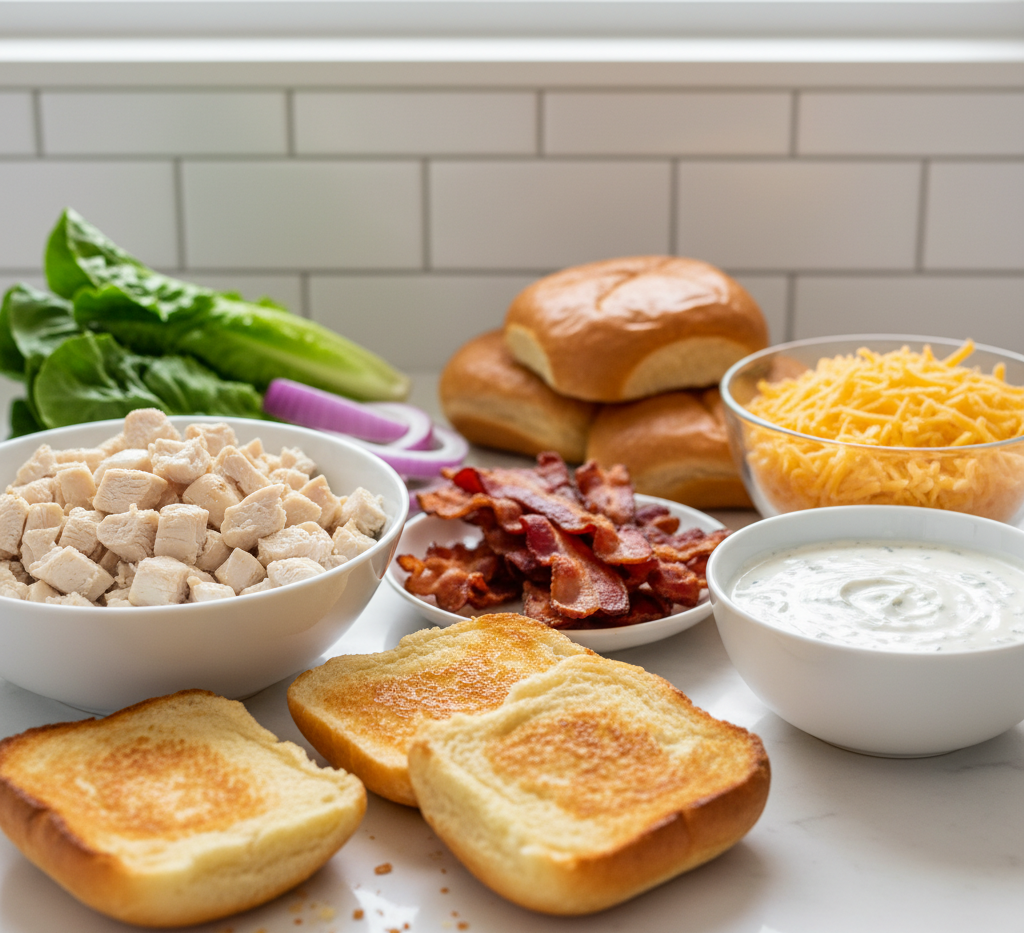
Ingredients

To make this delicious Irresistible Chopped Chicken Bacon Ranch Sandwich Bliss, you’ll need:

Main Ingredients:

  • 2 cups cooked chicken breast (chopped)
  • 6 slices bacon (cooked and chopped)
  • 1/2 cup shredded cheddar or mozzarella cheese
  • 1/3 cup ranch dressing
  • 4 sandwich rolls or hoagie buns
  • 1 tablespoon butter (for toasting)

Optional Add-Ons:

  • Lettuce
  • Tomato slices
  • Pickles
  • Red onion
  • Avocado

Ingredient Notes

The ingredients in this Irresistible Chopped Chicken Bacon Ranch Sandwich Bliss work together for maximum flavor:

  • Chicken: Rotisserie chicken works great for convenience
  • Bacon: Adds crunch and smoky flavor
  • Ranch dressing: Brings creaminess and tang
  • Cheese: Melts into the filling for richness
  • Bread: Choose sturdy rolls that hold up to the filling

Step-by-Step Instructions

1. Prepare the Filling

In a large bowl, combine chopped chicken, bacon, cheese, and ranch dressing. Mix well until evenly coated.

2. Toast the Bread

Butter the sandwich rolls and toast them in a skillet until golden brown.
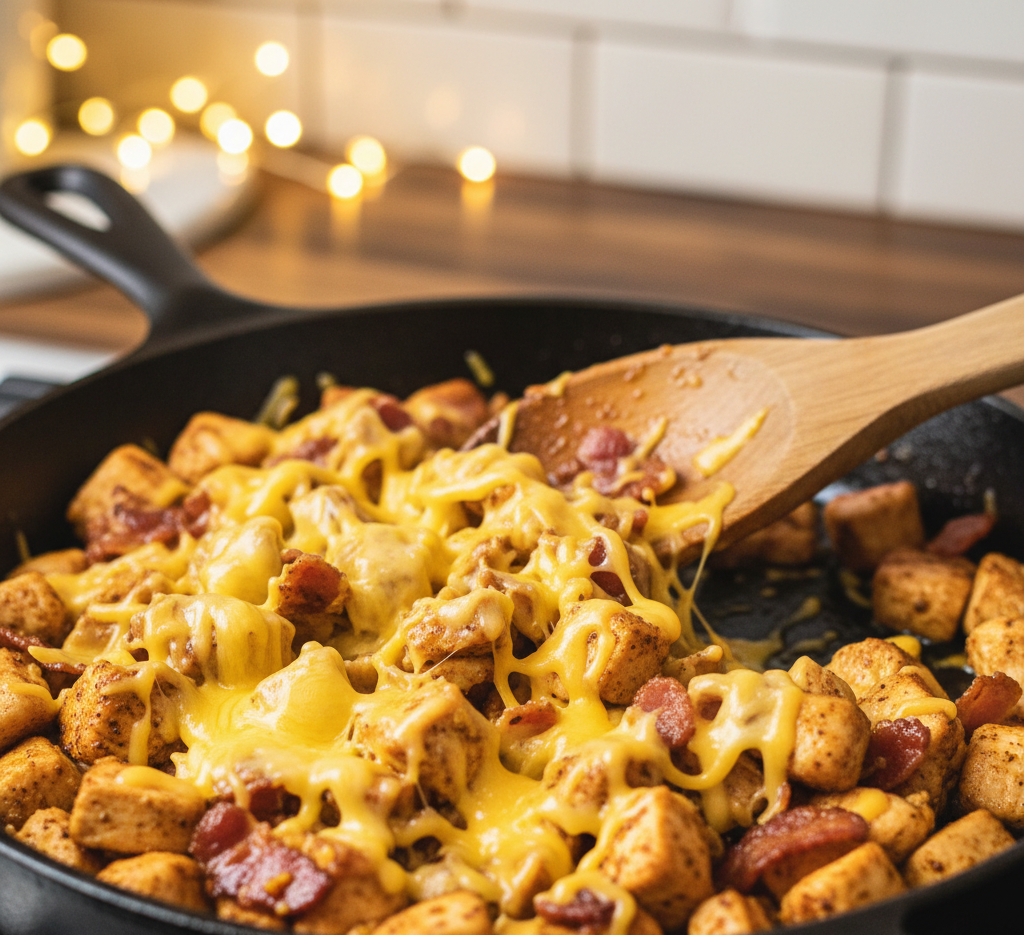
3. Heat the Mixture

Warm the chicken mixture in a skillet over medium heat until heated through and the cheese begins to melt.

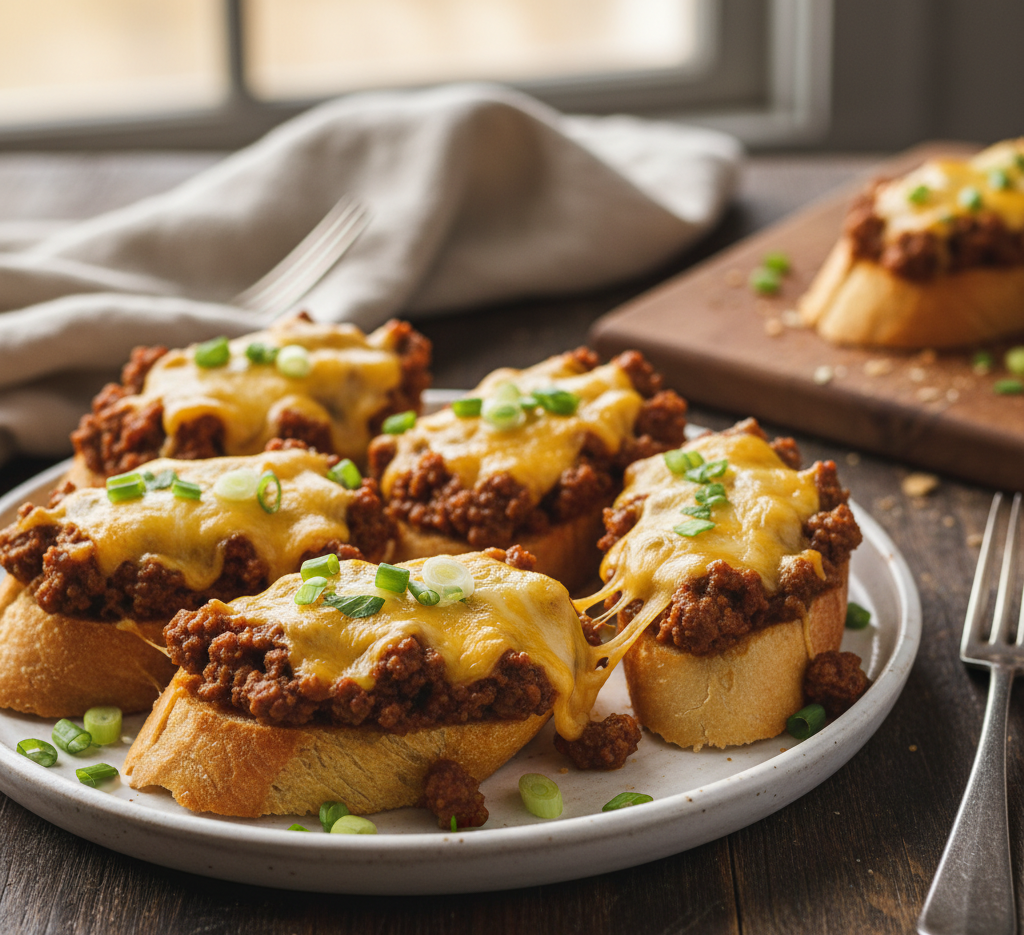
4. Assemble the Sandwich

Spoon the warm mixture onto the toasted rolls.

5. Add Toppings

Add lettuce, tomatoes, or other toppings if desired.

6. Serve Immediately

Enjoy while warm and melty.

Tips for Perfect Results

To make the best Irresistible Chopped Chicken Bacon Ranch Sandwich Bliss, follow these tips:

  • Chop ingredients evenly for balanced bites
  • Use freshly cooked bacon for maximum crispiness
  • Don’t overheat the mixture to avoid drying out chicken
  • Toast the bread well to prevent sogginess

These tips ensure a perfect sandwich every time.
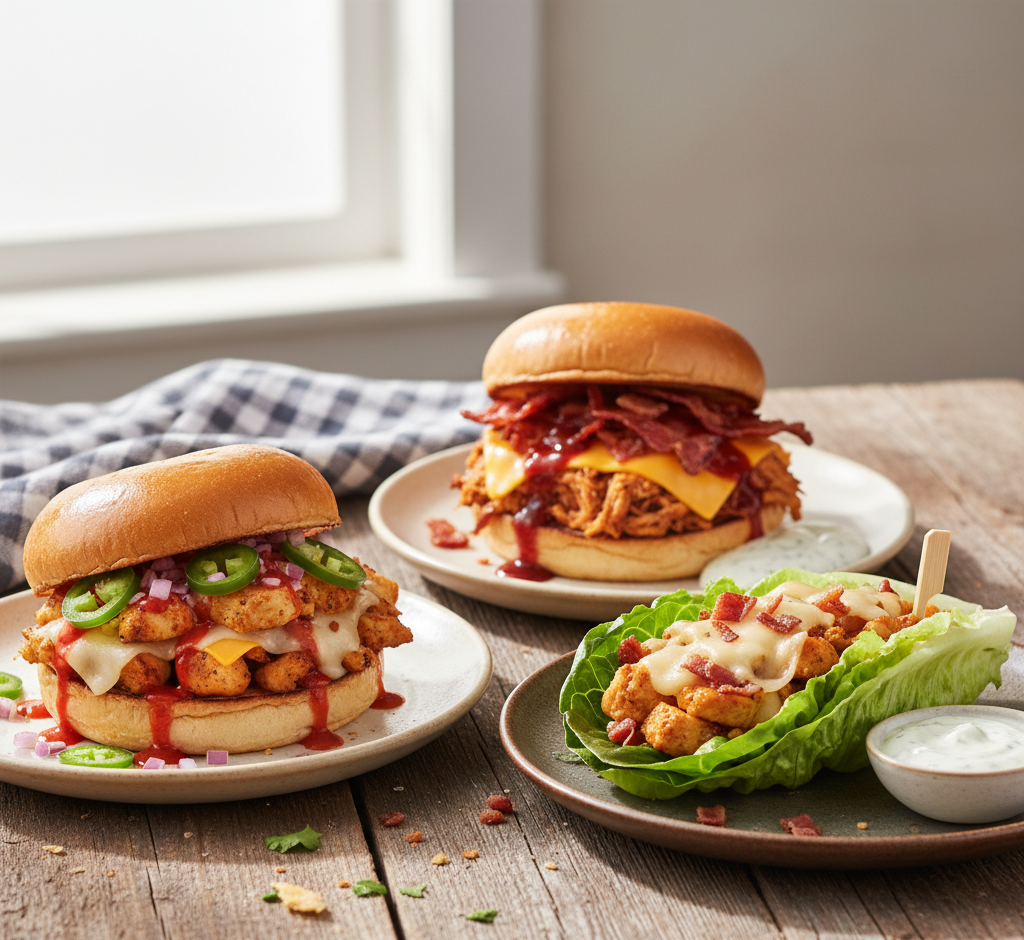
Variations

This Irresistible Chopped Chicken Bacon Ranch Sandwich Bliss is easy to customize:

Spicy Version

  • Add hot sauce or jalapeños

BBQ Twist

  • Mix in a bit of BBQ sauce

Low-Carb Option

  • Serve in lettuce wraps instead of bread

Extra Cheesy

  • Add cream cheese or extra shredded cheese

What to Serve With It

Pair your Irresistible Chopped Chicken Bacon Ranch Sandwich Bliss with:

  • French fries or sweet potato fries
  • Coleslaw
  • Pickles
  • Chips or a side salad

These sides complement the rich flavors perfectly.

Storage & Reheating

  • Refrigerate: Store filling for up to 3 days
  • Reheat: Warm in a skillet or microwave
  • Store separately from bread
  • Avoid freezing for best texture

Fresh assembly keeps the sandwich at its best.

Common Mistakes to Avoid

Avoid these mistakes when making Irresistible Chopped Chicken Bacon Ranch Sandwich Bliss:

  • Using dry chicken
  • Overloading the sandwich
  • Skipping toasting the bread
  • Adding too much dressing

Balance is key for the perfect sandwich.

FAQs

Can I use leftover chicken?

Yes! It’s a great way to use leftovers.

What’s the best bread for this sandwich?

Hoagie rolls or brioche buns work best.

Can I make it ahead of time?

You can prepare the filling ahead and assemble later.

Can I make it healthier?

Use light ranch and whole grain bread.

Final Thoughts

This Irresistible Chopped Chicken Bacon Ranch Sandwich Bliss is everything you want in a comfort meal—rich, flavorful, and incredibly satisfying. With its creamy, savory filling and perfectly toasted bread, it’s a recipe that delivers every single time.

Whether you’re cooking for yourself, your family, or a crowd, this sandwich is guaranteed to impress. Once you try it, you’ll understand why it truly is sandwich bliss.

Loaded Breakfast Tostadas: The Ultimate Flavor-Packed Morning Recipe

If you’re tired of the same old breakfast routine, it’s time to shake things up with these irresistible Loaded Breakfast Tostadas. This bold and satisfying dish combines crispy tortillas with layers of refried beans, fluffy eggs, melted cheese, and fresh toppings for a breakfast that’s bursting with flavor and texture.

Perfect for busy mornings, weekend brunches, or even breakfast-for-dinner nights, these Loaded Breakfast Tostadas are easy to make and endlessly customizable. They bring together everything you love about classic breakfast favorites in one crunchy, delicious bite.

Loaded Breakfast

Why You’ll Love This Recipe

These Loaded Breakfast Tostadas are a game-changer for breakfast lovers:

  • Crispy, crunchy base with hearty toppings
  • Quick and easy to prepare
  • Packed with protein and flavor
  • Perfect for meal prep or brunch gatherings
  • Customizable to suit any taste

Once you try them, they’ll quickly become a go-to favorite.

Ingredients

To make these flavorful Loaded Breakfast Tostadas, gather the following:

Base:

  • 6 tostada shells (store-bought or homemade)

Toppings:

  • 1 cup refried beans
  • 4 large eggs
  • 1/2 cup shredded cheddar or Mexican blend cheese
  • 1 avocado (sliced)
  • 1/2 cup salsa
  • 1/4 cup sour cream
  • 2 tablespoons chopped cilantro

Optional Add-Ons:

  • Cooked bacon or sausage
  • Diced tomatoes
  • Jalapeños
  • Hot sauce

Ingredient Notes

The magic of these Loaded Breakfast Tostadas comes from layering simple, flavorful ingredients:

  • Tostada shells: Provide the crispy foundation
  • Refried beans: Add creaminess and protein
  • Eggs: Scrambled or fried for richness
  • Cheese: Melts beautifully for a savory finish
  • Avocado: Adds freshness and creaminess

Step-by-Step Instructions

1. Warm the Beans

Heat refried beans in a saucepan until smooth and warm.

2. Cook the Eggs

Scramble or fry eggs according to your preference.

3. Heat the Tostadas

Warm tostada shells in the oven for a few minutes to crisp them up.

4. Assemble the Base

Spread a layer of refried beans onto each tostada.

5. Add Eggs and Cheese

Top with eggs and sprinkle cheese while everything is still warm.

6. Add Fresh Toppings

Layer avocado, salsa, sour cream, and cilantro.

7. Serve Immediately

Enjoy while crispy and fresh.

Tips for Perfect Results

To make the best Loaded Breakfast Tostadas, keep these tips in mind:

  • Don’t overload the tostadas to keep them crispy
  • Serve immediately to avoid sogginess
  • Use fresh ingredients for the best flavor
  • Warm components before assembling

These simple tips make a big difference.

Variations

One of the best things about Loaded Breakfast Tostadas is how versatile they are:

Vegetarian Version

  • Add sautéed veggies like peppers and onions

Meat Lover’s Version

  • Top with bacon, sausage, or chorizo

Spicy Kick

  • Add jalapeños or hot sauce

Healthy Option

  • Use whole grain tostadas and egg whites

What to Serve With It

These Loaded Breakfast Tostadas pair well with:

  • Fresh fruit salad
  • Smoothies or juices
  • Coffee or iced coffee
  • Breakfast potatoes

They create a balanced and satisfying meal.

Storage & Reheating

  • Store components separately for best results
  • Refrigerate toppings for up to 2 days
  • Reheat eggs and beans before assembling
  • Avoid storing assembled tostadas to prevent sogginess

Fresh assembly is key for maintaining texture.

Common Mistakes to Avoid

Avoid these mistakes when making Loaded Breakfast Tostadas:

  • Using cold ingredients
  • Overloading toppings
  • Skipping warming steps
  • Letting tostadas sit too long before serving

Attention to timing ensures the perfect bite.

FAQs

Can I make these ahead of time?

It’s best to prep ingredients ahead and assemble fresh.

Can I use corn tortillas instead?

Yes—just crisp them in the oven or pan.

Are these gluten-free?

They can be if using certified gluten-free tostadas.

What’s the best cheese to use?

Cheddar or Mexican blend works great.

Final Thoughts

These Loaded Breakfast Tostadas are everything you want in a breakfast—crispy, hearty, flavorful, and incredibly satisfying. They’re easy to make, fun to customize, and perfect for any occasion, from quick weekday mornings to relaxed weekend brunches.

Once you try this recipe, you’ll love how it transforms simple ingredients into a bold, delicious meal. It’s a breakfast worth waking up for.

Decadent Banana Foster French Toast Recipe with Easy Rum Caramel Sauce

If you’re ready to take your breakfast or brunch game to the next level, this Decadent Banana Foster French Toast Recipe with Easy Rum Caramel Sauce is exactly what you need. Inspired by the classic New Orleans dessert, this dish combines golden, custardy French toast with caramelized bananas and a rich, buttery rum sauce that’s simply irresistible.

This recipe feels fancy enough for special occasions yet simple enough to make at home. With warm spices, soft bread, and that luscious caramel topping, every bite of this Banana Foster French Toast delivers comfort and indulgence in the best way possible.

Decadent Banana

Why You’ll Love This Recipe

This Decadent Banana Foster French Toast Recipe with Easy Rum Caramel Sauce is a must-try for several reasons:

  • Rich, buttery, and indulgent flavor
  • Perfect balance of sweet and caramelized notes
  • Easy homemade rum caramel sauce
  • Ideal for brunch, holidays, or special mornings
  • Restaurant-quality results at home

It’s a show-stopping breakfast that feels like a treat.

Ingredients

Here’s what you’ll need to make this amazing Decadent Banana Foster French Toast Recipe with Easy Rum Caramel Sauce:

For the French Toast:

  • 6 slices thick bread (brioche or challah)
  • 3 large eggs
  • 3/4 cup milk
  • 1 tablespoon sugar
  • 1 teaspoon vanilla extract
  • 1/2 teaspoon cinnamon
  • Butter for cooking

For the Banana Foster Topping:

  • 3 ripe bananas (sliced)
  • 1/2 cup brown sugar
  • 1/4 cup butter
  • 1/4 cup heavy cream
  • 2 tablespoons dark rum (optional)
  • 1/2 teaspoon cinnamon
  • Pinch of salt

Ingredient Notes

The success of this Decadent Banana Foster French Toast Recipe with Easy Rum Caramel Sauce comes down to choosing the right ingredients:

  • Bread: Brioche or challah gives a rich, fluffy texture
  • Bananas: Use ripe but firm bananas for best caramelization
  • Brown sugar: Adds deep caramel flavor
  • Rum: Optional, but enhances authenticity and depth
  • Heavy cream: Makes the sauce silky and smooth

Step-by-Step Instructions

1. Prepare the Custard

In a bowl, whisk together eggs, milk, sugar, vanilla, and cinnamon.

2. Dip the Bread

Dip each slice into the custard mixture, ensuring it’s well coated but not soggy.

3. Cook the French Toast

Heat butter in a skillet over medium heat and cook each slice until golden brown on both sides.

4. Make the Caramel Sauce

In a pan, melt butter and brown sugar. Add cream, cinnamon, and salt, stirring until smooth.

5. Add Bananas

Add sliced bananas and cook until soft and caramelized.

6. Add Rum (Optional)

Stir in rum and cook briefly to combine flavors.

7. Assemble

Place French toast on a plate and top with banana caramel sauce.

8. Serve Warm

Enjoy immediately for best flavor and texture.

Tips for Perfect Results

For the best Decadent Banana Foster French Toast Recipe with Easy Rum Caramel Sauce, keep these tips in mind:

  • Use thick-cut bread for better texture
  • Don’t oversoak the bread to avoid sogginess
  • Cook on medium heat for even browning
  • Serve immediately while warm and fresh

These tips ensure your dish turns out perfectly every time.

Variations

This Decadent Banana Foster French Toast Recipe with Easy Rum Caramel Sauce can be customized easily:

No Alcohol Version

  • Skip the rum—it’s still delicious

Nutty Addition

  • Add chopped pecans or walnuts

Chocolate Twist

  • Drizzle chocolate sauce on top

Healthier Option

  • Use whole grain bread and reduce sugar

What to Serve With It

Pair your Decadent Banana Foster French Toast Recipe with Easy Rum Caramel Sauce with:

  • Fresh fruit
  • Bacon or sausage
  • Coffee or espresso
  • Fresh juice or smoothies

These sides balance the richness of the dish.


Storage & Reheating

  • Refrigerate: Store leftovers for up to 2 days
  • Reheat: Warm in a skillet or microwave
  • Store sauce separately if possible
  • Avoid freezing for best texture

This dish is best enjoyed fresh but can be saved if needed.

Common Mistakes to Avoid

Avoid these mistakes when making Decadent Banana Foster French Toast Recipe with Easy Rum Caramel Sauce:

  • Using thin or dry bread
  • Overcooking the caramel sauce
  • Skipping seasoning in the custard
  • Letting bananas over-soften

Careful attention ensures perfect results.

FAQs

Can I make this ahead of time?

You can prepare components ahead, but assemble fresh for best results.

Is the rum necessary?

No, it’s optional and can be skipped.

What’s the best bread to use?

Brioche or challah works best for richness.

Can I use milk alternatives?

Yes, almond or oat milk works well.

Final Thoughts

This Decadent Banana Foster French Toast Recipe with Easy Rum Caramel Sauce is the ultimate indulgent breakfast or brunch dish. With its rich caramel flavor, soft texture, and warm banana topping, it’s guaranteed to impress anyone at the table.

Whether you’re celebrating a special occasion or simply treating yourself, this recipe delivers comfort, flavor, and a touch of elegance in every bite. Once you try it, it may just become your new favorite brunch classic.

Try Our Fluffy Nutella Cream-Filled Crepes Recipe Today

If you’ve ever dreamed of a café-style breakfast that feels indulgent yet surprisingly easy to make, this Try Our Fluffy Nutella Cream-Filled Crepes Recipe Today is exactly what you need. These delicate, thin crepes are soft and slightly buttery, wrapped around a luscious filling of Nutella and whipped cream that melts in your mouth with every bite.

Perfect for weekend brunches, special occasions, or even a sweet late-night treat, this recipe transforms simple pantry ingredients into something truly magical. Once you master these Nutella cream-filled crepes, you’ll find yourself making them again and again.

Try Our Fluffy

Why You’ll Love This Recipe

There are so many reasons to fall in love with this Try Our Fluffy Nutella Cream-Filled Crepes Recipe Today:

  • Light, delicate, and fluffy crepes
  • Rich and creamy Nutella filling
  • Quick and easy to prepare
  • Perfect for breakfast, brunch, or dessert
  • Customizable with fruits and toppings

It’s the perfect balance of elegance and comfort in one dish.

Ingredients

Here’s everything you need for this delicious Try Our Fluffy Nutella Cream-Filled Crepes Recipe Today:

For the Crepes:

  • 1 cup all-purpose flour
  • 2 large eggs
  • 1 1/2 cups milk
  • 2 tablespoons melted butter
  • 1 tablespoon sugar
  • 1/2 teaspoon vanilla extract
  • Pinch of salt

For the Filling:

  • 1/2 cup Nutella
  • 1 cup heavy whipping cream
  • 2 tablespoons powdered sugar

Optional Toppings:

  • Fresh strawberries or bananas
  • Powdered sugar
  • Chocolate drizzle

Ingredient Notes

The beauty of this Try Our Fluffy Nutella Cream-Filled Crepes Recipe Today lies in its simple yet high-quality ingredients:

  • Nutella: The star of the filling—rich, smooth, and chocolatey
  • Heavy cream: Whipped to create a light, airy texture
  • Milk: Helps create thin, tender crepes
  • Butter: Adds richness and prevents sticking
  • Fresh fruit: Balances the sweetness

Step-by-Step Instructions

1. Make the Batter

In a bowl, whisk together flour, eggs, milk, melted butter, sugar, vanilla, and salt until smooth. Let the batter rest for 10–15 minutes.

2. Cook the Crepes

Heat a nonstick skillet over medium heat. Pour a small amount of batter and swirl to coat the pan. Cook for about 1 minute per side.

3. Prepare the Filling

Whip the heavy cream with powdered sugar until soft peaks form.

4. Assemble

Spread Nutella over each crepe, add whipped cream, and fold or roll.

5. Add Toppings

Top with fresh fruit, powdered sugar, or chocolate drizzle.

6. Serve Immediately

Enjoy warm for the best texture and flavor.

Tips for Perfect Results

For the best Try Our Fluffy Nutella Cream-Filled Crepes Recipe Today, follow these tips:

  • Let the batter rest for smoother crepes
  • Use a nonstick pan for easy flipping
  • Keep crepes thin for the best texture
  • Don’t overfill to prevent tearing
  • Cook on medium heat to avoid burning

These simple techniques ensure flawless crepes every time.

Variations

This Try Our Fluffy Nutella Cream-Filled Crepes Recipe Today is incredibly versatile:

Banana Nutella

  • Add sliced bananas inside

Berry Delight

  • Use strawberries, blueberries, or raspberries

Peanut Butter Twist

  • Add a layer of peanut butter

Savory Option

  • Skip sugar and fill with cheese and ham

What to Serve With It

Pair your Try Our Fluffy Nutella Cream-Filled Crepes Recipe Today with:

  • Fresh coffee or espresso
  • Orange juice or smoothies
  • Yogurt parfait
  • Scrambled eggs for a balanced brunch

These additions make it a complete and satisfying meal.

Storage & Reheating

  • Refrigerate: Store crepes (unfilled) for up to 3 days
  • Freeze: Stack with parchment paper and freeze up to 2 months
  • Reheat: Warm in a skillet or microwave
  • Fill fresh for best results

Proper storage helps maintain texture and flavor.

Common Mistakes to Avoid

Avoid these mistakes when making Try Our Fluffy Nutella Cream-Filled Crepes Recipe Today:

  • Skipping batter resting time
  • Making crepes too thick
  • Overcooking and drying them out
  • Overfilling with cream

A little attention ensures perfect results.

FAQs

Can I make crepe batter ahead of time?

Yes! It can be stored in the fridge for up to 24 hours.

Why are my crepes tearing?

They may be too thin or overfilled.

Can I use store-bought whipped cream?

Absolutely—it’s a convenient option.

Are crepes difficult to make?

Not at all! Once you get the hang of it, they’re quick and easy.

Final Thoughts

This Try Our Fluffy Nutella Cream-Filled Crepes Recipe Today is the ultimate treat for anyone who loves a sweet, elegant dish that’s surprisingly simple to prepare. With its delicate texture, rich filling, and endless customization options, it’s a recipe you’ll come back to time and time again.

Whether you’re serving it for brunch, dessert, or a special occasion, these crepes are guaranteed to impress. Once you take that first bite, you’ll understand why they’re so irresistible.

Easter Dirt Cake: The Ultimate No-Bake Spring Dessert Everyone Loves

If you’re looking for a playful, crowd-pleasing dessert this spring, this Easter Dirt Cake is the perfect choice. It’s a nostalgic favorite that combines layers of creamy pudding, crushed chocolate cookies, and festive Easter decorations into one irresistible no-bake treat.

What makes this Easter Dirt Cake so special is not just its rich, indulgent flavor but also its whimsical presentation. With pastel candies, mini chocolate eggs, and cute toppings, it’s a dessert that doubles as a centerpiece for your holiday table.

Easter Dirt

Why You’ll Love This Recipe

This Easter Dirt Cake is a must-make for so many reasons:

  • No baking required—perfect for busy holidays
  • Kid-friendly and fun to decorate
  • Rich, creamy, and chocolatey
  • Perfect for parties and gatherings
  • Easy to customize with toppings

It’s a dessert that brings joy to both kids and adults alike.

Ingredients

To make this delicious Easter Dirt Cake, you’ll need:

  • 1 package chocolate sandwich cookies (crushed)
  • 8 oz cream cheese (softened)
  • 1/2 cup butter (softened)
  • 1 cup powdered sugar
  • 2 (3.4 oz) packages instant vanilla pudding mix
  • 3 cups cold milk
  • 8 oz whipped topping (like Cool Whip)
  • Easter candies (mini eggs, Peeps, sprinkles)

Ingredient Notes

The ingredients in this Easter Dirt Cake come together to create its signature flavor and texture:

  • Chocolate cookies: Provide the “dirt” look and rich chocolate taste
  • Cream cheese: Adds a tangy, creamy base
  • Pudding mix: Creates a smooth and fluffy layer
  • Whipped topping: Lightens the texture
  • Easter candies: Add color and festive charm

Step-by-Step Instructions

1. Prepare the Cookies

Crush chocolate cookies into fine crumbs and set aside.

2. Make the Cream Base

In a bowl, beat cream cheese, butter, and powdered sugar until smooth.

3. Mix the Pudding

In another bowl, whisk pudding mix with cold milk until thickened.

4. Combine

Fold pudding into the cream cheese mixture, then gently fold in whipped topping.

5. Layer the Cake

In a dish, layer cookie crumbs and cream mixture, repeating layers.

6. Add Final Topping

Finish with a layer of cookie crumbs on top.

7. Decorate

Top with Easter candies and decorations.

8. Chill

Refrigerate for at least 2 hours before serving.

Tips for Perfect Results

For the best Easter Dirt Cake, keep these tips in mind:

  • Use softened cream cheese for a smooth mixture
  • Chill long enough to set the layers properly
  • Crush cookies finely for the best texture
  • Layer evenly for a beautiful presentation

These tips help create a perfectly balanced dessert.

Variations

This Easter Dirt Cake is easy to customize:

Chocolate Lover’s Version

  • Use chocolate pudding instead of vanilla

Peanut Butter Twist

  • Add peanut butter to the cream mixture

Healthier Option

  • Use reduced-fat cream cheese and whipped topping

Individual Cups

  • Serve in small cups for parties

What to Serve With It

This Easter Dirt Cake pairs well with:

  • Fresh fruit
  • Coffee or tea
  • Lemonade or iced drinks
  • Light spring desserts

It’s rich, so lighter sides balance it perfectly.

Storage & Reheating

  • Refrigerate: Store covered for up to 3–4 days
  • Do not freeze: Texture may change
  • Serve chilled: Best enjoyed cold

This dessert is ideal for making ahead.

Common Mistakes to Avoid

Avoid these mistakes when making Easter Dirt Cake:

  • Not softening cream cheese properly
  • Skipping chill time
  • Using too large cookie chunks
  • Overmixing the whipped topping

Attention to detail ensures a smooth, creamy dessert.

FAQs

Can I make Easter Dirt Cake ahead of time?

Yes! It’s best made a day in advance.

Can I use homemade whipped cream?

Absolutely—it works great as a substitute.

What cookies work best?

Chocolate sandwich cookies are ideal for the classic look.

Can kids help make this?

Definitely! It’s a fun, kid-friendly recipe.

Final Thoughts

This Easter Dirt Cake is the perfect combination of fun, flavor, and simplicity. With its creamy layers, chocolatey crunch, and festive toppings, it’s a dessert that brings smiles to any Easter celebration.

Whether you’re hosting a big gathering or enjoying a quiet holiday at home, this no-bake treat is sure to become a seasonal favorite. Easy to make and even easier to love, it’s a recipe you’ll come back to year after year.

Soft Hot Cross Buns Recipe with Easy Zesty Orange Glaze for Easter

Nothing says Easter quite like a batch of warm, fragrant buns fresh from the oven, and this Soft Hot Cross Buns Recipe with Easy Zesty Orange Glaze for Easter delivers everything you love about this classic treat—with a citrusy twist that takes it to the next level. These buns are pillowy soft, lightly spiced, and studded with sweet dried fruit, then finished with a glossy orange glaze that adds brightness and balance.

Whether you’re continuing a holiday tradition or trying hot cross buns for the first time, this recipe is approachable, rewarding, and incredibly delicious. The aroma alone—warm spices, yeast, and citrus—will make your kitchen feel like a cozy bakery.

Soft Hot Cross

Why You’ll Love This Recipe

This Soft Hot Cross Buns Recipe with Easy Zesty Orange Glaze for Easter stands out for its irresistible texture and flavor:

  • Ultra-soft and fluffy crumb
  • Perfect balance of spice and sweetness
  • Bright citrus glaze for a fresh twist
  • Ideal for Easter brunch or spring baking
  • Make-ahead friendly and freezer-friendly

These buns feel special enough for holidays but simple enough to enjoy anytime.

Ingredients

To make this delicious Soft Hot Cross Buns Recipe with Easy Zesty Orange Glaze for Easter, gather the following:

For the Dough:

  • 3 1/2 cups all-purpose flour
  • 1/4 cup sugar
  • 1 packet active dry yeast
  • 1 teaspoon cinnamon
  • 1/2 teaspoon nutmeg
  • 1/2 teaspoon salt
  • 3/4 cup warm milk
  • 1/4 cup melted butter
  • 2 large eggs
  • 1 cup raisins or currants
  • Zest of 1 orange

For the Cross:

  • 1/2 cup flour
  • 5–6 tablespoons water

For the Orange Glaze:

  • 1 cup powdered sugar
  • 2–3 tablespoons fresh orange juice
  • 1/2 teaspoon orange zest

Ingredient Notes

The ingredients in this Soft Hot Cross Buns Recipe with Easy Zesty Orange Glaze for Easter work together to create that signature flavor and texture:

  • Yeast: Make sure it’s fresh for a good rise
  • Orange zest and juice: Adds brightness and freshness
  • Spices: Cinnamon and nutmeg create warmth
  • Dried fruit: Provides sweetness and texture
  • Butter and eggs: Ensure richness and softness

Step-by-Step Instructions

1. Activate the Yeast

In a bowl, combine warm milk and yeast. Let sit for 5–10 minutes until foamy.

2. Mix the Dough

In a large bowl, combine flour, sugar, spices, and salt. Add yeast mixture, eggs, butter, and orange zest. Mix to form a dough.

3. Knead

Knead for 8–10 minutes until smooth and elastic. Fold in raisins.

4. First Rise

Place dough in a greased bowl, cover, and let rise for 1–1.5 hours until doubled.

5. Shape the Buns

Divide dough into equal portions and shape into balls. Place in a baking dish.

6. Second Rise

Cover and let rise again for 30–45 minutes.

7. Add the Cross

Mix flour and water into a paste and pipe crosses onto each bun.

8. Bake

Bake at 375°F (190°C) for 18–22 minutes until golden.

9. Glaze

Mix glaze ingredients and brush over warm buns.

Tips for Perfect Results

For the best Soft Hot Cross Buns Recipe with Easy Zesty Orange Glaze for Easter, follow these tips:

  • Don’t overheat the milk—it can kill the yeast
  • Knead thoroughly for soft texture
  • Allow proper rising time for fluffy buns
  • Glaze while warm for better absorption

These simple tips ensure bakery-quality results every time.

Variations

You can easily customize this Soft Hot Cross Buns Recipe with Easy Zesty Orange Glaze for Easter:

Chocolate Chip Version

  • Replace dried fruit with chocolate chips

Apple Cinnamon

  • Add small diced apples and extra cinnamon

Lemon Glaze Twist

  • Swap orange glaze for lemon

Dairy-Free Option

  • Use plant-based milk and butter

What to Serve With It

These Soft Hot Cross Buns Recipe with Easy Zesty Orange Glaze for Easter pair beautifully with:

  • Coffee or tea
  • Fresh fruit salad
  • Scrambled eggs or brunch dishes
  • Butter or cream cheese spread

They’re perfect for a festive Easter table.

Storage & Reheating

  • Room temperature: Store for up to 2 days
  • Refrigerate: Keep for up to 5 days
  • Freeze: Freeze for up to 2 months
  • Reheat: Warm in oven or microwave

Proper storage keeps them soft and delicious.

Common Mistakes to Avoid

Avoid these mistakes when making Soft Hot Cross Buns Recipe with Easy Zesty Orange Glaze for Easter:

  • Not activating yeast properly
  • Overworking or under-kneading the dough
  • Skipping the second rise
  • Overbaking and drying out the buns

Careful attention ensures perfect buns every time.

FAQs

Can I make these buns ahead of time?

Yes! Prepare the dough the night before and bake fresh in the morning.

Can I use instant yeast?

Absolutely—just skip the activation step.

Why are my buns dense?

They may not have risen long enough or were under-kneaded.

Can I freeze hot cross buns?

Yes, they freeze well—just thaw and reheat before serving.

Final Thoughts

This Soft Hot Cross Buns Recipe with Easy Zesty Orange Glaze for Easter is a beautiful blend of tradition and fresh flavor. The soft texture, warm spices, and bright citrus glaze make these buns truly unforgettable.

Whether you’re baking for Easter or simply craving a cozy homemade treat, this recipe delivers comfort, flavor, and a touch of seasonal joy. Once you try it, these buns will become a cherished part of your spring baking tradition.

Irresistibly Tasty Sloppy Joe Garlic Bread for Quick Dinners

If you’re looking for a fun, fast, and family-friendly dinner, this Irresistibly Tasty Sloppy Joe Garlic Bread for Quick Dinners is about to become your new go-to recipe. It combines the rich, saucy goodness of classic sloppy joes with crispy, buttery garlic bread—then tops it all with melted cheese for the ultimate comfort food experience.

This recipe is perfect for those nights when you want something hearty and satisfying without spending hours in the kitchen. The bold flavors, crispy edges, and gooey topping make this dish a guaranteed crowd-pleaser for both kids and adults alike.

Irresistibly Tasty

Why You’ll Love This Recipe

There are so many reasons to love this Irresistibly Tasty Sloppy Joe Garlic Bread for Quick Dinners:

  • Quick and easy—ready in about 30 minutes
  • Perfect combination of textures—crispy bread and saucy filling
  • Kid-friendly and crowd-pleasing
  • Great for weeknights or casual gatherings
  • Customizable with your favorite toppings

It’s everything you love about sloppy joes—just better and easier to serve.

Ingredients

Here’s what you’ll need to make this delicious Irresistibly Tasty Sloppy Joe Garlic Bread for Quick Dinners:

  • 1 loaf French bread (cut in half lengthwise)
  • 1 lb ground beef
  • 1/2 cup onion (finely chopped)
  • 2 cloves garlic (minced)
  • 3/4 cup ketchup
  • 2 tablespoons brown sugar
  • 1 tablespoon Worcestershire sauce
  • 1 teaspoon mustard
  • 2 tablespoons butter (melted)
  • 1 teaspoon garlic powder
  • 1 1/2 cups shredded mozzarella or cheddar cheese
  • Salt and pepper to taste

Ingredient Notes

The magic of this Irresistibly Tasty Sloppy Joe Garlic Bread for Quick Dinners comes from simple, flavorful ingredients:

  • Ground beef: Use lean beef to reduce excess grease
  • French bread: Provides a sturdy, crispy base
  • Cheese: Mozzarella melts beautifully, while cheddar adds sharp flavor
  • Worcestershire sauce: Deepens the savory taste
  • Garlic butter: Adds richness and enhances the bread

Step-by-Step Instructions

1. Preheat the Oven

Preheat your oven to 375°F (190°C) and line a baking sheet.

2. Cook the Beef

In a skillet over medium heat, cook ground beef and onions until browned. Drain excess grease, then add garlic.

3. Make the Sloppy Joe Sauce

Stir in ketchup, brown sugar, Worcestershire sauce, mustard, salt, and pepper. Simmer for 5–7 minutes.

4. Prepare the Garlic Bread

Mix melted butter with garlic powder and spread over the cut sides of the bread.

5. Assemble

Place bread on the baking sheet, spoon the sloppy joe mixture evenly over each half, then top with cheese.

6. Bake

Bake for 10–12 minutes until the cheese is melted and bubbly.

7. Slice and Serve

Cut into pieces and serve hot.

Tips for Perfect Results

To make the best Irresistibly Tasty Sloppy Joe Garlic Bread for Quick Dinners, keep these tips in mind:

  • Toast the bread slightly before adding toppings for extra crispiness
  • Drain the beef well to avoid soggy bread
  • Use freshly shredded cheese for better melting
  • Don’t overload with sauce—balance is key

These small steps ensure a perfect texture and flavor every time.

Variations

This Irresistibly Tasty Sloppy Joe Garlic Bread for Quick Dinners is easy to customize:

Spicy Version

  • Add chili flakes or hot sauce

Turkey Sloppy Joe

  • Substitute ground turkey for a lighter option

Veggie Version

  • Use plant-based crumbles or lentils

Extra Cheesy

  • Add a mix of mozzarella, cheddar, and provolone

What to Serve With It

Pair your Irresistibly Tasty Sloppy Joe Garlic Bread for Quick Dinners with:

  • Fresh green salad
  • Coleslaw
  • Sweet potato fries
  • Pickles or chips

These sides add freshness and crunch to balance the richness.

Storage & Reheating

  • Refrigerate: Store leftovers for up to 3 days
  • Freeze: Freeze assembled (unbaked) for up to 2 months
  • Reheat: Bake in the oven for best texture
  • Avoid microwaving if you want to keep the bread crispy

Proper storage keeps your leftovers just as delicious.

Common Mistakes to Avoid

Avoid these mistakes when making Irresistibly Tasty Sloppy Joe Garlic Bread for Quick Dinners:

  • Not draining the meat properly
  • Using too much sauce
  • Skipping the garlic butter step
  • Overbaking and drying out the bread

Attention to detail makes a big difference in the final dish.

FAQs

Can I make this ahead of time?

Yes! Prepare everything and bake just before serving.

What’s the best bread to use?

French bread works best for its sturdy texture.

Can I use store-bought sloppy joe sauce?

Absolutely—it’s a great shortcut.

How do I keep the bread crispy?

Pre-toast it and avoid adding too much sauce.

Final Thoughts

This Irresistibly Tasty Sloppy Joe Garlic Bread for Quick Dinners is the ultimate comfort food mashup—quick, easy, and packed with bold flavor. It’s perfect for busy nights when you want something satisfying without the hassle.

Once you try it, you’ll love how simple it is to transform classic sloppy joes into a fun, shareable meal that everyone will enjoy. Add it to your weekly rotation—you won’t regret it!

Reuben Bake Casserole: A Cheesy, Comforting Twist on a Classic Sandwich

If you love the bold, tangy flavors of a classic Reuben sandwich, this Reuben bake casserole is about to become your new favorite comfort dish. It transforms everything you love—savory corned beef, melty Swiss cheese, tangy sauerkraut, and creamy dressing—into a warm, cheesy, oven-baked meal that’s perfect for feeding a crowd.

This recipe takes the traditional sandwich to the next level by layering all the ingredients into a hearty casserole that’s easy to prepare and even easier to enjoy. Whether you’re making it for a family dinner, potluck, or holiday gathering, this Reuben bake casserole delivers big flavor with minimal effort.

Reuben Bake Casserole

Why You’ll Love This Recipe

This Reuben bake casserole is a standout comfort food for so many reasons:

  • All the flavors of a classic Reuben sandwich in one dish
  • Easy to prepare ahead of time
  • Perfect for feeding a crowd
  • Warm, cheesy, and satisfying
  • Great for leftovers

It’s a no-fuss recipe that brings comfort and bold flavor together beautifully.

Ingredients

Here’s what you’ll need to make this delicious Reuben bake casserole:

  • 1 loaf rye bread (cubed)
  • 1 lb corned beef (chopped)
  • 2 cups sauerkraut (drained well)
  • 2 cups shredded Swiss cheese
  • 1 cup Thousand Island dressing
  • 4 large eggs
  • 1 cup milk
  • 1 teaspoon caraway seeds (optional)
  • Salt and pepper to taste

Ingredient Notes

The key to a great Reuben bake casserole is using quality ingredients:

  • Corned beef: Deli-style or leftover works perfectly
  • Rye bread: Adds authentic flavor and texture
  • Sauerkraut: Be sure to drain well to avoid sogginess
  • Swiss cheese: Melts beautifully and adds a nutty flavor
  • Thousand Island dressing: Brings creaminess and tang

Step-by-Step Instructions

1. Preheat and Prep

Preheat your oven to 350°F (175°C) and grease a baking dish.

2. Layer the Bread

Spread half of the cubed rye bread evenly in the dish.

3. Add Fillings

Layer corned beef, sauerkraut, and Swiss cheese over the bread.

4. Add Remaining Bread

Top with the remaining bread cubes.

5. Make the Custard

In a bowl, whisk together eggs, milk, dressing, and seasonings.

6. Pour and Soak

Pour the mixture evenly over the casserole and let it sit for 10 minutes.

7. Bake

Bake for 40–45 minutes until golden and set.

8. Serve

Let cool slightly before serving.

Tips for Perfect Results

To make the best Reuben bake casserole, keep these tips in mind:

  • Drain sauerkraut thoroughly to prevent excess moisture
  • Use day-old bread for better texture
  • Let it rest before baking so flavors meld
  • Cover with foil if browning too quickly

These small steps ensure a perfectly balanced casserole.


Variations

This Reuben bake casserole is easy to customize:

Turkey Reuben

  • Substitute turkey for corned beef

Low-Carb Option

  • Use low-carb bread alternatives

Extra Cheesy

  • Add more Swiss or mix in mozzarella

Spicy Twist

  • Add a drizzle of spicy mustard or hot sauce

What to Serve With It

This hearty Reuben bake casserole pairs well with:

  • Fresh green salad
  • Pickles or coleslaw
  • Roasted vegetables
  • Potato soup

These sides help balance the richness of the dish.

Storage & Reheating

  • Refrigerate: Store leftovers for up to 4 days
  • Freeze: Freeze portions for up to 2 months
  • Reheat: Warm in the oven or microwave
  • Cover when reheating to retain moisture

It reheats beautifully and tastes just as good the next day.

Common Mistakes to Avoid

Avoid these mistakes when making Reuben bake casserole:

  • Not draining sauerkraut properly
  • Using too much liquid
  • Skipping resting time before baking
  • Overbaking and drying it out

Attention to detail ensures a perfect dish.

FAQs

Can I make Reuben bake casserole ahead of time?

Yes! Assemble it the night before and bake when ready.

Can I use a different cheese?

Swiss is traditional, but mozzarella or provolone can work.

Is this casserole freezer-friendly?

Absolutely—it freezes and reheats well.

How do I prevent it from getting soggy?

Drain ingredients well and use slightly stale bread.

Final Thoughts

This Reuben bake casserole is a comforting, flavorful twist on a beloved classic. It’s easy to make, incredibly satisfying, and perfect for sharing with family and friends.

With its layers of savory meat, tangy sauerkraut, and gooey cheese, this dish delivers everything you love about a Reuben sandwich in a warm, baked form. Once you try it, it’s sure to become a go-to comfort food in your recipe collection.

Creamy Indian Chicken Curry Recipe: Rich, Flavorful & Easy to Make at Home

If you’re craving something warm, comforting, and packed with bold flavor, this creamy Indian chicken curry recipe is exactly what you need. With tender chicken simmered in a rich, spiced sauce, this dish brings restaurant-quality flavor straight to your kitchen.

This recipe strikes the perfect balance between creamy and aromatic, making it ideal for both beginners and experienced cooks. Whether you’re serving it for a cozy family dinner or entertaining guests, this creamy Indian chicken curry recipe is guaranteed to impress.

Creamy Indian

Why You’ll Love This Recipe

This creamy Indian chicken curry recipe stands out for so many reasons:

  • Rich and creamy texture with bold spices
  • Easy to make at home with simple ingredients
  • Perfect balance of heat and flavor
  • Great for meal prep and leftovers
  • Pairs beautifully with rice or naan

It’s comfort food with a flavorful twist that you’ll want to make again and again.

Ingredients

Here’s what you’ll need for this delicious creamy Indian chicken curry recipe:

  • 1 1/2 lbs chicken (boneless, skinless, cut into pieces)
  • 2 tablespoons oil or butter
  • 1 onion (finely chopped)
  • 3 cloves garlic (minced)
  • 1 tablespoon ginger (grated)
  • 2 teaspoons curry powder
  • 1 teaspoon garam masala
  • 1 teaspoon turmeric
  • 1 teaspoon paprika
  • 1 cup tomato puree
  • 1 cup heavy cream or coconut milk
  • Salt and pepper to taste
  • Fresh cilantro for garnish

Ingredient Notes

Using the right ingredients is key to a flavorful creamy Indian chicken curry recipe:

  • Chicken: Thighs stay juicy, but breasts work too
  • Spices: Fresh spices give the best aroma and depth
  • Tomato puree: Adds acidity and richness
  • Cream or coconut milk: Creates that signature creamy texture
  • Garam masala: Adds warmth and complexity

Step-by-Step Instructions

1. Sauté Aromatics

Heat oil in a large pan over medium heat. Cook onions until soft and golden, then add garlic and ginger.

2. Add Spices

Stir in curry powder, garam masala, turmeric, and paprika. Cook for 1–2 minutes to release flavors.

3. Cook the Chicken

Add chicken pieces and cook until lightly browned on all sides.

4. Add Tomato Base

Pour in tomato puree and simmer for 10 minutes until thickened.

5. Make It Creamy

Stir in cream or coconut milk and simmer until the sauce is rich and smooth.

6. Season and Serve

Adjust seasoning with salt and pepper. Garnish with cilantro and serve hot.

Tips for Perfect Results

For the best creamy Indian chicken curry recipe, keep these tips in mind:

  • Cook spices properly to enhance flavor
  • Don’t rush the simmering process
  • Use full-fat cream for richness
  • Taste and adjust seasoning before serving

These tips help you achieve authentic, restaurant-quality results.

Variations

This creamy Indian chicken curry recipe is highly adaptable:

Make It Spicier

  • Add chili powder or fresh chilies

Dairy-Free Option

  • Use coconut milk instead of cream

Add Vegetables

  • Include spinach, peas, or potatoes

Protein Swap

  • Use shrimp, tofu, or paneer

What to Serve With It

This creamy Indian chicken curry recipe pairs perfectly with:

  • Steamed basmati rice
  • Warm naan or flatbread
  • Cucumber yogurt sauce (raita)
  • Pickled vegetables

These sides complement the rich flavors beautifully.

Storage & Reheating

  • Refrigerate: Store for up to 4 days
  • Freeze: Freeze for up to 2 months
  • Reheat: Warm gently on the stove or microwave
  • Add liquid if needed to restore creaminess

This dish tastes even better the next day as flavors deepen.

Common Mistakes to Avoid

Avoid these mistakes when making creamy Indian chicken curry recipe:

  • Skipping spice toasting
  • Overcooking chicken
  • Using low-fat cream (less flavor)
  • Not simmering long enough

Attention to detail makes a big difference.

FAQs

Can I make this curry ahead of time?

Yes! It actually tastes better after the flavors develop overnight.

Is this curry very spicy?

No, it’s mild, but you can adjust the heat level easily.

Can I use coconut milk instead of cream?

Absolutely—it’s a great dairy-free option.

What’s the best cut of chicken to use?

Chicken thighs are juicier, but breasts work well too.

Final Thoughts

This creamy Indian chicken curry recipe is the perfect combination of rich, comforting, and flavorful. It’s easy enough for weeknight dinners yet impressive enough for special occasions.

Once you try it, you’ll see how simple it is to recreate bold, authentic flavors at home. With its creamy texture and aromatic spices, this dish is sure to become a staple in your kitchen.

Strawberry Cream Cheese Muffins: Soft, Sweet, and Bakery-Style Perfection

There’s nothing quite like biting into a soft, fluffy muffin filled with juicy strawberries and a rich, creamy center. These strawberry cream cheese muffins are the perfect balance of sweet fruit and tangy creaminess, making them an irresistible treat any time of day.

Whether you’re baking for breakfast, brunch, or a cozy afternoon snack, this recipe delivers bakery-quality results right from your kitchen. The combination of fresh strawberries and smooth cream cheese creates a flavor and texture that feels indulgent yet comforting.

Strawberry Cream

Why You’ll Love This Recipe

These strawberry cream cheese muffins are sure to become a favorite for so many reasons:

  • Moist and fluffy texture
  • Bursting with fresh strawberry flavor
  • Creamy cheesecake-like filling
  • Perfect for breakfast, brunch, or dessert
  • Easy to make with simple ingredients

They’re the kind of muffins that disappear quickly once served.

Ingredients

Here’s everything you’ll need to make these delicious strawberry cream cheese muffins:

For the Muffins:

  • 2 cups all-purpose flour
  • 1/2 cup granulated sugar
  • 1/4 cup brown sugar
  • 2 teaspoons baking powder
  • 1/2 teaspoon salt
  • 1/2 cup vegetable oil
  • 2 large eggs
  • 1/2 cup milk
  • 1 teaspoon vanilla extract
  • 1 1/2 cups fresh strawberries (diced)

For the Cream Cheese Filling:

  • 8 oz cream cheese (softened)
  • 1/3 cup sugar
  • 1 teaspoon vanilla extract

Ingredient Notes

Using the right ingredients will make your strawberry cream cheese muffins even better:

  • Strawberries: Fresh strawberries provide the best flavor and texture
  • Cream cheese: Full-fat works best for a rich filling
  • Oil: Keeps muffins moist longer than butter
  • Vanilla extract: Enhances the overall flavor

Step-by-Step Instructions

1. Preheat and Prep

Preheat your oven to 375°F (190°C) and line a muffin tin with paper liners.

2. Make the Filling

In a bowl, mix cream cheese, sugar, and vanilla until smooth. Set aside.

3. Mix Dry Ingredients

In a large bowl, whisk together flour, sugars, baking powder, and salt.

4. Combine Wet Ingredients

In another bowl, mix oil, eggs, milk, and vanilla until smooth.

5. Make the Batter

Combine wet and dry ingredients, mixing until just combined. Fold in strawberries.

6. Fill Muffin Cups

Add batter halfway, spoon cream cheese filling in the center, then top with more batter.

7. Bake

Bake for 18–22 minutes, or until golden and set.

8. Cool and Serve

Let muffins cool slightly before enjoying.

Tips for Perfect Results

For the best strawberry cream cheese muffins, follow these tips:

  • Don’t overmix the batter to keep muffins light
  • Use room temperature cream cheese for smooth filling
  • Dice strawberries evenly for consistent texture
  • Fill muffin cups properly to avoid overflow

These small steps make a big difference in the final result.

Variations

These strawberry cream cheese muffins are easy to customize:

Add Crunch

  • Sprinkle a crumb topping before baking

Try Different Fruits

  • Substitute blueberries or raspberries

Make It Healthier

  • Use whole wheat flour or reduce sugar

Add Citrus Flavor

  • Mix in lemon zest for brightness

What to Serve With It

These strawberry cream cheese muffins pair perfectly with:

  • Coffee or tea
  • Fresh fruit
  • Yogurt parfaits
  • Smoothies

They’re ideal for breakfast spreads or brunch tables.

Storage & Reheating

  • Room temperature: Store for up to 2 days
  • Refrigerate: Keep for up to 5 days
  • Freeze: Freeze for up to 2 months
  • Reheat: Warm gently in the microwave

Proper storage helps maintain freshness and flavor.

Common Mistakes to Avoid

Avoid these mistakes when making strawberry cream cheese muffins:

  • Overmixing the batter
  • Using watery strawberries
  • Overfilling muffin cups
  • Skipping cooling time

Attention to detail ensures bakery-quality muffins.

FAQs

Can I use frozen strawberries?

Yes, but thaw and drain them well first.

How do I keep the filling from sinking?

Layer the batter properly and keep the filling thick.

Can I make these muffins ahead of time?

Absolutely—they store well and taste great the next day.

Are these muffins freezer-friendly?

Yes, just wrap them tightly before freezing.

Final Thoughts

These strawberry cream cheese muffins are everything you want in a homemade baked treat—soft, moist, flavorful, and filled with creamy goodness. They’re easy enough for everyday baking yet special enough to serve for brunch or gatherings.

Once you try them, you’ll understand why they’re such a crowd favorite. With their perfect balance of sweet strawberries and rich cream cheese, these muffins are guaranteed to become a staple in your kitchen.