Pumpkin Cheesecake (Creamy, Rich & Perfect Fall Dessert)

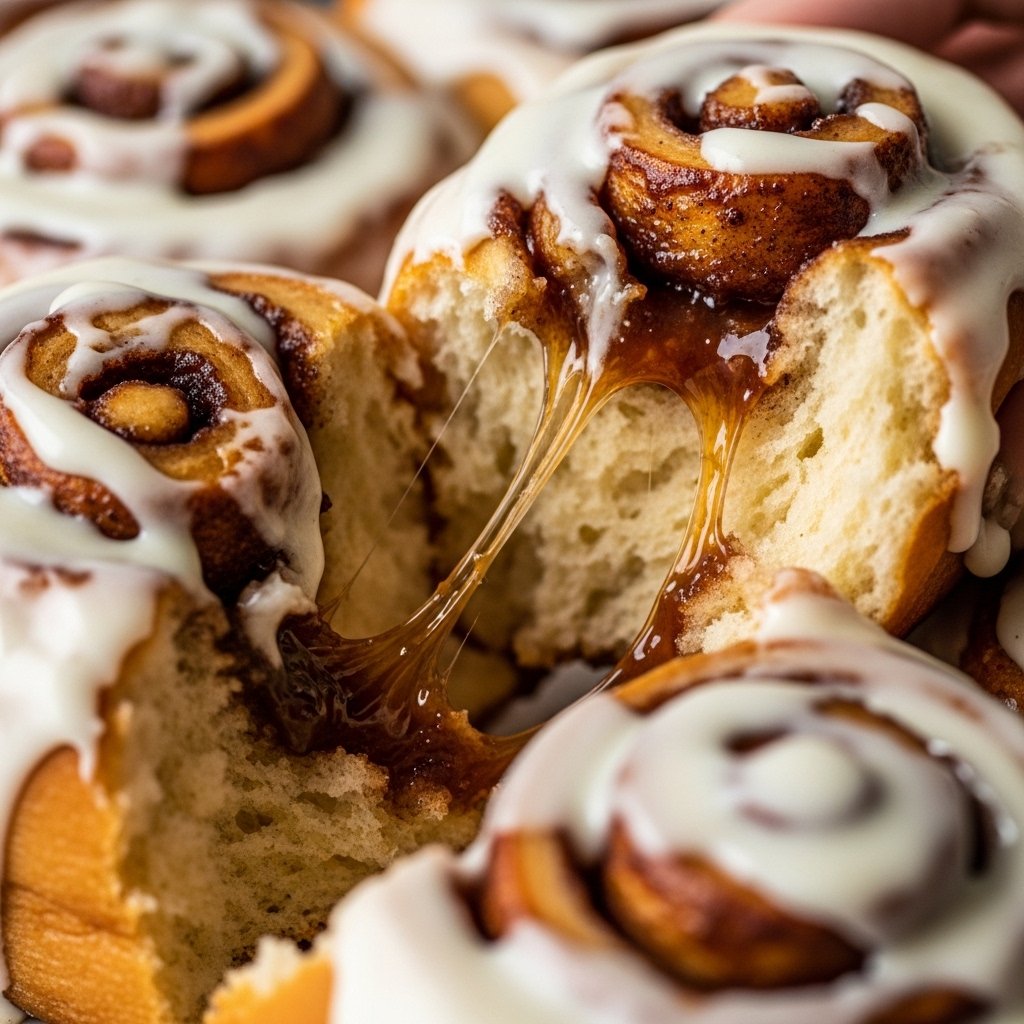
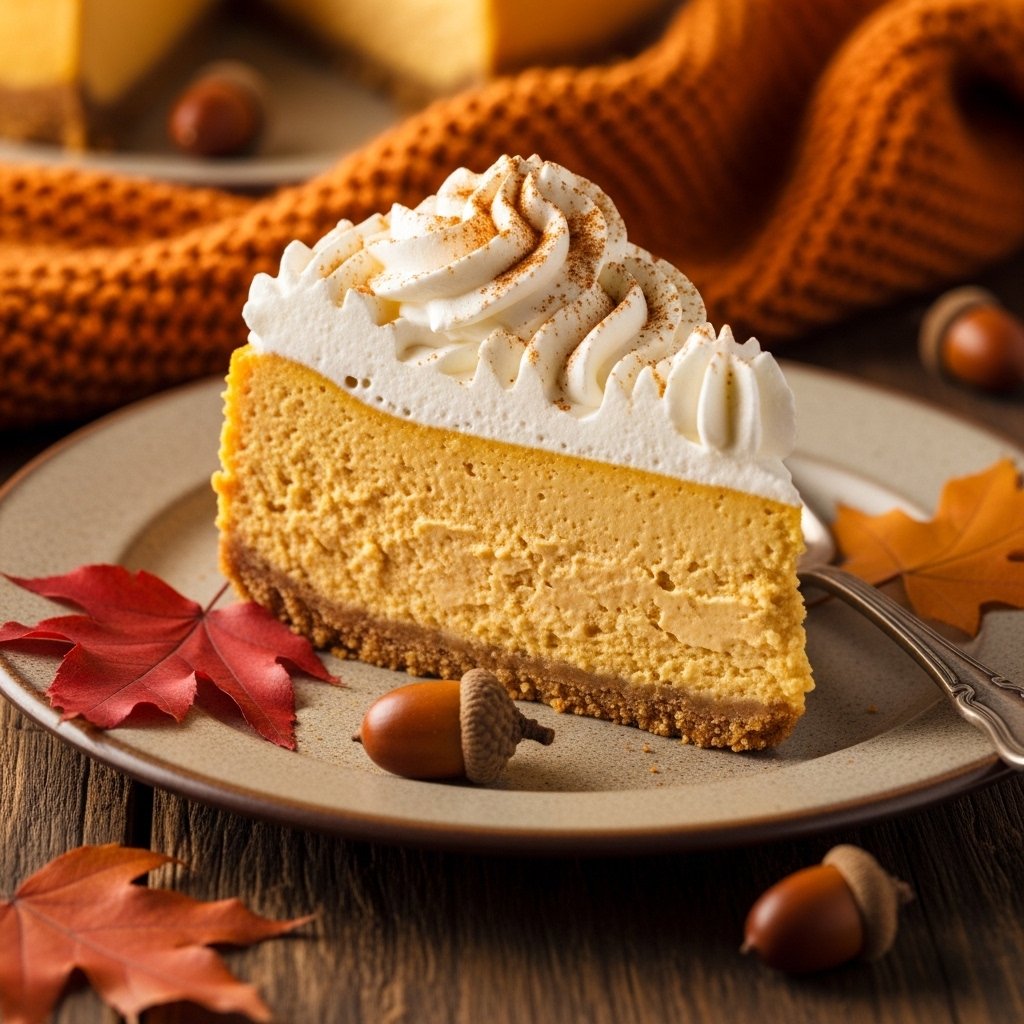
If there’s one dessert that truly captures the cozy essence of fall, it’s this Pumpkin Cheesecake. Creamy, rich, and perfectly spiced with cinnamon, nutmeg, and cloves, this cheesecake blends the best of classic cheesecake with the warm flavors of pumpkin pie.

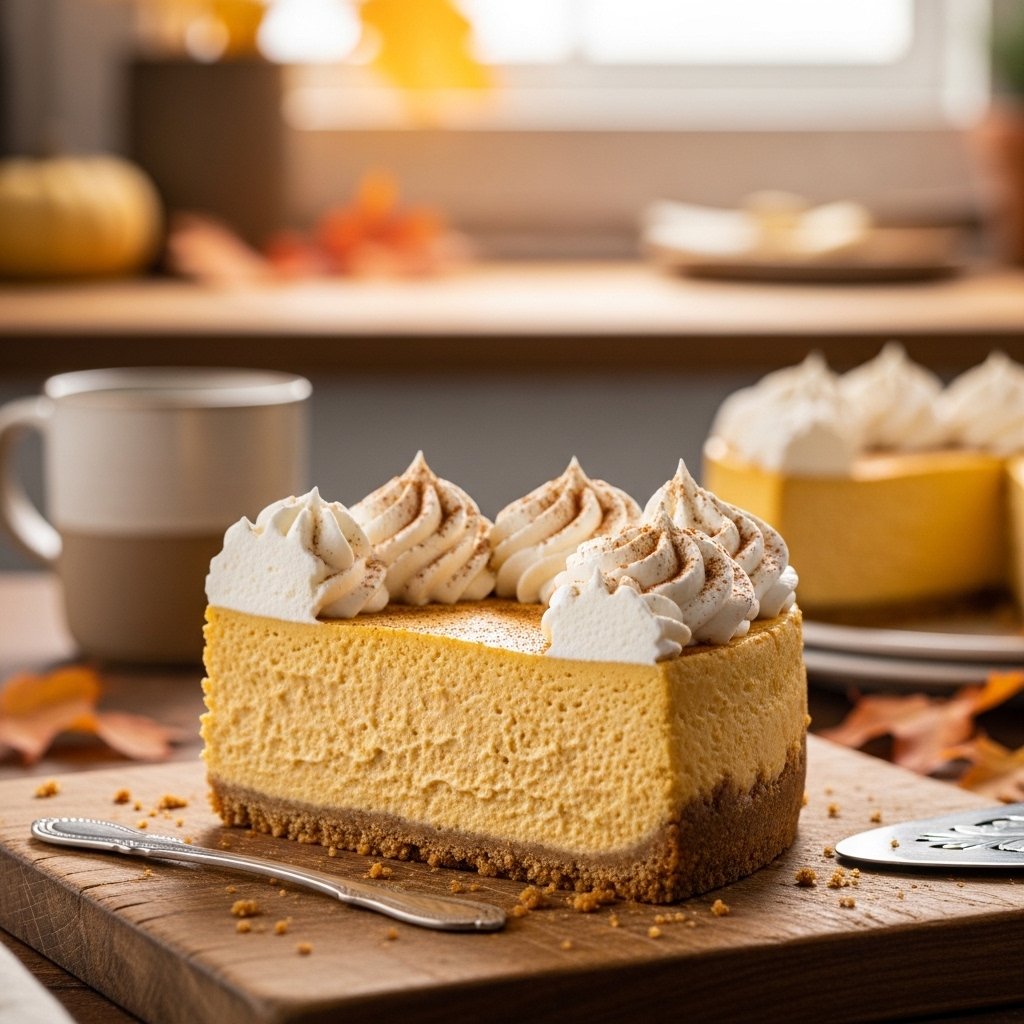
This dessert is a showstopper for Thanksgiving, holiday gatherings, or any time you want something indulgent yet comforting. The smooth texture combined with the spiced pumpkin filling makes every bite unforgettable.

Why You’ll Love This Pumpkin Cheesecake

This Pumpkin Cheesecake is a must-have dessert for fall baking season.

  • Ultra creamy texture with no cracks when baked properly
  • Perfect balance of pumpkin and warm spices
  • Graham cracker crust adds sweet crunch
  • Great make-ahead dessert for holidays
  • Crowd-pleasing and restaurant-quality flavor
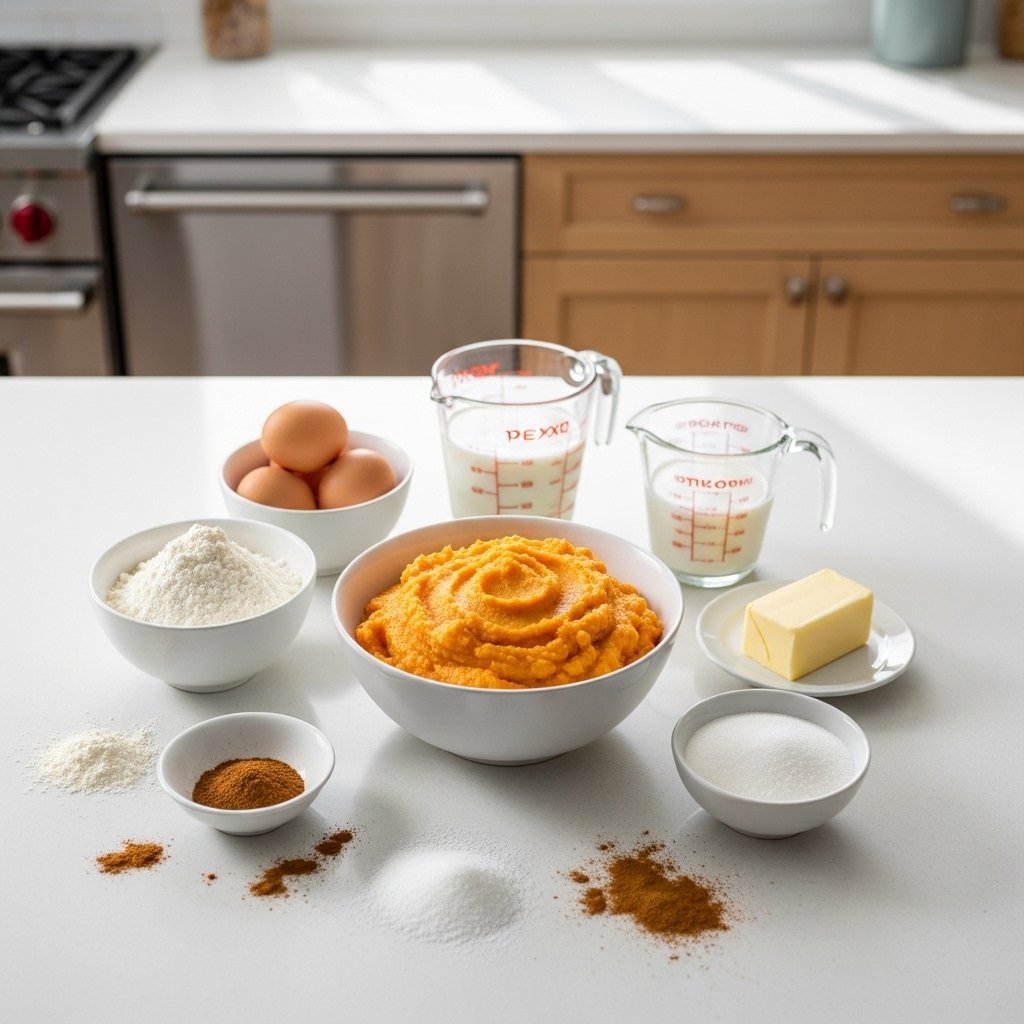
Ingredients

For the Crust:

  • 1 ½ cups graham cracker crumbs
  • ¼ cup brown sugar
  • ½ teaspoon cinnamon
  • 6 tablespoons melted butter

For the Filling:

  • 24 oz cream cheese (softened)
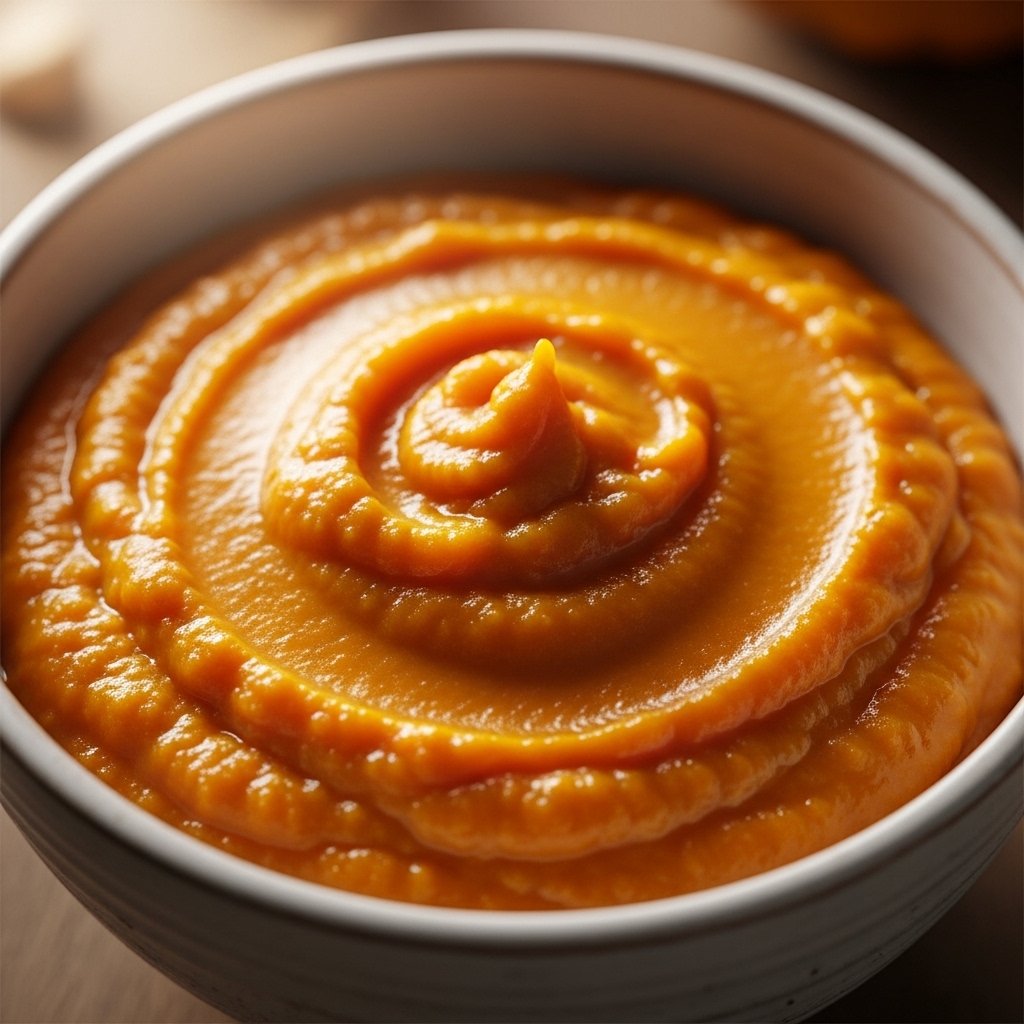
  • 1 cup pumpkin puree
  • ¾ cup granulated sugar
  • 3 large eggs
  • 1 teaspoon vanilla extract
  • 1 teaspoon cinnamon
  • ½ teaspoon nutmeg
  • ¼ teaspoon cloves
  • ¼ teaspoon salt

Ingredient Notes

The key to a perfect Pumpkin Cheesecake is using full-fat cream cheese for that rich, silky texture. Pumpkin puree should be plain—not pumpkin pie filling—to control sweetness and spice.

The warm spices are what give this cheesecake its signature fall flavor. A touch of cloves and nutmeg enhances the pumpkin without overpowering it.

Step-by-Step Instructions

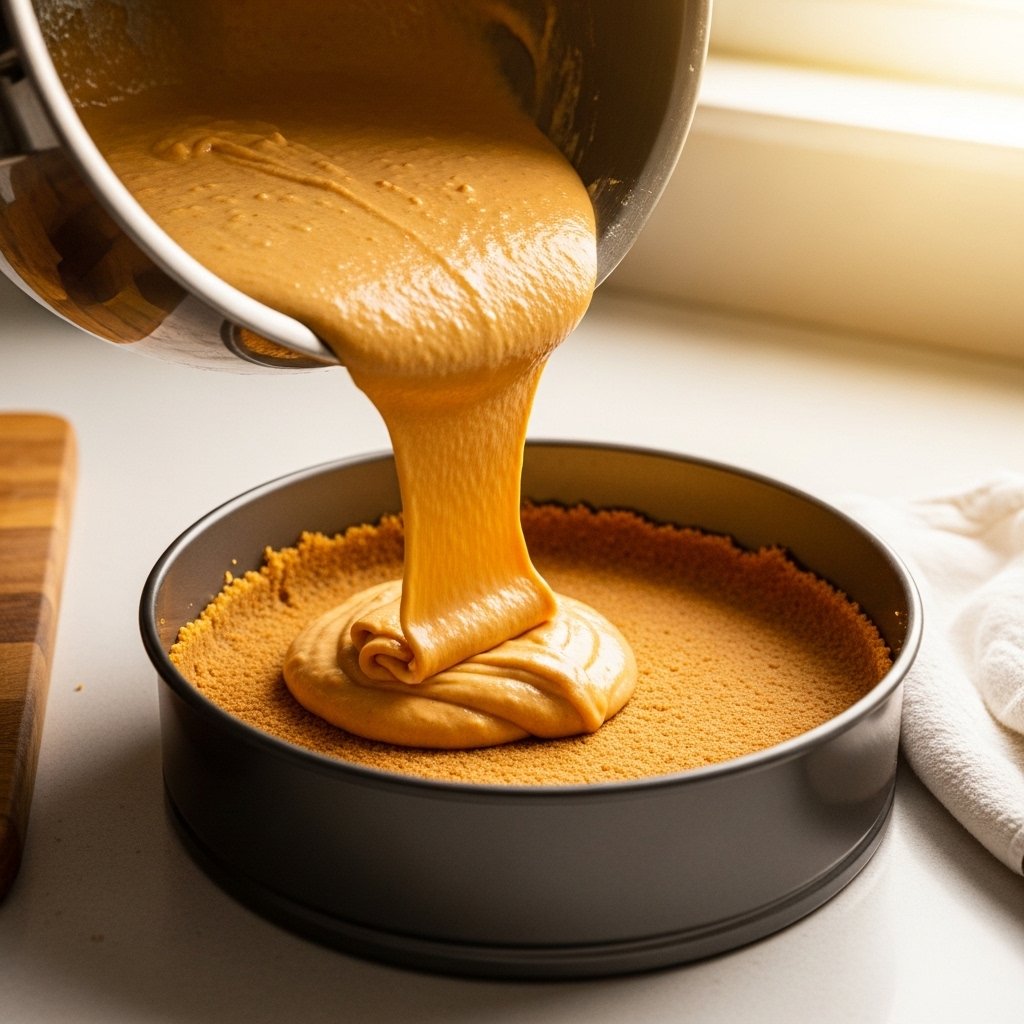
1. Prepare the Crust

Mix graham cracker crumbs, sugar, cinnamon, and melted butter. Press into a springform pan and bake for 8–10 minutes.

2. Make the Filling

Beat cream cheese until smooth, then add sugar, pumpkin puree, eggs, vanilla, and spices. Mix until creamy.

3. Assemble

Pour filling over cooled crust and smooth the top evenly.

4. Bake

Bake at 325°F for 55–65 minutes until edges are set but center is slightly jiggly.

5. Cool Slowly

Turn off oven and let cheesecake cool inside with the door slightly open.

6. Chill

Refrigerate for at least 4 hours or overnight before serving.

Tips for Perfect Results

To make the best Pumpkin Cheesecake, follow these expert tips:

  • Use room temperature cream cheese for a smooth filling
  • Do not overmix eggs to avoid cracks
  • Bake in a water bath for extra creaminess (optional but recommended)
  • Cool slowly to prevent sinking or cracking

These steps help achieve that bakery-style cheesecake texture.
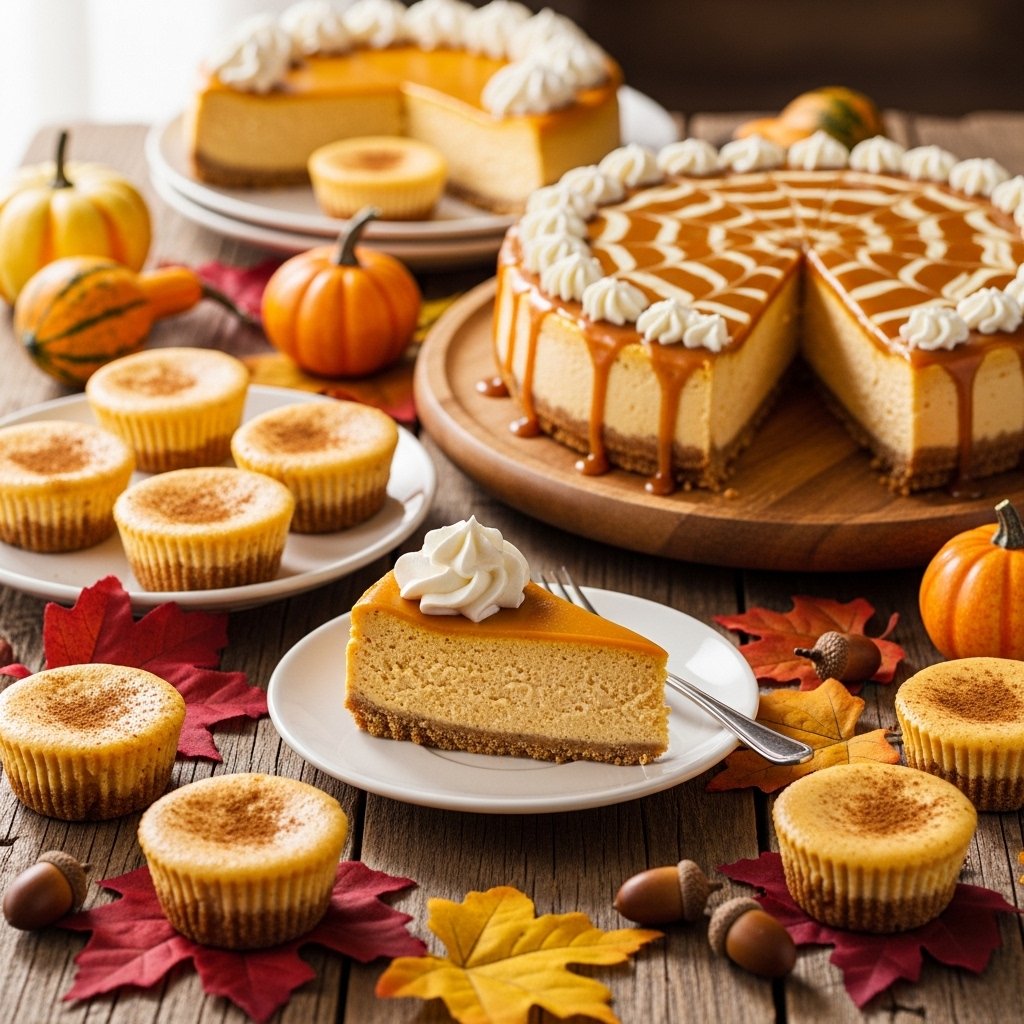
Variations

This Pumpkin Cheesecake recipe is easy to customize:

  • Add a gingersnap crust for extra spice
  • Swirl in caramel or maple sauce
  • Top with pecans or candied walnuts
  • Make mini pumpkin cheesecakes in muffin tins

What to Serve With It

Pumpkin cheesecake pairs beautifully with:

  • Whipped cream
  • Hot coffee or pumpkin spice latte
  • Vanilla ice cream
  • Warm caramel drizzle

It’s perfect for Thanksgiving dessert tables or cozy fall nights.
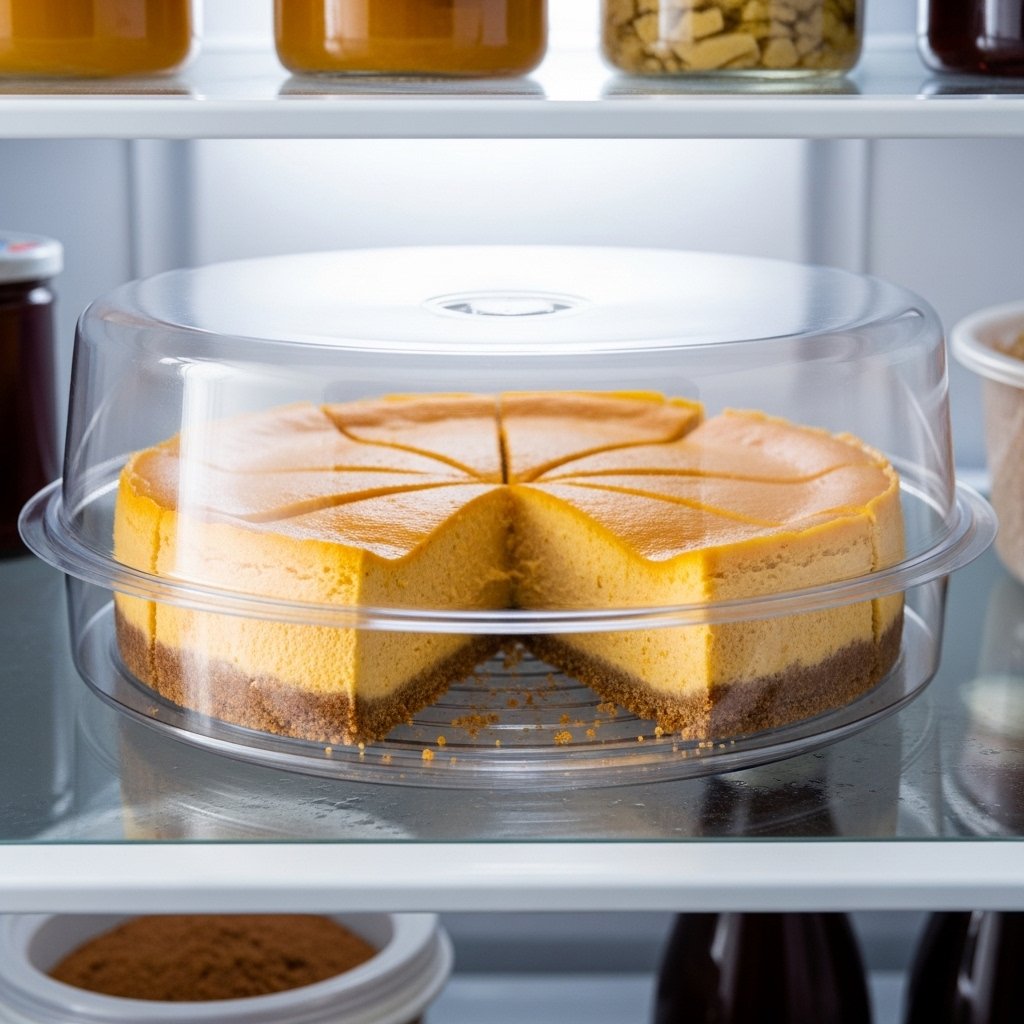
Storage & Reheating

Store your Pumpkin Cheesecake properly for best freshness:

  • Refrigerator: up to 5 days
  • Freezer: up to 2 months (wrap tightly)

Serve chilled or let it sit at room temperature for 15 minutes before serving.

Common Mistakes to Avoid

  • Overbaking (causes cracks and dryness)
  • Using cold cream cheese (leads to lumps)
  • Skipping cooling time
  • Overmixing batter after adding eggs

Avoiding these ensures a smooth, creamy cheesecake every time.

FAQs

1. Can I use fresh pumpkin instead of canned?

Yes, but make sure it is well-puréed and not watery.

2. Why did my cheesecake crack?

Overbaking or rapid cooling is usually the cause.

3. Can I make pumpkin cheesecake ahead of time?

Yes, it’s best made a day before serving.

4. Can I freeze pumpkin cheesecake?

Absolutely—wrap tightly and freeze up to 2 months.

Final Thoughts

This Pumpkin Cheesecake is the ultimate fall dessert—creamy, spiced, and absolutely irresistible. It brings together everything you love about autumn in one perfect slice.

Whether for holidays or cozy weekends, this recipe is guaranteed to impress every time.

Easy No Bake Lemon Tiramisu (Creamy, Refreshing & Perfect Summer Dessert)

If you love classic tiramisu but want something lighter, brighter, and perfect for warm weather, this Easy No Bake Lemon Tiramisu is going to become your new favorite dessert. It swaps the traditional coffee and cocoa for fresh lemon flavor, creating a creamy, citrusy treat that’s refreshing yet indulgent.

This dessert is incredibly simple to make—no oven required, no complicated techniques, and no stress. It’s perfect for spring gatherings, summer parties, or anytime you want a dessert that feels elegant but is secretly easy.

Why You’ll Love This Easy No Bake Lemon Tiramisu

This Easy No Bake Lemon Tiramisu is a total crowd-pleaser for so many reasons:

  • No baking required—perfect for hot days
  • Bright lemon flavor that feels light and refreshing
  • Creamy mascarpone layers with rich texture
  • Quick to assemble in under 20 minutes
  • Perfect make-ahead dessert for entertaining

Ingredients

To make this Easy No Bake Lemon Tiramisu, you’ll need:

  • 1 ½ cups mascarpone cheese
  • 1 cup heavy whipping cream
  • ½ cup powdered sugar
  • 1 teaspoon vanilla extract
  • Zest of 2 lemons
  • ½ cup fresh lemon juice
  • 1–2 cups ladyfinger cookies (savoiardi)
  • ½ cup lemon curd (optional but recommended)
  • Fresh lemon slices for garnish

Ingredient Notes

The key to the best Easy No Bake Lemon Tiramisu is using high-quality mascarpone cheese. It creates that rich, silky texture that makes tiramisu so irresistible. Fresh lemons are essential—they bring brightness and balance to the creamy layers.

Ladyfingers soak up the lemon mixture, softening into a cake-like texture while still holding structure between layers.

Step-by-Step Instructions

1. Prepare the Cream Mixture

Whip heavy cream until soft peaks form. In another bowl, mix mascarpone, powdered sugar, vanilla, and lemon zest. Fold in whipped cream gently.

2. Prepare Lemon Soak

Mix fresh lemon juice with a bit of water or sweetener if desired.

3. Dip Ladyfingers

Quickly dip ladyfingers into lemon mixture—do not over-soak.

4. Layer Dessert

In a dish, layer soaked ladyfingers, mascarpone cream, and optional lemon curd. Repeat layers.

5. Chill

Refrigerate for at least 4 hours or overnight for best texture.

Tips for Perfect Results

To make the best Easy No Bake Lemon Tiramisu, follow these tips:

  • Do not over-soak ladyfingers or they will become mushy
  • Use cold heavy cream for better whipping results
  • Fold gently to keep cream airy and light
  • Chill overnight for best flavor development

These small details make a huge difference in texture.

Variations

This dessert is easy to customize:

  • Add blueberries or raspberries between layers
  • Swap lemon for orange or lime for a citrus twist
  • Add crushed graham crackers for texture
  • Make it individual servings in cups or jars

What to Serve With It

This Easy No Bake Lemon Tiramisu pairs beautifully with:

  • Fresh berries on the side
  • Iced tea or lemonade
  • Light summer meals like grilled chicken or salads
  • Espresso for a dessert contrast

It’s perfect for brunches, BBQs, and dinner parties.

Storage & Reheating

This dessert stores very well:

  • Refrigerator: up to 3–4 days
  • Freezer: up to 1 month (texture may soften slightly)

Always keep it covered to maintain freshness.

Common Mistakes to Avoid

  • Over-soaking ladyfingers (makes dessert too soft)
  • Using warm cream (won’t whip properly)
  • Skipping chilling time (flavors won’t set)
  • Overmixing mascarpone (can become runny)

Avoid these for perfect layers and texture.

FAQs

1. Can I make lemon tiramisu ahead of time?

Yes, it actually tastes better after chilling overnight.

2. Can I use store-bought lemon curd?

Absolutely—it adds extra richness and flavor.

3. Is this recipe alcohol-free?

Yes, this version contains no alcohol.

4. Can I freeze lemon tiramisu?

Yes, but texture may become slightly softer after thawing.

Final Thoughts

This Easy No Bake Lemon Tiramisu is the perfect combination of creamy, citrusy, and refreshing flavors. It’s simple enough for beginners but elegant enough for special occasions.

Whether you’re hosting guests or just treating yourself, this dessert is guaranteed to impress without any baking stress.

Beef Kofta Recipe | The Mediterranean Dish (Juicy, Flavorful & Easy Homemade Kofta)

If you’re craving something bold, aromatic, and packed with Mediterranean flavor, this Beef Kofta Recipe | The Mediterranean Dish is exactly what you need. Juicy ground beef mixed with herbs, spices, and onion is shaped into skewers or patties and grilled to perfection. The result is smoky, tender, and absolutely irresistible.

This dish is a staple across Middle Eastern and Mediterranean kitchens, loved for its simplicity and deep flavor. Whether you serve it in pita bread, over rice, or with a fresh salad, kofta is a versatile recipe that never disappoints.

Why You’ll Love This Beef Kofta Recipe

This Beef Kofta Recipe | The Mediterranean Dish is a must-have for anyone who loves easy, flavorful meals.

  • Juicy and tender texture with every bite
  • Bold Mediterranean spices like cumin and coriander
  • Easy to grill, bake, or pan-cook
  • Perfect for meal prep or family dinners
  • Works in wraps, bowls, or platters

Ingredients

To make this authentic Beef Kofta Recipe | The Mediterranean Dish, you’ll need:

  • 1 lb ground beef (80/20 recommended)
  • 1 small onion (finely grated)
  • 3 cloves garlic (minced)
  • ¼ cup fresh parsley (chopped)
  • 1 teaspoon cumin
  • 1 teaspoon coriander
  • 1 teaspoon paprika
  • ½ teaspoon cinnamon
  • 1 teaspoon salt
  • ½ teaspoon black pepper
  • Wooden or metal skewers

Ingredient Notes

The key to a great Beef Kofta Recipe | The Mediterranean Dish is balance. The onion adds moisture, while the spices bring warmth and depth. Cinnamon may seem unusual, but it adds a subtle sweetness that makes kofta unique.

Using ground beef with some fat (80/20) ensures juicy kofta that doesn’t dry out during cooking.

Step-by-Step Instructions

1. Mix the Meat

In a large bowl, combine ground beef, onion, garlic, parsley, and spices. Mix gently until just combined.

2. Shape the Kofta

Form mixture into elongated shapes around skewers or shape into small logs or patties.

3. Chill (Optional but Recommended)

Refrigerate for 20–30 minutes to help them hold their shape.

4. Cook the Kofta

Grill over medium-high heat for 8–10 minutes, turning occasionally until fully cooked and charred.

5. Serve Hot

Serve immediately with sides like rice, salad, or pita bread.

Tips for Perfect Results

To make the best Beef Kofta Recipe | The Mediterranean Dish, follow these tips:

  • Don’t overmix the meat or it will become dense
  • Use grated onion instead of chopped for moisture
  • Chill before grilling for better shape
  • Cook over medium-high heat for proper char

These small steps ensure juicy, flavorful kofta every time.

Variations

This recipe is easy to customize:

  • Swap beef for lamb or a beef-lamb mix
  • Add chili flakes for heat
  • Make kofta patties instead of skewers
  • Add mint for extra freshness

What to Serve With It

This Beef Kofta Recipe | The Mediterranean Dish pairs beautifully with:

  • Tzatziki sauce or garlic yogurt
  • Warm pita bread
  • Rice pilaf or couscous
  • Greek salad or tabbouleh

It’s perfect for a full Mediterranean-style meal.

Storage & Reheating

Store leftover kofta in an airtight container:

  • Refrigerator: up to 3 days
  • Freezer: up to 2 months

To reheat:

  • Skillet over medium heat
  • Oven at 350°F until warmed through

Common Mistakes to Avoid

  • Overmixing the meat (makes kofta tough)
  • Skipping onion moisture
  • Cooking on too low heat (no char)
  • Not resting mixture before cooking

Avoiding these ensures perfect texture and flavor.

FAQs

1. Can I bake beef kofta instead of grilling?

Yes, bake at 400°F for 15–20 minutes, flipping halfway.

2. What meat works best for kofta?

Ground beef with some fat or a beef-lamb mix works best.

3. Can I make kofta ahead of time?

Yes, shape and refrigerate or freeze before cooking.

4. Why is my kofta falling apart?

The mixture may be too dry or not chilled properly.

Final Thoughts

This Beef Kofta Recipe | The Mediterranean Dish is a perfect blend of simplicity and bold Mediterranean flavor. Juicy, spiced, and incredibly versatile, it’s a recipe you’ll want to make again and again.

Whether for weeknight dinners or entertaining guests, this dish brings authentic Mediterranean flavor straight to your kitchen.

The BEST Bang Bang Shrimp Taco Recipe

If you love bold flavors, crispy textures, and restaurant-style tacos you can make at home, this The BEST Bang Bang Shrimp Taco Recipe is about to become your new obsession. These tacos combine crunchy golden shrimp with a creamy, sweet, and spicy bang bang sauce, all wrapped in warm tortillas and topped with fresh, vibrant toppings.

This recipe is inspired by the famous bang bang shrimp appetizer, but transformed into a full meal that’s perfect for Taco Tuesday, casual dinners, or even party platters. Every bite delivers crunch, heat, creaminess, and freshness all at once.

Why You’ll Love This Recipe

This The BEST Bang Bang Shrimp Taco Recipe is everything you want in a quick and flavorful meal.

  • Crispy fried shrimp with irresistible crunch
  • Creamy spicy-sweet bang bang sauce
  • Fresh toppings for balance and texture
  • Quick to prepare and perfect for weeknights
  • Restaurant-quality flavor at home

Ingredients

For the Shrimp:

  • 1 lb large shrimp (peeled and deveined)
  • 1 cup buttermilk
  • 1 cup cornstarch or flour
  • 1 teaspoon garlic powder
  • 1 teaspoon paprika
  • Salt and pepper to taste
  • Oil for frying

For the Bang Bang Sauce:

  • ½ cup mayonnaise
  • 2 tablespoons sweet chili sauce
  • 1–2 teaspoons sriracha (adjust for spice)
  • 1 teaspoon honey

For the Tacos:

  • Small flour or corn tortillas
  • Shredded cabbage or lettuce
  • Sliced green onions
  • Fresh cilantro
  • Lime wedges

Ingredient Notes

The secret behind The BEST Bang Bang Shrimp Taco Recipe is balance. The shrimp should be crispy and lightly seasoned so the sauce can shine. Buttermilk helps tenderize the shrimp and ensures the coating sticks well.

The bang bang sauce is the star—creamy mayo combined with sweet chili and a kick of sriracha creates that addictive flavor profile everyone loves.

Step-by-Step Instructions

1. Prep the Shrimp

Soak shrimp in buttermilk for 10–15 minutes to help the coating stick.

2. Coat the Shrimp

Mix flour or cornstarch with seasoning, then dredge shrimp until fully coated.

3. Fry the Shrimp

Heat oil to 350°F and fry shrimp until golden and crispy, about 2–3 minutes per side.

4. Make the Sauce

Whisk together mayonnaise, sweet chili sauce, sriracha, and honey until smooth.

5. Toss and Assemble

Toss crispy shrimp in sauce, then load into warm tortillas with cabbage and toppings.

Tips for Perfect Results

To make The BEST Bang Bang Shrimp Taco Recipe, follow these tips:

  • Don’t overcrowd the pan when frying shrimp
  • Use cold shrimp for better crispiness
  • Adjust spice level in sauce to taste
  • Warm tortillas before assembling for best texture

These small details make a big difference in flavor and crunch.

Variations

This recipe is easy to customize:

  • Make it grilled shrimp tacos for a lighter version
  • Swap shrimp for chicken or cauliflower
  • Add avocado slices for creaminess
  • Use spicy slaw instead of plain cabbage

What to Serve With It

These tacos pair perfectly with:

  • Mexican rice or cilantro lime rice
  • Black beans or refried beans
  • Corn on the cob or street corn
  • Fresh guacamole and chips

They’re perfect for Taco Tuesday or casual dinner nights.

Storage & Reheating

For best results, store components separately:

  • Shrimp: refrigerate up to 2 days
  • Sauce: store in fridge up to 5 days
  • Tortillas: keep sealed at room temperature

To reheat shrimp:

  • Air fryer: 350°F for 3–4 minutes
  • Oven: 375°F for 5–7 minutes

Common Mistakes to Avoid

  • Overcooking shrimp (makes them rubbery)
  • Not drying shrimp before coating
  • Frying at incorrect oil temperature
  • Adding sauce too early before serving

Avoid these mistakes for perfect tacos every time.

FAQs

1. Can I bake the shrimp instead of frying?

Yes, bake at 425°F until crispy, flipping halfway.

2. Is bang bang sauce spicy?

It’s mildly spicy but can be adjusted easily.

3. Can I make it ahead of time?

You can prep sauce and shrimp separately in advance.

4. What tortillas work best?

Both flour and corn tortillas work great.

Final Thoughts

This The BEST Bang Bang Shrimp Taco Recipe delivers everything you want in a taco—crispy shrimp, bold sauce, and fresh toppings wrapped in warm tortillas.

It’s quick, flavorful, and guaranteed to impress whether you’re cooking for family or friends.

Easy Sweet Potato Waffles (Crispy, Fluffy & Naturally Sweet)

If you’re looking for a cozy, wholesome breakfast that feels indulgent but is actually packed with nutrients, these Easy Sweet Potato Waffles are exactly what you need. They’re naturally sweet, perfectly crispy on the outside, and soft and fluffy on the inside—everything you want in a homemade waffle.

Made with simple ingredients and real sweet potatoes, this recipe is a delicious twist on classic waffles. Whether you’re making breakfast for the family or prepping ahead for busy mornings, these waffles deliver flavor, comfort, and nutrition in every bite.

Why You’ll Love This Recipe

These Easy Sweet Potato Waffles are a breakfast game-changer for so many reasons. They’re satisfying, simple, and incredibly versatile.

  • Naturally sweet and nutrient-rich from real sweet potatoes
  • Crispy edges with fluffy centers every time
  • Perfect for meal prep and freezing
  • Kid-friendly and family-approved
  • Great for breakfast, brunch, or even dinner

Ingredients

To make these Easy Sweet Potato Waffles, you’ll need:

  • 1 cup mashed cooked sweet potato
  • 2 cups all-purpose flour
  • 2 teaspoons baking powder
  • 1 teaspoon cinnamon
  • ½ teaspoon salt
  • 2 tablespoons brown sugar
  • 2 large eggs
  • 1 ¾ cups milk
  • ¼ cup melted butter
  • 1 teaspoon vanilla extract

Ingredient Notes

The star of these Easy Sweet Potato Waffles is, of course, the sweet potato. It adds natural sweetness, moisture, and a beautiful golden color. Make sure it is fully cooked and mashed until smooth for the best batter consistency.

Cinnamon enhances the warm flavor profile, while brown sugar deepens the sweetness without overpowering the natural taste of the sweet potato.

Step-by-Step Instructions

1. Prepare Sweet Potato

Cook and mash sweet potatoes until smooth and creamy. Let cool slightly.

2. Mix Dry Ingredients

In a large bowl, combine flour, baking powder, cinnamon, salt, and brown sugar.

3. Mix Wet Ingredients

In another bowl, whisk eggs, milk, melted butter, vanilla, and mashed sweet potato.

4. Combine Batter

Gently mix wet and dry ingredients until just combined—don’t overmix.

5. Cook Waffles

Preheat waffle iron and cook batter according to manufacturer instructions until golden and crispy.

6. Serve Warm

Top with syrup, butter, fruit, or nuts and enjoy immediately.

Tips for Perfect Results

To make the best Easy Sweet Potato Waffles, keep these tips in mind:

  • Don’t overmix the batter to keep waffles fluffy
  • Use smooth mashed sweet potato for even texture
  • Preheat the waffle iron fully for crispy edges
  • Let waffles rest briefly on a rack to stay crisp

These small steps make a big difference in texture and flavor.

Variations

One of the best things about Easy Sweet Potato Waffles is how easy they are to customize:

  • Add chocolate chips for a sweeter breakfast
  • Mix in chopped pecans or walnuts for crunch
  • Use gluten-free flour for dietary needs
  • Add pumpkin spice instead of cinnamon for fall flavor

What to Serve With It

These waffles pair perfectly with:

  • Maple syrup or honey
  • Greek yogurt and berries
  • Scrambled eggs and bacon
  • Nut butter and banana slices

They work for both sweet and savory breakfast plates.

Storage & Reheating

Store leftover Easy Sweet Potato Waffles in an airtight container:

  • Refrigerator: up to 4 days
  • Freezer: up to 2 months

To reheat:

  • Toaster for crispiness
  • Oven at 350°F for 5–8 minutes
  • Microwave for quick warming (softer texture)

Common Mistakes to Avoid

  • Using lumpy sweet potato mash
  • Overmixing batter (leads to dense waffles)
  • Not preheating waffle iron properly
  • Adding too much liquid

Avoiding these ensures perfect waffles every time.

FAQs

1. Can I make sweet potato waffles ahead of time?

Yes! They store and reheat very well for meal prep.

2. Can I freeze sweet potato waffles?

Absolutely—freeze them individually for best results.

3. Can I make them dairy-free?

Yes, substitute milk and butter with plant-based alternatives.

4. Are sweet potato waffles healthy?

Yes, they are rich in fiber, vitamins, and naturally sweet ingredients.

Final Thoughts

These Easy Sweet Potato Waffles are the perfect blend of comfort and nutrition. Crispy, fluffy, and naturally sweet, they make any breakfast feel special.

Whether you’re meal prepping for the week or making a weekend brunch, this recipe is one you’ll come back to again and again.

Crispy Buttered Rye Reuben Sandwich Recipe (Fast, Flavorful & Perfectly Crispy)

If you’re craving a deli-style sandwich that’s crispy on the outside, gooey on the inside, and packed with bold flavor, this Reuben sandwich recipe is fast, flavorful, and perfectly crispy with a buttery rye crust is exactly what you need. It’s the kind of comfort food that feels nostalgic, satisfying, and surprisingly easy to make at home.

This classic American sandwich combines salty corned beef, tangy sauerkraut, creamy dressing, and melty Swiss cheese—all pressed between buttery rye bread until perfectly crisp. It’s a diner favorite you can recreate in minutes.


Why You’ll Love This Reuben Sandwich Recipe

This Reuben sandwich recipe is the ultimate balance of crunch, richness, and tangy flavor. It’s simple enough for a quick lunch but impressive enough to serve guests.

  • Fast and easy to prepare in under 20 minutes
  • Perfectly crispy rye bread crust with buttery flavor
  • Melty Swiss cheese that holds everything together
  • Bold, classic deli flavor at home
  • Great for lunch, dinner, or game day meals


Ingredients

To make this crispy Reuben sandwich recipe, you’ll need:

  • 2 slices rye bread
  • 4–6 slices corned beef
  • 2 slices Swiss cheese
  • 2–3 tablespoons sauerkraut (drained)
  • 1–2 tablespoons Russian or Thousand Island dressing
  • 1–2 tablespoons butter (softened)


Ingredient Notes

The key to a perfect Reuben sandwich recipe is quality ingredients. Rye bread gives that signature earthy flavor and crisp texture when toasted in butter. Corned beef should be tender and flavorful—deli-sliced or homemade both work well.

Make sure to drain sauerkraut well to avoid a soggy sandwich. The dressing adds creamy tanginess that ties everything together.


Step-by-Step Instructions

1. Prep the Bread

Butter one side of each slice of rye bread generously.

2. Assemble the Sandwich

On the unbuttered side, layer Swiss cheese, corned beef, sauerkraut, and dressing.

3. Cook the Sandwich

Heat a skillet over medium heat. Place sandwich butter-side down and cook until golden brown.

4. Flip and Finish

Flip carefully and cook until the second side is crispy and cheese is fully melted.

5. Serve Hot

Slice in half and serve immediately while warm and crispy.


Tips for Perfect Results

To master this Reuben sandwich recipe, follow these expert tips:

  • Use medium heat to avoid burning the bread
  • Drain sauerkraut well to prevent sogginess
  • Press lightly with spatula for even crisping
  • Let cheese melt fully before removing from pan

These small adjustments make a huge difference in texture and flavor.


Variations

Want to switch things up? Try these delicious variations:

  • Swap corned beef for turkey (Rachel sandwich)
  • Use spicy mustard instead of dressing
  • Add pickles for extra crunch
  • Try marble rye or sourdough bread


What to Serve With It

This Reuben sandwich recipe pairs perfectly with:

  • Crispy French fries or sweet potato fries
  • Dill pickles
  • Coleslaw
  • Potato chips or soup

It’s a classic deli-style meal that works for lunch or dinner.


Storage & Reheating

Reuben sandwiches are best enjoyed fresh, but you can store leftovers:

  • Refrigerate: up to 2 days wrapped tightly
  • Reheat: skillet over low heat for best crispiness
  • Avoid microwave if possible (makes bread soggy)


Common Mistakes to Avoid

  • Using too much sauerkraut (causes sogginess)
  • Cooking on high heat (burns bread before cheese melts)
  • Skipping butter on bread
  • Not draining dressing properly

Avoiding these ensures a perfectly crispy sandwich every time.


FAQs

1. What is a Reuben sandwich made of?

Corned beef, Swiss cheese, sauerkraut, and Russian dressing on rye bread.

2. Can I make a Reuben without sauerkraut?

Yes, but it will lose its signature tangy flavor.

3. What’s the best cheese for a Reuben?

Swiss cheese is traditional, but Gruyère also works well.

4. Can I bake instead of pan-frying?

Yes, bake at 375°F until crispy and melted.


Final Thoughts

This Reuben sandwich recipe is fast, flavorful, and perfectly crispy with a buttery rye crust, making it one of the best homemade deli-style sandwiches you can create.

With its bold flavors and satisfying crunch, this recipe is sure to become a regular favorite in your kitchen.

Blackened Chicken Salad with the BEST Cashew Dressing

If you’re looking for a bold, flavor-packed salad that actually keeps you full, this Blackened Chicken Salad with the BEST Cashew Dressing is about to become your new favorite meal. It combines smoky, spicy blackened chicken with crisp greens and a creamy, dairy-free cashew dressing that is absolutely irresistible.

Unlike boring salads that leave you hungry an hour later, this one is protein-rich, satisfying, and bursting with layers of flavor. It’s perfect for lunch, dinner, or meal prep when you want something healthy but still crave something indulgent.

Why You’ll Love This Recipe

This Blackened Chicken Salad with the BEST Cashew Dressing is not your average salad—it’s a full, satisfying meal.

  • Bold blackened spice on juicy chicken
  • Creamy dairy-free cashew dressing with rich flavor
  • High-protein and nutrient-dense ingredients
  • Perfect for meal prep and healthy eating
  • Restaurant-quality flavor made at home

Ingredients

For the Blackened Chicken:

  • 2 chicken breasts
  • 1 tablespoon paprika
  • 1 teaspoon garlic powder
  • 1 teaspoon onion powder
  • 1 teaspoon cayenne pepper
  • 1 teaspoon dried thyme
  • 1 teaspoon salt
  • 1/2 teaspoon black pepper
  • 2 tablespoons olive oil

For the Salad:

  • Mixed greens (romaine, spinach, arugula)
  • Cherry tomatoes
  • Cucumber slices
  • Avocado
  • Red onion

For the Cashew Dressing:

  • 1 cup raw cashews (soaked)
  • 1/2 cup water
  • 1 tablespoon lemon juice
  • 1 tablespoon apple cider vinegar
  • 1 teaspoon garlic
  • 1 teaspoon maple syrup
  • Salt to taste

Ingredient Notes

The secret to this Blackened Chicken Salad with the BEST Cashew Dressing is balance. The blackening spice gives deep smoky heat, while the cashew dressing cools everything down with a creamy, slightly tangy flavor.

Soaking cashews is essential—it creates a smooth, silky dressing that feels indulgent without any dairy. Fresh greens and ripe avocado complete the dish with freshness and creaminess.

Step-by-Step Instructions

1. Prepare the Cashew Dressing

Blend soaked cashews, water, lemon juice, apple cider vinegar, garlic, maple syrup, and salt until smooth and creamy. Set aside.

2. Season the Chicken

Mix all blackening spices together and coat chicken breasts evenly.

3. Cook the Chicken

Heat olive oil in a skillet over medium-high heat and cook chicken for 5–7 minutes per side until blackened and fully cooked.

4. Slice and Assemble

Slice chicken and place over a bed of fresh greens with vegetables.

5. Add Dressing

Drizzle cashew dressing generously over the salad and serve immediately.

Tips for Perfect Results

To make the best Blackened Chicken Salad with the BEST Cashew Dressing, follow these tips:

  • Don’t overcook the chicken—keep it juicy inside
  • Use a hot skillet for proper blackening
  • Soak cashews longer for extra smooth dressing
  • Blend dressing until completely creamy

These small details make a huge difference in flavor and texture.

Variations

This salad is easy to customize depending on your preferences:

  • Swap chicken for shrimp or salmon
  • Add quinoa or brown rice for extra carbs
  • Use kale instead of mixed greens
  • Add roasted corn or bell peppers for sweetness

What to Serve With It

This Blackened Chicken Salad with the BEST Cashew Dressing pairs well with:

  • Garlic bread or whole grain toast
  • Fresh fruit salad
  • Soup like tomato or vegetable
  • A refreshing iced tea or lemonade

It works as both a light dinner or a hearty lunch.

Storage & Reheating

Store components separately for best results:

  • Chicken: up to 3 days in the refrigerator
  • Dressing: up to 5 days in a sealed jar
  • Salad greens: best fresh, but can last 2 days

Reheat chicken gently in a skillet or microwave before serving.

Common Mistakes to Avoid

  • Using low heat (prevents proper blackening)
  • Skipping cashew soaking (dressing won’t be smooth)
  • Overcrowding the pan when cooking chicken
  • Dressing the salad too early

Avoiding these ensures the best texture and flavor.

FAQs

1. Is cashew dressing dairy-free?

Yes, it’s completely dairy-free and vegan-friendly.

2. Can I make this salad ahead of time?

Yes, but store dressing and salad separately.

3. How do I make it less spicy?

Reduce or omit cayenne pepper in the chicken seasoning.

4. Can I use store-bought dressing?

Yes, but homemade cashew dressing gives the best flavor.

Final Thoughts

This Blackened Chicken Salad with the BEST Cashew Dressing is the perfect balance of bold spice, fresh ingredients, and creamy richness. It’s healthy, satisfying, and incredibly flavorful.

Whether you’re eating clean or just want a high-protein meal that actually tastes amazing, this recipe is a must-try.

Easy Ham and Cheese Sliders

If you’re searching for the ultimate crowd-pleasing appetizer or a quick weeknight dinner idea, these Easy Ham and Cheese Sliders are exactly what you need. Soft Hawaiian rolls, layers of savory ham and melted cheese, and a buttery glaze baked until golden—this recipe is comfort food at its best.

What makes these sliders so popular is their simplicity. With just a handful of ingredients, you can create something that feels indulgent, satisfying, and perfect for sharing at parties, game day gatherings, or even a quick family dinner.

Why You’ll Love This Recipe

These Easy Ham and Cheese Sliders are a go-to recipe for busy cooks who want maximum flavor with minimal effort.

  • Quick and simple preparation in under 30 minutes
  • Perfect for feeding a crowd at parties or events
  • Melty cheese and savory ham in every bite
  • Buttery, golden tops with incredible flavor
  • Easy to customize with different fillings

Ingredients

To make these delicious Easy Ham and Cheese Sliders, you’ll need:

  • 1 package Hawaiian sweet rolls (12 count)
  • ½ pound sliced ham
  • 6–8 slices Swiss cheese (or cheddar)
  • ¼ cup unsalted butter (melted)
  • 1 tablespoon Dijon mustard
  • 1 tablespoon Worcestershire sauce
  • 1 teaspoon poppy seeds
  • 1 teaspoon garlic powder
  • 1 teaspoon onion powder

Ingredient Notes

The key to the best Easy Ham and Cheese Sliders is using soft Hawaiian rolls—they add a subtle sweetness that pairs perfectly with salty ham and melted cheese. Swiss cheese is traditional, but cheddar or provolone also work beautifully.

The buttery glaze mixture is what takes these sliders to the next level, infusing every bite with rich, savory flavor.

Step-by-Step Instructions

1. Preheat Oven

Preheat your oven to 350°F and lightly grease a baking dish.

2. Slice the Rolls

Without separating them, slice the entire pack of rolls horizontally.

3. Layer Ingredients

Place the bottom half in the baking dish, layer ham and cheese evenly, then place the top half back on.

4. Make the Butter Glaze

Mix melted butter, Dijon mustard, Worcestershire sauce, garlic powder, onion powder, and poppy seeds.

5. Brush and Bake

Pour and brush the glaze evenly over the rolls, cover with foil, and bake for 15 minutes. Remove foil and bake an additional 5–7 minutes until golden.

Tips for Perfect Results

To make the best Easy Ham and Cheese Sliders, keep these tips in mind:

  • Don’t skip the glaze—it adds essential flavor
  • Cover while baking first to keep sliders soft
  • Use freshly sliced deli ham for best texture
  • Brush glaze evenly so every bite is flavorful

These simple steps guarantee bakery-level sliders every time.

Variations

One of the best things about Easy Ham and Cheese Sliders is how easy they are to customize:

  • Swap ham for turkey or roast beef
  • Use pepper jack cheese for a spicy kick
  • Add pickles or caramelized onions
  • Spread a layer of honey mustard or mayo inside

What to Serve With It

These sliders pair perfectly with:

  • French fries or sweet potato fries
  • Coleslaw or potato salad
  • Soup like tomato or chicken noodle
  • Chips and dipping sauces

They’re ideal for game day spreads or casual dinners.

Storage & Reheating

Store leftover Easy Ham and Cheese Sliders in an airtight container:

  • Refrigerator: up to 3 days
  • Freezer: up to 2 months

To reheat:

  • Oven: 325°F for 10 minutes
  • Microwave: 20–30 seconds per slider

Common Mistakes to Avoid

  • Skipping the butter glaze (reduces flavor)
  • Overbaking and drying out the rolls
  • Using dry or low-quality ham
  • Not covering during initial baking

Avoid these mistakes for perfectly soft and flavorful sliders.

FAQs

1. Can I make ham and cheese sliders ahead of time?

Yes! Assemble them and refrigerate until ready to bake.

2. Can I freeze sliders?

Absolutely—freeze before or after baking.

3. What cheese works best?

Swiss is classic, but cheddar, provolone, or mozzarella also work well.

4. How do I keep sliders from getting soggy?

Bake uncovered at the end to crisp the tops slightly.

Final Thoughts

These Easy Ham and Cheese Sliders are the perfect combination of simplicity and flavor. Soft rolls, savory ham, melted cheese, and buttery glaze make them irresistible for any occasion.

Whether you’re hosting a party or need a quick family meal, this recipe is guaranteed to disappear fast.

Baked Egg White & Vegetable Cups

If you’re looking for a quick, healthy, and protein-packed breakfast option, these Baked Egg White & Vegetable Cups are about to become your new favorite meal prep recipe. Light, fluffy, and loaded with colorful vegetables, they’re the perfect way to start your day without feeling weighed down.

These little egg cups are not only nutritious but also incredibly versatile. Whether you’re following a low-carb diet, eating clean, or just need something easy for busy mornings, this recipe delivers convenience without sacrificing flavor.

Why You’ll Love This Recipe

These Baked Egg White & Vegetable Cups are a game-changer for anyone who wants a healthy breakfast ready to go.

  • High-protein and low-calorie breakfast option
  • Perfect for meal prep and grab-and-go mornings
  • Customizable with any vegetables you like
  • Naturally gluten-free and low-carb
  • Quick to prepare and bake

They’re ideal for busy weekdays, post-workout meals, or even a light lunch paired with a salad.

Ingredients

To make these Baked Egg White & Vegetable Cups, you’ll need simple, fresh ingredients:

Main Ingredients:

  • 8–10 egg whites (or liquid egg whites)
  • 1/2 cup diced bell peppers
  • 1/2 cup spinach (chopped)
  • 1/4 cup diced onions
  • 1/4 cup cherry tomatoes (halved)
  • Salt and black pepper to taste

Optional Add-ins:

  • Feta cheese or shredded cheddar
  • Mushrooms, zucchini, or broccoli
  • Fresh herbs like parsley or chives

Ingredient Notes

The beauty of Baked Egg White & Vegetable Cups is their flexibility. Egg whites provide lean protein while allowing the vegetables to shine. Using fresh vegetables ensures the best texture and flavor.

If you want more richness, you can add a whole egg or a sprinkle of cheese, but the recipe is just as satisfying in its clean, simple form.

Step-by-Step Instructions

1. Preheat Oven

Preheat your oven to 350°F and lightly grease a muffin tin or use silicone molds.

2. Prepare Vegetables

Chop all vegetables into small, even pieces for consistent baking.

3. Mix Egg Whites

Whisk egg whites lightly with salt and pepper until slightly frothy.

4. Assemble Cups

Divide vegetables evenly into muffin cups, then pour egg whites over them.

5. Bake

Bake for 18–22 minutes until set and lightly golden on top.

6. Cool and Serve

Let cool slightly before removing from the pan.

Tips for Perfect Results

To make the best Baked Egg White & Vegetable Cups, follow these tips:

  • Don’t overfill muffin cups to avoid spilling
  • Chop vegetables small for even cooking
  • Use silicone molds for easy removal
  • Bake until just set to avoid rubbery texture

These simple steps ensure fluffy, flavorful egg cups every time.

Variations

One of the best things about Baked Egg White & Vegetable Cups is how easy they are to customize:

  • Add turkey bacon or ham for extra protein
  • Use different cheese options for richness
  • Add spicy jalapeños for heat
  • Make them Mediterranean-style with olives and feta

What to Serve With It

These egg white cups pair perfectly with:

  • Whole grain toast or avocado toast
  • Fresh fruit salad
  • Greek yogurt with honey
  • Smoothies for a balanced breakfast

They also work great as a protein side for lunch or dinner.

Storage & Reheating

Store Baked Egg White & Vegetable Cups in an airtight container:

  • Refrigerator: up to 4 days
  • Freezer: up to 2 months

To reheat:

  • Microwave for 20–30 seconds
  • Or warm in the oven at low heat

Common Mistakes to Avoid

  • Overbaking (makes them rubbery)
  • Using too many watery vegetables without draining
  • Not greasing the muffin tin properly
  • Overfilling cups

Avoiding these mistakes ensures perfect texture every time.

FAQs

1. Can I use whole eggs instead of egg whites?

Yes, you can substitute whole eggs for a richer texture.

2. Are these good for meal prep?

Absolutely! They store and reheat very well.

3. Can I freeze egg white cups?

Yes, freeze them individually and reheat when needed.

4. Why are my egg cups watery?

Vegetables like tomatoes release moisture—be sure to drain excess liquid.

Final Thoughts

These Baked Egg White & Vegetable Cups are the perfect healthy breakfast solution—light, protein-packed, and incredibly easy to make.

Whether you’re meal prepping for the week or looking for a quick grab-and-go option, this recipe is a simple way to stay healthy without sacrificing flavor.

The Best Cinnamon Rolls

There’s something magical about waking up to the smell of freshly baked cinnamon rolls. These The Best Cinnamon Rolls are everything you want in a homemade treat—pillowy soft dough, a rich cinnamon-sugar swirl, and a luscious cream cheese frosting that melts into every layer. Whether you’re making them for a holiday breakfast, weekend brunch, or just because, this recipe delivers bakery-quality results right in your own kitchen.

What makes these cinnamon rolls truly special is the perfect balance of sweetness, spice, and texture. Once you try them, you’ll never go back to store-bought again.

Why You’ll Love This Recipe

These The Best Cinnamon Rolls stand out for their irresistible texture and flavor. They’re soft, fluffy, and packed with gooey goodness in every bite.

  • Ultra soft dough that stays tender for days
  • Rich cinnamon filling with the perfect sweetness
  • Creamy frosting that melts beautifully
  • Make-ahead friendly for stress-free mornings
  • Perfect for special occasions or everyday treats

Ingredients

To make The Best Cinnamon Rolls, you’ll need:

For the Dough:

  • 4 cups all-purpose flour
  • 1 cup warm milk
  • 2 ¼ teaspoons active dry yeast
  • ½ cup granulated sugar
  • ⅓ cup melted butter
  • 2 eggs
  • 1 teaspoon salt

For the Filling:

  • 1 cup brown sugar
  • 2 ½ tablespoons cinnamon
  • ⅓ cup softened butter

For the Frosting:

  • 4 oz cream cheese
  • ¼ cup butter
  • 1 cup powdered sugar
  • 1 teaspoon vanilla extract

Ingredient Notes

Using high-quality ingredients makes a noticeable difference in The Best Cinnamon Rolls. Fresh yeast ensures a proper rise, while whole milk adds richness to the dough. The combination of brown sugar and cinnamon creates that classic gooey filling everyone loves.

For the frosting, full-fat cream cheese delivers the best flavor and texture—don’t substitute if you want that signature creamy finish.

Image Prompt: Close-up of cinnamon and brown sugar mixture in a bowl with a spoon, warm tones, natural lighting, shallow depth of field, ultra realistic, 4k

Step-by-Step Instructions

1. Activate the Yeast

Combine warm milk and yeast with a pinch of sugar. Let sit until foamy.

2. Make the Dough

Mix flour, sugar, eggs, butter, and salt with the yeast mixture. Knead until smooth and elastic.

3. Let It Rise

Place dough in a greased bowl, cover, and let rise until doubled in size.

4. Roll and Fill

Roll out dough into a rectangle, spread butter, and sprinkle cinnamon-sugar mixture evenly.

5. Shape the Rolls

Roll tightly into a log and cut into equal pieces. Place in a baking dish.

6. Second Rise

Let rolls rise again until puffy.

7. Bake

Bake at 350°F for 20–25 minutes until golden brown.

8. Frost and Serve

Spread cream cheese frosting over warm rolls.

Tips for Perfect Results

To achieve The Best Cinnamon Rolls, keep these tips in mind:

  • Use warm—not hot—milk to avoid killing the yeast
  • Don’t rush the rise time for fluffy rolls
  • Roll dough evenly for consistent baking
  • Frost while warm so it melts perfectly

These tips ensure soft, bakery-style cinnamon rolls every time.

Variations

Customize your The Best Cinnamon Rolls with these ideas:

  • Add chopped pecans or walnuts for crunch
  • Mix in raisins or dried cranberries
  • Use a maple glaze instead of cream cheese frosting
  • Add orange zest for a citrus twist

What to Serve With It

These cinnamon rolls pair perfectly with:

  • Freshly brewed coffee or espresso
  • Hot chocolate or latte
  • Fresh fruit or yogurt
  • A full brunch spread with eggs and bacon

They’re the centerpiece of any cozy breakfast table.

Storage & Reheating

Store The Best Cinnamon Rolls in an airtight container:

  • Room temperature for up to 2 days
  • Refrigerate for up to 5 days
  • Freeze for up to 2 months

Reheat in the microwave for 15–20 seconds or warm in the oven for best results.

Common Mistakes to Avoid

  • Using milk that’s too hot (kills yeast)
  • Overbaking (dries out rolls)
  • Skipping the second rise
  • Not sealing the roll tightly

Avoid these pitfalls for consistently amazing results.

FAQs

1. Can I make cinnamon rolls ahead of time?

Yes! Prepare them the night before and bake in the morning.

2. Why didn’t my dough rise?

Your yeast may be expired or the milk was too hot.

3. Can I freeze cinnamon rolls?

Absolutely—freeze before or after baking.

4. How do I keep them soft?

Store properly and avoid overbaking.

Final Thoughts

These The Best Cinnamon Rolls are the ultimate homemade treat—soft, gooey, and topped with a rich frosting that takes them over the top.

Once you make them from scratch, you’ll see why they truly deserve the title of “the best.”