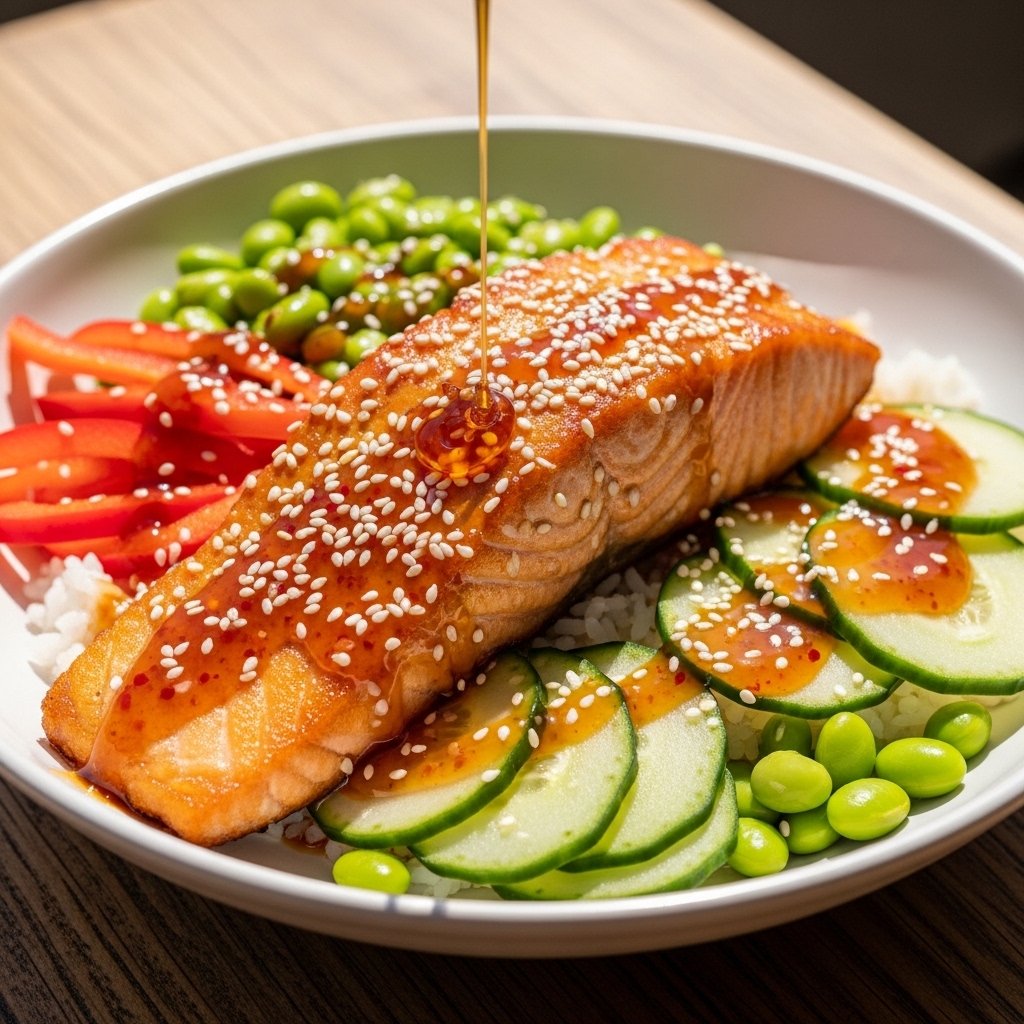
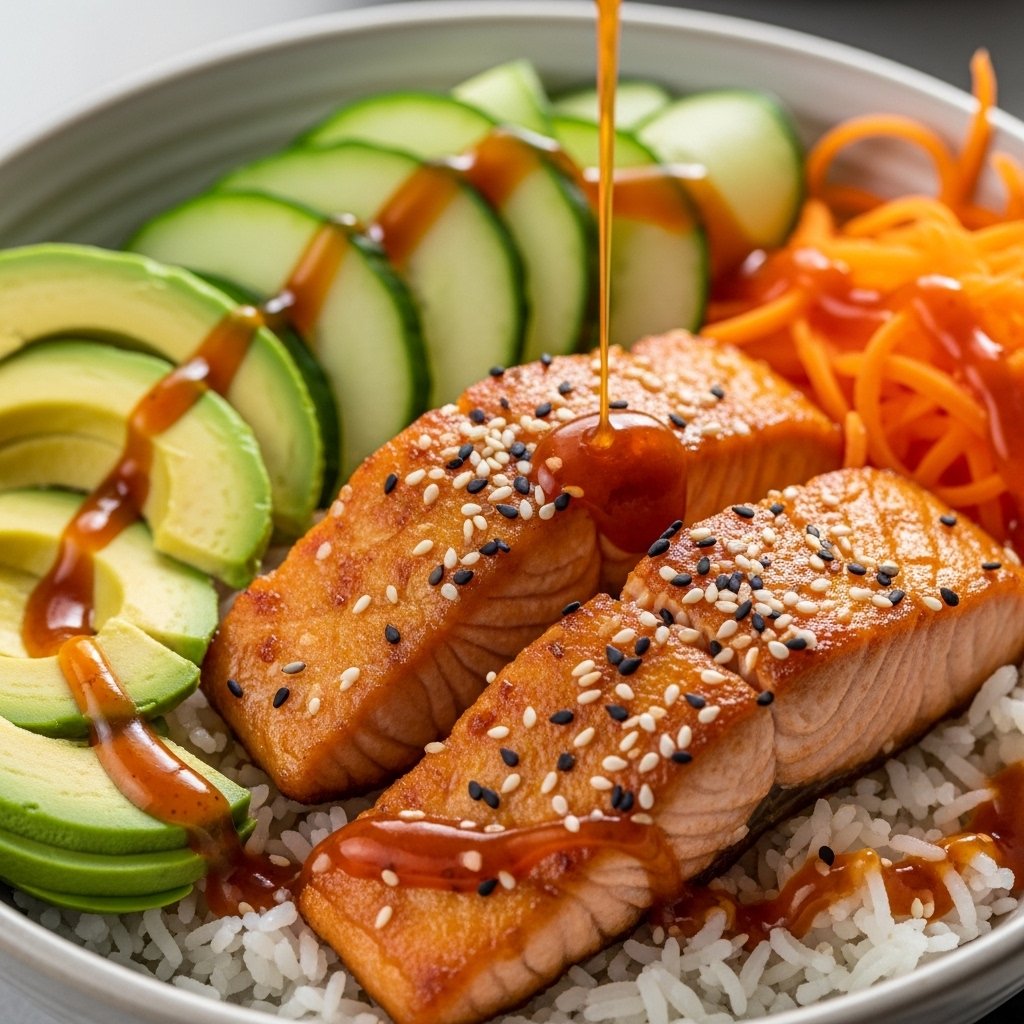
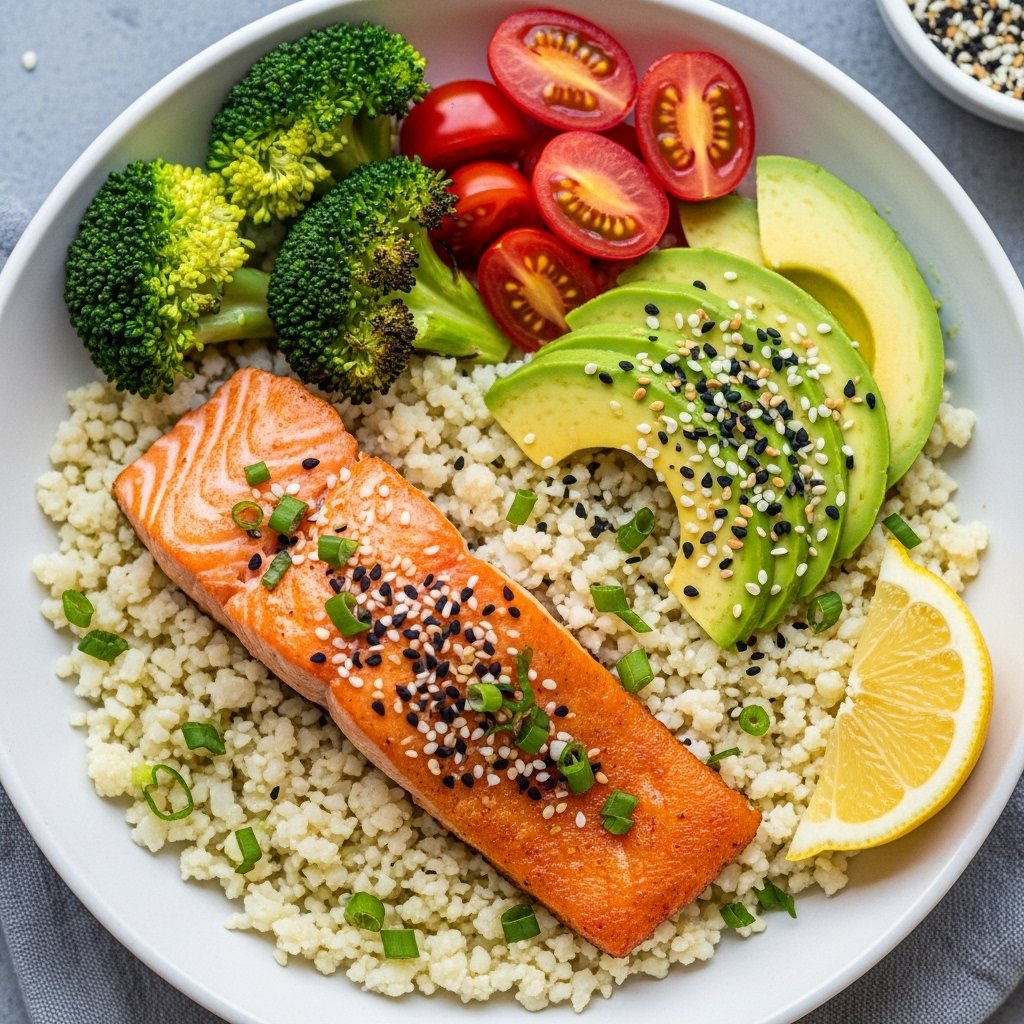
If you’re looking for a meal that hits every flavor note—sweet, spicy, crispy, and fresh—these Hot Honey Crispy Salmon Bowls are exactly what you need. This recipe takes perfectly seared salmon, coats it in a sticky hot honey glaze, and serves it over fluffy rice with fresh vegetables for a balanced and satisfying bowl.
What makes this dish truly special is the contrast in textures. You get crispy caramelized salmon edges, cool crunchy vegetables, and a warm drizzle of spicy honey that ties everything together. It’s a restaurant-quality meal you can easily make at home in under 30 minutes.
Why You’ll Love These Hot Honey Crispy Salmon Bowls
These Hot Honey Crispy Salmon Bowls are the perfect balance of flavor, nutrition, and convenience.
- Quick to make: Ready in under 30 minutes
- Healthy and balanced: Protein, veggies, and carbs in one bowl
- Bold flavors: Sweet honey meets spicy heat
- Crispy texture: Perfectly seared salmon
- Meal prep friendly: Great for lunches and dinners
This is the kind of meal that feels indulgent but is actually wholesome and nourishing.
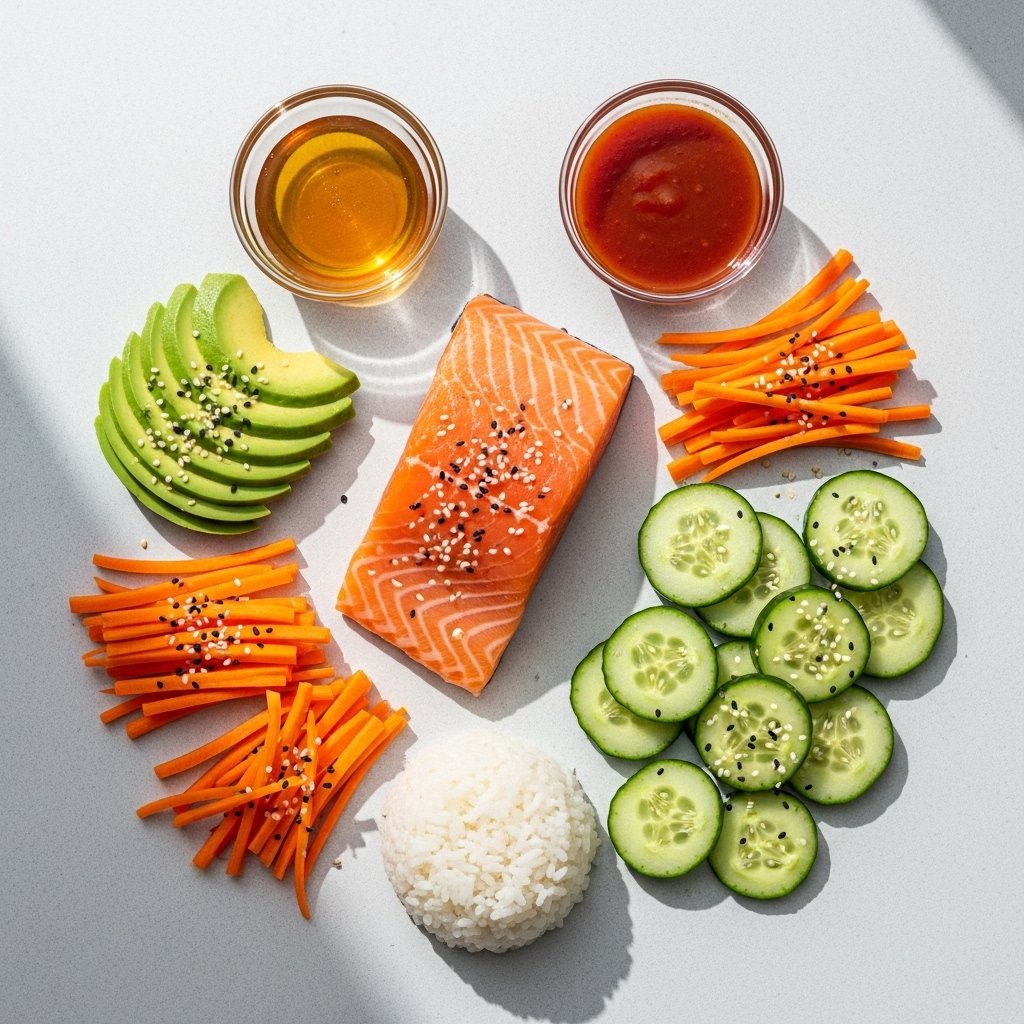
Ingredients
To make the best Hot Honey Crispy Salmon Bowls, you’ll need:
For the Salmon:
- Fresh salmon fillets
- Olive oil
- Salt and pepper
- Garlic powder
- Paprika
For the Hot Honey Sauce:
- Honey
- Hot sauce (or chili flakes)
- Butter
- Apple cider vinegar
Bowl Base:
- Cooked rice (white, brown, or jasmine)
- Avocado slices
- Cucumber
- Shredded carrots
- Edamame (optional)
- Sesame seeds
Ingredient Notes
The key to amazing Hot Honey Crispy Salmon Bowls is fresh salmon with a good sear. The crispy edges develop when the salmon is cooked in a hot pan without moving it too much.
Hot honey is a simple but powerful sauce—sweet honey combined with heat from chili or hot sauce. The butter helps it coat the salmon beautifully, while vinegar adds a slight tang to balance the sweetness.
Using fresh vegetables keeps the bowl light and refreshing, balancing the richness of the salmon and sauce.
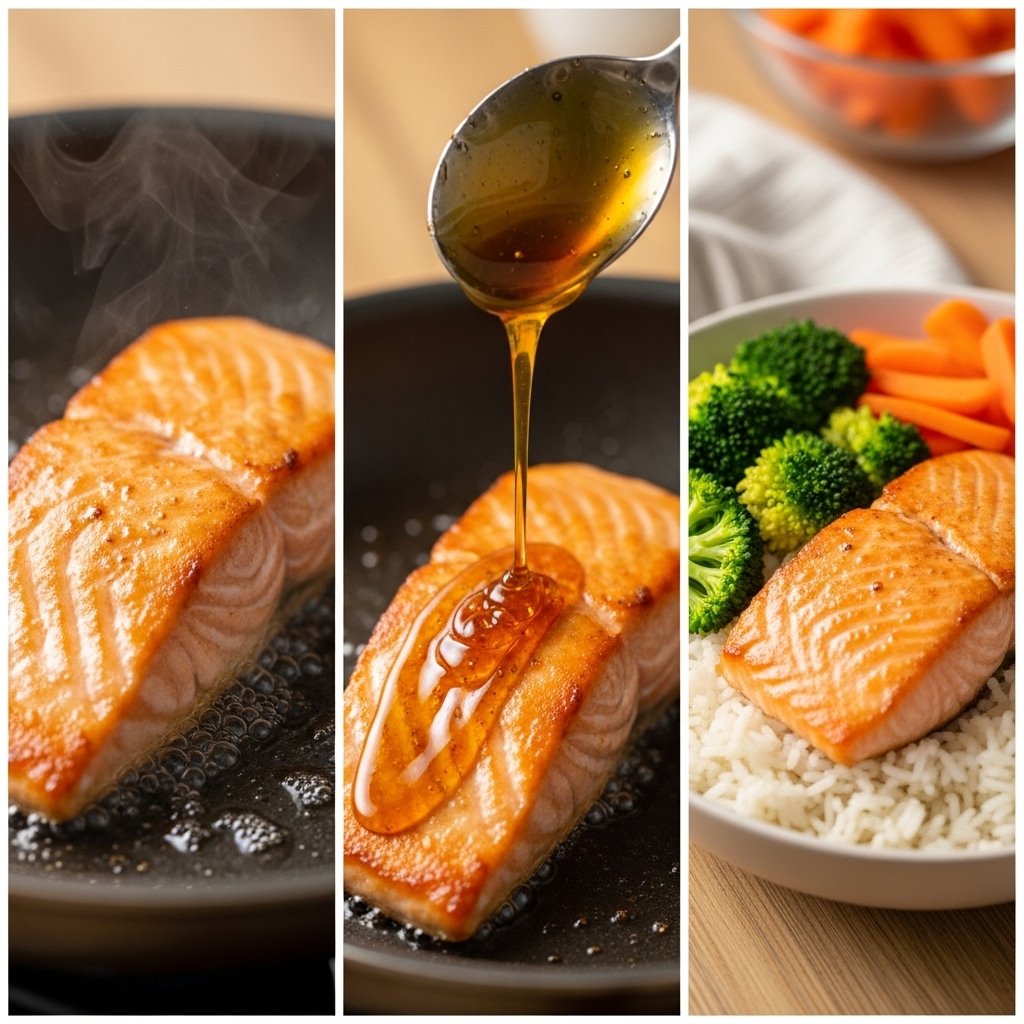
Step-by-Step Instructions
Step 1: Prepare the Salmon
Pat salmon dry and season with salt, pepper, garlic powder, and paprika.
Step 2: Sear Until Crispy
Heat olive oil in a pan and cook salmon skin-side down until crispy and golden, then flip and finish cooking.
Step 3: Make Hot Honey Sauce
In a small pan, melt butter, then stir in honey, hot sauce, and vinegar until smooth.
Step 4: Glaze the Salmon
Brush or drizzle hot honey sauce over the crispy salmon.
Step 5: Build Your Bowl
Add rice to a bowl, top with salmon, vegetables, and extra sauce.
Tips for Perfect Results
To make the best Hot Honey Crispy Salmon Bowls, follow these tips:
- Always pat salmon dry before cooking
- Don’t overcrowd the pan (ensures crispiness)
- Use high heat for a good sear
- Add sauce at the end to keep salmon crispy
- Slice vegetables evenly for better presentation
These small techniques elevate the dish from good to restaurant-level.
Variations
This Hot Honey Crispy Salmon Bowls recipe is easy to customize:
Spicy Extra Heat Version
- Add more chili flakes or sriracha
Low-Carb Version
- Replace rice with cauliflower rice
Tropical Bowl
- Add mango or pineapple for sweetness
Asian-Inspired Bowl
- Add soy sauce, ginger, and sesame oil
What to Serve With It
These Hot Honey Crispy Salmon Bowls pair well with:
- Miso soup
- Seaweed salad
- Steamed broccoli
- Spring rolls
- Fresh fruit salad
These sides complement the bold flavors without overpowering them.
Storage & Reheating
- Refrigerate: Store components separately for up to 3 days
- Reheat salmon: Use skillet or oven for best texture
- Avoid microwaving too long to maintain crispiness
- Assemble fresh for best flavor
Proper storage keeps everything tasting fresh and balanced.
Common Mistakes to Avoid
Avoid these mistakes when making Hot Honey Crispy Salmon Bowls:
- Cooking salmon on low heat (won’t crisp properly)
- Adding sauce too early (makes salmon soggy)
- Overcooking salmon (makes it dry)
- Using wet salmon fillets (prevents searing)
Paying attention to detail ensures perfect results every time.
FAQs
1. Can I use frozen salmon?
Yes, just thaw it completely and pat dry before cooking.
2. Is hot honey very spicy?
It depends on how much hot sauce you add—you can adjust easily.
3. Can I meal prep this bowl?
Yes, store ingredients separately and assemble when ready to eat.
4. What rice works best?
Jasmine rice or brown rice both work great.
Final Thoughts
These Hot Honey Crispy Salmon Bowls are the perfect combination of flavor, texture, and nutrition. With crispy salmon, spicy-sweet glaze, fresh vegetables, and fluffy rice, every bite feels balanced and satisfying.
Whether you’re cooking for a quick dinner or prepping meals for the week, this recipe delivers restaurant-quality taste with simple ingredients and minimal effort. Once you try it, it will quickly become a regular in your rotation.