Instant Pot White Chicken Chili

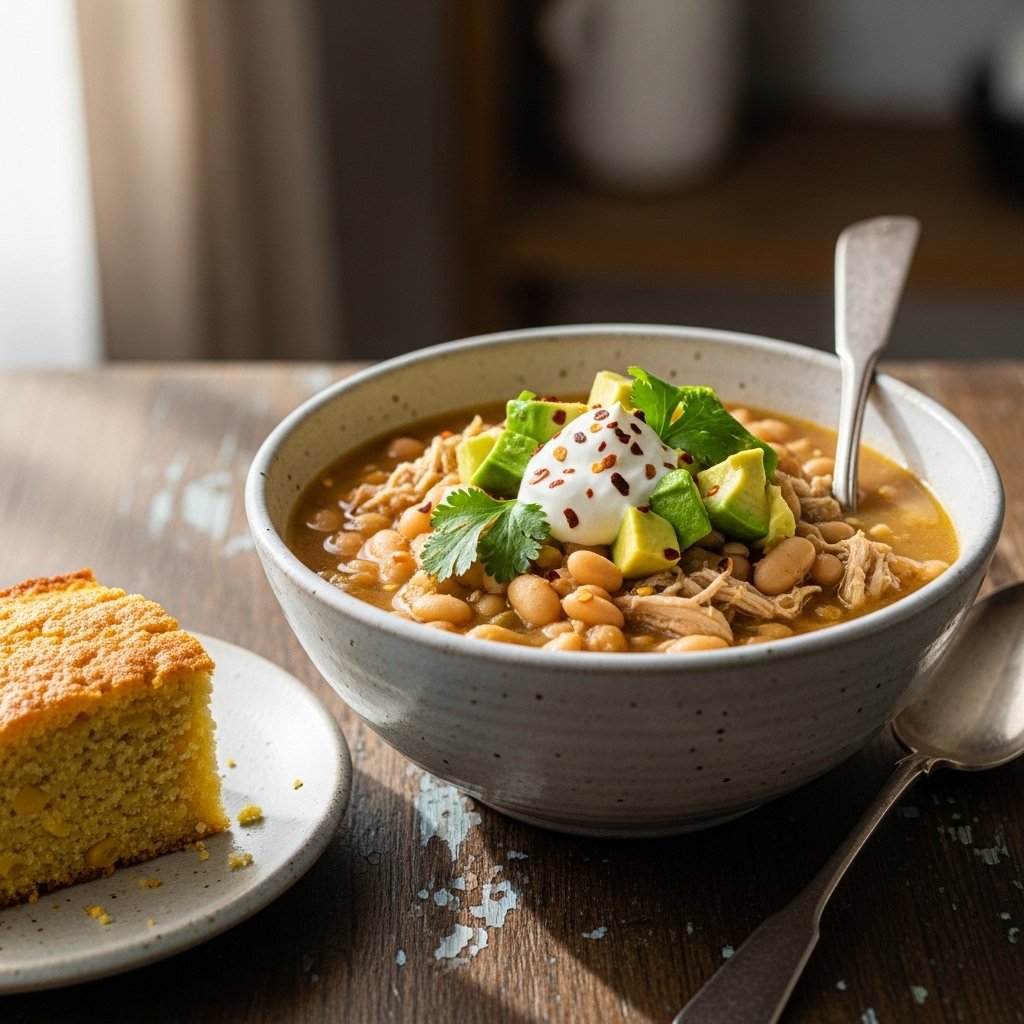
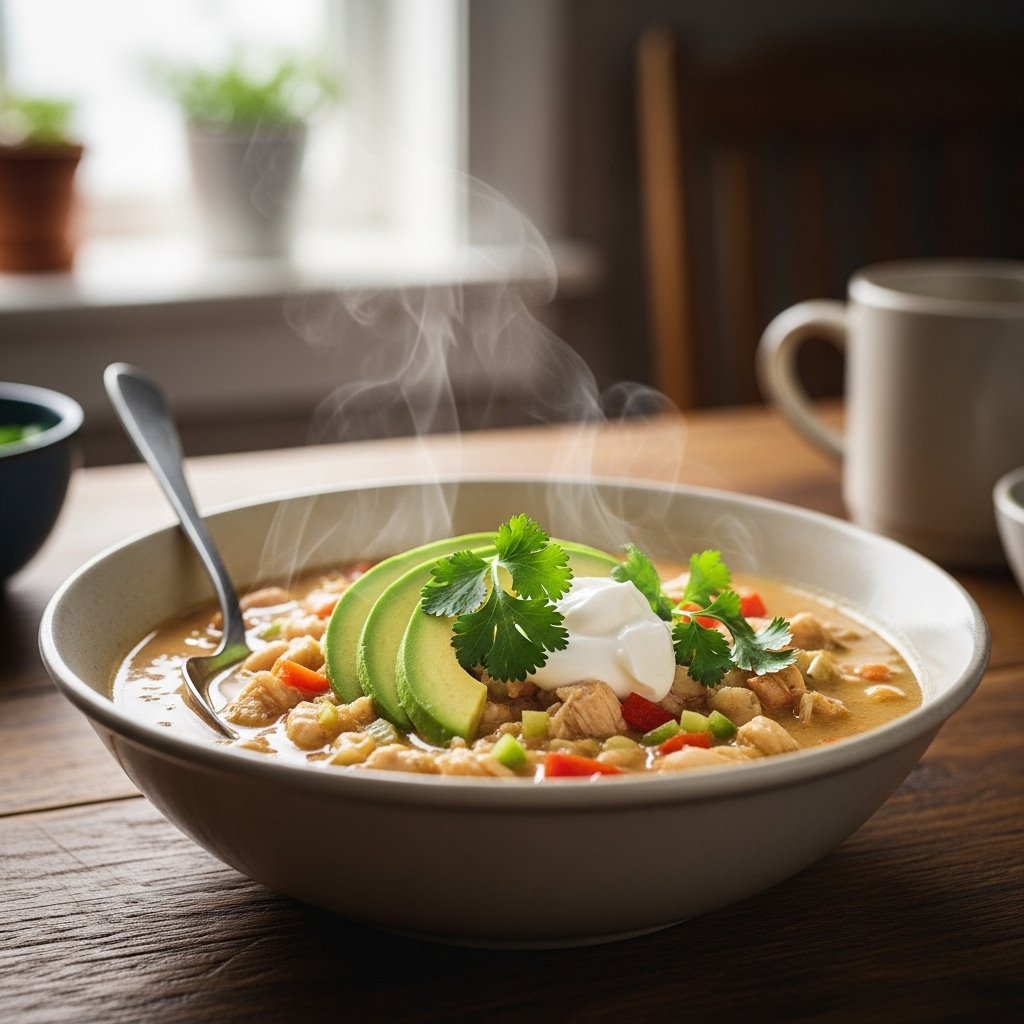
If you’re craving a cozy, satisfying meal that’s both easy to make and packed with flavor, this Instant Pot White Chicken Chili is exactly what you need. It’s creamy, hearty, and loaded with tender chicken, white beans, and a perfectly balanced blend of spices—all made effortlessly in your Instant Pot. Whether you’re cooking for a busy weeknight dinner or prepping meals ahead of time, this recipe delivers comfort in every spoonful.

What makes this dish truly special is how the pressure cooker locks in flavor while dramatically cutting down on cooking time. Instead of simmering for hours, you’ll have a rich and delicious chili ready in under an hour.

Why You’ll Love This Recipe

There are countless reasons why this Instant Pot White Chicken Chili deserves a spot in your regular rotation. It’s one of those recipes that feels indulgent but is surprisingly simple to make.

  • Ready in under 40 minutes using the Instant Pot
  • Rich, creamy texture without being overly heavy
  • Packed with protein and fiber
  • Perfect for meal prep and leftovers
  • Customizable with your favorite toppings

Once you try it, you’ll see why this dish is a favorite in so many American households.
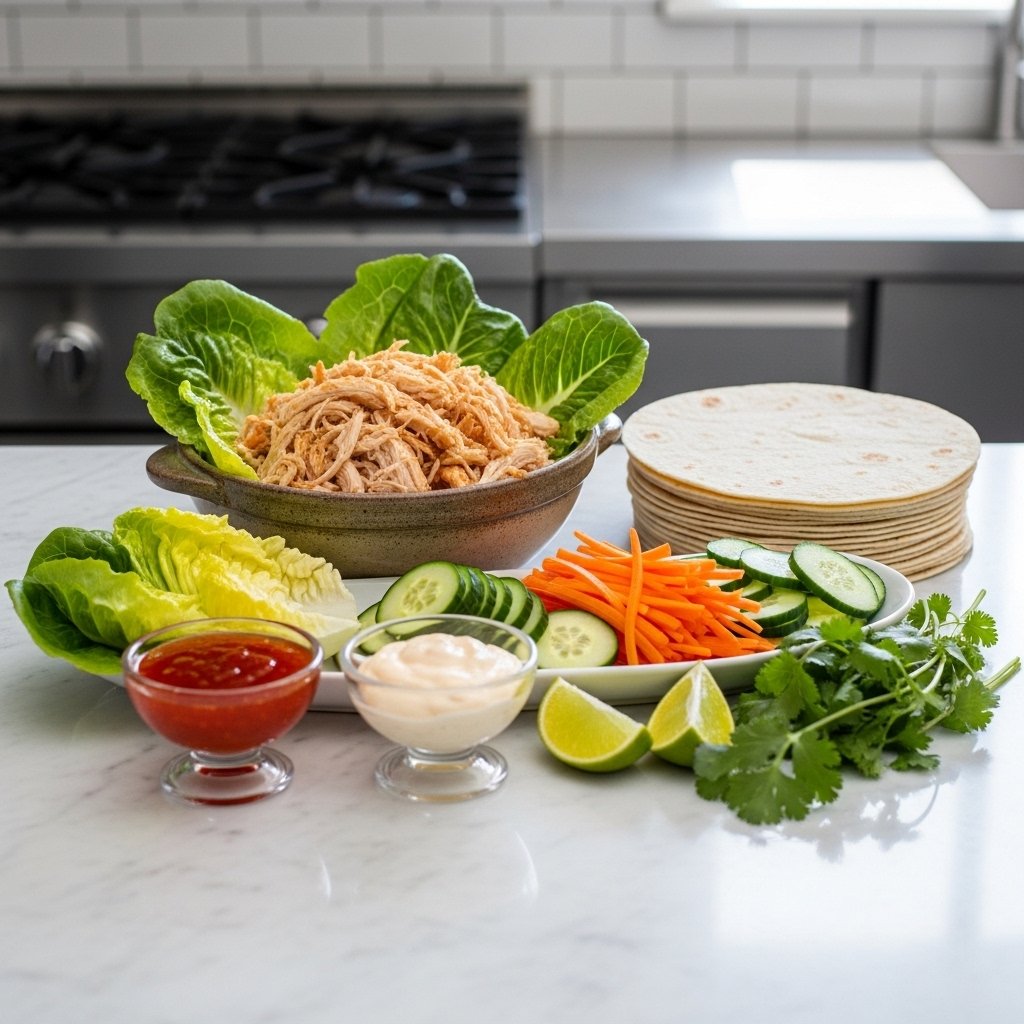
Ingredients

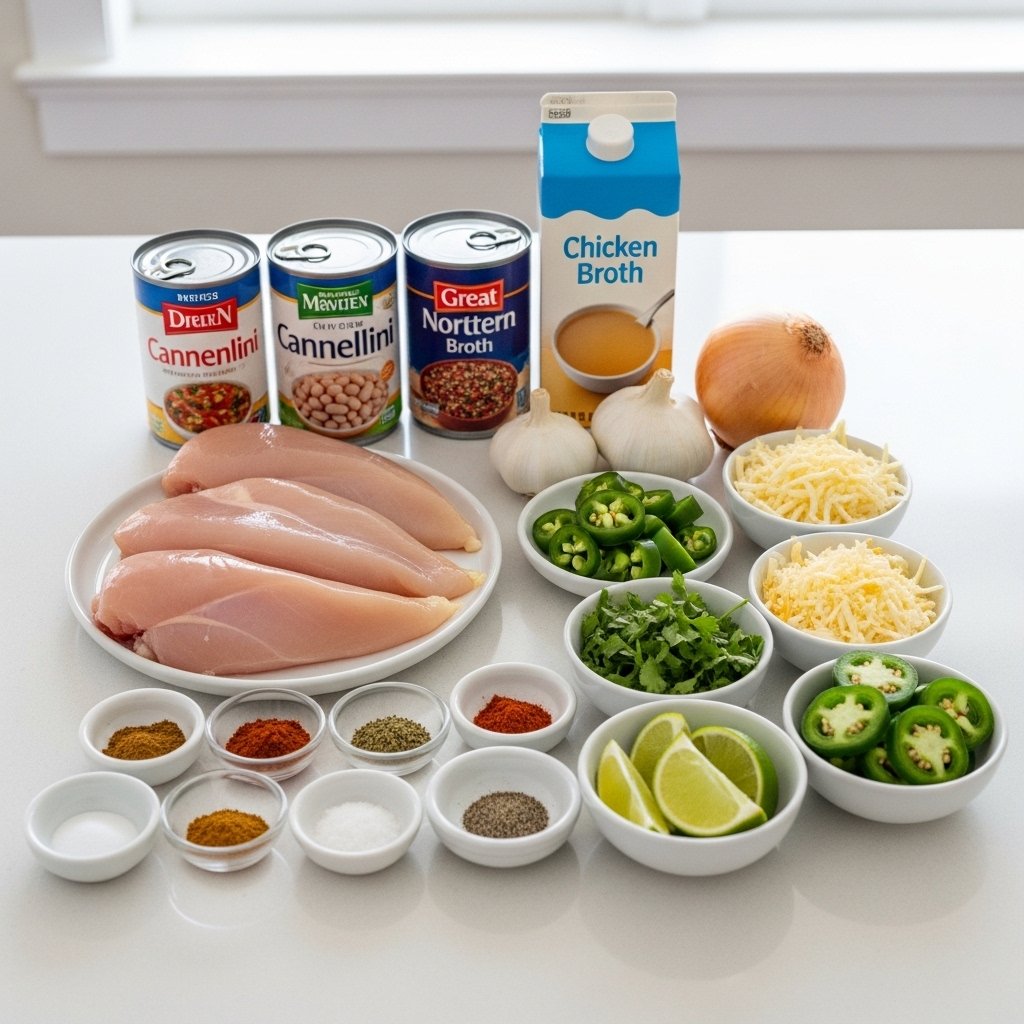
To make this comforting Instant Pot White Chicken Chili, you’ll need:

  • 1 pound boneless, skinless chicken breasts
  • 2 cans white beans (cannellini or great northern), drained and rinsed
  • 1 small onion, diced
  • 3 cloves garlic, minced
  • 1 can diced green chilies
  • 3 cups chicken broth
  • 1 teaspoon cumin
  • 1 teaspoon chili powder
  • 1/2 teaspoon paprika
  • 1/2 teaspoon oregano
  • Salt and pepper to taste
  • 1/2 cup sour cream
  • 1/2 cup cream cheese

Optional toppings: avocado, shredded cheese, cilantro, lime wedges

Ingredient Notes

Using quality ingredients can elevate your Instant Pot White Chicken Chili from good to exceptional. Boneless chicken breasts are lean and shred beautifully after pressure cooking, but you can also use chicken thighs for a richer flavor. White beans like cannellini or great northern beans provide a creamy base and hold their shape well during cooking.

Green chilies add a mild heat and signature flavor, while the combination of sour cream and cream cheese creates that luxurious, velvety texture everyone loves. If you prefer a lighter version, you can substitute Greek yogurt for sour cream.

Step-by-Step Instructions

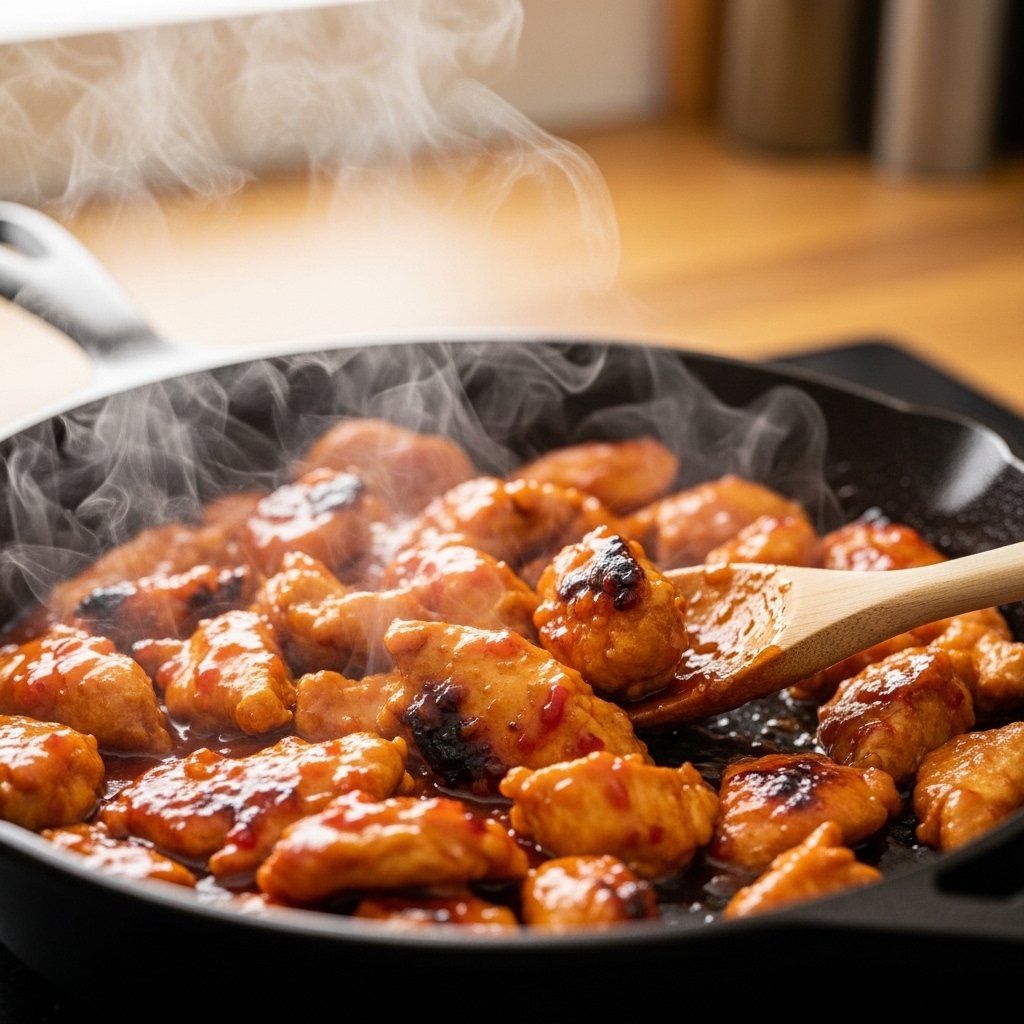
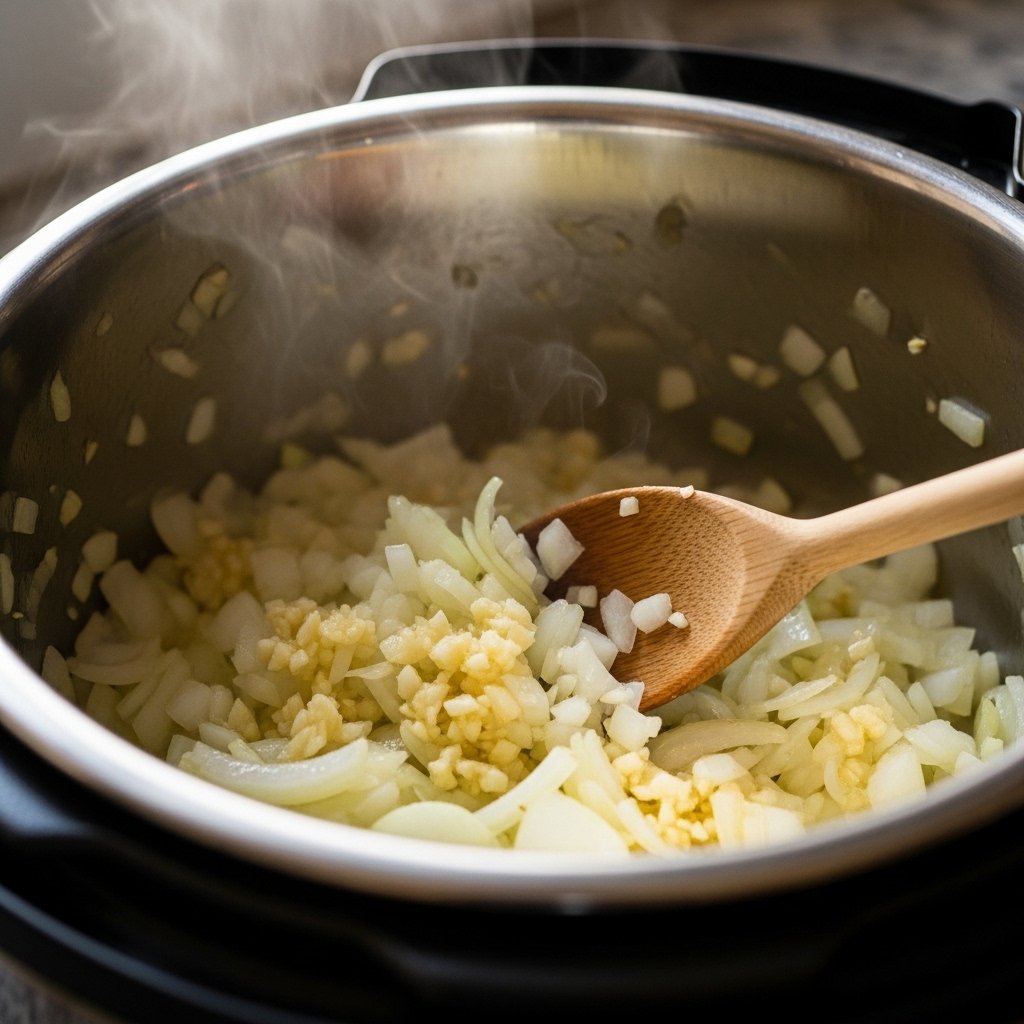
1. Sauté the Aromatics

Set your Instant Pot to sauté mode. Add a drizzle of oil, then cook the diced onion until softened. Stir in the garlic and cook for another 30 seconds until fragrant.

2. Add Ingredients and Pressure Cook

Add the chicken, beans, green chilies, broth, and spices to the pot. Stir gently to combine. Seal the lid and cook on high pressure for 12 minutes.

3. Shred the Chicken

Once cooking is complete, perform a natural release for 10 minutes, then manually release the remaining pressure. Remove the chicken, shred it with two forks, and return it to the pot.

4. Make It Creamy

Stir in the cream cheese and sour cream until fully melted and incorporated. Let the chili sit for a few minutes to thicken before serving.

Tips for Perfect Results

To make the best Instant Pot White Chicken Chili, keep these helpful tips in mind:

  • Cut cream cheese into small cubes for faster melting
  • Don’t skip the sauté step—it builds flavor
  • Adjust the thickness by adding more broth if needed
  • Taste and adjust seasoning before serving

Small tweaks can make a big difference in flavor and texture.
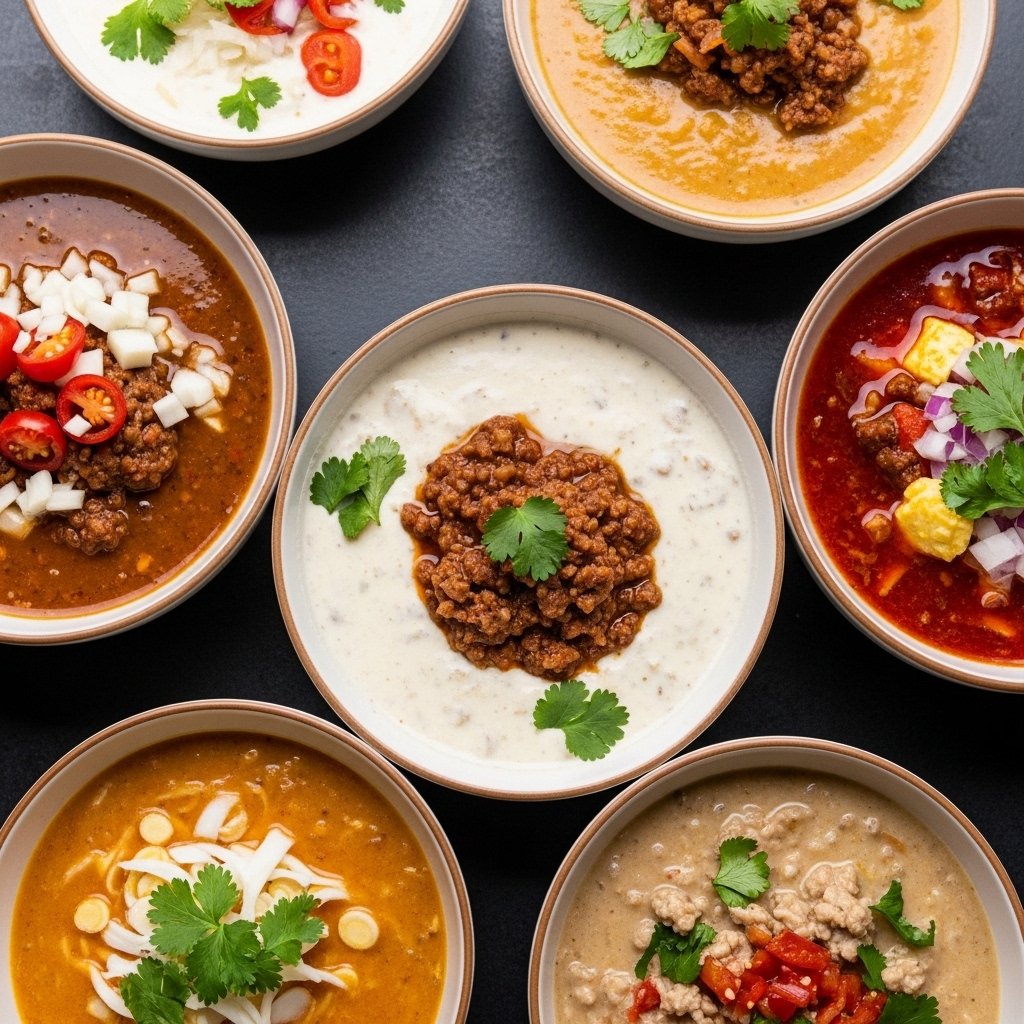
Variations

This Instant Pot White Chicken Chili is incredibly versatile and easy to adapt based on your preferences.

Make It Spicier

  • Add jalapeños or cayenne pepper
  • Use hot green chilies instead of mild

Make It Dairy-Free

  • Skip the cream cheese and sour cream
  • Use coconut milk for creaminess

Add More Veggies

  • Stir in corn, spinach, or zucchini

What to Serve With It

This chili is hearty on its own, but pairing it with the right sides can take your meal to the next level.

  • Warm cornbread
  • Tortilla chips for dipping
  • Simple green salad
  • Rice or cauliflower rice

These sides complement the creamy texture and bold flavors perfectly.

Storage & Reheating

One of the best things about Instant Pot White Chicken Chili is how well it stores.

  • Refrigerate in an airtight container for up to 4 days
  • Freeze for up to 3 months (without dairy for best results)
  • Reheat gently on the stovetop or microwave, stirring occasionally

The flavors often deepen over time, making leftovers even more delicious.

Common Mistakes to Avoid

Even an easy recipe like this can go wrong if you’re not careful.

  • Overcooking the chicken, which can make it dry
  • Adding dairy before pressure cooking (it can curdle)
  • Skipping seasoning adjustments at the end
  • Not allowing the chili to thicken before serving

Avoiding these pitfalls will ensure consistently great results.

FAQs

Can I use frozen chicken?

Yes, you can use frozen chicken breasts—just increase the cooking time by 3–5 minutes.

How do I thicken the chili?

Let it sit after cooking, or mash some of the beans to create a thicker texture.

Is this recipe spicy?

It’s mild, but you can easily adjust the heat level to your liking.

Can I make it on the stovetop?

Absolutely! Simmer everything for about 25–30 minutes, then shred the chicken and add the dairy.

Final Thoughts

This Instant Pot White Chicken Chili is the ultimate comfort food—creamy, flavorful, and incredibly easy to make. It’s the kind of recipe you’ll turn to again and again, whether you’re feeding your family or looking for a cozy meal to enjoy on a chilly evening.

With its rich texture, customizable ingredients, and foolproof method, this dish proves that delicious homemade meals don’t have to be complicated. Give it a try, and you’ll quickly see why it’s a favorite in kitchens across the country.

Sweet Chili Chicken Wraps

If you’re looking for a quick, flavorful, and satisfying meal that feels both fresh and indulgent, these Sweet Chili Chicken Wraps are about to become your new go-to. Combining tender chicken, crunchy vegetables, and a perfectly balanced sweet-and-spicy sauce, this recipe delivers restaurant-quality flavor right in your own kitchen. It’s ideal for busy weeknights, meal prep lunches, or even casual gatherings when you want something crowd-pleasing without the stress.

What makes these wraps truly special is how effortlessly they come together while still delivering bold, vibrant flavor. The sweet chili sauce brings just the right amount of heat and sweetness, coating every bite in a glossy, irresistible glaze.

Why You’ll Love This Recipe

These Sweet Chili Chicken Wraps check all the boxes for a perfect meal. They’re quick, customizable, and incredibly delicious.

  • Ready in under 30 minutes
  • Packed with bold sweet chili flavor
  • Perfect for meal prep or on-the-go lunches
  • Easily customizable with your favorite veggies
  • Family-friendly and great for picky eaters

Whether you’re cooking for yourself or feeding a group, this recipe is flexible enough to suit any occasion.

Ingredients

To make these irresistible Sweet Chili Chicken Wraps, you’ll need:

  • 2 cups cooked chicken breast (shredded or diced)
  • 1/3 cup sweet chili sauce
  • 1 tablespoon soy sauce
  • 1 teaspoon garlic (minced)
  • 1 tablespoon olive oil
  • 4 large flour tortillas
  • 1 cup shredded lettuce
  • 1/2 cup shredded carrots
  • 1/2 cup sliced cucumbers
  • 1/4 cup chopped green onions
  • Optional: cilantro, crushed peanuts, or sesame seeds

Ingredient Notes

Using high-quality ingredients makes a noticeable difference in these wraps. Rotisserie chicken works beautifully for convenience, while freshly cooked chicken breast gives you maximum control over flavor and texture. When choosing your sweet chili sauce, look for one that balances sweetness with mild heat—this is the backbone of the dish.

Fresh vegetables are key here. Crisp lettuce, crunchy carrots, and cool cucumbers create contrast against the warm, saucy chicken, making every bite dynamic and satisfying.

Step-by-Step Instructions

1. Prepare the Chicken

Heat olive oil in a skillet over medium heat. Add minced garlic and cook until fragrant, about 30 seconds. Stir in the cooked chicken, sweet chili sauce, and soy sauce. Toss everything together until the chicken is fully coated and heated through.

2. Warm the Tortillas

Lightly warm the tortillas in a dry pan or microwave for a few seconds. This makes them pliable and easier to wrap without tearing.

3. Assemble the Wraps

Lay each tortilla flat and layer with lettuce, carrots, cucumbers, and the sweet chili chicken. Sprinkle with green onions and any optional toppings you like.

4. Wrap and Serve

Fold in the sides and roll tightly into a wrap. Slice in half if desired and serve immediately.

Tips for Perfect Results

Getting the best out of your Sweet Chili Chicken Wraps is all about balance and technique.

  • Don’t over-sauce the chicken—too much can make the wraps soggy
  • Warm tortillas properly to prevent cracking
  • Use fresh, crisp vegetables for the best texture
  • Slice wraps diagonally for a more appealing presentation

A little attention to detail goes a long way in elevating this simple recipe.

Variations

One of the best things about these Sweet Chili Chicken Wraps is how easy they are to customize.

Protein Swaps

  • Try shrimp for a seafood twist
  • Use tofu or tempeh for a vegetarian version
  • Swap in ground chicken or turkey

Flavor Boosts

  • Add sriracha for extra heat
  • Drizzle with ranch or spicy mayo
  • Sprinkle with crushed peanuts for crunch

What to Serve With It

These wraps are a complete meal on their own, but pairing them with the right sides can make them even better.

  • Sweet potato fries
  • Asian-style slaw
  • Steamed edamame
  • Fresh fruit salad

These sides complement the sweet and savory flavors beautifully without overpowering the dish.

Storage & Reheating

If you’re making these Sweet Chili Chicken Wraps ahead of time, proper storage is key.

  • Store the chicken separately from the vegetables and tortillas
  • Keep everything in airtight containers in the refrigerator for up to 3 days
  • Reheat the chicken gently in a skillet or microwave before assembling

Avoid assembling the wraps too early, as the moisture can make them soggy over time.

Common Mistakes to Avoid

Even simple recipes can go wrong without the right approach.

  • Overfilling the wraps, making them hard to roll
  • Using cold tortillas that crack easily
  • Adding too much sauce, leading to soggy wraps
  • Skipping fresh vegetables, which add essential texture

Keeping these tips in mind will help you achieve perfect wraps every time.

FAQs

Can I make Sweet Chili Chicken Wraps ahead of time?

Yes, but store components separately and assemble just before eating for the best texture.

Are these wraps spicy?

They have a mild kick, but you can adjust the heat level by adding or reducing chili sauce.

Can I use a different type of tortilla?

Absolutely! Whole wheat, spinach, or low-carb tortillas all work great.

What’s the best chicken to use?

Cooked chicken breast or rotisserie chicken both work well for this recipe.

Final Thoughts

These Sweet Chili Chicken Wraps are everything you want in a quick, flavorful meal—simple to prepare, endlessly customizable, and packed with bold taste. Whether you’re cooking for a busy weeknight dinner or prepping lunches for the week, this recipe delivers consistent, delicious results every time.

Once you try them, you’ll find yourself coming back again and again—not just for the convenience, but for that irresistible sweet chili flavor that makes every bite unforgettable.

Cinnamon Roll Pumpkin Bread with Cream Cheese Glaze (Ultra Moist & Bakery-Style)

If you’re looking for the ultimate fall baking recipe that combines cozy spices, soft texture, and indulgent sweetness, this Cinnamon Roll Pumpkin Bread with Cream Cheese Glaze is going to become your new obsession. It brings together everything you love about cinnamon rolls and pumpkin bread in one perfectly moist loaf.

What makes this Cinnamon Roll Pumpkin Bread with Cream Cheese Glaze so special is the swirl of cinnamon sugar running through every bite and the rich, tangy cream cheese glaze drizzled on top. It’s warm, comforting, and smells like autumn heaven while baking.

Why You’ll Love This Cinnamon Roll Pumpkin Bread

This recipe is a guaranteed fall favorite for good reason.

  • Combines cinnamon rolls and pumpkin bread in one loaf
  • Super moist and soft texture
  • Perfect cinnamon sugar swirl inside
  • Easy enough for beginner bakers
  • Topped with creamy sweet glaze

Every bite of this Cinnamon Roll Pumpkin Bread with Cream Cheese Glaze feels like a cozy bakery-style treat made at home.

Ingredients You’ll Need

To make this Cinnamon Roll Pumpkin Bread with Cream Cheese Glaze, you’ll need simple pantry staples.

  • All-purpose flour
  • Pumpkin puree
  • Eggs
  • Brown sugar
  • Granulated sugar
  • Vegetable oil or melted butter
  • Baking powder
  • Baking soda
  • Cinnamon
  • Nutmeg
  • Vanilla extract
  • Salt
  • Cream cheese
  • Powdered sugar
  • Milk

Ingredient Notes & Substitutions

This Cinnamon Roll Pumpkin Bread with Cream Cheese Glaze is flexible and forgiving.

Pumpkin puree is the star ingredient—make sure you use pure pumpkin, not pumpkin pie filling. Oil gives the bread extra moisture, but melted butter adds richer flavor.

For the swirl, brown sugar and cinnamon create that classic cinnamon roll taste. You can also add chopped pecans or walnuts for extra crunch.

Step-by-Step Instructions

Step 1: Prepare the Batter

Mix dry ingredients in one bowl and wet ingredients in another, then combine until just mixed.


Step 2: Make the Cinnamon Swirl

Mix brown sugar and cinnamon in a small bowl.

Step 3: Layer the Bread

Pour half the batter into a loaf pan, sprinkle cinnamon sugar, then add remaining batter and swirl gently.

Step 4: Bake Until Golden

Bake until a toothpick comes out clean and the top is golden brown.

Step 5: Add Cream Cheese Glaze

Whisk cream cheese, powdered sugar, milk, and vanilla, then drizzle over cooled bread.

Image Prompt: Cream cheese glaze being drizzled over sliced pumpkin bread loaf, thick glossy icing flowing, rustic table setting, ultra realistic 4k food photography.

Tips for Perfect Results

To make your Cinnamon Roll Pumpkin Bread with Cream Cheese Glaze perfect every time:

  • Don’t overmix batter
  • Use room temperature ingredients
  • Let bread cool before glazing
  • Swirl gently for even cinnamon ribbons
  • Check doneness with toothpick

These tips ensure a moist, tender loaf every time.

Delicious Variations

This recipe is easy to customize.

  • Nutty version: Add walnuts or pecans
  • Extra sweet: Add chocolate chips
  • Maple glaze: Replace milk with maple syrup
  • Spiced version: Add pumpkin spice blend
  • Mini loaves: Bake in smaller pans for gifts

Each version adds a fun twist to the classic.

What to Serve With Pumpkin Bread

This bread is perfect on its own but pairs well with:

  • Hot coffee or latte
  • Chai tea
  • Vanilla ice cream
  • Whipped cream
  • Fresh fruit

These pairings enhance the cozy flavors of the Cinnamon Roll Pumpkin Bread with Cream Cheese Glaze.

Storage & Reheating Tips

Store in an airtight container at room temperature for 2 days or in the fridge for up to 5 days.

To reheat, warm slices in the microwave for 10–15 seconds. You can also freeze the loaf (without glaze) for up to 2 months.

Common Mistakes to Avoid

Even simple baking recipes need care.

  • Overmixing the batter (makes bread dense)
  • Overbaking (dries out the loaf)
  • Using pumpkin pie filling instead of puree
  • Skipping cooling before glazing
  • Not swirling cinnamon evenly

Avoiding these ensures perfect texture and flavor.

Frequently Asked Questions

Can I make this ahead of time?

Yes, it stays moist and flavorful for days.

Can I freeze pumpkin bread?

Yes, freeze without glaze for best results.

Can I use homemade pumpkin puree?

Yes, just make sure it’s not too watery.

Why is my bread dense?

Overmixing or too much flour can cause density.

Final Thoughts

This Cinnamon Roll Pumpkin Bread with Cream Cheese Glaze is the ultimate cozy fall bake. It’s soft, swirled with warm cinnamon sugar, and topped with a rich creamy glaze that makes every slice irresistible.

Whether you’re baking for family, guests, or just yourself, this recipe delivers bakery-level flavor right from your kitchen.

Caramel Apple French Toast Bake (Easy Make-Ahead Brunch Favorite)

If you’re searching for the ultimate cozy breakfast or brunch dish, this Caramel Apple French Toast Bake is exactly what you need. It’s warm, sweet, and comforting, with soft baked bread soaked in a cinnamon-vanilla custard, topped with tender caramelized apples and a rich caramel drizzle.

What makes this Caramel Apple French Toast Bake so special is that it combines all the flavors of classic French toast with the cozy sweetness of caramel apples. It’s perfect for holidays, weekend brunches, or any morning when you want something indulgent without standing over the stove.

Why You’ll Love This Caramel Apple French Toast Bake

This recipe is a guaranteed crowd-pleaser and perfect for stress-free mornings.

  • Easy make-ahead breakfast
  • Perfect for feeding a crowd
  • Warm caramel apple flavor in every bite
  • Soft inside, slightly crispy on top
  • Great for holidays and weekends

The magic of this Caramel Apple French Toast Bake is how it transforms simple ingredients into a bakery-style breakfast casserole.

Ingredients You’ll Need

To make this Caramel Apple French Toast Bake, you only need basic pantry and fridge staples.

  • Brioche or French bread, cubed
  • Eggs
  • Milk or heavy cream
  • Brown sugar
  • Vanilla extract
  • Cinnamon
  • Nutmeg (optional)
  • Apples (Granny Smith or Honeycrisp)
  • Butter
  • Caramel sauce
  • Pinch of salt

Ingredient Notes & Substitutions

The success of this Caramel Apple French Toast Bake depends on using the right bread and apples.

Brioche or challah bread works best because it soaks up the custard without becoming mushy. Day-old bread is ideal for better texture.

For apples, Granny Smith adds tartness that balances the sweetness, while Honeycrisp gives a naturally sweeter flavor. You can mix both for the best results.

Step-by-Step Instructions

Step 1: Prepare the Apples

Peel, slice, and sauté apples in butter, brown sugar, and cinnamon until soft and caramelized.

Step 2: Prepare the Custard

Whisk eggs, milk, vanilla, cinnamon, and sugar in a large bowl until smooth.

Step 3: Assemble the Bake

Place cubed bread in a baking dish, then layer caramelized apples over the top. Pour custard evenly over everything.

Step 4: Chill or Bake Immediately

Let it sit for 20–30 minutes or refrigerate overnight for deeper flavor. Then bake until golden and set.

Step 5: Add Caramel Finish

Drizzle warm caramel sauce over the baked dish before serving.

Tips for Perfect Results

To make your Caramel Apple French Toast Bake absolutely perfect, follow these tips:

  • Use day-old bread for best texture
  • Don’t skip soaking time for custard absorption
  • Slice apples evenly for consistent cooking
  • Cover with foil if browning too quickly
  • Let it rest before serving

These tips ensure a soft, custardy center with a golden top.

Delicious Variations

This Caramel Apple French Toast Bake is easy to customize.

  • Nutty version: Add pecans or walnuts
  • Extra indulgent: Mix cream cheese into layers
  • Berry twist: Add blueberries or raspberries
  • Spiced version: Add pumpkin spice
  • Dairy-free: Use almond milk and plant butter

Each variation adds a unique flavor twist.

What to Serve With This French Toast Bake

This dish is rich and satisfying but pairs beautifully with:

  • Fresh fruit salad
  • Crispy bacon or sausage
  • Yogurt parfait
  • Hot coffee or chai latte
  • Fresh orange juice

These sides balance the sweetness of the Caramel Apple French Toast Bake.

Storage & Reheating Tips

This recipe stores very well, making it great for leftovers.

Store in an airtight container in the refrigerator for up to 4 days. Reheat in the oven or microwave until warm, adding a drizzle of caramel to refresh flavor.

You can also freeze portions for up to 2 months.

Common Mistakes to Avoid

Even simple breakfast bakes need attention to detail.

  • Using fresh soft bread (too mushy)
  • Not soaking long enough
  • Overbaking and drying out
  • Skipping apple caramelization step
  • Using too little custard

Avoiding these mistakes ensures perfect texture every time.

Frequently Asked Questions

Can I make this ahead of time?

Yes, assemble it the night before and bake in the morning.

What bread works best?

Brioche or challah works best for softness and structure.

Can I freeze it?

Yes, freeze after baking for up to 2 months.

Can I reduce sugar?

Yes, adjust caramel and brown sugar to taste.

Final Thoughts

This Caramel Apple French Toast Bake is the perfect blend of cozy, sweet, and comforting. It’s easy to prepare, perfect for sharing, and ideal for holidays or weekend brunches.

Once you try it, it will quickly become a favorite go-to breakfast recipe for any special morning.

Apple Cinnamon Overnight Oats Recipe (Easy, Healthy & Perfect Make-Ahead Breakfast)

If you’re looking for a quick, healthy, and satisfying breakfast that basically makes itself overnight, this Apple Cinnamon Overnight Oats Recipe is exactly what you need. It combines creamy oats with fresh apples, warm cinnamon, and a touch of sweetness to create a cozy, nourishing start to your day.

What makes this Apple Cinnamon Overnight Oats Recipe so popular is how simple it is. With just a few minutes of prep the night before, you wake up to a ready-to-eat breakfast that tastes like apple pie in a jar—but much healthier and packed with nutrients.

Why You’ll Love This Apple Cinnamon Overnight Oats Recipe

This recipe is perfect for busy mornings or anyone trying to eat healthier without sacrificing flavor.

  • Ready in just 5–10 minutes of prep
  • No cooking required
  • High in fiber and nutrients
  • Tastes like apple pie in breakfast form
  • Perfect for meal prep and grab-and-go mornings

The beauty of this Apple Cinnamon Overnight Oats Recipe is that it’s both comforting and incredibly convenient.

Ingredients You’ll Need

To make this Apple Cinnamon Overnight Oats Recipe, you only need simple pantry staples and fresh fruit.

  • Rolled oats
  • Milk (dairy or plant-based)
  • Greek yogurt
  • Apple (sweet or tart variety)
  • Cinnamon powder
  • Honey or maple syrup
  • Chia seeds (optional)
  • Vanilla extract (optional)
  • Pinch of salt

Ingredient Notes & Substitutions

This Apple Cinnamon Overnight Oats Recipe is flexible and easy to adjust based on your preferences.

Rolled oats work best because they soften perfectly overnight without becoming mushy. Quick oats can be used but will result in a softer texture. Steel-cut oats are not recommended unless pre-cooked.

For milk, any type works—almond, oat, soy, or dairy milk all create a creamy base. Greek yogurt adds protein and thickness, but you can skip it for a dairy-free version.

Step-by-Step Instructions

Step 1: Combine Base Ingredients

In a jar or container, mix rolled oats, milk, yogurt, cinnamon, and sweetener.

Step 2: Add Apples

Chop fresh apples and mix them into the oat mixture or layer them on top for texture.

Step 3: Stir and Refrigerate

Stir everything well, cover, and refrigerate overnight or at least 6 hours.

Step 4: Serve and Top

In the morning, stir and add extra toppings like apple slices, nuts, or drizzle of honey.

Tips for Perfect Results

To make your Apple Cinnamon Overnight Oats Recipe perfect every time, follow these tips:

  • Use rolled oats for best texture
  • Chop apples finely for even flavor
  • Adjust sweetness after chilling
  • Stir before serving for creamy consistency
  • Add toppings fresh in the morning

These small steps make a big difference in taste and texture.

Delicious Variations

This Apple Cinnamon Overnight Oats Recipe is easy to customize.

  • Apple pie version: Add crushed graham crackers
  • Protein boost: Add protein powder or extra Greek yogurt
  • Nutty twist: Add almond butter or walnuts
  • Dairy-free: Use plant-based milk and yogurt
  • Extra spice: Add nutmeg or cloves

Each variation adds a unique twist while keeping it healthy and delicious.

What to Serve With Apple Cinnamon Overnight Oats

This recipe is a complete breakfast on its own, but it pairs well with:

  • Boiled eggs for extra protein
  • Fresh fruit salad
  • Smoothies or green juice
  • Coffee or chai tea
  • Nut butter toast

These pairings make your Apple Cinnamon Overnight Oats Recipe even more satisfying.

Storage & Reheating Tips

This recipe is designed for meal prep and storage.

Store in airtight containers or jars in the refrigerator for up to 4 days. No reheating is needed, but you can warm it slightly if you prefer a hot breakfast.

If the oats thicken too much, simply add a splash of milk before eating.

Common Mistakes to Avoid

Even simple recipes can go wrong without attention to detail.

  • Using too much liquid (too runny oats)
  • Not mixing well before refrigerating
  • Adding too many apples (can release excess water)
  • Skipping sweetener adjustment after chilling
  • Using steel-cut oats without cooking

Avoiding these mistakes ensures your Apple Cinnamon Overnight Oats Recipe turns out perfect every time.

Frequently Asked Questions

Can I use steel-cut oats?

Not recommended unless they are pre-cooked first.

Can I make it vegan?

Yes, use plant-based milk and yogurt alternatives.

How long do overnight oats last?

They stay fresh for up to 4 days in the fridge.

Can I eat them warm?

Yes, just microwave for 30–60 seconds if desired.

Final Thoughts

This Apple Cinnamon Overnight Oats Recipe is the perfect combination of convenience, nutrition, and cozy flavor. It’s quick to prepare, easy to customize, and ideal for busy mornings when you still want something healthy and homemade.

Once you try it, it will easily become a staple in your weekly breakfast rotation.

Easy Turkey Bolognese Spaghetti (Healthy, Flavorful & Weeknight-Friendly)

If you’re craving a comforting bowl of pasta without the heaviness of traditional beef sauces, this Easy Turkey Bolognese Spaghetti is the perfect solution. It’s rich, hearty, and packed with classic Italian flavors—but made lighter with lean ground turkey.

This Easy Turkey Bolognese Spaghetti is ideal for busy weeknights when you want something satisfying yet wholesome. The sauce simmers into a delicious blend of tomatoes, herbs, and tender turkey, coating every strand of spaghetti with flavor.

Why You’ll Love This Easy Turkey Bolognese Spaghetti

This recipe is a healthier twist on a classic favorite that doesn’t sacrifice flavor.

  • Made with lean ground turkey
  • Rich, hearty, and satisfying
  • Easy to prepare in under 40 minutes
  • Family-friendly and kid-approved
  • Perfect for meal prep and leftovers

The beauty of Easy Turkey Bolognese Spaghetti is how it delivers comfort food flavor in a lighter, more balanced way.

Ingredients You’ll Need

To make this Easy Turkey Bolognese Spaghetti, you’ll need simple pantry staples and fresh ingredients.

  • Spaghetti
  • Ground turkey
  • Onion, finely chopped
  • Garlic cloves, minced
  • Crushed tomatoes or marinara sauce
  • Tomato paste
  • Olive oil
  • Italian seasoning
  • Salt and black pepper
  • Parmesan cheese
  • Optional: carrots, celery, fresh basil

Ingredient Notes & Substitutions

This Easy Turkey Bolognese Spaghetti is incredibly flexible and easy to adapt.

Ground turkey keeps the dish lean, but you can also use ground chicken or a mix of turkey and beef for added richness. Adding finely diced carrots and celery gives the sauce more depth and a traditional Bolognese flavor.

If you prefer a smoother sauce, use marinara instead of crushed tomatoes. Whole wheat spaghetti or gluten-free pasta are great alternatives for dietary needs.

Step-by-Step Instructions

Step 1: Cook the Spaghetti

Boil spaghetti in salted water until al dente. Reserve some pasta water and drain.

Step 2: Sauté the Aromatics

Heat olive oil in a large skillet and cook onion and garlic until soft and fragrant. Add carrots and celery if using.

Step 3: Cook the Turkey

Add ground turkey and cook until browned, breaking it up as it cooks.

Step 4: Build the Sauce

Stir in tomato paste and crushed tomatoes, then add Italian seasoning, salt, and pepper. Let the sauce simmer until thickened and flavorful.

Image Prompt: Turkey bolognese sauce simmering in a pan, rich red color, thick texture, steam rising, close-up macro food photography, soft natural lighting, ultra realistic 4k.

Step 5: Combine and Serve

Toss cooked spaghetti with the sauce or serve sauce over pasta. Top with Parmesan and fresh basil.

Tips for Perfect Results

To make your Easy Turkey Bolognese Spaghetti absolutely perfect, follow these tips:

  • Don’t overcook the pasta
  • Let the sauce simmer for deeper flavor
  • Use fresh garlic and herbs for best taste
  • Add pasta water to loosen sauce if needed
  • Taste and adjust seasoning before serving

These small steps elevate the dish from good to amazing.

Delicious Variations

This Easy Turkey Bolognese Spaghetti can easily be customized.

  • Spicy version: Add red pepper flakes
  • Creamy twist: Stir in a splash of cream
  • Veggie-packed: Add mushrooms or zucchini
  • Low-carb: Serve over zucchini noodles
  • Cheesy bake: Turn it into a baked pasta dish

Each variation adds a new dimension while keeping the dish simple.

What to Serve With Turkey Bolognese

This pasta pairs beautifully with classic sides.

  • Garlic bread or breadsticks
  • Caesar salad or mixed greens
  • Roasted vegetables
  • Tomato soup
  • Sparkling water or iced tea

These sides complement the richness of the Easy Turkey Bolognese Spaghetti.

Storage & Reheating Tips

This dish is perfect for leftovers and meal prep.

Store in an airtight container in the fridge for up to 4 days. Reheat on the stovetop or microwave with a splash of water or sauce to keep it moist.

You can also freeze the sauce separately for up to 2 months.

Common Mistakes to Avoid

Even simple pasta recipes need attention to detail.

  • Overcooking the turkey until dry
  • Not seasoning enough
  • Skipping the simmer time
  • Using too much liquid
  • Not reserving pasta water

Avoiding these mistakes ensures your Easy Turkey Bolognese Spaghetti turns out perfectly.

Frequently Asked Questions

Can I make this ahead of time?

Yes, the sauce tastes even better the next day.

Can I freeze turkey bolognese?

Yes, freeze the sauce separately for best results.

What pasta works best?

Spaghetti is classic, but any pasta works.

Is this recipe healthy?

Yes, it’s lighter than traditional beef Bolognese.

Final Thoughts

Easy Turkey Bolognese Spaghetti is a perfect example of how comfort food can be both delicious and balanced. It’s hearty, flavorful, and easy enough for weeknight dinners while still feeling special.

Once you try it, this lighter take on a classic pasta dish will quickly become a staple in your kitchen.