Stunning Rice Bowl Recipes You’ll Love | Easy, Flavorful & Aesthetic Meals

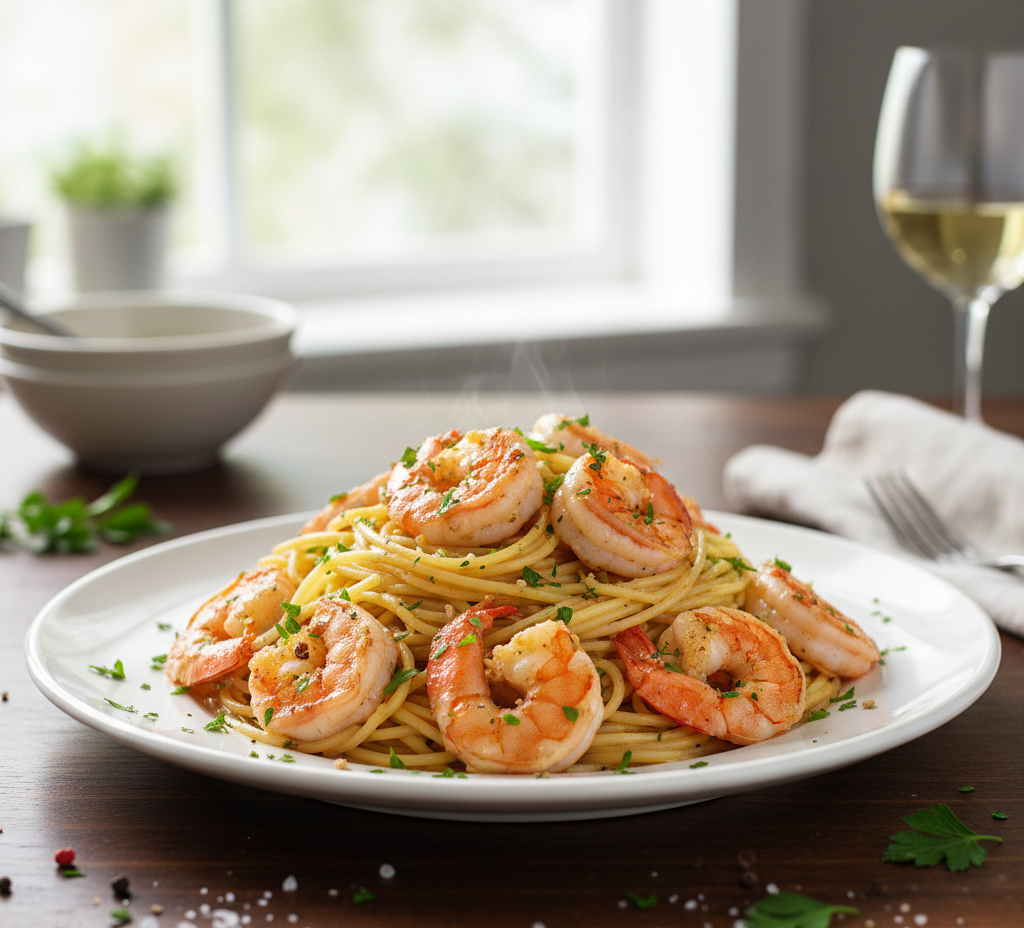
If you’re looking for meals that are equal parts delicious, nutritious, and visually appealing, these stunning rice bowl recipes you’ll love | easy, flavorful & aesthetic meals are exactly what you need. Rice bowls have taken the food world by storm—and for good reason. They’re versatile, customizable, and perfect for busy lifestyles.

Whether you’re craving something savory, spicy, fresh, or comforting, rice bowls allow you to mix and match ingredients to create a satisfying meal in one dish. From vibrant veggie-packed bowls to protein-rich options, these recipes bring together bold flavors and beautiful presentation.

Why You’ll Love These Rice Bowl Recipes

These stunning rice bowl recipes you’ll love | easy, flavorful & aesthetic meals are designed to simplify your cooking while maximizing flavor and presentation.

Here’s why they’re so popular:

  • Easy to customize with your favorite ingredients
  • Perfect for meal prep and leftovers
  • Balanced with protein, carbs, and veggies
  • Great for quick lunches or dinners
  • Visually stunning and Instagram-worthy

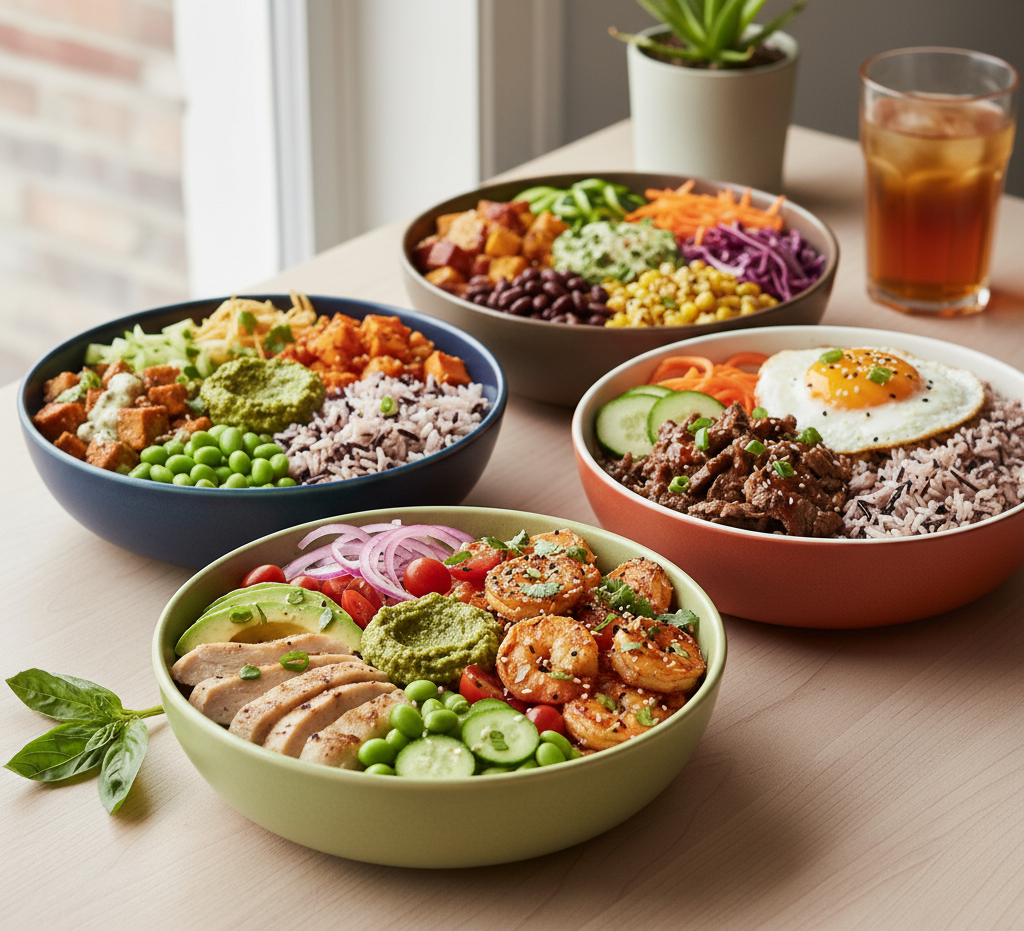
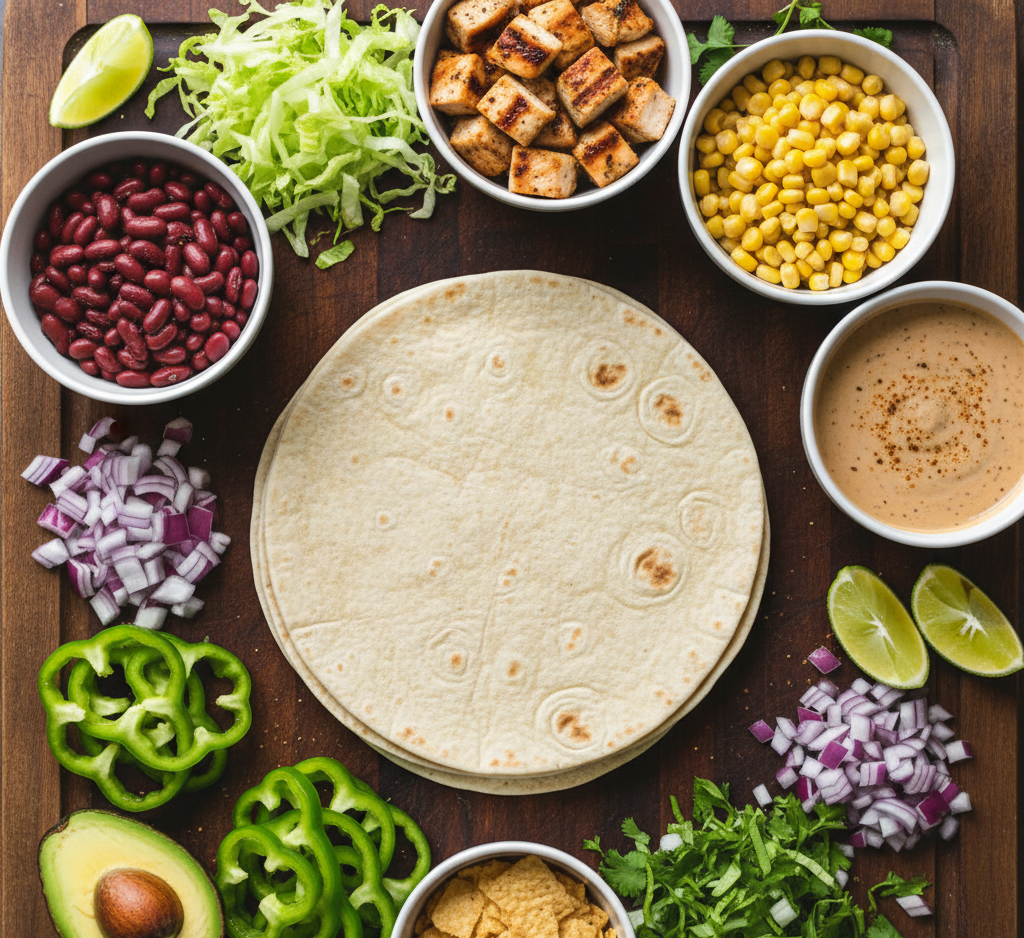
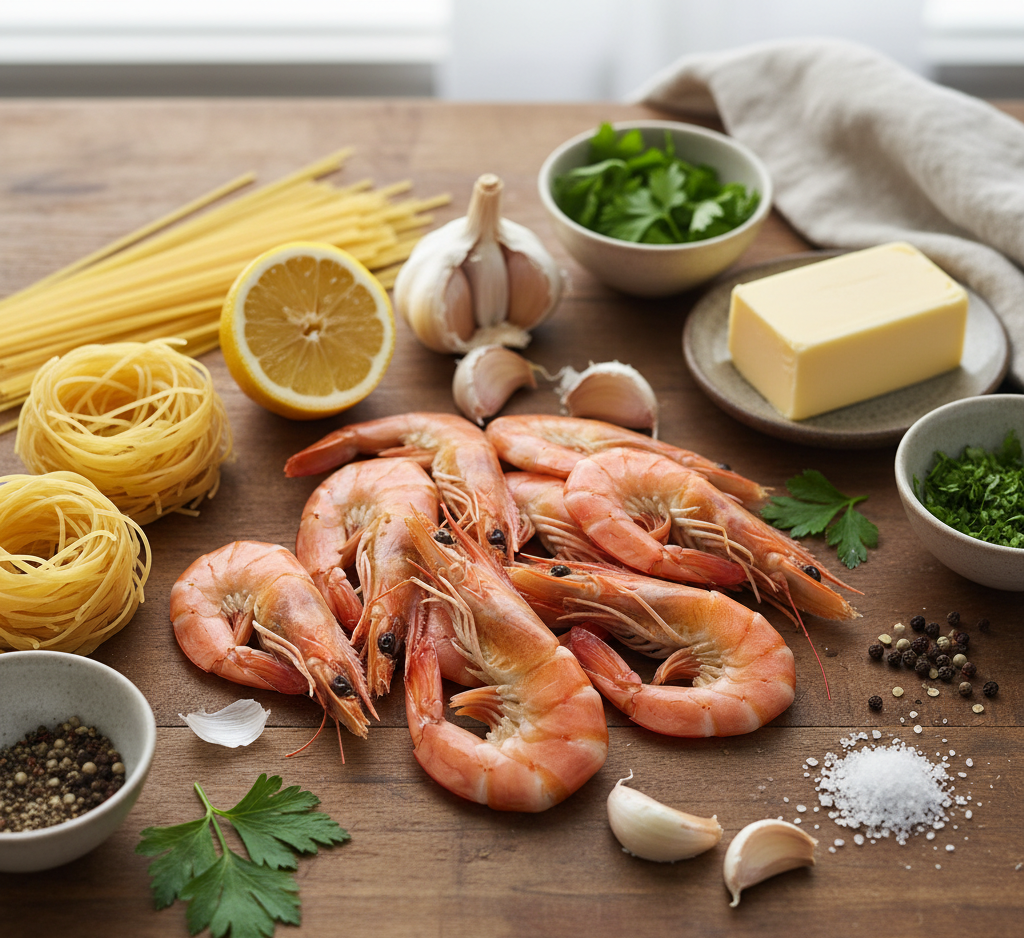
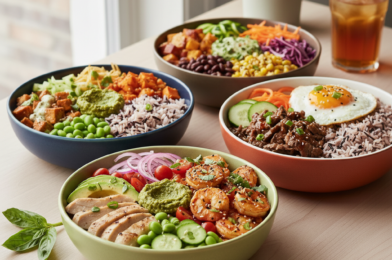
Essential Ingredients for Rice Bowls

Creating the perfect rice bowl starts with a few staple components:

Base:

  • White rice, brown rice, jasmine rice, or cauliflower rice

Protein:

  • Grilled chicken, shrimp, tofu, beef, or salmon

Vegetables:

  • Avocado, cucumbers, carrots, broccoli, edamame

Toppings & Sauces:

  • Soy sauce, teriyaki, spicy mayo, sesame dressing
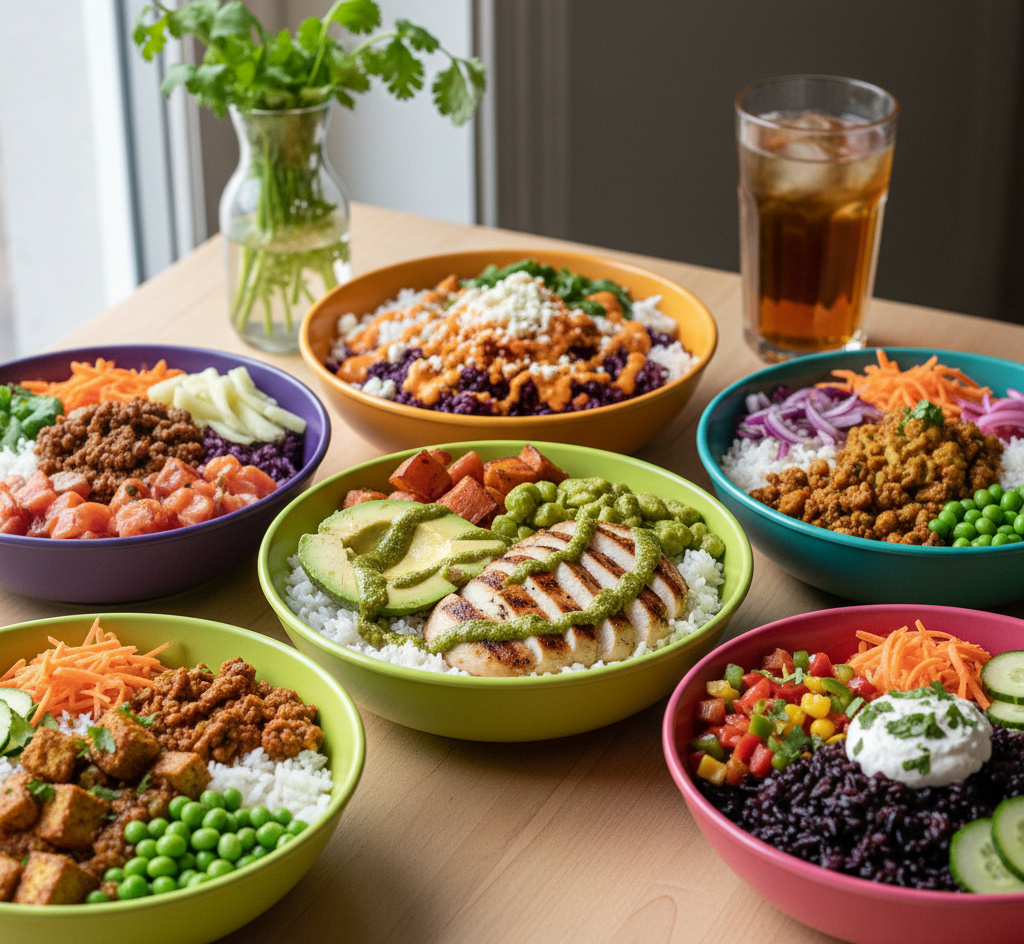
Ingredient Notes

The beauty of these stunning rice bowl recipes you’ll love | easy, flavorful & aesthetic meals lies in flexibility. You can easily adapt ingredients based on dietary needs or what you have on hand.

Using fresh, colorful vegetables not only enhances flavor but also makes your bowl visually appealing. A balance of textures—crunchy, creamy, and tender—is key to a great rice bowl.

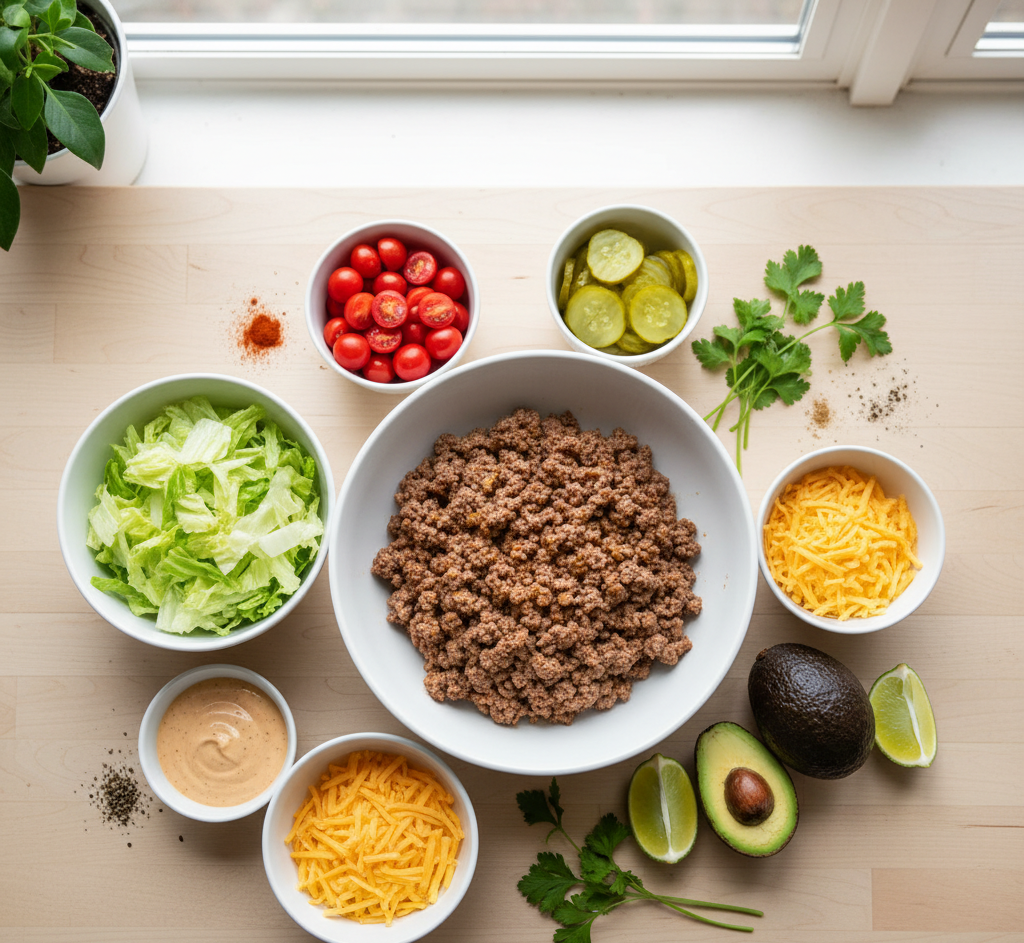
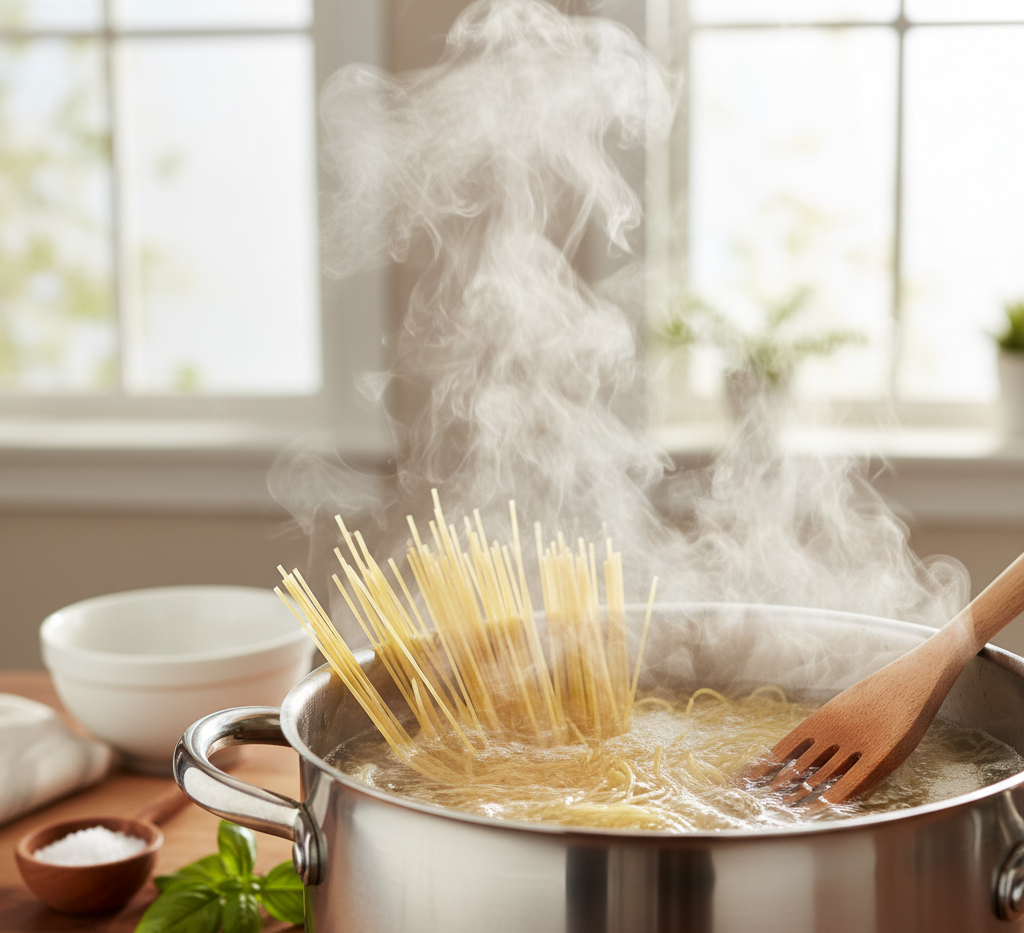
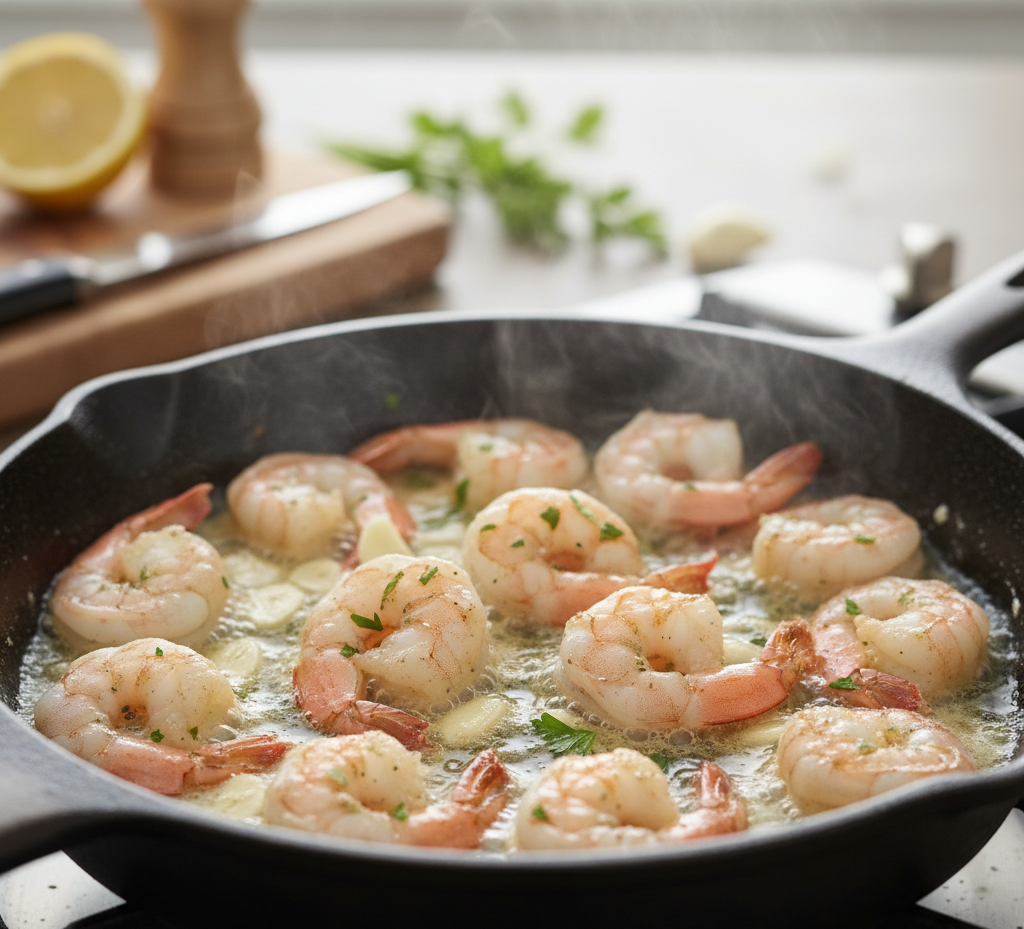
Step-by-Step Instructions for Building the Perfect Rice Bowl

1. Cook the Rice

Prepare your rice according to package instructions. Fluff and set aside.

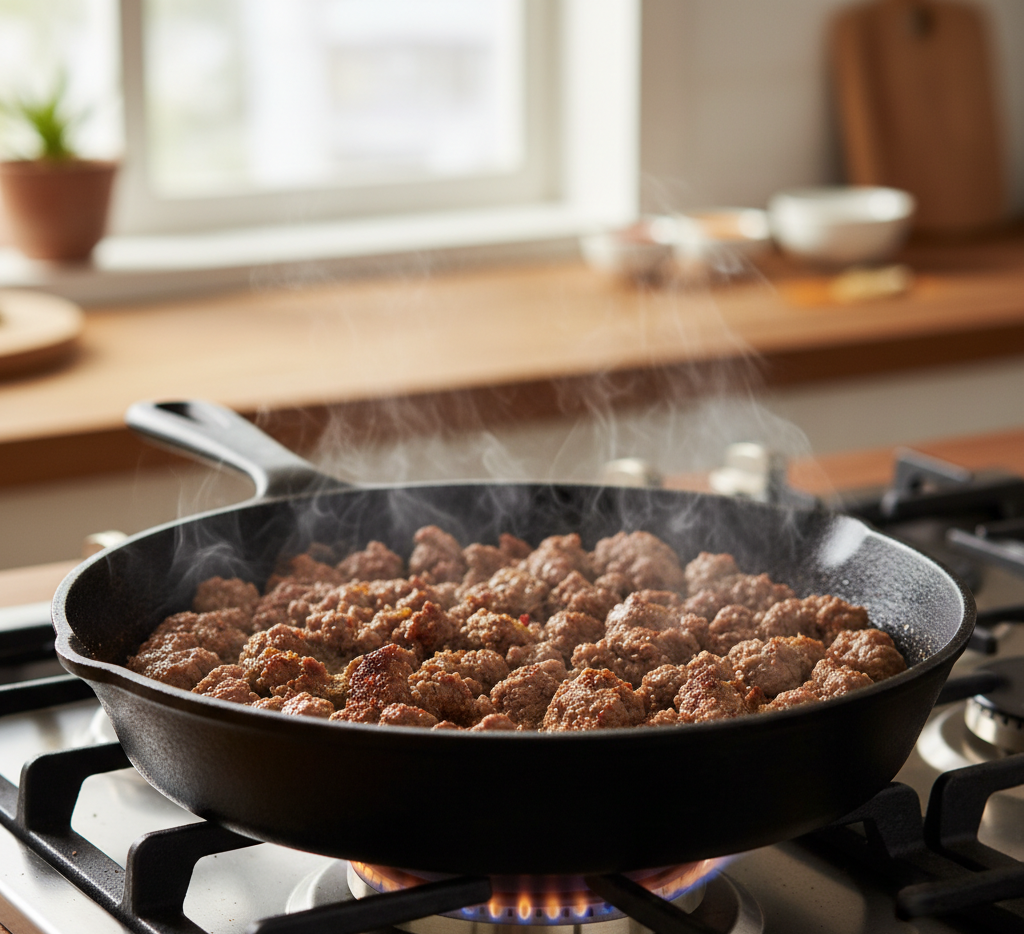
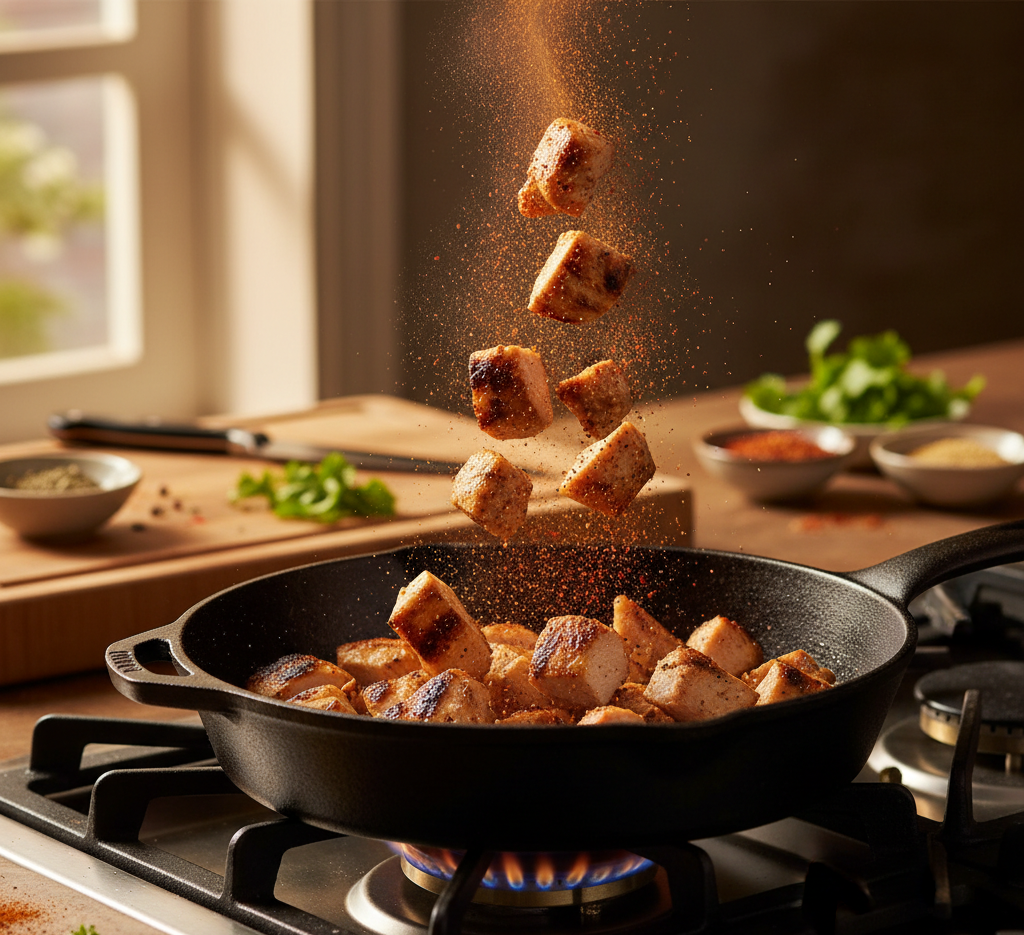
2. Prepare Your Protein

Cook your chosen protein using your preferred method—grilling, sautéing, or baking.

3. Chop Fresh Vegetables

Slice and prepare vegetables for easy assembly and vibrant presentation.

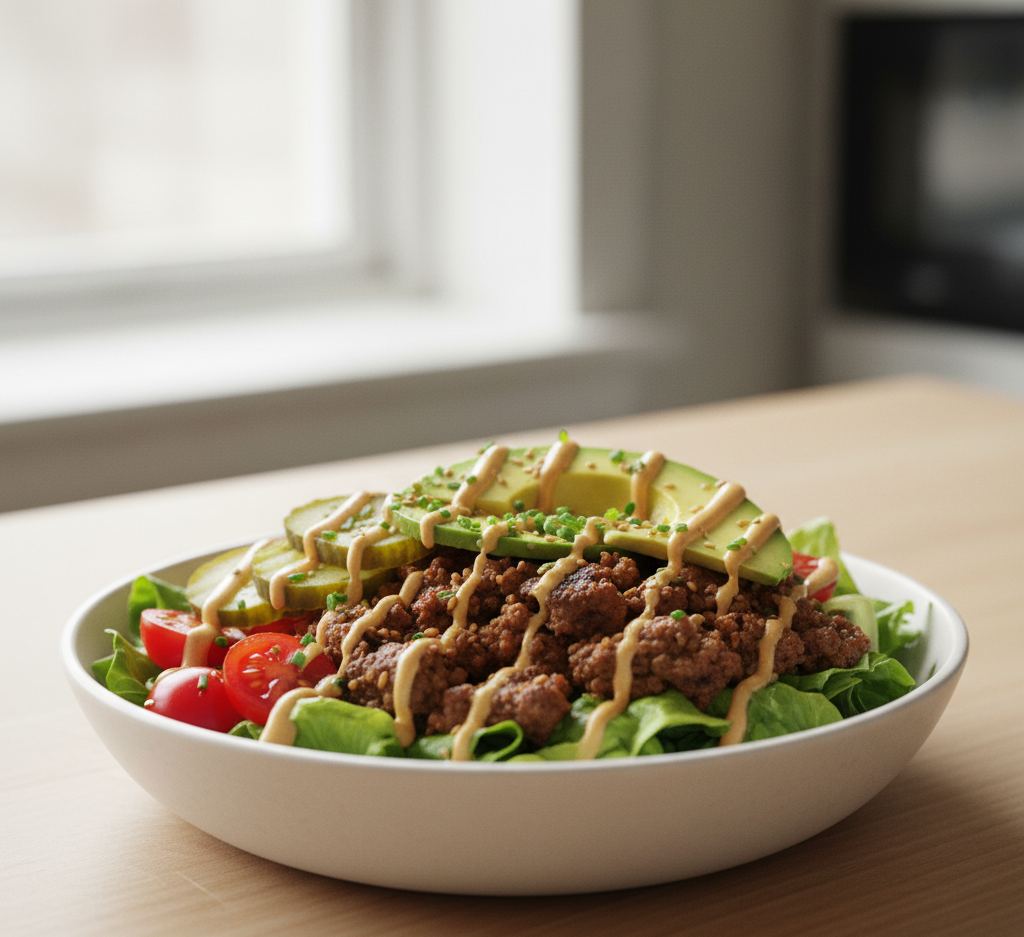
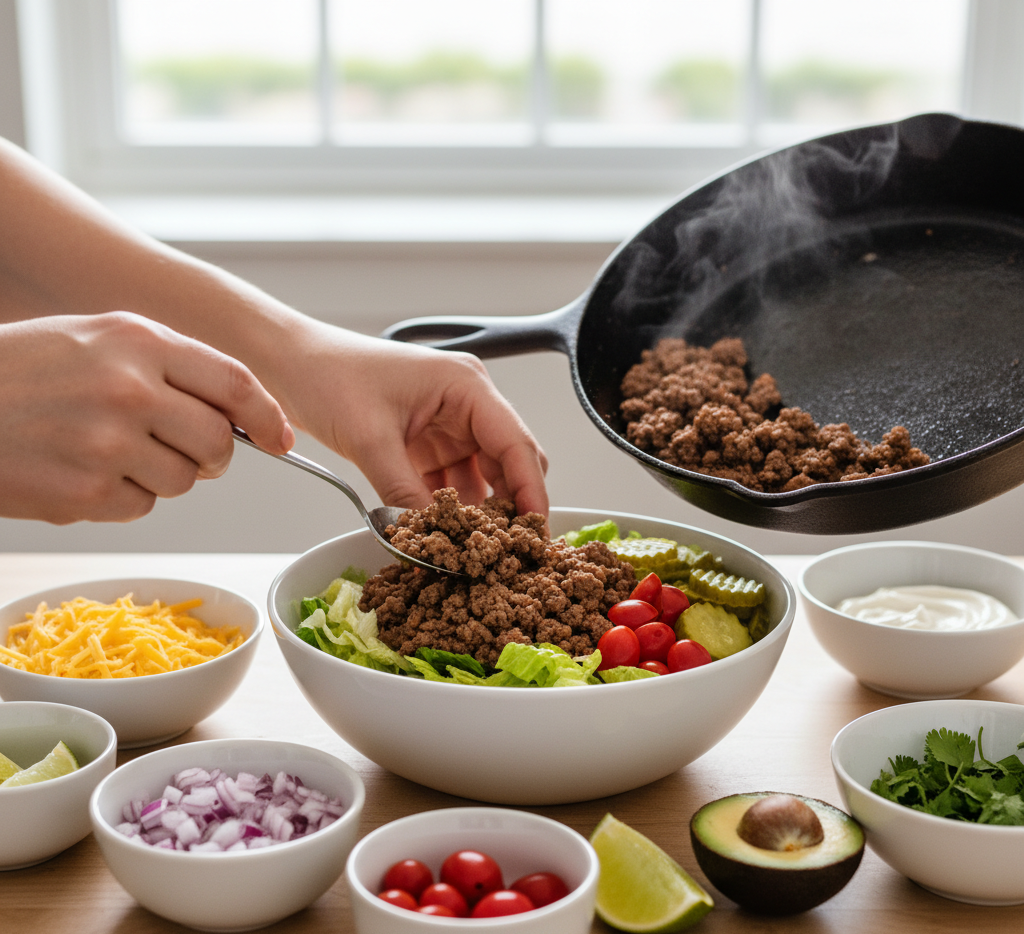
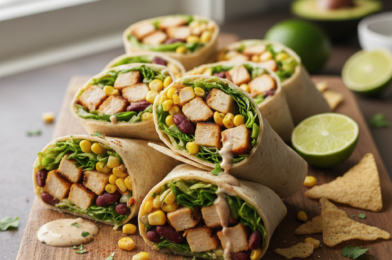
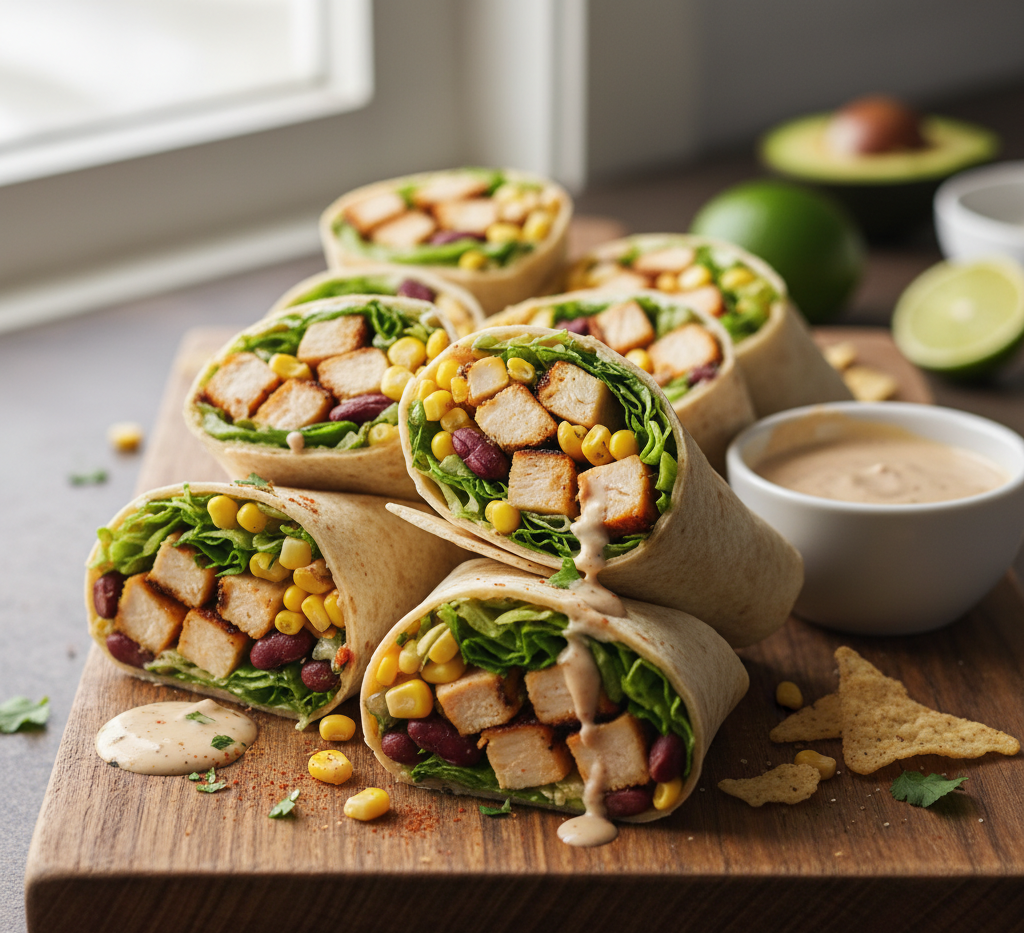
4. Assemble the Bowl

Start with a base of rice, then layer protein, vegetables, and toppings.

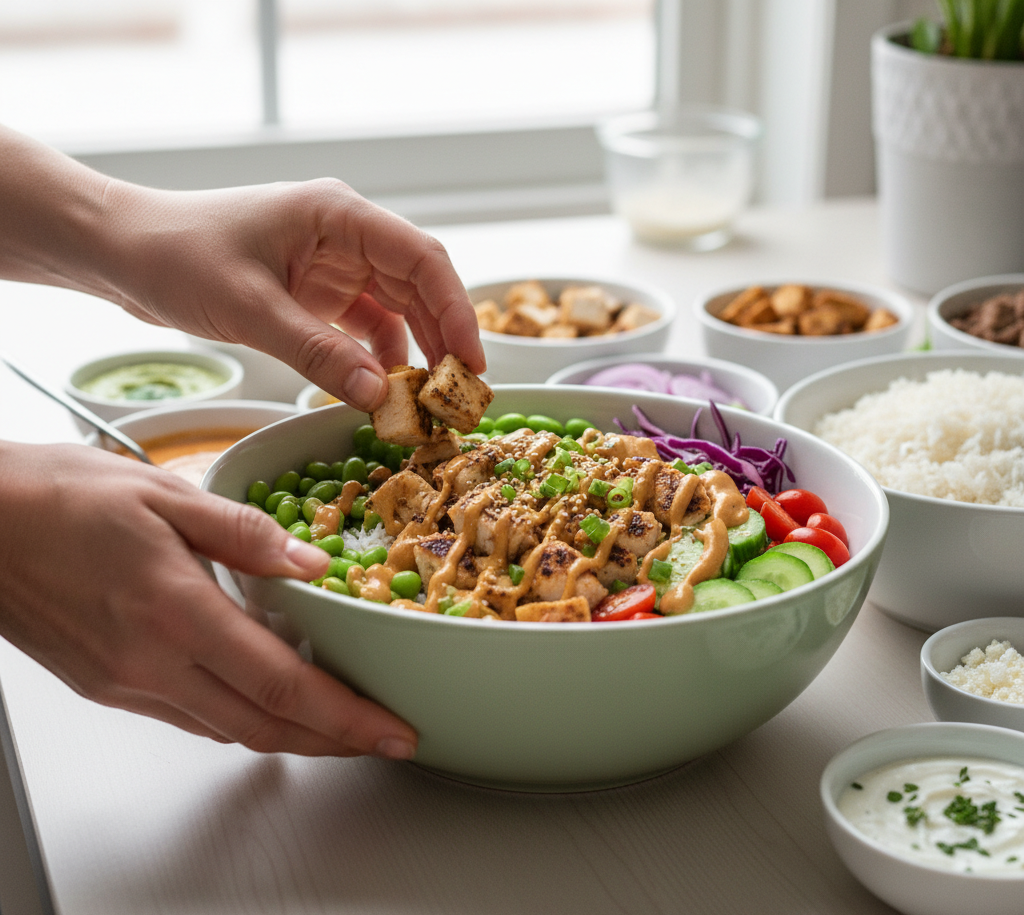
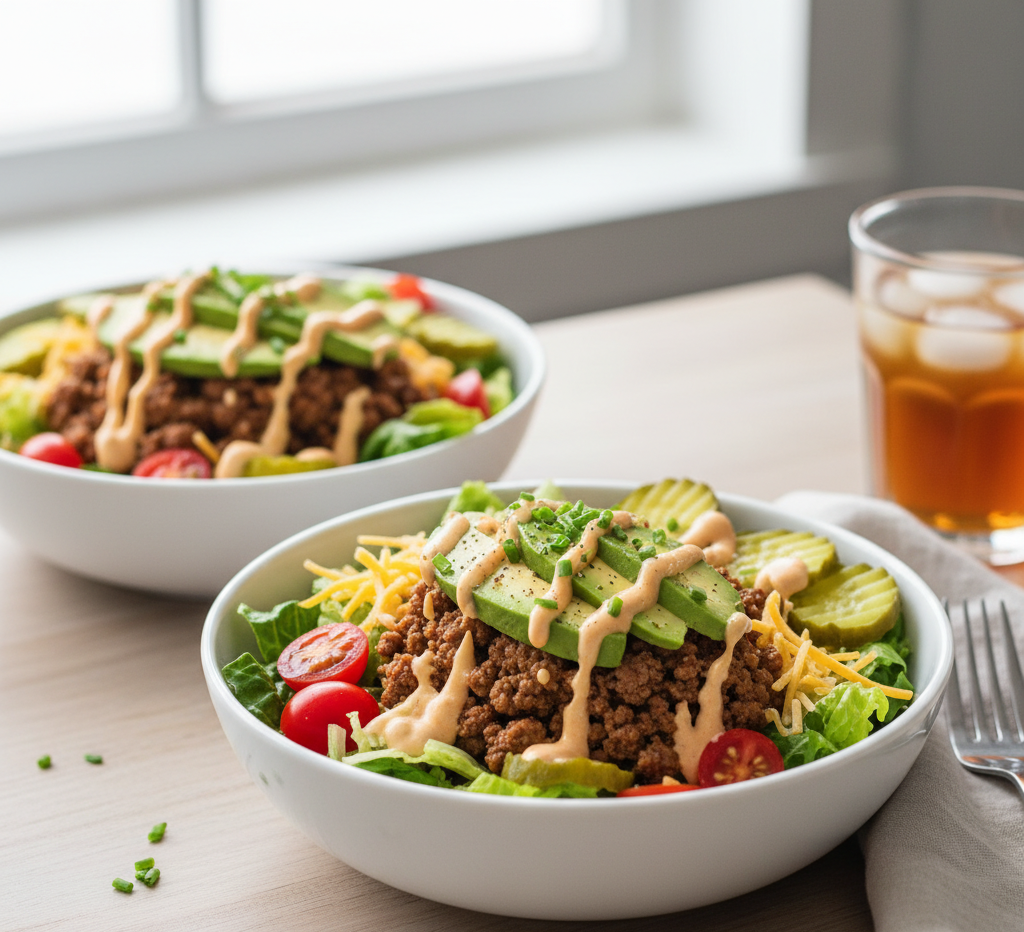
5. Add Sauce and Garnish

Drizzle your favorite sauce and finish with herbs or seeds.

Tips for Perfect Results

To master these stunning rice bowl recipes you’ll love | easy, flavorful & aesthetic meals, keep these tips in mind:

  • Use warm rice for better flavor absorption
  • Balance textures (crunchy, creamy, soft)
  • Don’t overload with too many toppings
  • Use contrasting colors for visual appeal

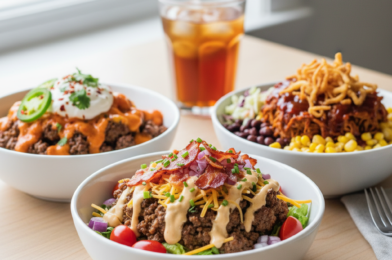
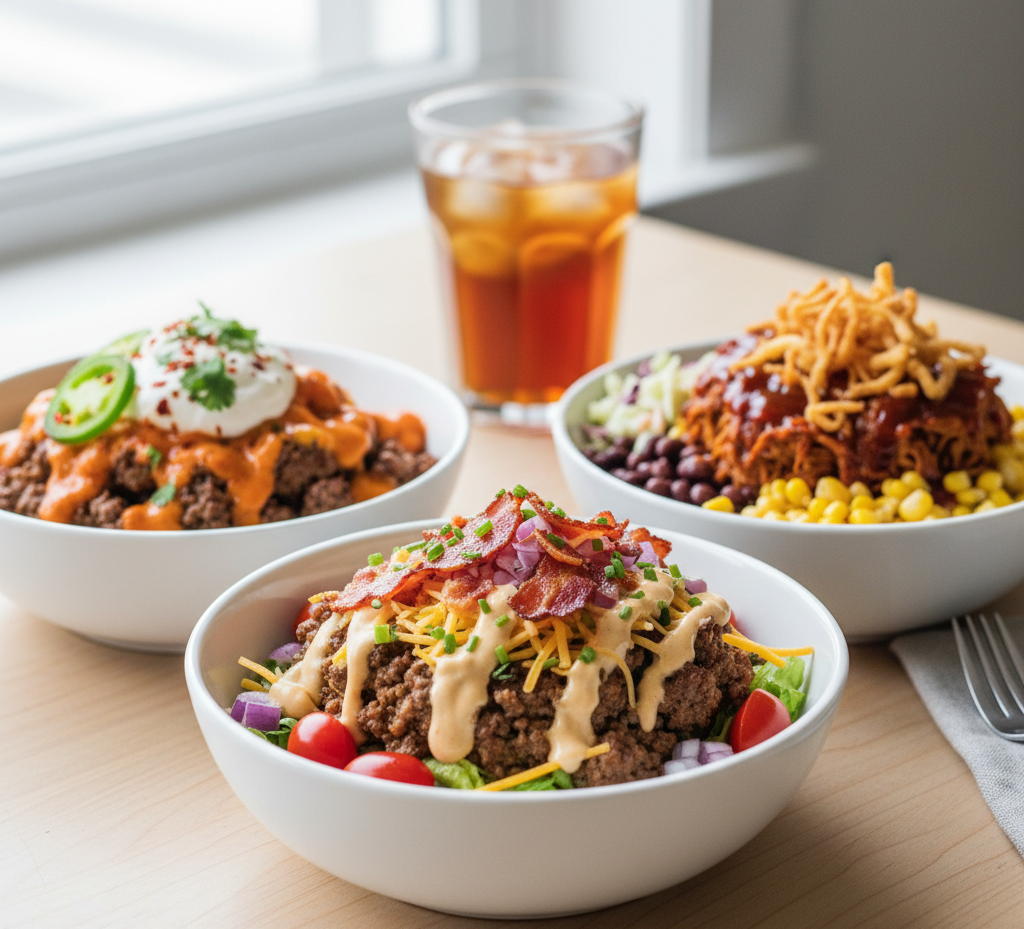
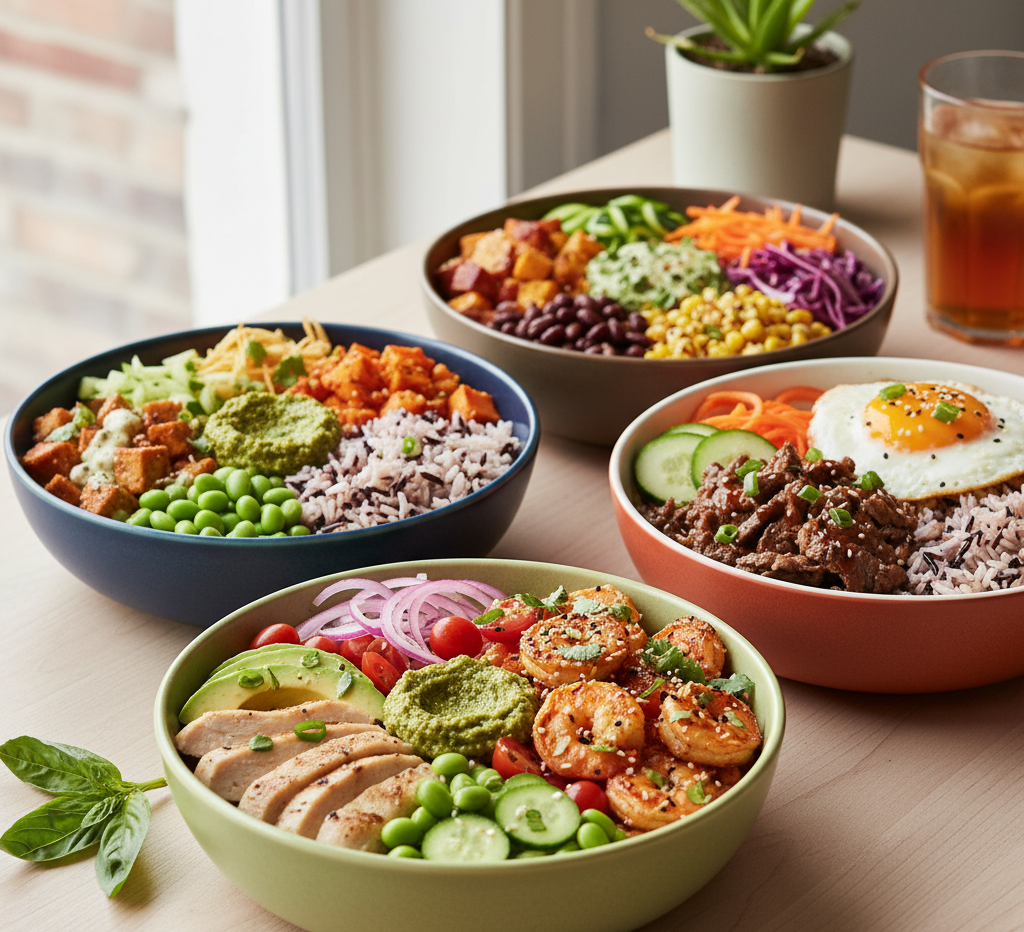
Popular Rice Bowl Variations

Here are some delicious variations to try:

  • Chicken Teriyaki Bowl: Sweet and savory classic
  • Spicy Shrimp Bowl: Bold and flavorful
  • Veggie Buddha Bowl: Packed with nutrients
  • Beef and Broccoli Bowl: Comfort food favorite

What to Serve With Rice Bowls

Rice bowls are often a complete meal, but you can pair them with:

  • Miso soup
  • Side salad
  • Spring rolls
  • Fresh fruit

These additions make your meal even more satisfying.

Storage & Reheating

For your stunning rice bowl recipes you’ll love | easy, flavorful & aesthetic meals:

  • Refrigerate: Store components separately for up to 4 days
  • Reheat: Warm rice and protein before assembling
  • Meal Prep Tip: Keep sauces separate to maintain freshness

Common Mistakes to Avoid

Avoid these common mistakes:

  • Overcooking rice
  • Using bland, unseasoned protein
  • Adding too much sauce
  • Skipping texture variety

Paying attention to these details makes a big difference.

FAQs

What type of rice is best for rice bowls?

Jasmine and brown rice are popular choices, but any rice works.

Can I make rice bowls ahead of time?

Yes, they’re excellent for meal prep.

Are rice bowls healthy?

Absolutely—they can be balanced with protein, veggies, and healthy fats.

How do I keep rice bowls from getting soggy?

Store sauces separately and add just before serving.

Final Thoughts

These stunning rice bowl recipes you’ll love | easy, flavorful & aesthetic meals are the ultimate solution for quick, customizable, and visually beautiful meals. They’re perfect for busy lifestyles, healthy eating goals, and anyone who loves bold flavors in a simple format.

Once you start making rice bowls at home, you’ll realize how easy it is to create restaurant-quality meals with minimal effort. Mix, match, and enjoy endless combinations that keep your meals exciting and satisfying.

Savory Burger Bowls: A Healthy Twist on Your Favorite Meal!

If you love burgers but want a lighter, more nutritious option, these Savory Burger Bowls: A Healthy Twist on Your Favorite Meal! are about to become your new go-to. All the classic burger flavors you crave—juicy beef, crisp lettuce, tangy pickles, and creamy sauce—are transformed into a satisfying, low-carb bowl.

This recipe is perfect for anyone looking to eat healthier without sacrificing flavor. Whether you’re meal prepping for the week or whipping up a quick dinner, burger bowls offer a customizable, wholesome alternative that’s just as indulgent as your favorite burger.

Why You’ll Love These Savory Burger Bowls

These savory burger bowls a healthy twist on your favorite meal are packed with benefits that make them irresistible.

Here’s why you’ll love them:

  • Low-carb and keto-friendly
  • Quick and easy to prepare
  • Fully customizable
  • Great for meal prep
  • Loaded with fresh, wholesome ingredients

Ingredients

To make these savory burger bowls, you’ll need:

For the Beef:

  • 1 lb ground beef
  • 1 teaspoon garlic powder
  • 1 teaspoon onion powder
  • Salt and pepper to taste

For the Bowl:

  • 4 cups chopped romaine or iceberg lettuce
  • 1 cup cherry tomatoes, halved
  • 1/2 cup sliced pickles
  • 1/4 cup red onion, thinly sliced
  • 1 cup shredded cheddar cheese
  • 1 avocado, sliced

For the Sauce:

  • 1/2 cup mayonnaise
  • 2 tablespoons ketchup
  • 1 tablespoon mustard
  • 1 tablespoon pickle juice

Ingredient Notes

The beauty of these savory burger bowls a healthy twist on your favorite meal is their flexibility. Ground beef provides that classic burger flavor, but you can easily swap in ground turkey or chicken for a leaner option.

The sauce mimics a classic burger spread—creamy, tangy, and slightly sweet—while fresh veggies add crunch and balance. Using high-quality ingredients makes a noticeable difference in flavor.

Step-by-Step Instructions

1. Cook the Beef

In a skillet over medium heat, cook the ground beef with garlic powder, onion powder, salt, and pepper until browned and fully cooked.

2. Prepare the Sauce

In a small bowl, whisk together mayonnaise, ketchup, mustard, and pickle juice until smooth.

3. Assemble the Bowls

Start with a base of lettuce, then add cooked beef, tomatoes, pickles, onion, cheese, and avocado slices.

4. Add the Sauce

Drizzle the prepared sauce generously over each bowl.

5. Serve and Enjoy

Serve immediately while the beef is warm and the veggies are fresh.

Tips for Perfect Results

To make the best savory burger bowls a healthy twist on your favorite meal, keep these tips in mind:

  • Use freshly cooked, hot beef for the best flavor
  • Chop veggies evenly for balanced bites
  • Don’t skip the sauce—it ties everything together
  • Season generously for that classic burger taste

Variations

These burger bowls are incredibly versatile. Try these variations:

  • Cheeseburger Bowl: Add extra cheese and crispy bacon
  • Low-Fat Version: Use ground turkey and light mayo
  • Spicy Burger Bowl: Add jalapeños or hot sauce
  • BBQ Style: Swap sauce for BBQ dressing

What to Serve With It

Pair these bowls with:

  • Sweet potato fries
  • Roasted vegetables
  • Fresh fruit
  • Sparkling water or iced tea

This keeps your meal balanced and satisfying.

Storage & Reheating

For your savory burger bowls a healthy twist on your favorite meal:

  • Refrigerate: Store components separately for up to 4 days
  • Reheat: Warm beef before assembling
  • Meal Prep Tip: Keep sauce in a separate container

Common Mistakes to Avoid

Avoid these common issues:

  • Overcooking the beef
  • Using too much sauce
  • Skipping seasoning
  • Assembling too early (can make veggies soggy)

Keeping everything fresh and balanced is key.

FAQs

Can I make burger bowls ahead of time?

Yes! Store ingredients separately and assemble when ready.

Are burger bowls healthy?

Yes, they’re lower in carbs and packed with nutrients.

Can I use a different protein?

Absolutely—chicken, turkey, or plant-based options work great.

What’s the best lettuce to use?

Romaine or iceberg for crunch, but any greens will work.

Final Thoughts

These Savory Burger Bowls: A Healthy Twist on Your Favorite Meal! prove that you don’t need a bun to enjoy all the delicious flavors of a classic burger. They’re fresh, filling, and incredibly easy to make.

Whether you’re looking to eat healthier, save time, or simply try something new, these burger bowls deliver on all fronts. Once you try them, you might never go back to traditional burgers again!

Southwest Chicken Wraps: Easy & Healthy Lunch Recipes (Fresh, Flavorful & Meal-Prep Friendly)

When it comes to quick, nutritious meals that don’t sacrifice flavor, these Southwest Chicken Wraps: Easy & Healthy Lunch Recipes truly deliver. Loaded with seasoned chicken, crisp vegetables, hearty beans, and a creamy, zesty dressing, these wraps bring bold Southwest-inspired flavors into a convenient, handheld meal.

Perfect for busy weekdays, school lunches, or light dinners, this recipe is designed to keep you satisfied without weighing you down. The combination of lean protein, fiber-rich ingredients, and vibrant textures makes these wraps both wholesome and incredibly delicious.

Why You’ll Love These Southwest Chicken Wraps

These Southwest chicken wraps easy & healthy lunch recipes are a go-to for anyone who wants something quick, fresh, and satisfying.

Here’s why they stand out:

  • Ready in under 30 minutes
  • Packed with protein and nutrients
  • Perfect for meal prep
  • Easy to customize
  • Great for both lunch and light dinners

Ingredients

To make these Southwest chicken wraps, you’ll need:

For the Chicken:

  • 2 cooked chicken breasts (grilled, baked, or rotisserie)
  • 1 teaspoon chili powder
  • 1/2 teaspoon cumin
  • 1/2 teaspoon smoked paprika
  • Salt and pepper to taste

For the Wrap Filling:

  • 4 large flour tortillas
  • 1 cup romaine lettuce, chopped
  • 1/2 cup corn (fresh, canned, or grilled)
  • 1/2 cup black beans, rinsed and drained
  • 1/2 cup cherry tomatoes, halved
  • 1/4 cup red onion, thinly sliced
  • 1/2 cup shredded cheddar or Mexican blend cheese

For the Creamy Dressing:

  • 1/2 cup Greek yogurt or sour cream
  • 1 tablespoon lime juice
  • 1 teaspoon taco seasoning

Ingredient Notes

The secret to amazing Southwest chicken wraps easy & healthy lunch recipes is balancing flavors and textures. The seasoned chicken provides savory depth, while the beans and corn add heartiness and fiber.

Greek yogurt keeps the dressing light and tangy, making this a healthier alternative to heavy sauces. Fresh lime juice brightens the entire dish, giving it that signature Southwest flair.

Step-by-Step Instructions

1. Season and Prepare the Chicken

Slice or shred your cooked chicken and toss it with chili powder, cumin, paprika, salt, and pepper. Warm it slightly for the best flavor.

2. Make the Dressing

In a small bowl, combine Greek yogurt, lime juice, and taco seasoning. Mix until smooth and creamy.

3. Prepare the Fillings

Chop the lettuce, slice the tomatoes, and prep all vegetables so everything is ready for assembly.

4. Assemble the Wraps

Lay each tortilla flat and layer with chicken, lettuce, corn, beans, tomatoes, onion, and cheese. Drizzle with the creamy dressing.

5. Roll and Slice

Fold in the sides and roll tightly into a wrap. Slice in half and serve immediately or wrap for later.

Tips for Perfect Results

To get the best results from your Southwest chicken wraps easy & healthy lunch recipes, keep these tips in mind:

  • Warm tortillas to prevent cracking
  • Don’t overfill to keep wraps easy to roll
  • Use freshly squeezed lime juice
  • Add dressing just before serving to avoid sogginess

Variations

These wraps are incredibly versatile. Try these variations:

  • Spicy Southwest Wrap: Add jalapeños or hot sauce
  • Low-Carb Version: Use lettuce wraps instead of tortillas
  • Vegetarian Option: Swap chicken for grilled veggies or tofu
  • Avocado Lover’s Wrap: Add sliced avocado or guacamole

What to Serve With It

These wraps pair beautifully with:

  • Tortilla chips and salsa
  • Fresh fruit or fruit salad
  • Light coleslaw
  • Sparkling water or iced tea

This creates a balanced and refreshing meal.

Storage & Reheating

For your Southwest chicken wraps easy & healthy lunch recipes:

  • Refrigerate: Store wraps tightly wrapped for up to 3 days
  • Meal Prep Tip: Keep ingredients separate until ready to assemble
  • Reheat: Warm chicken separately if desired
  • Avoid soggy wraps by adding dressing last

Common Mistakes to Avoid

Avoid these common pitfalls:

  • Overstuffing wraps
  • Skipping seasoning on the chicken
  • Using cold, stiff tortillas
  • Adding too much dressing

Keeping everything balanced ensures a better texture and flavor.

FAQs

Can I make these wraps ahead of time?

Yes, but store the dressing separately until serving.

What type of chicken works best?

Grilled, baked, or rotisserie chicken all work well.

Are these wraps good for weight loss?

They can be, especially when using Greek yogurt and fresh ingredients.

Can I freeze these wraps?

It’s not recommended due to fresh vegetables and texture changes.

Final Thoughts

These Southwest Chicken Wraps: Easy & Healthy Lunch Recipes are the perfect combination of convenience, nutrition, and bold flavor. They’re quick to make, easy to customize, and ideal for anyone looking to enjoy a healthy meal without sacrificing taste.

Whether you’re meal prepping for the week or whipping up a fast lunch, these wraps deliver fresh, satisfying goodness in every bite. Once you try them, they’re sure to become a staple in your kitchen.

Garlic Butter Shrimp Angel Hair Pasta (Quick, Elegant & Flavor-Packed)

If you’re looking for a fast, flavorful meal that feels restaurant-worthy, this Garlic Butter Shrimp Angel Hair Pasta is exactly what you need. It’s light yet satisfying, loaded with tender shrimp, delicate angel hair pasta, and a rich garlic butter sauce that comes together in no time.

This dish is perfect for busy weeknights, date nights at home, or when you want something impressive without spending hours in the kitchen. With simple ingredients and a quick cooking process, you’ll have a stunning pasta dish ready in under 30 minutes.

Why You’ll Love This Garlic Butter Shrimp Angel Hair Pasta

This garlic butter shrimp angel hair pasta is a favorite for so many reasons.

Here’s why it deserves a spot in your rotation:

  • Ready in under 30 minutes
  • Light yet rich and satisfying
  • Packed with garlic butter flavor
  • Perfect for weeknights or entertaining
  • Uses simple, easy-to-find ingredients

Ingredients

To make this garlic butter shrimp angel hair pasta, you’ll need:

  • 8 oz angel hair pasta
  • 1 lb large shrimp, peeled and deveined
  • 4 tablespoons unsalted butter
  • 4 cloves garlic, minced
  • 1/4 teaspoon red pepper flakes (optional)
  • 1/2 cup chicken broth or white wine
  • Juice of 1 lemon
  • 1/4 cup grated Parmesan cheese
  • 2 tablespoons fresh parsley, chopped
  • Salt and pepper to taste

Ingredient Notes

The beauty of this garlic butter shrimp angel hair pasta lies in its simplicity. Fresh garlic is essential for bold flavor, while butter creates that rich, silky sauce.

Angel hair pasta cooks quickly and pairs perfectly with shrimp because it doesn’t overpower the dish. A splash of lemon juice adds brightness, balancing the richness of the butter.

Step-by-Step Instructions

1. Cook the Pasta

Bring a large pot of salted water to a boil and cook angel hair pasta according to package instructions. Drain and set aside.

2. Cook the Shrimp

In a large skillet, melt 2 tablespoons of butter over medium heat. Add shrimp, season with salt and pepper, and cook for 2–3 minutes per side until pink and opaque. Remove and set aside.

3. Make the Garlic Butter Sauce

In the same skillet, add remaining butter and garlic. Sauté until fragrant, then stir in red pepper flakes and broth or wine.

4. Add Lemon and Combine

Add lemon juice and let the sauce simmer for a few minutes to develop flavor.

5. Toss Everything Together

Return shrimp to the pan, add cooked pasta, and toss until everything is coated in the garlic butter sauce.

6. Finish with Cheese and Herbs

Sprinkle Parmesan and parsley over the pasta and gently toss before serving.

Tips for Perfect Results

To get the best garlic butter shrimp angel hair pasta, follow these tips:

  • Don’t overcook shrimp—they cook quickly
  • Salt your pasta water for better flavor
  • Use fresh lemon juice for brightness
  • Reserve some pasta water to adjust sauce consistency

Variations

Switch up your garlic butter shrimp angel hair pasta with these ideas:

  • Creamy Version: Add a splash of heavy cream
  • Spicy Kick: Increase red pepper flakes
  • Veggie Boost: Add spinach or cherry tomatoes
  • Garlic Lovers: Double the garlic

What to Serve With It

This dish pairs beautifully with:

  • Garlic bread
  • Caesar salad
  • Roasted asparagus
  • A glass of white wine or sparkling water

These sides complement the light, buttery flavors.

Storage & Reheating

For your garlic butter shrimp angel hair pasta:

  • Refrigerate: Store in airtight container for up to 3 days
  • Reheat: Warm gently on stovetop with a splash of broth
  • Avoid overcooking shrimp when reheating

Common Mistakes to Avoid

Avoid these common issues:

  • Overcooking shrimp (they become rubbery)
  • Using too much pasta without enough sauce
  • Burning garlic
  • Skipping lemon juice

Attention to these details ensures perfect results.

FAQs

Can I use frozen shrimp?

Yes, just thaw and pat dry before cooking.

What can I substitute for angel hair pasta?

Spaghetti or linguine works well too.

Can I make this dairy-free?

Yes, use olive oil instead of butter.

How do I keep the pasta from drying out?

Add reserved pasta water or extra sauce when reheating.

Final Thoughts

This Garlic Butter Shrimp Angel Hair Pasta is the perfect combination of simplicity and elegance. It’s quick enough for busy nights yet impressive enough for special occasions.

With its buttery garlic sauce, tender shrimp, and light pasta, this recipe delivers big flavor with minimal effort. Once you try it, it’s sure to become one of your go-to meals for any occasion.