Fudgy Tiramisu Brownies: The Ultimate Decadent Dessert Mashup

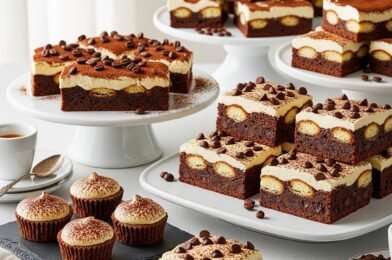
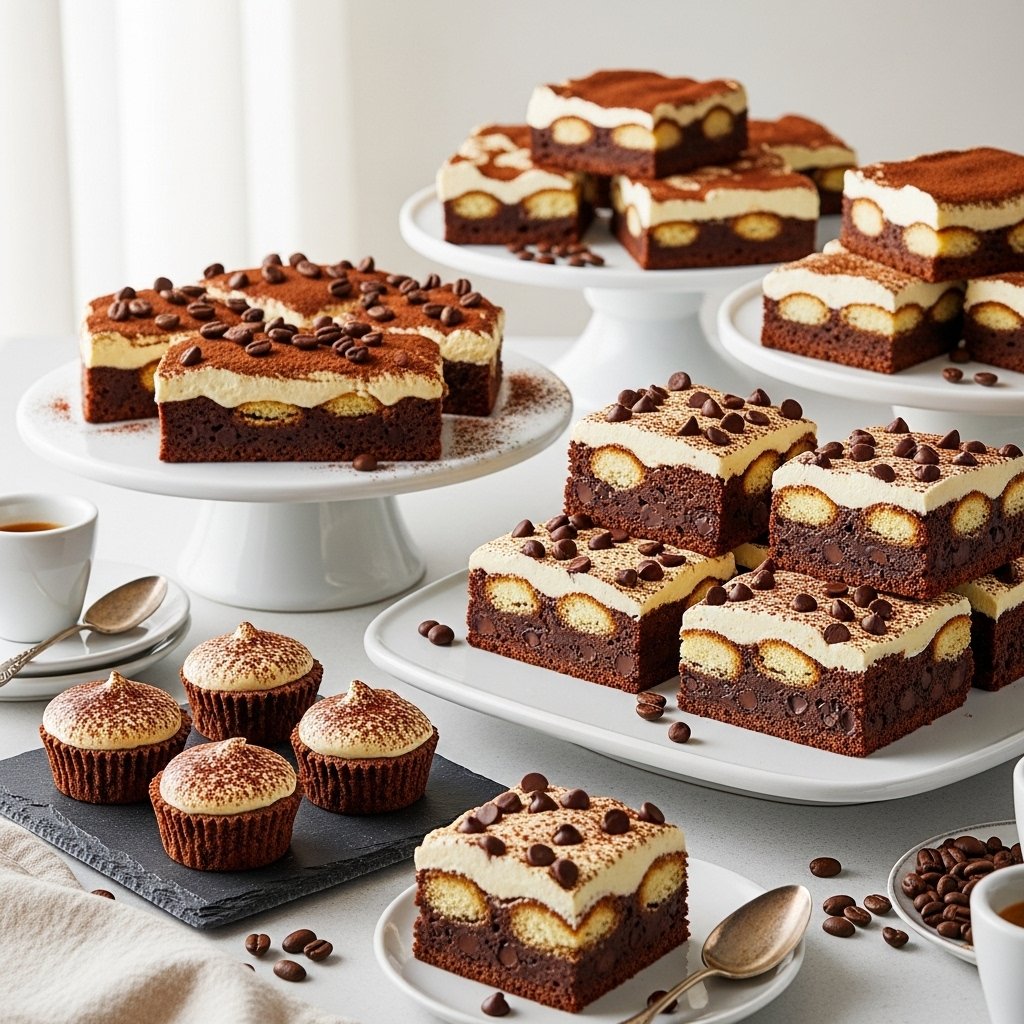
If you love rich chocolate desserts and classic Italian flavors, these fudgy tiramisu brownies are about to become your new favorite treat. This irresistible dessert combines dense, chocolatey brownies with the bold flavor of espresso and a luscious mascarpone cream layer—bringing together the best of brownies and tiramisu in one unforgettable bite.

Perfect for dinner parties, holidays, or when you simply want to impress, these brownies deliver bakery-quality results right from your kitchen.

Why You’ll Love These Fudgy Tiramisu Brownies

There are so many reasons to fall in love with these fudgy tiramisu brownies:

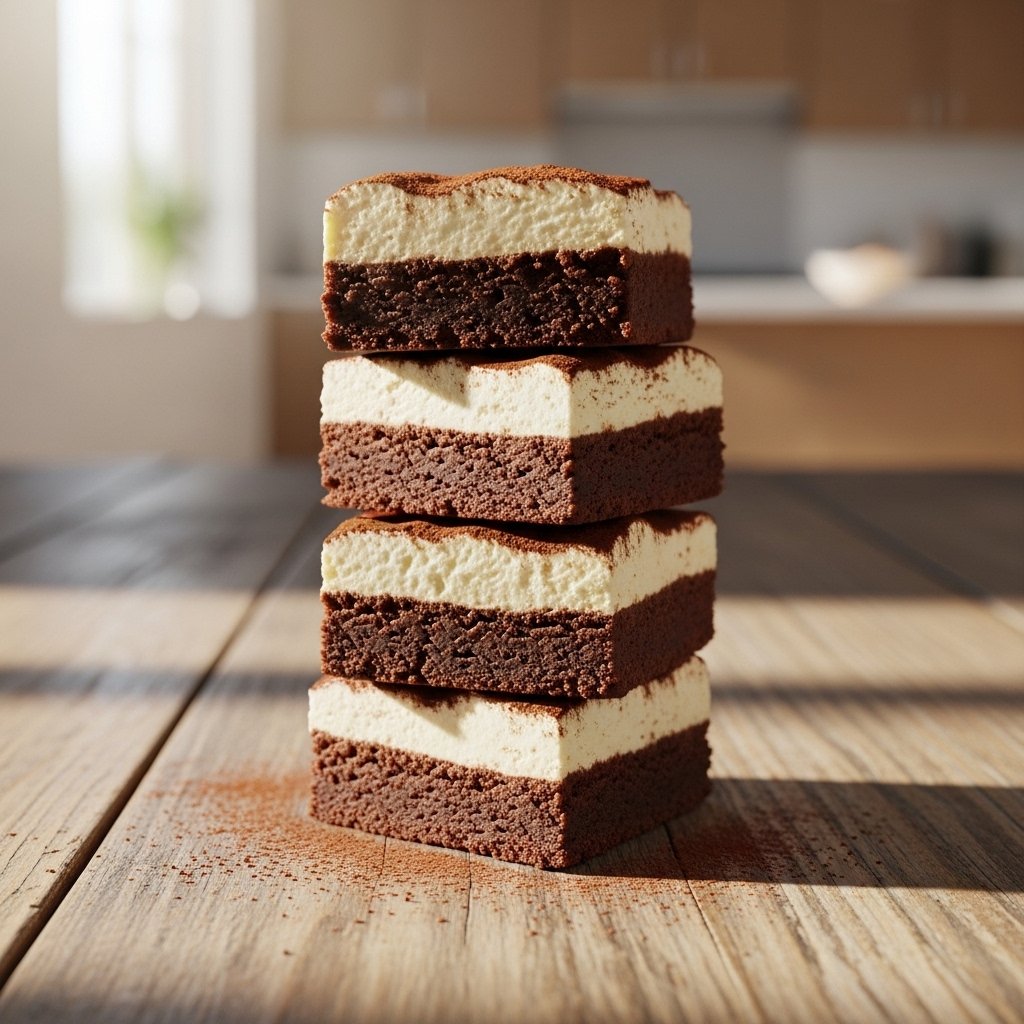
  • Ultra-rich and chocolatey texture
  • Perfect balance of coffee and cream flavors
  • Elegant dessert that’s surprisingly easy to make
  • Great for make-ahead occasions
  • A unique twist on classic brownies

These brownies feel indulgent and sophisticated while still being approachable for home bakers.
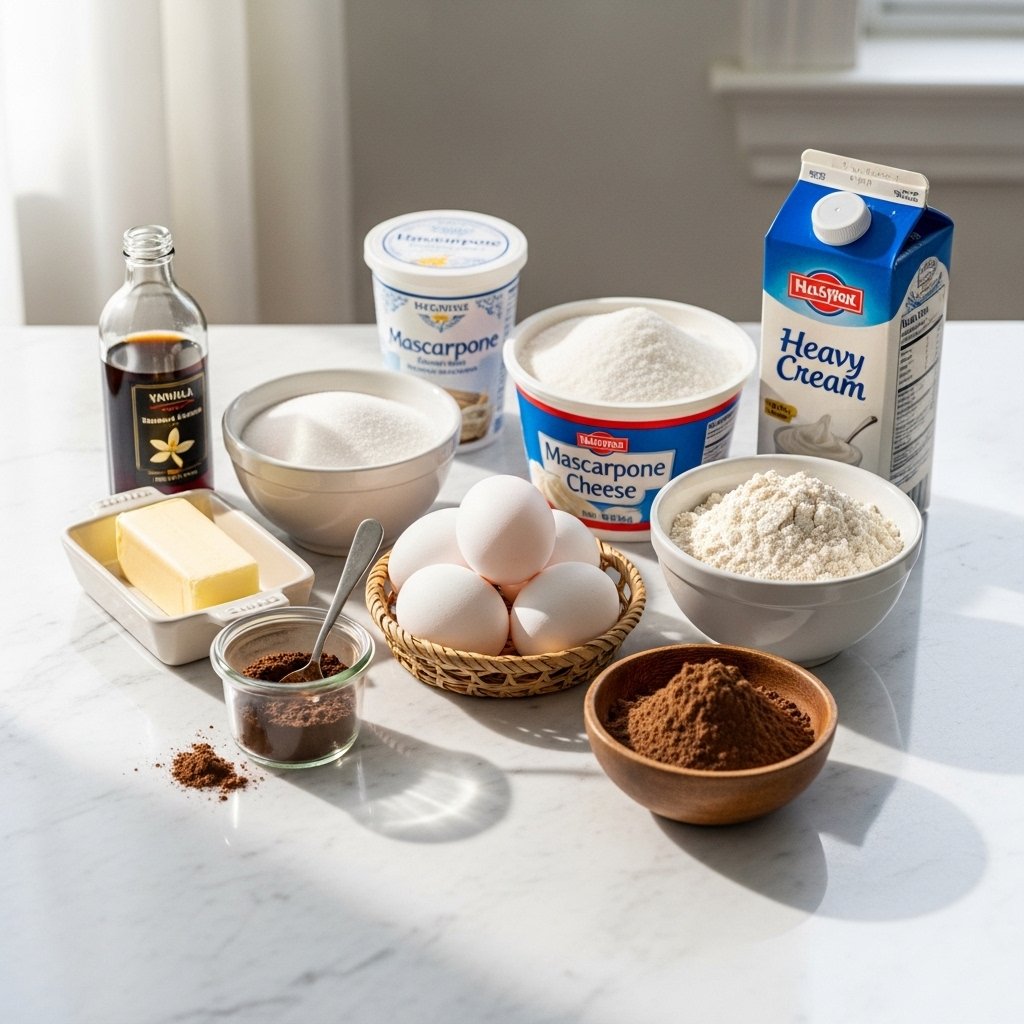
Ingredients

To make these delicious fudgy tiramisu brownies, you’ll need:

For the Brownie Layer:

  • 1 cup unsalted butter
  • 1 cup granulated sugar
  • ¾ cup brown sugar
  • 3 large eggs
  • 1 teaspoon vanilla extract
  • ¾ cup cocoa powder
  • 1 cup all-purpose flour
  • ½ teaspoon salt

For the Tiramisu Layer:

  • 1 cup mascarpone cheese
  • ½ cup heavy cream
  • ¼ cup powdered sugar
  • 1 teaspoon vanilla extract
  • 2 teaspoons espresso powder

For Topping:

  • Cocoa powder for dusting

Ingredient Notes

The key to perfect fudgy tiramisu brownies is using high-quality ingredients. Mascarpone cheese gives that signature creamy tiramisu flavor, while espresso powder enhances the chocolate without overpowering it.

If you don’t have espresso powder, strong brewed coffee can be reduced and used instead. Always use unsweetened cocoa powder for a deep, rich chocolate taste.

Step-by-Step Instructions

1. Prepare the Brownie Batter

Melt butter and mix with sugars, then whisk in eggs and vanilla. Stir in cocoa powder, flour, and salt until combined.

2. Bake the Brownies

Pour batter into a lined baking pan and bake at 350°F (175°C) for 20–25 minutes. Let cool completely.

3. Make the Tiramisu Cream

Whip mascarpone, heavy cream, powdered sugar, vanilla, and espresso powder until smooth and fluffy.

4. Assemble the Layers

Spread the mascarpone mixture over cooled brownies and smooth evenly.

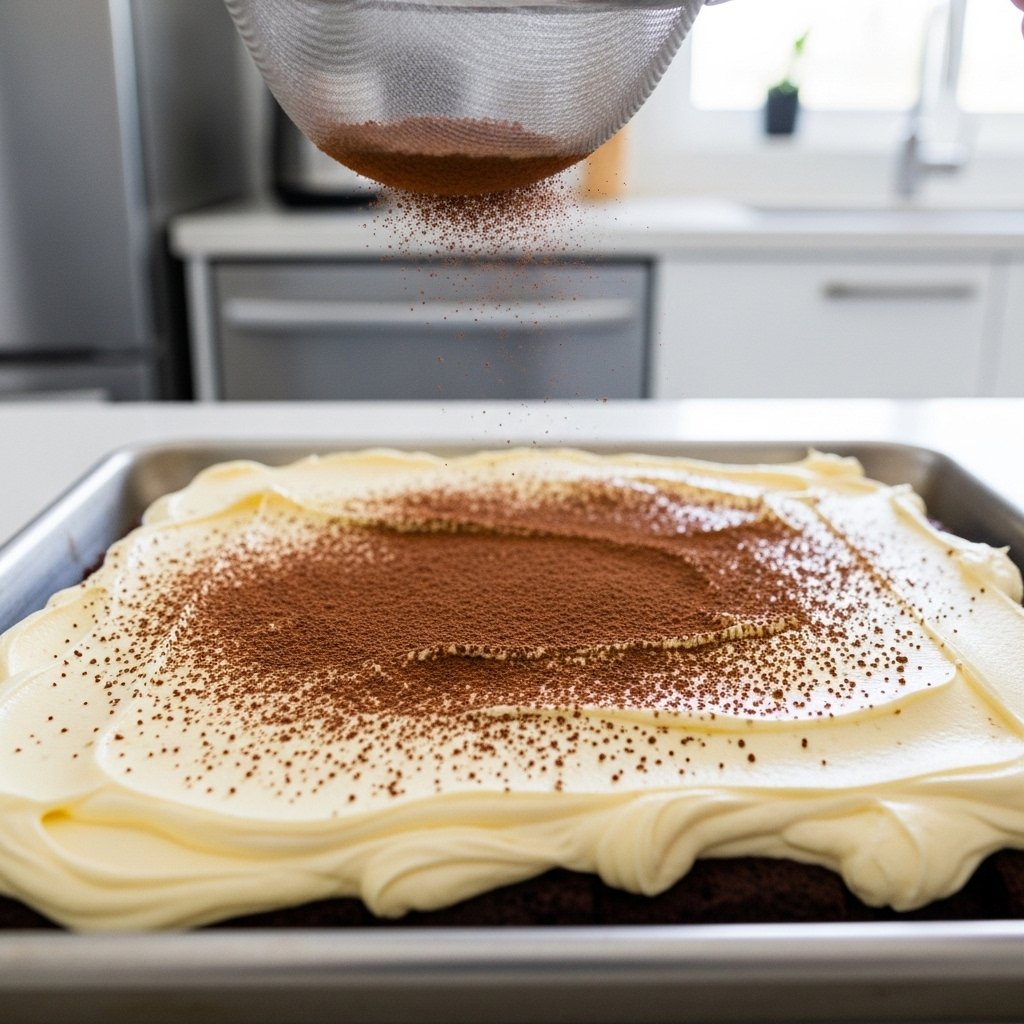
5. Finish with Cocoa

Dust generously with cocoa powder before serving.

Tips for Perfect Results

To master these fudgy tiramisu brownies, keep these tips in mind:

  • Don’t overbake the brownies—keep them moist and fudgy
  • Let brownies cool completely before adding the cream layer
  • Chill before slicing for clean, neat layers
  • Use a sharp knife and wipe between cuts
  • Taste and adjust espresso intensity to your preference

Variations to Try

Chocolate Chip Tiramisu Brownies

Add chocolate chips to the brownie batter for extra richness.

Alcohol-Infused Version

Add a splash of coffee liqueur for a classic tiramisu twist.

Gluten-Free Option

Use a gluten-free flour blend for the brownie base.

Mini Tiramisu Brownie Bites

Cut into small squares for party-friendly desserts.

What to Serve With It

Pair your fudgy tiramisu brownies with:

  • Fresh brewed coffee or espresso
  • Vanilla ice cream
  • Whipped cream
  • Fresh berries for contrast

These pairings enhance the dessert’s rich flavors and create a complete experience.

Storage & Reheating

To keep your fudgy tiramisu brownies fresh:

  • Store in the refrigerator for up to 4 days
  • Keep covered to prevent drying out
  • Serve chilled or slightly softened
  • Do not freeze with cream topping (texture may change)

Common Mistakes to Avoid

Avoid these common issues when making fudgy tiramisu brownies:

  • Overbaking the brownies, making them dry
  • Adding the cream layer before brownies cool
  • Using low-fat mascarpone (affects texture)
  • Skipping the chilling step

FAQs

1. Can I make fudgy tiramisu brownies ahead of time?

Yes! They actually taste better after chilling for a few hours or overnight.

2. Can I substitute mascarpone cheese?

Cream cheese can be used, but it will slightly change the flavor.

3. How do I get clean slices?

Chill the brownies and use a sharp knife, wiping it between cuts.

4. Can I make them less sweet?

Reduce the sugar slightly in the brownie layer or use dark chocolate cocoa powder.

Final Thoughts

These fudgy tiramisu brownies are the perfect blend of rich chocolate and creamy coffee flavor, making them a standout dessert for any occasion. They’re indulgent, elegant, and surprisingly easy to prepare at home.

Whether you’re baking for guests or treating yourself, this recipe delivers bakery-quality results with every bite. Once you try them, these brownies are sure to earn a permanent spot in your dessert rotation!

Healthy Recipes That Change Your Body | Beginner Friendly Guide to Eating Better

If you’ve ever felt overwhelmed by complicated diets or confusing nutrition advice, you’re not alone. The truth is, transforming your body doesn’t require extreme restrictions—it starts with simple, consistent choices. These healthy recipes that change your body | beginner friendly are designed to help you build sustainable habits while enjoying delicious, satisfying meals every day.

This guide focuses on easy, approachable recipes that support energy, digestion, and overall wellness. Whether your goal is weight loss, muscle tone, or just feeling better, these meals are a powerful starting point.

Why You’ll Love These Healthy Recipes That Change Your Body

These healthy recipes that change your body | beginner friendly are crafted with real life in mind:

  • Simple ingredients you can find anywhere
  • Quick prep times for busy schedules
  • Balanced nutrition with protein, fiber, and healthy fats
  • Delicious flavors that make healthy eating enjoyable
  • Flexible recipes you can customize

Instead of restrictive dieting, this approach focuses on nourishing your body consistently.

Core Ingredients for Body-Changing Recipes

To build meals that truly support transformation, focus on these essential ingredients:

  • Lean proteins (chicken, fish, eggs, legumes)
  • Whole grains (quinoa, brown rice, oats)
  • Fresh fruits and vegetables
  • Healthy fats (avocado, olive oil, nuts)
  • Natural sweeteners (honey, dates)

These ingredients form the foundation of all healthy recipes that change your body | beginner friendly.

Ingredient Notes

Choosing high-quality ingredients makes a noticeable difference. Fresh produce provides more nutrients and better flavor, while whole foods keep you fuller longer. Avoid overly processed items and focus on natural, minimally refined ingredients.

For beginners, don’t worry about perfection—start small. Even swapping white bread for whole grain or soda for smoothies can make a big impact over time.

Step-by-Step Beginner Meal Example

Let’s break down a simple recipe that fits perfectly into healthy recipes that change your body | beginner friendly:

Grilled Chicken Power Bowl

1. Prepare Ingredients

Cook grilled chicken, quinoa, and chop vegetables like spinach, cucumber, and tomatoes.

2. Assemble the Bowl

Layer quinoa, chicken, veggies, and avocado in a bowl.

3. Add Dressing

Drizzle with olive oil and lemon juice.

4. Serve Fresh

Enjoy immediately for maximum freshness and flavor.

Tips for Perfect Results

To get the most out of these healthy recipes that change your body | beginner friendly, follow these tips:

  • Prep meals in advance to stay consistent
  • Balance protein, carbs, and fats in every meal
  • Stay hydrated throughout the day
  • Use herbs and spices to enhance flavor without extra calories
  • Keep portions mindful but satisfying

Consistency matters more than perfection when it comes to results.

Variations to Keep Things Exciting

High-Protein Version

Add extra chicken, tofu, or eggs to boost protein intake.

Low-Carb Option

Swap grains for leafy greens or cauliflower rice.

Plant-Based Version

Use beans, lentils, or tofu instead of animal protein.

Quick Meal Prep Version

Prepare ingredients in bulk and mix-and-match throughout the week.

What to Serve With These Recipes

Enhance your healthy recipes that change your body | beginner friendly with:

  • Fresh fruit smoothies
  • Herbal teas
  • Light soups
  • Whole-grain bread

These additions help create balanced, satisfying meals.

Storage & Reheating

Meal prep is key for consistency:

  • Store meals in airtight containers for up to 3–4 days
  • Keep dressings separate to maintain freshness
  • Reheat gently to avoid drying out proteins
  • Freeze portions for longer storage

Having meals ready makes it easier to stick to your goals.

Common Mistakes to Avoid

Even the best healthy recipes that change your body | beginner friendly can fall short if you:

  • Skip meals and overeat later
  • Rely too much on processed “healthy” foods
  • Ignore portion sizes
  • Lack variety in your diet

Focus on balance, not extremes.


FAQs

1. How quickly will I see results?

Results vary, but consistent use of healthy recipes that change your body | beginner friendly can lead to noticeable changes in a few weeks.

2. Do I need to count calories?

Not necessarily. Focus on whole foods and balanced meals first.

3. Can beginners really follow these recipes?

Absolutely! These recipes are designed to be simple and approachable.

4. Are these recipes good for weight loss?

Yes, they support healthy weight management when combined with an active lifestyle.

Final Thoughts

Building a healthier body doesn’t require complicated diets or extreme changes. These healthy recipes that change your body | beginner friendly prove that small, consistent steps can lead to powerful results.

By focusing on whole ingredients, balanced meals, and sustainable habits, you’ll not only see physical changes but also feel more energized and confident every day. Start simple, stay consistent, and let these recipes guide your journey to a healthier you.

Healthy and Refreshing Peach Smoothie Made with Frozen Peaches for a Tasty Boost

If you’re looking for a delicious way to fuel your day, this healthy and refreshing peach smoothie made with frozen peaches for a tasty boost is exactly what you need. It’s creamy, naturally sweet, and packed with nutrients that keep you energized without weighing you down. Frozen peaches bring a thick, frosty texture and vibrant flavor that tastes like summer in every sip.

Whether you’re blending up a quick breakfast, a post-workout snack, or a refreshing afternoon drink, this smoothie delivers both flavor and nutrition in minutes.

Why You’ll Love This Healthy Peach Smoothie

This healthy and refreshing peach smoothie made with frozen peaches for a tasty boost is a go-to recipe for so many reasons:

  • Quick and easy—ready in under 5 minutes
  • Naturally sweet with no refined sugar
  • Thick, creamy, and satisfying
  • Packed with vitamins, fiber, and antioxidants
  • Perfect for meal prep or on-the-go mornings

It’s a simple recipe that feels indulgent while still being incredibly good for you.

Ingredients

Here’s what you’ll need to make this delicious healthy and refreshing peach smoothie made with frozen peaches for a tasty boost:

  • 1 ½ cups frozen peach slices
  • 1 banana (for creaminess)
  • ¾ cup milk (dairy or plant-based)
  • ½ cup Greek yogurt (optional for protein)
  • 1 teaspoon honey or maple syrup (optional)
  • ½ teaspoon vanilla extract

Ingredient Notes

The beauty of this healthy and refreshing peach smoothie made with frozen peaches for a tasty boost is its flexibility. Frozen peaches are key—they create that thick, frosty texture without needing ice. Bananas add natural sweetness and creaminess, while Greek yogurt boosts protein and makes the smoothie more filling.

If you prefer a dairy-free version, swap in almond milk, oat milk, or coconut milk, and use a plant-based yogurt or skip it altogether.

Step-by-Step Instructions

1. Add Ingredients to Blender

Place frozen peaches, banana, milk, yogurt, sweetener, and vanilla extract into your blender.

2. Blend Until Smooth

Blend on high speed until the mixture is creamy and smooth.

3. Adjust Texture

  • Add more milk for a thinner consistency
  • Add extra frozen peaches for a thicker smoothie

4. Serve Immediately

Pour into a chilled glass and enjoy fresh.

Tips for Perfect Results

To make the best healthy and refreshing peach smoothie made with frozen peaches for a tasty boost, keep these tips in mind:

  • Use fully ripe bananas for natural sweetness
  • Always use frozen peaches for the best texture
  • Blend liquids first to help everything combine smoothly
  • Taste and adjust sweetness as needed
  • Chill your glass for an extra refreshing experience

These simple techniques help you achieve a perfectly balanced smoothie every time.

Variations to Try

Peach Mango Smoothie

Add frozen mango for a tropical flavor boost.

Peach Protein Smoothie

Include a scoop of vanilla protein powder for extra nutrition.

Peach Green Smoothie

Blend in spinach or kale for added vitamins without overpowering flavor.

Peach Coconut Smoothie

Use coconut milk for a creamy, tropical twist.

What to Serve With It

Pair your healthy and refreshing peach smoothie made with frozen peaches for a tasty boost with:

  • Whole-grain toast with almond butter
  • Granola bowls
  • Hard-boiled eggs
  • Light breakfast wraps

These options turn your smoothie into a balanced, satisfying meal.

Storage & Reheating

While this smoothie is best enjoyed fresh, here’s how to store it:

  • Refrigerate in an airtight container for up to 24 hours
  • Shake or stir before drinking
  • Freeze in portions and re-blend when needed

Avoid reheating—this smoothie is meant to be served cold and refreshing.

Common Mistakes to Avoid

To perfect your healthy and refreshing peach smoothie made with frozen peaches for a tasty boost, avoid these common mistakes:

  • Using fresh peaches instead of frozen (reduces thickness)
  • Adding too much liquid, making it watery
  • Skipping the banana, which adds creaminess
  • Over-blending, which can affect texture

FAQs

1. Can I use fresh peaches instead of frozen?

Yes, but add ice to achieve the same thick texture.

2. Is this smoothie good for weight loss?

Yes! This healthy and refreshing peach smoothie made with frozen peaches for a tasty boost is nutrient-dense and naturally low in added sugars.

3. Can I make it vegan?

Absolutely. Use plant-based milk and yogurt or skip the yogurt entirely.

4. How can I make it sweeter naturally?

Use ripe bananas or add a few dates for natural sweetness.

Final Thoughts

This healthy and refreshing peach smoothie made with frozen peaches for a tasty boost is everything you want in a smoothie—quick, nutritious, and incredibly delicious. It’s a recipe you can rely on for busy mornings, post-workout recovery, or a refreshing afternoon treat.

With its creamy texture, natural sweetness, and endless customization options, this smoothie is sure to become a staple in your kitchen. Blend it once, and you’ll keep coming back for more!

Healthy Strawberry Smoothie Recipe: Fresh, Creamy, and Naturally Sweet

There’s nothing quite like starting your day with a refreshing, nutrient-packed drink, and this healthy strawberry smoothie recipe is exactly what your routine needs. Bursting with the natural sweetness of ripe strawberries and blended into a creamy, satisfying texture, this smoothie is both delicious and nourishing. Whether you’re rushing out the door or taking a slow morning, it’s the perfect balance of flavor and wellness.

Image Prompt: A glass of vibrant strawberry smoothie with fresh strawberries on top, served on a wooden table in a bright kitchen, natural sunlight streaming through the window, realistic food photography, shallow depth of field, 4k resolution

This recipe is designed with simplicity and health in mind, using wholesome ingredients that you can feel good about. It’s a fantastic option for breakfast, a mid-day snack, or even a post-workout recovery drink.

Why You’ll Love This Healthy Strawberry Smoothie Recipe

This healthy strawberry smoothie recipe stands out for so many reasons:

  • Quick and easy—ready in just 5 minutes
  • Naturally sweet with no added sugar
  • Packed with vitamins, fiber, and antioxidants
  • Kid-friendly and customizable
  • Perfect for weight management and clean eating

Once you try it, you’ll find yourself coming back to this smoothie again and again.

Ingredients

To make this refreshing healthy strawberry smoothie recipe, you’ll need:

  • 1 cup fresh or frozen strawberries
  • 1 banana (for natural sweetness and creaminess)
  • ¾ cup milk (dairy or plant-based)
  • ½ cup Greek yogurt (optional for protein boost)
  • 1 teaspoon honey or maple syrup (optional)
  • ½ cup ice (if using fresh strawberries)

Ingredient Notes

The beauty of this healthy strawberry smoothie recipe lies in its flexibility. Frozen strawberries create a thicker, colder smoothie, while fresh strawberries deliver a lighter, more refreshing taste. Bananas are essential for creaminess, but you can substitute with mango or avocado if needed.

Greek yogurt adds protein and a tangy richness, making the smoothie more filling. For a dairy-free version, simply swap it with a plant-based yogurt or skip it entirely.

Step-by-Step Instructions

1. Add Ingredients to Blender

Place strawberries, banana, milk, yogurt, and sweetener (if using) into a blender.

2. Blend Until Smooth

Blend on high speed until the mixture is creamy and lump-free.

3. Adjust Consistency

  • Add more milk for a thinner smoothie
  • Add ice or frozen fruit for a thicker texture

4. Serve Immediately

Pour into a glass and enjoy right away for the freshest flavor.

Tips for Perfect Results

To get the best results from your healthy strawberry smoothie recipe, keep these tips in mind:

  • Use ripe bananas for natural sweetness
  • Freeze your fruit ahead of time for a thicker smoothie
  • Blend liquids first to help the blender run smoothly
  • Don’t over-blend to preserve nutrients and texture
  • Taste and adjust sweetness as needed

These small details make a big difference in flavor and consistency.

Variations to Try

Strawberry Protein Smoothie

Add a scoop of protein powder for a post-workout boost.

Strawberry Green Smoothie

Blend in a handful of spinach for extra nutrients without altering flavor.

Strawberry Oat Smoothie

Add 2 tablespoons of oats for a more filling breakfast option.

Tropical Strawberry Smoothie

Mix in pineapple or mango for a tropical twist.

What to Serve With It

Pair your healthy strawberry smoothie recipe with:

  • Whole-grain toast with peanut butter
  • Granola or energy bars
  • Fresh fruit bowls
  • Light breakfast sandwiches

These combinations turn your smoothie into a complete and satisfying meal.

Storage & Reheating

Smoothies are best enjoyed fresh, but here’s how to store your healthy strawberry smoothie recipe:

  • Refrigerate in an airtight container for up to 24 hours
  • Shake or stir before drinking
  • Freeze in portions and re-blend when needed

Avoid reheating—this drink is meant to be served cold and refreshing.

Common Mistakes to Avoid

To make sure your healthy strawberry smoothie recipe turns out perfect:

  • Avoid adding too much liquid, which makes it watery
  • Don’t skip the banana—it adds natural creaminess
  • Use fresh, high-quality ingredients
  • Balance flavors—too much yogurt can make it too tangy

FAQs About Healthy Strawberry Smoothie Recipe

1. Can I make this smoothie without yogurt?

Yes! Simply skip the yogurt or replace it with a plant-based alternative.

2. Is this smoothie good for weight loss?

Absolutely. This healthy strawberry smoothie recipe is low in calories and high in nutrients, making it great for weight management.

3. Can I use frozen strawberries?

Yes, frozen strawberries are ideal for a thicker and colder smoothie.

4. How can I make it sweeter without sugar?

Use ripe bananas or add naturally sweet fruits like mango.

Final Thoughts

This healthy strawberry smoothie recipe is the perfect blend of simplicity, nutrition, and flavor. It’s quick to make, endlessly customizable, and packed with ingredients that support a healthy lifestyle.

Whether you’re looking for a quick breakfast, a refreshing snack, or a post-workout drink, this smoothie delivers every time. Once you make it part of your routine, you’ll wonder how you ever lived without it.

Milkshakes Fudge Brownie: The Ultimate Decadent Chocolate Dessert Drink

If you’re a chocolate lover, milkshakes fudge brownie are about to become your new obsession. Imagine blending thick, creamy ice cream with chunks of rich, fudgy brownies and a swirl of chocolate sauce—every sip is intensely chocolatey, smooth, and irresistibly indulgent. This is not just a milkshake; it’s a full-on dessert experience in a glass.

Perfect for summer treats, late-night cravings, or impressing guests, this recipe brings together the best of two worlds: classic milkshakes and gooey brownies. The result? A rich, creamy drink that tastes like it came straight from a gourmet dessert shop.


Why You’ll Love This Milkshakes Fudge Brownie Recipe

This milkshakes fudge brownie recipe checks all the boxes for an unforgettable dessert:

  • Ultra-rich chocolate flavor in every sip
  • Thick, creamy, and perfectly blended texture
  • Quick and easy—ready in under 10 minutes
  • Customizable with endless toppings and mix-ins
  • Perfect for parties, gatherings, or solo indulgence

Whether you’re making it for kids or adults, this milkshake always delivers a wow factor.

Ingredients

To make the best milkshakes fudge brownie, gather these ingredients:

  • 2 cups chocolate ice cream
  • 1 cup milk (whole milk recommended)
  • 1 large fudge brownie (homemade or store-bought)
  • 3 tablespoons chocolate syrup
  • ½ teaspoon vanilla extract
  • Whipped cream (for topping)
  • Extra brownie chunks (for garnish)

Ingredient Notes

The secret to exceptional milkshakes fudge brownie lies in the quality of your ingredients. Use a dense, fudgy brownie rather than a cakey one—it blends better and gives a richer texture. Premium chocolate ice cream enhances the overall flavor, while whole milk ensures a creamy consistency.

For an extra indulgent twist, you can use chocolate milk instead of regular milk. And if you’re feeling adventurous, try adding a scoop of vanilla ice cream alongside the chocolate for a balanced flavor profile.

Step-by-Step Instructions

1. Prepare the Brownie

Break the brownie into small chunks for easier blending.

2. Add Ingredients to Blender

Combine chocolate ice cream, milk, brownie pieces, chocolate syrup, and vanilla extract in a blender.

3. Blend Until Smooth

Blend until creamy, leaving a few small brownie bits for texture if desired.

4. Serve and Garnish

Pour into a chilled glass, top with whipped cream, chocolate drizzle, and extra brownie chunks.

Tips for Perfect Milkshakes Fudge Brownie

Making the perfect milkshakes fudge brownie is easy when you follow these tips:

  • Use slightly softened ice cream for easier blending
  • Don’t over-blend—keep that thick milkshake texture
  • Chill your serving glass beforehand
  • Add brownie pieces gradually to control texture
  • For extra richness, replace part of the milk with heavy cream

These small adjustments can take your milkshake from good to unforgettable.

Variations to Try

Triple Chocolate Fudge Brownie Shake

Add chocolate chips or chunks for an even richer chocolate experience.

Peanut Butter Fudge Brownie Shake

Blend in a tablespoon of peanut butter for a nutty twist.

Cookies & Brownie Shake

Add crushed chocolate cookies for extra crunch and flavor.

Vegan Version

Use dairy-free ice cream, plant-based milk, and vegan brownies.

What to Serve With It

Pair your milkshakes fudge brownie with:

  • Freshly baked cookies
  • Chocolate cake slices
  • Ice cream sandwiches
  • Salty snacks like pretzels or fries for contrast

This milkshake can easily become the centerpiece of a dessert spread.

Storage & Reheating

Milkshakes are best enjoyed immediately, but if you need to save some:

  • Store in the freezer for up to 1 hour
  • Re-blend before serving to restore creaminess
  • Avoid refrigerating, as it will become too thin

Common Mistakes to Avoid

Keep your milkshakes fudge brownie perfect by avoiding these pitfalls:

  • Using dry or cakey brownies instead of fudgy ones
  • Adding too much liquid, making the shake runny
  • Over-blending, which melts the ice cream too much
  • Skipping toppings—they enhance both flavor and presentation

FAQs About Milkshakes Fudge Brownie

1. Can I use store-bought brownies?

Absolutely! Store-bought brownies work perfectly, especially if they’re rich and fudgy.

2. How do I make my milkshake thicker?

Use more ice cream or reduce the amount of milk for a thicker consistency.

3. Can I make this without chocolate ice cream?

Yes, you can use vanilla ice cream and rely on brownie and chocolate syrup for flavor.

4. Is it possible to make this ahead of time?

It’s best served fresh, but you can freeze briefly and re-blend before serving.

Final Thoughts

There’s no denying that milkshakes fudge brownie are the ultimate indulgence for chocolate lovers. Rich, creamy, and loaded with brownie goodness, this recipe transforms simple ingredients into a luxurious treat that feels both comforting and special.

Whether you enjoy it as a weekend dessert, a party highlight, or a personal treat, this milkshake is guaranteed to satisfy your sweet tooth. Once you try it, don’t be surprised if it becomes a regular favorite in your kitchen!

Milkshakes Caramel: The Ultimate Creamy, Sweet Treat You’ll Crave

There’s something irresistibly comforting about milkshakes caramel—that perfect balance of creamy vanilla ice cream and rich, buttery caramel swirling together into a silky, indulgent drink. Whether you’re cooling off on a hot summer day or treating yourself after dinner, a caramel milkshake delivers a nostalgic yet elevated dessert experience that never goes out of style.

This recipe is designed for home cooks who want café-quality results without complicated steps. With just a handful of ingredients and a blender, you can create a thick, luscious milkshake that rivals anything from your favorite diner.

Why You’ll Love This Milkshakes Caramel Recipe

If you’re searching for the best milkshakes caramel recipe, here’s why this one stands out:

  • Quick and easy—ready in under 5 minutes
  • Uses simple, pantry-friendly ingredients
  • Perfectly balanced sweetness and creaminess
  • Easily customizable with fun variations
  • Great for kids and adults alike

This recipe is also incredibly forgiving, making it ideal whether you’re a beginner or a seasoned home cook.

Ingredients

To make the perfect milkshakes caramel, you’ll need:

  • 2 cups vanilla ice cream (high-quality preferred)
  • ¾ cup whole milk
  • ¼ cup caramel sauce (plus extra for drizzling)
  • ½ teaspoon vanilla extract
  • Whipped cream (optional topping)
  • Pinch of sea salt (optional, for salted caramel twist)

Ingredient Notes

Using premium ingredients can elevate your milkshakes caramel from good to unforgettable. Choose a rich, creamy vanilla ice cream with real vanilla beans if possible. Whole milk provides the best texture, but you can substitute with half-and-half for an even thicker shake.

Caramel sauce is the star here—opt for a high-quality store-bought version or make your own for deeper flavor. Adding a pinch of sea salt transforms it into a gourmet salted caramel milkshake.

Step-by-Step Instructions

1. Blend the Base

Add vanilla ice cream, milk, caramel sauce, and vanilla extract into a blender.

2. Blend Until Smooth

Blend on medium-high speed until the mixture is creamy and smooth, about 30–45 seconds.

3. Adjust Consistency

  • Too thick? Add a splash of milk
  • Too thin? Add more ice cream

4. Serve Immediately

Pour into a chilled glass, top with whipped cream, and drizzle extra caramel sauce on top.

Tips for Perfect Milkshakes Caramel

Creating the ultimate milkshakes caramel is all about technique:

  • Use cold glasses to keep the shake thick longer
  • Don’t over-blend, or it may become too thin
  • Add ice cream gradually if adjusting texture
  • Chill your milk beforehand for best results
  • For extra richness, use half milk and half heavy cream

Variations to Try

Salted Caramel Milkshake

Add a pinch of sea salt for a sweet-and-savory twist.

Chocolate Caramel Milkshake

Blend in 2 tablespoons of chocolate syrup for a decadent combo.

Coffee Caramel Milkshake

Add ½ teaspoon instant espresso powder for a subtle coffee kick.

Dairy-Free Option

Use plant-based ice cream and almond or oat milk for a vegan-friendly version.

What to Serve With It

Pair your milkshakes caramel with:

  • Classic cheeseburgers
  • French fries (sweet and salty combo!)
  • Chocolate chip cookies
  • Brownies or blondies

These pairings turn your milkshake into a full dessert experience or a fun retro-style meal.

Storage & Reheating

Milkshakes are best enjoyed fresh, but if needed:

  • Store in the freezer for up to 1 hour
  • Re-blend before serving to restore texture
  • Avoid refrigerating—it will melt and separate

Common Mistakes to Avoid

Even simple recipes can go wrong. Watch out for:

  • Using low-quality ice cream (affects flavor and texture)
  • Adding too much milk too quickly
  • Skipping the caramel drizzle—it enhances presentation and flavor
  • Over-blending, which melts the ice cream too much

FAQs About Milkshakes Caramel

1. Can I make caramel milkshakes without a blender?

Yes! Let the ice cream soften slightly, then whisk vigorously or use a hand mixer until smooth.

2. What’s the best caramel sauce to use?

A thick, buttery caramel sauce works best. Homemade is ideal, but premium store-bought options are great too.

3. How do I make my milkshake thicker?

Use more ice cream and less milk. You can also freeze the glass beforehand.

4. Can I make it ahead of time?

It’s not recommended, as milkshakes caramel are best served immediately for optimal texture and flavor.

Final Thoughts

There’s a reason milkshakes caramel remain a timeless favorite—they’re simple, satisfying, and endlessly customizable. With this easy recipe, you can recreate a restaurant-quality milkshake right at home, tailored to your taste preferences.

Whether you stick with the classic version or experiment with creative variations, one thing is certain: this creamy caramel treat is guaranteed to become a go-to indulgence. So grab your blender, drizzle that caramel generously, and enjoy every sip of this sweet, velvety delight.

Milkshakes Berry Mix Recipe – Creamy, Fruity & Refreshing Homemade Treat

If you’re craving something sweet, creamy, and refreshing, this milkshakes berry mix recipe is about to become your new favorite. Packed with juicy strawberries, blueberries, and raspberries blended into rich vanilla ice cream, this drink is the perfect balance of fruity freshness and creamy indulgence. Whether you’re making it for breakfast, dessert, or a summer snack, this milkshake delivers pure joy in every sip.

This milkshakes berry mix is not only delicious but also incredibly easy to prepare at home with just a few simple ingredients. You don’t need any fancy equipment—just a blender and a craving for something amazing.

Why You’ll Love This Milkshakes Berry Mix Recipe

This recipe is more than just a drink—it’s a full experience. The milkshakes berry mix is loved for its vibrant color, refreshing taste, and creamy texture that feels like a café-style treat right at home.

Top Reasons to Love It:

  • Made with real, fresh berries
  • Thick, creamy, and naturally sweet
  • Ready in under 10 minutes
  • Perfect for kids and adults
  • Easy to customize with different fruits or toppings

The combination of sweet strawberries and slightly tart blueberries creates a balanced flavor that keeps you coming back for more.

Ingredients for Milkshakes Berry Mix

To make the perfect milkshakes berry mix, you only need a handful of ingredients that are easy to find in any grocery store.

Ingredients:

  • 1 cup fresh strawberries (hulled)
  • ½ cup blueberries
  • ½ cup raspberries
  • 2 cups vanilla ice cream
  • 1 cup cold milk (adjust for thickness)
  • 1–2 tablespoons honey or sugar (optional)
  • Whipped cream for topping
  • Extra berries for garnish

This simple ingredient list makes the recipe quick, budget-friendly, and incredibly satisfying.

Ingredient Notes & Substitutions

The beauty of this milkshakes berry mix is its flexibility. You can easily adjust ingredients based on your taste or dietary needs.

Helpful Substitutions:

  • Use almond milk or oat milk for a dairy-free version
  • Swap vanilla ice cream for frozen yogurt for a lighter option
  • Add banana for extra creaminess
  • Use frozen berries if fresh ones are not available

If you prefer a sweeter shake, you can increase honey or add a splash of vanilla extract for extra depth of flavor.

Step-by-Step Instructions

How to Make Milkshakes Berry Mix

Step 1: Prepare the berries

Wash all berries thoroughly and remove stems from strawberries. This ensures a clean and fresh taste in your milkshake.

Step 2: Blend the base

In a blender, combine strawberries, blueberries, raspberries, vanilla ice cream, and milk. Blend until smooth and creamy. Adjust milk quantity depending on how thick you want your milkshakes berry mix.

Step 3: Serve and garnish

Pour into tall glasses, top with whipped cream, and garnish with fresh berries. Serve immediately for the best texture and flavor.

Tips for Perfect Milkshakes Berry Mix

To make your milkshakes berry mix even better, keep these expert tips in mind:

  • Use frozen berries for a thicker texture
  • Chill your glasses before serving
  • Blend in short pulses to avoid over-thinning
  • Add ice cream last for extra creaminess
  • Taste before serving and adjust sweetness if needed

These small adjustments can elevate your homemade milkshake to café-level quality.

Delicious Variations

One of the best things about this recipe is how customizable it is.

Try These Variations:

  • Protein Berry Shake: Add a scoop of vanilla protein powder
  • Tropical Berry Mix: Add mango or pineapple chunks
  • Chocolate Berry Twist: Add a drizzle of chocolate syrup
  • Healthy Version: Use Greek yogurt instead of ice cream

Each version keeps the core milkshakes berry mix flavor while offering a new twist.

What to Serve With Milkshakes Berry Mix

This drink pairs beautifully with many snacks and desserts.

Perfect Pairings:

  • Pancakes or waffles
  • Butter cookies
  • Breakfast toast with peanut butter
  • Fruit bowls
  • Light salads for a refreshing combo

It works equally well as a dessert or a refreshing afternoon treat.

Storage & Make-Ahead Tips

The milkshakes berry mix is best enjoyed fresh, but you can still prepare parts ahead of time.

  • Store blended shake in the fridge for up to 24 hours
  • Shake or stir before serving
  • Freeze leftovers into popsicle molds for a fun frozen treat

Avoid leaving it at room temperature for too long, as it may separate.

Common Mistakes to Avoid

Even simple recipes can go wrong if you’re not careful.

  • Adding too much milk (makes it watery)
  • Over-blending (can warm the mixture)
  • Using unripe berries (affects sweetness)
  • Skipping ice cream (reduces creaminess)

Avoiding these mistakes ensures a perfectly thick and flavorful milkshakes berry mix every time.

Frequently Asked Questions (FAQs)

Can I use frozen berries instead of fresh ones?

Yes, frozen berries actually make the milkshake thicker and colder.

How can I make my milkshake thicker?

Use less milk and more ice cream or frozen fruit.

Is this milkshakes berry mix healthy?

It can be! Use yogurt, natural sweeteners, and fresh fruit for a healthier version.

Can I prepare it ahead of time?

Yes, but it’s best enjoyed immediately for the freshest texture.

Conclusion

This milkshakes berry mix recipe is the perfect blend of simplicity, flavor, and freshness. With just a few ingredients and a blender, you can create a café-style drink right in your kitchen. Whether you’re serving it on a hot summer day or enjoying it as a sweet treat, this milkshake always delivers comfort and satisfaction.

Try it once, and it might just become your go-to homemade drink for every occasion.

Strawberry Milkshakes (Creamy, Classic & Easy Homemade Recipe)

There’s something timeless and irresistible about milkshakes strawberry. Creamy, sweet, and bursting with fresh strawberry flavor, this classic drink is the perfect treat for warm days, dessert cravings, or even a quick indulgent snack.

Whether you’re using fresh strawberries in peak season or frozen ones for convenience, strawberry milkshakes deliver a refreshing balance of fruity brightness and rich creaminess. Best of all, they’re incredibly easy to make at home with just a few simple ingredients.

Why You’ll Love These Strawberry Milkshakes

These milkshakes strawberry are a favorite for many reasons:

  • Naturally sweet and refreshing
  • Creamy, smooth texture
  • Quick and easy—ready in minutes
  • Perfect for kids and adults
  • Customizable with fun toppings

They’re the kind of dessert that always brings comfort and joy.

Ingredients

To make the best milkshakes strawberry, you’ll need:

  • 2 cups fresh or frozen strawberries
  • 2 cups vanilla ice cream
  • 1 cup cold milk
  • 1–2 tablespoons sugar (optional)
  • 1/2 teaspoon vanilla extract
  • Whipped cream (for topping)
  • Fresh strawberries (for garnish)

Ingredient Notes

Each ingredient in milkshakes strawberry plays a key role:

  • Strawberries: Provide natural sweetness and vibrant flavor
  • Ice Cream: Adds creaminess and richness
  • Milk: Controls the texture
  • Vanilla Extract: Enhances overall flavor

For best results, use ripe, juicy strawberries—they make a big difference.

Step-by-Step Instructions

1. Prepare the Strawberries

Wash and hull fresh strawberries, or measure frozen ones.

2. Blend Ingredients

In a blender, combine strawberries, ice cream, milk, sugar, and vanilla extract. Blend until smooth.

3. Adjust Consistency

Add more milk for a thinner shake or more ice cream for a thicker one.

4. Pour Into Glasses

Pour the milkshake into chilled glasses.

5. Add Toppings

Top with whipped cream and fresh strawberries.

6. Serve Immediately

Enjoy your milkshake while cold and creamy.

Tips for Perfect Strawberry Milkshakes

  • Use frozen strawberries for a thicker texture
  • Chill your glasses before serving
  • Blend just until smooth to avoid melting
  • Adjust sweetness depending on strawberry ripeness

These tips help your milkshakes strawberry turn out perfect every time.

Variations

Try these delicious variations:

  • Chocolate Strawberry Milkshake: Add chocolate syrup
  • Strawberry Banana Milkshake: Blend with ripe banana
  • Healthy Version: Use yogurt instead of ice cream
  • Vegan Version: Use plant-based milk and ice cream

What to Serve With It

These milkshakes strawberry pair perfectly with:

  • Cookies
  • Brownies
  • Pancakes
  • Waffles
  • Light snacks

They’re versatile and great for any occasion.

Storage Tips

  • Best served immediately
  • Can be refrigerated for a few hours
  • Stir or blend again before drinking
  • Avoid freezing after blending

Common Mistakes to Avoid

  • Using unripe strawberries
  • Adding too much milk
  • Over-blending
  • Not serving cold

FAQs

1. Can I use frozen strawberries?

Yes, they work great and make the shake thicker.

2. How do I make it healthier?

Use yogurt or reduce sugar.

3. Can I make it vegan?

Yes, use plant-based milk and ice cream.

4. How do I thicken my milkshake?

Add more ice cream or frozen fruit.

Final Thoughts

These milkshakes strawberry are the perfect combination of creamy, sweet, and refreshing. Whether you enjoy them as a dessert or a quick treat, they’re always satisfying and easy to make.

Once you try this recipe, it will quickly become your go-to strawberry milkshake at home.

Easy Salmon Burger Recipe (Juicy, Flavorful & Better Than Takeout)

If you’re searching for a lighter, healthier twist on a classic burger, this Easy Salmon Burger Recipe is exactly what you need. These salmon burgers are juicy, flavorful, and incredibly simple to make, offering a perfect balance between comfort food and clean eating.

Made with fresh salmon, simple seasonings, and a few pantry staples, this recipe delivers restaurant-quality results right from your kitchen. Whether you’re cooking for a quick weeknight dinner or prepping meals for the week, these salmon burgers are a delicious and satisfying option.

Why You’ll Love This Easy Salmon Burger Recipe

This Easy Salmon Burger Recipe is a favorite for many reasons:

  • Quick and easy—ready in under 30 minutes
  • Packed with protein and healthy fats
  • Light yet satisfying
  • Perfect for meal prep
  • Customizable with toppings and sauces

It’s a fresh and flavorful alternative to traditional beef burgers.

Ingredients

To make this delicious Easy Salmon Burger Recipe, you’ll need:

For the Salmon Patties:

  • 1 lb fresh salmon (skin removed)
  • 1/4 cup breadcrumbs
  • 1 egg
  • 2 tablespoons mayonnaise
  • 1 tablespoon Dijon mustard
  • 1 tablespoon lemon juice
  • 2 tablespoons fresh parsley, chopped
  • 1 clove garlic, minced
  • Salt and pepper to taste

For Serving:

  • Burger buns
  • Lettuce
  • Tomato slices
  • Onion slices
  • Sauce of choice (aioli, tartar, or yogurt sauce)

Ingredient Notes

Each component in this Easy Salmon Burger Recipe plays an important role:

  • Fresh Salmon: The star ingredient—rich, flaky, and flavorful
  • Breadcrumbs & Egg: Help bind the patties
  • Lemon Juice: Adds brightness
  • Parsley: Brings freshness
  • Dijon Mustard: Adds a subtle tang

For best results, use fresh salmon instead of canned for better texture and taste.

Step-by-Step Instructions

1. Prepare the Salmon

Finely chop the salmon into small pieces or pulse lightly in a food processor.

2. Mix the Ingredients

In a bowl, combine salmon, breadcrumbs, egg, mayonnaise, mustard, lemon juice, parsley, garlic, salt, and pepper.

3. Form Patties

Shape the mixture into evenly sized burger patties.

4. Cook the Patties

Heat oil in a skillet and cook patties for 3–4 minutes per side until golden brown.

5. Assemble the Burgers

Place patties on toasted buns and add lettuce, tomato, onion, and sauce.

6. Serve and Enjoy

Serve immediately while warm for best flavor.

Tips for Perfect Results

  • Don’t over-process salmon—keep some texture
  • Chill patties before cooking for better shape
  • Cook on medium heat to avoid drying out
  • Toast buns for added crunch

These tips will help you perfect your Easy Salmon Burger Recipe every time.

Variations

Try these fun variations:

  • Spicy Salmon Burger: Add chili flakes or sriracha
  • Asian-Inspired: Add soy sauce and ginger
  • Low-Carb: Serve in lettuce wraps
  • Cheesy Version: Add melted cheese on top

What to Serve With It

This Easy Salmon Burger Recipe pairs perfectly with:

  • Sweet potato fries
  • Coleslaw
  • Fresh salad
  • Roasted vegetables
  • Lemonade or iced tea

Storage & Reheating

  • Store cooked patties in airtight container
  • Refrigerate up to 3 days
  • Reheat in skillet or oven
  • Freeze uncooked patties for up to 2 months

Common Mistakes to Avoid

  • Overcooking salmon (leads to dryness)
  • Not binding mixture properly
  • Skipping seasoning
  • Using too much filler

FAQs

1. Can I use canned salmon?

Yes, but fresh salmon gives better texture and flavor.

2. How do I keep patties from falling apart?

Use enough egg and breadcrumbs, and chill before cooking.

3. Can I grill salmon burgers?

Yes, but use a grill-safe pan or foil.

4. Are salmon burgers healthy?

Yes, they are rich in protein and omega-3 fatty acids.

Final Thoughts

This Easy Salmon Burger Recipe is a simple yet flavorful way to enjoy a healthier burger at home. With juicy patties, fresh toppings, and endless customization options, it’s a recipe you’ll come back to again and again.

Whether for a quick lunch or a satisfying dinner, these salmon burgers deliver big flavor with minimal effort.

Ginger Chicken Meatball Sandwich Recipe (Flavor-Packed & Easy Homemade Dinner)

This Ginger Chicken Meatball Sandwich Recipe is a fresh and flavorful twist on the classic meatball sandwich. Juicy ground chicken meatballs infused with ginger, garlic, and savory seasonings are nestled into soft bread and topped with a delicious sauce that ties everything together beautifully.

If you’re tired of traditional beef meatball sandwiches, this lighter yet equally satisfying version is a must-try. The ginger adds a subtle warmth and depth that makes every bite exciting, while the tender chicken keeps the dish juicy and balanced.

Why You’ll Love This Ginger Chicken Meatball Sandwich Recipe

This Ginger Chicken Meatball Sandwich Recipe stands out for several reasons:

  • Juicy and flavorful chicken meatballs
  • Unique ginger-infused taste
  • Lighter alternative to beef sandwiches
  • Easy to prepare for weeknight meals
  • Perfect for lunch, dinner, or meal prep

It’s a modern, flavorful sandwich that feels both comforting and exciting.

Ingredients

To make this delicious Ginger Chicken Meatball Sandwich Recipe, you’ll need:

For the Meatballs:

  • 1 lb ground chicken
  • 1 tablespoon fresh ginger, grated
  • 2 cloves garlic, minced
  • 1/4 cup breadcrumbs
  • 1 egg
  • 2 tablespoons green onions, chopped
  • 1 tablespoon soy sauce
  • Salt and pepper to taste

For the Sauce:

  • 1/4 cup mayonnaise or yogurt
  • 1 teaspoon soy sauce
  • 1 teaspoon honey
  • 1/2 teaspoon sesame oil

For Assembly:

  • Sandwich rolls or baguettes
  • Lettuce or slaw
  • Sliced cucumbers (optional)

Ingredient Notes

Each ingredient in this Ginger Chicken Meatball Sandwich Recipe plays a key role:

  • Ground Chicken: Lean and tender base
  • Ginger: Adds warmth and signature flavor
  • Soy Sauce: Provides savory umami depth
  • Breadcrumbs & Egg: Help bind the meatballs
  • Sauce Ingredients: Add creaminess and balance

Fresh ginger is highly recommended for the best flavor impact.

Step-by-Step Instructions

1. Prepare the Meatball Mixture

In a bowl, combine ground chicken, ginger, garlic, breadcrumbs, egg, green onions, soy sauce, salt, and pepper. Mix gently.

2. Shape the Meatballs

Form the mixture into small, evenly sized meatballs.

3. Cook the Meatballs

Heat a skillet with oil and cook meatballs until golden brown and fully cooked.

4. Prepare the Sauce

Mix mayonnaise, soy sauce, honey, and sesame oil until smooth.

5. Assemble the Sandwich

Place cooked meatballs into sandwich rolls, add lettuce or slaw, drizzle sauce on top.

6. Serve and Enjoy

Serve immediately while warm for best flavor and texture.

Tips for Perfect Results

  • Don’t overmix meatball mixture to keep them tender
  • Use fresh ginger for stronger flavor
  • Cook on medium heat to avoid drying out
  • Toast bread lightly for better texture

These tips will elevate your Ginger Chicken Meatball Sandwich Recipe.

Variations

Try these creative variations:

  • Spicy Version: Add chili flakes or sriracha
  • Asian-Inspired: Add hoisin sauce or pickled veggies
  • Healthy Version: Use whole wheat bread and yogurt sauce
  • Cheesy Version: Add melted cheese on top

What to Serve With It

This Ginger Chicken Meatball Sandwich Recipe pairs well with:

  • Sweet potato fries
  • Coleslaw
  • Salad
  • Pickles
  • Iced tea or lemonade

Storage & Reheating

  • Store meatballs separately in airtight container
  • Refrigerate up to 3 days
  • Reheat gently in skillet or microwave
  • Assemble sandwich fresh before serving

Common Mistakes to Avoid

  • Overcooking meatballs (they become dry)
  • Skipping seasoning
  • Using too much sauce
  • Not balancing flavors

FAQs

1. Can I bake the meatballs instead of frying?

Yes, bake at 400°F for about 15–20 minutes.

2. Can I freeze the meatballs?

Yes, freeze cooked meatballs for up to 2 months.

3. What bread works best?

Soft rolls, baguettes, or brioche buns work great.

4. Can I make it gluten-free?

Yes, use gluten-free breadcrumbs and bread.

Final Thoughts

This Ginger Chicken Meatball Sandwich Recipe is a delicious and creative take on a classic sandwich. With juicy meatballs, bold ginger flavor, and fresh toppings, it’s a meal that’s both comforting and exciting.

Perfect for any day of the week, this sandwich is sure to become a favorite in your kitchen.