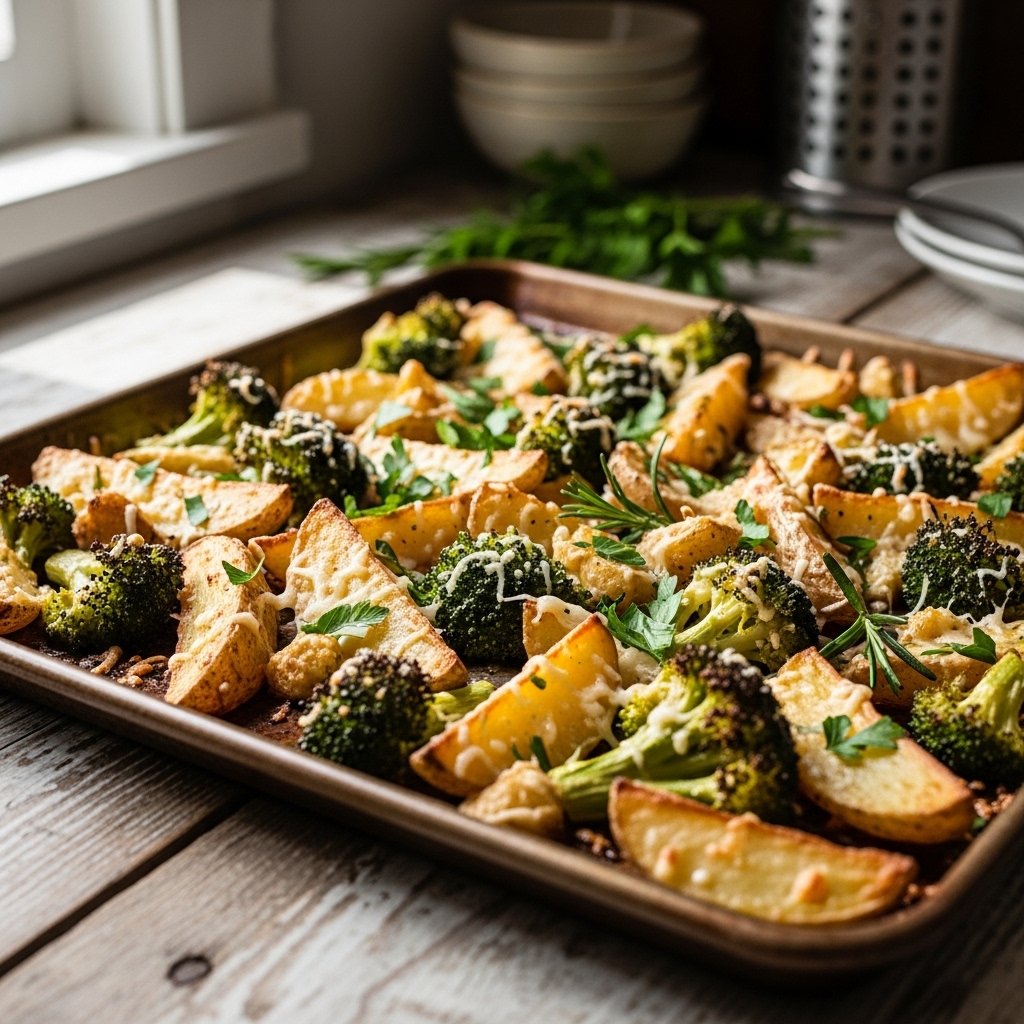
If you’re searching for a simple, flavorful side dish that works with almost any meal, these roasted Parmesan potatoes and broccoli are about to become a staple in your kitchen. This recipe combines crispy golden potatoes with tender roasted broccoli, all tossed in olive oil, garlic, and a generous sprinkle of Parmesan cheese.
What makes this dish so irresistible is the contrast in textures—crispy edges on the potatoes, slightly caramelized broccoli florets, and a savory, cheesy finish that ties everything together. It’s easy enough for weeknights but delicious enough to serve with guests.
Why You’ll Love This Roasted Parmesan Potatoes and Broccoli Recipe
These roasted Parmesan potatoes and broccoli are more than just a side dish—they’re a flavor upgrade for any dinner.
- Crispy and cheesy: Perfect roasted texture with Parmesan flavor
- Easy and quick: Minimal prep, simple ingredients
- Healthy-ish comfort food: Balanced veggies and carbs
- Versatile side dish: Works with chicken, beef, fish, or vegetarian meals
- Meal prep friendly: Holds up well for leftovers
Once you try it, you’ll understand why this dish disappears so quickly from the table.
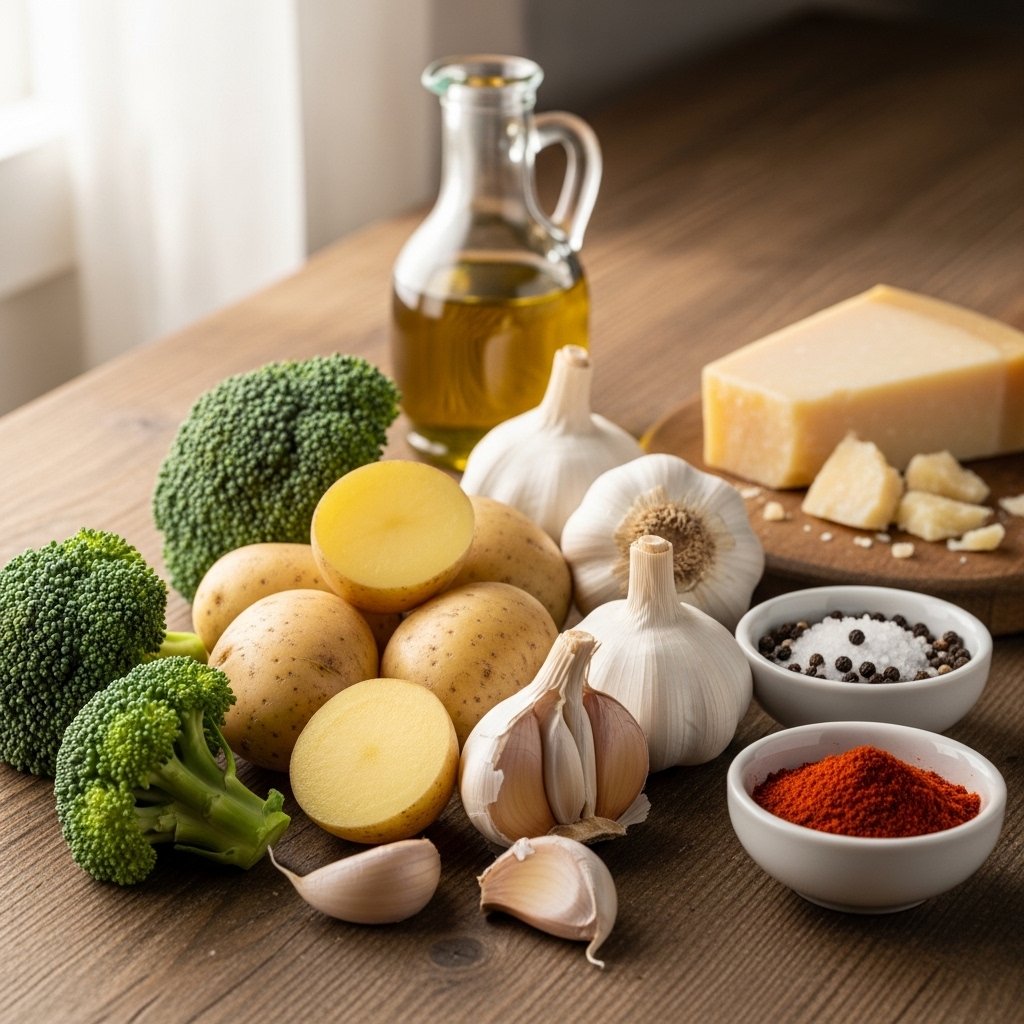
Ingredients for Roasted Parmesan Potatoes and Broccoli
To make these delicious roasted Parmesan potatoes and broccoli, you’ll need:
- 1.5 lbs baby potatoes, halved
- 3 cups broccoli florets
- 3 tablespoons olive oil
- 3 cloves garlic, minced
- 1 teaspoon salt
- 1/2 teaspoon black pepper
- 1 teaspoon paprika
- 1/2 cup grated Parmesan cheese
- Optional: red pepper flakes for heat
Ingredient Notes and Substitutions
Understanding your ingredients helps you get the best results from your roasted Parmesan potatoes and broccoli.
Potatoes
Baby potatoes work best because they roast evenly and get extra crispy edges.
Broccoli
Fresh broccoli is ideal, but frozen can work if fully thawed and dried well.
Parmesan Cheese
Freshly grated Parmesan melts and crisps better than pre-shredded versions.
Step-by-Step Instructions
1. Preheat the Oven
Preheat your oven to 425°F (220°C) and line a baking sheet with parchment paper.
2. Season the Potatoes
In a large bowl, toss potatoes with olive oil, garlic, salt, pepper, and paprika until evenly coated.
3. Roast the Potatoes First
Spread potatoes on the baking sheet and roast for 20 minutes until they start to crisp.
4. Add Broccoli
Add broccoli florets to the pan, drizzle with a little more oil, and toss gently.
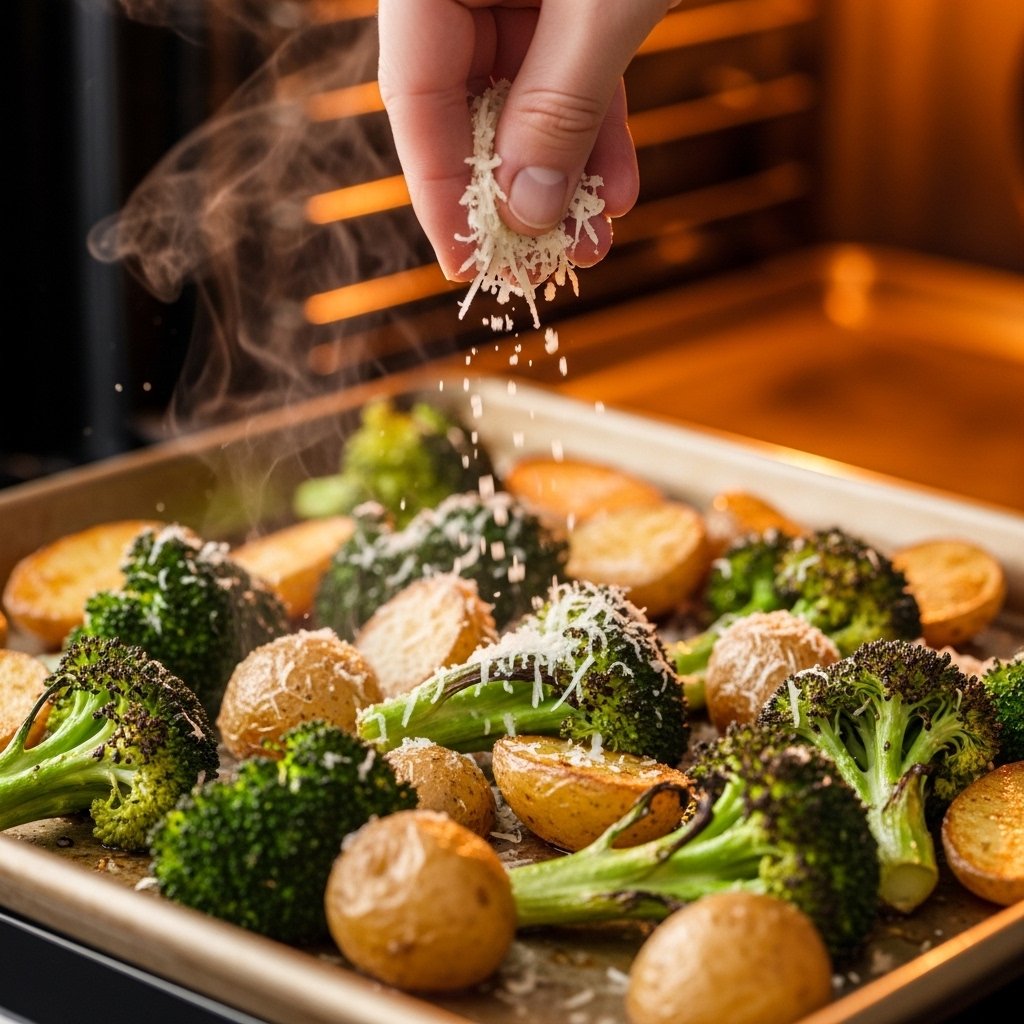
5. Add Parmesan and Finish Roasting
Sprinkle Parmesan cheese over everything and roast for another 15–20 minutes until golden and crispy.
Tips for Perfect Results
To make the best roasted Parmesan potatoes and broccoli, keep these tips in mind:
- Cut potatoes evenly for consistent roasting
- Don’t overcrowd the pan or they will steam instead of crisp
- Add broccoli later so it doesn’t overcook
- Use high heat for crispy edges
- Flip halfway through for even browning
These small steps make a big difference in texture and flavor.
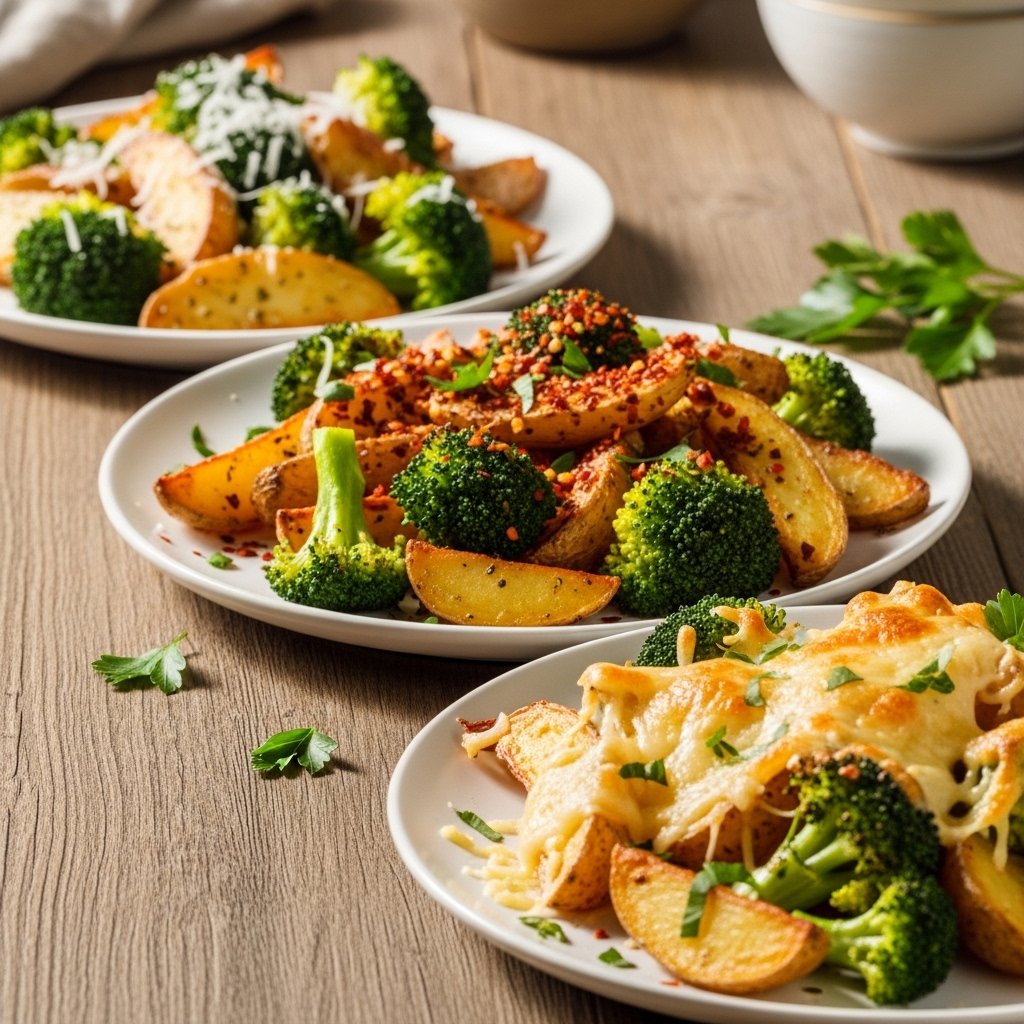
Variations to Try
This recipe is easy to customize based on your preferences.
Garlic Lover’s Version
Add extra minced garlic or garlic powder for stronger flavor.
Spicy Version
Add chili flakes or cayenne pepper for heat.
Cheesy Upgrade
Mix Parmesan with mozzarella for extra gooey texture.
What to Serve With Roasted Parmesan Potatoes and Broccoli
These roasted Parmesan potatoes and broccoli pair well with many main dishes:
- Grilled chicken or baked chicken breast
- Steak or beef roast
- Salmon or baked fish
- Pork chops
- Vegetarian grain bowls
They’re versatile enough to fit almost any dinner menu.
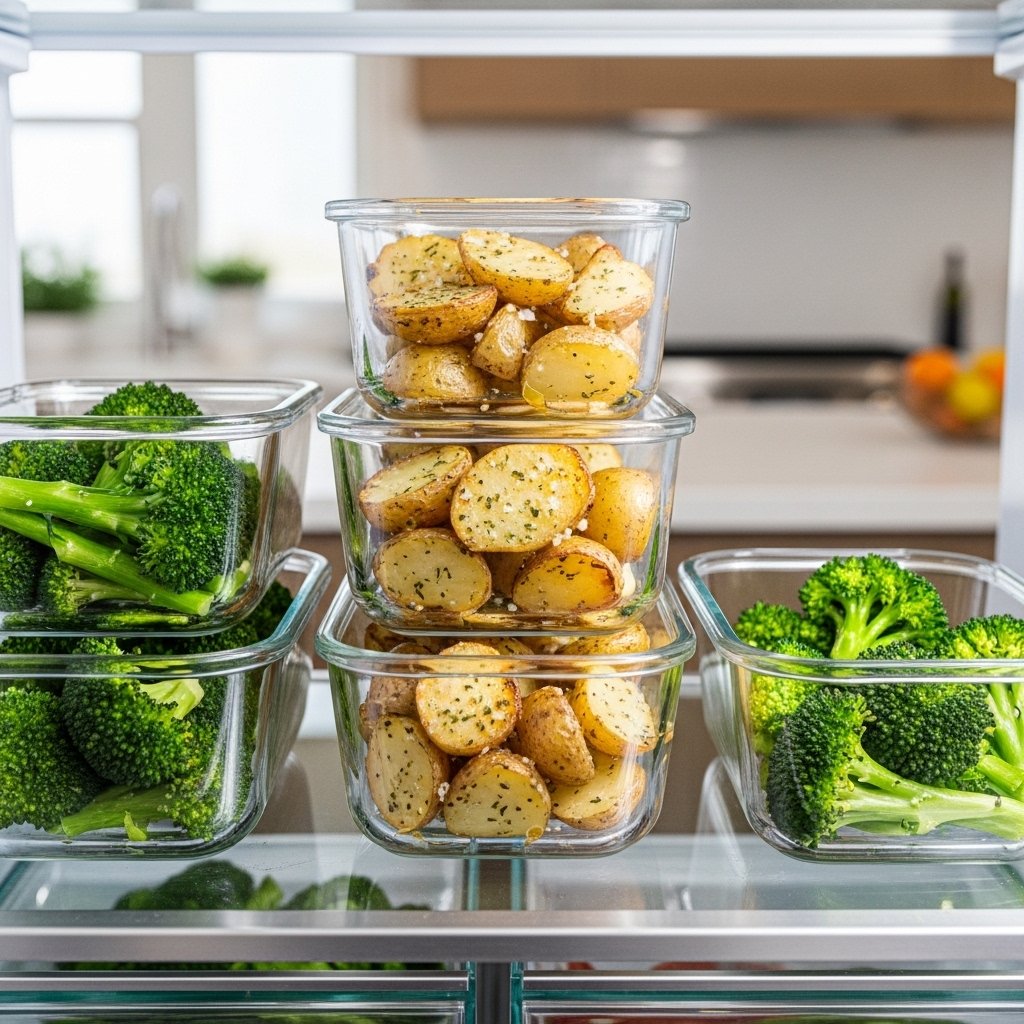
Storage & Reheating Tips
This dish stores well, making it great for meal prep.
Storage
- Refrigerate in airtight containers for up to 4 days
Reheating
- Oven: Reheat at 375°F for 10–12 minutes for crispiness
- Air fryer: Best option for restoring crunch
- Microwave: Quick but less crispy
Common Mistakes to Avoid
Avoid these common issues when making roasted Parmesan potatoes and broccoli:
- Overcrowding the pan (causes sogginess)
- Adding broccoli too early (leads to mushy texture)
- Using too little oil (prevents crisping)
- Skipping high heat roasting
Avoiding these mistakes ensures perfectly roasted vegetables every time.
FAQs
Can I use frozen broccoli?
Yes, but thaw and dry it completely before roasting.
Why aren’t my potatoes crispy?
They may be overcrowded or not cooked at high enough heat.
Can I make this ahead of time?
Yes, but it’s best reheated in the oven or air fryer.
What cheese works best besides Parmesan?
Pecorino Romano or a Parmesan blend works well.
Final Thoughts
These roasted Parmesan potatoes and broccoli are the perfect example of how simple ingredients can create something truly delicious. With crispy potatoes, tender broccoli, and savory Parmesan cheese, this dish is a guaranteed crowd-pleaser.
Whether you’re preparing a quick weeknight dinner or planning meals for the week, this easy side dish delivers flavor, texture, and satisfaction every single time.