5 Ingredient Protein Energy Balls (Easy, Healthy & No-Bake Snack Recipe)

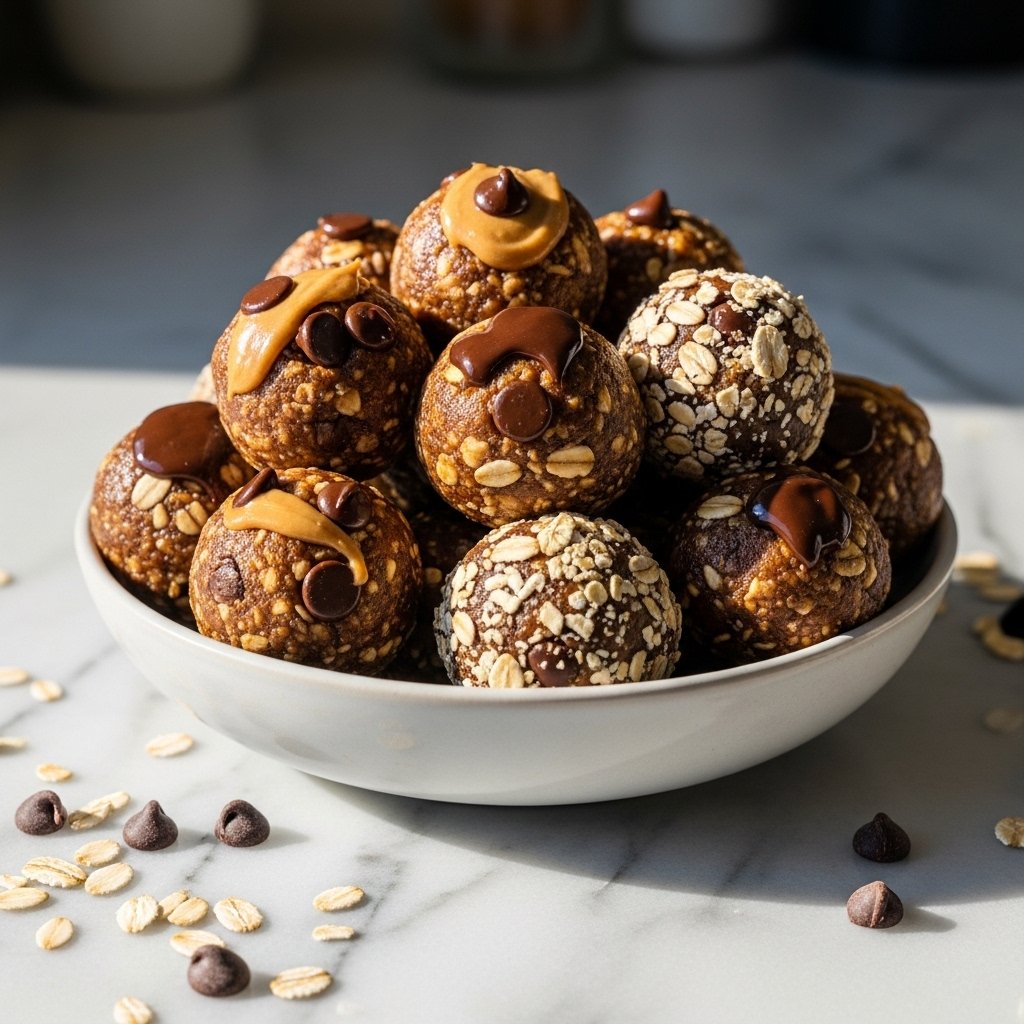
If you’re looking for a quick, healthy, and satisfying snack, these 5 ingredient protein energy balls are about to become your new favorite recipe. They’re soft, chewy, naturally sweet, and packed with protein to keep you energized throughout the day.

Perfect for busy mornings, post-workout snacks, or lunchbox treats, these energy balls come together in just minutes with simple pantry staples. No baking required, no complicated steps—just mix, roll, and enjoy.

Why You’ll Love These 5 Ingredient Protein Energy Balls

These 5 ingredient protein energy balls are simple but incredibly effective for healthy snacking.

  • Only 5 ingredients: Minimal pantry items needed
  • High in protein: Great for energy and muscle recovery
  • No baking required: Quick and easy prep
  • Perfect for meal prep: Make a batch for the week
  • Kid-friendly snack: Naturally sweet and delicious

They’re the perfect grab-and-go snack for busy lifestyles.

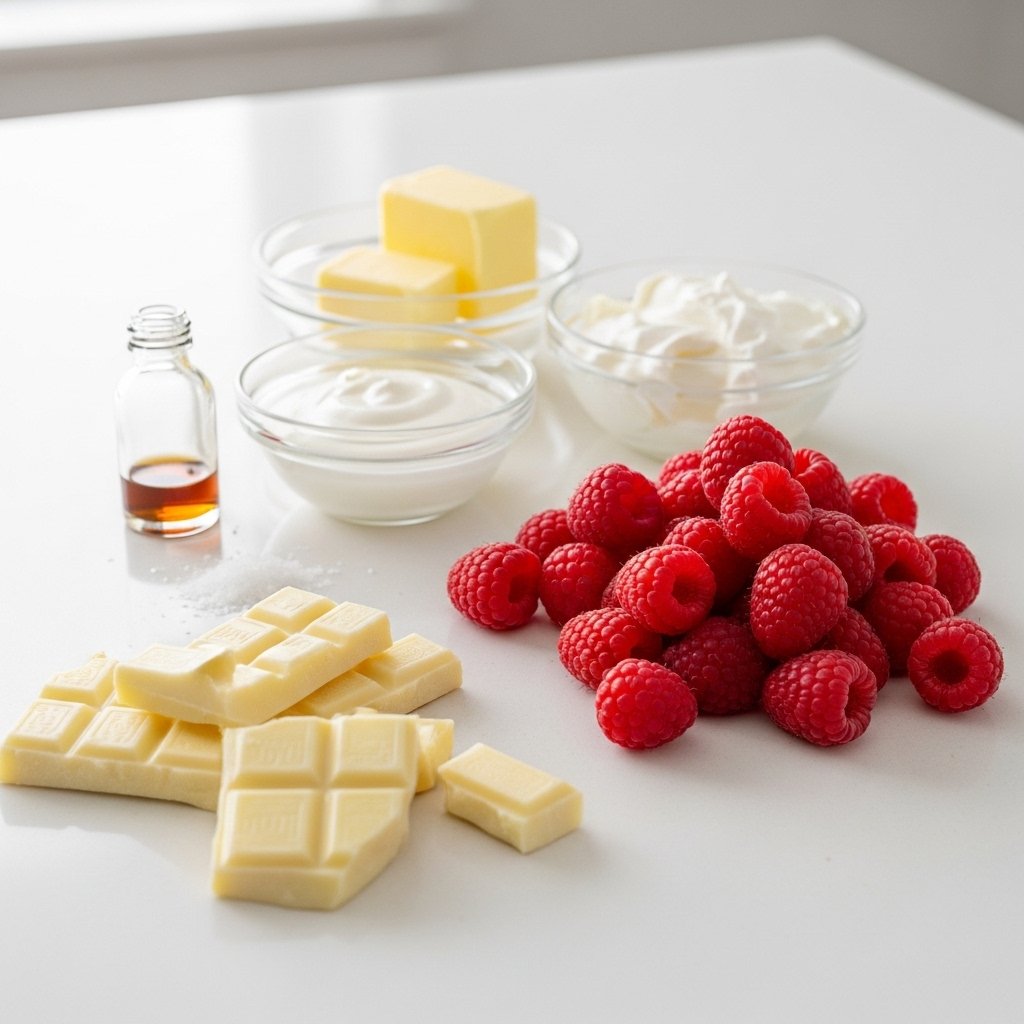
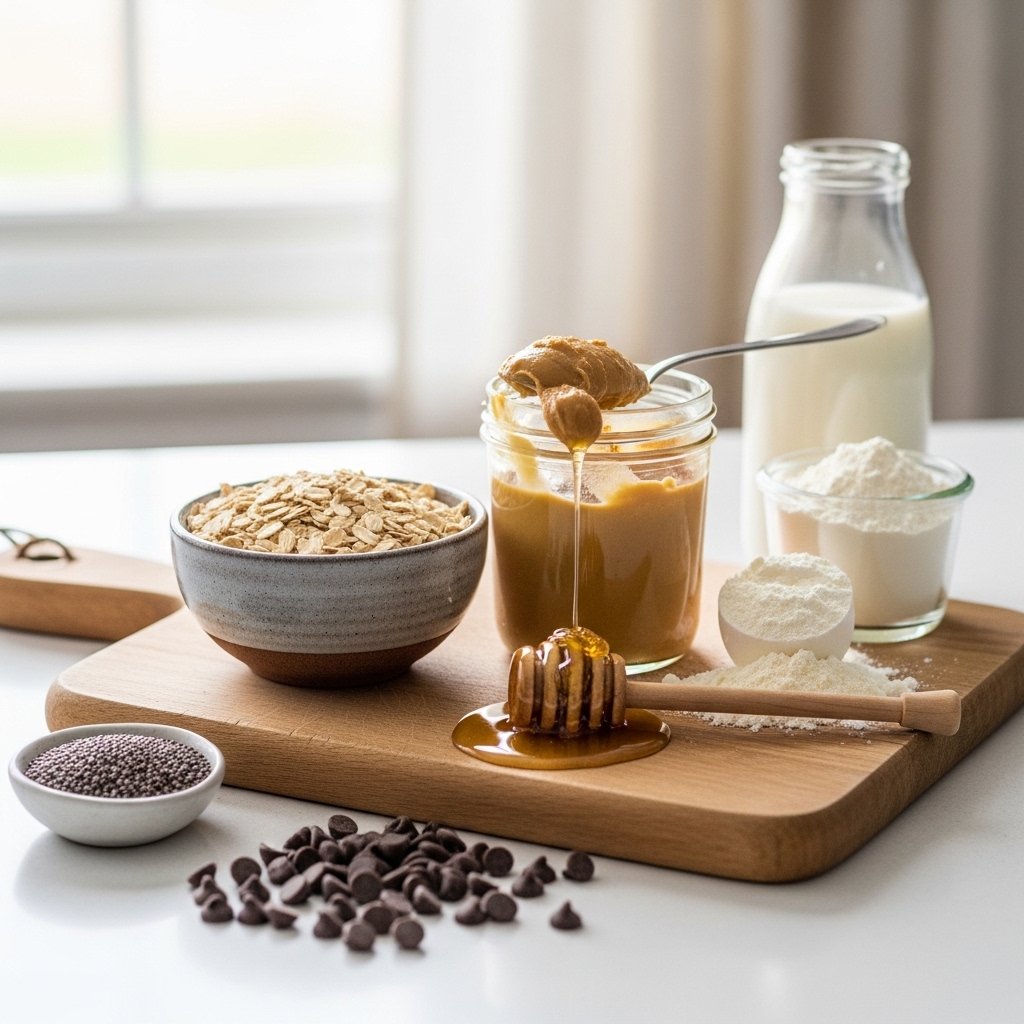
Ingredients for 5 Ingredient Protein Energy Balls

To make these 5 ingredient protein energy balls, you’ll need:

  • 1 cup rolled oats
  • 1/2 cup peanut butter (or almond butter)
  • 1/3 cup honey or maple syrup
  • 1/2 cup protein powder (vanilla or chocolate)
  • 1/3 cup chocolate chips or chia seeds

Ingredient Notes and Substitutions

Understanding your ingredients helps perfect your 5 ingredient protein energy balls.

Oats

Use rolled oats for the best chewy texture.

Nut Butter

Peanut butter gives rich flavor, but almond or cashew butter also works.

Protein Powder

Choose your favorite flavor—vanilla and chocolate work best.

Step-by-Step Instructions

1. Mix Dry Ingredients

In a large bowl, combine oats, protein powder, and chocolate chips.

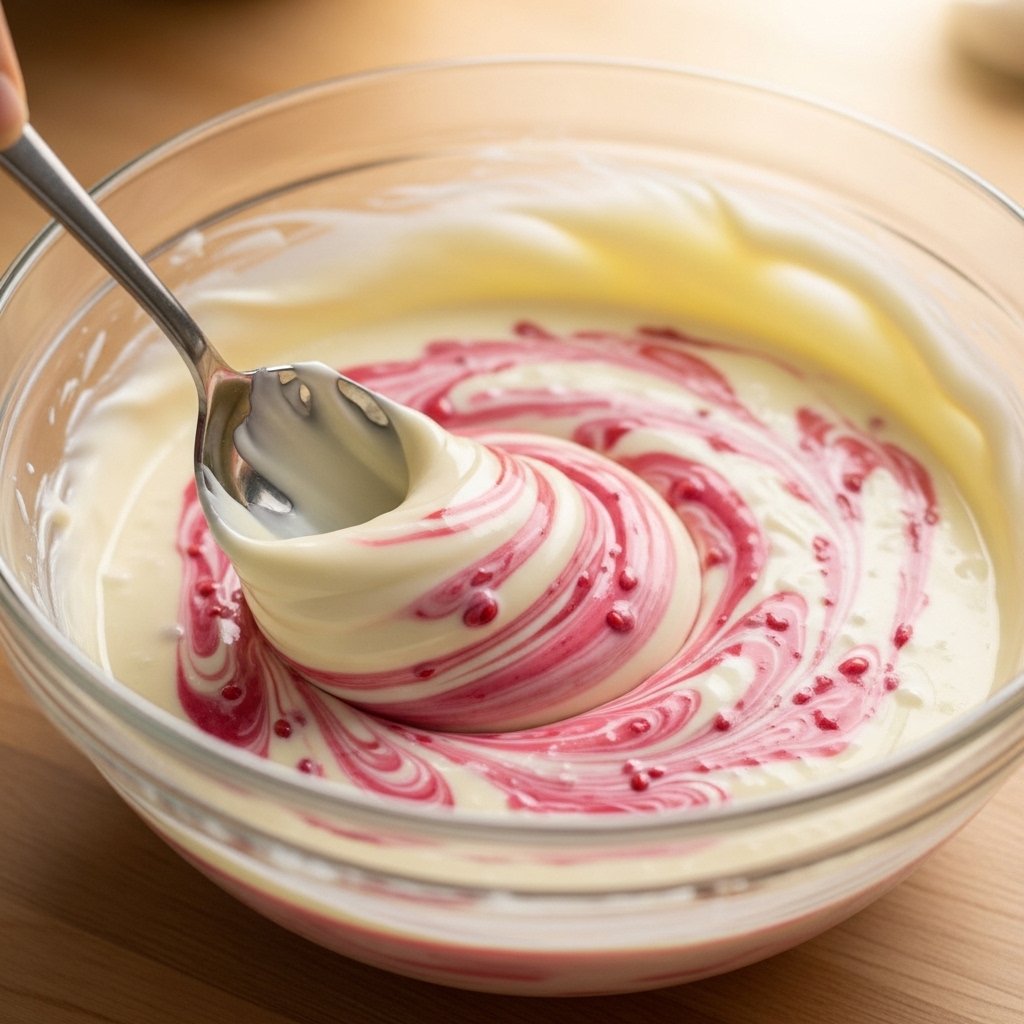
2. Add Wet Ingredients

Stir in peanut butter and honey until fully combined.

3. Adjust Texture

If too dry, add a splash of milk; if too wet, add more oats.
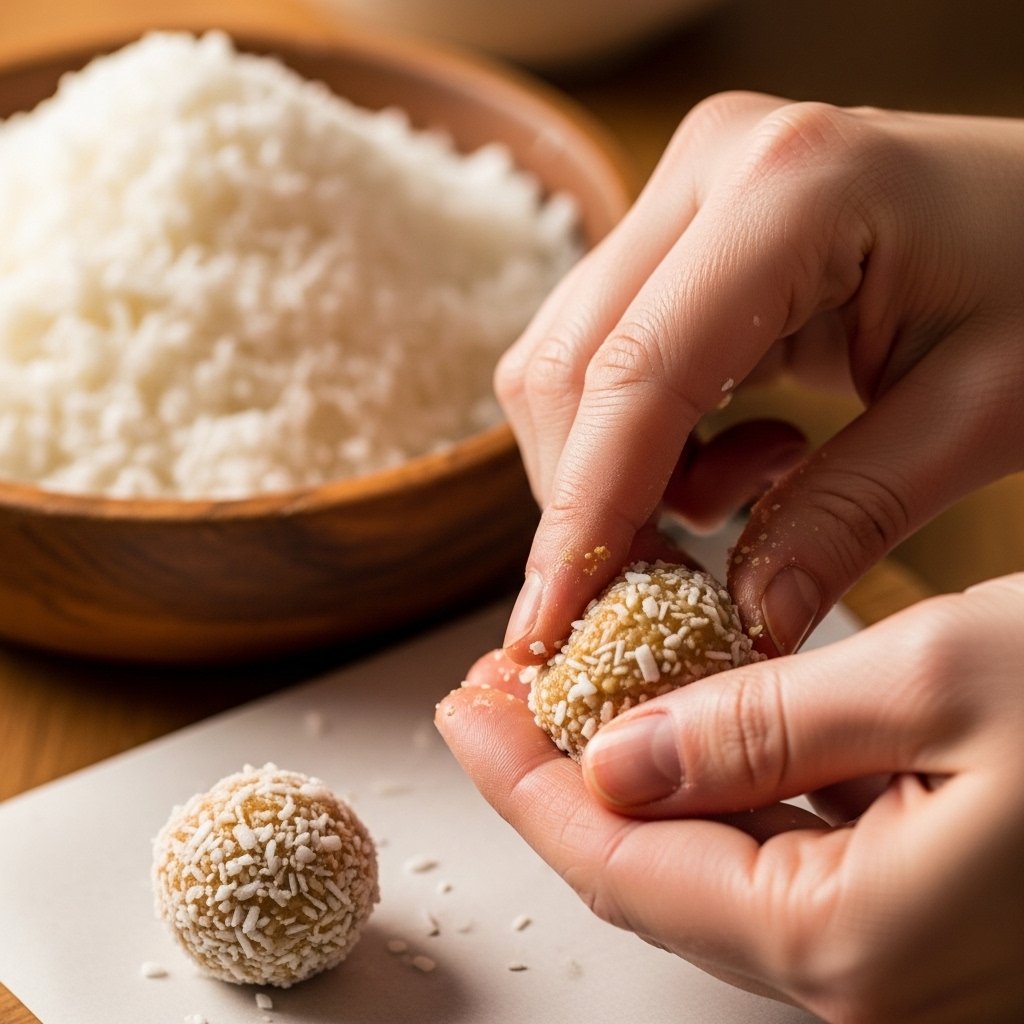
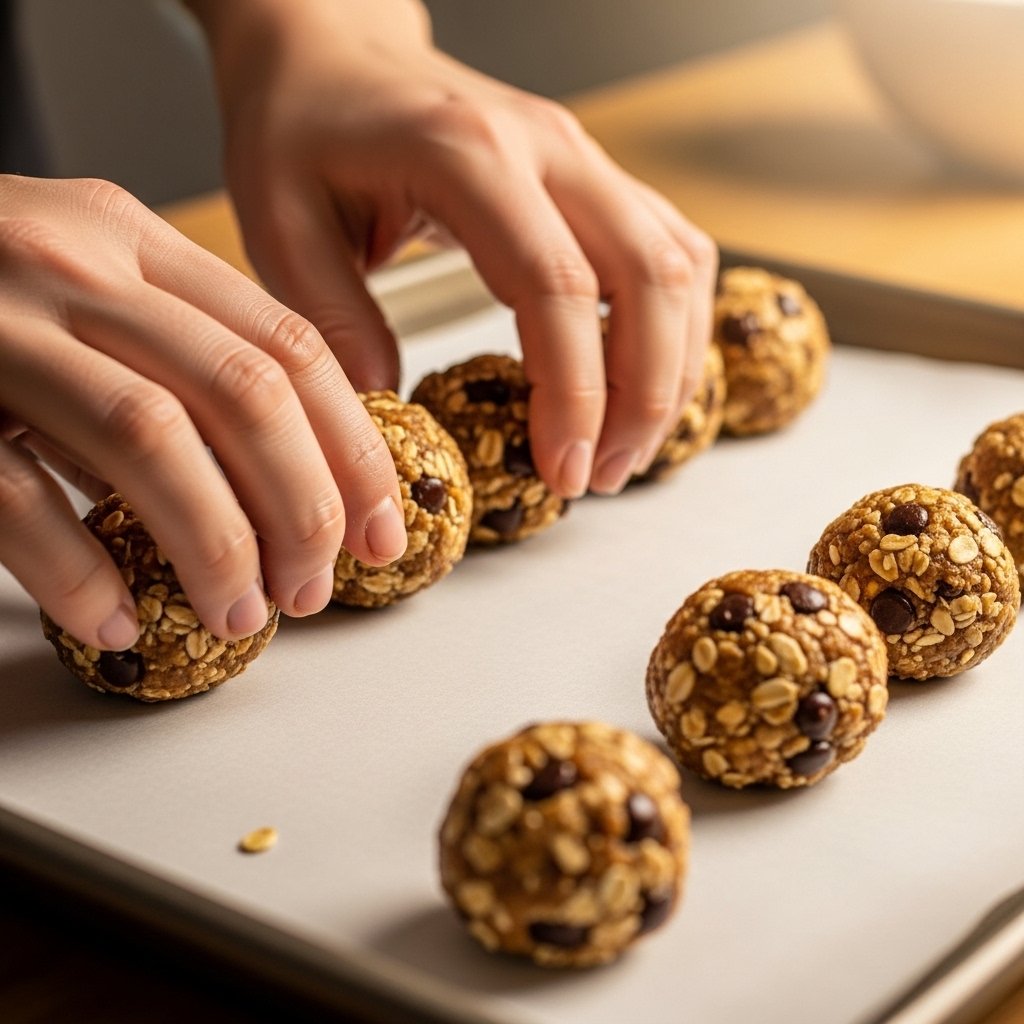
4. Roll into Balls

Scoop and roll mixture into bite-sized energy balls.

5. Chill

Refrigerate for 20–30 minutes to set.

Tips for Perfect Results

To make the best 5 ingredient protein energy balls, follow these tips:

  • Use natural peanut butter for better texture
  • Chill mixture before rolling if sticky
  • Don’t overmix or they become dry
  • Adjust sweetness with honey if needed
  • Store in airtight container for freshness

These tips ensure perfect texture every time.
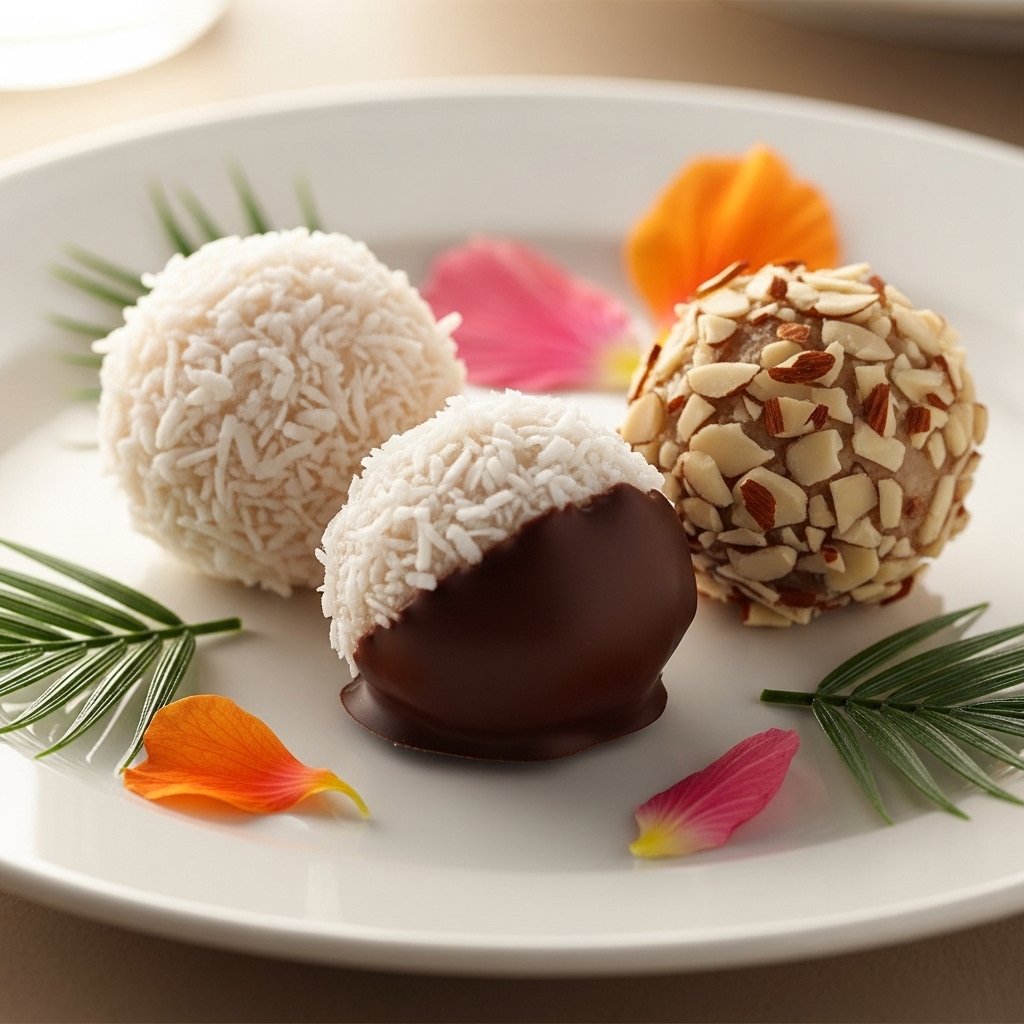
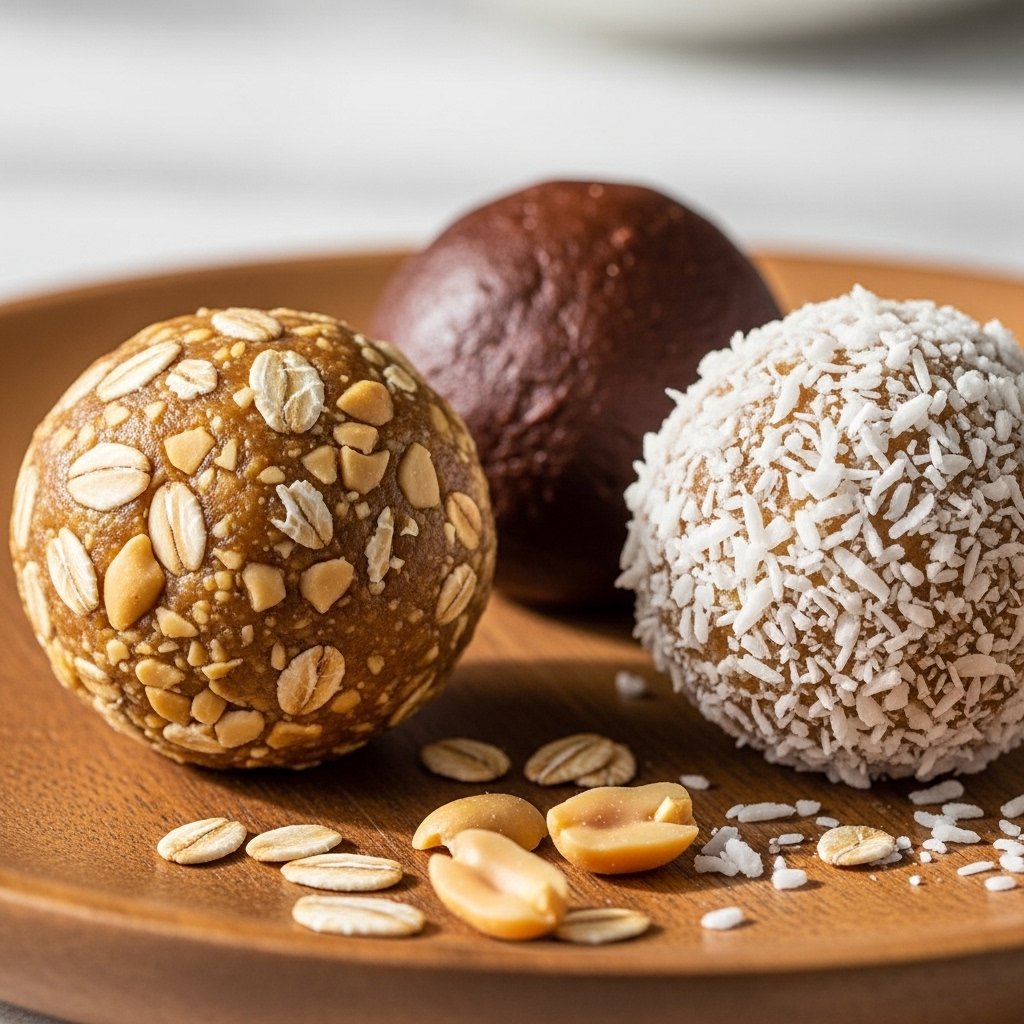
Variations to Try

This recipe is highly customizable.

Chocolate Version

Use chocolate protein powder and extra chocolate chips.
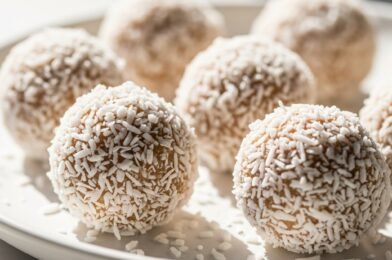
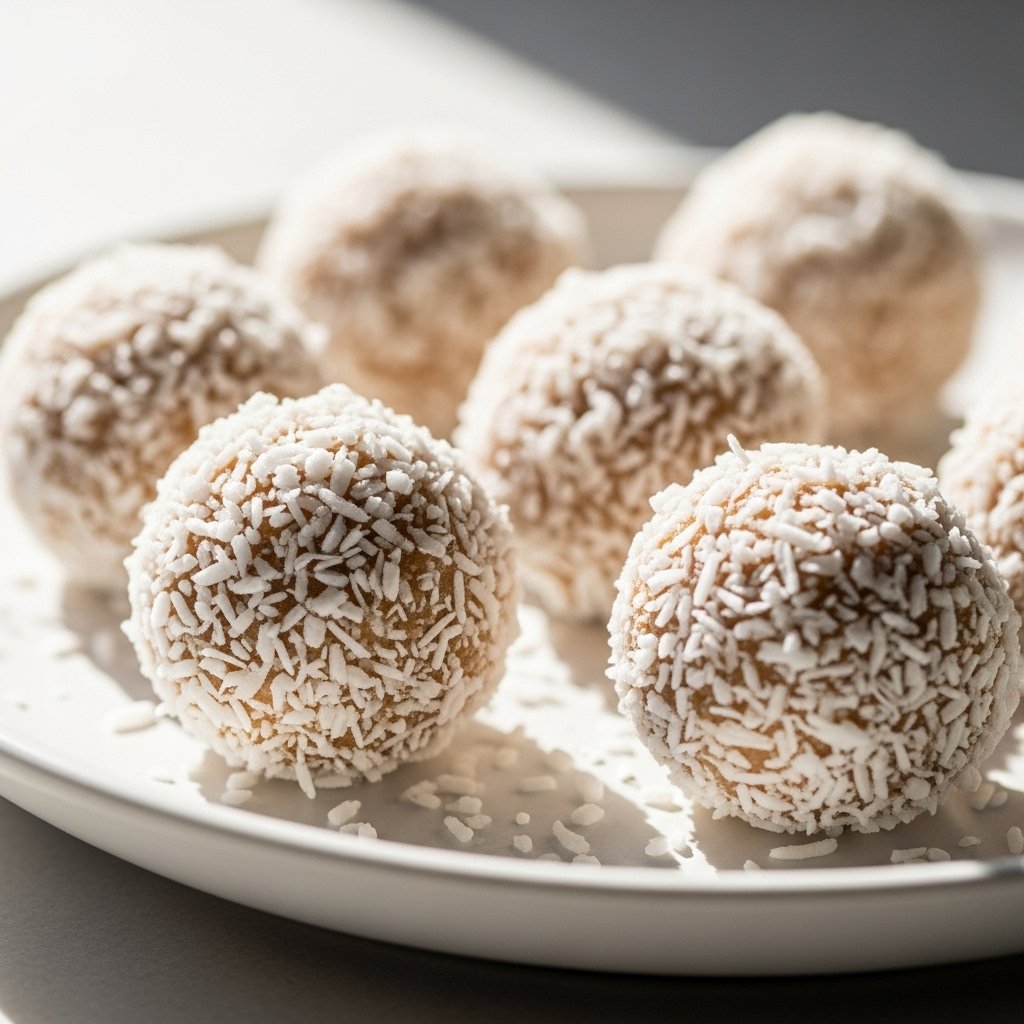
Coconut Version

Add shredded coconut for tropical flavor.

Nut-Free Version

Use sunflower seed butter instead of peanut butter.

What to Serve With Protein Energy Balls

These 5 ingredient protein energy balls pair well with:

  • Protein shakes or smoothies
  • Coffee or iced latte
  • Fresh fruit
  • Yogurt bowls
  • Post-workout snacks

They’re perfect anytime you need a quick energy boost.
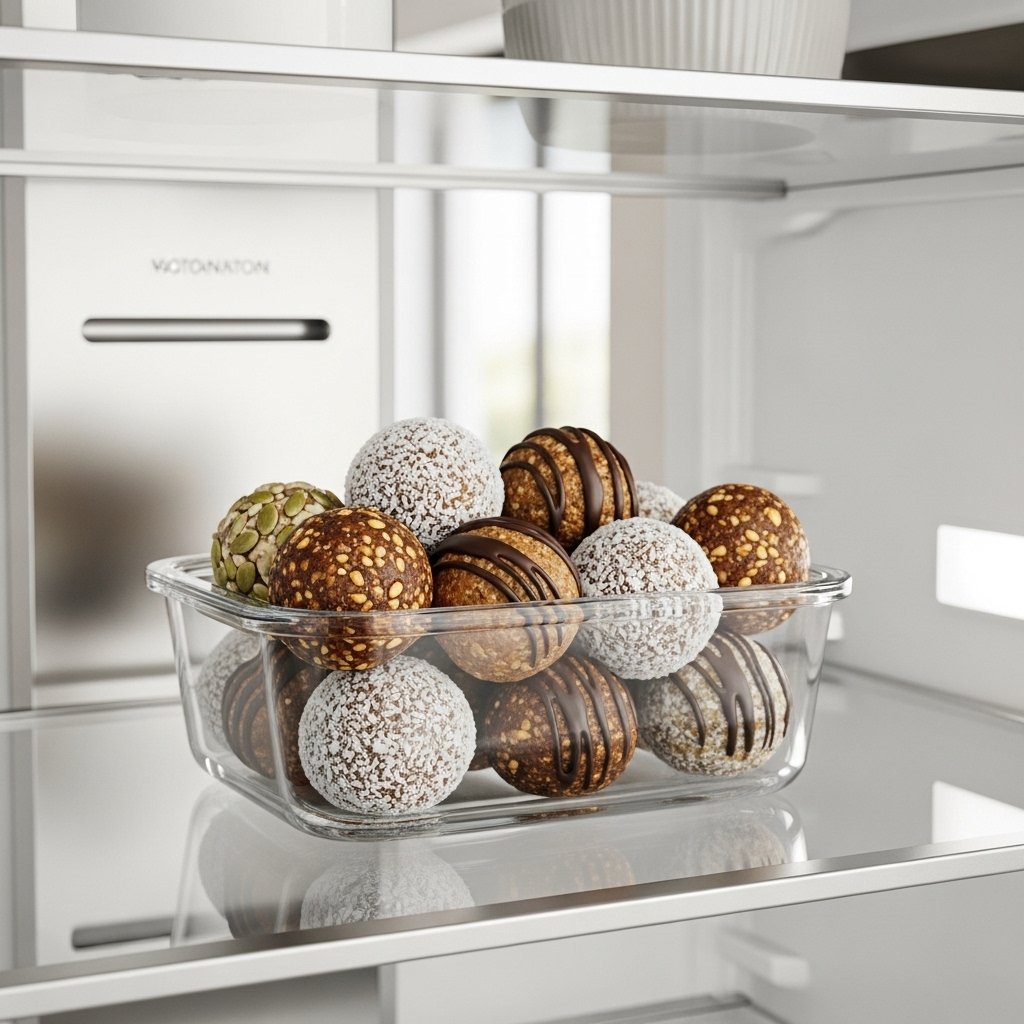
Storage Tips

These energy balls store very well.

Storage

  • Refrigerate for up to 7–10 days
  • Freeze for up to 2 months

Serving Tip

  • Let sit at room temperature for 5 minutes before eating

Common Mistakes to Avoid

Avoid these mistakes when making 5 ingredient protein energy balls:

  • Using too much liquid sweetener
  • Not chilling before rolling
  • Skipping protein powder measurement
  • Overpacking oats (makes them dry)
  • Not mixing evenly

Avoiding these ensures perfect consistency.

FAQs

Are protein energy balls healthy?

Yes, they’re high in protein and made with whole ingredients.

Can I make them without protein powder?

Yes, but protein content will be lower.

Can I freeze them?

Yes, they freeze perfectly for long-term storage.

How long do they last?

About 7–10 days in the fridge.

Final Thoughts

These 5 ingredient protein energy balls are the perfect combination of convenience, nutrition, and taste. They’re quick to make, easy to customize, and ideal for busy days or post-workout fuel.

Whether you’re meal prepping or just need a healthy snack on hand, this recipe is one you’ll keep coming back to again and again.

Delicious Homemade Coconut Truffles Recipe for a Sweet and Creamy Treat

If you love sweet, creamy, and bite-sized desserts, this delicious homemade coconut truffles recipe for a sweet and creamy treat is going to become one of your favorites. These truffles are soft, rich, and full of coconut flavor, coated in a delicate layer that melts in your mouth.

The best part is that they require no baking at all. With just a few simple ingredients, you can create an elegant dessert that looks impressive but is incredibly easy to prepare. Perfect for holidays, parties, or everyday snacking, these coconut truffles are always a crowd-pleaser.

Why You’ll Love This Coconut Truffles Recipe

This delicious homemade coconut truffles recipe for a sweet and creamy treat is simple but incredibly satisfying.

  • No-bake dessert: Quick and easy to prepare
  • Only a few ingredients: Pantry-friendly recipe
  • Creamy texture: Smooth coconut filling
  • Perfect for gifting: Elegant homemade sweet
  • Kid-friendly treat: Naturally sweet and fun

It’s the kind of recipe you can make anytime you want something sweet without hassle.

Ingredients for Coconut Truffles Recipe

To make this delicious homemade coconut truffles recipe for a sweet and creamy treat, you’ll need:

  • 2 cups shredded coconut (sweetened or unsweetened)
  • 1 cup sweetened condensed milk
  • 1 teaspoon vanilla extract
  • 1/2 cup white chocolate (melted)
  • Pinch of salt
  • Optional coating: extra shredded coconut, cocoa powder, or crushed nuts

Ingredient Notes and Tips

Understanding your ingredients helps improve your delicious homemade coconut truffles recipe for a sweet and creamy treat.

Coconut

Use fine shredded coconut for smoother texture.

Condensed Milk

This provides sweetness and helps bind the mixture.

White Chocolate

Optional but adds richness and structure.

Step-by-Step Instructions

1. Mix the Base

In a bowl, combine shredded coconut, condensed milk, vanilla, and salt.

2. Add White Chocolate

Stir in melted white chocolate for extra creaminess.

3. Chill the Mixture

Refrigerate for 30–60 minutes until firm enough to shape.

4. Shape the Truffles

Roll mixture into small bite-sized balls.

5. Coat the Truffles

Roll in shredded coconut or your preferred coating.

Tips for Perfect Results

To make the best delicious homemade coconut truffles recipe for a sweet and creamy treat, follow these tips:

  • Chill mixture before rolling for easier shaping
  • Use damp hands to prevent sticking
  • Don’t overdo condensed milk or texture becomes too soft
  • Roll quickly to maintain shape
  • Store cold for best texture

These simple tips guarantee perfect truffles every time.

Variations to Try

This recipe is very flexible.

Chocolate Coconut Truffles

Dip finished truffles in melted dark chocolate.

Almond Coconut Version

Add chopped almonds for crunch.

Tropical Version

Mix in pineapple or mango flavoring.

What to Serve With Coconut Truffles

These delicious homemade coconut truffles recipe for a sweet and creamy treat pair well with:

  • Coffee or espresso
  • Hot chocolate
  • Fruit platters
  • Dessert boards
  • Ice cream

They are perfect for any sweet occasion.

Storage Tips

These truffles store very well.

Storage

  • Refrigerate in airtight container for up to 1 week
  • Freeze for up to 2 months

Serving Tip

  • Let sit at room temperature for 5–10 minutes before eating

Common Mistakes to Avoid

Avoid these mistakes when making delicious homemade coconut truffles recipe for a sweet and creamy treat:

  • Using too much condensed milk (too soft)
  • Skipping chilling time
  • Not evenly mixing coconut
  • Rolling without chilling hands
  • Storing uncovered in fridge

Avoiding these ensures perfect texture and flavor.

FAQs

Can I make coconut truffles without chocolate?

Yes, they still taste delicious without it.

Can I use unsweetened coconut?

Yes, but you may need a bit more sweetness.

Can I freeze coconut truffles?

Yes, they freeze very well for up to 2 months.

How long do they last in the fridge?

About 5–7 days in an airtight container.

Final Thoughts

This delicious homemade coconut truffles recipe for a sweet and creamy treat is a simple yet elegant dessert that anyone can make. With its rich coconut flavor and soft creamy texture, it’s perfect for gifting, parties, or everyday indulgence.

Easy, no-bake, and incredibly satisfying—this is one recipe you’ll want to keep forever.

White Chocolate Raspberry Truffles Recipe (Easy, Creamy & Elegant Homemade Treats)

If you’re looking for a simple yet elegant homemade dessert, this white chocolate raspberry truffles recipe is exactly what you need. These truffles are creamy, rich, and melt-in-your-mouth delicious with a bright burst of raspberry flavor in every bite.

Perfect for holidays, gifting, or special occasions, these truffles look like they came straight from a fancy chocolate shop—but they’re surprisingly easy to make at home with just a few ingredients.

Why You’ll Love This White Chocolate Raspberry Truffles Recipe

This white chocolate raspberry truffles recipe is both simple and luxurious.

  • Only a few ingredients: Minimal pantry items needed
  • Elegant dessert: Perfect for gifts or parties
  • Creamy texture: Smooth white chocolate ganache center
  • Fruity flavor: Real raspberry adds freshness
  • No baking required: Easy no-bake recipe

It’s the kind of dessert that impresses without stress.

Ingredients for White Chocolate Raspberry Truffles Recipe

To make this white chocolate raspberry truffles recipe, you’ll need:

  • 10 oz white chocolate (high quality, chopped)
  • 1/2 cup heavy cream
  • 1/2 cup fresh or freeze-dried raspberries
  • 1 tablespoon unsalted butter
  • 1 teaspoon vanilla extract
  • Pinch of salt
  • Optional coating: powdered sugar, melted white chocolate, or crushed freeze-dried raspberries

Ingredient Notes and Tips

Understanding your ingredients helps improve your white chocolate raspberry truffles recipe.

White Chocolate

Use high-quality white chocolate for a smooth, creamy texture.

Raspberries

Freeze-dried raspberries give stronger flavor and less moisture.

Cream

Heavy cream ensures a rich ganache filling.

Step-by-Step Instructions

1. Heat the Cream

Warm heavy cream in a saucepan until just simmering.

2. Melt White Chocolate

Pour hot cream over chopped white chocolate and let sit for 2 minutes.

3. Stir Until Smooth

Mix until silky and fully combined.

4. Add Flavor

Stir in butter, vanilla, salt, and crushed raspberries.

5. Chill the Mixture

Refrigerate for 2–3 hours until firm.

6. Shape the Truffles

Scoop and roll into small balls.

7. Coat the Truffles

Roll in powdered sugar or melted white chocolate.

Tips for Perfect Results

To make the best white chocolate raspberry truffles recipe, follow these tips:

  • Use high-quality chocolate for smooth texture
  • Chill mixture fully before shaping
  • Work quickly to avoid melting
  • Use gloves for cleaner rolling
  • Crush raspberries finely for even flavor

These tips ensure perfect truffles every time.

Variations to Try

This recipe is easy to customize.

Dark Chocolate Version

Replace white chocolate with dark chocolate.

Coconut Version

Roll truffles in shredded coconut.

Lemon Raspberry Version

Add lemon zest for extra freshness.

What to Serve With White Chocolate Raspberry Truffles

This white chocolate raspberry truffles recipe pairs well with:

  • Coffee or espresso
  • Champagne or sparkling juice
  • Fruit platters
  • Cheesecake desserts
  • Dessert gift boxes

They are perfect for elegant dessert tables.

Storage Tips

These truffles store very well.

Storage

  • Keep in airtight container in fridge for up to 1 week
  • Freeze for up to 2 months

Serving Tip

  • Let sit at room temperature for 5–10 minutes before serving

Common Mistakes to Avoid

Avoid these mistakes when making white chocolate raspberry truffles recipe:

  • Overheating chocolate
  • Not chilling mixture enough
  • Using watery raspberries
  • Rolling while mixture is too soft
  • Skipping salt (it enhances flavor)

Avoiding these ensures smooth, rich truffles.

FAQs

Can I use frozen raspberries?

Yes, but thaw and drain them first.

Why are my truffles too soft?

The mixture likely wasn’t chilled enough.

Can I make them ahead of time?

Yes, they are perfect for make-ahead desserts.

Can I freeze truffles?

Yes, store in freezer-safe container for up to 2 months.

Final Thoughts

This white chocolate raspberry truffles recipe is a perfect balance of creamy sweetness and fruity brightness. It’s elegant, easy to make, and ideal for gifting or special occasions.

Whether you’re preparing holiday treats or just craving something luxurious, these truffles deliver bakery-quality results right from your kitchen.

10-Minute Frozen Yogurt Bark with Berries (Healthy, Easy & High-Protein Snack)

If you’re looking for a quick, healthy, and refreshing snack, this 10-minute frozen yogurt bark with berries is about to become your new favorite treat. It’s creamy, slightly sweet, packed with fresh fruit, and takes almost no effort to prepare.

This recipe is perfect for busy days, kids’ snacks, post-workout cravings, or even a light dessert. With just a few simple ingredients, you can create a colorful, nutrient-packed frozen snack that feels indulgent but is actually good for you.

Why You’ll Love This 10-Minute Frozen Yogurt Bark with Berries

This 10-minute frozen yogurt bark with berries is simple but incredibly satisfying.

  • Super quick to prepare: Only 10 minutes of prep time
  • Healthy and refreshing: Made with Greek yogurt and fresh fruit
  • Kid-friendly snack: Naturally sweet and fun to eat
  • High in protein: Thanks to Greek yogurt
  • Perfect for meal prep: Store and enjoy anytime

It’s a guilt-free dessert you can always feel good about.

Ingredients for 10-Minute Frozen Yogurt Bark with Berries

To make this 10-minute frozen yogurt bark with berries, you’ll need:

  • 2 cups Greek yogurt (plain or vanilla)
  • 1–2 tablespoons honey or maple syrup
  • 1 teaspoon vanilla extract (optional)
  • 1/2 cup strawberries, sliced
  • 1/2 cup blueberries
  • 1/2 cup raspberries or blackberries
  • Optional: granola, chia seeds, shredded coconut, dark chocolate chips

Ingredient Notes and Healthy Benefits

Understanding your ingredients helps improve your 10-minute frozen yogurt bark with berries.

Greek Yogurt

Rich in protein and probiotics for gut health.

Berries

Packed with antioxidants and natural sweetness.

Honey

Adds light sweetness without refined sugar.

Step-by-Step Instructions

1. Prepare the Yogurt Base

Mix Greek yogurt with honey and vanilla until smooth.

2. Spread the Yogurt

Line a baking tray with parchment paper and spread yogurt evenly.

3. Add Toppings

Sprinkle berries and optional toppings evenly over the yogurt.

4. Freeze

Place in freezer for 3–4 hours or until completely firm.

5. Break into Pieces

Once frozen, break into bark-sized chunks and serve.

Tips for Perfect Results

To make the best 10-minute frozen yogurt bark with berries, follow these tips:

  • Use thick Greek yogurt for better texture
  • Don’t overload with toppings or it won’t freeze evenly
  • Freeze on a flat surface for consistent thickness
  • Add toppings quickly before yogurt starts setting
  • Store immediately after breaking into pieces

These tips ensure perfect crunchy, creamy bark every time.

Variations to Try

This recipe is very flexible.

Chocolate Version

Add melted dark chocolate drizzle before freezing.

Tropical Version

Use mango, pineapple, and coconut flakes.

Nutty Version

Add almonds, walnuts, or peanut butter swirl.

What to Serve With Frozen Yogurt Bark

This 10-minute frozen yogurt bark with berries pairs well with:

  • Smoothies or protein shakes
  • Fresh fruit bowls
  • Coffee or iced tea
  • Light breakfast spreads
  • Post-workout snacks

It’s perfect for any time of day.

Storage & Freezing Tips

This snack is freezer-friendly.

Storage

  • Store in airtight container or freezer bag
  • Keep frozen for up to 2 weeks

Serving Tip

  • Let sit 1–2 minutes before eating for easier biting

Common Mistakes to Avoid

Avoid these mistakes when making 10-minute frozen yogurt bark with berries:

  • Using thin yogurt (causes icy texture)
  • Adding too many watery fruits
  • Not freezing long enough
  • Breaking bark too early
  • Skipping parchment paper

Avoiding these ensures perfect texture and flavor.

FAQs

Can I use non-dairy yogurt?

Yes, coconut or almond yogurt works well.

How long does it take to freeze?

About 3–4 hours depending on thickness.

Can I make it sugar-free?

Yes, skip honey or use sugar-free sweetener.

Is it healthy for kids?

Yes, it’s a great healthy snack for children.

Final Thoughts

This 10-minute frozen yogurt bark with berries is one of the easiest and healthiest snacks you can make at home. It’s refreshing, customizable, and perfect for both kids and adults.

Whether you’re meal prepping snacks or looking for a light dessert, this recipe delivers flavor, nutrition, and convenience in every bite.

Workout Egg Avocado Salad Recipe (High-Protein, Healthy & Perfect for Meal Prep)

If you’re looking for a simple, high-protein, and nutrient-dense meal that supports your fitness goals, this workout egg avocado salad recipe is exactly what you need. It combines hard-boiled eggs, creamy avocado, and clean, wholesome ingredients designed to fuel your body after workouts or during busy days.

This recipe is also designed in a “digital download printable” style format, meaning it’s easy to follow, cleanly structured, and perfect for saving or printing as part of your healthy meal prep collection—just like a premium Etsy-style fitness recipe card.

Why You’ll Love This Workout Egg Avocado Salad Recipe

This workout egg avocado salad recipe is designed for both taste and performance nutrition.

  • High in protein: Supports muscle recovery after workouts
  • Healthy fats: Avocado provides long-lasting energy
  • Low-carb friendly: Perfect for clean eating or keto-style diets
  • Meal prep ready: Easy to store and portion
  • Simple ingredients: No complicated cooking required

It’s the kind of recipe fitness lovers rely on daily.

Ingredients for Workout Egg Avocado Salad Recipe

To make this workout egg avocado salad recipe, you’ll need:

  • 6 large eggs (hard-boiled)
  • 1 ripe avocado
  • 1 tablespoon olive oil or avocado oil
  • 1 tablespoon lemon juice
  • 1 teaspoon Dijon mustard
  • Salt and black pepper to taste
  • Optional: spinach or arugula
  • Optional: chia seeds or hemp seeds for extra protein

Ingredient Notes and Fitness Benefits

Understanding your ingredients helps maximize the benefits of this workout egg avocado salad recipe.

Eggs

Eggs provide complete protein essential for muscle recovery and strength.

Avocado

Avocado delivers healthy fats that support energy and hormone balance.

Lemon Juice

Adds freshness and helps prevent avocado browning.

Step-by-Step Instructions

1. Boil the Eggs

Cook eggs for 10–12 minutes until fully set, then cool and peel.

2. Prepare the Avocado Base

Mash avocado in a bowl until creamy but slightly chunky.

3. Chop the Eggs

Dice or slice boiled eggs into bite-sized pieces.

4. Mix Ingredients

Combine eggs, avocado, lemon juice, mustard, salt, and pepper.

5. Adjust Texture

Add olive oil or a splash of water if needed for creaminess.

Tips for Perfect Results

To make the best workout egg avocado salad recipe, follow these tips:

  • Use slightly firm ripe avocado for best texture
  • Don’t overmix—keep chunks for bite
  • Add lemon juice immediately after cutting avocado
  • Season gradually for balanced flavor
  • Chill before eating for refreshing taste

These steps ensure the perfect fitness meal texture and flavor.

Variations to Try

This recipe is highly customizable for different fitness goals.

High-Protein Version

Add grilled chicken or tuna.

Keto Workout Version

Add extra avocado and skip seeds.

Green Power Version

Add spinach, kale, or arugula.

What to Serve With Workout Egg Avocado Salad

This workout egg avocado salad recipe pairs well with:

  • Whole grain toast or low-carb bread
  • Fresh cucumber or carrot sticks
  • Protein shakes or smoothies
  • Rice cakes
  • Grilled chicken or fish

It’s perfect for post-workout meals or light lunches.

Storage & Meal Prep Tips

This salad is best enjoyed fresh but works well for meal prep.

Storage

  • Store in airtight containers for up to 2 days
  • Press plastic wrap on top to reduce oxidation

Meal Prep Tip

  • Keep eggs and avocado separate until serving for freshness

Common Mistakes to Avoid

Avoid these mistakes when making this workout egg avocado salad recipe:

  • Using overripe avocado (too mushy)
  • Overcooking eggs (rubbery texture)
  • Not seasoning properly
  • Leaving avocado exposed too long
  • Overmixing ingredients

Avoiding these ensures a clean, fresh, fitness-friendly meal.

FAQs

Is this workout egg avocado salad good for weight loss?

Yes, it’s high in protein and healthy fats, helping you stay full longer.

Can I eat this after a workout?

Absolutely—it’s ideal for post-workout recovery.

Can I make it ahead of time?

Yes, but it’s best consumed within 24–48 hours.

Can I add mayonnaise?

Yes, but it will increase calories and reduce “clean eating” benefits.

Final Thoughts

This workout egg avocado salad recipe is a simple, powerful, and nutrient-rich meal designed for anyone focused on fitness and healthy eating. With high-quality protein, healthy fats, and clean ingredients, it supports recovery, energy, and overall wellness.

Whether you’re meal prepping for the week or fueling up after a workout, this recipe is a reliable, delicious option you can always count on.

Keto Avocado Egg Salad (Creamy, Low-Carb & Perfect for Meal Prep)

If you’re looking for a quick, creamy, and satisfying low-carb meal, this keto avocado egg salad is about to become one of your favorites. It combines perfectly cooked eggs with rich, buttery avocado and a simple, flavorful dressing that keeps everything fresh and delicious.

Unlike traditional egg salad loaded with mayonnaise, this keto version uses avocado as the base, giving it a healthier twist packed with good fats and nutrients. It’s perfect for busy weekdays, meal prep, or even a light dinner when you want something nourishing but effortless.

Why You’ll Love This Keto Avocado Egg Salad

This keto avocado egg salad is simple, healthy, and incredibly versatile.

  • Low-carb and keto-friendly: Perfect for weight management
  • High in healthy fats and protein: Keeps you full longer
  • No mayo needed: Creamy avocado replaces heavy dressings
  • Quick to prepare: Ready in under 15 minutes
  • Meal prep friendly: Stays fresh for easy lunches

It’s the kind of recipe you’ll turn to whenever you need something fast, healthy, and satisfying.

Ingredients for Keto Avocado Egg Salad

To make this keto avocado egg salad, you’ll need:

  • 6 large eggs, hard-boiled
  • 1 ripe avocado
  • 1 tablespoon olive oil or avocado oil
  • 1 tablespoon lemon juice
  • 1 teaspoon Dijon mustard
  • Salt and black pepper to taste
  • Optional: chopped chives or parsley
  • Optional: red pepper flakes for heat

Ingredient Notes and Substitutions

Understanding your ingredients helps improve your keto avocado egg salad.

Avocado

Use a ripe avocado for the creamiest texture and best flavor.

Eggs

Hard-boiled eggs should be firm but not overcooked to avoid dryness.

Dressing

Dijon mustard adds a subtle tang that balances the richness.

Step-by-Step Instructions

1. Boil the Eggs

Cook eggs in boiling water for 10–12 minutes, then cool and peel.

2. Mash the Avocado

In a bowl, mash avocado until smooth but slightly chunky.

3. Chop the Eggs

Cut eggs into small pieces for texture.

4. Mix Everything

Combine eggs, avocado, lemon juice, mustard, salt, and pepper.

5. Adjust Seasoning

Taste and adjust salt, pepper, or lemon juice as needed.

Tips for Perfect Results

To make the best keto avocado egg salad, follow these tips:

  • Use slightly firm but ripe avocado
  • Don’t over-mash—keep texture
  • Add lemon juice immediately to prevent browning
  • Chill eggs before mixing for better consistency
  • Season gradually and taste as you go

These steps ensure a creamy and fresh result every time.

Variations to Try

This recipe is flexible and easy to customize.

Spicy Version

Add jalapeños or chili flakes.

Bacon Version

Mix in crispy bacon bits for extra flavor.

Herb Version

Add dill, parsley, or cilantro for freshness.

What to Serve With Keto Avocado Egg Salad

This keto avocado egg salad pairs well with:

  • Lettuce wraps
  • Keto bread or low-carb crackers
  • Cucumber slices
  • Stuffed in avocado halves
  • As a side with grilled chicken or fish

It’s versatile enough for lunch or a light dinner.

Storage & Reheating Tips

This salad is best enjoyed fresh.

Storage

  • Store in airtight container in fridge for up to 2 days
  • Press plastic wrap directly on surface to reduce browning

Reheating

  • No reheating needed—serve cold

Common Mistakes to Avoid

Avoid these mistakes when making keto avocado egg salad:

  • Using overripe or underripe avocado
  • Overcooking eggs (causes dry texture)
  • Not adding enough seasoning
  • Letting salad sit too long without covering
  • Over-mashing avocado

Avoiding these ensures a perfect creamy consistency.

FAQs

Is keto avocado egg salad healthy?

Yes, it’s high in healthy fats, protein, and very low in carbs.

Can I make it ahead of time?

Yes, but it’s best eaten within 1–2 days.

Can I use mayonnaise instead of avocado?

Yes, but it will no longer be fully keto avocado-based.

How do I keep it from turning brown?

Use lemon juice and store it tightly covered.

Final Thoughts

This keto avocado egg salad is the perfect combination of simplicity, nutrition, and flavor. It’s creamy without mayonnaise, rich in healthy fats, and incredibly easy to prepare.

Whether you’re following a keto lifestyle or just want a quick, healthy meal, this recipe delivers every time with minimal effort and maximum satisfaction.

BBQ Chicken Salad with Creamy Avocado Dressing (Healthy, High-Protein & Flavor-Packed)

If you’re craving something fresh, filling, and packed with bold flavor, this BBQ chicken salad with creamy avocado dressing is going to be your new go-to meal. It combines smoky, tender BBQ chicken with crisp greens and a rich, silky avocado dressing that feels indulgent while still being incredibly healthy.

This salad is perfect for lunch, dinner, or meal prep. It delivers all the satisfaction of comfort food but in a lighter, nutrient-packed way. The creamy avocado dressing replaces heavy store-bought dressings and brings a fresh, homemade touch that makes every bite unforgettable.

Why You’ll Love This BBQ Chicken Salad with Creamy Avocado Dressing

This BBQ chicken salad with creamy avocado dressing is the perfect balance of healthy and satisfying.

  • High in protein: BBQ chicken keeps you full longer
  • Creamy without guilt: Avocado dressing replaces heavy sauces
  • Fresh and crunchy: Packed with crisp vegetables
  • Quick to make: Ready in under 30 minutes
  • Meal prep friendly: Stays fresh when stored properly

It’s the kind of meal that feels both nourishing and exciting.

Ingredients for BBQ Chicken Salad with Creamy Avocado Dressing

To make this BBQ chicken salad with creamy avocado dressing, you’ll need:

For the Chicken

  • 2 chicken breasts
  • 1/2 cup BBQ sauce (low sugar preferred)
  • 1 teaspoon olive oil
  • Salt and black pepper

For the Salad Base

  • 1 head romaine lettuce, chopped
  • 1 cup cherry tomatoes, halved
  • 1 cup corn kernels
  • 1 cucumber, diced
  • 1/4 red onion, thinly sliced
  • Optional: black beans or avocado chunks

For Creamy Avocado Dressing

  • 1 ripe avocado
  • 2 tablespoons Greek yogurt
  • 1 tablespoon lime juice
  • 1 garlic clove
  • 2–3 tablespoons water (to thin)
  • Salt and pepper to taste

Ingredient Notes and Substitutions

Understanding your ingredients helps perfect this BBQ chicken salad with creamy avocado dressing.

Chicken

Grilled chicken gives the best smoky flavor, but baked or air-fried works too.

Avocado Dressing

Use a ripe avocado for the creamiest texture and best flavor.

Vegetables

Fresh, crisp vegetables are key for texture contrast.

Step-by-Step Instructions

1. Cook the Chicken

Season chicken with salt and pepper, then grill or pan-cook until fully done.

2. Add BBQ Sauce

Brush BBQ sauce over the chicken and let it caramelize slightly.

3. Prepare the Avocado Dressing

Blend avocado, Greek yogurt, lime juice, garlic, and water until smooth.

4. Chop the Vegetables

Cut all vegetables into bite-sized pieces for a chopped salad feel.

5. Assemble the Salad

Combine greens, vegetables, and sliced BBQ chicken in a large bowl.

Tips for Perfect Results

To make the best BBQ chicken salad with creamy avocado dressing, follow these tips:

  • Use ripe avocado for smooth dressing
  • Don’t overdress the salad
  • Let chicken rest before slicing
  • Add lime juice to prevent avocado browning
  • Keep vegetables chilled for maximum crunch

These small details make a big difference in freshness and flavor.

Variations to Try

This recipe is easy to customize.

Spicy Version

Add jalapeños or spicy BBQ sauce.

Keto Version

Skip corn and beans for a low-carb option.

Extra Protein Version

Add boiled eggs or grilled shrimp.

What to Serve With BBQ Chicken Salad

This BBQ chicken salad with creamy avocado dressing pairs well with:

  • Sweet potato fries
  • Garlic bread
  • Cornbread
  • Fresh fruit salad
  • Iced tea or lemonade

These sides enhance the smoky BBQ flavor perfectly.

Storage & Reheating Tips

This salad is great for meal prep.

Storage

  • Store chicken, vegetables, and dressing separately for up to 3 days

Reheating

  • Reheat chicken before serving
  • Add avocado dressing fresh to avoid browning

Common Mistakes to Avoid

Avoid these mistakes when making BBQ chicken salad with creamy avocado dressing:

  • Using unripe avocado for dressing
  • Overcooking chicken
  • Adding dressing too early
  • Using too much BBQ sauce
  • Cutting vegetables unevenly

Avoiding these ensures perfect flavor and texture.

FAQs

Can I use store-bought BBQ chicken?

Yes, rotisserie or pre-cooked BBQ chicken works well.

Is avocado dressing healthy?

Yes, it’s rich in healthy fats and nutrients.

Can I make it ahead of time?

Yes, but store dressing separately.

What can I use instead of Greek yogurt?

Sour cream or dairy-free yogurt works too.

Final Thoughts

This BBQ chicken salad with creamy avocado dressing is the perfect combination of smoky, creamy, and fresh. It’s a nutritious, high-protein meal that feels indulgent while still being healthy and balanced.

Whether you’re meal prepping or making a quick dinner, this recipe delivers bold flavor and satisfying texture every single time.

Healthy BBQ Chicken Chopped Salad Recipe (Fresh, High-Protein & Easy Meal Prep)

If you’re craving something fresh, filling, and packed with bold flavor, this healthy BBQ chicken chopped salad recipe is exactly what you need. It combines smoky BBQ chicken, crisp chopped vegetables, and a light, tangy dressing that brings everything together beautifully.

Unlike heavy comfort foods, this salad gives you that satisfying BBQ taste without feeling overly rich or unhealthy. It’s perfect for lunch, dinner, or weekly meal prep, especially when you want something quick, nutritious, and full of flavor.

Why You’ll Love This Healthy BBQ Chicken Chopped Salad Recipe

This healthy BBQ chicken chopped salad recipe is a perfect balance of flavor and nutrition.

  • High in protein: BBQ chicken keeps you full and satisfied
  • Fresh and crunchy: Loaded with chopped vegetables
  • Quick and easy: Ready in under 30 minutes
  • Meal prep friendly: Stays fresh for days
  • Bold BBQ flavor: Smoky, sweet, and tangy

It’s the kind of salad that doesn’t feel like a compromise—it feels like a real meal.

Ingredients for Healthy BBQ Chicken Chopped Salad Recipe

To make this healthy BBQ chicken chopped salad recipe, you’ll need:

For the Chicken

  • 2 large chicken breasts
  • 1/2 cup BBQ sauce (low sugar preferred)
  • 1 teaspoon olive oil
  • Salt and pepper

For the Salad Base

  • 1 head romaine lettuce, chopped
  • 1 cup cherry tomatoes, halved
  • 1 cup corn kernels (fresh or canned)
  • 1 cucumber, diced
  • 1 avocado, chopped
  • 1/4 red onion, thinly sliced
  • 1/2 cup black beans (optional)

For the Dressing

  • 2 tablespoons Greek yogurt
  • 1 tablespoon lime juice
  • 1 tablespoon BBQ sauce
  • Salt and pepper to taste

Ingredient Notes and Substitutions

Understanding your ingredients improves your healthy BBQ chicken chopped salad recipe.

BBQ Sauce

Choose a low-sugar BBQ sauce to keep it healthy.

Chicken

Grilled chicken adds smoky flavor, but baked or air-fried works too.

Vegetables

Use fresh, crunchy vegetables for the best texture contrast.

Step-by-Step Instructions

1. Cook the Chicken

Season chicken with salt and pepper, then grill or pan-cook until fully done.

2. Add BBQ Flavor

Brush BBQ sauce onto chicken and let it caramelize slightly.

3. Chop Ingredients

Dice all vegetables into small, even pieces for a true chopped salad texture.

4. Prepare Dressing

Mix Greek yogurt, lime juice, BBQ sauce, salt, and pepper.

5. Assemble Salad

Combine vegetables in a large bowl, add sliced BBQ chicken, and drizzle dressing.

Tips for Perfect Results

To make the best healthy BBQ chicken chopped salad recipe, follow these tips:

  • Chop ingredients evenly for better texture
  • Don’t overdress the salad
  • Let chicken rest before slicing
  • Use fresh lime juice for brightness
  • Add BBQ sauce gradually to control sweetness

These small steps improve both flavor and presentation.

Variations to Try

This recipe is easy to customize.

Spicy Version

Add jalapeños or spicy BBQ sauce.

Low-Carb Version

Skip corn and beans for a keto-friendly option.

Extra Protein Version

Add boiled eggs or extra chicken.

What to Serve With Healthy BBQ Chicken Chopped Salad

This healthy BBQ chicken chopped salad recipe pairs well with:

  • Sweet potato fries
  • Cornbread
  • Garlic toast
  • Fresh fruit
  • Iced tea or lemonade

These sides complement the smoky BBQ flavor perfectly.

Storage & Reheating Tips

This salad is great for meal prep.

Storage

  • Store chicken and vegetables separately for up to 3–4 days

Reheating

  • Reheat chicken before assembling salad
  • Keep dressing separate until serving

Common Mistakes to Avoid

Avoid these mistakes when making healthy BBQ chicken chopped salad recipe:

  • Using too much BBQ sauce
  • Cutting vegetables unevenly
  • Adding dressing too early
  • Overcooking chicken
  • Using soggy lettuce

Avoiding these ensures the best texture and flavor.

FAQs

Can I use store-bought rotisserie chicken?

Yes, it works great and saves time.

Is this salad good for weight loss?

Yes, it’s high in protein and fiber with balanced calories.

Can I make it ahead of time?

Yes, but store components separately for freshness.

What dressing works best?

Greek yogurt BBQ dressing is the healthiest option.

Final Thoughts

This healthy BBQ chicken chopped salad recipe is the perfect combination of smoky, fresh, and satisfying. It delivers all the bold BBQ flavor you love in a lighter, healthier format that works for busy weeknights and meal prep.

If you’re looking for a simple, high-protein salad that doesn’t feel boring, this recipe is a must-try.

Honey Hot Chicken Salad Recipe (Sweet, Spicy & Crispy Comfort Bowl)

If you love bold flavors that hit every craving at once, this honey hot chicken salad recipe is going to become a new favorite. It combines crispy chicken coated in a sweet and spicy honey hot sauce with fresh, crunchy greens and a creamy, flavorful dressing.

This salad isn’t your average “light meal”—it’s a full, satisfying bowl packed with texture, heat, sweetness, and freshness. It works perfectly for lunch, dinner, or even meal prep when you want something exciting but still balanced and wholesome.

Why You’ll Love This Honey Hot Chicken Salad Recipe

This honey hot chicken salad recipe brings together everything you want in a modern comfort salad.

  • Sweet and spicy flavor combo: Honey and hot sauce balance perfectly
  • Crispy chicken: Crunchy outside, juicy inside
  • Fresh and healthy base: Loaded with vegetables
  • Customizable: Easy to adjust heat and toppings
  • Restaurant-quality at home: Big flavor, simple steps

It’s the kind of salad that doesn’t feel like a salad—it feels like a full, satisfying meal.

Ingredients for Honey Hot Chicken Salad Recipe

To make this honey hot chicken salad recipe, you’ll need:

For the Chicken

  • 2 large chicken breasts
  • 1 cup buttermilk (optional for tenderness)
  • 1 cup flour
  • 1 teaspoon paprika
  • 1 teaspoon garlic powder
  • Salt and black pepper
  • Oil for frying or air frying

For Honey Hot Sauce

  • 1/3 cup honey
  • 2–3 tablespoons hot sauce
  • 1 tablespoon butter
  • 1 teaspoon chili flakes (optional)

For the Salad Base

  • Mixed greens or romaine lettuce
  • Cherry tomatoes
  • Cucumber slices
  • Shredded carrots
  • Red onion

Optional Dressing

  • Ranch or creamy yogurt dressing

Ingredient Notes and Substitutions

Understanding your ingredients helps elevate your honey hot chicken salad recipe.

Chicken Preparation

Buttermilk makes the chicken extra tender, but you can skip it if needed.

Hot Sauce Level

Adjust hot sauce depending on your spice tolerance.

Greens Choice

Romaine gives crunch, while mixed greens add variety and softness.

Step-by-Step Instructions

1. Prepare the Chicken

Marinate chicken in buttermilk (optional), then coat in seasoned flour mixture.

2. Cook the Chicken

Fry, bake, or air fry until crispy and fully cooked.

3. Make Honey Hot Sauce

In a small pan, melt butter and stir in honey and hot sauce until smooth.

4. Coat the Chicken

Toss crispy chicken in the warm honey hot sauce until evenly coated.

5. Assemble the Salad

Layer greens, vegetables, and sauced chicken in a large bowl.

Tips for Perfect Results

To make the best honey hot chicken salad recipe, follow these tips:

  • Double coat chicken for extra crispiness
  • Don’t overcrowd the pan while frying
  • Toss chicken in sauce right before serving
  • Keep vegetables cold for best crunch
  • Balance heat by adjusting honey and hot sauce

These details make a huge difference in flavor and texture.

Variations to Try

This recipe is easy to customize.

Extra Spicy Version

Add cayenne pepper or extra chili flakes.

Grilled Version

Swap crispy chicken for grilled chicken for a lighter option.

Wrap Version

Turn it into a honey hot chicken wrap with tortillas.

What to Serve With Honey Hot Chicken Salad

This honey hot chicken salad recipe pairs well with:

  • Garlic bread
  • Sweet potato fries
  • Cornbread
  • Fruit salad
  • Iced tea or lemonade

These sides complement the sweet and spicy flavors perfectly.

Storage & Reheating Tips

This salad is best enjoyed fresh but can be prepped ahead.

Storage

  • Store chicken, sauce, and salad separately for up to 3 days

Reheating

  • Reheat chicken in oven or air fryer to keep it crispy
  • Add sauce fresh before serving

Common Mistakes to Avoid

Avoid these mistakes when making honey hot chicken salad recipe:

  • Adding sauce too early (makes chicken soggy)
  • Overcrowding frying pan
  • Using wilted greens
  • Not seasoning chicken properly
  • Skipping texture balance

Avoiding these ensures a perfect salad every time.

FAQs

Can I bake the chicken instead of frying?

Yes, baking or air frying works great for a lighter version.

Is this salad very spicy?

It depends on how much hot sauce you add—you control the heat.

Can I meal prep this recipe?

Yes, but store components separately for best texture.

What dressing works best?

Ranch or creamy yogurt dressing pairs perfectly.

Final Thoughts

This honey hot chicken salad recipe is the perfect balance of crispy, sweet, spicy, and fresh. It transforms a simple salad into a bold, satisfying meal that feels indulgent but still wholesome.

Whether you’re cooking for yourself or sharing with family, this recipe delivers restaurant-quality flavor with simple ingredients and easy steps.

BEST Chicken Caesar Salad with Homemade Croutons (Crisp, Creamy & Restaurant-Quality at Home)

If you’re looking for a fresh, satisfying, and restaurant-quality salad you can easily make at home, this BEST chicken Caesar salad with homemade croutons is exactly what you need. It combines crisp romaine lettuce, juicy seasoned chicken, crunchy golden croutons, and a rich, creamy Caesar dressing that ties everything together perfectly.

Unlike store-bought versions, this homemade recipe delivers bold flavor and freshness in every bite. The homemade croutons alone take this salad to another level, adding a buttery crunch that makes it irresistible. Whether you’re making it for lunch, dinner, or meal prep, this is a recipe you’ll keep coming back to.

Why You’ll Love This BEST Chicken Caesar Salad with Homemade Croutons

This BEST chicken Caesar salad with homemade croutons is everything a great salad should be:

  • Crisp and refreshing: Fresh romaine lettuce in every bite
  • Protein-packed: Juicy grilled chicken makes it filling
  • Crunchy homemade croutons: Way better than store-bought
  • Creamy dressing: Rich, tangy, and flavorful
  • Easy to customize: Perfect for meal prep or dinner

It’s a classic recipe upgraded for maximum flavor and texture.

Ingredients for BEST Chicken Caesar Salad with Homemade Croutons

To make this BEST chicken Caesar salad with homemade croutons, you’ll need:

For the Salad

  • 2 large chicken breasts
  • 1 large head romaine lettuce, chopped
  • 1/2 cup shaved Parmesan cheese

For Homemade Croutons

  • 3 cups day-old bread, cubed
  • 3 tablespoons olive oil
  • 2 cloves garlic, minced
  • 1/2 teaspoon salt
  • 1/2 teaspoon Italian seasoning

For Caesar Dressing

  • 1/2 cup mayonnaise
  • 2 tablespoons lemon juice
  • 2 teaspoons Dijon mustard
  • 1 teaspoon Worcestershire sauce
  • 1/3 cup grated Parmesan cheese
  • Salt and black pepper to taste

Ingredient Notes and Substitutions

Understanding your ingredients helps elevate your BEST chicken Caesar salad with homemade croutons.

Chicken

Grilled chicken adds smoky flavor, but baked or air-fried chicken works too.

Bread for Croutons

Use slightly stale bread for the crispiest homemade croutons.

Dressing

Traditional Caesar includes anchovy, but this version uses Worcestershire for a balanced flavor.

Step-by-Step Instructions

1. Prepare the Chicken

Season chicken with salt, pepper, and olive oil. Grill or pan-sear until fully cooked, then slice.

2. Make Homemade Croutons

Toss bread cubes with olive oil, garlic, salt, and seasoning. Bake until golden and crispy.

3. Prepare Caesar Dressing

Whisk mayonnaise, lemon juice, mustard, Worcestershire, and Parmesan until smooth.

4. Assemble the Salad

Combine romaine lettuce, chicken, croutons, and Parmesan cheese in a large bowl.

5. Add Dressing

Toss everything together until evenly coated and serve immediately.

Tips for Perfect Results

To make the BEST chicken Caesar salad with homemade croutons, follow these tips:

  • Use cold, crisp romaine lettuce
  • Don’t overdress the salad
  • Bake croutons until golden but not burnt
  • Let chicken rest before slicing
  • Toss salad right before serving

These steps ensure perfect texture and flavor.

Variations to Try

This salad is easy to customize.

Spicy Version

Add chili flakes or spicy grilled chicken.

Bacon Caesar

Add crispy bacon bits for extra flavor.

Light Version

Use Greek yogurt instead of mayonnaise in dressing.

What to Serve With BEST Chicken Caesar Salad

This BEST chicken Caesar salad with homemade croutons pairs well with:

  • Soup (tomato or vegetable)
  • Garlic bread
  • Pasta dishes
  • Roasted vegetables
  • Fresh fruit sides

It can be a full meal or a side dish depending on portion size.

Storage & Reheating Tips

This salad is best fresh but can be prepped ahead.

Storage

  • Store chicken, dressing, and lettuce separately for up to 3 days

Reheating

  • Reheat chicken separately if desired
  • Assemble salad fresh before serving

Common Mistakes to Avoid

Avoid these mistakes when making BEST chicken Caesar salad with homemade croutons:

  • Using soggy lettuce
  • Overdressing the salad
  • Burning croutons
  • Not seasoning chicken properly
  • Assembling too early

Avoiding these ensures maximum freshness and crunch.

FAQs

Can I use store-bought croutons?

Yes, but homemade croutons taste much better.

Is Caesar salad healthy?

It can be, especially when made fresh with controlled dressing.

Can I make it ahead of time?

Yes, but store components separately.

What protein can I use instead of chicken?

Shrimp, steak, or tofu all work well.

Final Thoughts

This BEST chicken Caesar salad with homemade croutons is a timeless classic made even better with fresh ingredients and homemade touches. Crisp lettuce, juicy chicken, crunchy croutons, and creamy dressing come together for a truly satisfying meal.

Whether you’re making it for lunch, dinner, or meal prep, this recipe delivers restaurant-quality flavor with simple ingredients you can trust.