Cheesy Taco Potatoes

If you’re craving comfort food with a Tex-Mex twist, cheesy taco potatoes are your new go-to dish. Imagine golden baked potatoes loaded with seasoned taco beef, smothered in gooey melted cheese, and finished with fresh toppings like salsa, sour cream, and green onions. It’s a fusion of classic baked potato comfort and bold taco flavors, all in one dish.

This recipe is perfect for busy weeknights, casual family dinners, or even game-day snacks. The combination of tender potato, seasoned meat, and creamy, melty cheese makes every bite irresistibly satisfying. Plus, it’s flexible enough to customize with your favorite toppings and heat levels.

Why You’ll Love This Recipe

There are so many reasons to try these cheesy taco potatoes:

  • Easy and quick to make with simple ingredients
  • Comfort food with a twist combining baked potato and taco flavors
  • Customizable toppings to suit your taste or dietary needs
  • Kid-friendly and family-approved
  • Perfect for meal prep—reheat leftovers easily without losing flavor

Whether you’re hosting a casual dinner or just craving a hearty snack, this dish delivers.
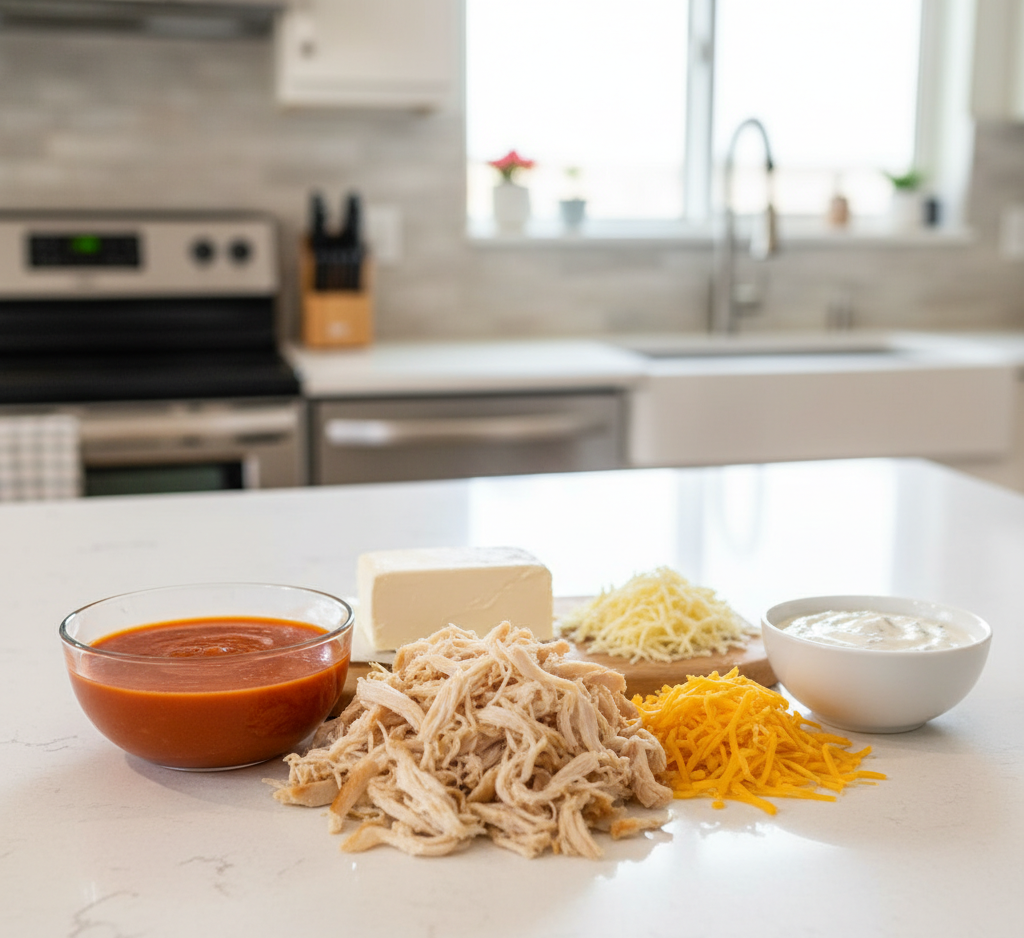
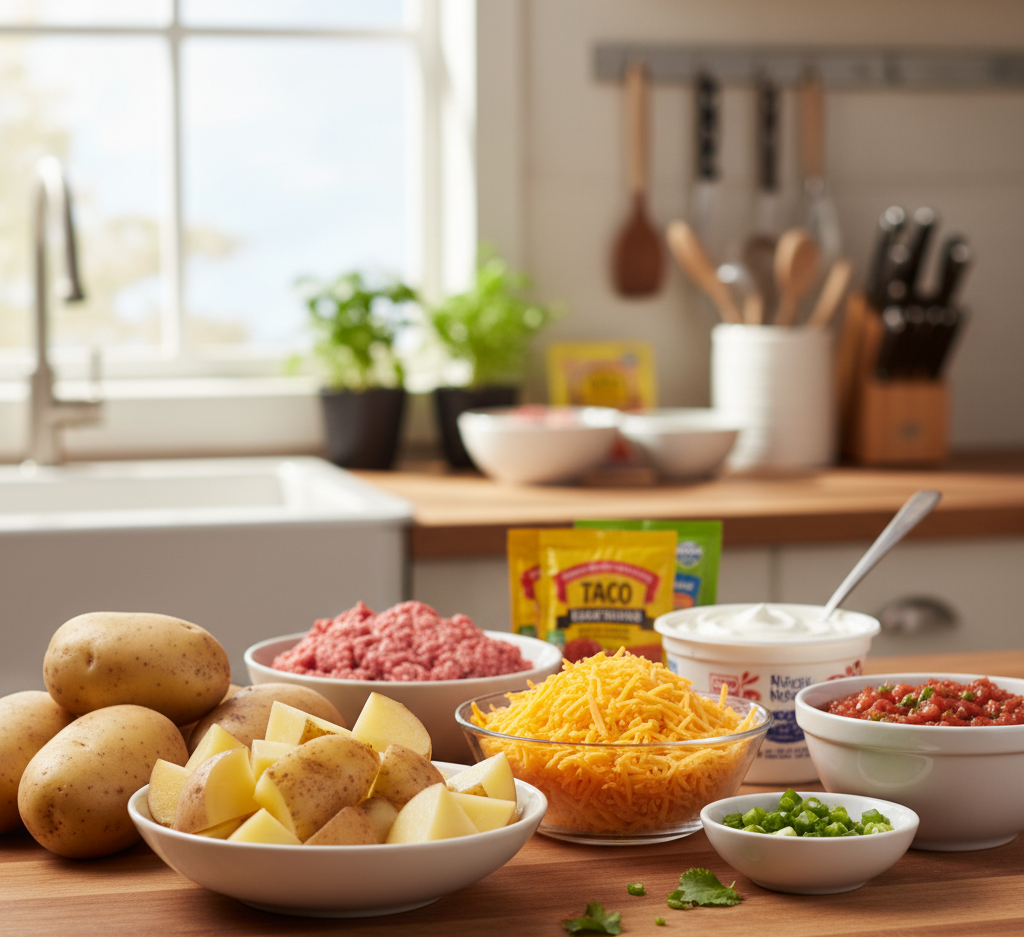
Ingredients

Here’s what you’ll need for the ultimate cheesy taco potatoes:

For the Potatoes:

  • 4 large russet potatoes
  • 2 tablespoons olive oil
  • Salt and pepper, to taste

For the Taco Beef:

  • 1 pound ground beef (or turkey/chicken)
  • 1 packet taco seasoning (or homemade mix)
  • 1/4 cup water

For Toppings:

  • 1 cup shredded cheddar or Mexican blend cheese
  • 1/2 cup sour cream
  • 1/2 cup salsa
  • 1/4 cup chopped green onions
  • Optional: diced tomatoes, jalapeños, black olives, avocado

Ingredient Notes

Choosing the right ingredients makes all the difference:

  • Potatoes: Russet potatoes work best for fluffy interiors that hold toppings well
  • Cheese: Cheddar, Monterey Jack, or a Mexican blend melts beautifully
  • Taco seasoning: Homemade allows you to control spice levels
  • Toppings: Fresh ingredients like green onions or avocado add texture and brightness

Step-by-Step Instructions

1. Prepare the Potatoes

Preheat oven to 400°F (200°C). Scrub potatoes, rub with olive oil, and sprinkle with salt. Bake directly on the oven rack for 45–50 minutes until tender.

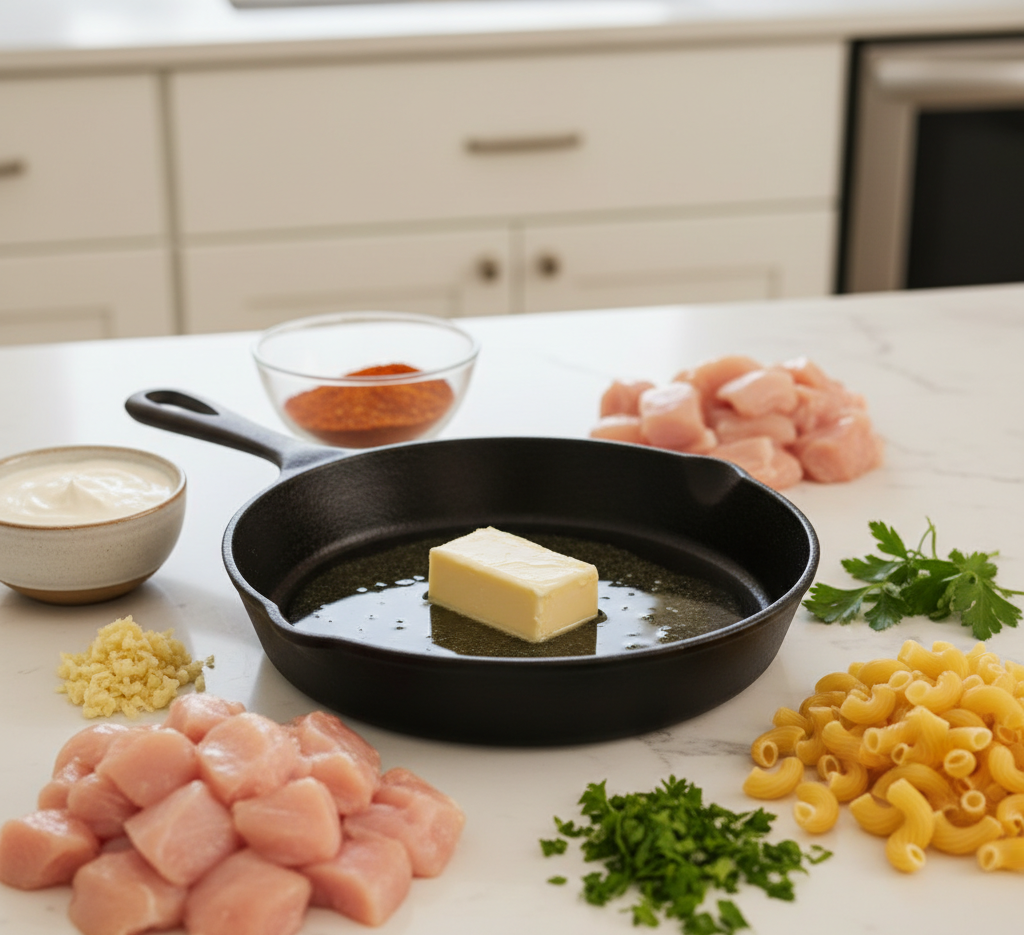
2. Cook the Taco Beef

While potatoes bake, cook ground beef in a skillet over medium heat. Drain excess fat, add taco seasoning and water, simmer for 5 minutes until well combined.

3. Assemble the Potatoes

Once baked, slice the potatoes lengthwise. Use a fork to fluff the inside. Top each potato with taco beef and a generous sprinkle of shredded cheese.
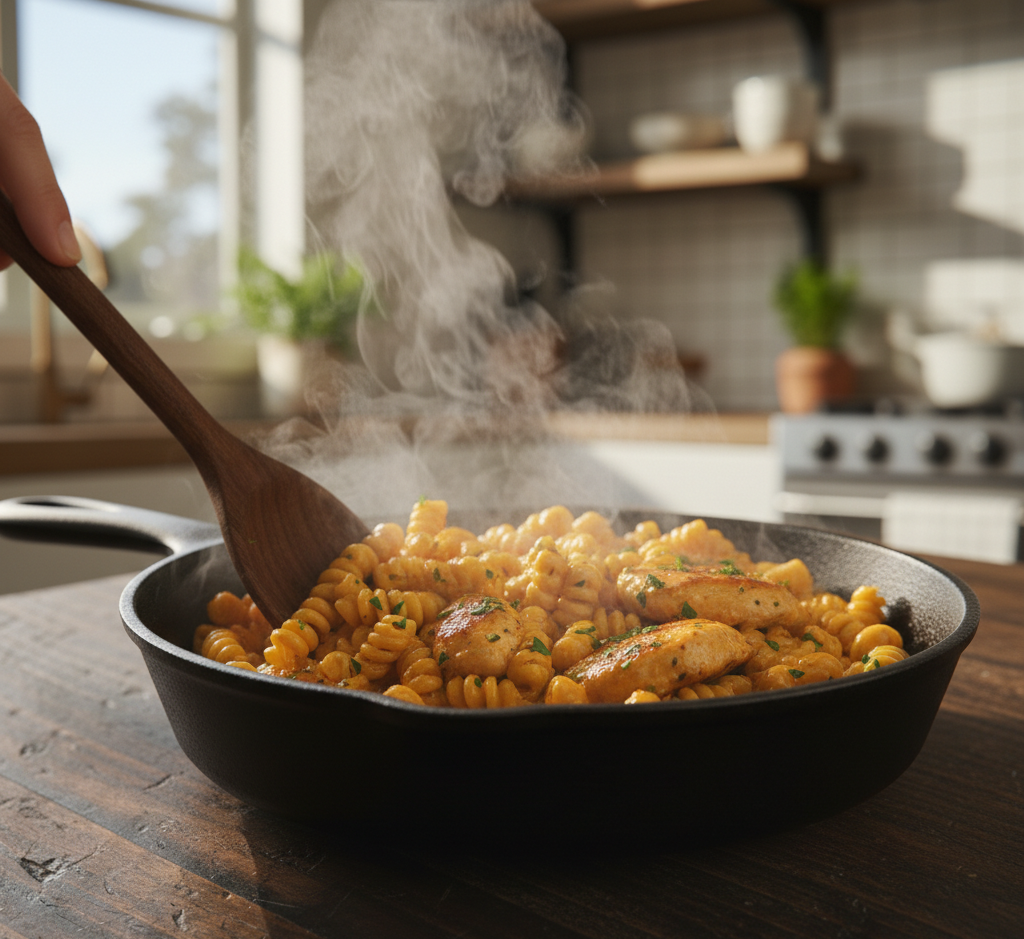
4. Melt the Cheese

Return the topped potatoes to the oven for 5 minutes or until cheese is melted and bubbly.

5. Add Fresh Toppings

Remove from oven and add sour cream, salsa, green onions, and any optional toppings. Serve hot.

Tips for Perfect Results

  • Bake potatoes fully—undercooked potatoes won’t support toppings well
  • Don’t overload toppings—balance ensures flavors shine
  • Cheese melt tip: Cover with foil if cheese browns too quickly
  • Use warm beef to help cheese melt evenly

These tips ensure each cheesy taco potato is perfectly baked and flavorful.

Variations

Make these cheesy taco potatoes your own:

  • Vegetarian: Use black beans, lentils, or sautéed mushrooms instead of meat
  • Spicy kick: Add chopped jalapeños or hot sauce to the beef
  • Extra cheesy: Combine multiple cheeses like Monterey Jack and Pepper Jack
  • Loaded version: Add corn, diced bell peppers, or guacamole for more texture


What to Serve With It

Cheesy taco potatoes pair wonderfully with:

  • Fresh garden salad or coleslaw
  • Mexican rice or quinoa
  • Corn on the cob
  • A refreshing lime or citrus beverage

This makes them perfect for casual dinners or backyard gatherings.


Storage & Reheating

  • Refrigerate: Store leftover potatoes in an airtight container for up to 3 days
  • Reheat: Microwave or bake at 350°F (175°C) until warmed through
  • Avoid soggy potatoes: Reheat without adding additional moisture

Proper storage preserves texture and flavor for quick weekday meals.


Common Mistakes to Avoid

  • Using small potatoes—they can dry out or cook unevenly
  • Overcrowding the oven—potatoes need space to crisp
  • Skipping seasoning—both potatoes and beef need salt for balanced flavor
  • Not preheating oven—affects cooking time and texture

Following these pointers ensures every potato is fluffy, cheesy, and perfectly seasoned.

FAQs

Can I make these ahead of time?

Yes! Bake potatoes and cook beef ahead. Assemble and add fresh toppings just before serving.

Can I use sweet potatoes?

Absolutely! Sweet potatoes add a natural sweetness that pairs nicely with taco seasoning.

Can I freeze cheesy taco potatoes?

Yes, but best to freeze potatoes and beef separately to maintain texture.

Can I make them vegetarian?

Yes, substitute beans, lentils, or sautéed veggies for the meat.

Final Thoughts

Cheesy taco potatoes are a versatile, comforting, and flavor-packed dish that’s easy to make for any occasion. The combination of fluffy baked potatoes, seasoned taco beef, and gooey cheese topped with fresh garnishes makes every bite a delight.

Whether you’re serving them for a quick weeknight meal, a family gathering, or a game-day snack, this dish hits all the right notes of flavor and satisfaction. These potatoes are sure to become a family favorite you’ll make over and over.


Iced Espresso Coffee Smoothie Recipes

Nothing jumpstarts your morning quite like a perfectly chilled coffee beverage. If you’re craving something that’s both refreshing and energizing, these iced espresso coffee smoothie recipes are exactly what you need. Combining the rich, bold flavor of espresso with creamy ingredients and a hint of sweetness, these smoothies are a perfect pick-me-up for any time of day.

Whether you want a quick breakfast on-the-go or a cool treat to beat the summer heat, these smoothies are quick to whip up and endlessly customizable. The combination of icy texture, bold espresso, and creamy base makes them a true delight for coffee lovers.

Why You’ll Love These Recipes

There are countless reasons to try these iced espresso coffee smoothie recipes:

  • Quick and easy to make in under 10 minutes
  • Customizable to suit your taste—dairy or non-dairy options
  • Perfectly balanced flavors—bold espresso, creamy base, sweetener
  • Energizing and refreshing—ideal for mornings or afternoon pick-me-ups
  • Great for meal prep—make a batch and store for a few days

With these smoothies, you get all the flavor of your favorite coffeehouse drink without leaving home.

Ingredients

Here’s a basic set of ingredients for your iced espresso coffee smoothies:

  • 1 cup brewed espresso (cooled)
  • 1 cup milk (dairy or plant-based)
  • 1–2 tablespoons sweetener (honey, maple syrup, or agave)
  • 1 frozen banana (adds creaminess)
  • 1/2 cup ice cubes
  • Optional add-ins:
    • Cocoa powder or chocolate syrup
    • Peanut butter or almond butter
    • Protein powder
    • Vanilla extract

Ingredient Notes

Each ingredient plays an important role in creating the perfect iced espresso coffee smoothie:

  • Espresso: Provides the bold coffee flavor and caffeine kick
  • Frozen banana: Adds natural sweetness and creamy texture
  • Milk or milk alternative: Controls creaminess and can be adjusted for richness
  • Sweeteners: Adjust to taste; maple syrup adds a subtle depth
  • Optional flavor boosters: Peanut butter, cocoa, or protein powder can make it more indulgent or meal-worthy

Step-by-Step Instructions

1. Brew and Chill Espresso

Brew a strong cup of espresso and let it cool to room temperature, or use cold-brewed espresso.

2. Blend the Base

In a high-speed blender, combine cooled espresso, milk, frozen banana, and sweetener. Blend until smooth.

3. Add Ice

Add ice cubes gradually and blend again until the smoothie reaches your preferred consistency.

4. Customize

Add optional flavorings such as chocolate syrup, peanut butter, or a scoop of protein powder, blending until smooth.

5. Serve Immediately

Pour into a tall glass, garnish with whipped cream, chocolate shavings, or a sprinkle of cinnamon. Enjoy immediately for the best texture.

Tips for Perfect Results

To get your iced espresso coffee smoothie recipes just right every time:

  • Use frozen banana for a naturally creamy texture without ice cream
  • Adjust ice quantity to control thickness
  • Sweeten gradually—espresso adds slight bitterness
  • Blend on high speed to fully incorporate ingredients
  • Use cold espresso or cold brew to prevent melting ice

These tips ensure your smoothie is creamy, balanced, and perfectly chilled.

Variations

Make these iced espresso coffee smoothie recipes your own with creative twists:

Mocha Espresso Smoothie

  • Add 1 tablespoon cocoa powder or chocolate syrup for a chocolatey kick

Nutty Espresso Smoothie

  • Blend in 1 tablespoon peanut or almond butter for richness

Protein-Packed Espresso Smoothie

  • Add a scoop of vanilla or chocolate protein powder for a filling drink

Vegan-Friendly Option

  • Use almond, oat, or soy milk and maple syrup as a sweetener

What to Serve With It

These smoothies pair wonderfully with light breakfasts or snacks:

  • Fresh fruit or fruit salad
  • Granola bars or overnight oats
  • Muffins or coffee cake for a brunch setting
  • A handful of nuts for a protein boost

They’re versatile enough to be enjoyed on their own or alongside your favorite breakfast items.

Storage & Reheating

  • Refrigerate: Store smoothies in an airtight container for up to 24 hours. Shake before drinking as separation may occur.
  • Freeze: Pour into ice cube trays for mini smoothie cubes to blend later.
  • Do not heat: These smoothies are best served chilled.

Proper storage keeps the flavors fresh and prevents ice from melting too quickly.

Common Mistakes to Avoid

When making iced espresso coffee smoothie recipes, watch out for these common pitfalls:

  • Using hot espresso—it melts ice too fast and dilutes the flavor
  • Over-blending—can make the smoothie too thin
  • Forgetting the banana or frozen element—results in less creamy texture
  • Adding too much sweetener—can overpower the espresso flavor

Avoiding these mistakes ensures a perfectly balanced, creamy iced coffee smoothie.

FAQs

Can I use regular brewed coffee instead of espresso?

Yes, but espresso provides a stronger, richer flavor. You may need to adjust the coffee-to-milk ratio.

Can I make this smoothie ahead of time?

You can prepare the base (coffee + banana + milk) and store it in the fridge for up to 12 hours, but add ice just before blending.

Can I use plant-based milk?

Absolutely! Almond, oat, soy, or coconut milk all work well.

Can I add protein powder or supplements?

Yes, protein powder, collagen, or superfood powders can be blended in for added nutrition.

Final Thoughts

These iced espresso coffee smoothie recipes are the perfect way to enjoy coffee in a refreshing, creamy, and energizing form. Quick, easy, and endlessly customizable, they’re ideal for mornings, afternoon pick-me-ups, or a cool treat on hot days.

Experiment with flavors, toppings, and add-ins to create your own favorite version. Once you try these smoothies, they’ll become a go-to recipe you’ll crave again and again.

Image Prompt: A tall glass of iced espresso coffee smoothie with whipped cream and chocolate drizzle, set on a wooden kitchen counter with natural sunlight streaming in, shallow depth of field, 4k resolution.


Easy and Delicious Coffee Cake Cheesecake You’ll Crave Forever

If you’ve ever found yourself torn between a slice of classic coffee cake and a rich, creamy cheesecake, this easy and delicious coffee cake cheesecake is the ultimate solution. It combines the best of both worlds: a velvety smooth cheesecake base layered with warm cinnamon streusel and topped with a buttery crumb that’s simply irresistible.

This dessert is perfect for brunch gatherings, holiday celebrations, or anytime you want to impress your guests with something truly special. The flavors are comforting yet indulgent, and the textures—from creamy to crumbly—make every bite unforgettable.

Why You’ll Love This Recipe

This easy and delicious coffee cake cheesecake stands out for so many reasons.

  • Two desserts in one—cheesecake and coffee cake combined
  • Rich and creamy texture with a crunchy topping
  • Perfect for any occasion from brunch to dessert
  • Make-ahead friendly for stress-free entertaining
  • Beautiful presentation that looks bakery-quality

It’s the kind of dessert people will ask you to make again and again.

Ingredients

To make this incredible easy and delicious coffee cake cheesecake, you’ll need:

Crust:

  • 2 cups graham cracker crumbs
  • 1/2 cup melted butter
  • 2 tablespoons sugar

Cheesecake Filling:

  • 24 oz cream cheese (softened)
  • 3/4 cup granulated sugar
  • 3 large eggs
  • 1 teaspoon vanilla extract
  • 1/2 cup sour cream

Streusel Filling & Topping:

  • 1 cup brown sugar
  • 1 cup all-purpose flour
  • 1 tablespoon cinnamon
  • 1/2 cup cold butter (cubed)

Ingredient Notes

The quality of your ingredients makes all the difference in this easy and delicious coffee cake cheesecake.

  • Cream cheese: Use full-fat for the creamiest texture
  • Cinnamon: Fresh, high-quality cinnamon enhances flavor
  • Butter: Cold butter is key for a crumbly streusel
  • Graham crackers: Provide a sweet, slightly crunchy base

Step-by-Step Instructions

1. Prepare the Crust

Preheat your oven to 325°F (160°C). Mix graham cracker crumbs, melted butter, and sugar. Press into the bottom of a springform pan and bake for 8–10 minutes.

2. Make the Streusel

In a bowl, combine brown sugar, flour, and cinnamon. Cut in cold butter until crumbly.

3. Prepare the Cheesecake Filling

Beat cream cheese and sugar until smooth. Add eggs one at a time, then mix in vanilla and sour cream.

4. Assemble the Layers

Pour half of the cheesecake filling over the crust. Add a layer of streusel, then the remaining filling. Top with more streusel.

5. Bake

Bake for 50–60 minutes, or until the center is set but slightly jiggly.

6. Cool and Chill

Let the cheesecake cool at room temperature, then refrigerate for at least 4 hours or overnight.

7. Serve

Slice and serve chilled or slightly at room temperature.

Tips for Perfect Results

To make the best easy and delicious coffee cake cheesecake, keep these tips in mind:

  • Don’t overmix the batter to avoid cracks
  • Use room temperature ingredients for smooth blending
  • Bake in a water bath for extra creaminess
  • Cool gradually to prevent cracking

These techniques ensure a flawless, bakery-quality cheesecake.

Variations

This easy and delicious coffee cake cheesecake can be customized to suit your taste.

Add Nuts

  • Mix chopped pecans or walnuts into the streusel

Flavor Twist

  • Add a swirl of caramel or maple syrup

Chocolate Version

  • Add mini chocolate chips to the filling

Gluten-Free Option

  • Use gluten-free graham crackers and flour

What to Serve With It

This dessert pairs beautifully with:

  • Freshly brewed coffee or cappuccino
  • A drizzle of caramel sauce
  • Fresh berries for a light contrast
  • Whipped cream on the side

It’s especially perfect for brunch spreads or holiday tables.

Storage & Reheating

Keep your easy and delicious coffee cake cheesecake fresh with these tips:

  • Refrigerate: Store in an airtight container for up to 5 days
  • Freeze: Wrap slices tightly and freeze for up to 2 months
  • Serve chilled or slightly warmed depending on preference

Proper storage ensures the texture stays creamy and delicious.

Common Mistakes to Avoid

Avoid these common issues when making easy and delicious coffee cake cheesecake:

  • Overbaking (causes dryness and cracks)
  • Skipping chill time
  • Using cold ingredients
  • Not pressing the crust firmly enough

A little attention to detail goes a long way.

FAQs

Can I make this cheesecake ahead of time?

Yes! It’s actually better when made a day ahead.

Do I need a water bath?

It’s optional, but it helps prevent cracks and ensures a creamy texture.

Can I use a different crust?

Absolutely! Try a cookie crust or digestive biscuits.

How do I know when it’s done?

The center should be slightly jiggly but set around the edges.

Final Thoughts

This easy and delicious coffee cake cheesecake is the ultimate dessert mashup—rich, creamy, and layered with warm cinnamon goodness. It’s a recipe that feels both comforting and luxurious, making it perfect for any occasion.

Once you try it, you’ll understand why it’s so crave-worthy. Whether you’re serving it at a brunch, holiday gathering, or just treating yourself, this cheesecake is guaranteed to impress and satisfy every sweet tooth.

Savory Cheesy Baked Dumpling Lasagna

If you’re looking for a creative comfort food mashup that’s both easy and incredibly satisfying, this savory cheesy baked dumpling lasagna is about to become your new obsession. Imagine replacing traditional lasagna noodles with soft, pillowy dumplings layered between rich marinara sauce and gooey melted cheese—every bite is pure comfort.

This dish combines the hearty, familiar flavors of Italian lasagna with the convenience and texture of dumplings, making it perfect for busy weeknights or cozy family dinners. It’s a fun twist that feels gourmet but is surprisingly simple to make.

Why You’ll Love This Recipe

This savory cheesy baked dumpling lasagna checks all the boxes for a perfect comfort meal.

  • Unique twist on classic lasagna
  • Quick and easy preparation using frozen dumplings
  • Rich, cheesy, and hearty
  • Perfect for feeding a crowd
  • Customizable with different flavors and fillings

It’s the kind of dish that feels familiar yet exciting at the same time.

Ingredients

Here’s what you’ll need to make this delicious savory cheesy baked dumpling lasagna:

  • 1 bag frozen dumplings (potstickers or gyoza)
  • 2 cups marinara sauce
  • 1 cup ricotta cheese
  • 2 cups shredded mozzarella cheese
  • 1/2 cup grated Parmesan cheese
  • 1/2 pound ground beef or sausage (optional)
  • 1 teaspoon Italian seasoning
  • 2 cloves garlic (minced)
  • Salt and pepper to taste
  • Fresh basil or parsley for garnish

Ingredient Notes

The beauty of this savory cheesy baked dumpling lasagna is its flexibility and bold flavor.

  • Dumplings: Use chicken, pork, or veggie dumplings based on preference
  • Marinara sauce: Choose a high-quality sauce for the best flavor
  • Ricotta cheese: Adds creaminess between layers
  • Mozzarella: Creates that classic cheesy stretch
  • Protein: Ground beef or sausage adds extra heartiness

Step-by-Step Instructions

1. Preheat the Oven

Preheat your oven to 375°F (190°C) and lightly grease a baking dish.

2. Prepare the Sauce

In a skillet, cook ground beef or sausage (if using) until browned. Add garlic, marinara sauce, and Italian seasoning. Simmer for a few minutes.

3. Layer the Dish

Spread a thin layer of sauce on the bottom of the dish. Add a layer of dumplings, followed by ricotta, mozzarella, and sauce.

4. Repeat Layers

Continue layering dumplings, cheese, and sauce until all ingredients are used, finishing with a generous layer of mozzarella and Parmesan on top.

5. Bake

Cover with foil and bake for 25 minutes. Remove foil and bake an additional 10–15 minutes until bubbly and golden.

6. Rest and Serve

Let the lasagna rest for 10 minutes before slicing. Garnish with fresh herbs and serve warm.

Tips for Perfect Results

To get the most out of your savory cheesy baked dumpling lasagna, keep these tips in mind:

  • Don’t thaw dumplings beforehand—they hold their shape better frozen
  • Use enough sauce to keep the dish moist
  • Cover while baking to prevent over-browning
  • Let it rest before cutting for clean slices

These tips ensure a perfectly cooked, flavorful dish every time.


Variations

One of the best parts about savory cheesy baked dumpling lasagna is how easy it is to customize.

Vegetarian Version

  • Use veggie dumplings and add spinach or mushrooms

Spicy Twist

  • Add red pepper flakes or spicy marinara

Alfredo Style

  • Swap marinara for Alfredo sauce

Asian-Inspired Fusion

  • Use soy-based sauce and sesame oil for a unique flavor

What to Serve With It

This hearty savory cheesy baked dumpling lasagna pairs well with lighter sides:

  • Fresh green salad
  • Garlic bread
  • Roasted vegetables
  • Light vinaigrette dishes

These sides help balance the richness of the main dish.

Storage & Reheating

This dish stores beautifully, making it great for leftovers.

  • Refrigerate: Store in an airtight container for up to 4 days
  • Freeze: Freeze portions for up to 2 months
  • Reheat: Warm in the oven at 350°F or microwave individual servings

Add a bit of sauce before reheating to keep it moist.

Common Mistakes to Avoid

Avoid these common pitfalls when making savory cheesy baked dumpling lasagna:

  • Using too little sauce (can dry out the dish)
  • Overbaking (leads to tough dumplings)
  • Skipping the resting time
  • Overloading layers unevenly

Paying attention to these details makes all the difference.

FAQs

Can I use fresh dumplings instead of frozen?

Yes, but reduce the baking time slightly to avoid overcooking.

What type of dumplings work best?

Potstickers or gyoza with sturdy wrappers work best.

Can I make this ahead of time?

Absolutely! Assemble it ahead and refrigerate until ready to bake.

Is this freezer-friendly?

Yes, it freezes well—just thaw and reheat before serving.

Final Thoughts

This savory cheesy baked dumpling lasagna is the ultimate comfort food fusion—combining familiar flavors with a fun, creative twist. It’s rich, cheesy, and incredibly satisfying, making it perfect for both casual dinners and special occasions.

Once you try it, you’ll see how easy and versatile it is. Whether you stick to the classic version or experiment with variations, this dish is sure to become a favorite in your recipe rotation.

BBQ Chicken Pasta Salad: A Delightful Summer Dish!

When the weather warms up and you’re craving something fresh yet satisfying, this BBQ chicken pasta salad is exactly what you need. It combines smoky barbecue chicken, tender pasta, crisp veggies, and a creamy, tangy dressing into one irresistible dish that screams summer.

Perfect for backyard cookouts, potlucks, or easy weeknight dinners, this recipe is both hearty and refreshing. It’s one of those dishes that feels indulgent yet balanced, with bold flavors and vibrant textures in every bite. If you love BBQ and pasta salad, this fusion is going to become a staple in your kitchen.

Why You’ll Love This Recipe

This BBQ chicken pasta salad is a must-make for so many reasons:

  • Perfect summer dish for gatherings and picnics
  • Loaded with flavor from smoky BBQ sauce and creamy dressing
  • Easy to prepare ahead of time
  • Great use for leftover chicken
  • Balanced textures—creamy, crunchy, and tender

It’s the kind of dish that disappears quickly at any event.

Ingredients

To make this flavorful BBQ chicken pasta salad, you’ll need:

  • 12 oz pasta (rotini or penne)
  • 2 cups cooked chicken (grilled or shredded)
  • 1/2 cup BBQ sauce
  • 1/2 cup mayonnaise
  • 1/4 cup sour cream
  • 1 cup corn (fresh, canned, or grilled)
  • 1/2 cup cherry tomatoes (halved)
  • 1/4 cup red onion (finely chopped)
  • 1/2 cup shredded cheddar cheese
  • 2 tablespoons fresh cilantro (chopped)
  • Salt and pepper to taste

Ingredient Notes

The secret to a standout BBQ chicken pasta salad lies in using fresh, flavorful ingredients.

  • Chicken: Grilled chicken adds a smoky depth, but rotisserie works great too
  • BBQ sauce: Choose your favorite—sweet, smoky, or spicy
  • Pasta: Short pasta shapes hold the dressing best
  • Corn: Grilled corn adds extra flavor and texture
  • Cheese: Sharp cheddar gives a bold, savory bite

Step-by-Step Instructions

1. Cook the Pasta

Bring a large pot of salted water to a boil and cook the pasta according to package directions. Drain and let cool completely.

2. Prepare the Chicken

If not already cooked, grill or sauté your chicken, then chop or shred it into bite-sized pieces. Toss with BBQ sauce until well coated.

3. Make the Dressing

In a large bowl, mix mayonnaise, sour cream, and a bit more BBQ sauce for extra flavor.

4. Combine Ingredients

Add cooled pasta, BBQ chicken, corn, tomatoes, red onion, and cheese to the bowl.

5. Toss and Chill

Mix everything until evenly coated. Refrigerate for at least 30 minutes before serving.

6. Garnish and Serve

Top with fresh cilantro and an extra drizzle of BBQ sauce if desired.

Tips for Perfect Results

To make your BBQ chicken pasta salad truly shine, keep these tips in mind:

  • Cool the pasta completely before mixing to avoid a soggy texture
  • Don’t overdress—add dressing gradually
  • Use fresh ingredients for the best flavor
  • Chill before serving to let flavors meld together

These simple steps make a big difference in taste and texture.

Variations

This BBQ chicken pasta salad is easy to customize based on your preferences.

Make It Spicy

  • Add jalapeños or spicy BBQ sauce

Add More Crunch

  • Include bell peppers or celery

Lighten It Up

  • Use Greek yogurt instead of mayonnaise

Go Tex-Mex Style

  • Add black beans and avocado

What to Serve With It

This BBQ chicken pasta salad pairs perfectly with classic summer dishes:

  • Grilled burgers or hot dogs
  • BBQ ribs or pulled pork
  • Fresh fruit salad
  • Lemonade or iced tea

It’s versatile enough to be a side dish or a main course.

Storage & Reheating

Here’s how to keep your BBQ chicken pasta salad fresh:

  • Refrigerate: Store in an airtight container for up to 3 days
  • Stir before serving to redistribute dressing
  • Avoid freezing—the texture won’t hold up

Since it’s served cold, no reheating is needed—just enjoy straight from the fridge.

Common Mistakes to Avoid

Avoid these common pitfalls when making BBQ chicken pasta salad:

  • Mixing hot pasta with dressing
  • Using too much sauce (can overpower flavors)
  • Skipping seasoning adjustments
  • Not chilling long enough

Taking a little extra care ensures the best results.

FAQs

Can I make BBQ chicken pasta salad ahead of time?

Yes! It actually tastes better after chilling for a few hours.

What’s the best pasta to use?

Rotini, penne, or bowtie pasta work best for holding the dressing.

Can I use store-bought rotisserie chicken?

Absolutely—it’s a great time-saving option.

How do I keep it from drying out?

Add a little extra dressing before serving if needed.

Final Thoughts

This BBQ chicken pasta salad is the ultimate summer dish—fresh, flavorful, and incredibly easy to make. It brings together smoky BBQ flavors and creamy pasta salad in a way that feels both comforting and refreshing.

Whether you’re hosting a backyard party or preparing a simple family meal, this recipe is sure to be a hit. Once you try it, you’ll see why it’s a go-to favorite for warm-weather cooking—and why it deserves a permanent spot in your recipe collection.

Heavenly Red Velvet Cinnamon Rolls: Indulgent Treats You’ll Love

There’s something truly magical about warm, freshly baked cinnamon rolls—but when you add a red velvet twist, they become absolutely unforgettable. These Heavenly Red Velvet Cinnamon Rolls are soft, fluffy, and filled with rich cocoa flavor, finished with a luscious cream cheese frosting that melts into every swirl.

Perfect for holidays, weekend brunch, or special occasions, these rolls combine the iconic flavor of red velvet cake with the comforting, gooey goodness of classic cinnamon rolls. If you’ve been looking for a show-stopping baked treat that tastes just as amazing as it looks, this recipe delivers in every way.

Why You’ll Love This Recipe

These Heavenly Red Velvet Cinnamon Rolls are more than just beautiful—they’re incredibly delicious and satisfying.

  • Soft, pillowy texture with rich flavor
  • Perfect balance of cocoa and cinnamon
  • Cream cheese frosting that melts into every bite
  • Ideal for special occasions or holidays
  • Make-ahead friendly for convenience

They’re guaranteed to impress anyone lucky enough to try them.

  • Ingredients

To make these irresistible Heavenly Red Velvet Cinnamon Rolls, you’ll need:

Dough:

  • 3 1/2 cups all-purpose flour
  • 1/4 cup granulated sugar
  • 1 packet active dry yeast
  • 1/2 cup warm milk
  • 1/4 cup unsalted butter (melted)
  • 1 large egg
  • 2 tablespoons cocoa powder
  • 1 teaspoon red food coloring
  • 1/2 teaspoon salt

Filling:

  • 1/2 cup brown sugar
  • 2 teaspoons cinnamon
  • 1/4 cup butter (softened)

Cream Cheese Frosting:

  • 8 oz cream cheese (softened)
  • 1/4 cup butter (softened)
  • 1 cup powdered sugar
  • 1 teaspoon vanilla extract

Ingredient Notes

Understanding your ingredients helps you create the best Heavenly Red Velvet Cinnamon Rolls every time.

  • Cocoa powder: Adds subtle chocolate flavor without overpowering
  • Red food coloring: Gives the signature red velvet look
  • Yeast: Make sure it’s fresh for proper rising
  • Cream cheese: Use full-fat for the richest frosting
  • Butter: Adds softness and flavor throughout


Step-by-Step Instructions

1. Activate the Yeast

In a bowl, combine warm milk and yeast. Let it sit for 5–10 minutes until foamy.

2. Make the Dough

Mix in sugar, melted butter, egg, cocoa powder, food coloring, and salt. Gradually add flour and knead until a soft dough forms.

3. Let It Rise

Place the dough in a greased bowl, cover, and let it rise for about 1–1.5 hours, or until doubled in size.

4. Prepare the Filling

Mix brown sugar and cinnamon. Roll out the dough into a rectangle and spread softened butter over it, then sprinkle the sugar mixture evenly.

5. Roll and Slice

Roll the dough tightly into a log and slice into even rolls.

6. Second Rise

Place rolls in a greased baking dish, cover, and let rise again for 30–45 minutes.

7. Bake

Bake at 350°F (175°C) for 20–25 minutes until cooked through.

8. Frost and Serve

Spread cream cheese frosting over warm rolls and serve immediately.

Tips for Perfect Results

Making perfect Heavenly Red Velvet Cinnamon Rolls is all about technique and patience.

  • Don’t overheat the milk—it can kill the yeast
  • Knead until smooth and elastic for soft rolls
  • Allow enough rising time for fluffy texture
  • Frost while warm so it melts beautifully

Taking your time ensures bakery-quality results at home.

Variations

These Heavenly Red Velvet Cinnamon Rolls are easy to customize for different tastes.

Add Chocolate Chips

  • Sprinkle mini chocolate chips into the filling

Make It Extra Creamy

  • Add a cream cheese layer inside the rolls

Holiday Twist

  • Shape into heart or wreath designs

Less Sweet Option

  • Reduce sugar in the frosting slightly

What to Serve With It

These indulgent rolls pair perfectly with:

  • Freshly brewed coffee or espresso
  • A glass of cold milk
  • Fresh fruit for balance
  • Scrambled eggs or breakfast sides

They work beautifully as a centerpiece for brunch spreads.

Storage & Reheating

Keep your Heavenly Red Velvet Cinnamon Rolls fresh with these tips:

  • Room temperature: Store for up to 2 days
  • Refrigerator: Up to 5 days in an airtight container
  • Freezer: Freeze unfrosted rolls for up to 2 months
  • Reheat: Warm in microwave for 15–20 seconds

Proper storage keeps them soft and delicious.

Common Mistakes to Avoid

Avoid these pitfalls when making Heavenly Red Velvet Cinnamon Rolls:

  • Using expired yeast
  • Adding too much flour (leads to dense rolls)
  • Skipping the second rise
  • Overbaking (dries them out)

Attention to detail makes all the difference.

FAQs

Can I make these ahead of time?

Yes! Prepare the rolls and refrigerate overnight before baking.

Do I have to use food coloring?

No, but it gives the signature red velvet look.

Can I use instant yeast?

Yes, just skip the activation step and mix directly.

How do I keep them soft?

Store properly and avoid overbaking.

Final Thoughts

These Heavenly Red Velvet Cinnamon Rolls are the ultimate indulgent treat—soft, rich, and topped with irresistible cream cheese frosting. They bring together the best of two beloved desserts into one unforgettable experience.

Whether you’re baking for a holiday, a special brunch, or simply to treat yourself, this recipe is guaranteed to impress. Once you take that first bite, you’ll understand why these rolls are truly heavenly—and why they deserve a permanent spot in your baking rotation.

Easy Loaded Fries Recipe – Ready in 20 Minutes!

When it comes to quick comfort food that always hits the spot, nothing beats a plate of easy loaded fries. Crispy golden fries piled high with gooey melted cheese, savory toppings, and flavorful sauces—what’s not to love? Whether you’re hosting a game day party, looking for a fun appetizer, or just craving something indulgent, this recipe delivers big flavor in just 20 minutes.

The best part? You don’t need fancy ingredients or complicated steps. This easy loaded fries recipe is all about simplicity, speed, and satisfaction. It’s the kind of dish that brings people together, and once you make it, you’ll find yourself coming back to it again and again.


Why You’ll Love This Recipe

These easy loaded fries are more than just a snack—they’re a full-on flavor experience.

  • Ready in 20 minutes—perfect for busy days
  • Crispy, cheesy, and savory in every bite
  • Highly customizable with your favorite toppings
  • Perfect for sharing at parties or gatherings
  • Minimal prep and cleanup

Whether you’re cooking for yourself or feeding a crowd, this recipe is guaranteed to impress.


Ingredients

Here’s what you’ll need to make the ultimate easy loaded fries recipe:

  • 1 bag frozen French fries (or homemade fries)
  • 1 cup shredded cheddar cheese
  • 1/2 cup cooked bacon bits
  • 1/4 cup sour cream
  • 2 tablespoons green onions (chopped)
  • 1/4 cup nacho cheese sauce (optional)
  • Salt and pepper to taste

Ingredient Notes

The secret to amazing easy loaded fries lies in using quality ingredients and balancing textures.

  • Fries: Use thick-cut or crinkle fries for better crispiness
  • Cheese: Freshly shredded cheddar melts more smoothly
  • Bacon: Adds a smoky, salty crunch
  • Sour cream: Brings a cool, creamy contrast
  • Green onions: Add freshness and color

Step-by-Step Instructions

1. Bake the Fries

Preheat your oven according to package instructions and bake the fries until golden and crispy.

2. Add the Cheese

Remove fries from the oven and immediately sprinkle shredded cheese evenly over the top.

3. Melt the Cheese

Return the fries to the oven for 3–5 minutes, or until the cheese is fully melted and bubbly.

4. Add Toppings

Remove from the oven and top with bacon bits, sour cream, green onions, and optional nacho cheese sauce.

5. Serve Immediately

Serve hot and enjoy your delicious easy loaded fries while they’re fresh and crispy.

Tips for Perfect Results

To get the best out of your easy loaded fries recipe, follow these helpful tips:

  • Don’t overcrowd the pan—this helps fries crisp up evenly
  • Bake instead of microwave for better texture
  • Add toppings right before serving to keep fries crispy
  • Layer toppings evenly so every bite is flavorful

Small details like these make a big difference in the final result.

Variations

One of the best things about easy loaded fries is how customizable they are.

Classic Cheeseburger Fries

  • Add ground beef, pickles, and a drizzle of ketchup and mustard

Spicy Loaded Fries

  • Add jalapeños and hot sauce

BBQ Chicken Fries

  • Top with shredded BBQ chicken and red onions

Vegetarian Option

  • Skip bacon and add sautéed mushrooms and peppers

What to Serve With It

These easy loaded fries pair perfectly with:

  • Burgers or sliders
  • Fried chicken or wings
  • Fresh salads for balance
  • Cold drinks like soda or iced tea

They can be a side dish or the star of the show depending on how you serve them.

Storage & Reheating

While easy loaded fries are best enjoyed fresh, here’s how to handle leftovers:

  • Refrigerate: Store in an airtight container for up to 2 days
  • Reheat: Use an oven or air fryer to restore crispiness
  • Avoid microwaving—it makes fries soggy

For best results, always try to make just enough to enjoy immediately.

Common Mistakes to Avoid

Keep your easy loaded fries recipe flawless by avoiding these common mistakes:

  • Not cooking fries long enough (they need to be crispy)
  • Adding toppings too early (can make fries soggy)
  • Using low-quality cheese
  • Overloading with toppings (balance is key)

A little attention goes a long way in making this dish perfect.

FAQs

Can I use fresh potatoes instead of frozen fries?

Yes! Just cut, soak, and bake or fry them until crispy before adding toppings.

What cheese works best?

Cheddar is classic, but mozzarella, Monterey Jack, or a blend also work well.

Can I make these in an air fryer?

Absolutely! Air fry the fries for extra crispiness, then add toppings.

How do I keep fries crispy after adding toppings?

Add toppings just before serving and avoid overly wet ingredients.

Final Thoughts

This easy loaded fries recipe proves that delicious comfort food doesn’t have to be complicated. In just 20 minutes, you can create a dish that’s crispy, cheesy, and completely satisfying.

Whether you’re making them for a party, a family snack, or just treating yourself, these easy loaded fries are always a hit. Once you try them, you’ll understand why they’re such a beloved classic—and why this quick version deserves a permanent spot in your recipe collection.

Garlic Butter Shrimp Pasta: A Quick and Irresistible Dinner Favorite

If you’re searching for a fast, flavorful dinner that feels a little fancy without the extra effort, this garlic butter shrimp pasta is exactly what you need. It combines tender, juicy shrimp with a rich garlic butter sauce and perfectly cooked pasta, creating a dish that tastes like it came straight from a restaurant kitchen.

This recipe is ideal for busy weeknights, date nights at home, or anytime you want a comforting meal that doesn’t take hours to prepare. With simple ingredients and a straightforward method, even beginner cooks can master this dish with confidence.

Why You’ll Love This Recipe

This garlic butter shrimp pasta stands out for so many reasons, and once you try it, you’ll see why it’s a staple in so many kitchens.

  • Quick and easy—ready in about 30 minutes
  • Rich and buttery flavor with a hint of garlic
  • Light yet satisfying—perfect balance of protein and carbs
  • Minimal ingredients but maximum flavor
  • Customizable with your favorite add-ins

It’s the kind of meal that feels indulgent but is surprisingly simple to make.

Ingredients

To make this delicious garlic butter shrimp pasta, you’ll need:

  • 12 oz spaghetti or linguine
  • 1 lb large shrimp (peeled and deveined)
  • 4 tablespoons unsalted butter
  • 4 cloves garlic (minced)
  • 1/4 teaspoon red pepper flakes
  • 1/2 cup chicken broth
  • 1/4 cup freshly grated Parmesan cheese
  • Juice of 1 lemon
  • Salt and black pepper to taste
  • 2 tablespoons fresh parsley (chopped)

Ingredient Notes

The beauty of this garlic butter shrimp pasta lies in the quality of its simple ingredients.

  • Shrimp: Use fresh or frozen (thawed) shrimp for best results
  • Butter: Adds richness and depth—don’t substitute with margarine
  • Garlic: Fresh garlic is key for bold flavor
  • Lemon juice: Brightens and balances the dish
  • Parmesan: Adds a savory, slightly nutty finish

Step-by-Step Instructions

1. Cook the Pasta

Bring a large pot of salted water to a boil and cook the pasta according to package instructions. Reserve 1/2 cup of pasta water before draining.

2. Sauté the Shrimp

Season shrimp with salt and pepper. In a large skillet, melt 2 tablespoons of butter over medium-high heat. Cook shrimp for 2–3 minutes per side until pink and opaque. Remove and set aside.

3. Make the Garlic Butter Sauce

In the same skillet, melt the remaining butter. Add garlic and red pepper flakes, cooking until fragrant (about 1 minute).

4. Add Liquid and Flavor

Pour in chicken broth and lemon juice. Let it simmer for 2–3 minutes to slightly reduce.

5. Combine Everything

Add cooked pasta and shrimp back to the skillet. Toss to coat, adding reserved pasta water as needed.

6. Finish with Cheese and Herbs

Sprinkle in Parmesan and parsley, tossing until everything is well combined and glossy.

Tips for Perfect Results

To make your garlic butter shrimp pasta truly outstanding, keep these tips in mind:

  • Don’t overcook shrimp—they should be tender, not rubbery
  • Salt your pasta water generously for better flavor
  • Use fresh lemon juice instead of bottled
  • Add pasta water gradually to control sauce consistency

These small techniques elevate your dish from good to exceptional.

Variations

This garlic butter shrimp pasta is incredibly versatile, making it easy to adapt.

Add Vegetables

  • Spinach, cherry tomatoes, or asparagus

Make It Creamy

  • Add a splash of heavy cream for a richer sauce

Try a Different Protein

  • Substitute shrimp with chicken or scallops

Make It Spicy

  • Increase red pepper flakes or add chili paste

What to Serve With It

This dish pairs beautifully with simple sides that complement its rich flavor:

  • Garlic bread or crusty baguette
  • Fresh green salad with vinaigrette
  • Roasted vegetables
  • A glass of white wine like Pinot Grigio

These additions round out the meal without overpowering the pasta.

Storage & Reheating

Leftover garlic butter shrimp pasta can still taste great with proper storage.

  • Refrigerate: Store in an airtight container for up to 2 days
  • Reheat: Warm gently on the stove with a splash of broth or water
  • Avoid overcooking during reheating to keep shrimp tender

For best flavor, enjoy it fresh whenever possible.

Common Mistakes to Avoid

Here are a few pitfalls to watch out for when making garlic butter shrimp pasta:

  • Overcooking the shrimp
  • Burning the garlic (it turns bitter quickly)
  • Skipping the pasta water (important for sauce texture)
  • Using pre-grated cheese (doesn’t melt as smoothly)

Avoiding these ensures a perfectly balanced and delicious dish.

FAQs

Can I use frozen shrimp?

Yes, just thaw them completely and pat dry before cooking.

What pasta works best?

Spaghetti and linguine are ideal, but fettuccine or penne also work well.

Can I make this dairy-free?

You can substitute butter with olive oil and skip the cheese.

How do I know when shrimp are done?

They turn pink and opaque and curl slightly—usually within a few minutes.

Final Thoughts

This garlic butter shrimp pasta is the perfect example of how simple ingredients can create something truly special. It’s quick, flavorful, and elegant enough to serve on any occasion.

Whether you’re cooking for your family or treating yourself to a cozy homemade dinner, this recipe delivers every time. Once you make it, don’t be surprised if it becomes a regular in your weekly meal rotation—it’s just that good.

Buffalo Chicken Cheese Bake: A Flavorful Delight You’ll Love

If you love bold, spicy comfort food, this Buffalo Chicken Cheese Bake is about to become your go-to recipe. It combines everything people adore about buffalo chicken—tangy heat, juicy chicken, and creamy richness—into one bubbling, cheesy casserole that’s impossible to resist.

Perfect for game days, family dinners, or potlucks, this dish delivers big flavor with minimal effort. Even better, it’s incredibly versatile, allowing you to customize the spice level and ingredients to suit your taste. Whether you’re feeding a crowd or meal-prepping for the week, this bake checks all the boxes.

Why You’ll Love This Recipe

This Buffalo Chicken Cheese Bake stands out because it’s both comforting and exciting at the same time.

  • Bold buffalo flavor with the perfect spicy kick
  • Super creamy and cheesy texture
  • Quick and easy prep with simple ingredients
  • Great for meal prep or gatherings
  • Customizable heat level for all preferences

It’s the kind of recipe that disappears quickly from the table—and people will definitely ask for seconds.

Ingredients

Here’s everything you’ll need to make this irresistible dish:

  • 3 cups cooked, shredded chicken
  • 1/2 cup buffalo sauce
  • 1/2 cup ranch dressing (or blue cheese dressing)
  • 8 oz cream cheese (softened)
  • 1 1/2 cups shredded cheddar cheese
  • 1/2 cup shredded mozzarella cheese
  • 1/2 teaspoon garlic powder
  • 1/2 teaspoon onion powder
  • Salt and pepper to taste
  • 2 green onions (chopped, for garnish)

Ingredient Notes

The magic of this Buffalo Chicken Cheese Bake comes from balancing creamy and spicy elements perfectly.

  • Chicken: Rotisserie chicken works great for convenience and flavor
  • Buffalo sauce: Choose your favorite brand and adjust for spice level
  • Cream cheese: Creates that rich, creamy base
  • Cheddar + mozzarella: The perfect combo for flavor and meltability
  • Ranch or blue cheese dressing: Adds tangy balance to the heat

Step-by-Step Instructions

1. Preheat and Prep

Preheat your oven to 375°F (190°C) and lightly grease a baking dish.

2. Mix the Base

In a large bowl, combine shredded chicken, buffalo sauce, ranch dressing, and softened cream cheese. Mix until well incorporated.

3. Add Seasonings and Cheese

Stir in garlic powder, onion powder, and half of the shredded cheeses. Season with salt and pepper to taste.

4. Assemble the Bake

Transfer the mixture to your prepared baking dish and spread evenly. Top with the remaining cheese.

5. Bake to Perfection

Bake uncovered for 20–25 minutes, or until hot and bubbly with a golden cheesy top.

6. Garnish and Serve

Remove from the oven and sprinkle with chopped green onions before serving.

Tips for Perfect Results

To make the best Buffalo Chicken Cheese Bake, keep these tips in mind:

  • Use softened cream cheese for easier mixing
  • Don’t overbake—you want it creamy, not dry
  • Taste before baking to adjust spice and seasoning
  • Shred your own cheese for better melting

These small details make a big difference in texture and flavor.

Variations

One of the best things about Buffalo Chicken Cheese Bake is how adaptable it is.

Make It Low-Carb

  • Serve as-is or over cauliflower rice

Add Pasta or Rice

  • Turn it into a heartier casserole by mixing in cooked pasta or rice

Spice It Up

  • Add jalapeños or extra hot sauce

Make It Lighter

  • Use reduced-fat cream cheese and dressing

What to Serve With It

This rich and creamy Buffalo Chicken Cheese Bake pairs beautifully with lighter sides:

  • Celery and carrot sticks
  • Crisp green salad with vinaigrette
  • Garlic bread or dinner rolls
  • Roasted vegetables

These sides help balance the bold, spicy flavors of the dish.

Storage & Reheating

This dish stores well, making it perfect for leftovers.

  • Refrigerator: Store in an airtight container for up to 4 days
  • Freezer: Freeze for up to 2 months
  • Reheating: Warm in the oven at 350°F or microwave in short intervals

Add a splash of milk or dressing when reheating to keep it creamy.

Common Mistakes to Avoid

Avoid these common pitfalls when making Buffalo Chicken Cheese Bake:

  • Using cold cream cheese (leads to lumps)
  • Overbaking (dries out the dish)
  • Not balancing spice with creamy elements
  • Skipping seasoning adjustments

Being mindful of these ensures a perfect bake every time.

FAQs

Can I make Buffalo Chicken Cheese Bake ahead of time?

Yes! Assemble it ahead, cover, and refrigerate. Bake when ready to serve.

Can I use canned chicken?

You can, but freshly cooked or rotisserie chicken gives better flavor and texture.

How spicy is this dish?

It depends on your buffalo sauce—adjust to your preferred heat level.

Can I make it without ranch dressing?

Absolutely! Substitute with blue cheese dressing or even a bit of sour cream.

Final Thoughts

This Buffalo Chicken Cheese Bake is everything you want in a comfort food dish—bold, creamy, cheesy, and incredibly satisfying. It’s easy enough for weeknight dinners but delicious enough to serve at parties or gatherings.

Once you try it, you’ll understand why it’s such a favorite. With its rich flavor and simple preparation, this recipe is sure to earn a permanent spot in your meal rotation.

Savor Creamy Cowboy Butter Chicken Pasta in 40 Minutes

If you’re craving a bold, comforting dinner that comes together fast, this creamy cowboy butter chicken pasta is about to steal the spotlight. Packed with juicy chicken, a rich buttery sauce, and a kick of garlic, herbs, and spice, this dish brings serious flavor to your table in just 40 minutes.

Inspired by the viral cowboy butter trend, this pasta recipe transforms those zesty, savory flavors into a creamy, satisfying meal that’s perfect for busy weeknights or cozy weekends. It’s hearty, indulgent, and surprisingly easy to make—even if you’re not a seasoned cook.

Why You’ll Love This Recipe

This creamy cowboy butter chicken pasta hits all the right notes for a crowd-pleasing meal.

  • Ready in 40 minutes from start to finish
  • Rich, creamy, and flavorful with a buttery garlic kick
  • Family-friendly comfort food with a gourmet feel
  • One-pan sauce keeps cleanup simple
  • Customizable spice level to suit your taste

Every bite is loaded with bold flavors that feel indulgent yet balanced, making it a go-to recipe for pasta lovers.

Ingredients

Here’s what you’ll need to make this irresistible dish:

  • 2 boneless, skinless chicken breasts (cubed)
  • 12 oz pasta (penne or fettuccine work great)
  • 3 tablespoons butter
  • 4 cloves garlic (minced)
  • 1 cup heavy cream
  • 1/2 cup grated Parmesan cheese
  • 1 tablespoon Dijon mustard
  • 1 teaspoon smoked paprika
  • 1/2 teaspoon red pepper flakes (adjust to taste)
  • Juice of 1/2 lemon
  • Salt and black pepper to taste
  • 2 tablespoons fresh parsley (chopped)

Ingredient Notes

The secret to a truly unforgettable creamy cowboy butter chicken pasta lies in the balance of bold and creamy ingredients.

  • Butter: The foundation of the cowboy butter flavor—don’t skimp here
  • Garlic: Fresh garlic adds depth and aroma
  • Lemon juice: Brightens the rich sauce and balances flavors
  • Parmesan cheese: Adds a salty, nutty finish to the cream sauce
  • Smoked paprika: Gives a subtle smoky warmth

Step-by-Step Instructions

1. Cook the Pasta

Bring a large pot of salted water to a boil and cook your pasta according to package instructions. Reserve 1/2 cup of pasta water, then drain and set aside.

2. Sear the Chicken

Season the chicken with salt, pepper, and smoked paprika. In a large skillet, melt 1 tablespoon of butter over medium-high heat. Add the chicken and cook until golden brown and fully cooked, about 5–7 minutes. Remove and set aside.

3. Make the Cowboy Butter Sauce

In the same skillet, melt the remaining butter. Add minced garlic and cook until fragrant, about 1 minute. Stir in Dijon mustard, red pepper flakes, and lemon juice.

4. Add Cream and Cheese

Pour in the heavy cream and bring to a gentle simmer. Stir in Parmesan cheese until melted and smooth.

5. Combine Everything

Add the cooked pasta and chicken back into the skillet. Toss everything together, adding reserved pasta water as needed to loosen the sauce.

6. Garnish and Serve

Sprinkle with fresh parsley and extra Parmesan before serving.

Tips for Perfect Results

To make your creamy cowboy butter chicken pasta absolutely perfect, keep these tips in mind:

  • Don’t overcook the chicken—keep it juicy and tender
  • Use freshly grated Parmesan for the smoothest sauce
  • Adjust spice level by adding more or less red pepper flakes
  • Save pasta water—it helps create a silky sauce

Small adjustments can elevate your dish from good to restaurant-quality.

Variations

One of the best things about creamy cowboy butter chicken pasta is how easy it is to customize.

Make It Spicier

  • Add cayenne pepper or hot sauce

Swap the Protein

  • Use shrimp, steak, or even sausage

Add Veggies

  • Spinach, mushrooms, or sun-dried tomatoes work beautifully

Lighten It Up

  • Substitute half-and-half for heavy cream

What to Serve With It

This rich and creamy pasta pairs perfectly with lighter sides:

  • Garlic bread or crusty baguette
  • Simple green salad with vinaigrette
  • Roasted vegetables like asparagus or broccoli
  • A crisp white wine like Sauvignon Blanc

These sides balance the richness of the dish and round out your meal beautifully.

Storage & Reheating

Leftovers of creamy cowboy butter chicken pasta are just as delicious the next day.

  • Refrigerate: Store in an airtight container for up to 3 days
  • Reheat: Warm gently on the stove with a splash of cream or milk
  • Avoid microwaving too long to prevent drying out

Proper storage keeps the sauce creamy and the chicken tender.

Common Mistakes to Avoid

Even simple recipes can have pitfalls. Avoid these when making creamy cowboy butter chicken pasta:

  • Overheating the cream (can cause separation)
  • Using pre-shredded cheese (doesn’t melt as well)
  • Skipping the lemon juice (you’ll miss the balance)
  • Not seasoning enough—taste as you go

Being mindful of these ensures consistent, delicious results.

FAQs

What is cowboy butter?

Cowboy butter is a flavorful butter sauce made with garlic, herbs, lemon, and spices—perfect for meats and pasta.

Can I make this ahead of time?

Yes, but it’s best fresh. Reheat gently with added liquid to maintain creaminess.

What pasta works best?

Penne, fettuccine, or rigatoni all hold the sauce well.

Can I make it dairy-free?

You can substitute plant-based butter, cream, and cheese, though flavor will vary slightly.

Final Thoughts

This creamy cowboy butter chicken pasta is the perfect blend of bold flavor and comforting texture—all ready in just 40 minutes. It’s a dish that feels indulgent yet approachable, making it ideal for both weeknight dinners and special occasions.

Once you try it, you’ll see why it’s quickly becoming a favorite in kitchens everywhere. Rich, creamy, and packed with personality, this pasta recipe is one you’ll come back to again and again.