Fudgy Brownie Cookies: Soft, Chewy, and Decadently Chocolatey

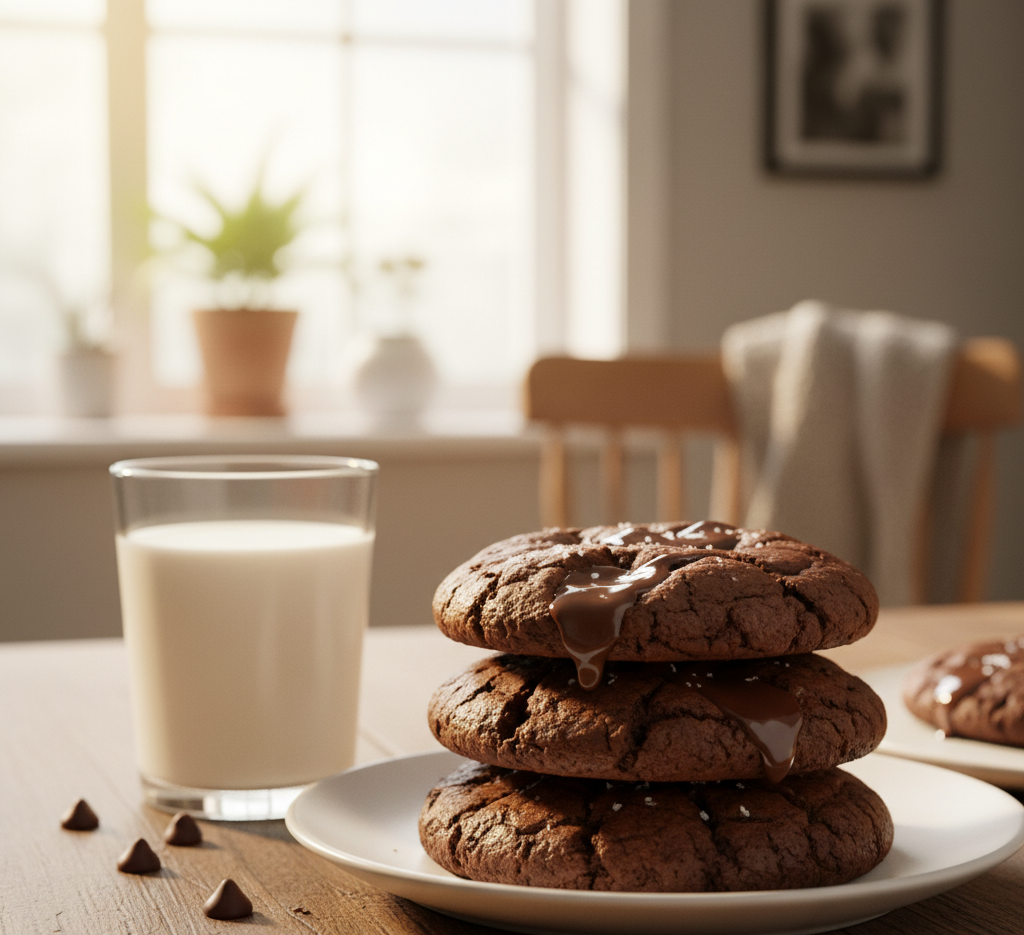
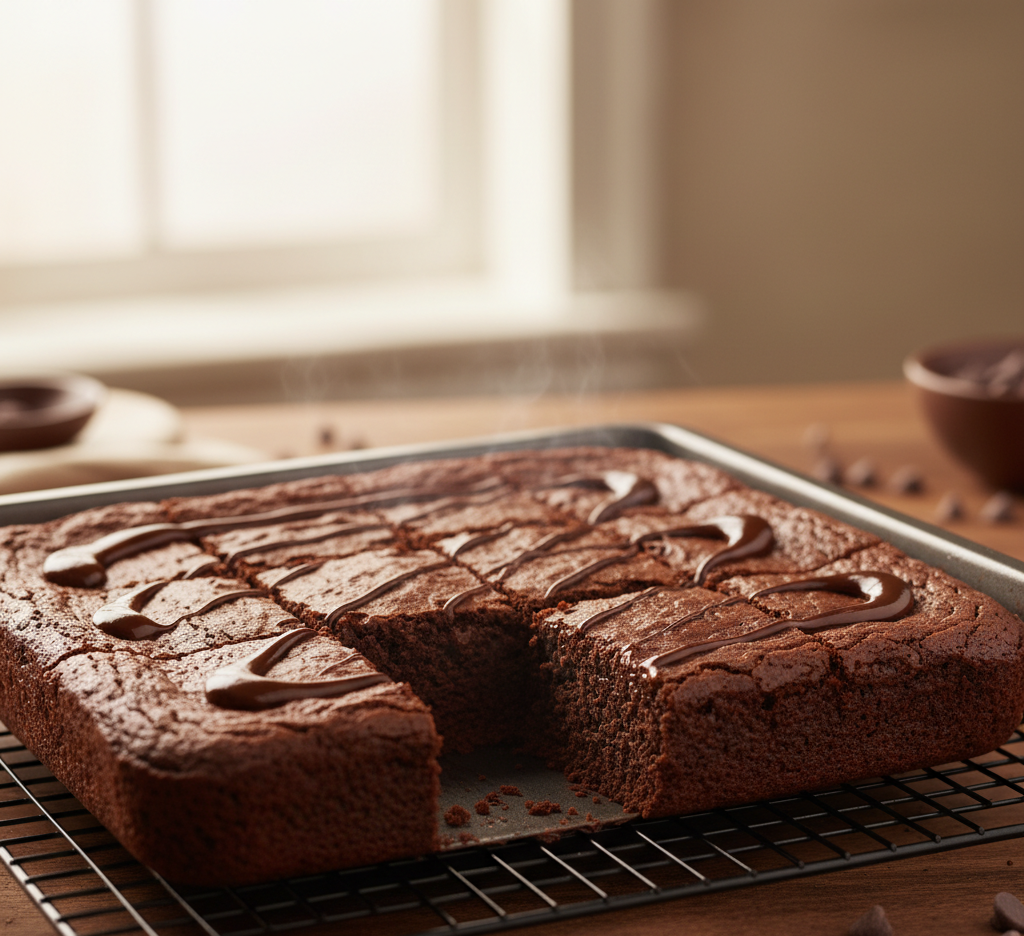
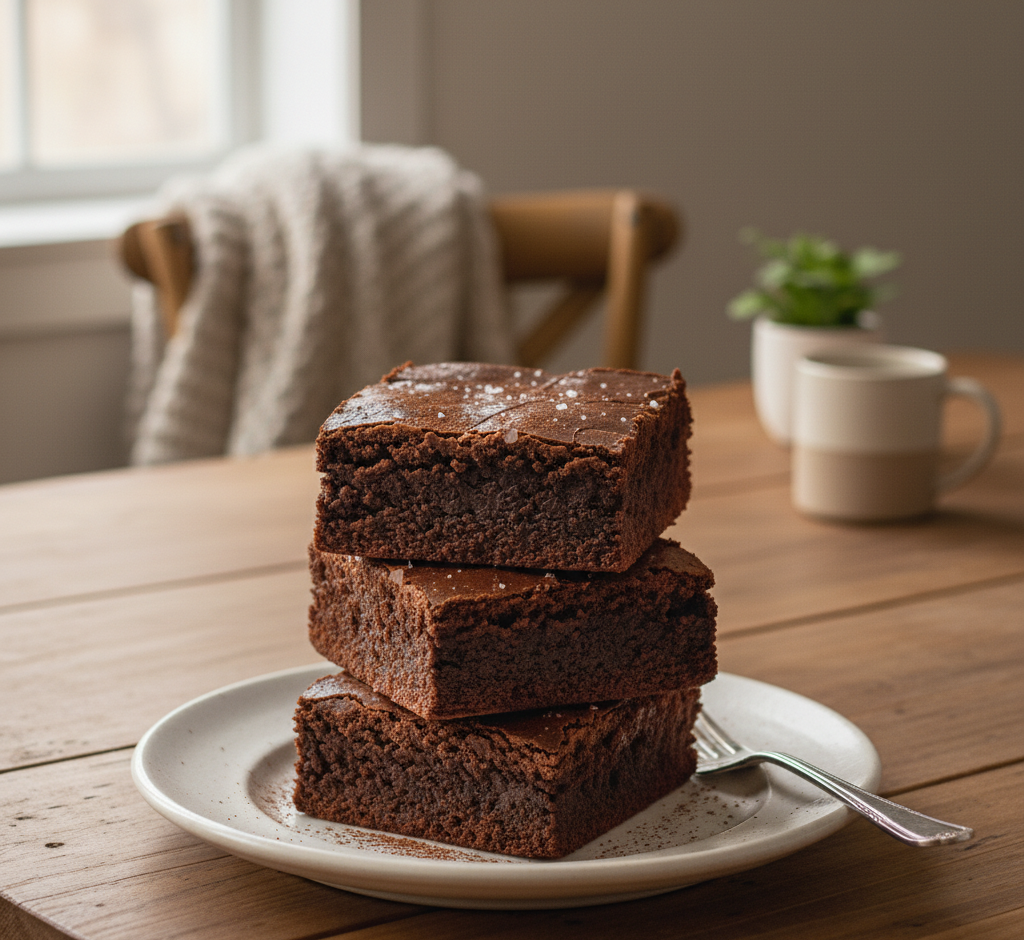
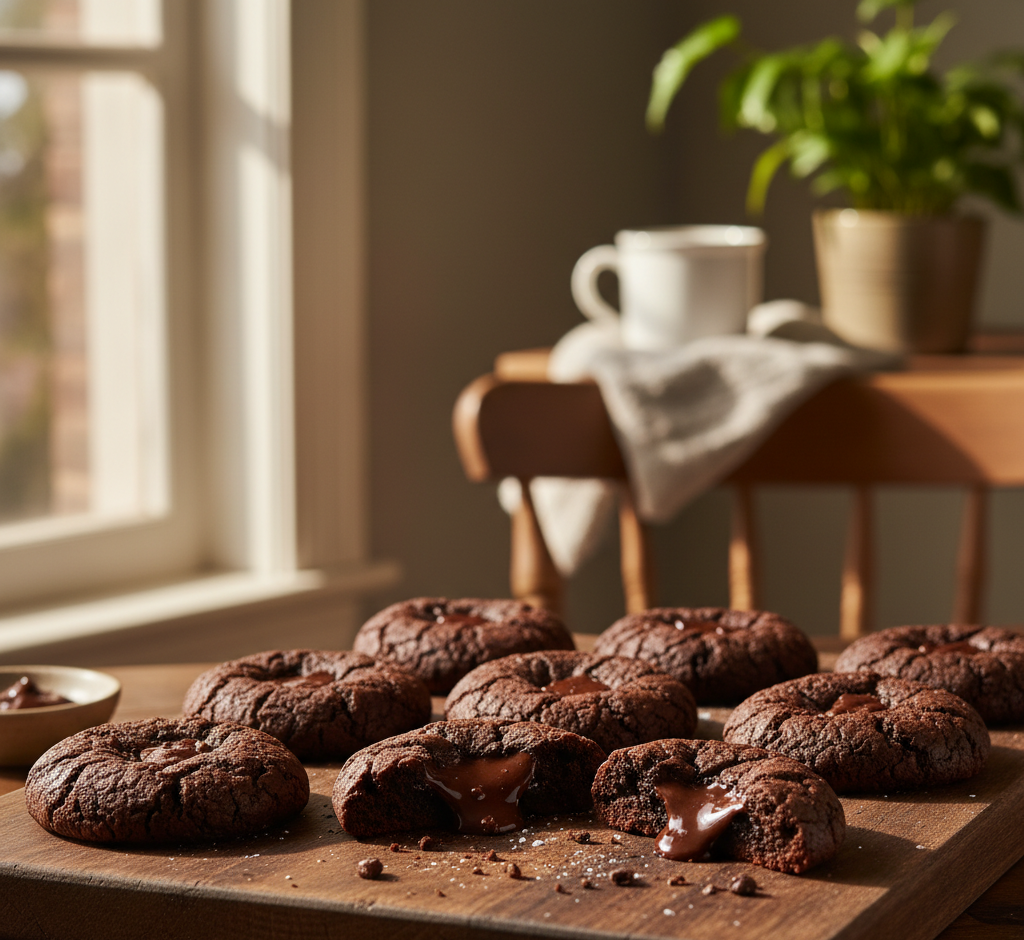
If you’re a chocolate lover, you already know there’s nothing quite like a freshly baked brownie. But what if you could combine that rich, fudgy texture with the convenience and fun of a cookie? Enter fudgy brownie cookies—a hybrid treat that’s chewy on the inside, slightly crisp on the edges, and bursting with chocolatey goodness in every bite.

Unlike regular cookies, these brownies-in-cookie-form have a dense, melt-in-your-mouth center, making them the ultimate indulgence for snack time, dessert, or even breakfast if you’re feeling daring. They’re perfect for sharing at parties, gifting during holidays, or keeping all to yourself.

Why You’ll Love This Recipe

There are countless chocolate treats out there, but fudgy brownie cookies stand out for several reasons:

  • Ultra-Fudgy Texture: These cookies are dense and chewy, just like a brownie, but easy to grab and eat by hand.
  • Rich Chocolate Flavor: Using high-quality cocoa powder and chocolate chunks ensures deep, indulgent chocolate taste.
  • Quick & Simple: Unlike traditional brownies, these cookies require no pan baking, just scoop, bake, and enjoy.
  • Customizable: Add nuts, caramel bits, or even a swirl of peanut butter for your own twist.

This recipe is perfect for both beginner bakers and seasoned pros who want a show-stopping chocolate treat without extra fuss.
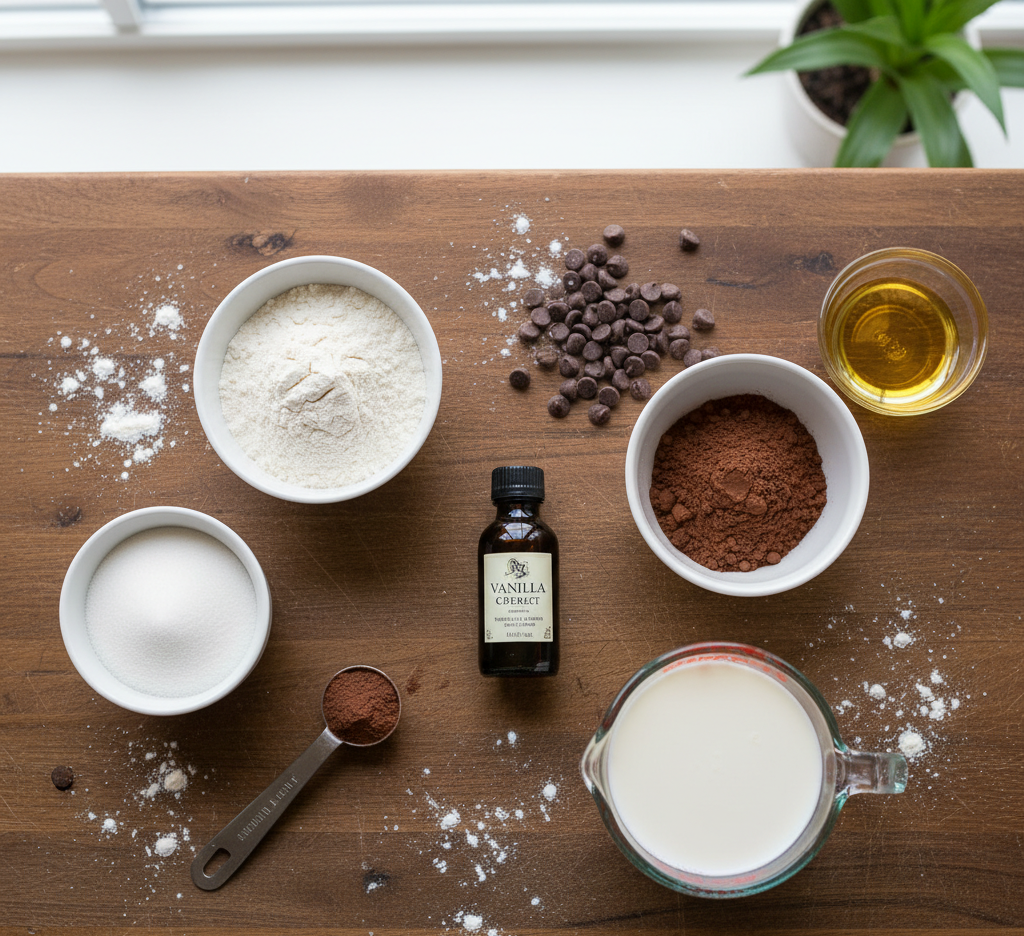
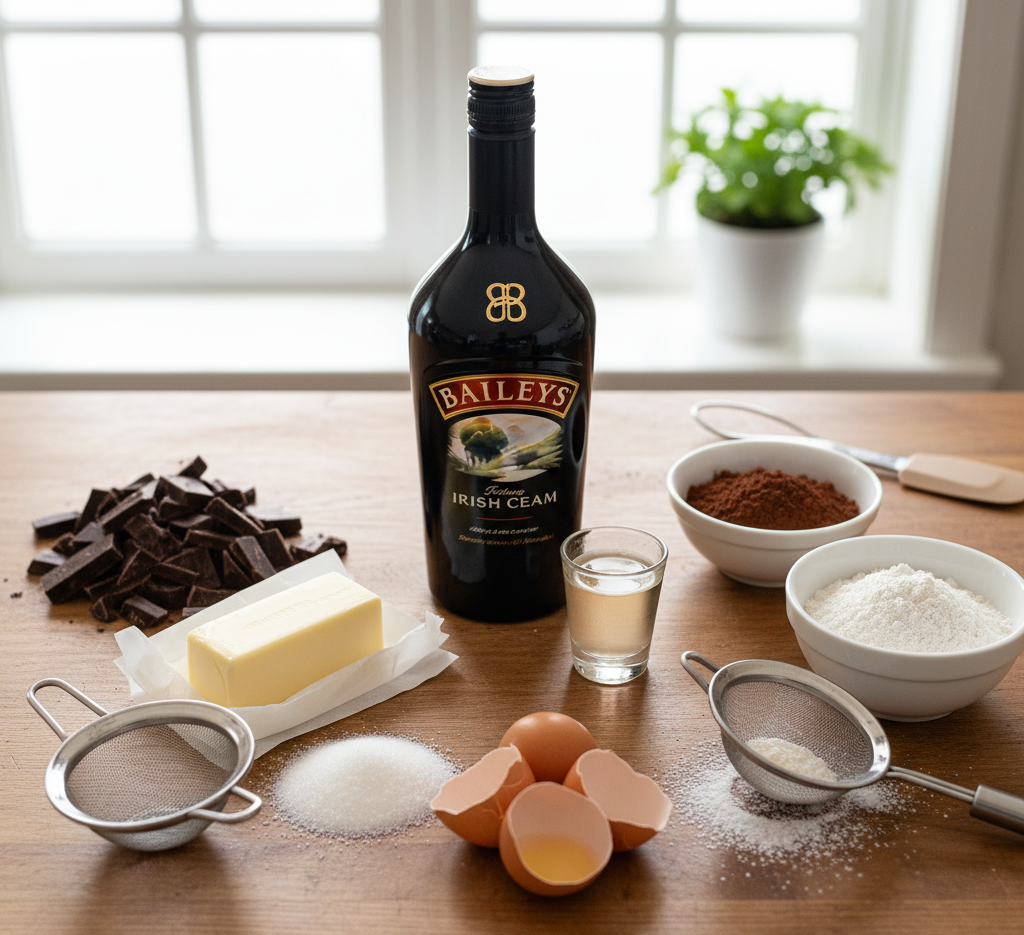
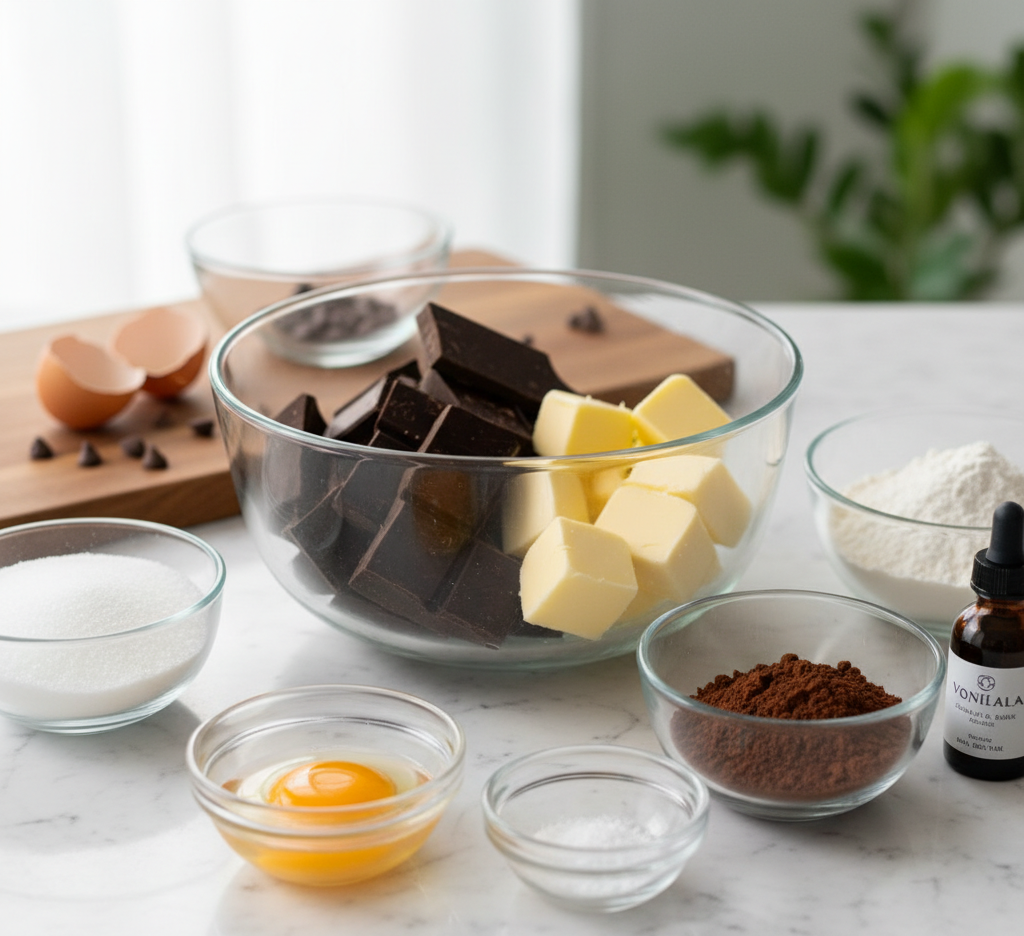
Ingredients

To make about 18 fudgy brownie cookies, you’ll need:

  • 1 cup (2 sticks) unsalted butter, melted
  • 1 cup granulated sugar
  • ½ cup brown sugar, packed
  • 2 large eggs
  • 2 teaspoons pure vanilla extract
  • ¾ cup all-purpose flour
  • 1 cup unsweetened cocoa powder
  • ½ teaspoon baking powder
  • ¼ teaspoon salt
  • 1 cup chocolate chunks or chips
  • Optional: ½ cup chopped walnuts or pecans

Ingredient Notes

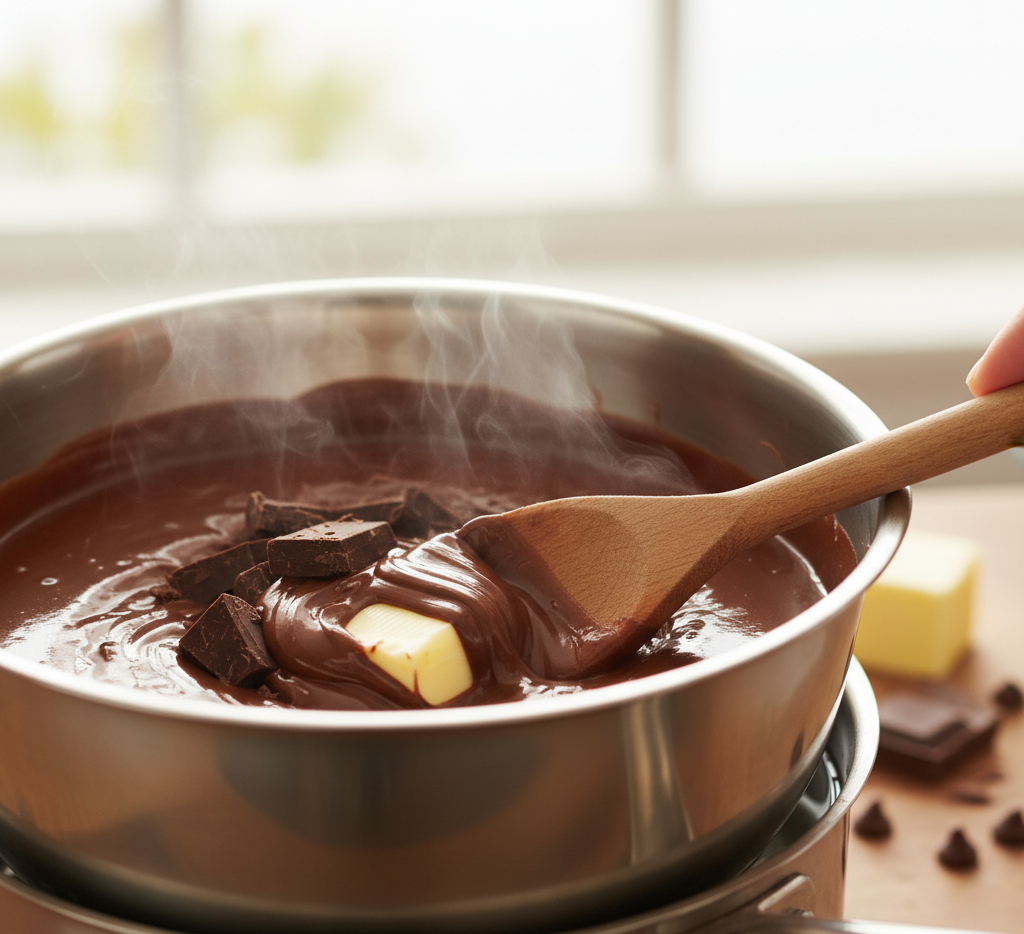
  • Butter: Melting the butter helps create the fudgy texture that makes these cookies feel like brownies.
  • Cocoa Powder: Use unsweetened cocoa for a deep chocolate flavor; Dutch-processed cocoa can be substituted for a slightly smoother taste.
  • Chocolate Chunks vs. Chips: Chunks create pockets of melted chocolate throughout, enhancing the gooey texture. Chips tend to hold their shape more.
  • Eggs: Room temperature eggs help bind the batter and add richness.

Step-by-Step Instructions

  1. Preheat the Oven: Set your oven to 350°F (175°C) and line a baking sheet with parchment paper.
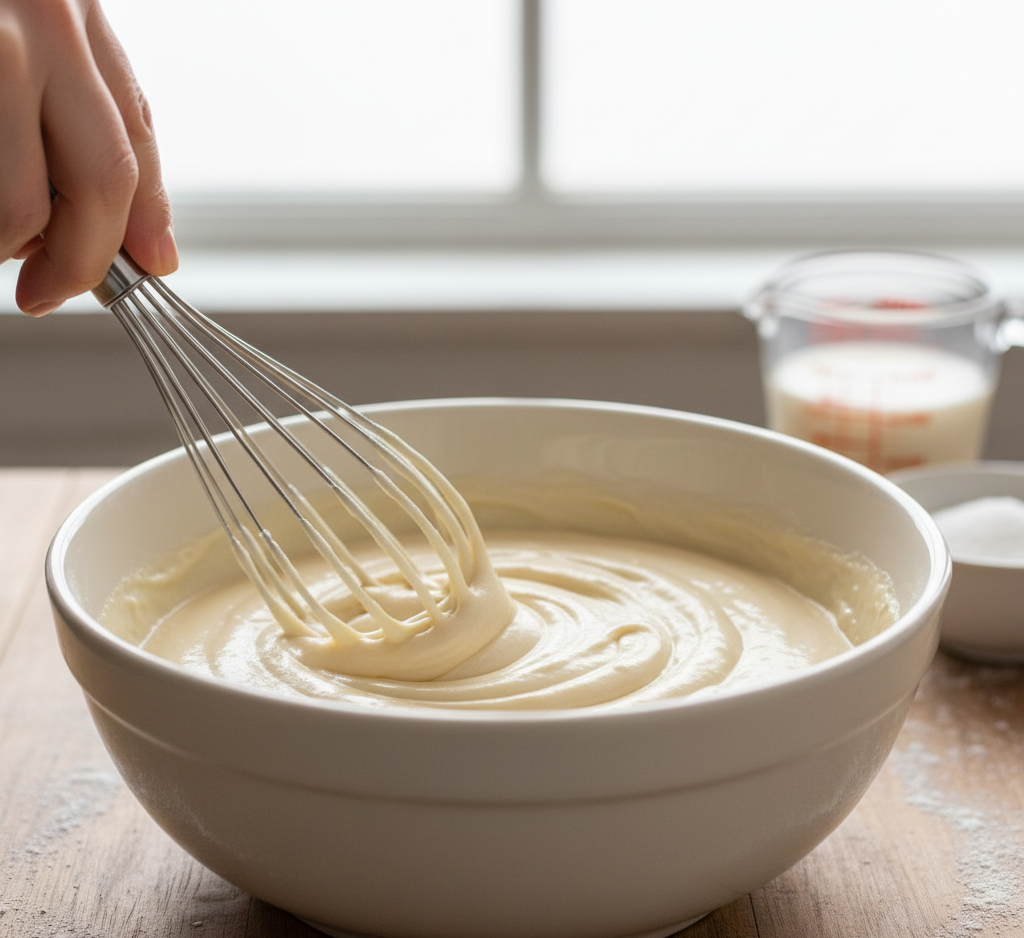
  2. Mix Wet Ingredients: In a large bowl, whisk together melted butter, granulated sugar, and brown sugar until smooth. Add eggs and vanilla, mixing until fully incorporated.
  3. Combine Dry Ingredients: In a separate bowl, sift together flour, cocoa powder, baking powder, and salt. Gradually fold into the wet ingredients until a thick, glossy dough forms.
  4. Add Chocolate & Nuts: Gently fold in chocolate chunks and nuts if using.
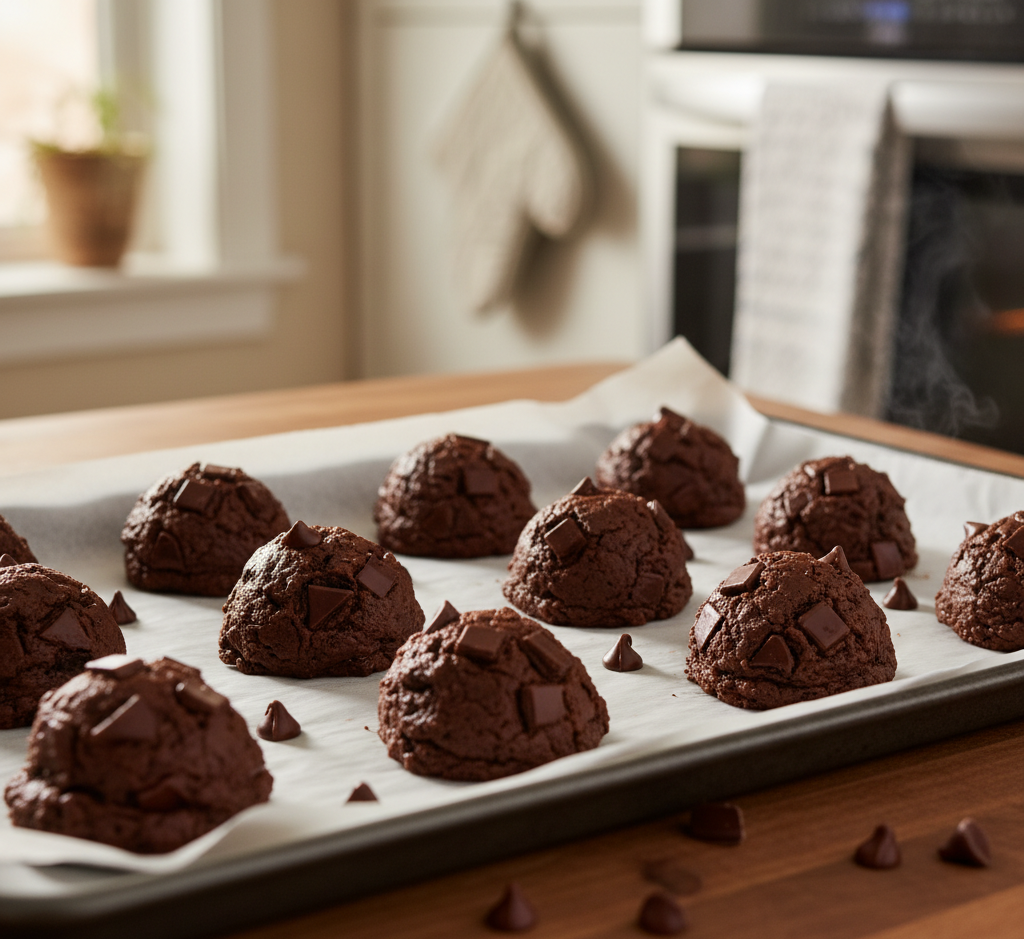
  5. Scoop the Dough: Use a cookie scoop or tablespoon to portion dough onto the prepared sheet, spacing about 2 inches apart.
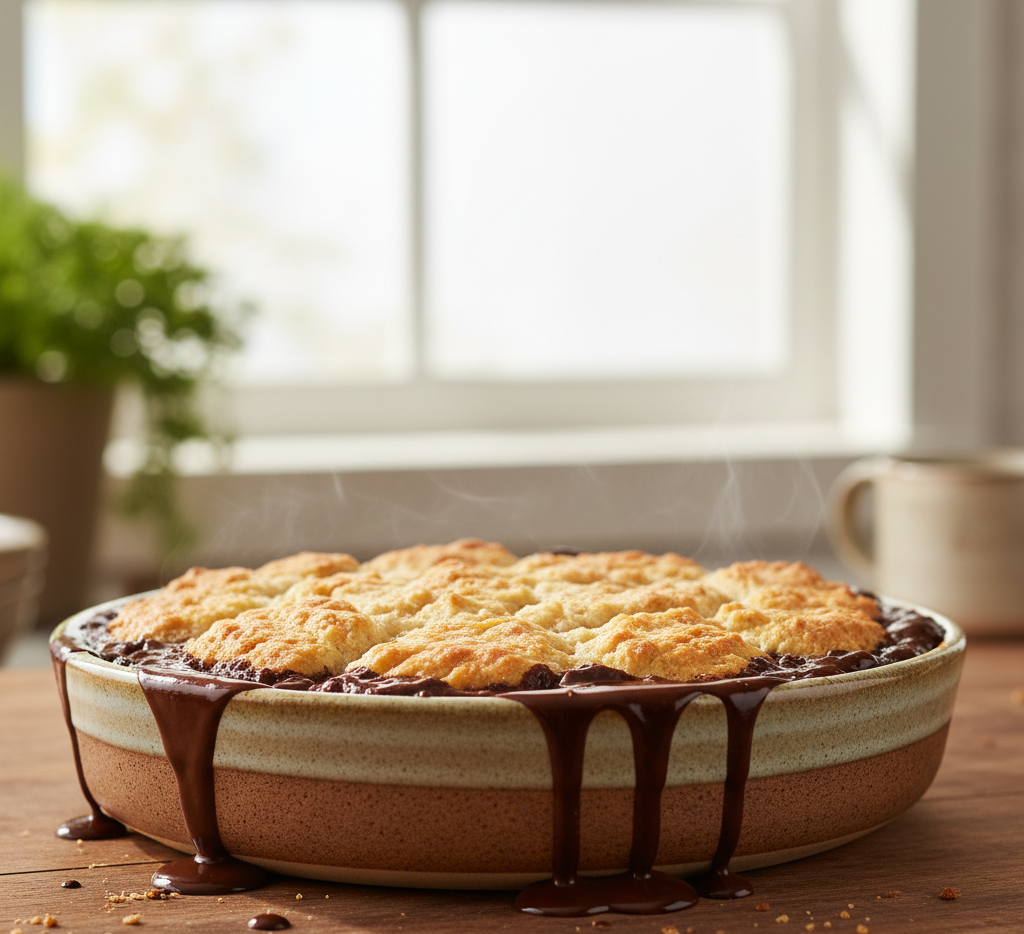
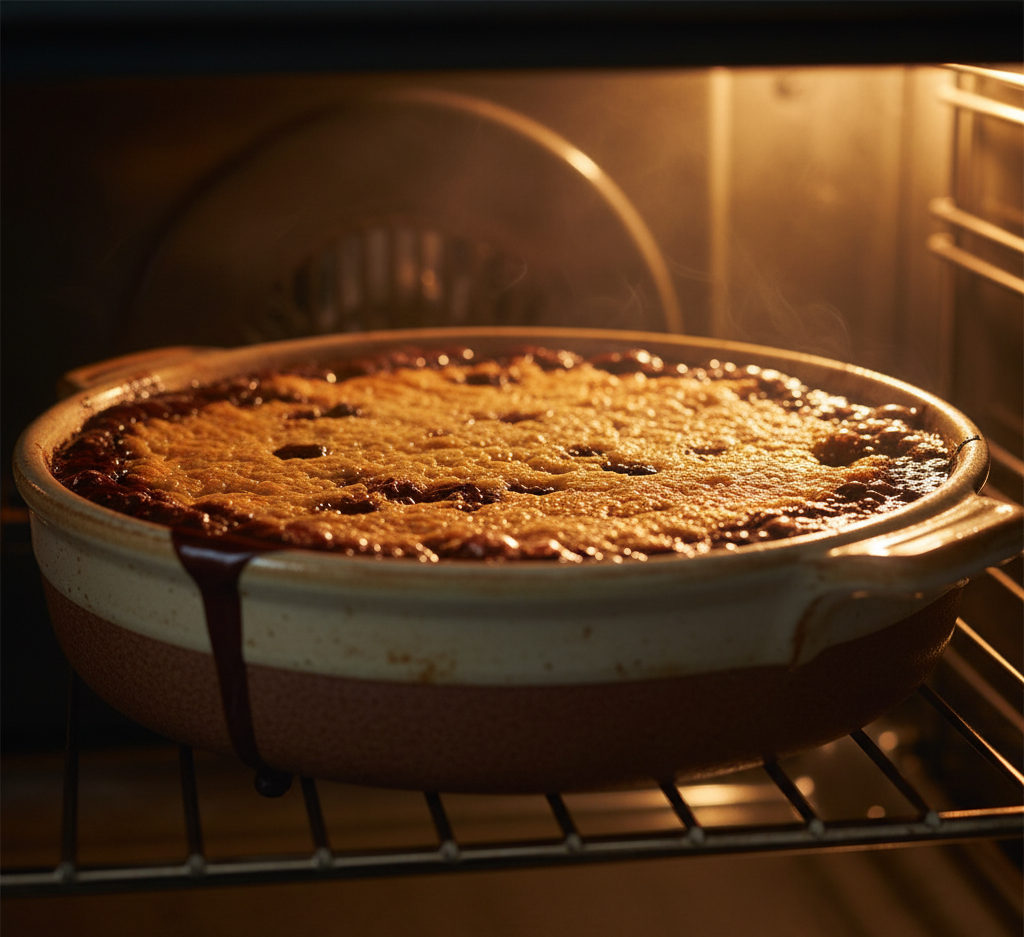
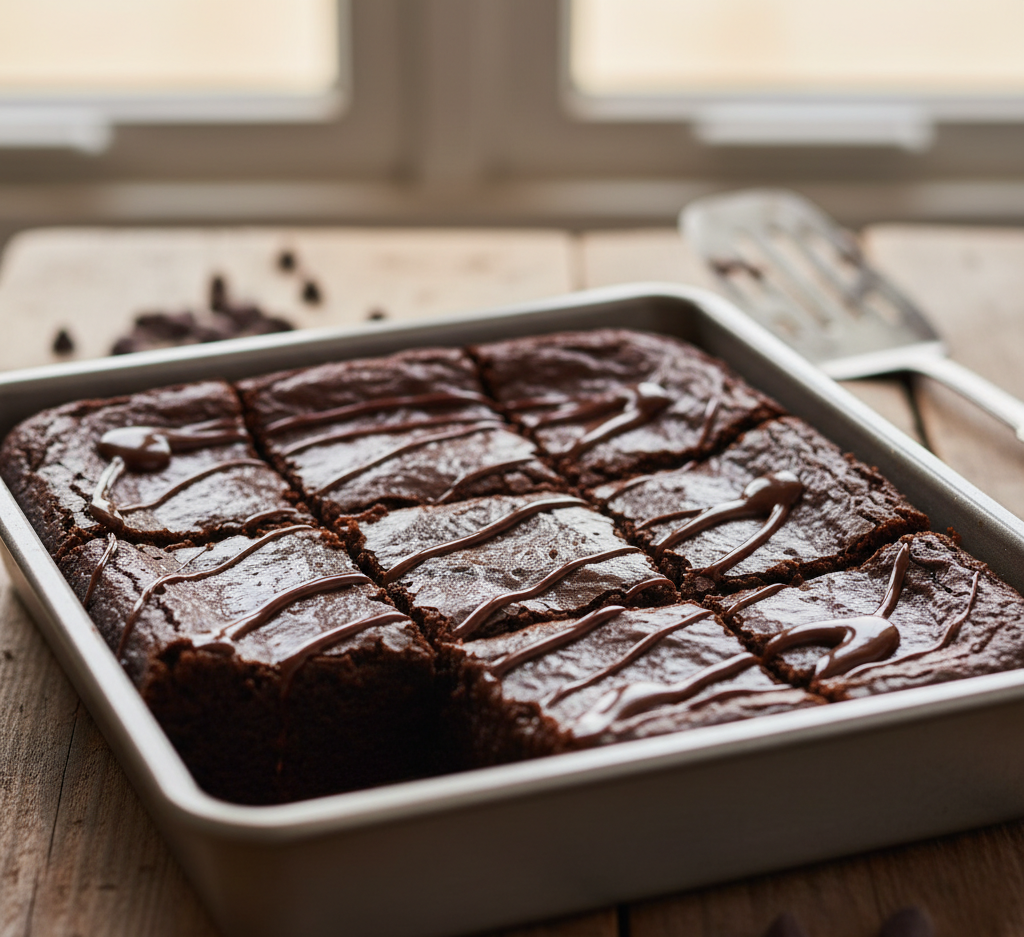
  6. Bake: Bake 10–12 minutes. Cookies should look slightly underbaked in the center—they’ll firm up as they cool.
  7. Cool & Serve: Let cookies rest on the baking sheet for 5 minutes before transferring to a wire rack. Enjoy warm or at room temperature.

Tips for Perfect Results

  • Don’t Overmix: Overmixing can create cakier cookies, while we want dense, fudgy bites.
  • Slightly Underbake: Cookies may appear soft in the center; this ensures they remain gooey.
  • Chill the Dough: For thicker cookies, chill dough for 30 minutes before baking.
  • Use Room Temperature Ingredients: Helps create even texture and prevents curdling.

Variations

  • Nutty Fudge: Add pecans, walnuts, or almonds for crunch.
  • Salted Caramel Swirl: Drop small dollops of caramel into dough before baking.
  • Double Chocolate: Mix in white chocolate chunks for contrast.
  • Espresso Kick: Add 1 teaspoon instant espresso powder to intensify chocolate flavor.

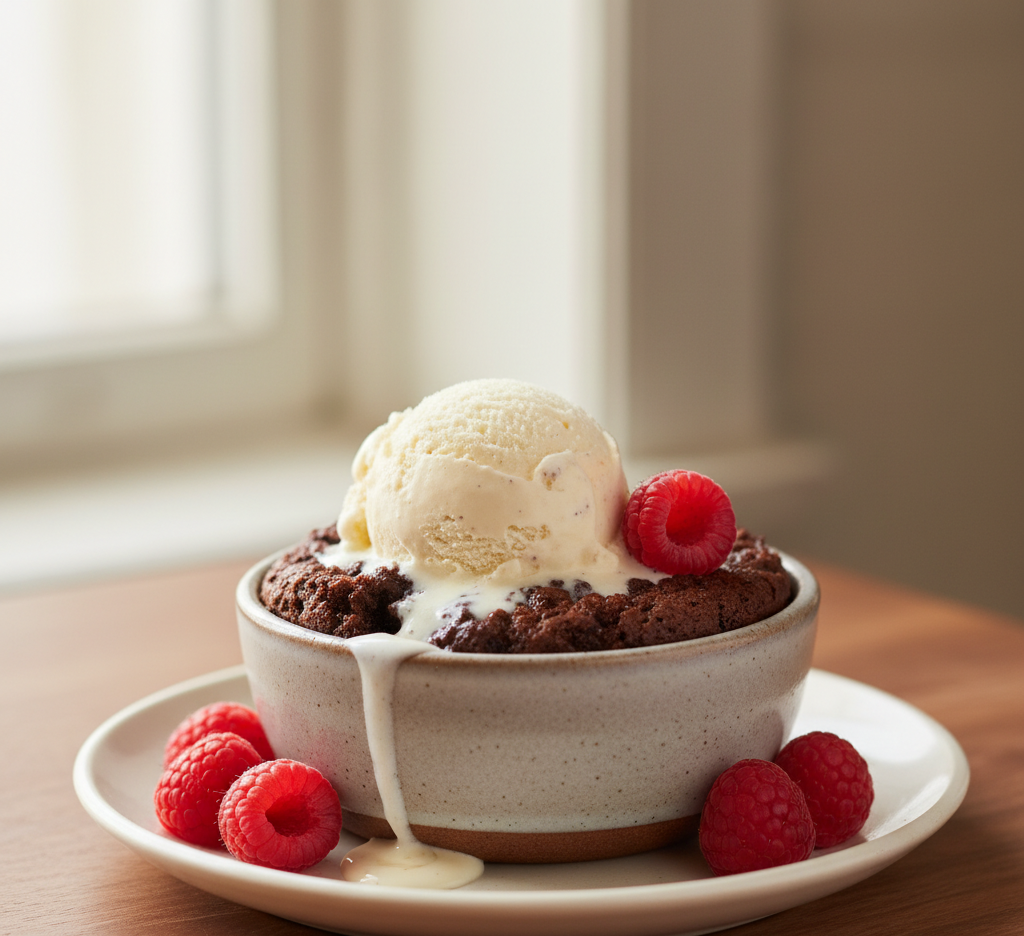
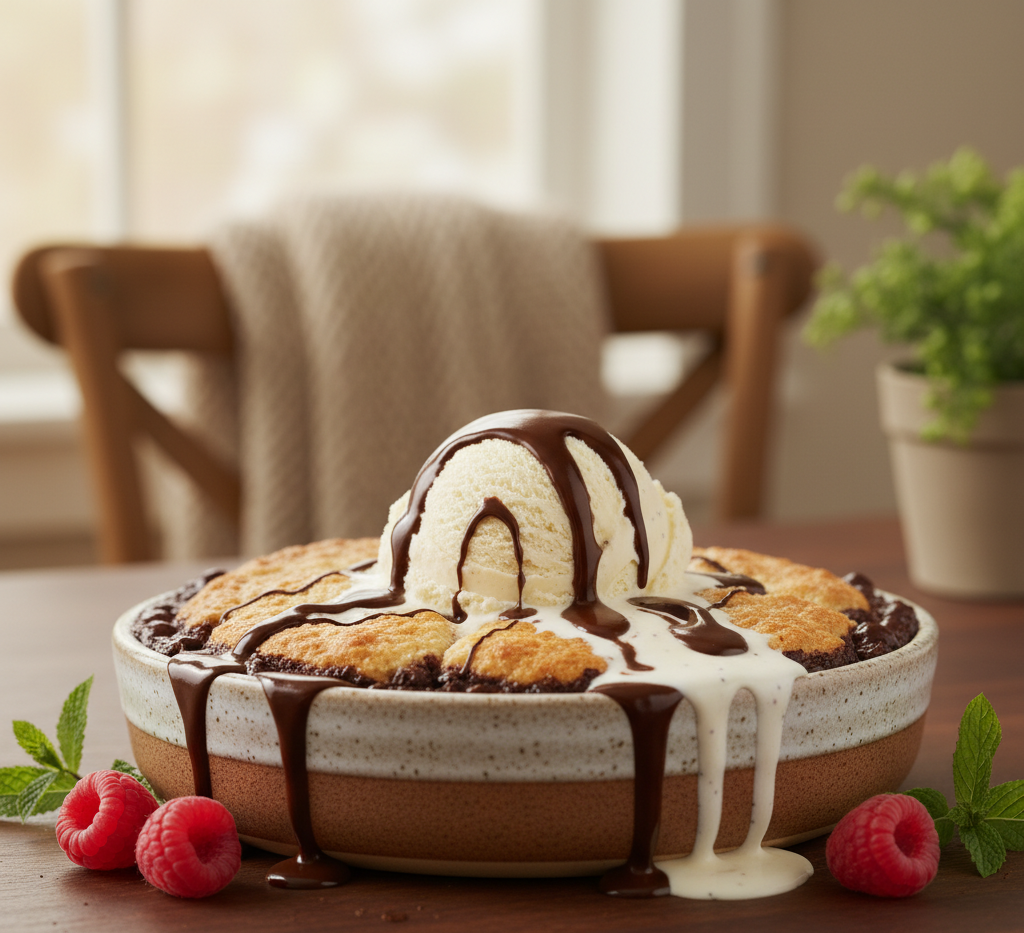
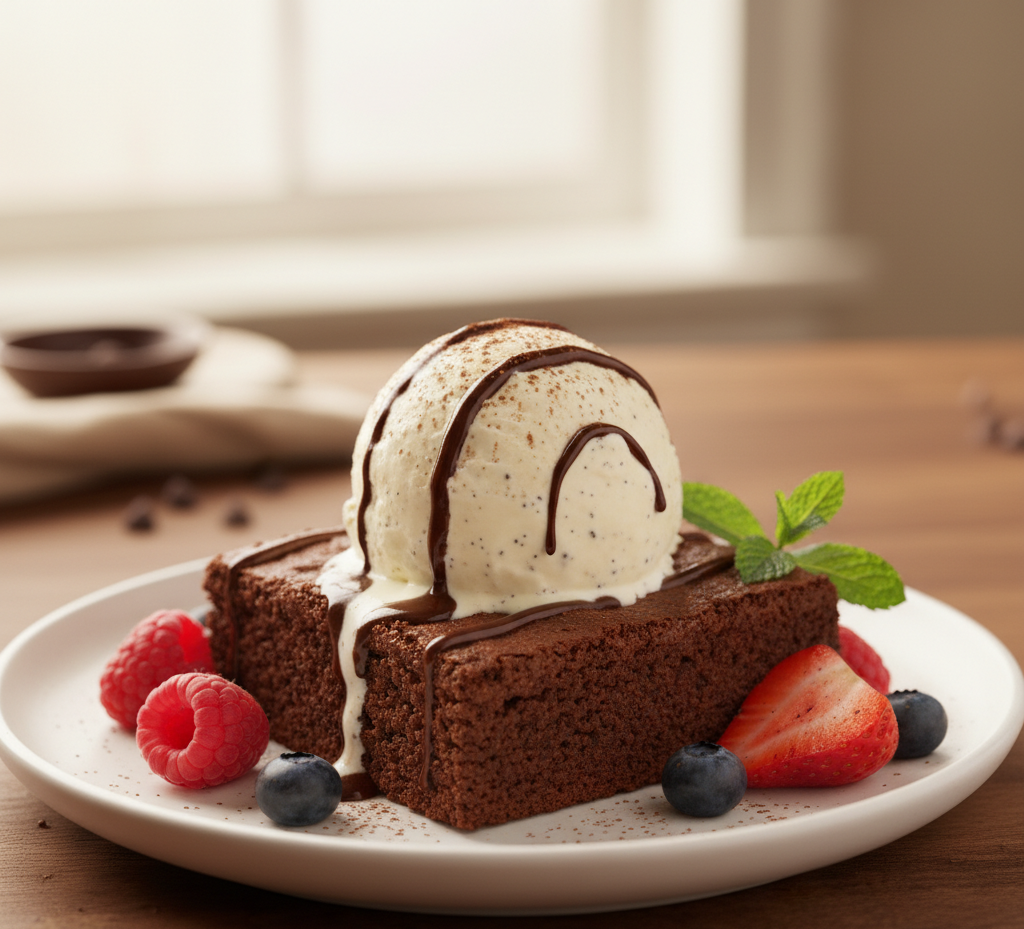
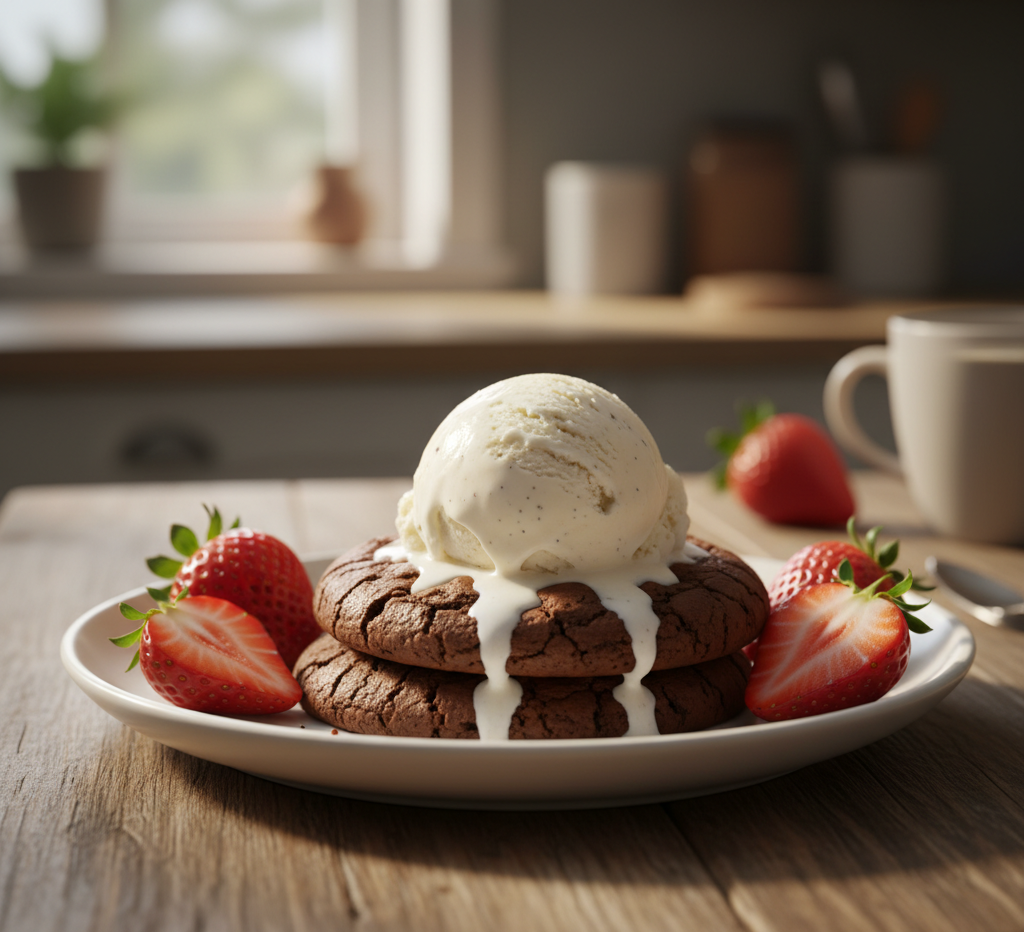
What to Serve With It

Fudgy brownie cookies pair beautifully with:

  • A tall glass of cold milk (classic choice)
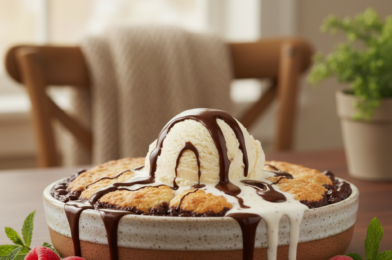
  • Vanilla ice cream for a cookie sundae
  • Fresh berries to cut through the richness
  • Coffee or hot chocolate for a cozy dessert experience

Storage & Reheating

  • Room Temperature: Store in an airtight container for up to 3 days.
  • Refrigeration: Keeps for up to 1 week, though texture may firm slightly.
  • Freezing: Freeze baked cookies in a single layer, then transfer to a freezer-safe bag for up to 3 months.
  • Reheating: Microwave for 10–15 seconds to regain that fresh-from-the-oven warmth and gooey texture.

Common Mistakes

  • Overbaking: Leads to dry, crumbly cookies. Remove when slightly underbaked.
  • Skipping Cooling Time: Moving cookies too early can break them apart.
  • Wrong Chocolate: Avoid low-quality chocolate for best melt and flavor.
  • Incorrect Measuring: Too much flour makes cookies cakier—measure carefully.

FAQs

1. Can I use all-purpose flour substitutes?
Yes! You can replace with gluten-free flour blends, but the texture may be slightly less fudgy.

2. Can I make these cookies dairy-free?
Absolutely. Use plant-based butter and dairy-free chocolate chips for a delicious vegan version.

3. Why are my cookies cakier than fudgy?
This usually happens if you overmix the batter or bake too long. Reduce mixing time and check oven timing.

4. Can I freeze the dough?
Yes, portioned dough balls freeze beautifully. Bake from frozen—just add 1–2 extra minutes to the bake time.

Final Thoughts

Fudgy brownie cookies are the perfect fusion of two classic desserts, offering the best of both worlds: chewy, rich, chocolatey centers and slightly crisp edges. They’re easy to make, versatile, and guaranteed to satisfy any chocolate craving. With these tips, variations, and tricks, you’ll master the ultimate indulgent treat that friends and family will beg you to make again and again.

Decadent Chocolate Cobbler Recipe for Ultimate Indulgence

If you’re a chocolate lover, this Decadent Chocolate Cobbler is your dream come true. Imagine a warm, gooey chocolate base with a soft, pillowy topping that soaks up every bit of chocolatey goodness—every bite is pure indulgence. This dessert strikes the perfect balance between a cake and a pudding, making it irresistible for family gatherings, date nights, or solo indulgence.

What makes this chocolate cobbler so special is its simplicity. With basic pantry ingredients and straightforward steps, you can create a dessert that feels gourmet but is incredibly easy to prepare. Plus, the aroma of baking chocolate filling your kitchen is enough to make anyone eager to dig in.

Why You’ll Love This Decadent Chocolate Cobbler

There are countless chocolate desserts out there, but this cobbler has unique charm:

  • Fudgy, indulgent base that melts in your mouth
  • Light, fluffy topping that contrasts perfectly with the richness
  • No complicated techniques—any home baker can master it
  • Serves warm for ultimate comfort food vibes
  • Customizable with nuts, caramel, or fruit mix-ins

This cobbler isn’t just dessert; it’s an experience of chocolatey comfort that satisfies cravings like no other.

Ingredients for Chocolate Cobbler

To make this indulgent dessert, you’ll need:

  • 1 cup all-purpose flour
  • 1 cup granulated sugar
  • 1 teaspoon baking powder
  • ½ teaspoon salt
  • ¼ cup unsweetened cocoa powder
  • ½ cup milk
  • ⅓ cup vegetable oil
  • 1 teaspoon vanilla extract
  • 1 cup semi-sweet chocolate chips or chopped chocolate
  • 1 cup hot water
  • Optional: whipped cream, ice cream, or chocolate drizzle for serving

Ingredient Notes and Tips

Flour & Sugar

Use all-purpose flour for a tender topping. Granulated sugar balances the rich chocolate, but you can substitute half with brown sugar for a deeper flavor.

Cocoa & Chocolate

Unsweetened cocoa gives a deep chocolate flavor while chocolate chips add gooey texture. High-quality chocolate is highly recommended.

Liquid Ingredients

Milk and oil create a tender topping and keep it moist. Whole milk works best, but non-dairy alternatives like oat milk are fine.

Step-by-Step Instructions

1. Preheat the Oven

Preheat your oven to 350°F (175°C). Grease a 9×9-inch baking dish or a similar size pan.

2. Prepare the Topping

In a medium bowl, whisk together flour, sugar, cocoa, baking powder, and salt. Stir in milk, oil, and vanilla until smooth.

3. Assemble the Cobbler

Pour the batter into the prepared dish. Sprinkle chocolate chips evenly over the top. Carefully pour 1 cup of hot water over the chocolate chips—the batter will rise through the water as it bakes.

4. Bake

Bake for 35–40 minutes until the topping is set but still tender. The chocolate base will remain gooey and fudgy.

5. Serve

Allow to cool slightly, then serve warm with whipped cream, ice cream, or a drizzle of chocolate sauce.

Tips for Perfect Chocolate Cobbler

  • Don’t overmix the batter; a few lumps are okay.
  • Use hot water carefully—pour slowly over chocolate for even distribution.
  • Bake until the topping is just set; the base should remain fudgy.
  • Serve immediately for the ultimate warm, gooey experience.

Variations to Try

  • Nutty Delight: Fold in chopped walnuts or pecans for crunch.
  • Berry Chocolate Cobbler: Add raspberries or cherries for a fruity twist.
  • Caramel Swirl: Drizzle caramel sauce into the batter before baking.
  • Spiced Chocolate: Add a pinch of cinnamon or cayenne for subtle warmth.

What to Serve With Chocolate Cobbler

  • Vanilla or chocolate ice cream for contrast
  • Whipped cream for extra creaminess
  • Fresh berries to balance richness
  • Coffee or milk for pairing with dessert

Storage & Reheating Tips

  • Room Temperature: Store covered for up to 2 days.
  • Refrigerator: Keeps well for 3–4 days, reheat before serving.
  • Freezer: Freeze in airtight containers for up to 2 months; thaw overnight in the fridge.
  • Reheating: Warm individual portions in the microwave for 20–30 seconds for that gooey chocolate experience.

Common Mistakes to Avoid

  • Pouring cold water over the batter (will affect the rise and texture).
  • Overbaking the cobbler; topping should be firm but soft inside.
  • Using low-quality chocolate—it affects flavor and melt.
  • Skipping greasing the pan; cobbler may stick to the dish.

Frequently Asked Questions

1. Can I make this cobbler ahead of time?

Yes! Assemble and refrigerate the batter, then bake the next day for fresh results.

2. Can I use dark chocolate instead of semi-sweet?

Absolutely! Dark chocolate enhances richness but may slightly reduce sweetness.

3. Is this dessert very sweet?

It is indulgent but balanced—adjust sugar or chocolate chips to taste.

4. Can I make this gluten-free?

Yes, substitute all-purpose flour with a 1-to-1 gluten-free flour blend.

Final Thoughts

This Decadent Chocolate Cobbler is a must-try dessert for chocolate enthusiasts. Its fudgy, rich base paired with a soft, cake-like topping makes every bite a moment of indulgence. Whether for a special occasion, a cozy night in, or a celebration, this cobbler will impress anyone lucky enough to try it. Serve it warm with ice cream or whipped cream, and enjoy the ultimate chocolate experience.

Bailey’s Irish Cream Brownies – Decadent, Boozy, and Irresistible

If you’re looking for a dessert that combines indulgent chocolate with a smooth, boozy twist, these Bailey’s Irish Cream Brownies are exactly what you need. Imagine fudgy, melt-in-your-mouth brownies infused with the subtle, creamy flavor of Bailey’s Irish Cream—a dessert that feels both decadent and sophisticated.

Perfect for date nights, holiday parties, or just treating yourself, these brownies deliver a rich, chocolatey bite with a gentle hint of liqueur. The combination of buttery chocolate, espresso hints (optional), and the luxurious creaminess of Bailey’s makes them a guaranteed crowd-pleaser.

Why You’ll Love These Bailey’s Irish Cream Brownies

There are plenty of brownie recipes out there, but these stand out because:

  • Fudgy and rich – soft, chocolatey interior with a glossy top
  • Subtle boozy flavor – Bailey’s Irish Cream adds a creamy sophistication
  • Perfect for gifting – elegant enough for holidays or parties
  • Easy to make – requires basic ingredients with minimal fuss
  • Customizable – add nuts, chocolate chunks, or ganache for extra indulgence

The balance of chocolate and Bailey’s flavor makes each bite a little celebration.

Ingredients for Bailey’s Irish Cream Brownies

To make these luxurious brownies, gather the following:

  • 1 cup (2 sticks) unsalted butter
  • 8 oz semisweet chocolate, chopped
  • 1 cup granulated sugar
  • ½ cup brown sugar
  • 4 large eggs
  • 1 teaspoon vanilla extract
  • ¼ cup Bailey’s Irish Cream
  • ¾ cup all-purpose flour
  • ¼ cup unsweetened cocoa powder
  • ½ teaspoon salt
  • Optional: ½ cup chopped walnuts or chocolate chips

Ingredient Notes and Substitutions

A few tips to make these brownies perfect every time:

  • Bailey’s Irish Cream: Adds flavor and moisture. Can substitute with other cream liqueurs if needed.
  • Chocolate: Use high-quality semisweet chocolate for deep flavor; dark chocolate intensifies richness.
  • Butter: Unsalted butter gives better control over sweetness.
  • Optional Add-ins: Nuts, chocolate chunks, or espresso powder elevate the brownies for a gourmet touch.

Step-by-Step Instructions

1. Preheat and Prepare

Preheat your oven to 350°F (175°C) and line an 8×8-inch baking pan with parchment paper.

2. Melt Butter and Chocolate

In a heatproof bowl over simmering water, melt butter and chopped chocolate together until smooth, stirring frequently. Remove from heat and let cool slightly.

3. Mix Eggs and Sugar

In a separate bowl, whisk together eggs, granulated sugar, and brown sugar until slightly thickened.

4. Combine Mixtures

Slowly fold the melted chocolate mixture into the eggs and sugar. Add vanilla extract and Bailey’s Irish Cream, mixing until fully incorporated.

5. Add Dry Ingredients

Sift in flour, cocoa powder, and salt. Fold gently until just combined—overmixing can make brownies dense.

6. Optional Add-ins

Fold in nuts or chocolate chunks if desired.

7. Bake

Pour batter into prepared pan and bake for 25–30 minutes, or until a toothpick inserted in the center comes out with a few moist crumbs.

8. Cool and Slice

Allow brownies to cool completely in the pan before slicing. For extra indulgence, drizzle with chocolate ganache or sprinkle with cocoa powder.

Tips for Perfect Bailey’s Irish Cream Brownies

  • Don’t overbake: The center should be fudgy, not dry.
  • Use quality chocolate: It makes a noticeable difference in flavor.
  • Chill for clean slices: Refrigerating briefly before cutting prevents crumbs.
  • Fold gently: Preserves the airy texture while keeping brownies rich.

Delicious Variations

  • Minty Irish Cream: Add ½ teaspoon peppermint extract for a holiday twist.
  • Espresso Infusion: Add 1 teaspoon espresso powder to enhance chocolate depth.
  • Nut Lovers: Fold in toasted pecans or almonds.
  • Ganache Topping: Pour warm chocolate ganache over brownies for a luxurious finish.

What to Serve With Bailey’s Irish Cream Brownies

Enhance your dessert experience:

  • Vanilla ice cream or whipped cream
  • A drizzle of chocolate or caramel sauce
  • Fresh berries for contrast
  • A glass of Bailey’s or coffee on the side

Storage & Reheating Tips

  • Room temperature: Store in an airtight container for up to 3 days.
  • Refrigerator: Keeps for up to 1 week, especially if topped with ganache.
  • Freezer: Wrap tightly in plastic wrap and foil—freeze for up to 2 months. Thaw overnight in the fridge.
  • Serving tip: Warm briefly in the microwave for a gooey treat.

Common Mistakes to Avoid

  • Overbaking: Makes brownies dry and crumbly.
  • Skipping parchment: Can cause sticking to the pan.
  • Overmixing batter: Leads to tough brownies.
  • Adding Bailey’s too early over heat: Alcohol may evaporate—add after chocolate mixture has cooled slightly.

Frequently Asked Questions

1. Can I make these brownies alcohol-free?

Yes! Substitute Bailey’s with milk or cream for flavor without the alcohol.

2. Can I use dark chocolate instead of semisweet?

Absolutely! Dark chocolate will make them richer and slightly less sweet.

3. How fudgy should these brownies be?

They should be moist and dense, with a slightly gooey center.

4. Can I double the recipe?

Yes! Use a 9×13-inch pan and adjust baking time accordingly.

Final Thoughts

These Bailey’s Irish Cream Brownies are decadent, fudgy, and perfectly boozy—a dessert that feels special with minimal effort. They’re ideal for holidays, dinner parties, or cozy nights in, and the combination of chocolate and Bailey’s Irish Cream is always a winner.

With simple ingredients and straightforward steps, you can create a luxurious treat that’s sure to impress friends and family. Give them a try, and savor each rich, creamy bite!

Peanut Butter Icebox Cake (No-Bake, Creamy & Irresistible!)

If you’re searching for a simple yet unforgettable dessert, this Peanut Butter Icebox Cake is about to become your new favorite. With layers of creamy peanut butter filling and soft, cake-like cookies that magically transform in the fridge, this no-bake treat delivers big flavor with minimal effort.

Perfect for warm days when you don’t want to turn on the oven, this dessert is as convenient as it is delicious. The combination of rich peanut butter, fluffy whipped cream, and tender cookie layers creates a texture that’s light yet indulgent. Whether you’re hosting a party or just treating yourself, this Peanut Butter Icebox Cake always impresses.

Why You’ll Love This Peanut Butter Icebox Cake

This Peanut Butter Icebox Cake is a dream dessert for both beginners and seasoned bakers.

  • No baking required—perfect for hot weather
  • Easy to assemble with simple ingredients
  • Make-ahead friendly—even better the next day
  • Rich and creamy texture with balanced sweetness
  • Crowd-pleasing dessert for all ages

It’s one of those recipes that feels fancy but couldn’t be easier to prepare.

Ingredients for Peanut Butter Icebox Cake

To make this delicious Peanut Butter Icebox Cake, you’ll need:

  • 2 cups heavy whipping cream
  • 1 cup creamy peanut butter
  • 8 oz cream cheese, softened
  • ¾ cup powdered sugar
  • 1 teaspoon vanilla extract
  • 1 package chocolate wafer cookies or graham crackers
  • Optional toppings: chocolate chips, peanut butter drizzle, crushed peanuts

Ingredient Notes and Substitutions

A few simple tweaks can help you customize your Peanut Butter Icebox Cake to your taste.

Peanut Butter

Use creamy peanut butter for a smooth texture, but crunchy works if you want added texture.

Cookies

Chocolate wafers are classic, but graham crackers or even vanilla wafers can be used.

Cream Cheese

Adds richness and stability to the filling—make sure it’s softened for easy mixing.

Sweetness Level

Adjust powdered sugar based on your preference for sweetness.

Step-by-Step Instructions

1. Make the Filling

In a large bowl, beat cream cheese, peanut butter, powdered sugar, and vanilla until smooth and creamy.

2. Whip the Cream

In a separate bowl, whip heavy cream until stiff peaks form, then gently fold it into the peanut butter mixture.

3. Layer the Cake

Spread a thin layer of filling in a dish, then add a layer of cookies. Repeat layers until all ingredients are used.

4. Chill and Set

Cover and refrigerate for at least 6 hours or overnight to allow the cookies to soften.

5. Garnish and Serve

Top with whipped cream, chocolate drizzle, or crushed peanuts before serving.

Tips for Perfect Peanut Butter Icebox Cake

To get the best results with your Peanut Butter Icebox Cake, keep these tips in mind:

  • Chill overnight for best texture
  • Use full-fat ingredients for richness
  • Layer evenly for a clean slice
  • Don’t skip the folding step to keep the filling light

These simple techniques ensure a smooth, creamy dessert every time.

Delicious Variations to Try

This Peanut Butter Icebox Cake is incredibly versatile.

Chocolate Peanut Butter Version

Add a layer of chocolate ganache between layers.

Banana Twist

Add sliced bananas between layers for a classic flavor combo.

Oreo Icebox Cake

Use Oreo cookies instead of wafers.

Nutella Swirl

Swirl Nutella into the filling for extra indulgence.

What to Serve With Peanut Butter Icebox Cake

This rich dessert pairs well with lighter, refreshing options.

  • Fresh berries
  • Vanilla ice cream
  • Iced coffee or cold brew
  • Milk or hot chocolate

Storage & Reheating Tips

This Peanut Butter Icebox Cake stores beautifully, making it ideal for planning ahead.

  • Refrigerate: Store covered for up to 4–5 days
  • Freeze: Freeze for up to 1 month for a firmer texture
  • Serve chilled: Best enjoyed straight from the fridge

No reheating needed—just slice and enjoy!

Common Mistakes to Avoid

Avoid these common issues when making Peanut Butter Icebox Cake:

  • Not chilling long enough (layers won’t set properly)
  • Overmixing whipped cream (can deflate texture)
  • Using dry or stale cookies
  • Skipping even layering

Paying attention to these details ensures perfect results.

Frequently Asked Questions

1. Can I make Peanut Butter Icebox Cake ahead of time?

Yes! It’s actually better when made a day in advance.

2. Can I freeze this dessert?

Absolutely. It freezes well and can even be served slightly frozen.

3. What’s the best cookie to use?

Chocolate wafers are classic, but graham crackers or Oreos work great.

4. Is this dessert very sweet?

It’s rich but balanced—adjust sugar to your taste if needed.

Final Thoughts

This Peanut Butter Icebox Cake is the ultimate no-bake dessert—simple, creamy, and packed with flavor. It’s perfect for any occasion, from casual family dinners to special celebrations.

With its layers of peanut butter goodness and soft, cake-like texture, it’s a recipe you’ll come back to again and again. Give it a try, and enjoy a dessert that’s as easy to make as it is delicious.

Ultimate Beef Bacon Ranch Mac and Cheese – Crowd Favorite

If you’re looking for the ultimate comfort food that guarantees rave reviews, this Ultimate Beef Bacon Ranch Mac and Cheese – Crowd Favorite is exactly what you need. Imagine tender pasta coated in a rich, creamy cheese sauce, loaded with savory ground beef, crispy beef bacon, and a punch of ranch flavor that ties it all together. It’s hearty, indulgent, and completely irresistible.

This dish is perfect for potlucks, family dinners, game day spreads, or anytime you want something filling and satisfying. The combination of cheesy goodness, smoky beef bacon, and seasoned beef makes this recipe stand out from your typical mac and cheese. One bite, and you’ll see why it’s truly a crowd favorite.

Why You’ll Love This Beef Bacon Ranch Mac and Cheese

This Ultimate Beef Bacon Ranch Mac and Cheese – Crowd Favorite delivers big on flavor, texture, and convenience.

  • Ultra creamy and cheesy with bold ranch flavor
  • Hearty and filling thanks to beef and bacon
  • Perfect for feeding a crowd
  • Easy to customize with different cheeses and add-ins
  • Great for leftovers and meal prep

It’s comfort food taken to the next level—rich, satisfying, and absolutely unforgettable.

Ingredients for Ultimate Beef Bacon Ranch Mac and Cheese

Here’s everything you need to make this flavorful beef bacon ranch mac and cheese:

  • 1 lb ground beef
  • 6 slices beef bacon, cooked and crumbled
  • 8 oz elbow macaroni or pasta of choice
  • 2 cups shredded cheddar cheese
  • 1 cup mozzarella cheese
  • 1½ cups milk
  • ½ cup heavy cream
  • 2 tablespoons butter
  • 2 tablespoons flour
  • 1 packet ranch seasoning mix
  • 1 teaspoon garlic powder
  • Salt and pepper to taste


Ingredient Notes and Substitutions

To make the best Ultimate Beef Bacon Ranch Mac and Cheese – Crowd Favorite, consider these helpful tips and swaps.

Ground Beef

Use lean ground beef to avoid excess grease, or substitute ground turkey for a lighter option.

Beef Bacon

Adds a smoky, savory flavor. You can use turkey bacon if preferred.

Cheese Blend

Cheddar provides sharpness, while mozzarella adds creaminess. You can also include Colby Jack or Monterey Jack.

Ranch Seasoning

A store-bought packet works great, but homemade ranch seasoning can enhance freshness.

Step-by-Step Instructions

1. Cook the Pasta

Boil salted water and cook pasta until al dente. Drain and set aside.

2. Brown the Beef

In a large skillet, cook ground beef over medium heat until browned. Drain excess grease if needed.

3. Make the Cheese Sauce

In the same pan, melt butter and whisk in flour to create a roux. Slowly add milk and cream, stirring until thickened.

4. Add Cheese and Seasoning

Stir in shredded cheeses, ranch seasoning, and garlic powder until smooth and creamy.

5. Combine Everything

Add cooked pasta, ground beef, and crumbled beef bacon. Mix until everything is evenly coated.

6. Optional Bake

Transfer to a baking dish, top with extra cheese, and bake until bubbly and golden.

Tips for Perfect Results

To get the most out of your Ultimate Beef Bacon Ranch Mac and Cheese – Crowd Favorite, keep these tips in mind:

  • Use freshly shredded cheese for smoother melting
  • Don’t overcook pasta to maintain texture
  • Season gradually to balance flavors
  • Let it rest slightly before serving to thicken

These small steps make a big difference in the final result.

Delicious Variations to Try

This beef bacon ranch mac and cheese is incredibly versatile and easy to customize.

Spicy Version

Add jalapeños or red pepper flakes for heat.

Veggie Boost

Mix in broccoli, spinach, or bell peppers.

Extra Cheesy

Add cream cheese or more shredded cheese for richness.

BBQ Twist

Drizzle in a bit of BBQ sauce for a smoky-sweet flavor.

What to Serve With Beef Bacon Ranch Mac and Cheese

Pair this hearty dish with lighter sides to balance the meal.

  • Fresh green salad
  • Steamed vegetables
  • Garlic bread
  • Coleslaw
  • Lemonade or iced tea

Storage & Reheating Tips

Leftovers of this Ultimate Beef Bacon Ranch Mac and Cheese – Crowd Favorite are just as delicious.

  • Refrigerate: Store in an airtight container for up to 4 days
  • Freeze: Freeze for up to 2 months
  • Reheat: Warm on the stove with a splash of milk to restore creaminess

Proper reheating keeps the dish smooth and flavorful.

Common Mistakes to Avoid

Avoid these common pitfalls when making beef bacon ranch mac and cheese:

  • Using pre-shredded cheese (can cause grainy sauce)
  • Overheating the sauce (may separate)
  • Skipping seasoning adjustments
  • Not draining beef properly

Paying attention to these details ensures perfect results every time.

Frequently Asked Questions

1. Can I make this dish ahead of time?

Yes! Assemble it ahead and bake just before serving.

2. Can I use a different protein?

Absolutely—try ground turkey, chicken, or even sausage.

3. Is ranch flavor overpowering?

No, it adds a subtle tangy boost, but you can adjust to taste.

4. Can I make it gluten-free?

Yes, use gluten-free pasta and flour alternatives.

Final Thoughts

This Ultimate Beef Bacon Ranch Mac and Cheese – Crowd Favorite truly lives up to its name. It’s creamy, hearty, and packed with bold, comforting flavors that everyone loves. Whether you’re feeding a crowd or just treating yourself, this dish delivers satisfaction in every bite.

With its rich cheese sauce, savory beef, and smoky bacon, it’s the kind of recipe you’ll come back to again and again. Try it once, and it just might become your new go-to comfort food favorite.

The Best Chicken Tikka Masala Recipe (Rich, Creamy & Restaurant-Quality!)

If you’ve ever fallen in love with the rich, creamy, and boldly spiced flavors of The Best Chicken Tikka Masala Recipe, you’re not alone. This iconic dish has become a favorite across the U.S., blending tender marinated chicken with a velvety tomato-based sauce that’s both comforting and complex.

What makes this recipe truly special is how it balances smoky, spiced chicken with a creamy, slightly tangy sauce. The good news? You don’t need a restaurant or a tandoor oven to recreate it. With a few simple steps and pantry-friendly spices, you can make The Best Chicken Tikka Masala Recipe right in your own kitchen—and it might even taste better than takeout.

Why You’ll Love This Chicken Tikka Masala Recipe

This truly is The Best Chicken Tikka Masala Recipe for home cooks who want bold flavor without complicated steps.

  • Restaurant-quality taste at home
  • Rich and creamy sauce packed with spices
  • Customizable heat level
  • Perfect for meal prep
  • Pairs beautifully with rice or naan

It’s the kind of dish that impresses guests but is simple enough for a cozy weeknight dinner.

Ingredients for The Best Chicken Tikka Masala Recipe

To make this flavorful Chicken Tikka Masala, you’ll need two main components: the marinade and the sauce.

For the Chicken Marinade:

  • 1½ lbs boneless chicken (thighs or breasts)
  • 1 cup plain yogurt
  • 1 tablespoon lemon juice
  • 2 teaspoons garam masala
  • 1 teaspoon cumin
  • 1 teaspoon paprika
  • 1 teaspoon garlic (minced)
  • Salt to taste

For the Sauce:

  • 2 tablespoons butter
  • 1 small onion, finely chopped
  • 3 cloves garlic, minced
  • 1 tablespoon ginger, grated
  • 1 can (14 oz) crushed tomatoes
  • 1 cup heavy cream
  • 1 teaspoon turmeric
  • 1 teaspoon chili powder
  • 1 teaspoon garam masala
  • Salt and pepper to taste


Ingredient Notes and Substitutions

Making The Best Chicken Tikka Masala Recipe is all about layering flavor, and your ingredient choices matter.

Chicken Cuts

Chicken thighs are more flavorful and juicy, but breasts work well for a leaner option.

Yogurt Marinade

Full-fat yogurt gives the best texture and helps tenderize the chicken beautifully.

Spice Blend

Garam masala is essential for authentic flavor—don’t skip it.

Cream Alternatives

You can use coconut milk for a dairy-free version with a slightly different flavor profile.

Step-by-Step Instructions

1. Marinate the Chicken

Combine all marinade ingredients and coat the chicken thoroughly. Let it marinate for at least 1 hour (overnight is best).

2. Cook the Chicken

Grill, bake, or pan-sear the marinated chicken until cooked through and slightly charred.

3. Sauté Aromatics

In a large pan, melt butter and sauté onion, garlic, and ginger until soft and fragrant.

4. Build the Sauce

Add crushed tomatoes and spices. Simmer until thickened, then stir in heavy cream.

5. Combine and Simmer

Add the cooked chicken to the sauce and simmer for 10–15 minutes to meld flavors.

6. Garnish and Serve

Top with fresh cilantro and serve hot with rice or naan.

Tips for Perfect Chicken Tikka Masala

To truly master The Best Chicken Tikka Masala Recipe, keep these tips in mind:

  • Marinate longer for deeper flavor
  • Char the chicken slightly for a smoky taste
  • Use fresh spices for maximum aroma
  • Simmer the sauce gently to avoid curdling

These small steps elevate your dish from good to unforgettable.

Delicious Variations to Try

Once you’ve mastered The Best Chicken Tikka Masala Recipe, try these variations:

Spicy Version

Add extra chili powder or fresh chilies.

Vegetarian Option

Swap chicken for paneer, tofu, or chickpeas.

Dairy-Free Version

Use coconut milk instead of cream and dairy-free yogurt.

Instant Pot Method

Cook everything in one pot for convenience and speed.

What to Serve With Chicken Tikka Masala

Pair your Chicken Tikka Masala with these classic sides:

  • Basmati rice
  • Garlic naan
  • Cucumber raita
  • Roasted vegetables

Storage & Reheating Tips

This Chicken Tikka Masala stores beautifully and tastes even better the next day.

  • Refrigerate: Store in an airtight container for up to 4 days
  • Freeze: Freeze for up to 2 months
  • Reheat: Warm gently on the stove, adding a splash of cream if needed

The flavors deepen over time, making leftovers especially delicious.

Common Mistakes to Avoid

Avoid these pitfalls when making The Best Chicken Tikka Masala Recipe:

  • Skipping the marinade (reduces flavor)
  • Overcooking the chicken (makes it dry)
  • Using low-quality spices (dulls the taste)
  • Boiling the sauce too hard (can separate cream)

Paying attention to these details ensures a perfect dish every time.

Frequently Asked Questions

1. Is chicken tikka masala spicy?

It has mild to moderate heat, but you can easily adjust the spice level.

2. Can I make this recipe ahead of time?

Yes! It actually tastes better after the flavors meld overnight.

3. What’s the difference between tikka masala and butter chicken?

Tikka masala is usually more spiced and tomato-forward, while butter chicken is richer and sweeter.

4. Can I grill the chicken instead?

Absolutely! Grilling adds a delicious smoky flavor.

Final Thoughts

This truly is The Best Chicken Tikka Masala Recipe for anyone who loves bold, comforting flavors. With its creamy sauce, tender chicken, and aromatic spices, it’s a dish that feels both indulgent and approachable.

Whether you’re making it for a special dinner or a cozy night at home, this recipe delivers restaurant-quality results with simple ingredients. Once you try it, it’s sure to become a regular favorite in your kitchen.

Buffalo Chicken Wings (Crispy, Saucy & Game-Day Perfect!)

There’s nothing quite like a plate of Buffalo chicken wings—crispy on the outside, juicy on the inside, and tossed in that iconic tangy, buttery hot sauce. Whether you’re hosting a game-day party, planning a casual get-together, or simply craving a bold and satisfying snack, this classic recipe never disappoints.

Originating from Buffalo, New York, these wings have become a staple across the U.S., loved for their irresistible combination of crunch and heat. The good news? You don’t need a restaurant or deep fryer to make incredible Buffalo chicken wings at home. With the right technique and a few key tips, you can achieve perfectly crispy wings every time.

Why You’ll Love These Buffalo Chicken Wings

These homemade Buffalo chicken wings deliver everything you want in a classic wing recipe—and more.

  • Crispy texture without complicated techniques
  • Bold, tangy flavor from the signature buffalo sauce
  • Perfect for gatherings like game day or parties
  • Customizable heat levels to suit your taste
  • Multiple cooking methods (baked, fried, or air-fried)

Once you master this recipe, you’ll never need to order takeout wings again.

Ingredients for Buffalo Chicken Wings

To make the best Buffalo chicken wings, you’ll need simple ingredients that pack a punch:

  • 2 lbs chicken wings (split into flats and drumettes)
  • 1 tablespoon baking powder (for crispiness)
  • 1 teaspoon salt
  • ½ teaspoon black pepper
  • 1 teaspoon garlic powder

For the Buffalo Sauce:

  • ⅓ cup hot sauce
  • ¼ cup unsalted butter
  • 1 tablespoon honey (optional)
  • ½ teaspoon Worcestershire sauce

Ingredient Notes and Substitutions

Understanding your ingredients can make all the difference when preparing Buffalo chicken wings.

Chicken Wings

Fresh wings are best, but frozen wings work if fully thawed and patted dry.

Baking Powder Trick

This is the secret to crispy baked wings—it helps dry out the skin for a crunchy finish.

Hot Sauce

Classic cayenne-based sauces work best, but you can experiment with different brands or spice levels.

Butter Balance

Butter mellows the heat and creates that signature silky buffalo sauce.

Step-by-Step Instructions

1. Prep the Wings

Pat the chicken wings completely dry with paper towels. Toss them with baking powder, salt, pepper, and garlic powder.

2. Arrange and Bake

Place wings on a wire rack over a baking sheet. Bake at 425°F for 40–45 minutes, flipping halfway through.

3. Make the Buffalo Sauce

In a saucepan, melt butter and whisk in hot sauce, honey, and Worcestershire sauce until smooth.

4. Toss the Wings

Once crispy, toss the wings in the buffalo sauce until evenly coated.

5. Serve Immediately

Serve hot with your favorite dipping sauces and sides.

Tips for Perfect Buffalo Chicken Wings

Achieving restaurant-quality Buffalo chicken wings at home is easier than you think with these tips:

  • Dry wings thoroughly for maximum crispiness
  • Use a wire rack to allow air circulation
  • Bake at high heat for a crispy exterior
  • Don’t overcrowd the pan
  • Sauce just before serving to keep wings crispy

These small techniques make a big difference in texture and flavor.

Delicious Variations to Try

Once you’ve mastered classic Buffalo chicken wings, try these fun variations:

Garlic Parmesan Wings

Skip buffalo sauce and toss in garlic butter and Parmesan.

Honey Buffalo Wings

Add extra honey for a sweet and spicy twist.

Extra Hot Wings

Increase the hot sauce or add cayenne pepper.

BBQ Buffalo Hybrid

Mix buffalo sauce with BBQ sauce for a smoky-sweet flavor.

What to Serve With Buffalo Chicken Wings

Complete your spread with these classic pairings:

  • Celery and carrot sticks
  • Ranch or blue cheese dressing
  • French fries or potato wedges
  • Coleslaw
  • Cold drinks like soda or beer

Storage & Reheating Tips

Leftover Buffalo chicken wings can still be delicious if stored properly.

  • Refrigerate: Store in an airtight container for up to 4 days
  • Reheat: Bake at 375°F until heated through and crispy
  • Avoid microwaving: It softens the skin

Reheating in the oven helps restore that crispy texture.

Common Mistakes to Avoid

Avoid these common pitfalls when making Buffalo chicken wings:

  • Not drying the wings (leads to soggy skin)
  • Skipping the wire rack (prevents even cooking)
  • Over-saucing too early (makes wings soggy)
  • Cooking at too low a temperature

Keeping these in mind ensures perfectly crispy, flavorful wings.

Frequently Asked Questions

1. Can I air fry Buffalo chicken wings?

Yes! Air fry at 400°F for about 20–25 minutes, flipping halfway through.

2. Are Buffalo wings very spicy?

They have a moderate kick, but you can adjust the heat by changing the sauce ratio.

3. Can I make them ahead of time?

You can bake the wings ahead and reheat before tossing in sauce.

4. What’s the best dipping sauce?

Ranch and blue cheese are classic favorites.

Final Thoughts

These Buffalo chicken wings are everything you want in a classic American favorite—crispy, saucy, and bursting with bold flavor. Whether baked, fried, or air-fried, they’re guaranteed to be a hit at any gathering.

Once you try making them at home, you’ll realize just how easy and rewarding it is to recreate this iconic dish. So grab your ingredients, fire up the oven, and get ready to enjoy the ultimate wing experience.

Buffalo Chicken Mac and Cheese (Ultra Creamy, Spicy & Irresistible!)

If you’re a fan of bold, spicy comfort food, this Buffalo Chicken Mac and Cheese is about to become your new favorite dish. It combines everything you love about classic mac and cheese—creamy sauce, tender pasta, and gooey melted cheese—with the tangy, spicy kick of buffalo chicken. The result is a rich, satisfying meal that’s perfect for weeknights, game days, or whenever you’re craving something indulgent.

This recipe strikes the perfect balance between creamy and spicy, with just enough heat to keep things exciting without overpowering the dish. Whether you’re cooking for family, friends, or just yourself, this Buffalo Chicken Mac and Cheese delivers comfort and flavor in every bite.

Why You’ll Love This Buffalo Chicken Mac and Cheese

There are so many reasons this Buffalo Chicken Mac and Cheese deserves a spot on your dinner rotation.

  • Bold flavor: Combines creamy cheese with spicy buffalo sauce
  • Comfort food upgrade: Takes classic mac and cheese to the next level
  • Easy to make: Simple ingredients and straightforward steps
  • Crowd-pleaser: Perfect for gatherings and family meals
  • Customizable heat level: Adjust spice to your liking

It’s the kind of dish that feels indulgent yet approachable—exactly what great home cooking should be.

Ingredients for Buffalo Chicken Mac and Cheese

To make this rich and flavorful Buffalo Chicken Mac and Cheese, you’ll need:

  • 2 cups cooked chicken (shredded or diced)
  • 8 oz elbow macaroni
  • 2 cups shredded cheddar cheese
  • 1 cup mozzarella cheese
  • 1 cup milk
  • ½ cup heavy cream
  • ⅓ cup buffalo sauce
  • 2 tablespoons butter
  • 2 tablespoons flour
  • ½ teaspoon garlic powder
  • Salt and pepper to taste

Ingredient Notes and Substitutions

A few smart choices can elevate your Buffalo Chicken Mac and Cheese and make it perfectly suited to your taste.

Chicken Options

Rotisserie chicken is quick and flavorful, but grilled or baked chicken works just as well.

Cheese Choices

Cheddar provides sharp flavor, while mozzarella adds creaminess. You can also try Monterey Jack or Colby.

Buffalo Sauce

Choose your favorite brand—mild, medium, or hot depending on your spice tolerance.

Pasta Types

Elbow macaroni is classic, but shells or cavatappi hold the sauce beautifully.

Step-by-Step Instructions

1. Cook the Pasta

Bring salted water to a boil and cook the pasta until al dente. Drain and set aside.

2. Make the Roux

In a large skillet, melt butter over medium heat. Whisk in flour and cook for 1–2 minutes.

3. Build the Cheese Sauce

Slowly whisk in milk and cream. Cook until thickened, then stir in shredded cheese until melted and smooth.

4. Add Buffalo Flavor

Mix in buffalo sauce and garlic powder, adjusting the amount to taste.

5. Combine Everything

Add cooked pasta and chicken to the sauce, stirring until fully coated and heated through.

6. Optional Bake

Transfer to a baking dish, top with extra cheese, and broil for a golden, bubbly finish.

Tips for Perfect Buffalo Chicken Mac and Cheese

To make your Buffalo Chicken Mac and Cheese absolutely perfect, follow these tips:

  • Use freshly shredded cheese for better melting
  • Don’t overcook pasta to avoid mushy texture
  • Add buffalo sauce gradually to control spice level
  • Stir constantly to keep the sauce smooth

These small details help create a creamy, restaurant-quality dish at home.

Delicious Variations to Try

This Buffalo Chicken Mac and Cheese is incredibly versatile and easy to customize.

Blue Cheese Lovers

Add crumbled blue cheese for a classic buffalo pairing.

Crispy Topping

Top with breadcrumbs and bake for added crunch.

Low-Carb Version

Use cauliflower instead of pasta.

Extra Protein

Mix in bacon or even shrimp for a unique twist.

What to Serve With Buffalo Chicken Mac and Cheese

Balance out the richness of this dish with fresh and light sides.

  • Celery and carrot sticks
  • Crisp green salad
  • Garlic bread
  • Roasted vegetables
  • Lemonade or iced tea

Storage & Reheating Tips

This Buffalo Chicken Mac and Cheese stores well and makes great leftovers.

  • Refrigerate: Store in an airtight container for up to 4 days
  • Reheat: Warm on the stove with a splash of milk
  • Freeze: Freeze for up to 2 months (best without pasta overcooked)

Reheating gently helps maintain that creamy consistency.

Common Mistakes to Avoid

Avoid these common pitfalls when making Buffalo Chicken Mac and Cheese:

  • Using pre-shredded cheese (can make sauce grainy)
  • Adding buffalo sauce all at once (may overpower dish)
  • Overheating cheese sauce (causes separation)
  • Skipping seasoning (leads to bland flavor)

Paying attention to these details ensures a perfect result every time.

Frequently Asked Questions

1. Can I make Buffalo Chicken Mac and Cheese ahead of time?

Yes! Prepare it in advance and reheat with a bit of milk to keep it creamy.

2. Is it very spicy?

It depends on the buffalo sauce you use. You can easily adjust the heat level.

3. Can I use a different protein?

Absolutely—try turkey, shredded pork, or even plant-based alternatives.

4. What’s the best cheese combination?

Cheddar and mozzarella are ideal, but adding Monterey Jack or blue cheese enhances flavor.

Final Thoughts

This Buffalo Chicken Mac and Cheese is the ultimate comfort food with a bold twist. Creamy, cheesy, and perfectly spicy, it’s a dish that delivers big flavor with minimal effort. Whether you’re making it for a cozy dinner or a crowd-pleasing party dish, it’s guaranteed to impress.

Once you try it, you’ll see why this recipe is such a favorite—it’s rich, satisfying, and endlessly customizable. Don’t be surprised if it becomes a regular request in your kitchen!

Cheesy Rotel Chicken Pasta (Creamy, Spicy, and Comforting!)

When it comes to easy comfort food that delivers bold flavor with minimal effort, Cheesy Rotel Chicken Pasta is a true standout. This creamy, cheesy pasta dish combines tender chicken, zesty Rotel tomatoes, and perfectly cooked pasta in a rich, satisfying sauce that hits all the right notes—savory, slightly spicy, and irresistibly creamy.

Whether you’re feeding a hungry family, meal prepping for the week, or just craving something cozy and indulgent, this recipe is a reliable go-to. The best part? It comes together quickly using simple pantry staples, making it ideal for busy weeknights when you want something homemade without the hassle.

Why You’ll Love This Cheesy Rotel Chicken Pasta

This Cheesy Rotel Chicken Pasta isn’t just another pasta recipe—it’s a flavor-packed dish that checks all the boxes for comfort and convenience.

  • Quick and easy: Ready in about 30 minutes
  • One-pot friendly: Fewer dishes, less cleanup
  • Bold flavor: Rotel adds a zesty, slightly spicy kick
  • Family-approved: Creamy and cheesy with just the right amount of heat
  • Customizable: Easy to adjust spice level and ingredients

If you’re looking for a dinner that feels indulgent yet approachable, this recipe delivers every time.

Ingredients for Cheesy Rotel Chicken Pasta

Here’s what you’ll need to make this creamy and delicious Cheesy Rotel Chicken Pasta:

  • 2 cups cooked chicken (shredded or diced)
  • 8 oz pasta (penne, rotini, or shells)
  • 1 can (10 oz) Rotel diced tomatoes with green chilies
  • 1 cup heavy cream
  • 1½ cups shredded cheddar cheese
  • ½ cup cream cheese
  • 2 cloves garlic, minced
  • 1 tablespoon olive oil
  • 1 teaspoon paprika
  • Salt and pepper to taste

Ingredient Notes and Substitutions

A few thoughtful tweaks can take your Cheesy Rotel Chicken Pasta to the next level.

Chicken Options

Rotisserie chicken is a fantastic shortcut, but grilled or baked chicken works just as well.

Pasta Choices

Short pasta shapes like penne or rotini hold the creamy sauce beautifully, but any pasta you have on hand will work.

Cheese Variations

Cheddar is classic, but mixing in Monterey Jack or pepper jack adds extra creaminess and a little kick.

Spice Level

Rotel comes in mild, original, and hot varieties—choose based on your heat preference.

Step-by-Step Instructions

1. Cook the Pasta

Bring a large pot of salted water to a boil and cook the pasta according to package instructions. Drain and set aside.

2. Sauté the Garlic

In a large skillet, heat olive oil over medium heat. Add minced garlic and sauté until fragrant.

3. Build the Sauce

Add the Rotel tomatoes (with juices), heavy cream, and cream cheese. Stir until smooth and well combined.

4. Add Chicken and Cheese

Stir in the cooked chicken and shredded cheddar cheese, allowing it to melt into the sauce.

5. Combine Everything

Add the cooked pasta to the skillet and toss until fully coated in the creamy sauce.

6. Serve Warm

Serve immediately, garnished with extra cheese or fresh herbs if desired.

Tips for Perfect Cheesy Rotel Chicken Pasta

To make your Cheesy Rotel Chicken Pasta absolutely perfect, keep these tips in mind:

  • Don’t overcook pasta: Keep it al dente for best texture
  • Use room temperature cream cheese: Helps it melt smoothly
  • Stir constantly: Prevents the sauce from separating
  • Adjust consistency: Add a splash of pasta water if needed

These small steps ensure a creamy, cohesive dish every time.

Delicious Variations to Try

One of the best things about Cheesy Rotel Chicken Pasta is how versatile it is.

Spicy Kick Version

Add red pepper flakes or jalapeños for extra heat.

Veggie-Packed Pasta

Mix in spinach, bell peppers, or mushrooms.

Bacon Lover’s Twist

Add crispy bacon bits for a smoky flavor boost.

Lighter Version

Use half-and-half instead of heavy cream and reduce the cheese slightly.

What to Serve With Cheesy Rotel Chicken Pasta

This rich dish pairs perfectly with lighter sides to balance the meal.

  • Fresh green salad with vinaigrette
  • Garlic bread or breadsticks
  • Steamed broccoli or roasted vegetables
  • Iced tea or sparkling water

Storage & Reheating Tips

Leftovers of Cheesy Rotel Chicken Pasta are just as delicious the next day.

  • Refrigerate: Store in an airtight container for up to 4 days
  • Reheat: Warm on the stove with a splash of milk or cream
  • Freeze: Freeze for up to 2 months (texture may slightly change)

Reheating gently helps maintain that creamy texture.

Common Mistakes to Avoid

Avoid these pitfalls to ensure your Cheesy Rotel Chicken Pasta turns out perfect:

  • Using pre-shredded cheese (doesn’t melt as smoothly)
  • Overheating the sauce (can cause separation)
  • Not seasoning enough (balance is key)
  • Skipping the pasta water (helps bind the sauce)

Paying attention to these details makes a big difference in flavor and texture.

Frequently Asked Questions

1. Can I make Cheesy Rotel Chicken Pasta ahead of time?

Yes! Prepare it in advance and reheat gently with added liquid to keep it creamy.

2. Is this dish very spicy?

It depends on the Rotel you use. Mild versions are very family-friendly.

3. Can I use a different protein?

Absolutely—try shrimp, ground beef, or even sausage.

4. What’s the best cheese for this recipe?

Cheddar is classic, but blending cheeses adds depth and richness.

Final Thoughts

This Cheesy Rotel Chicken Pasta is everything you want in a comfort meal—creamy, flavorful, easy, and incredibly satisfying. It’s the kind of recipe you’ll come back to again and again because it’s reliable, customizable, and always a hit.

Whether you’re cooking for your family or just treating yourself to a cozy homemade dinner, this dish delivers big flavor with minimal effort. Give it a try, and don’t be surprised if it becomes a regular on your weekly menu.

Savory Baked Chicken Chimichangas with a Golden Crunch

If you’re craving a crispy, satisfying meal without the heaviness of deep frying, these Savory Baked Chicken Chimichangas with a Golden Crunch are exactly what you need. Packed with seasoned chicken, melty cheese, and bold Tex-Mex flavors, these oven-baked chimichangas deliver all the indulgence you love—without the extra oil.

This recipe is perfect for busy weeknights, family dinners, or meal prep. The best part? You get that irresistible golden crunch straight from the oven. Once you try these baked chicken chimichangas, you may never go back to frying again.

Why You’ll Love This Recipe

These Savory Baked Chicken Chimichangas with a Golden Crunch are more than just delicious—they’re practical, healthier, and incredibly satisfying.

  • Healthier option: No deep frying required
  • Crispy texture: Oven-baked to golden perfection
  • Easy to make: Simple ingredients and straightforward steps
  • Family-friendly: Loved by kids and adults alike
  • Perfect for leftovers: Reheat beautifully

They strike the perfect balance between comfort food and a lighter, modern approach to classic Mexican-inspired dishes.

Ingredients for Baked Chicken Chimichangas

To make these flavorful baked chicken chimichangas, you’ll need:

  • 2 cups cooked shredded chicken
  • 1 cup shredded cheddar or Mexican blend cheese
  • ½ cup salsa
  • ¼ cup sour cream
  • 1 teaspoon cumin
  • 1 teaspoon chili powder
  • ½ teaspoon garlic powder
  • 6 large flour tortillas
  • 2 tablespoons melted butter or olive oil
  • Salt and pepper to taste

Ingredient Notes and Substitutions

When making Savory Baked Chicken Chimichangas with a Golden Crunch, a few ingredient swaps can tailor the recipe to your preferences.

Chicken Options

Rotisserie chicken is a huge time-saver and adds extra flavor, but any cooked shredded chicken works well.

Cheese Choices

A Mexican blend melts beautifully, but you can also use Monterey Jack, pepper jack, or cheddar for different flavor profiles.

Tortillas

Large flour tortillas are ideal for wrapping and crisping. Whole wheat tortillas can be used for a healthier twist.

Spice Level

Adjust chili powder or add jalapeños if you prefer more heat.

Step-by-Step Instructions

1. Prepare the Filling

In a large bowl, mix shredded chicken, cheese, salsa, sour cream, and spices until well combined.

2. Assemble the Chimichangas

Place the filling in the center of each tortilla. Fold in the sides, then roll tightly like a burrito.

3. Brush and Arrange

Place the chimichangas seam-side down on a baking sheet. Brush the tops with melted butter or olive oil for that golden finish.

4. Bake Until Golden

Bake at 400°F for 20–25 minutes, flipping halfway through, until crispy and golden brown.

5. Serve and Enjoy

Remove from the oven and let cool slightly before serving. Garnish with your favorite toppings.

Tips for Perfect Results

To get that signature crunch in your baked chicken chimichangas, keep these tips in mind:

  • Don’t overfill: Prevents tearing and uneven cooking
  • Brush generously: Helps achieve a crispy, golden exterior
  • Flip halfway: Ensures even browning on all sides
  • Use a wire rack: Allows heat to circulate for extra crispiness

Small adjustments like these can make a big difference in texture and flavor.

Delicious Variations to Try

These Savory Baked Chicken Chimichangas with a Golden Crunch are incredibly versatile.

Beef Chimichangas

Swap chicken for seasoned ground beef.

Vegetarian Version

Use black beans, rice, sautéed peppers, and corn.

Spicy Chipotle Style

Add chipotle sauce or smoked paprika for a smoky kick.

Breakfast Chimichangas

Fill with scrambled eggs, cheese, and breakfast sausage.

What to Serve With Chimichangas

Make your meal complete by pairing these baked chicken chimichangas with delicious sides:

  • Spanish rice or cilantro lime rice
  • Refried beans or black beans
  • Fresh guacamole and chips
  • Corn salad or street corn
  • Margaritas or iced tea

Storage & Reheating Tips

These Savory Baked Chicken Chimichangas with a Golden Crunch store beautifully, making them ideal for meal prep.

  • Refrigerate: Store in an airtight container for up to 4 days
  • Freeze: Wrap individually and freeze up to 2 months
  • Reheat: Bake at 375°F until heated through for best texture

Avoid microwaving if you want to keep that crispy exterior intact.

Common Mistakes to Avoid

Even simple recipes can have pitfalls. Avoid these when making baked chicken chimichangas:

  • Skipping the oil or butter (leads to dry tortillas)
  • Overfilling the tortillas (causes bursting)
  • Not sealing properly (filling may leak)
  • Baking at too low a temperature (won’t crisp up)

Keeping these in mind will ensure your chimichangas turn out perfectly every time.

Frequently Asked Questions

1. Can I make baked chicken chimichangas ahead of time?

Yes! Assemble them in advance and refrigerate until ready to bake.

2. How do I keep chimichangas crispy?

Brush with oil and bake at a high temperature. Reheat in the oven instead of the microwave.

3. Can I air fry these instead?

Absolutely! Air fry at 375°F for about 10–12 minutes, flipping halfway.

4. What toppings go best with chimichangas?

Sour cream, guacamole, salsa, shredded lettuce, and fresh cilantro are all great options.

Final Thoughts

These Savory Baked Chicken Chimichangas with a Golden Crunch prove that you don’t need a deep fryer to enjoy crispy, satisfying comfort food. With bold flavors, a golden exterior, and endless customization options, this recipe is a must-try for anyone who loves easy, delicious meals.

Whether you’re cooking for your family or prepping meals for the week, these baked chimichangas are sure to become a staple in your kitchen. Once you taste that crunchy, cheesy goodness, you’ll be hooked for good.