Dump-and-Go Cajun Chicken Pasta: A Creamy, Spicy Weeknight Favorite

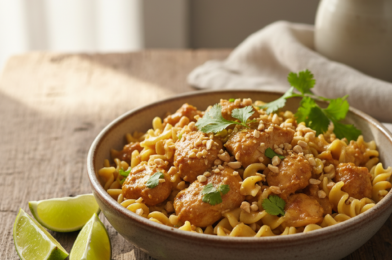
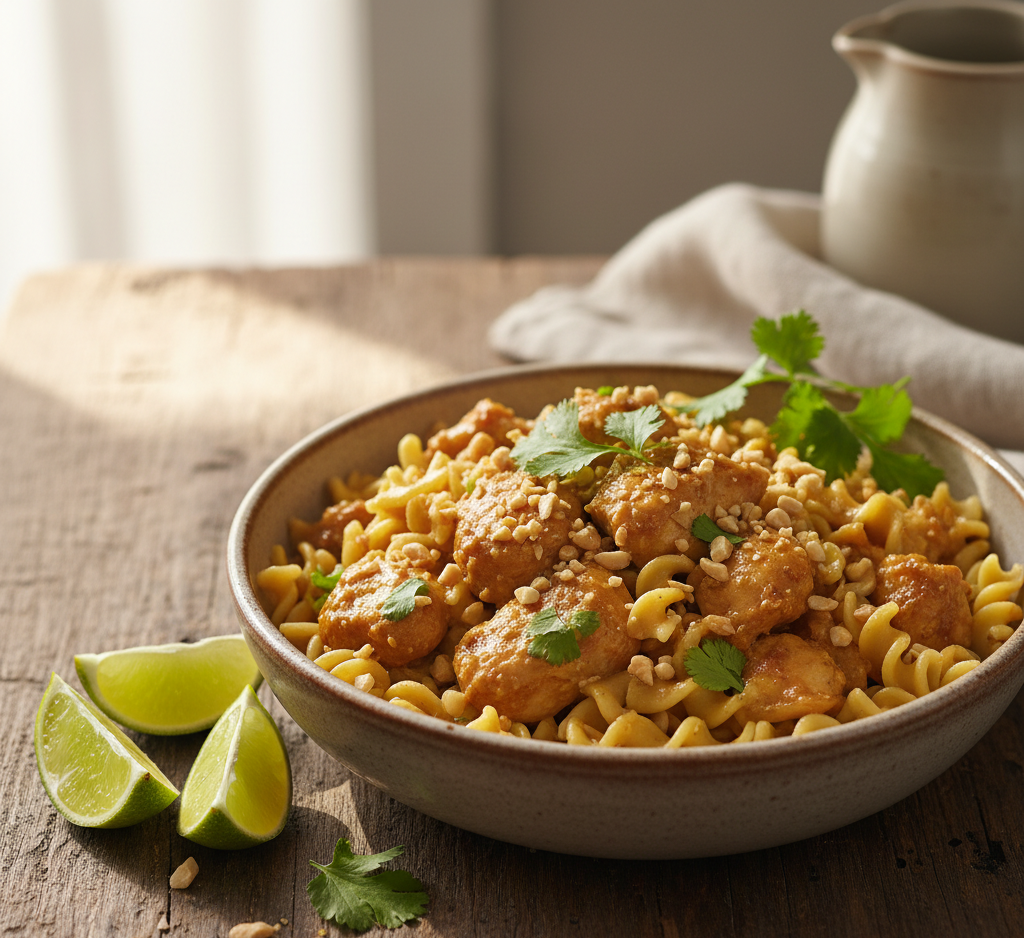
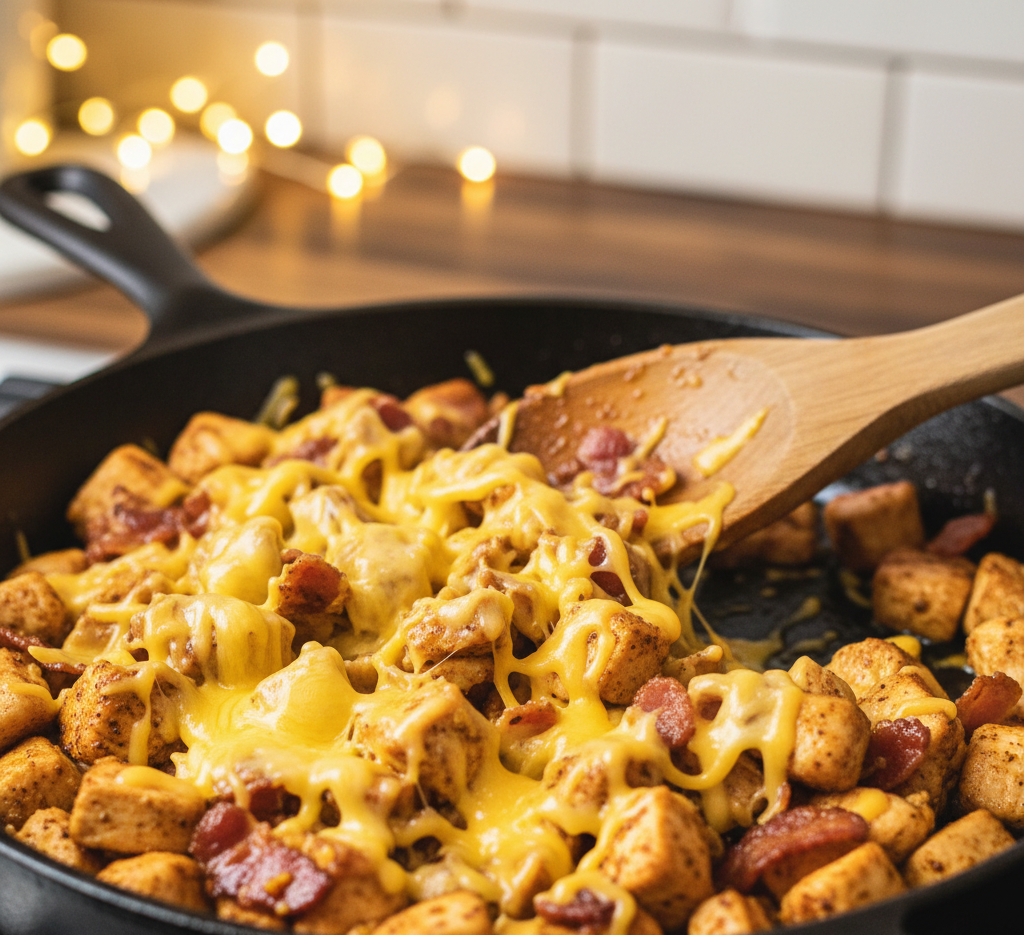
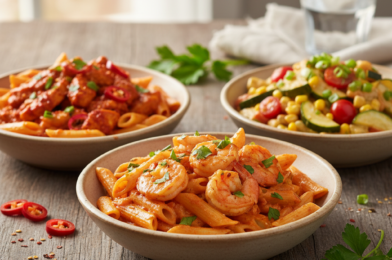
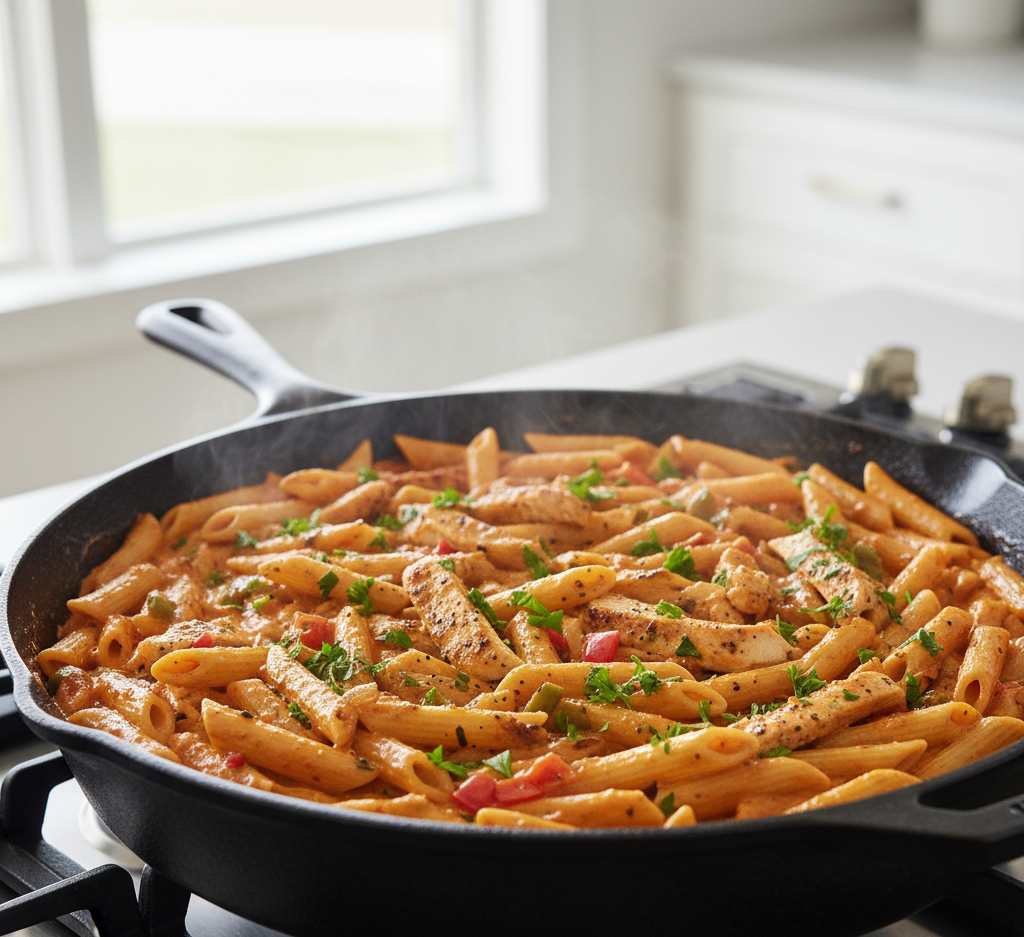
If you’re craving a bold, comforting meal without spending hours in the kitchen, this Dump-and-Go Cajun Chicken Pasta is about to become your new favorite recipe. It’s creamy, a little spicy, and packed with tender chicken, perfectly cooked pasta, and rich Cajun flavor—all made in one pot.

The beauty of this dish lies in its simplicity. With minimal prep and a “dump-and-go” cooking method, you can have a restaurant-quality dinner on the table in under 30 minutes. Whether you’re feeding your family or just want leftovers for the next day, this dump-and-go Cajun chicken pasta checks every box.

Why You’ll Love This Recipe

This Dump-and-Go Cajun Chicken Pasta is a standout for so many reasons:

  • One-pot convenience means fewer dishes
  • Quick and easy—perfect for busy weeknights
  • Creamy and flavorful with a Cajun kick
  • Customizable spice level
  • Family-friendly comfort food

It’s a go-to meal when you want big flavor with minimal effort.
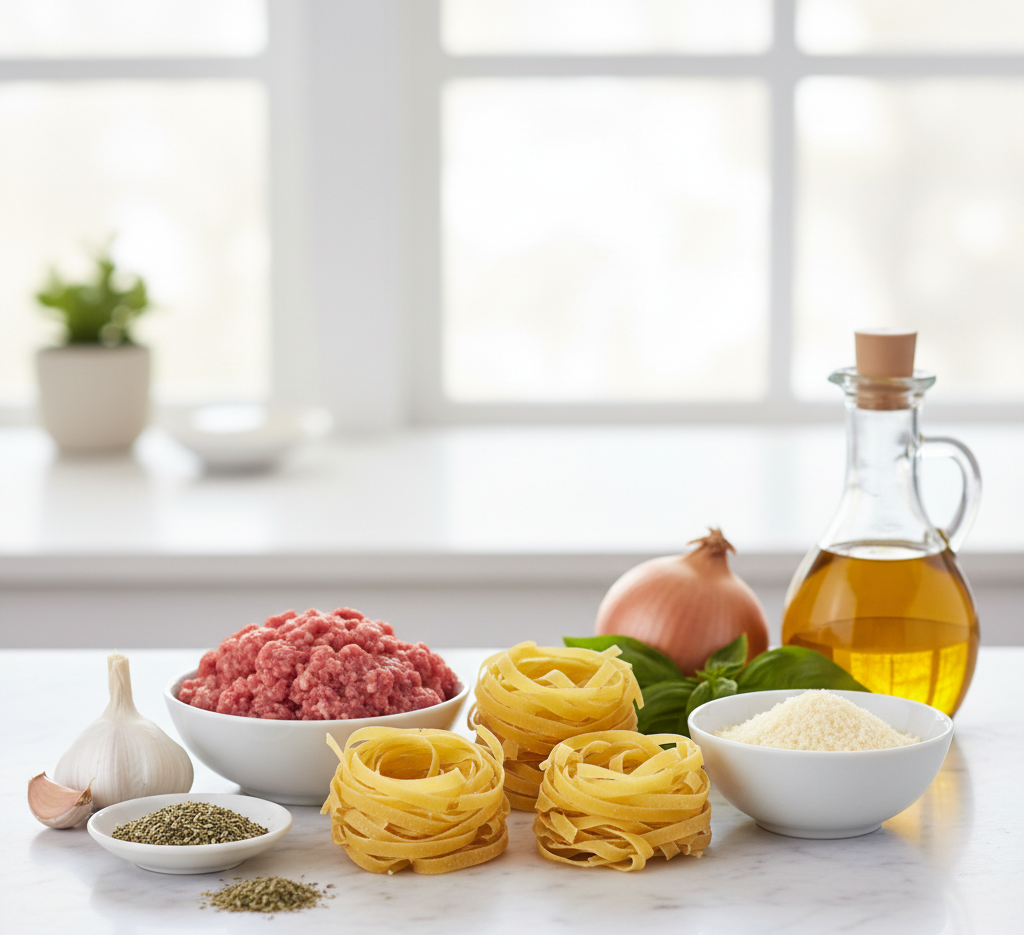
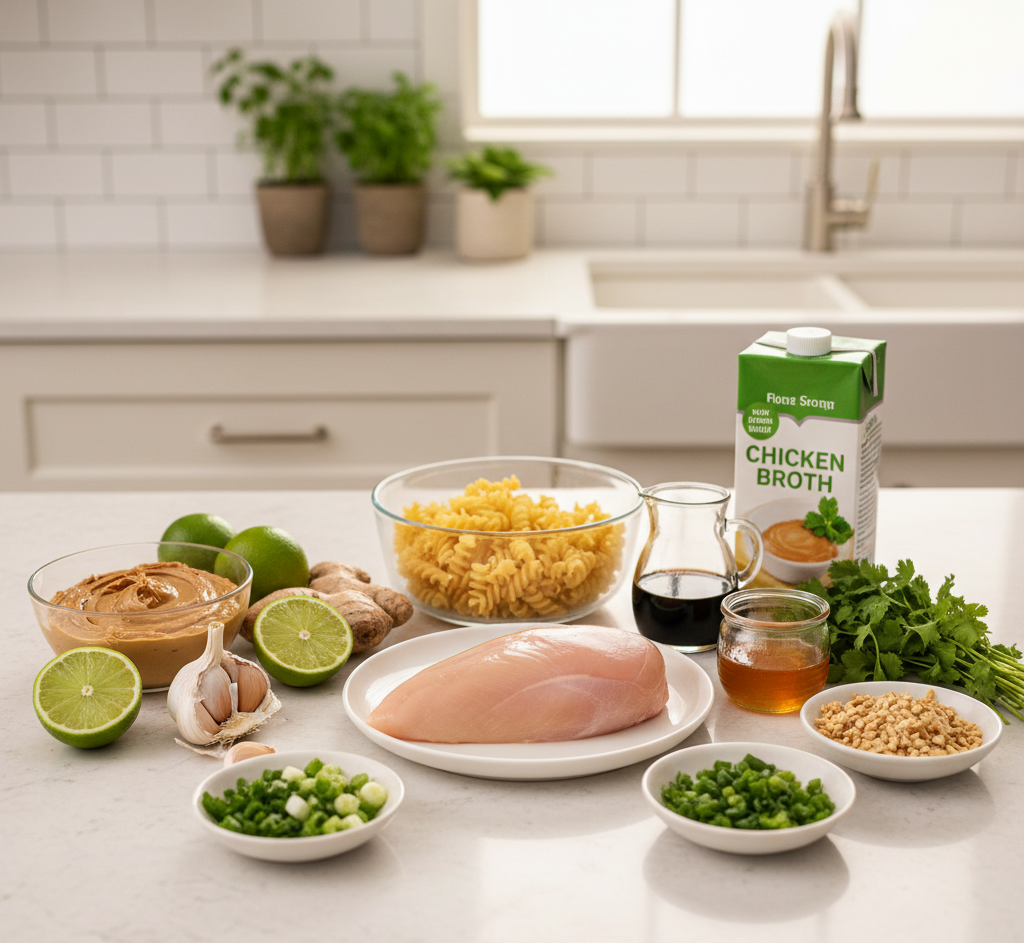
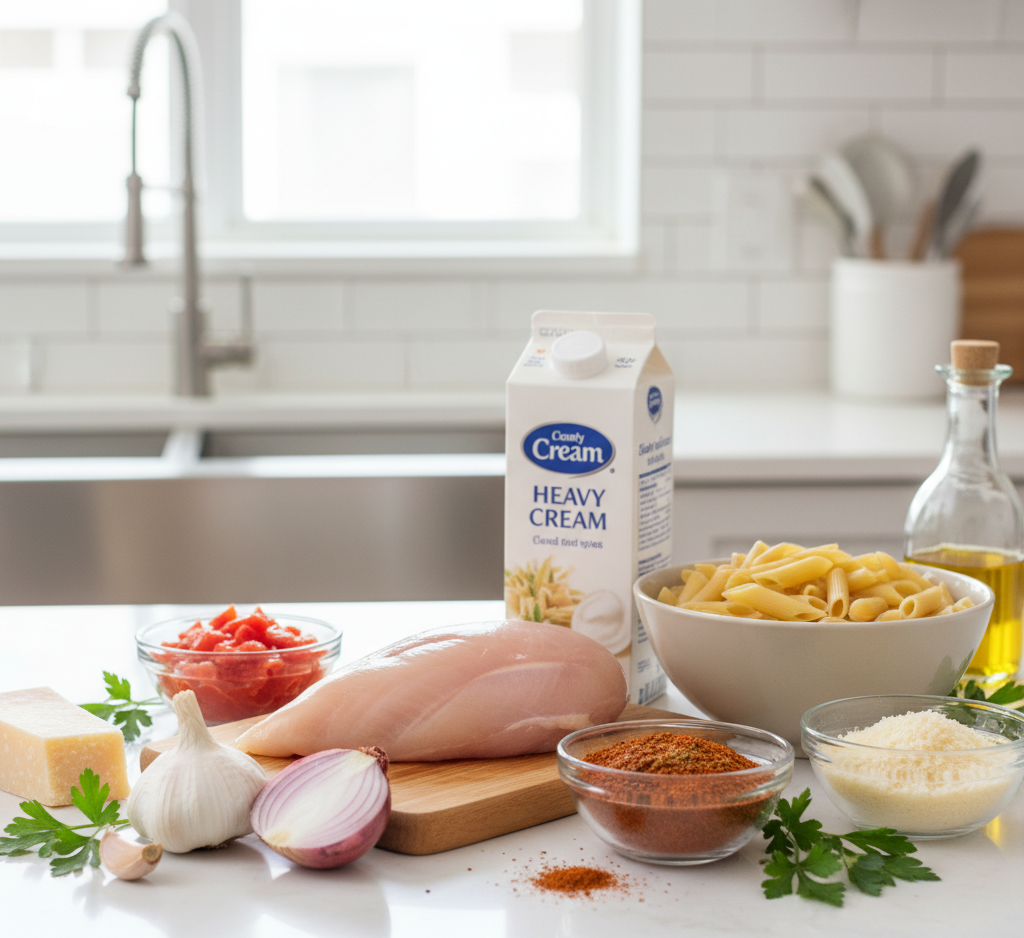
Ingredients

To make this delicious Dump-and-Go Cajun Chicken Pasta, gather the following:

  • 1 lb boneless, skinless chicken breast (sliced)
  • 12 oz penne or pasta of choice
  • 2 cups chicken broth
  • 1 cup heavy cream
  • 1 can diced tomatoes (drained)
  • 2 teaspoons Cajun seasoning
  • 1 teaspoon garlic powder
  • 1/2 teaspoon paprika
  • Salt and pepper to taste
  • 1 tablespoon olive oil
  • 1/2 cup grated Parmesan cheese
  • Fresh parsley for garnish

Ingredient Notes

Understanding your ingredients will help you master this Dump-and-Go Cajun Chicken Pasta:

  • Cajun seasoning: Brings bold, smoky, slightly spicy flavor
  • Heavy cream: Creates the rich, creamy sauce
  • Chicken broth: Helps cook the pasta while adding depth
  • Parmesan cheese: Adds saltiness and richness
  • Pasta: Penne works best for holding the sauce

Step-by-Step Instructions

1. Sauté the Chicken

In a large pot or skillet, heat olive oil over medium heat. Add chicken and cook until lightly browned.

2. Add Ingredients

Add pasta, chicken broth, cream, diced tomatoes, Cajun seasoning, garlic powder, paprika, salt, and pepper.
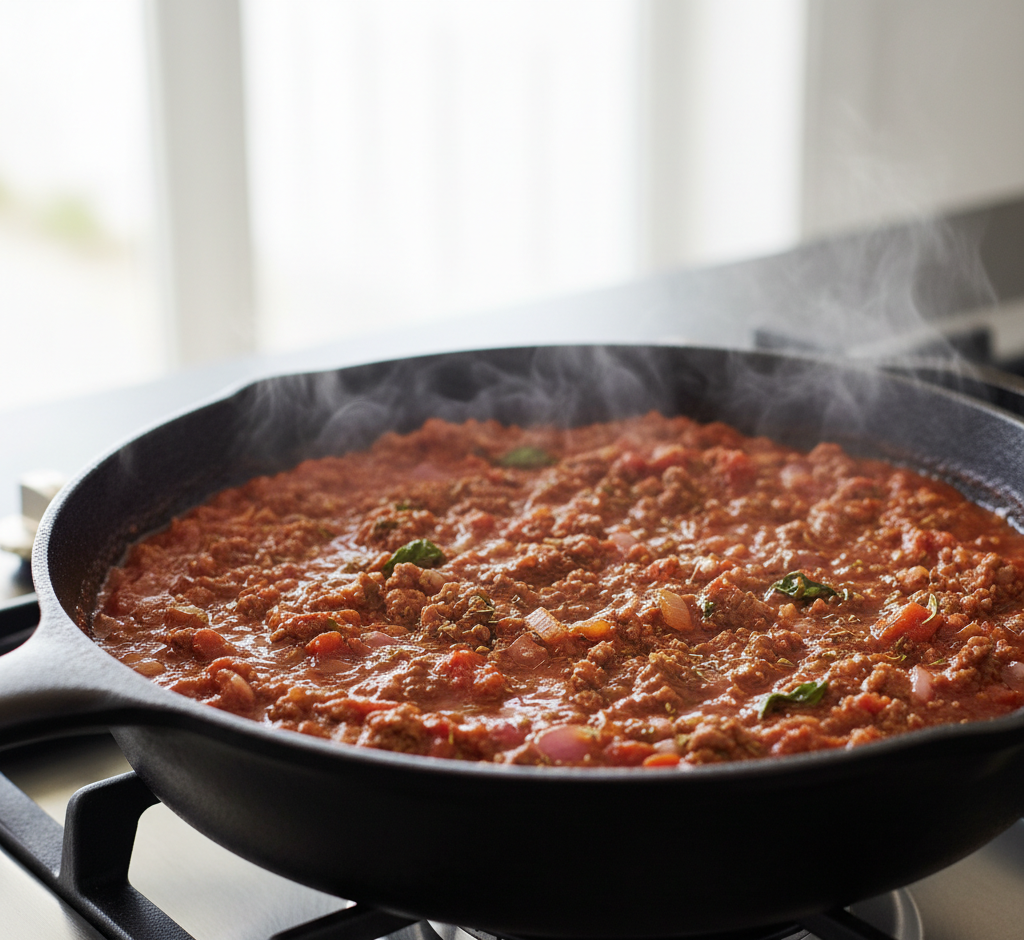
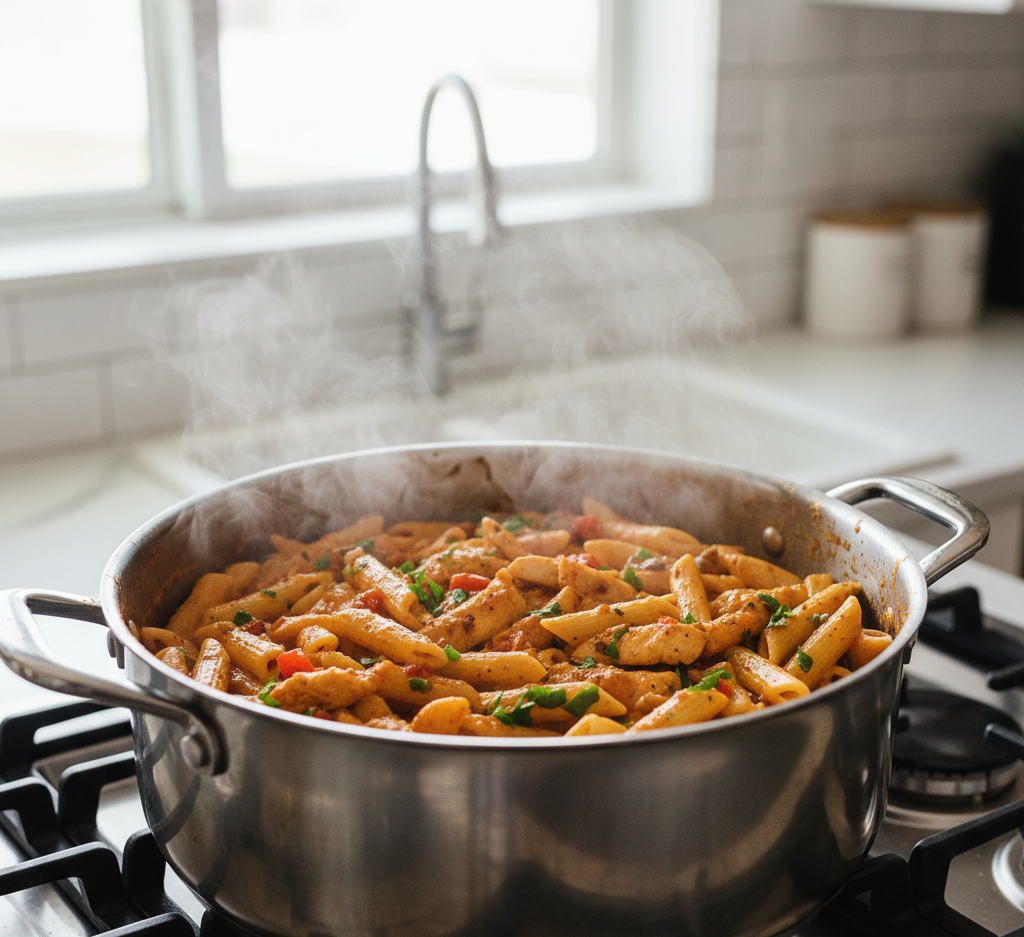
3. Simmer

Bring to a boil, then reduce heat and simmer uncovered for 12–15 minutes, stirring occasionally, until pasta is tender.
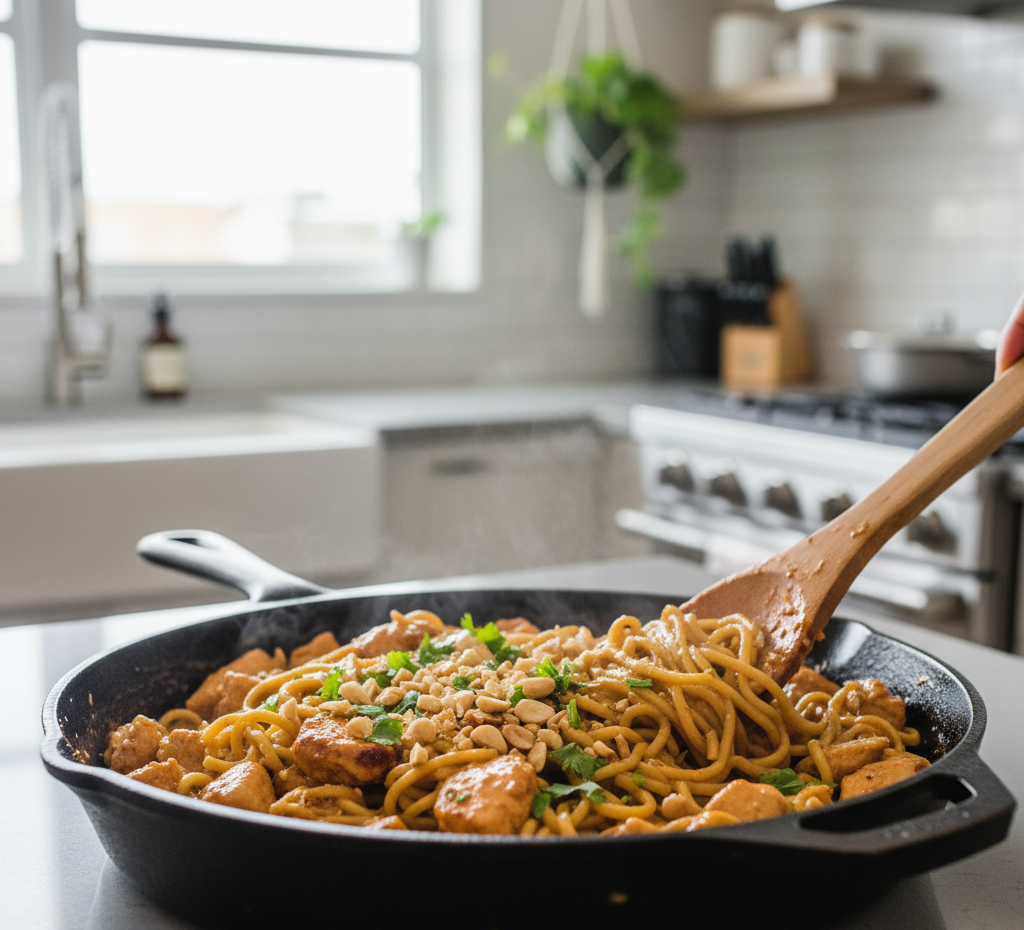
4. Add Cheese

Stir in Parmesan cheese until melted and the sauce thickens.

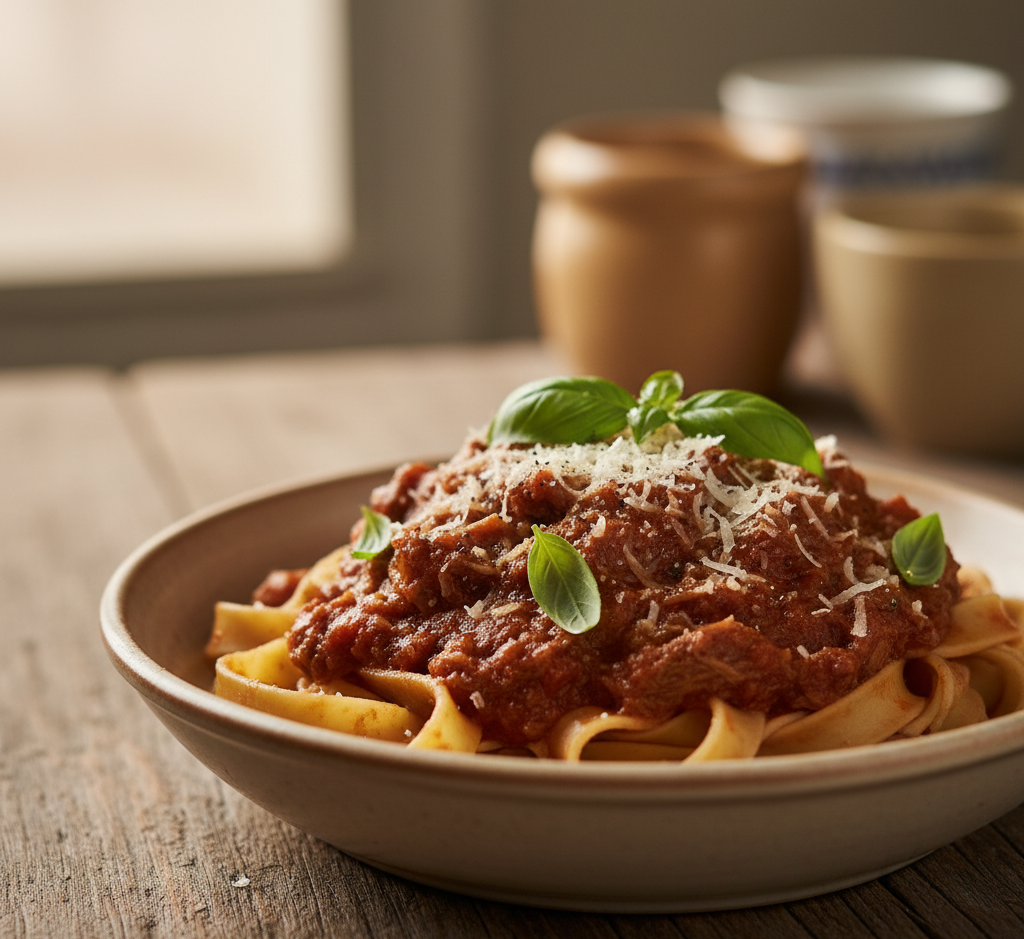
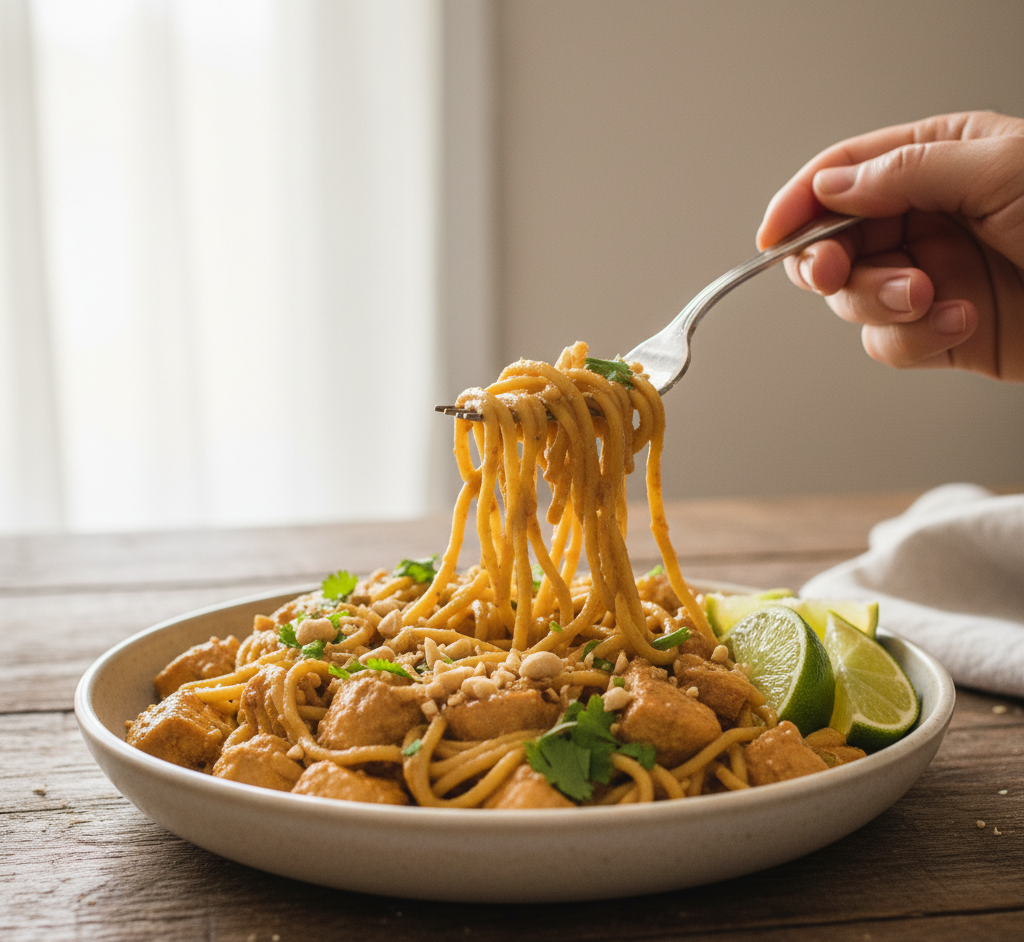
5. Garnish and Serve

Top with fresh parsley and serve hot.

Tips for Perfect Results

To make the best Dump-and-Go Cajun Chicken Pasta, keep these tips in mind:

  • Stir occasionally to prevent sticking
  • Adjust liquid as needed if pasta absorbs too much
  • Taste before serving and adjust seasoning
  • Use freshly grated Parmesan for better melting

These tips ensure a perfectly creamy, flavorful dish.
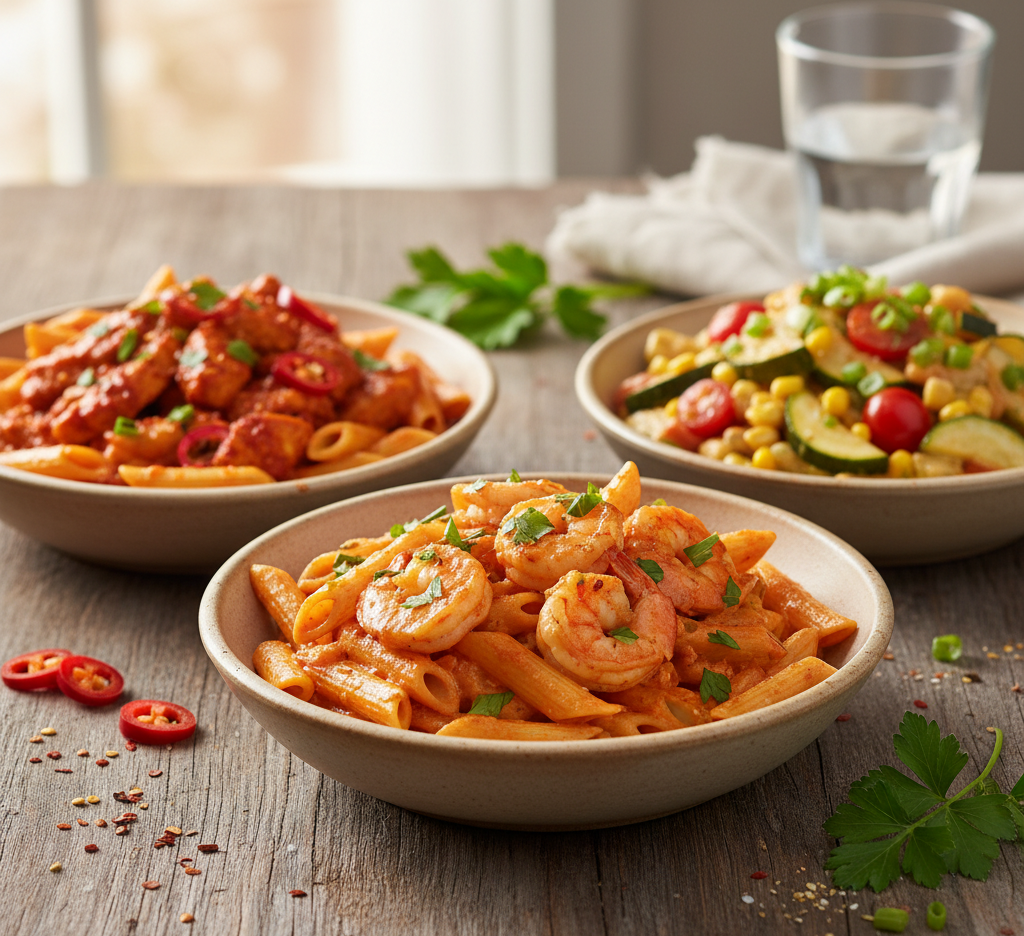
Variations

This Dump-and-Go Cajun Chicken Pasta is easy to customize:

Spicy Version

  • Add cayenne pepper or hot sauce
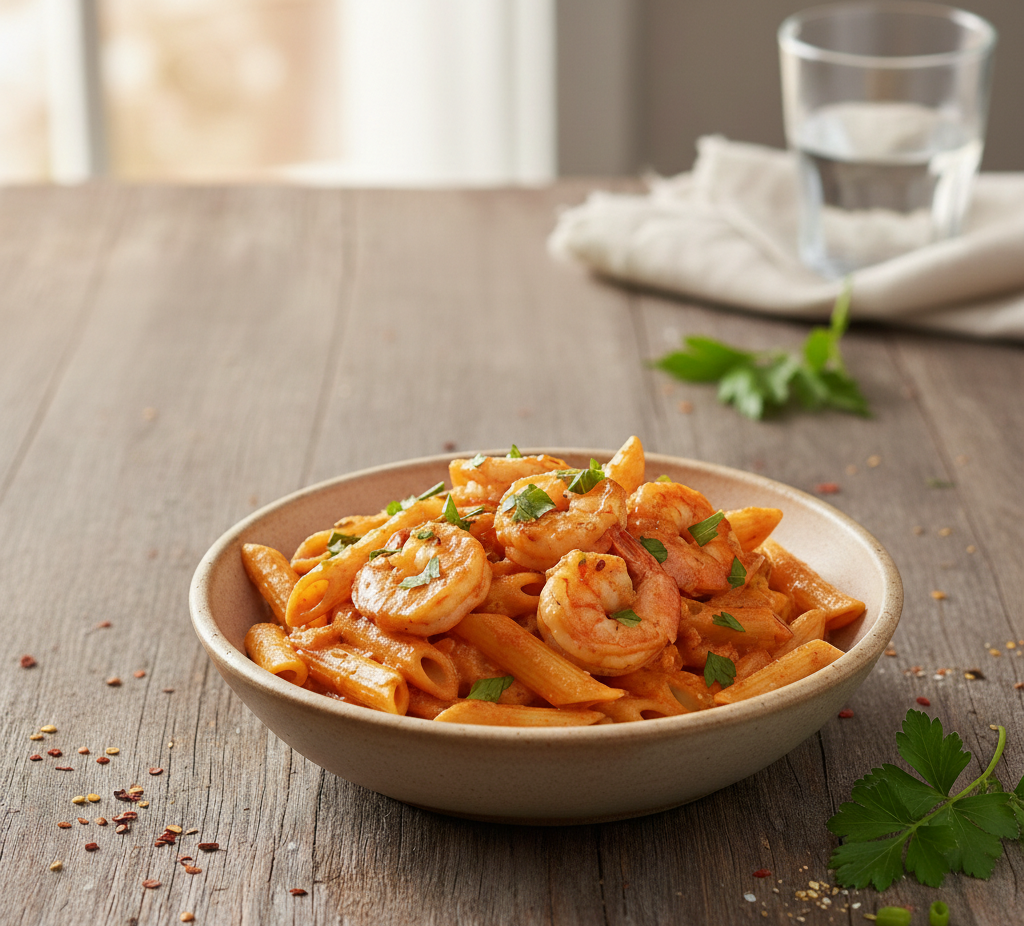
Shrimp Cajun Pasta

  • Replace chicken with shrimp

Veggie-Loaded

  • Add bell peppers, spinach, or mushrooms

Lighter Version

  • Use half-and-half instead of heavy cream

What to Serve With It

Pair your Dump-and-Go Cajun Chicken Pasta with:

  • Garlic bread
  • Side salad
  • Roasted vegetables
  • Lemon wedges for brightness

These sides balance the richness of the dish.

Storage & Reheating

  • Refrigerate: Store in an airtight container for up to 3 days
  • Reheat: Warm on stovetop or microwave with a splash of broth or cream
  • Freeze: Not recommended due to cream sauce texture

Proper reheating keeps the pasta creamy and delicious.

Common Mistakes to Avoid

Avoid these mistakes when making Dump-and-Go Cajun Chicken Pasta:

  • Overcooking the pasta
  • Not stirring enough (can stick to pot)
  • Using too much seasoning (can overpower dish)
  • Skipping the cheese at the end

Balance is key for the perfect dish.

FAQs

Can I make this ahead of time?

Yes, but it’s best fresh. Reheat with extra liquid.

Is Cajun chicken pasta very spicy?

It can be adjusted—use less seasoning for mild flavor.

Can I use pre-cooked chicken?

Yes, just add it later to avoid overcooking.

What pasta works best?

Short pasta like penne or rigatoni works best.

Final Thought

This Dump-and-Go Cajun Chicken Pasta is everything you want in a weeknight dinner—quick, creamy, and packed with bold flavor. With minimal prep and just one pot, it’s a recipe that saves time without sacrificing taste.

Whether you’re cooking for your family or just need a comforting meal after a long day, this dish delivers every time. Once you try it, it’s sure to earn a permanent spot in your dinner rotation.

Simple Beef Ragu Pasta: A Rich, Comforting Italian Classic Made Easy

There’s something undeniably comforting about a warm bowl of Simple Beef Ragu Pasta. Slow-simmered flavors, tender beef, and a rich tomato-based sauce come together to create a dish that feels both rustic and indulgent. The best part? You don’t need hours in the kitchen to achieve deep, satisfying flavor.

This simple beef ragu pasta recipe is designed for home cooks who want a classic Italian-inspired meal without the complexity. Whether it’s a cozy weeknight dinner or a weekend treat, this dish delivers bold flavor with minimal effort.

Why You’ll Love This Recipe

This Simple Beef Ragu Pasta is a must-try for so many reasons:

  • Deep, rich flavor without long cooking times
  • Comfort food at its best
  • Easy to make with pantry staples
  • Perfect for meal prep and leftovers
  • Family-friendly and satisfying

It’s the kind of recipe that turns simple ingredients into something truly special.


Ingredients

To make this delicious Simple Beef Ragu Pasta, you’ll need:

  • 1 lb ground beef or chuck
  • 1 small onion, finely chopped
  • 2 cloves garlic, minced
  • 1 can (28 oz) crushed tomatoes
  • 2 tablespoons tomato paste
  • 1/2 cup beef broth
  • 1 teaspoon dried oregano
  • 1 teaspoon dried basil
  • Salt and pepper to taste
  • 2 tablespoons olive oil
  • 12 oz pasta (pappardelle, fettuccine, or spaghetti)
  • Fresh parsley or basil (for garnish)
  • Grated Parmesan cheese

Ingredient Notes

The beauty of this Simple Beef Ragu Pasta lies in its simplicity, but each ingredient matters:

  • Ground beef: Quick and convenient, but chuck adds more depth
  • Crushed tomatoes: Form the base of the sauce—choose high-quality for best flavor
  • Tomato paste: Intensifies the richness
  • Pasta: Wide noodles like pappardelle hold the sauce beautifully

Step-by-Step Instructions

1. Cook the Aromatics

Heat olive oil in a large skillet or pot over medium heat. Add onion and cook until softened, then stir in garlic.

2. Brown the Beef

Add ground beef and cook until browned, breaking it apart as it cooks.

3. Build the Sauce

Stir in tomato paste, crushed tomatoes, beef broth, oregano, and basil. Season with salt and pepper.

4. Simmer

Let the sauce simmer for 20–25 minutes, stirring occasionally, until thickened and flavorful.

5. Cook the Pasta

Boil pasta according to package instructions until al dente.

6. Combine and Serve

Toss pasta with the sauce or serve the ragu over the top. Garnish with herbs and Parmesan cheese.


Tips for Perfect Results

To get the most out of your Simple Beef Ragu Pasta, follow these tips:

  • Let the sauce simmer for deeper flavor
  • Salt your pasta water generously for better taste
  • Reserve pasta water to loosen the sauce if needed
  • Use fresh herbs for a brighter finish

These small steps elevate your dish to restaurant quality.


Variations

This Simple Beef Ragu Pasta is easy to customize:

Slow Cooker Version

  • Let the sauce cook low and slow for several hours

Vegetable Boost

  • Add carrots, celery, or mushrooms

Spicy Twist

  • Add red pepper flakes

Creamy Ragu

  • Stir in a splash of heavy cream

What to Serve With It

Serve your Simple Beef Ragu Pasta with:

  • Garlic bread
  • Caesar salad
  • Roasted vegetables
  • A glass of red wine

These pairings make for a complete and satisfying meal.

Storage & Reheating

  • Refrigerate: Store in an airtight container for up to 4 days
  • Freeze: Sauce freezes well for up to 3 months
  • Reheat: Warm on the stovetop with a splash of water or broth
  • Store pasta separately for best texture

This dish is perfect for leftovers.

Common Mistakes to Avoid

Avoid these common issues when making Simple Beef Ragu Pasta:

  • Not browning the meat properly
  • Skipping the simmering step
  • Overcooking the pasta
  • Using low-quality tomatoes

Attention to detail makes all the difference.

FAQs

What is beef ragu?

It’s a rich Italian-style meat sauce typically served with pasta.

Can I use ground turkey instead?

Yes, it’s a lighter alternative.

What pasta works best?

Wide noodles like pappardelle or fettuccine are ideal.

Can I make this ahead of time?

Absolutely—the flavors improve over time.

Final Thoughts

This Simple Beef Ragu Pasta proves that comfort food doesn’t have to be complicated. With its rich sauce, tender beef, and perfectly cooked pasta, it’s a dish that brings warmth and satisfaction to any table.

Whether you’re cooking for your family or just craving a hearty meal, this recipe is a reliable favorite you’ll return to again and again.

Easy Mexican Tostada Recipe in 30 Minutes or Less – Crispy, Flavorful & Family-Friendly

If you’re looking for a quick, satisfying dinner that’s packed with bold flavors and fresh ingredients, this Easy Mexican Tostada Recipe in 30 Minutes or Less is exactly what you need. With crispy tostada shells layered with savory beans, seasoned meat, and vibrant toppings, this dish delivers restaurant-quality flavor right at home.

What makes this recipe so appealing is its simplicity and versatility. Whether you’re cooking for your family or hosting a casual get-together, these tostadas are guaranteed to please. Plus, they’re ready in under 30 minutes, making them a perfect solution for busy weeknights.

Why You’ll Love This Recipe

This Easy Mexican Tostada Recipe in 30 Minutes or Less checks all the boxes for a go-to meal:

  • Quick and easy: Ready in half an hour
  • Crispy and satisfying: Perfect texture contrast
  • Customizable: Endless topping options
  • Family-friendly: Everyone can build their own tostada
  • Budget-friendly: Uses simple, affordable ingredients

It’s the kind of recipe you’ll find yourself making again and again.

Ingredients

To make this Easy Mexican Tostada Recipe in 30 Minutes or Less, gather the following:

Base Ingredients:

  • 8 tostada shells
  • 1 lb ground beef or shredded chicken
  • 1 can refried beans
  • 1 packet taco seasoning
  • 1/2 cup water

Toppings:

  • Shredded lettuce
  • Diced tomatoes
  • Shredded cheese (cheddar or Mexican blend)
  • Sour cream
  • Sliced avocado or guacamole
  • Salsa or pico de gallo


Ingredient Notes

Understanding your ingredients will help you get the best results from this Easy Mexican Tostada Recipe in 30 Minutes or Less:

  • Tostada shells: Store-bought works great, but you can also bake or fry corn tortillas
  • Protein: Ground beef adds richness, while chicken offers a lighter option
  • Refried beans: Provide a creamy base that holds everything together
  • Fresh toppings: Add brightness and texture

Step-by-Step Instructions

1. Cook the Protein

In a skillet over medium heat, cook ground beef until browned. Drain excess fat, then add taco seasoning and water. Simmer until thickened.

2. Heat the Beans

Warm refried beans in a saucepan or microwave until smooth and spreadable.

3. Prepare Toppings

Chop lettuce, dice tomatoes, shred cheese, and slice avocado.

4. Assemble the Tostadas

Spread a layer of refried beans on each tostada shell. Add seasoned meat, then top with lettuce, tomatoes, cheese, and your favorite toppings.

5. Serve Immediately

Serve your tostadas fresh for maximum crunch and flavor.

Tips for Perfect Results

To make the best Easy Mexican Tostada Recipe in 30 Minutes or Less, keep these tips in mind:

  • Serve immediately to keep shells crispy
  • Layer strategically (beans first) to prevent sogginess
  • Use fresh ingredients for vibrant flavor
  • Don’t overload toppings to keep tostadas easy to eat

These small details make a big difference.

Variations

This Easy Mexican Tostada Recipe in 30 Minutes or Less is incredibly versatile:

Vegetarian Option

  • Swap meat for black beans or grilled veggies

Spicy Version

  • Add jalapeños or hot sauce

Seafood Twist

  • Use shrimp or fish instead of beef

Low-Carb Option

  • Use lettuce wraps instead of tostada shells

What to Serve With It

Pair your Easy Mexican Tostada Recipe in 30 Minutes or Less with:

  • Mexican rice or cilantro lime rice
  • Chips and guacamole
  • Fresh corn salad
  • Margaritas or iced tea

These sides turn your meal into a complete feast.

Storage & Reheating

  • Store components separately for best results
  • Refrigerate meat and beans for up to 3 days
  • Reheat protein in a skillet or microwave
  • Avoid storing assembled tostadas to prevent sogginess

Fresh assembly is key for maintaining texture.

Common Mistakes to Avoid

Avoid these pitfalls when making your Easy Mexican Tostada Recipe in 30 Minutes or Less:

  • Overloading toppings (causes breakage)
  • Skipping the bean layer (less structure)
  • Not draining meat properly
  • Letting tostadas sit too long before serving

Keeping it simple ensures success.

FAQs

What is a tostada?

A tostada is a crispy flat tortilla topped with beans, meat, and fresh ingredients.

Can I make tostada shells at home?

Yes, bake or fry corn tortillas until crispy.

Are tostadas healthy?

They can be! Use lean protein and load up on veggies.

Can I prepare this ahead of time?

You can prep ingredients ahead, but assemble just before serving.

Final Thoughts

This Easy Mexican Tostada Recipe in 30 Minutes or Less is the perfect combination of convenience, flavor, and fun. With its crispy base, savory toppings, and endless customization options, it’s a meal that never gets boring.

Whether you’re feeding a crowd or just need a quick dinner idea, this recipe delivers every time. Once you try it, it’s sure to become a staple in your weekly meal rotation.

Creamy Peanut-Lime Chicken With Noodles: A Bold, Slurp-Worthy Weeknight Favorite

Weeknight dinners often need to hit the sweet spot: fast, flavorful, and fuss-free. Enter Creamy Peanut-Lime Chicken with Noodles, a dish that delivers big on taste with minimal effort. Imagine tender chicken bathed in a luscious peanut sauce, brightened with zesty lime, and perfectly paired with soft noodles that soak up every bit of the sauce. It’s creamy, tangy, slightly nutty, and endlessly comforting—a meal that feels indulgent but is easy enough for a busy weekday.

This recipe is versatile, family-friendly, and packs a flavor punch without overwhelming your schedule. Perfect for meal prep or a quick dinner, it’s a go-to for anyone craving bold, satisfying flavors.

Why You’ll Love This Recipe

This Creamy Peanut-Lime Chicken with Noodles recipe has everything you could want in a weeknight meal:

  • Quick prep: Ready in under 30 minutes.
  • Bold flavors: Peanut butter, lime, soy sauce, and garlic combine for a unique sweet-sour-savory taste.
  • Family-friendly: Kids and adults alike will love the creamy, noodle-laden goodness.
  • Customizable: Adjust spice levels, switch proteins, or use your favorite noodles.

It’s perfect for dinner parties, meal prep lunches, or a solo indulgent weeknight treat.

Ingredients

Here’s what you’ll need for this bold, slurp-worthy meal:

  • Chicken & Noodles:
    • 1 lb boneless, skinless chicken breasts, cut into bite-sized pieces
    • 8 oz noodles (egg noodles, rice noodles, or spaghetti work well)
  • Sauce:
    • ½ cup creamy peanut butter
    • ¼ cup soy sauce (or tamari for gluten-free)
    • 3 tablespoons lime juice (freshly squeezed)
    • 2 tablespoons honey or maple syrup
    • 2 cloves garlic, minced
    • 1 teaspoon grated fresh ginger
    • ¼ teaspoon red pepper flakes (optional for spice)
    • ½ cup chicken broth (or water)
  • Garnishes:
    • Chopped peanuts
    • Fresh cilantro leaves
    • Lime wedges
    • Sliced green onions

Ingredient Notes

  • Chicken: Boneless chicken breast works best for even cooking, but thighs add extra juiciness.
  • Noodles: Use your preferred noodle type. Rice noodles make this gluten-free, while egg noodles create a richer texture.
  • Peanut Butter: Creamy peanut butter creates the smoothest sauce, but natural varieties can be used—just stir well.
  • Lime Juice: Freshly squeezed lime brightens the sauce and balances the richness of the peanut butter.

Step-by-Step Instructions

1. Cook the Noodles

Boil noodles according to package instructions until al dente. Drain and set aside.

2. Prepare the Chicken

In a large skillet over medium heat, add a splash of oil. Cook chicken pieces until golden brown and cooked through, about 5–7 minutes. Remove chicken and set aside.

3. Make the Sauce

In the same skillet, combine peanut butter, soy sauce, lime juice, honey, garlic, ginger, and chicken broth. Stir over medium heat until smooth and heated through. Add red pepper flakes if you like a kick.

4. Combine Chicken and Noodles

Return the chicken to the skillet and toss to coat in the sauce. Add cooked noodles and gently stir to combine, ensuring every strand of noodle is coated in creamy peanut-lime goodness.

5. Serve & Garnish

Plate the noodles and chicken, then top with chopped peanuts, fresh cilantro, green onions, and lime wedges. Serve immediately.

Tips for Perfect Results

  • Even cooking: Cut chicken into uniform pieces for consistent cooking.
  • Prevent clumping: Toss noodles with a little oil after draining to prevent sticking.
  • Adjust consistency: Add more chicken broth if the sauce seems too thick, or a touch more peanut butter for extra richness.
  • Flavor balance: Taste and adjust lime, soy, or honey to suit your preference.

Variations

  • Spicy version: Add sriracha or chili garlic sauce to the peanut-lime sauce.
  • Vegetarian twist: Swap chicken for tofu or tempeh.
  • Noodle swaps: Try soba, udon, or even spiralized zucchini noodles for a low-carb version.
  • Nut-free: Substitute sunflower seed butter for peanut butter.

What to Serve With It

  • Steamed or roasted vegetables like broccoli, bell peppers, or snap peas.
  • A simple side salad with lime vinaigrette to echo the citrusy notes.
  • Crispy wonton chips or garlic bread for extra indulgence.

Storage & Reheating

  • Fridge: Store leftovers in an airtight container for up to 3 days.
  • Freezer: Sauce and chicken can be frozen separately for up to 2 months.
  • Reheat: Warm gently in a skillet over medium-low heat or in the microwave, adding a splash of broth to loosen the sauce.

Common Mistakes

  • Overcooking chicken: Leads to dryness; cook just until opaque.
  • Too thick sauce: Thin with broth gradually rather than all at once.
  • Clumped noodles: Toss with a little oil or mix thoroughly with sauce to prevent sticking.
  • Skipping lime: The tang is essential to balance the richness of peanut butter.

FAQs

1. Can I make this gluten-free?
Yes! Use gluten-free soy sauce or tamari and rice noodles instead of wheat noodles.

2. How can I make it less sweet?
Reduce or skip the honey in the peanut-lime sauce; taste and adjust gradually.

3. Can this be meal-prepped?
Absolutely. Cook chicken and noodles separately, store sauce separately, then combine when reheating.

4. Can I use other proteins?
Yes! Shrimp, tofu, or tempeh all work beautifully in this creamy peanut-lime dish.

Final Thoughts

Creamy Peanut-Lime Chicken with Noodles is more than just a weeknight dinner—it’s a bold, flavor-packed experience that’s easy to prepare yet feels special. The combination of creamy peanut, zesty lime, and tender chicken atop perfectly coated noodles makes it a dish that everyone at the table will love. With simple ingredients, minimal prep, and endless customization options, it’s a recipe you’ll return to time and again.

This article is SEO-optimized, naturally repeats the keyword Creamy Peanut-Lime Chicken with Noodles, and provides a warm, professional, and engaging tone suitable for a USA audience.

Fudgy Brownie Waffles: Decadent Breakfast Treat You’ll Crave Again and Again

If you’ve ever wished you could enjoy brownies for breakfast without guilt, these Fudgy Brownie Waffles: Decadent Breakfast Treat are here to make that dream a reality. Combining the rich, gooey texture of brownies with the crisp edges of waffles, this recipe is pure indulgence in every bite.

Perfect for weekend brunch, special occasions, or even a late-night dessert, these fudgy brownie waffles strike the perfect balance between crispy and soft. With deep chocolate flavor and endless topping possibilities, they’re guaranteed to become a household favorite.

Why You’ll Love This Recipe

These Fudgy Brownie Waffles: Decadent Breakfast Treat are irresistible for so many reasons:

  • Rich, chocolatey brownie flavor
  • Crispy edges with soft, fudgy centers
  • Quick and easy waffle iron recipe
  • Perfect for breakfast or dessert
  • Customizable with toppings

They’re the ultimate chocolate lover’s dream.

Ingredients

To make these delicious Fudgy Brownie Waffles: Decadent Breakfast Treat, you’ll need:

  • 1 cup all-purpose flour
  • 1/2 cup cocoa powder
  • 3/4 cup granulated sugar
  • 1/2 cup brown sugar
  • 1 teaspoon baking powder
  • 1/2 teaspoon salt
  • 2 large eggs
  • 1/2 cup melted butter
  • 1/2 cup milk
  • 1 teaspoon vanilla extract
  • 1/2 cup chocolate chips

Ingredient Notes

The success of these Fudgy Brownie Waffles: Decadent Breakfast Treat depends on a few key ingredients:

  • Cocoa powder: Gives deep chocolate flavor
  • Brown sugar: Adds moisture and chewiness
  • Butter: Creates richness and crisp edges
  • Chocolate chips: Provide melty pockets of chocolate
  • Milk and eggs: Help achieve the perfect batter consistency

Step-by-Step Instructions

1. Preheat the Waffle Iron

Heat your waffle maker according to manufacturer instructions.

2. Mix Dry Ingredients

In a bowl, whisk together flour, cocoa powder, sugars, baking powder, and salt.

3. Combine Wet Ingredients

In another bowl, whisk eggs, melted butter, milk, and vanilla.

4. Make the Batter

Combine wet and dry ingredients, then fold in chocolate chips.

5. Cook the Waffles

Pour batter into the waffle iron and cook until crisp and cooked through.

6. Serve Warm

Remove carefully and serve immediately with your favorite toppings.

Tips for Perfect Results

To make the best Fudgy Brownie Waffles: Decadent Breakfast Treat, follow these tips:

  • Don’t overmix the batter to keep waffles tender
  • Grease the waffle iron well to prevent sticking
  • Cook until slightly crisp for contrast with fudgy interior
  • Serve immediately for best texture

These tips ensure perfect waffles every time.

Variations

You can easily customize these Fudgy Brownie Waffles: Decadent Breakfast Treat:

Peanut Butter Swirl

  • Add peanut butter to the batter

Mint Chocolate

  • Add a drop of mint extract

Gluten-Free Option

  • Use gluten-free flour blend

Extra Decadent

  • Top with ice cream and fudge sauce

What to Serve With It

These Fudgy Brownie Waffles: Decadent Breakfast Treat pair perfectly with:

  • Fresh berries
  • Whipped cream
  • Ice cream
  • Coffee or milk

They can be as simple or indulgent as you like.

Storage & Reheating

  • Refrigerate: Store for up to 3 days
  • Freeze: Freeze waffles for up to 2 months
  • Reheat: Use toaster or oven for crispiness
  • Avoid microwaving to keep texture intact

Proper storage keeps them delicious.

Common Mistakes to Avoid

Avoid these mistakes when making Fudgy Brownie Waffles: Decadent Breakfast Treat:

  • Overcooking (leads to dryness)
  • Under-greasing the waffle iron
  • Using too much batter
  • Skipping preheating

Small details make a big difference.

FAQs

Can I use brownie mix instead?

Yes, brownie mix works as a shortcut.

Are these waffles very sweet?

They’re rich but balanced—adjust sugar if needed.

Can I make them ahead of time?

Yes, and reheat in a toaster for best results.

What waffle maker works best?

Any standard waffle maker works well.

Final Thoughts

These Fudgy Brownie Waffles: Decadent Breakfast Treat are the perfect combination of comfort and indulgence. With their rich chocolate flavor, crisp edges, and soft centers, they’re a treat you’ll want to make again and again.

Whether you’re serving them for brunch, dessert, or a special breakfast, these waffles are guaranteed to impress. Once you try them, you’ll never look at waffles—or brownies—the same way again.

Kitchen Sink Cookies (Panera Copycat): The Ultimate Loaded Cookie Recipe

If you’ve ever walked into Panera Bread and spotted those giant, chunky cookies packed with everything but the kitchen sink, you already know how irresistible they are. This Kitchen Sink Cookies (Panera Copycat) recipe brings that same magic right into your home kitchen—with chewy centers, crispy edges, and a perfect balance of sweet and salty flavors.

What makes these cookies so special is their mix-ins. From chocolate chunks to crunchy pretzels and gooey caramel bits, every bite is a surprise. Whether you’re baking for a party, holiday, or just because, these Kitchen Sink Cookies (Panera Copycat) are guaranteed to impress.

Why You’ll Love This Recipe

There are countless reasons to fall in love with these Kitchen Sink Cookies (Panera Copycat):

  • Loaded with sweet and salty mix-ins
  • Soft, chewy centers with crisp edges
  • Perfect bakery-style texture at home
  • Great for sharing or gifting
  • Endlessly customizable

These cookies truly deliver that indulgent, over-the-top cookie experience.

Ingredients

To make these delicious Kitchen Sink Cookies (Panera Copycat), you’ll need:

Base Dough:

  • 2 1/2 cups all-purpose flour
  • 1 teaspoon baking soda
  • 1/2 teaspoon salt
  • 1 cup unsalted butter (softened)
  • 3/4 cup brown sugar
  • 1/2 cup granulated sugar
  • 2 large eggs
  • 1 tablespoon vanilla extract

Mix-Ins:

  • 1 cup chocolate chunks or chips
  • 1/2 cup caramel bits
  • 1/2 cup crushed pretzels
  • 1/2 cup toffee bits or nuts

Ingredient Notes

The key to perfect Kitchen Sink Cookies (Panera Copycat) lies in the balance of flavors and textures:

  • Brown sugar: Adds moisture and chewiness
  • Butter: Creates richness and flavor
  • Pretzels: Bring that signature salty crunch
  • Caramel bits: Add gooey sweetness
  • Chocolate: The heart of every great cookie

Step-by-Step Instructions

1. Prepare the Dough

In a bowl, whisk together flour, baking soda, and salt.

2. Cream Butter and Sugar

In a separate bowl, beat butter, brown sugar, and granulated sugar until light and fluffy.

3. Add Eggs and Vanilla

Mix in eggs one at a time, then add vanilla extract.

4. Combine Dry Ingredients

Gradually add dry ingredients to the wet mixture.

5. Fold in Mix-Ins

Gently fold in chocolate, caramel, pretzels, and toffee bits.

6. Chill the Dough

Refrigerate for at least 30 minutes for better texture.

7. Bake

Scoop large portions onto a baking sheet and bake at 350°F (175°C) for 10–12 minutes.

8. Cool and Serve

Let cool slightly before enjoying.

Tips for Perfect Results

To achieve bakery-quality Kitchen Sink Cookies (Panera Copycat):

  • Chill the dough for thicker cookies
  • Use large scoops for that signature look
  • Don’t overbake—they should be soft in the center
  • Sprinkle sea salt on top for extra flavor

These tips help you recreate that iconic cookie texture.

Variations

This Kitchen Sink Cookies (Panera Copycat) recipe is highly customizable:

Peanut Butter Version

  • Add peanut butter chips

Holiday Cookies

  • Use festive candies or sprinkles

Nut-Free Option

  • Skip nuts and add more chocolate

Extra Crunchy

  • Add more pretzels or cereal pieces

What to Serve With It

These Kitchen Sink Cookies (Panera Copycat) pair perfectly with:

  • Cold milk
  • Coffee or espresso
  • Hot chocolate
  • Ice cream for a dessert sandwich

They’re versatile and always satisfying.

Storage & Reheating

  • Room temperature: Store in an airtight container for up to 4 days
  • Freeze: Dough or baked cookies for up to 2 months
  • Reheat: Warm in the microwave for a gooey texture

Proper storage keeps them fresh and delicious.

Common Mistakes to Avoid

Avoid these mistakes when making Kitchen Sink Cookies (Panera Copycat):

  • Overmixing the dough
  • Skipping chilling time
  • Overbaking
  • Using too many mix-ins (causes spreading issues)

Balance is key to perfect cookies.

FAQs

Why are they called kitchen sink cookies?

Because they include a variety of mix-ins—everything but the kitchen sink!

Can I make the dough ahead of time?

Yes, it can be refrigerated for up to 48 hours.

Can I freeze the dough?

Absolutely—portion it and freeze for easy baking later.

How do I keep cookies soft?

Store them with a slice of bread in the container.

Final Thoughts

These Kitchen Sink Cookies (Panera Copycat) are the ultimate treat for cookie lovers who want it all—sweet, salty, chewy, crunchy, and completely irresistible. They capture the essence of bakery-style indulgence while being easy enough to make at home.

Whether you’re baking for friends, family, or yourself, this recipe guarantees big flavor and even bigger smiles. Once you try them, you’ll see why these cookies are truly unforgettable.

Smash Burger Grilled Cheese with Special Sauce: The Ultimate Comfort Food Mashup

If you’ve ever struggled to choose between a juicy burger and a gooey grilled cheese, this Smash Burger Grilled Cheese with Special Sauce is your dream come true. It combines the crispy, caramelized edges of a smash burger with the buttery crunch of grilled cheese, all brought together with a rich, tangy special sauce.

This indulgent recipe is the ultimate comfort food mashup—perfect for casual dinners, game days, or whenever you’re craving something seriously satisfying. Once you bite into this smash burger grilled cheese with special sauce, you’ll understand why it’s quickly becoming a viral favorite.

Why You’ll Love This Recipe

This Smash Burger Grilled Cheese with Special Sauce is irresistible for so many reasons:

  • Crispy, buttery grilled bread
  • Juicy smash burger with caramelized edges
  • Melty cheese in every bite
  • Tangy, creamy special sauce
  • Perfect for indulgent comfort meals

It’s everything you love about burgers and grilled cheese—combined into one epic sandwich.

Ingredients

Here’s what you’ll need for this incredible Smash Burger Grilled Cheese with Special Sauce:

For the Sandwich:

  • 1 lb ground beef (80/20)
  • Salt and pepper
  • 4 slices of bread (Texas toast or sourdough)
  • 4 slices cheddar or American cheese
  • 2 tablespoons butter

For the Special Sauce:

  • 1/3 cup mayonnaise
  • 2 tablespoons ketchup
  • 1 tablespoon mustard
  • 1 tablespoon pickle relish
  • 1 teaspoon garlic powder
  • 1 teaspoon paprika

Optional Add-Ons:

  • Pickles
  • Caramelized onions
  • Lettuce
  • Tomato

Ingredient Notes

Each component in this Smash Burger Grilled Cheese with Special Sauce plays a key role:

  • Ground beef: Use 80/20 for juicy, flavorful patties
  • Bread: Thick slices hold everything together
  • Cheese: Melts beautifully for that gooey texture
  • Special sauce: Adds tang, sweetness, and richness

Step-by-Step Instructions

1. Make the Special Sauce

In a bowl, mix mayonnaise, ketchup, mustard, relish, garlic powder, and paprika. Set aside.

2. Prepare the Beef

Divide ground beef into portions and lightly shape into balls.

3. Smash the Patties

Heat a skillet over high heat. Place beef balls and smash flat. Season with salt and pepper.

4. Cook the Patties

Cook for 2–3 minutes per side until crispy edges form.

5. Assemble the Sandwich

Butter bread slices. Place cheese, cooked patties, and sauce between slices.

6. Grill the Sandwich

Cook in a skillet over medium heat until bread is golden and cheese is melted.

7. Serve Hot

Slice and enjoy immediately.

Tips for Perfect Results

To master the Smash Burger Grilled Cheese with Special Sauce, keep these tips in mind:

  • Use a hot skillet for proper smashing and crust
  • Don’t overwork the beef to keep it tender
  • Press firmly when smashing for crispy edges
  • Cook low and slow for the sandwich to melt cheese perfectly

These tips ensure restaurant-quality results at home.

Variations

This Smash Burger Grilled Cheese with Special Sauce is easy to customize:

Spicy Version

  • Add jalapeños or hot sauce

Bacon Lover’s

  • Add crispy bacon strips

Double Cheese

  • Use multiple cheese varieties

Low-Carb Option

  • Use low-carb bread or lettuce wraps

What to Serve With It

Pair your Smash Burger Grilled Cheese with Special Sauce with:

  • French fries or onion rings
  • Coleslaw
  • Pickles
  • Milkshakes or soda

These sides make it a complete comfort meal.

Storage & Reheating

  • Refrigerate: Store leftovers for up to 2 days
  • Reheat: Use a skillet for best texture
  • Avoid microwaving to keep bread crispy
  • Store sauce separately if possible

Fresh is always best, but reheating works well with care.

Common Mistakes to Avoid

Avoid these mistakes when making Smash Burger Grilled Cheese with Special Sauce:

  • Using lean beef (less flavor)
  • Not heating the pan enough
  • Overloading the sandwich
  • Burning the bread before cheese melts

Balance and timing are key.

FAQs

What is a smash burger?

It’s a burger cooked by smashing beef onto a hot surface for crispy edges.

Can I use different cheese?

Yes—Swiss, provolone, or pepper jack work great.

Can I make it ahead of time?

It’s best served fresh, but components can be prepped ahead.

Is the special sauce necessary?

It’s highly recommended—it adds signature flavor.

Final Thoughts

This Smash Burger Grilled Cheese with Special Sauce is the ultimate indulgence for anyone who loves bold, comforting flavors. With its crispy bread, juicy beef, melty cheese, and tangy sauce, it’s a sandwich that truly delivers on every level.

Whether you’re cooking for a crowd or treating yourself, this recipe is guaranteed to impress. Once you try it, you may never look at burgers or grilled cheese the same way again.

Irresistible Chopped Chicken Bacon Ranch Sandwich Bliss

If you’re craving a sandwich that’s bold, hearty, and completely satisfying, this Irresistible Chopped Chicken Bacon Ranch Sandwich Bliss is about to become your new favorite. Packed with juicy chicken, crispy bacon, creamy ranch dressing, and gooey melted cheese, this sandwich delivers a perfect balance of textures and flavors in every bite.

What makes this recipe stand out is the chopped filling—everything is finely diced and mixed together, ensuring you get a little bit of everything in each mouthful. Whether you’re making lunch, dinner, or a quick comfort meal, this chopped chicken bacon ranch sandwich truly lives up to its name.

Why You’ll Love This Recipe

There are so many reasons to love this Irresistible Chopped Chicken Bacon Ranch Sandwich Bliss:

  • Packed with bold, savory flavors
  • Perfectly balanced textures—crispy, creamy, and juicy
  • Quick and easy to prepare
  • Great for lunch, dinner, or meal prep
  • Customizable with your favorite toppings

This is comfort food at its absolute best.

Ingredients

To make this delicious Irresistible Chopped Chicken Bacon Ranch Sandwich Bliss, you’ll need:

Main Ingredients:

  • 2 cups cooked chicken breast (chopped)
  • 6 slices bacon (cooked and chopped)
  • 1/2 cup shredded cheddar or mozzarella cheese
  • 1/3 cup ranch dressing
  • 4 sandwich rolls or hoagie buns
  • 1 tablespoon butter (for toasting)

Optional Add-Ons:

  • Lettuce
  • Tomato slices
  • Pickles
  • Red onion
  • Avocado

Ingredient Notes

The ingredients in this Irresistible Chopped Chicken Bacon Ranch Sandwich Bliss work together for maximum flavor:

  • Chicken: Rotisserie chicken works great for convenience
  • Bacon: Adds crunch and smoky flavor
  • Ranch dressing: Brings creaminess and tang
  • Cheese: Melts into the filling for richness
  • Bread: Choose sturdy rolls that hold up to the filling

Step-by-Step Instructions

1. Prepare the Filling

In a large bowl, combine chopped chicken, bacon, cheese, and ranch dressing. Mix well until evenly coated.

2. Toast the Bread

Butter the sandwich rolls and toast them in a skillet until golden brown.

3. Heat the Mixture

Warm the chicken mixture in a skillet over medium heat until heated through and the cheese begins to melt.

4. Assemble the Sandwich

Spoon the warm mixture onto the toasted rolls.

5. Add Toppings

Add lettuce, tomatoes, or other toppings if desired.

6. Serve Immediately

Enjoy while warm and melty.

Tips for Perfect Results

To make the best Irresistible Chopped Chicken Bacon Ranch Sandwich Bliss, follow these tips:

  • Chop ingredients evenly for balanced bites
  • Use freshly cooked bacon for maximum crispiness
  • Don’t overheat the mixture to avoid drying out chicken
  • Toast the bread well to prevent sogginess

These tips ensure a perfect sandwich every time.

Variations

This Irresistible Chopped Chicken Bacon Ranch Sandwich Bliss is easy to customize:

Spicy Version

  • Add hot sauce or jalapeños

BBQ Twist

  • Mix in a bit of BBQ sauce

Low-Carb Option

  • Serve in lettuce wraps instead of bread

Extra Cheesy

  • Add cream cheese or extra shredded cheese

What to Serve With It

Pair your Irresistible Chopped Chicken Bacon Ranch Sandwich Bliss with:

  • French fries or sweet potato fries
  • Coleslaw
  • Pickles
  • Chips or a side salad

These sides complement the rich flavors perfectly.

Storage & Reheating

  • Refrigerate: Store filling for up to 3 days
  • Reheat: Warm in a skillet or microwave
  • Store separately from bread
  • Avoid freezing for best texture

Fresh assembly keeps the sandwich at its best.

Common Mistakes to Avoid

Avoid these mistakes when making Irresistible Chopped Chicken Bacon Ranch Sandwich Bliss:

  • Using dry chicken
  • Overloading the sandwich
  • Skipping toasting the bread
  • Adding too much dressing

Balance is key for the perfect sandwich.

FAQs

Can I use leftover chicken?

Yes! It’s a great way to use leftovers.

What’s the best bread for this sandwich?

Hoagie rolls or brioche buns work best.

Can I make it ahead of time?

You can prepare the filling ahead and assemble later.

Can I make it healthier?

Use light ranch and whole grain bread.

Final Thoughts

This Irresistible Chopped Chicken Bacon Ranch Sandwich Bliss is everything you want in a comfort meal—rich, flavorful, and incredibly satisfying. With its creamy, savory filling and perfectly toasted bread, it’s a recipe that delivers every single time.

Whether you’re cooking for yourself, your family, or a crowd, this sandwich is guaranteed to impress. Once you try it, you’ll understand why it truly is sandwich bliss.

Loaded Breakfast Tostadas: The Ultimate Flavor-Packed Morning Recipe

If you’re tired of the same old breakfast routine, it’s time to shake things up with these irresistible Loaded Breakfast Tostadas. This bold and satisfying dish combines crispy tortillas with layers of refried beans, fluffy eggs, melted cheese, and fresh toppings for a breakfast that’s bursting with flavor and texture.

Perfect for busy mornings, weekend brunches, or even breakfast-for-dinner nights, these Loaded Breakfast Tostadas are easy to make and endlessly customizable. They bring together everything you love about classic breakfast favorites in one crunchy, delicious bite.

Why You’ll Love This Recipe

These Loaded Breakfast Tostadas are a game-changer for breakfast lovers:

  • Crispy, crunchy base with hearty toppings
  • Quick and easy to prepare
  • Packed with protein and flavor
  • Perfect for meal prep or brunch gatherings
  • Customizable to suit any taste

Once you try them, they’ll quickly become a go-to favorite.

Ingredients

To make these flavorful Loaded Breakfast Tostadas, gather the following:

Base:

  • 6 tostada shells (store-bought or homemade)

Toppings:

  • 1 cup refried beans
  • 4 large eggs
  • 1/2 cup shredded cheddar or Mexican blend cheese
  • 1 avocado (sliced)
  • 1/2 cup salsa
  • 1/4 cup sour cream
  • 2 tablespoons chopped cilantro

Optional Add-Ons:

  • Cooked bacon or sausage
  • Diced tomatoes
  • Jalapeños
  • Hot sauce

Ingredient Notes

The magic of these Loaded Breakfast Tostadas comes from layering simple, flavorful ingredients:

  • Tostada shells: Provide the crispy foundation
  • Refried beans: Add creaminess and protein
  • Eggs: Scrambled or fried for richness
  • Cheese: Melts beautifully for a savory finish
  • Avocado: Adds freshness and creaminess

Step-by-Step Instructions

1. Warm the Beans

Heat refried beans in a saucepan until smooth and warm.

2. Cook the Eggs

Scramble or fry eggs according to your preference.

3. Heat the Tostadas

Warm tostada shells in the oven for a few minutes to crisp them up.

4. Assemble the Base

Spread a layer of refried beans onto each tostada.

5. Add Eggs and Cheese

Top with eggs and sprinkle cheese while everything is still warm.

6. Add Fresh Toppings

Layer avocado, salsa, sour cream, and cilantro.

7. Serve Immediately

Enjoy while crispy and fresh.

Tips for Perfect Results

To make the best Loaded Breakfast Tostadas, keep these tips in mind:

  • Don’t overload the tostadas to keep them crispy
  • Serve immediately to avoid sogginess
  • Use fresh ingredients for the best flavor
  • Warm components before assembling

These simple tips make a big difference.

Variations

One of the best things about Loaded Breakfast Tostadas is how versatile they are:

Vegetarian Version

  • Add sautéed veggies like peppers and onions

Meat Lover’s Version

  • Top with bacon, sausage, or chorizo

Spicy Kick

  • Add jalapeños or hot sauce

Healthy Option

  • Use whole grain tostadas and egg whites

What to Serve With It

These Loaded Breakfast Tostadas pair well with:

  • Fresh fruit salad
  • Smoothies or juices
  • Coffee or iced coffee
  • Breakfast potatoes

They create a balanced and satisfying meal.

Storage & Reheating

  • Store components separately for best results
  • Refrigerate toppings for up to 2 days
  • Reheat eggs and beans before assembling
  • Avoid storing assembled tostadas to prevent sogginess

Fresh assembly is key for maintaining texture.

Common Mistakes to Avoid

Avoid these mistakes when making Loaded Breakfast Tostadas:

  • Using cold ingredients
  • Overloading toppings
  • Skipping warming steps
  • Letting tostadas sit too long before serving

Attention to timing ensures the perfect bite.

FAQs

Can I make these ahead of time?

It’s best to prep ingredients ahead and assemble fresh.

Can I use corn tortillas instead?

Yes—just crisp them in the oven or pan.

Are these gluten-free?

They can be if using certified gluten-free tostadas.

What’s the best cheese to use?

Cheddar or Mexican blend works great.

Final Thoughts

These Loaded Breakfast Tostadas are everything you want in a breakfast—crispy, hearty, flavorful, and incredibly satisfying. They’re easy to make, fun to customize, and perfect for any occasion, from quick weekday mornings to relaxed weekend brunches.

Once you try this recipe, you’ll love how it transforms simple ingredients into a bold, delicious meal. It’s a breakfast worth waking up for.

Decadent Banana Foster French Toast Recipe with Easy Rum Caramel Sauce

If you’re ready to take your breakfast or brunch game to the next level, this Decadent Banana Foster French Toast Recipe with Easy Rum Caramel Sauce is exactly what you need. Inspired by the classic New Orleans dessert, this dish combines golden, custardy French toast with caramelized bananas and a rich, buttery rum sauce that’s simply irresistible.

This recipe feels fancy enough for special occasions yet simple enough to make at home. With warm spices, soft bread, and that luscious caramel topping, every bite of this Banana Foster French Toast delivers comfort and indulgence in the best way possible.

Why You’ll Love This Recipe

This Decadent Banana Foster French Toast Recipe with Easy Rum Caramel Sauce is a must-try for several reasons:

  • Rich, buttery, and indulgent flavor
  • Perfect balance of sweet and caramelized notes
  • Easy homemade rum caramel sauce
  • Ideal for brunch, holidays, or special mornings
  • Restaurant-quality results at home

It’s a show-stopping breakfast that feels like a treat.

Ingredients

Here’s what you’ll need to make this amazing Decadent Banana Foster French Toast Recipe with Easy Rum Caramel Sauce:

For the French Toast:

  • 6 slices thick bread (brioche or challah)
  • 3 large eggs
  • 3/4 cup milk
  • 1 tablespoon sugar
  • 1 teaspoon vanilla extract
  • 1/2 teaspoon cinnamon
  • Butter for cooking

For the Banana Foster Topping:

  • 3 ripe bananas (sliced)
  • 1/2 cup brown sugar
  • 1/4 cup butter
  • 1/4 cup heavy cream
  • 2 tablespoons dark rum (optional)
  • 1/2 teaspoon cinnamon
  • Pinch of salt

Ingredient Notes

The success of this Decadent Banana Foster French Toast Recipe with Easy Rum Caramel Sauce comes down to choosing the right ingredients:

  • Bread: Brioche or challah gives a rich, fluffy texture
  • Bananas: Use ripe but firm bananas for best caramelization
  • Brown sugar: Adds deep caramel flavor
  • Rum: Optional, but enhances authenticity and depth
  • Heavy cream: Makes the sauce silky and smooth

Step-by-Step Instructions

1. Prepare the Custard

In a bowl, whisk together eggs, milk, sugar, vanilla, and cinnamon.

2. Dip the Bread

Dip each slice into the custard mixture, ensuring it’s well coated but not soggy.

3. Cook the French Toast

Heat butter in a skillet over medium heat and cook each slice until golden brown on both sides.

4. Make the Caramel Sauce

In a pan, melt butter and brown sugar. Add cream, cinnamon, and salt, stirring until smooth.

5. Add Bananas

Add sliced bananas and cook until soft and caramelized.

6. Add Rum (Optional)

Stir in rum and cook briefly to combine flavors.

7. Assemble

Place French toast on a plate and top with banana caramel sauce.

8. Serve Warm

Enjoy immediately for best flavor and texture.

Tips for Perfect Results

For the best Decadent Banana Foster French Toast Recipe with Easy Rum Caramel Sauce, keep these tips in mind:

  • Use thick-cut bread for better texture
  • Don’t oversoak the bread to avoid sogginess
  • Cook on medium heat for even browning
  • Serve immediately while warm and fresh

These tips ensure your dish turns out perfectly every time.

Variations

This Decadent Banana Foster French Toast Recipe with Easy Rum Caramel Sauce can be customized easily:

No Alcohol Version

  • Skip the rum—it’s still delicious

Nutty Addition

  • Add chopped pecans or walnuts

Chocolate Twist

  • Drizzle chocolate sauce on top

Healthier Option

  • Use whole grain bread and reduce sugar

What to Serve With It

Pair your Decadent Banana Foster French Toast Recipe with Easy Rum Caramel Sauce with:

  • Fresh fruit
  • Bacon or sausage
  • Coffee or espresso
  • Fresh juice or smoothies

These sides balance the richness of the dish.


Storage & Reheating

  • Refrigerate: Store leftovers for up to 2 days
  • Reheat: Warm in a skillet or microwave
  • Store sauce separately if possible
  • Avoid freezing for best texture

This dish is best enjoyed fresh but can be saved if needed.

Common Mistakes to Avoid

Avoid these mistakes when making Decadent Banana Foster French Toast Recipe with Easy Rum Caramel Sauce:

  • Using thin or dry bread
  • Overcooking the caramel sauce
  • Skipping seasoning in the custard
  • Letting bananas over-soften

Careful attention ensures perfect results.

FAQs

Can I make this ahead of time?

You can prepare components ahead, but assemble fresh for best results.

Is the rum necessary?

No, it’s optional and can be skipped.

What’s the best bread to use?

Brioche or challah works best for richness.

Can I use milk alternatives?

Yes, almond or oat milk works well.

Final Thoughts

This Decadent Banana Foster French Toast Recipe with Easy Rum Caramel Sauce is the ultimate indulgent breakfast or brunch dish. With its rich caramel flavor, soft texture, and warm banana topping, it’s guaranteed to impress anyone at the table.

Whether you’re celebrating a special occasion or simply treating yourself, this recipe delivers comfort, flavor, and a touch of elegance in every bite. Once you try it, it may just become your new favorite brunch classic.