Louisiana Voodoo Fries (Wingstop Copycat)

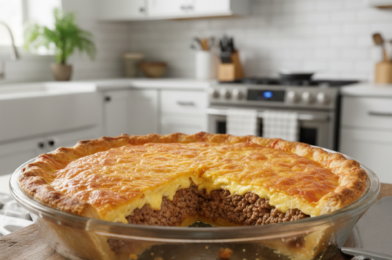
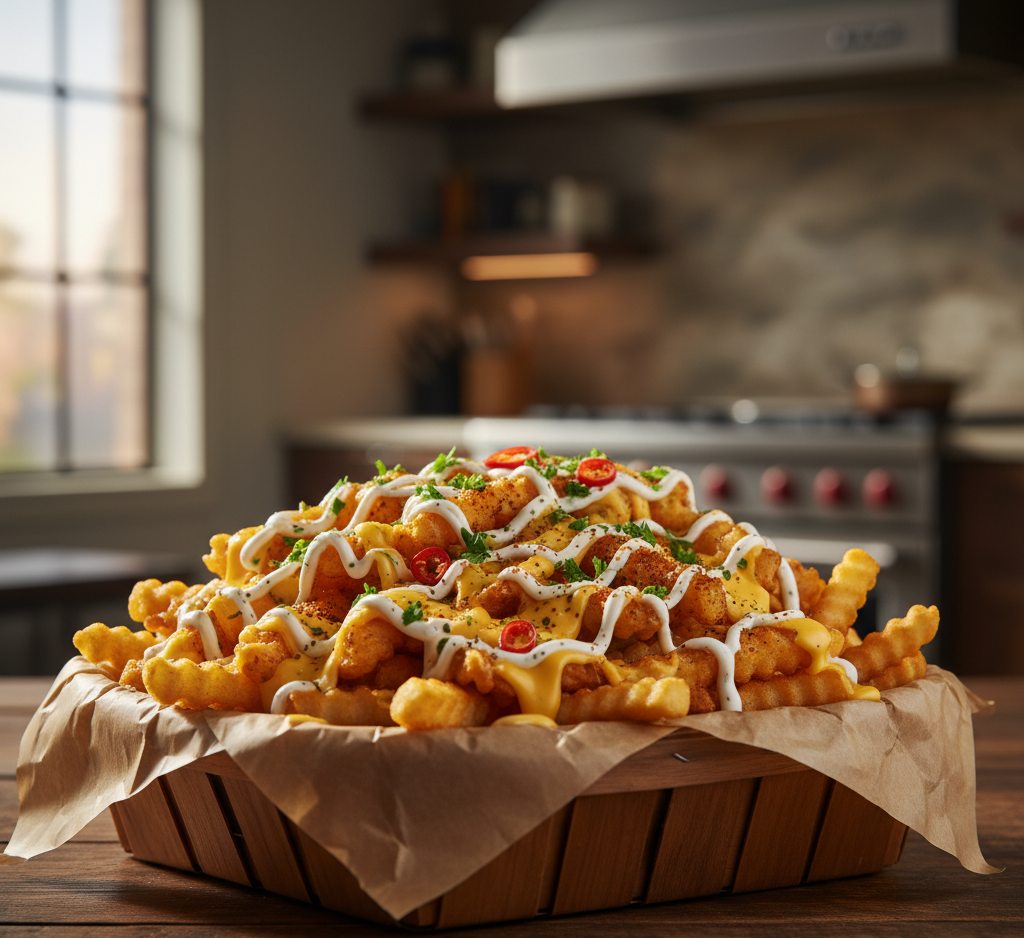
If you’ve ever ordered fries from Wingstop, chances are you’ve tried (or at least eyed) their famous Louisiana Voodoo Fries. Crispy golden fries tossed in bold Cajun seasoning, smothered in creamy cheese sauce, and drizzled with cool ranch dressing—this indulgent side dish is practically legendary. The good news? You can recreate these Louisiana Voodoo Fries (Wingstop copycat) right in your own kitchen with simple ingredients and big flavor.

This recipe captures everything you love about the original: the spicy kick, the savory cheese, and that irresistible ranch finish. Whether you’re hosting game day, planning a casual family dinner, or just craving loaded fries with serious attitude, this copycat recipe delivers restaurant-quality results without leaving the house.

Why You’ll Love This Louisiana Voodoo Fries (Wingstop Copycat)

There are plenty of loaded fry recipes online, but this Louisiana Voodoo Fries (Wingstop copycat) recipe stands out for a few delicious reasons.

  • Bold Cajun flavor in every bite

  • Ultra-crispy fries with fluffy interiors

  • Creamy, homemade cheese sauce

  • Cool ranch drizzle to balance the heat

  • Easy to customize for spice level and toppings

What makes these fries special is the layering of flavors. The Cajun seasoning hits first—smoky, spicy, and savory. Then comes the rich cheese sauce, followed by the tangy ranch that ties everything together. It’s comfort food with a Southern-inspired kick.

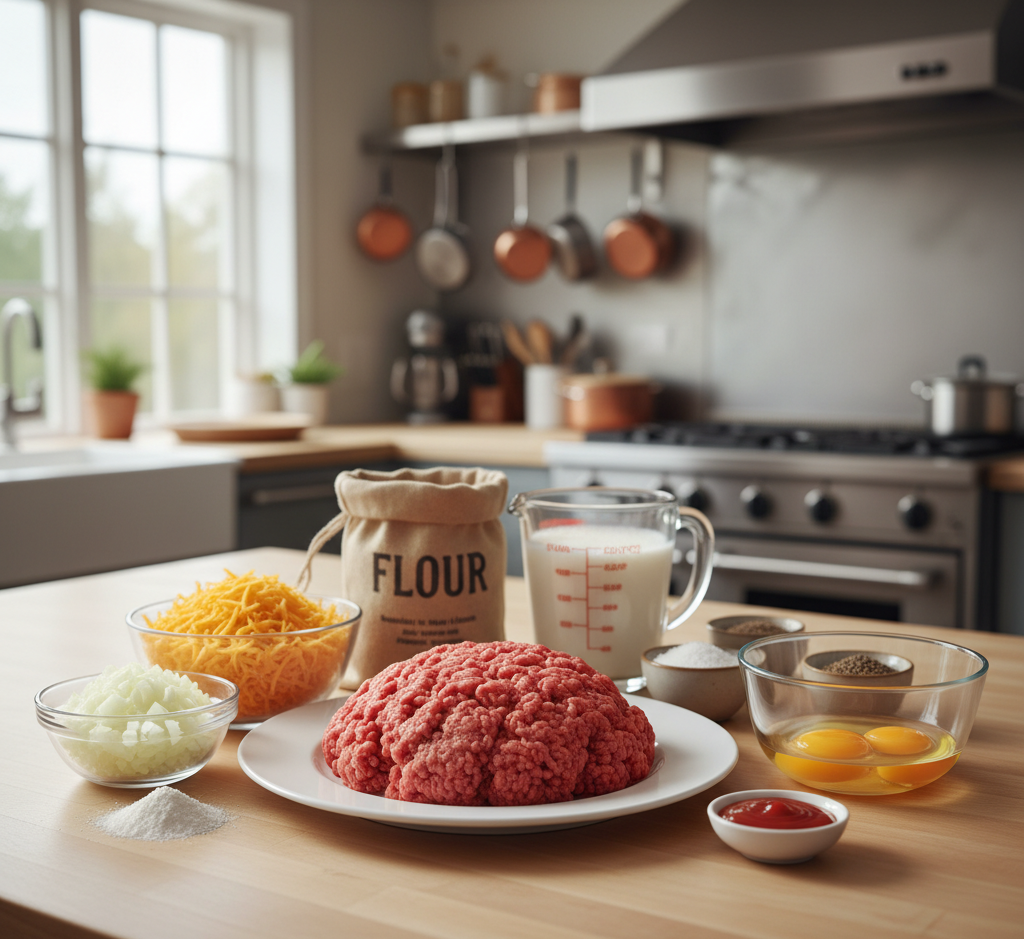
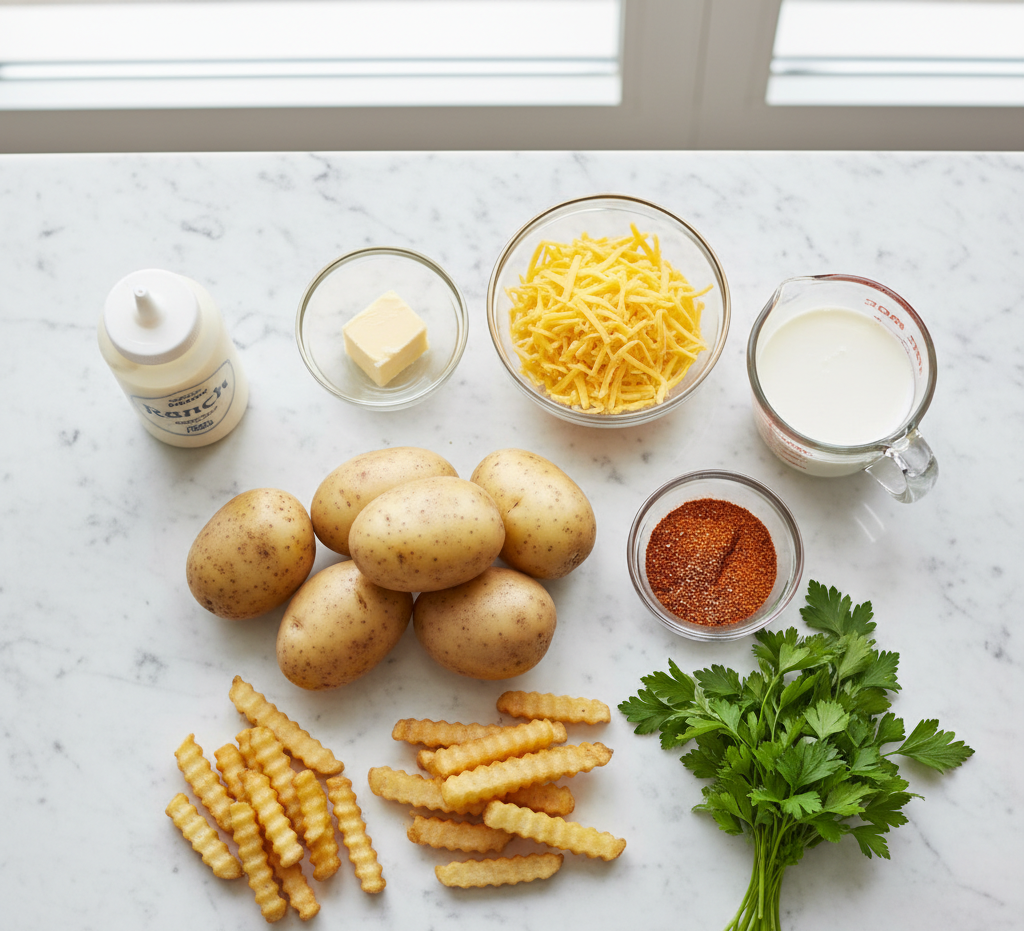
Ingredients for Louisiana Voodoo Fries

To make this Wingstop copycat recipe at home, you’ll need:

For the Fries:

  • 1½ pounds russet potatoes (or frozen thick-cut fries)

  • 2 tablespoons vegetable oil (if baking fresh potatoes)

  • 1–2 tablespoons Cajun seasoning

  • Salt to taste

For the Cheese Sauce:

  • 2 tablespoons butter

  • 2 tablespoons all-purpose flour

  • 1 cup whole milk

  • 1½ cups freshly shredded sharp cheddar cheese

  • Pinch of paprika

For Topping:

  • ½ cup ranch dressing

  • Extra Cajun seasoning for garnish

  • Chopped parsley (optional)

Ingredient Notes & Flavor Tips

Choosing the Right Potatoes

Russet potatoes are ideal because of their high starch content, which creates crispy exteriors and fluffy centers. If you’re short on time, high-quality frozen steak fries work beautifully for Louisiana Voodoo Fries (Wingstop copycat).

Cajun Seasoning Matters

Not all Cajun blends are created equal. Look for one with paprika, garlic powder, onion powder, cayenne, and thyme. If you prefer full control, you can mix your own to adjust the heat level.

Cheese Sauce Consistency

Freshly shredded cheese melts smoother than pre-shredded varieties, which often contain anti-caking agents. For ultra-creamy texture, shred your cheese right before making the sauce.

Step-by-Step Instructions

1. Prepare the Fries

If using fresh potatoes, wash and cut them into thick fries. Soak in cold water for at least 30 minutes to remove excess starch. Drain, pat dry thoroughly, toss with oil, and bake at 425°F for 30–35 minutes, flipping halfway through. For frozen fries, bake according to package instructions until extra crispy.

Image Prompt: Fresh-cut russet potato fries spread on a baking sheet lined with parchment paper, lightly coated in oil and ready for baking, natural light from kitchen window, professional kitchen background, shallow depth of field, realistic food photography, 4k resolution.

2. Season Generously

Once the fries are hot and crispy, immediately toss them with Cajun seasoning and a light sprinkle of salt. The heat helps the seasoning adhere perfectly.

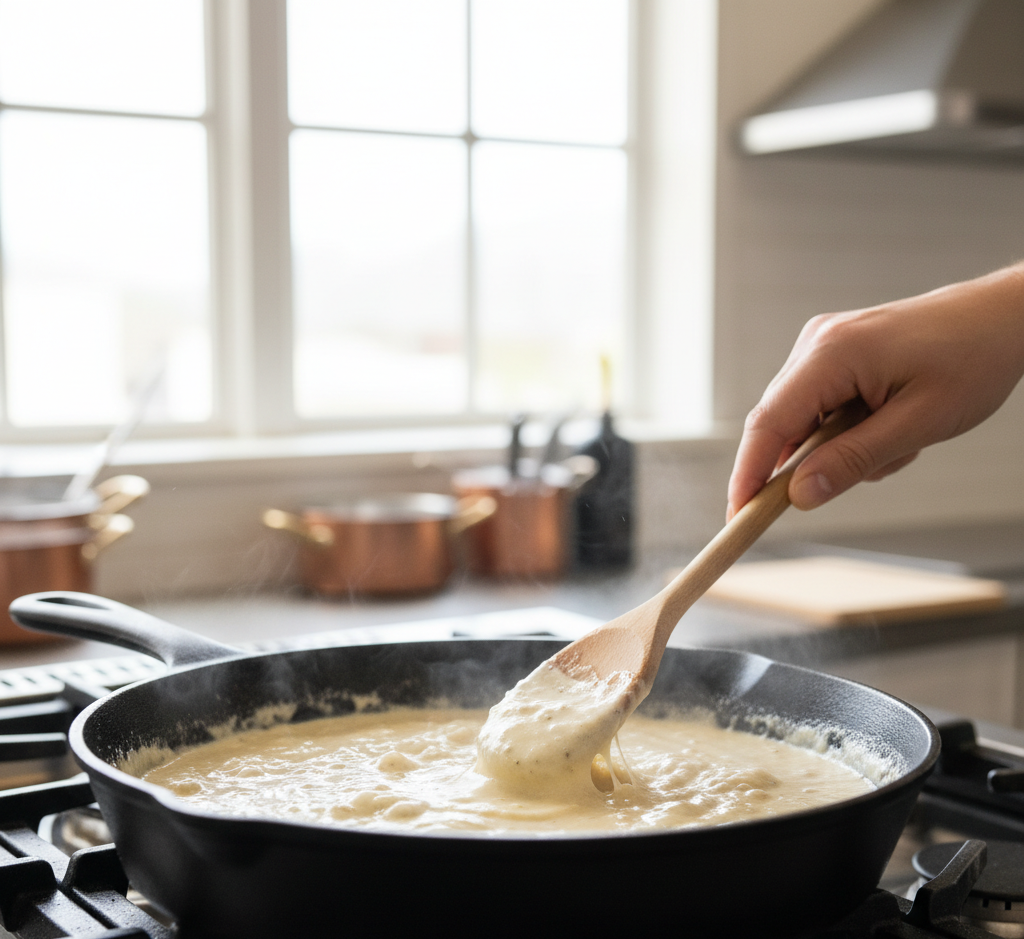
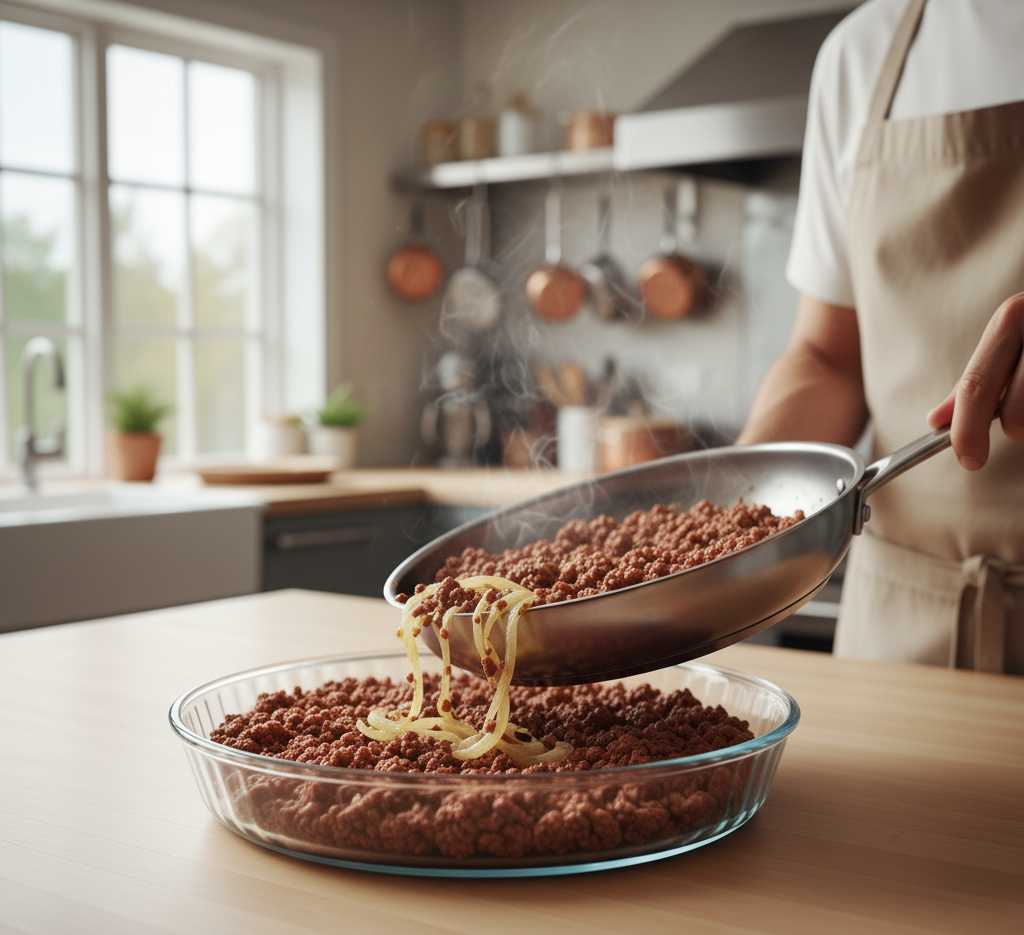
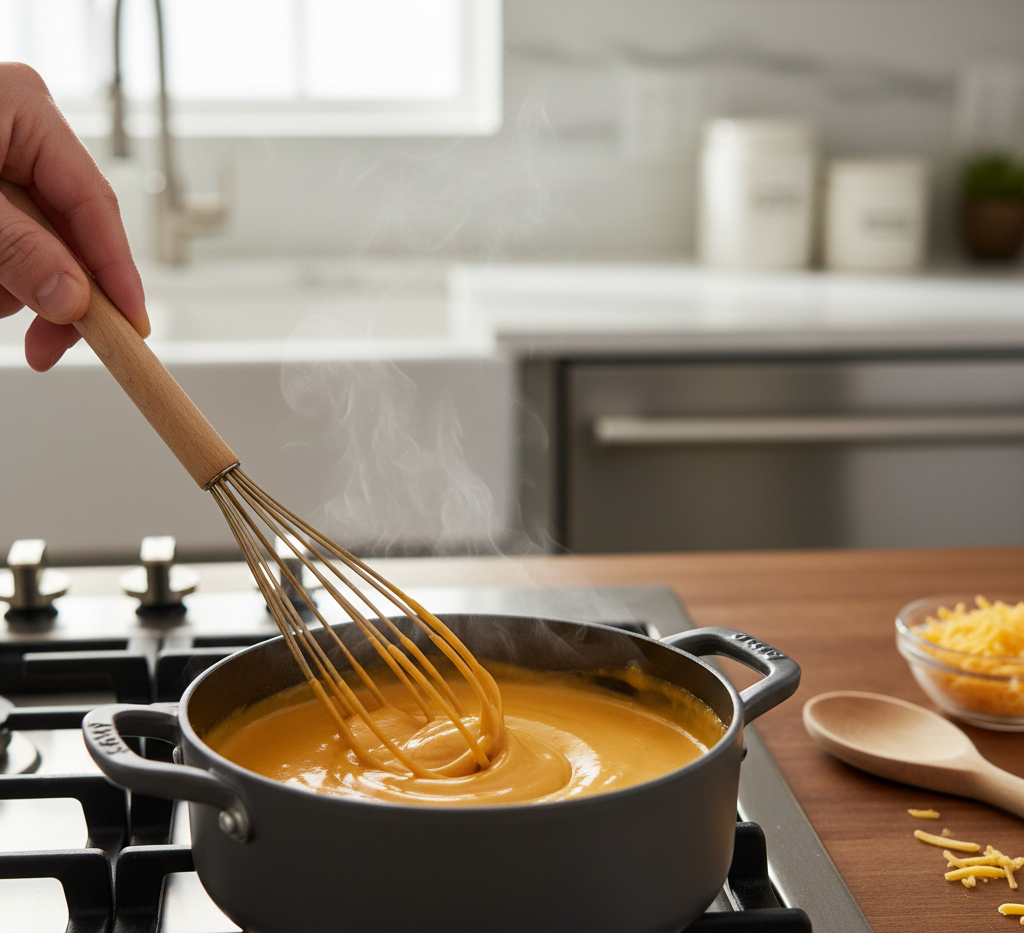
3. Make the Cheese Sauce

In a saucepan over medium heat, melt butter. Whisk in flour and cook for 1–2 minutes to form a roux. Slowly add milk while whisking continuously. Simmer until slightly thickened, then remove from heat and stir in shredded cheddar until smooth and creamy.

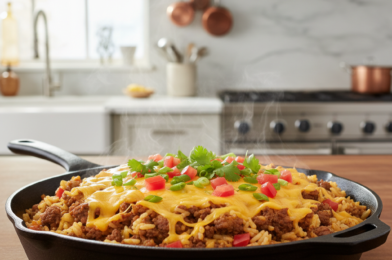
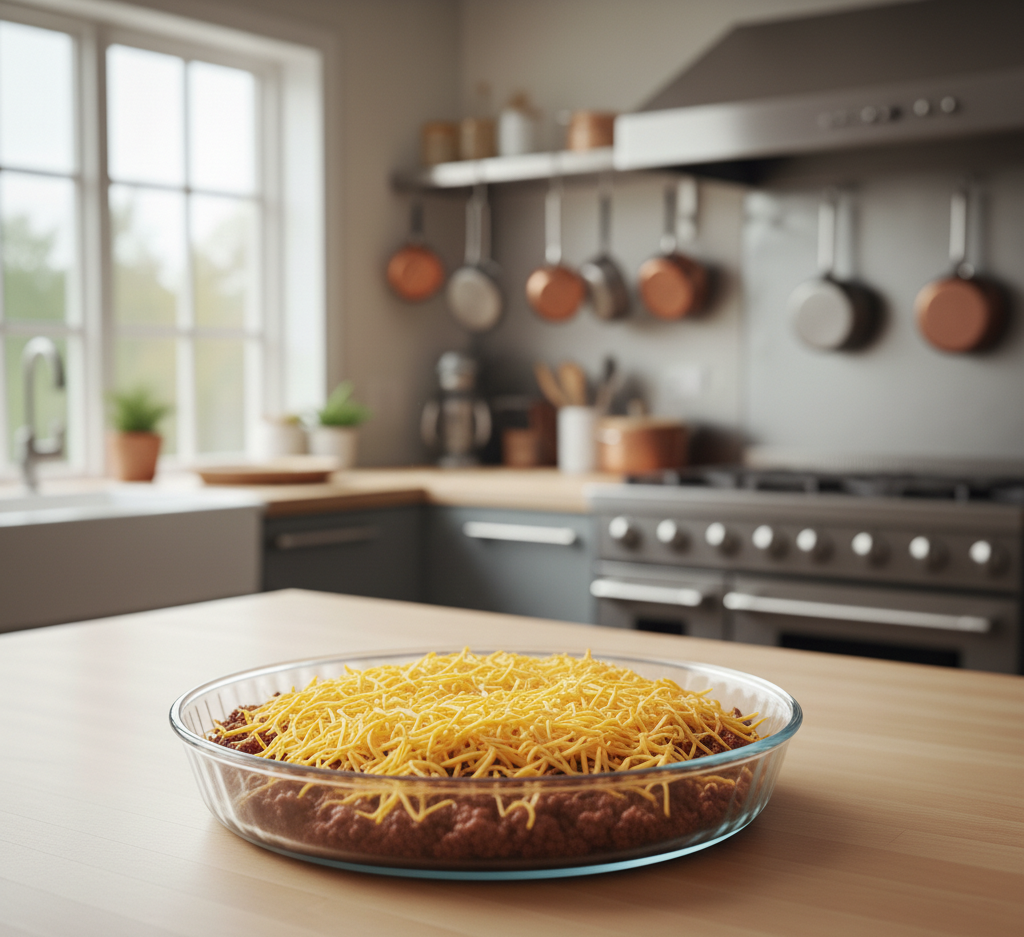
4. Assemble the Louisiana Voodoo Fries

Pile the seasoned fries onto a serving platter. Pour warm cheese sauce generously over the top. Finish with a drizzle of ranch dressing and a final sprinkle of Cajun seasoning.

Tips for Perfect Louisiana Voodoo Fries

  • Dry potatoes thoroughly before baking to maximize crispiness.

  • Don’t overcrowd the pan—fries need space for airflow.

  • Serve immediately for best texture.

  • Keep cheese sauce warm over low heat if preparing ahead.

  • Add ranch just before serving to prevent sogginess.

These small details make a big difference in achieving that authentic Wingstop copycat flavor and texture.

Delicious Variations

Spicy Extra Voodoo Fries

Add sliced jalapeños or a dash of hot sauce to the cheese sauce for more heat.

Loaded Cajun Fries

Top with crispy bacon bits and sliced green onions.

Chicken Voodoo Fries

Add chopped crispy chicken tenders for a full meal version inspired by your favorite wing joint.

What to Serve With Louisiana Voodoo Fries

These Louisiana Voodoo Fries (Wingstop copycat) pair perfectly with:

  • Buffalo wings

  • Fried chicken sandwiches

  • Classic cheeseburgers

  • Coleslaw

  • Iced sweet tea or lemonade

They’re bold enough to shine on their own but versatile enough to complement a variety of comfort food favorites.

Storage & Reheating Tips

Loaded fries are best enjoyed fresh, but leftovers can be stored in an airtight container in the refrigerator for up to 2 days.

To reheat:

  • Bake at 400°F until warmed and crispy.

  • Avoid microwaving if possible, as it softens the fries.

  • Reheat cheese sauce separately and drizzle fresh ranch before serving.

For best results, store fries and sauce separately whenever possible.

Common Mistakes to Avoid

  • Skipping the soak for fresh fries – leads to less crispiness.

  • Overheating the cheese sauce – can cause separation.

  • Adding too much ranch too early – makes fries soggy.

  • Under-seasoning – Cajun flavor should be bold and noticeable.

Balancing crispiness and creaminess is key to mastering Louisiana Voodoo Fries at home.

FAQs

1. What makes Louisiana Voodoo Fries different from regular loaded fries?

The bold Cajun seasoning combined with creamy cheese sauce and ranch drizzle gives Louisiana Voodoo Fries their signature flavor profile.

2. Can I air fry the fries?

Yes! Air fry at 400°F for 15–20 minutes, shaking halfway through for even crispiness.

3. Can I make the cheese sauce ahead of time?

Absolutely. Store in the refrigerator for up to 3 days and gently reheat on the stovetop with a splash of milk.

4. Are Louisiana Voodoo Fries very spicy?

They have a mild-to-medium kick. Adjust the Cajun seasoning or cayenne to control the heat level.

5. Can I make this recipe gluten-free?

Yes. Use gluten-free flour for the roux and confirm your Cajun seasoning is gluten-free.

Final Thoughts

These Louisiana Voodoo Fries (Wingstop copycat) are the ultimate homemade indulgence. Crispy, spicy, cheesy, and drizzled with cool ranch, they capture everything fans love about the restaurant favorite while giving you full control over ingredients and spice level.

Whether you’re making them for game day, movie night, or just because you’re craving something bold and comforting, this recipe proves that you don’t need takeout to enjoy incredible Louisiana Voodoo Fries. Once you try them homemade, you may never go back.

Cheesy Taco Rice Recipe (Easy One-Pan Dinner the Whole Family Will Love)

If you’re looking for a comforting, flavor-packed dinner that comes together fast, this Cheesy Taco Rice Recipe is about to become a staple in your kitchen. It’s everything you love about tacos—seasoned ground beef, savory spices, fluffy rice, and gooey melted cheese—all cooked together in one skillet. The result? A satisfying, family-friendly meal that’s perfect for busy weeknights, meal prep, or even casual entertaining.

What makes this cheesy taco rice so irresistible is the balance of bold Tex-Mex flavors and creamy, melty cheese in every bite. Plus, it’s incredibly versatile. You can spice it up, lighten it down, or load it with your favorite toppings. If you’re a fan of easy taco rice recipes that don’t sacrifice flavor, you’re in the right place.

Why You’ll Love This Cheesy Taco Rice Recipe

There are plenty of taco-inspired dinners out there, but this cheesy taco rice stands out for several reasons:

  • One-pan convenience – Less cleanup, more flavor.

  • Ready in about 30 minutes – Perfect for busy weeknights.

  • Kid-friendly and crowd-pleasing – Mild yet flavorful.

  • Budget-friendly ingredients – Pantry staples and affordable proteins.

  • Great for meal prep – Reheats beautifully.

This recipe brings together the heartiness of a taco casserole and the simplicity of skillet rice. It’s comfort food with a Tex-Mex twist that keeps everyone coming back for seconds.

Ingredients for Cheesy Taco Rice

To make this easy taco rice recipe, you’ll need simple, everyday ingredients:

  • 1 pound lean ground beef

  • 1 cup long-grain white rice (uncooked)

  • 2 cups beef broth

  • 1 packet taco seasoning (or homemade)

  • 1 can (14.5 oz) diced tomatoes (undrained)

  • 1 small onion, diced

  • 2 cloves garlic, minced

  • 1 cup shredded cheddar cheese

  • 1/2 cup shredded Monterey Jack cheese

  • 1 tablespoon olive oil

  • Salt and black pepper to taste

  • Optional toppings: sour cream, cilantro, avocado, jalapeños

Ingredient Notes and Substitutions

Ground Beef

Lean ground beef (85/15 or 90/10) works best because it provides flavor without excessive grease. You can also substitute:

  • Ground turkey for a lighter version

  • Ground chicken for a milder flavor

  • Plant-based crumbles for a vegetarian cheesy taco rice

Rice

Long-grain white rice cooks evenly and stays fluffy. Avoid instant rice, as it can become mushy. Brown rice can be used, but you’ll need extra broth and longer cooking time.

Cheese

A blend of cheddar and Monterey Jack creates the ultimate creamy, melty finish. Freshly shredded cheese melts better than pre-shredded varieties due to the absence of anti-caking agents.

Step-by-Step Instructions

1. Brown the Beef

Heat olive oil in a large skillet over medium heat. Add diced onion and cook until soft, about 3–4 minutes. Stir in garlic and cook for 30 seconds until fragrant. Add ground beef and cook until browned, breaking it apart with a spatula. Drain excess grease if needed.

2. Add Seasoning and Rice

Stir in taco seasoning, uncooked rice, diced tomatoes (with juice), and beef broth. Mix well to combine all the flavors evenly.

3. Simmer to Perfection

Bring the mixture to a gentle boil, then reduce heat to low. Cover and simmer for 18–20 minutes, or until the rice is tender and most of the liquid is absorbed.

4. Add the Cheese

Remove from heat and sprinkle shredded cheddar and Monterey Jack evenly over the top. Cover again for 2–3 minutes until the cheese melts into gooey perfection.

Tips for Perfect Cheesy Taco Rice

To make sure your cheesy taco rice recipe turns out perfect every time, keep these tips in mind:

  • Don’t lift the lid while simmering – Steam is essential for properly cooking the rice.

  • Use the right rice-to-liquid ratio – Too little liquid leaves rice undercooked.

  • Let it rest – Allow the dish to sit covered for 5 minutes after cooking.

  • Taste before serving – Adjust salt and spice levels as needed.

Small details like these can elevate your taco rice from good to restaurant-quality.

Delicious Variations

One of the best things about this cheesy taco rice recipe is how adaptable it is.

Spicy Taco Rice

Add diced green chilies, chipotle powder, or hot sauce for heat.

Veggie-Packed Version

Stir in:

  • Corn kernels

  • Black beans

  • Diced bell peppers

  • Zucchini

Taco Rice Casserole Style

Transfer to a baking dish, add extra cheese, and broil for 3–5 minutes until bubbly and golden on top.

What to Serve With Cheesy Taco Rice

While this dish is hearty on its own, you can round out the meal with:

  • A crisp green salad with lime vinaigrette

  • Tortilla chips and salsa

  • Guacamole or sliced avocado

  • Warm flour tortillas

  • Mexican street corn

These sides add freshness and texture, balancing the richness of the cheesy taco rice.

Storage & Reheating

This easy taco rice recipe stores beautifully.

Refrigerator: Store in an airtight container for up to 4 days.
Freezer: Freeze for up to 2 months in freezer-safe containers.

To reheat:

  • Microwave with a splash of broth or water to prevent dryness.

  • Reheat on the stovetop over medium-low heat, stirring occasionally.

The flavors deepen overnight, making leftovers even more delicious.

Common Mistakes to Avoid

Even simple recipes can go wrong if you’re not careful. Avoid these common issues:

  • Using too much liquid – Results in mushy rice.

  • Cooking on high heat – Can burn the bottom before rice is done.

  • Adding cheese too early – It may become greasy instead of creamy.

  • Skipping seasoning adjustments – Always taste before serving.

Paying attention to these small details ensures a perfect cheesy taco rice every time.

Frequently Asked Questions

1. Can I make cheesy taco rice ahead of time?

Yes! It’s an excellent make-ahead meal. Store in the fridge and reheat when ready to serve.

2. Can I use brown rice instead of white rice?

Absolutely, but increase the broth to about 2½ cups and extend cooking time by 15–20 minutes.

3. Is this recipe gluten-free?

It can be! Just ensure your taco seasoning and broth are certified gluten-free.

4. Can I make this in a slow cooker?

Yes. Brown the beef first, then add all ingredients except cheese to the slow cooker. Cook on low for 2–3 hours until rice is tender, then stir in cheese before serving.

5. How do I make it creamier?

Stir in 2–3 tablespoons of cream cheese or a splash of heavy cream before adding shredded cheese.

Final Thoughts

This Cheesy Taco Rice Recipe is the kind of dependable, flavor-packed meal every home cook needs. It’s easy, budget-friendly, endlessly customizable, and guaranteed to satisfy even picky eaters. Whether you’re feeding a hungry family, meal prepping for the week, or craving comfort food with bold Tex-Mex flavor, cheesy taco rice delivers every single time.

Give it a try tonight—you might just find it becomes your new go-to one-pan dinner.

Bang Bang Chicken Sliders Recipe – Crispy Easy Chicken Sliders on Kings Hawaiian Rolls

If you’re looking for the ultimate party sandwich, these Bang Bang Chicken Sliders are about to become your new go-to recipe. Crispy, golden chicken layered with creamy, sweet-and-spicy bang bang sauce and tucked into soft, buttery Kings Hawaiian rolls—what’s not to love? These sliders are the perfect balance of crunch, heat, sweetness, and melt-in-your-mouth bread.

Whether you’re hosting game day, planning a backyard BBQ, or just craving something bold and comforting, this Bang Bang Chicken Sliders recipe checks every box. It’s easy enough for a weeknight dinner but impressive enough to serve to guests. Best of all, it’s packed with flavor in every single bite.

Why You’ll Love This Bang Bang Chicken Sliders Recipe

There are so many reasons this recipe stands out from basic chicken sliders:

  • Ultra crispy chicken with a perfectly seasoned coating

  • Sweet and spicy bang bang sauce that’s creamy and addictive

  • Soft, slightly sweet Kings Hawaiian rolls

  • Easy to prep ahead for parties

  • Perfect for game day, potlucks, or family dinners

The contrast between crunchy chicken and fluffy rolls creates the kind of texture combination that keeps everyone coming back for seconds. These crispy chicken sliders aren’t just good—they’re crave-worthy.

Ingredients for Bang Bang Chicken Sliders

Here’s everything you’ll need to make these crispy easy chicken sliders:

For the Chicken:

  • 2 large boneless, skinless chicken breasts (cut into slider-size pieces)

  • 1 cup buttermilk

  • 1 cup all-purpose flour

  • ½ cup cornstarch

  • 1 teaspoon paprika

  • 1 teaspoon garlic powder

  • 1 teaspoon salt

  • ½ teaspoon black pepper

  • Oil for frying

For the Bang Bang Sauce:

  • ½ cup mayonnaise

  • ¼ cup sweet chili sauce

  • 1–2 tablespoons sriracha (adjust for heat)

  • 1 tablespoon honey

For Assembly:

  • 1 package Kings Hawaiian rolls (12 rolls)

  • Shredded lettuce or coleslaw mix

  • Sliced pickles (optional)

  • Chopped green onions (optional garnish)

Ingredient Notes & Substitutions

To make the best Bang Bang Chicken Sliders, a few ingredient choices really matter:

  • Buttermilk helps tenderize the chicken and creates that signature crispy coating. If you don’t have it, mix 1 cup milk with 1 tablespoon vinegar and let it sit for 5 minutes.

  • Cornstarch makes the breading extra crunchy. Don’t skip it!

  • Sweet chili sauce + sriracha creates that classic bang bang flavor—sweet, spicy, and slightly tangy.

  • Kings Hawaiian rolls add a buttery sweetness that balances the spicy sauce beautifully.

If you want to lighten things up, you can air fry or bake the chicken instead of deep frying.

Step-by-Step Instructions

1. Marinate the Chicken

Place the chicken pieces in buttermilk and let them marinate for at least 30 minutes (or up to 4 hours in the fridge). This step ensures juicy, flavorful chicken.

2. Prepare the Breading

In a bowl, combine flour, cornstarch, paprika, garlic powder, salt, and pepper. Remove chicken from buttermilk, letting excess drip off, and dredge each piece in the flour mixture. Press firmly so the coating sticks well.

3. Fry Until Crispy

Heat oil in a deep skillet to 350°F. Fry chicken in batches for 4–5 minutes per side, or until golden brown and cooked through (internal temperature of 165°F). Transfer to a wire rack to stay crispy.

4. Make the Bang Bang Sauce

In a small bowl, whisk together mayonnaise, sweet chili sauce, sriracha, and honey until smooth and creamy.

5. Assemble the Sliders

Slice the Kings Hawaiian rolls in half. Add shredded lettuce or slaw, top with crispy chicken, drizzle generously with bang bang sauce, and add pickles if desired. Replace the tops and serve immediately.

Tips for Perfect Bang Bang Chicken Sliders

Want restaurant-quality results? Follow these expert tips:

  • Double dredge for extra crunch: Dip chicken back into buttermilk and flour for a thicker crust.

  • Don’t overcrowd the pan: Fry in batches to maintain oil temperature.

  • Use a thermometer: Keep oil steady at 350°F for even cooking.

  • Toast the rolls lightly: This prevents sogginess and adds extra flavor.

These small steps make a big difference in achieving ultra crispy chicken sliders every time.

Delicious Variations

This Bang Bang Chicken Sliders recipe is easy to customize:

Air Fryer Version

Spray coated chicken with oil and air fry at 375°F for 12–15 minutes, flipping halfway.

Baked Version

Bake at 400°F on a wire rack for 20–25 minutes until golden and crispy.

Spicy Kick

Add cayenne pepper to the flour mixture or extra sriracha to the sauce.

Healthier Twist

Use grilled chicken instead of fried for a lighter version of bang bang chicken sliders.

What to Serve With Bang Bang Chicken Sliders

These crispy easy chicken sliders pair perfectly with:

  • Sweet potato fries

  • Classic French fries

  • Creamy coleslaw

  • Corn on the cob

  • Pasta salad

  • Pickle spears

For parties, serve them alongside chips and extra bang bang sauce for dipping.

Storage & Reheating

If you have leftovers (which is rare!), here’s how to store them:

  • Store chicken separately from rolls and sauce in airtight containers.

  • Refrigerate for up to 3 days.

  • Reheat chicken in the oven or air fryer at 375°F for 5–8 minutes to restore crispiness.

  • Avoid microwaving if possible—it softens the coating.

For best results, assemble sliders fresh before serving.

Common Mistakes to Avoid

Even simple recipes can go wrong. Here’s what to watch for:

  • Frying at the wrong temperature (leads to greasy chicken)

  • Skipping the cornstarch (less crispy texture)

  • Overcrowding the pan

  • Adding sauce too early (makes sliders soggy)

Keeping these tips in mind guarantees perfectly crispy Bang Bang Chicken Sliders every time.

Frequently Asked Questions

1. Can I make Bang Bang Chicken Sliders ahead of time?

Yes! You can fry the chicken and prepare the sauce in advance. Store separately and assemble just before serving.

2. Can I use chicken thighs instead of breasts?

Absolutely. Boneless, skinless thighs are juicier and work beautifully in this recipe.

3. How spicy are these sliders?

They’re mildly spicy. You can easily adjust the heat by adding more or less sriracha.

4. Can I freeze the fried chicken?

Yes. Freeze cooked chicken pieces in a freezer-safe bag for up to 2 months. Reheat in the oven for best texture.

5. What makes bang bang sauce different?

Bang bang sauce combines creamy mayonnaise with sweet chili sauce and heat from sriracha, creating a sweet-spicy flavor that’s bold but balanced.

Final Thoughts

These Bang Bang Chicken Sliders are everything you want in a crowd-pleasing sandwich—crispy, creamy, sweet, spicy, and incredibly satisfying. The combination of crunchy fried chicken, flavorful bang bang sauce, and soft Kings Hawaiian rolls creates an irresistible bite that’s perfect for any occasion.

Whether you’re making them for game day, family dinner, or your next party, this crispy easy chicken sliders recipe is guaranteed to impress. Once you try them, they’ll earn a permanent spot in your rotation.

Now grab those rolls and get cooking—you’re about to make the best Bang Bang Chicken Sliders ever!

7 Early American Recipes You Won’t Believe Were Popular in the 1800’s

When we think about food from the 1800s, it’s easy to imagine simple bread, stew, and maybe a pie cooling on a farmhouse windowsill. But the truth is far more fascinating. These 7 Early American recipes you won’t believe were popular in the 1800’s reveal a culinary world filled with creativity, resourcefulness, and sometimes downright surprising flavor combinations.

Early American cooking was shaped by regional ingredients, immigration influences, and pure necessity. Cooks made use of everything available—from wild game to molasses to oysters—and many of these dishes became staples in homes across the country. Today, we’re revisiting seven historic recipes that once graced 19th-century tables and exploring how you can recreate them in your modern kitchen.

Why Early American Recipes Still Matter Today

Exploring 7 Early American recipes you won’t believe were popular in the 1800’s isn’t just about nostalgia—it’s about understanding the roots of American cuisine. Many modern comfort foods evolved from these early dishes.

These recipes reflect:

  • Regional agriculture and seasonal cooking

  • European immigrant influences

  • Frugality and zero-waste principles

  • Traditional preservation techniques

You’ll notice that many of these historic recipes are surprisingly adaptable—and even delicious by today’s standards.

1. Election Cake

Yes, cake for voting! Election Cake was served during 18th and 19th-century political gatherings. This dense, fruit-filled yeast cake symbolized celebration and civic participation.

Made with molasses, spices, raisins, and sometimes brandy, Election Cake was closer to fruitcake than modern birthday cake. It required hours of rising and baking, making it a true labor of love.

Image Prompt:
Thick slice of old-fashioned Election Cake with raisins and nuts on antique plate, rustic wooden background, soft natural lighting, shallow depth of field, 4k resolution.

Modern Tip

  • Use active dry yeast and let the dough rise overnight for authentic flavor.

  • Store tightly wrapped for up to a week—the flavor deepens over time.

2. Oysters for Breakfast

In the 1800s, oysters were cheap and abundant along the East Coast. Oysters for breakfast—often stewed in milk with butter—were completely normal.

This early American recipe may surprise modern readers, but it reflects how seafood was once considered everyday fare.

Serving Suggestion

Serve oyster stew with crusty bread or crackers for a more modern brunch twist.

3. Brown Bread in a Can

Steamed Boston brown bread was often cooked in cylindrical molds (today we use cans). Made with rye flour, cornmeal, molasses, and buttermilk, this hearty bread was dense and slightly sweet.

Among the 7 Early American recipes you won’t believe were popular in the 1800’s, this one has truly stood the test of time.

Cooking Tip

Steam rather than bake for the most authentic texture.

4. Mock Turtle Soup

This dish mimicked expensive turtle soup using calf’s head or organ meats. It was a creative and frugal alternative in the 19th century.

While it may sound unusual today, it demonstrates the nose-to-tail cooking philosophy common in early American kitchens.

Modern Variation

Substitute beef stew meat and rich broth for a more approachable version.

5. Vinegar Pie

No fruit? No problem. Vinegar pie was a clever solution when fresh produce wasn’t available. Vinegar provided tartness similar to apples or lemons.

Among these 7 Early American recipes you won’t believe were popular in the 1800’s, vinegar pie is surprisingly delicious—sweet, tangy, and custard-like.

Storage Tip

Refrigerate for up to 3 days; serve chilled or at room temperature.

6. Johnnycakes

Johnnycakes were cornmeal flatbreads cooked on a griddle. They were simple, filling, and affordable—perfect for frontier life.

Often served with butter and molasses, they resemble modern cornbread pancakes.

Serving Idea

Top with maple syrup and fresh berries for a modern breakfast upgrade.

7. Shoofly Pie

This Pennsylvania Dutch classic features a gooey molasses filling and crumb topping. Shoofly pie was rich, sweet, and deeply comforting.

Its popularity in the 1800s stemmed from molasses being affordable and shelf-stable.

Tips for Recreating Early American Recipes Today

If you’re inspired by these 7 Early American recipes you won’t believe were popular in the 1800’s, keep these tips in mind:

  • Use whole, simple ingredients

  • Embrace seasonal produce

  • Try traditional cooking methods like steaming or slow baking

  • Don’t fear bold flavors like molasses and vinegar

Historic cooking often relied on patience and technique more than complicated ingredients.

Common Mistakes to Avoid

  • Over-sweetening historically balanced dishes

  • Skipping resting times for yeast-based recipes

  • Using overly processed substitutes

  • Ignoring texture (many dishes are meant to be dense and hearty)

Understanding the context of these early American recipes helps you recreate them authentically.

FAQs

Why were these early American recipes so unusual?

Many were born from necessity, seasonal shortages, and regional abundance.

Are these recipes still edible by modern standards?

Absolutely! With small adjustments, most are surprisingly delicious.

What ingredients were common in the 1800s?

Molasses, cornmeal, rye flour, preserved meats, oysters, and root vegetables.

Can I modernize these recipes?

Yes—while keeping their spirit intact, you can adjust sweetness, texture, and cooking methods.

Final Thoughts

Exploring these 7 Early American recipes you won’t believe were popular in the 1800’s offers a fascinating glimpse into the culinary past. From oyster breakfasts to vinegar pie, early American cooks were resourceful, creative, and surprisingly bold.

Many of these historic dishes laid the groundwork for the comfort foods we love today. Whether you try making shoofly pie or steam a loaf of brown bread, reconnecting with early American recipes is a delicious way to experience history—one bite at a time.

Cheesy Taco Rice Recipe – The Ultimate One-Pan Family Favorite

If you’re looking for a quick, satisfying dinner that delivers big flavor with minimal effort, this Cheesy Taco Rice Recipe is exactly what your weeknight menu needs. It combines everything you love about tacos—savory seasoned beef, fluffy rice, bold spices, and gooey melted cheese—into one hearty, comforting skillet meal.

This cheesy taco rice recipe is perfect for busy families, meal prep lovers, and anyone craving Tex-Mex flavor without the fuss of assembling individual tacos. It’s simple, customizable, and comes together in under 40 minutes using pantry staples. Plus, it’s a guaranteed crowd-pleaser that both kids and adults devour.

Why You’ll Love This Cheesy Taco Rice Recipe

This cheesy taco rice recipe isn’t just convenient—it’s incredibly flavorful and versatile. Here’s why it deserves a permanent spot in your dinner rotation:

  • One-pan meal with easy cleanup

  • Ready in under 40 minutes

  • Packed with bold taco seasoning flavor

  • Perfect for meal prep

  • Customizable with your favorite toppings

It’s the ultimate comfort food mashup—tacos meet cheesy rice casserole in the best way possible.

Ingredients

Here’s everything you’ll need to make this easy cheesy taco rice recipe:

  • 1 pound ground beef (or ground turkey)

  • 1 tablespoon olive oil

  • 1 small onion, diced

  • 2 cloves garlic, minced

  • 1 packet taco seasoning (or 2 tablespoons homemade)

  • 1 cup long-grain white rice (uncooked)

  • 2 cups beef broth

  • 1 can (14.5 oz) diced tomatoes, drained

  • 1 cup tomato sauce

  • 1 ½ cups shredded cheddar cheese

  • ½ cup shredded Monterey Jack cheese

  • Salt and pepper to taste

  • Optional toppings: sour cream, avocado, cilantro, jalapeños

Ingredient Notes & Flavor Boosters

Ground Beef

An 80/20 blend works beautifully for juicy, flavorful cheesy taco rice. If you prefer leaner meat, ground turkey or chicken is a great substitute.

Rice

Long-grain white rice cooks evenly and stays fluffy. Avoid instant rice for this recipe—it can become mushy.

Cheese

A combination of cheddar and Monterey Jack gives you maximum melt and rich flavor. Freshly shredded cheese melts better than pre-shredded.

For an extra kick, add a pinch of smoked paprika or a dash of hot sauce to elevate your cheesy taco rice recipe even more.

Step-by-Step Instructions

1. Brown the Beef

Heat olive oil in a large skillet over medium heat. Add ground beef and cook until browned, breaking it apart with a spoon. Drain excess grease if needed.

Add diced onion and cook until softened, about 3–4 minutes. Stir in garlic and cook for 30 seconds until fragrant.

2. Add Seasoning and Rice

Stir in taco seasoning until the beef is evenly coated. Add uncooked rice, beef broth, diced tomatoes, and tomato sauce. Stir well to combine.

Bring to a gentle boil, then reduce heat to low. Cover and simmer for 18–20 minutes until rice is tender and liquid is absorbed.

3. Melt the Cheese

Once the rice is cooked, sprinkle shredded cheddar and Monterey Jack evenly over the top. Cover and let sit for 3–5 minutes until the cheese is melted and gooey.

Tips for Perfect Cheesy Taco Rice

  • Keep heat low while simmering to prevent rice from sticking.

  • Stir once or twice during cooking for even texture.

  • Let the dish rest 5 minutes before serving—it thickens beautifully.

  • Taste before serving and adjust salt or spice level.

These small techniques make a big difference in achieving the best cheesy taco rice recipe every time.

Delicious Variations

One of the best things about this cheesy taco rice recipe is how adaptable it is.

Make It Spicy

Add diced jalapeños or a pinch of cayenne pepper.

Add Beans

Black beans or pinto beans add protein and texture.

Go Vegetarian

Swap the meat for seasoned black beans and corn.

Make It Creamy

Stir in ½ cup cream cheese before adding shredded cheese.

What to Serve With Cheesy Taco Rice

This dish is hearty enough to stand alone, but it pairs wonderfully with:

  • Fresh green salad

  • Tortilla chips and salsa

  • Mexican street corn

  • Guacamole and sour cream

You can also use leftover cheesy taco rice as a filling for burritos or stuffed peppers.

Storage & Reheating Tips

This cheesy taco rice recipe stores beautifully, making it ideal for meal prep.

  • Refrigerate in an airtight container for up to 4 days.

  • Freeze for up to 2 months.

  • Reheat in microwave or stovetop with a splash of broth to restore moisture.

The flavors deepen overnight, making leftovers even more delicious.

Common Mistakes to Avoid

  • Using too much liquid (rice may become mushy)

  • Cooking on high heat (can burn the bottom)

  • Skipping the resting time before serving

  • Using pre-shredded cheese without adjusting salt

Taking your time ensures your cheesy taco rice recipe turns out perfectly every time.

FAQs

Can I make this cheesy taco rice recipe ahead of time?

Yes! It’s excellent for meal prep and reheats beautifully.

Can I use brown rice instead?

You can, but increase cooking time and add extra broth.

Is this recipe gluten-free?

Yes, as long as your taco seasoning is gluten-free.

Can I make it in the oven?

Yes. After mixing everything, transfer to a baking dish, cover, and bake at 375°F for about 25 minutes before adding cheese.

Final Thoughts

This Cheesy Taco Rice Recipe is the definition of comfort food made easy. It’s bold, cheesy, satisfying, and endlessly customizable. Whether you’re feeding a hungry family or prepping meals for the week, this one-pan dinner delivers big flavor with minimal effort.

Once you try this cheesy taco rice recipe, it’s bound to become one of those dependable favorites you return to again and again. Simple ingredients, bold Tex-Mex flavor, and plenty of melty cheese—what’s not to love?

Ultimate Chicken Ramen Noodles: The Best Cozy Comfort Bowl

There’s nothing quite like a steaming bowl of Ultimate Chicken Ramen Noodles: The Best Cozy Comfort Bowl to warm you from the inside out. Whether it’s a chilly evening, a long workday, or you’re simply craving something soothing and satisfying, this homemade chicken ramen delivers big, comforting flavor in every spoonful.

Unlike basic instant ramen, this ultimate chicken ramen noodles recipe builds layers of flavor with tender chicken, aromatic broth, perfectly cooked noodles, and fresh toppings that elevate it to restaurant quality. The result? A rich, savory comfort bowl that tastes like it simmered all day—but comes together in about 45 minutes.

Why You’ll Love This Ultimate Chicken Ramen Noodles Recipe

This isn’t just another soup—it’s a complete, satisfying meal in a bowl. Here’s why this ultimate chicken ramen noodles recipe stands out:

  • Deep, savory homemade broth

  • Tender, juicy chicken

  • Perfectly slurpable ramen noodles

  • Customizable toppings

  • Cozy, comforting, and filling

The beauty of this cozy comfort bowl is its balance: rich but not heavy, flavorful but not overwhelming. Every component works together for the ultimate chicken ramen experience.

Ingredients

To create this ultimate chicken ramen noodles recipe, you’ll need:

  • 2 boneless, skinless chicken breasts

  • 8 cups chicken broth (high quality)

  • 2 packs fresh or dried ramen noodles (discard seasoning packets)

  • 1 tablespoon sesame oil

  • 1 tablespoon olive oil

  • 3 cloves garlic, minced

  • 1 tablespoon fresh ginger, grated

  • 2 tablespoons soy sauce

  • 1 tablespoon miso paste (optional, for depth)

  • 1 teaspoon rice vinegar

  • 2 soft-boiled eggs

  • 1 cup sliced mushrooms

  • 1 cup baby spinach

  • 2 green onions, sliced

  • Sesame seeds for garnish

Ingredient Notes for Maximum Flavor

Chicken

Poaching the chicken directly in the broth keeps it juicy and infuses the soup with extra richness. You can also use shredded rotisserie chicken for convenience.

Broth

High-quality chicken broth makes a huge difference. If you have homemade stock, this is the time to use it.

Ramen Noodles

Fresh ramen noodles offer the best texture, but dried noodles work beautifully for this ultimate chicken ramen noodles recipe.

Step-by-Step Instructions

1. Build the Flavor Base

In a large pot over medium heat, add olive oil and sesame oil. Sauté garlic and ginger until fragrant, about 30 seconds.

Pour in chicken broth, soy sauce, miso paste, and rice vinegar. Bring to a gentle simmer.

2. Cook the Chicken

Add chicken breasts directly into the simmering broth. Cover and cook for 15–20 minutes until fully cooked. Remove and let rest before slicing.

3. Prepare the Noodles

Cook ramen noodles separately according to package directions. Drain and set aside.

Cooking noodles separately prevents them from becoming overly soft in the broth.

4. Assemble the Cozy Comfort Bowl

Divide cooked noodles into bowls. Ladle hot broth over noodles. Top with sliced chicken, soft-boiled eggs, mushrooms, spinach, green onions, and sesame seeds.

Tips for Perfect Ultimate Chicken Ramen Noodles

  • Don’t overcook noodles—keep them al dente.

  • Simmer broth gently, not rapidly.

  • Let chicken rest before slicing to keep juices inside.

  • Taste and adjust seasoning before serving.

These simple techniques ensure your ultimate chicken ramen noodles taste authentic and balanced.

Delicious Variations

One of the best things about this cozy comfort bowl is how adaptable it is.

Spicy Chicken Ramen

Add chili oil or sriracha for heat.

Creamy Ramen

Stir in a splash of coconut milk for a richer broth.

Veggie-Loaded Version

Add bok choy, shredded carrots, or corn.

Low-Carb Option

Replace noodles with zucchini noodles or shirataki noodles.

What to Serve With Chicken Ramen

This ultimate chicken ramen noodles recipe is satisfying on its own, but you can pair it with:

  • Steamed dumplings

  • Edamame

  • Asian cucumber salad

  • Spring rolls

Light sides complement the richness of the broth without overpowering it.

Storage & Reheating Tips

For best results, store components separately:

  • Broth and chicken: up to 4 days refrigerated

  • Noodles: up to 3 days refrigerated

  • Reheat broth on stovetop before assembling

Avoid storing noodles in broth long-term—they’ll become mushy.

Common Mistakes to Avoid

  • Boiling broth too aggressively

  • Overcooking chicken

  • Letting noodles sit too long in hot soup

  • Under-seasoning the broth

A properly seasoned broth is the heart of ultimate chicken ramen noodles.

FAQs

Can I use rotisserie chicken?

Yes! Shredded rotisserie chicken is a great shortcut.

Is this recipe spicy?

Not by default, but you can easily add heat.

Can I make this gluten-free?

Use gluten-free tamari and gluten-free ramen noodles.

Can I freeze chicken ramen?

Freeze broth and chicken only—cook fresh noodles when serving.

Final Thoughts

This Ultimate Chicken Ramen Noodles: The Best Cozy Comfort Bowl truly lives up to its name. It’s warm, satisfying, deeply flavorful, and endlessly customizable. Whether you’re cooking to impress or simply feeding your family on a busy weeknight, this homemade chicken ramen brings comfort and bold flavor to the table.

Once you master this ultimate chicken ramen noodles recipe, you may never look at instant ramen the same way again. One cozy bowl, and you’ll understand why this dish is pure comfort in every bite.

Indulgent Creamy Cajun Chicken Linguine with Garlic Mozzarella Sauce (Bold, Comforting & Restaurant-Quality)

If you love bold Southern flavors wrapped in a creamy, cheesy pasta sauce, this Indulgent Creamy Cajun Chicken Linguine with Garlic Mozzarella Sauce is about to steal your heart. It’s the perfect balance of smoky Cajun spice, tender pan-seared chicken, silky garlic cream sauce, and melty mozzarella tossed with perfectly cooked linguine.

This dish feels like something you’d order at a cozy New Orleans bistro, yet it’s surprisingly easy to recreate at home. Whether you’re cooking for a date night, family dinner, or just treating yourself to something special, this creamy Cajun chicken linguine delivers unforgettable flavor with every forkful.

Why You’ll Love This Indulgent Creamy Cajun Chicken Linguine with Garlic Mozzarella Sauce

This recipe is pure comfort food with a spicy twist. Here’s why it stands out:

  • Rich, creamy garlic mozzarella sauce

  • Bold Cajun-seasoned chicken

  • Perfect balance of heat and creaminess

  • Easy enough for weeknights, impressive enough for guests

  • Customizable spice level

The combination of Cajun spices and mozzarella cheese creates a depth of flavor that’s indulgent without being overwhelming. Every bite of this Indulgent Creamy Cajun Chicken Linguine with Garlic Mozzarella Sauce is layered with smoky, garlicky goodness.

Ingredients

To make this creamy Cajun chicken linguine, gather the following:

  • 12 oz linguine pasta

  • 2 boneless, skinless chicken breasts

  • 2 tablespoons Cajun seasoning

  • 1 tablespoon olive oil

  • 2 tablespoons butter

  • 4 cloves garlic, minced

  • 1 ½ cups heavy cream

  • ½ cup chicken broth

  • 1 cup shredded mozzarella cheese

  • ½ cup grated Parmesan cheese

  • ½ teaspoon smoked paprika

  • ½ teaspoon black pepper

  • 1 cup sliced bell peppers (optional)

  • Fresh parsley for garnish

Ingredient Notes & Flavor Enhancers

Cajun Seasoning

Choose a high-quality Cajun seasoning blend with paprika, cayenne, garlic powder, and thyme. Adjust the amount to control heat.

Mozzarella Cheese

Freshly shredded mozzarella melts smoother and creates that signature creamy pull in this garlic mozzarella sauce.

Heavy Cream

Heavy cream gives the sauce its luxurious texture. Avoid substituting milk, as it won’t thicken properly.

Balancing richness and spice is the key to mastering this Indulgent Creamy Cajun Chicken Linguine with Garlic Mozzarella Sauce.

Step-by-Step Instructions

1. Cook the Linguine

Bring a large pot of salted water to a boil. Cook linguine until al dente according to package directions. Reserve ½ cup pasta water before draining.

2. Season and Sear the Chicken

Coat chicken breasts generously with Cajun seasoning. Heat olive oil in a skillet over medium-high heat and sear chicken for 5–6 minutes per side until fully cooked. Remove and let rest before slicing.

3. Build the Garlic Mozzarella Sauce

In the same skillet, reduce heat to medium. Add butter and minced garlic, sautéing until fragrant. Pour in chicken broth to deglaze the pan, scraping up flavorful browned bits.

Stir in heavy cream and bring to a gentle simmer. Add mozzarella and Parmesan cheese, stirring until melted and smooth.

4. Combine Everything

Add cooked linguine to the skillet and toss until coated. Slice chicken and place on top. Add reserved pasta water if needed to loosen sauce.

Tips for Perfect Creamy Cajun Chicken Linguine

  • Don’t overcook chicken—let it rest before slicing.

  • Simmer cream gently to prevent curdling.

  • Use freshly grated cheese for smoother sauce.

  • Adjust Cajun seasoning gradually.

These small details ensure your Indulgent Creamy Cajun Chicken Linguine with Garlic Mozzarella Sauce turns out restaurant-worthy.

Delicious Variations

Add Shrimp

Swap or combine chicken with Cajun shrimp for a surf-and-turf twist.

Make It Spicier

Add red pepper flakes or extra cayenne.

Veggie Boost

Stir in spinach, mushrooms, or sun-dried tomatoes.

Lighter Option

Substitute half-and-half for a slightly lighter sauce.

What to Serve With It

This indulgent pasta pairs beautifully with:

  • Garlic bread

  • Caesar salad

  • Roasted asparagus

  • Steamed broccoli

A crisp, fresh salad balances the richness of the garlic mozzarella sauce perfectly.

Storage & Reheating Tips

This Indulgent Creamy Cajun Chicken Linguine with Garlic Mozzarella Sauce stores well with proper care:

  • Refrigerate in airtight container for up to 3 days.

  • Reheat gently on stovetop with splash of cream or broth.

  • Avoid overheating to keep chicken tender.

Cream-based sauces are best enjoyed fresh but can still taste delicious the next day.

Common Mistakes to Avoid

  • Overcooking the chicken

  • Boiling the cream too aggressively

  • Adding cheese all at once without stirring

  • Forgetting to reserve pasta water

Proper technique ensures a smooth, creamy sauce every time.

FAQs

Is this Cajun chicken linguine very spicy?

It has moderate heat, but you can adjust the Cajun seasoning to your preference.

Can I make this dish ahead of time?

You can prep ingredients in advance, but it’s best served fresh.

Can I use another pasta shape?

Yes! Fettuccine, penne, or spaghetti work well.

Can I freeze creamy Cajun chicken linguine?

Cream-based sauces don’t freeze well, so it’s not recommended.

Final Thoughts

This Indulgent Creamy Cajun Chicken Linguine with Garlic Mozzarella Sauce is bold, creamy, and absolutely unforgettable. It brings together spicy Cajun flavors and rich garlic cheese sauce in a way that feels luxurious yet approachable.

Whether you’re making it for a special dinner or upgrading your weeknight routine, this creamy Cajun chicken linguine delivers five-star flavor without the restaurant price tag. One bite, and you’ll understand why this recipe is truly indulgent comfort food at its finest.

Delicious Pappadeaux Mardi Gras Pasta for Cajun Lovers (Bold, Creamy & Packed with Flavor)

If you crave bold Cajun spices, creamy sauces, and hearty seafood pasta, this Delicious Pappadeaux Mardi Gras Pasta for Cajun Lovers is about to become your new favorite comfort dish. Inspired by the vibrant flavors of Louisiana cuisine, this pasta brings together tender shrimp, smoky sausage, colorful bell peppers, and a rich Cajun cream sauce tossed with perfectly cooked pasta.

This Mardi Gras pasta recipe captures that festive, New Orleans–style flair in a way that’s totally doable in your home kitchen. It’s indulgent yet balanced, spicy yet creamy, and absolutely loaded with flavor in every bite. Whether you’re celebrating Mardi Gras or simply craving a restaurant-style Cajun pasta dinner, this dish delivers serious Southern comfort.

Why You’ll Love This Delicious Pappadeaux Mardi Gras Pasta

There’s a reason Cajun pasta dishes are so popular—they combine heat, richness, and satisfying textures in one unforgettable bowl. This Delicious Pappadeaux Mardi Gras Pasta stands out because it’s:

  • Creamy but not overly heavy

  • Packed with shrimp and smoky sausage

  • Loaded with authentic Cajun flavor

  • Perfect for entertaining or special dinners

  • Easy enough for a weeknight indulgence

The combination of spices, seafood, and cream sauce creates layers of flavor that feel both celebratory and comforting.

Ingredients

To make this Delicious Pappadeaux Mardi Gras Pasta, you’ll need:

  • 12 oz fettuccine or penne pasta

  • 1 lb large shrimp, peeled and deveined

  • 8 oz smoked andouille sausage, sliced

  • 1 tablespoon olive oil

  • 1 tablespoon butter

  • 1 red bell pepper, sliced

  • 1 green bell pepper, sliced

  • 1 small onion, thinly sliced

  • 3 cloves garlic, minced

  • 1 ½ cups heavy cream

  • ½ cup chicken broth

  • ½ cup grated Parmesan cheese

  • 1 ½ tablespoons Cajun seasoning

  • ½ teaspoon smoked paprika

  • Salt and black pepper to taste

  • Fresh parsley for garnish

Ingredient Notes & Cajun Flavor Tips

Shrimp

Use large or jumbo shrimp for the best texture. Pat them dry before seasoning to help them sear properly.

Andouille Sausage

Authentic andouille brings smoky heat and depth. If unavailable, substitute smoked sausage.

Cajun Seasoning

You can use store-bought Cajun seasoning or make your own blend with paprika, garlic powder, onion powder, cayenne, oregano, and thyme.

Balancing the spice level is key in this Delicious Pappadeaux Mardi Gras Pasta. Adjust seasoning gradually to match your heat preference.

Step-by-Step Instructions

1. Cook the Pasta

Bring a large pot of salted water to a boil and cook pasta according to package directions. Reserve ½ cup pasta water before draining.

2. Sear the Sausage and Shrimp

In a large skillet over medium-high heat, add olive oil and butter. Brown the sausage slices for 3–4 minutes until slightly crisp. Remove and set aside.

Season shrimp with Cajun seasoning and smoked paprika. Sear for 1–2 minutes per side until pink and opaque. Remove from pan.

3. Sauté the Vegetables

In the same skillet, sauté bell peppers and onion until softened. Add garlic and cook for another 30 seconds until fragrant.

4. Make the Cajun Cream Sauce

Pour in chicken broth and scrape up any browned bits. Add heavy cream and bring to a gentle simmer. Stir in Parmesan cheese until melted and smooth.

Return sausage and shrimp to the skillet. Toss in drained pasta and mix until coated. Add reserved pasta water if needed to loosen the sauce.

Tips for Perfect Mardi Gras Pasta

  • Don’t overcook shrimp—they cook quickly.

  • Let sausage brown for extra flavor.

  • Use freshly grated Parmesan for a smoother sauce.

  • Simmer gently to avoid curdling cream.

These simple techniques elevate your Delicious Pappadeaux Mardi Gras Pasta from good to unforgettable.

Delicious Variations

This recipe is wonderfully adaptable.

Add Crawfish

For an authentic Louisiana twist, add crawfish tails.

Make It Spicier

Add extra cayenne or red pepper flakes.

Chicken Version

Swap shrimp for blackened chicken breast.

Lighter Option

Use half-and-half instead of heavy cream for a lighter sauce.

What to Serve With Mardi Gras Pasta

This rich, creamy dish pairs beautifully with:

  • Garlic bread

  • Caesar salad

  • Roasted asparagus

  • Cornbread

A fresh, crisp side dish balances the bold Cajun cream sauce perfectly.

Storage & Reheating Tips

Leftover Delicious Pappadeaux Mardi Gras Pasta stores well:

  • Refrigerate in airtight container up to 3 days.

  • Reheat gently on stovetop with splash of cream or broth.

  • Avoid microwaving too long to prevent rubbery shrimp.

Cream-based pasta is best enjoyed fresh, but careful reheating preserves its texture.

Common Mistakes to Avoid

  • Overcooking shrimp

  • Adding too much Cajun seasoning at once

  • Boiling cream sauce aggressively

  • Skipping the step of browning sausage

Layering flavors properly makes all the difference in this Cajun pasta recipe.

FAQs

Is this Delicious Pappadeaux Mardi Gras Pasta very spicy?

It has moderate heat, but you can easily adjust the spice level.

Can I make it ahead of time?

It’s best fresh, but you can prep ingredients in advance.

What pasta works best?

Fettuccine, penne, or linguine all hold the sauce well.

Can I freeze this pasta?

Cream-based sauces don’t freeze well, so it’s not recommended.

Final Thoughts

This Delicious Pappadeaux Mardi Gras Pasta for Cajun Lovers is everything a Cajun seafood pasta should be—bold, creamy, smoky, and packed with flavor. It captures that festive Mardi Gras spirit while being totally approachable for home cooks.

Whether you’re hosting a themed dinner party or just craving Southern comfort, this Mardi Gras pasta recipe brings restaurant-quality flavor straight to your table. Once you make it, don’t be surprised if it becomes a regular request in your household.

Pioneer Woman Cheeseburger Pie Recipe (Easy, Comforting Family Favorite)

If you’re craving classic comfort food that’s hearty, cheesy, and incredibly satisfying, this Pioneer Woman Cheeseburger Pie Recipe is exactly what you need. It combines all the flavors of a juicy cheeseburger—savory ground beef, melty cheese, and a tender crust—baked together into one easy, sliceable dinner that the whole family will love.

Perfect for busy weeknights or cozy Sunday suppers, this cheeseburger pie recipe is simple to prepare with everyday ingredients. It’s the kind of nostalgic, stick-to-your-ribs meal that feels both homey and dependable. Whether you’re feeding picky eaters or hungry teenagers, this Pioneer Woman Cheeseburger Pie Recipe delivers big flavor with minimal fuss.

Why You’ll Love This Pioneer Woman Cheeseburger Pie Recipe

There’s something magical about transforming simple ingredients into a warm, bubbling pie straight from the oven. This Pioneer Woman Cheeseburger Pie Recipe works so well because it’s:

  • Easy to prepare in under an hour

  • Made with pantry staples

  • Family-friendly and budget-conscious

  • Perfect for leftovers

  • Customizable with your favorite burger toppings

Unlike traditional burgers, there’s no flipping patties or grilling required. Everything bakes together in one dish, making cleanup quick and easy.

Ingredients

Here’s what you’ll need to make this Pioneer Woman Cheeseburger Pie Recipe:

  • 1 pound ground beef

  • 1 small onion, diced

  • 1 cup shredded cheddar cheese

  • 1 cup milk

  • ½ cup all-purpose flour

  • 2 large eggs

  • ½ teaspoon salt

  • ½ teaspoon black pepper

  • ½ teaspoon garlic powder

  • 1 tablespoon ketchup (optional for flavor boost)

Ingredient Notes & Substitutions

Ground Beef

Use 80/20 ground beef for the best balance of flavor and moisture. Leaner beef works, but you may want to add a touch of olive oil to prevent dryness.

Cheese

Sharp cheddar gives this Pioneer Woman Cheeseburger Pie Recipe bold flavor, but Colby Jack or American cheese also work well.

Flour & Milk Mixture

The simple batter poured over the beef creates a soft, biscuit-like crust as it bakes—similar to classic diner-style cheeseburger pie.

2. Add the Cheese Layer

Sprinkle shredded cheddar cheese evenly over the beef layer. This creates that classic cheeseburger flavor in every bite.

3. Prepare the Batter

In a mixing bowl, whisk together milk, flour, and eggs until smooth. Pour this mixture evenly over the beef and cheese.

4. Bake to Golden Perfection

Bake for 25–30 minutes until the top is golden and set in the center. Let rest for 5–10 minutes before slicing.

Tips for Perfect Results

To make sure your Pioneer Woman Cheeseburger Pie Recipe turns out perfectly every time:

  • Drain the beef thoroughly to prevent greasiness.

  • Use freshly shredded cheese for better melting.

  • Let the pie rest before cutting for clean slices.

  • Don’t overbake—check at 25 minutes.

These small adjustments elevate the texture and flavor significantly.

Delicious Variations

One of the best things about this Pioneer Woman Cheeseburger Pie Recipe is how easy it is to customize.

Bacon Cheeseburger Pie

Add cooked, crumbled bacon to the beef layer.

Pickle Lover’s Version

Top slices with diced pickles after baking.

Southwest Twist

Add diced green chilies and pepper jack cheese.

Low-Carb Option

Replace the flour with almond flour for a keto-friendly alternative.

What to Serve With Cheeseburger Pie

This hearty dish pairs beautifully with:

  • Crisp garden salad

  • Roasted green beans

  • French fries

  • Coleslaw

Adding a fresh vegetable side balances the richness of the pie perfectly.

Storage & Reheating Tips

The Pioneer Woman Cheeseburger Pie Recipe stores wonderfully:

  • Refrigerate leftovers in an airtight container for up to 4 days.

  • Freeze individual slices wrapped tightly for up to 2 months.

  • Reheat in oven at 350°F for best texture.

Microwaving works for quick reheating but may soften the crust slightly.

Common Mistakes to Avoid

  • Not draining grease properly

  • Using too much milk in the batter

  • Overbaking (which can dry it out)

  • Cutting too soon before it sets

Paying attention to these simple steps ensures success every time.

FAQs

Can I make this Pioneer Woman Cheeseburger Pie Recipe ahead of time?

Yes! Assemble it earlier in the day and bake when ready.

Can I use ground turkey instead of beef?

Absolutely. Ground turkey works well for a lighter version.

Why is my pie watery?

It’s usually from not draining the beef thoroughly.

Can I add vegetables?

Yes! Mushrooms, bell peppers, or spinach are excellent additions.

Final Thoughts

This Pioneer Woman Cheeseburger Pie Recipe is the ultimate comfort food solution—simple, hearty, and packed with classic cheeseburger flavor. It’s a timeless dinner that feels nostalgic yet practical for today’s busy households.

Whether you’re cooking for your family or prepping meals ahead of time, this cheeseburger pie recipe is dependable, delicious, and guaranteed to satisfy. Once you try it, it may just become one of your regular weeknight staples.

Easy Ham and Cheese Calzones (Perfect Weeknight Dinner Recipe)

When you need a comforting, crowd-pleasing meal that comes together fast, these Easy Ham and Cheese Calzones are exactly what your dinner routine has been missing. Think golden pizza dough folded around layers of savory ham and gooey melted cheese, baked until perfectly crisp on the outside and irresistibly melty on the inside.

This easy ham and cheese calzones recipe is ideal for busy weeknights, after-school dinners, or even casual weekend lunches. They’re portable, freezer-friendly, and endlessly customizable. If you love pizza and hot sandwiches, you’re going to fall head over heels for these homemade calzones.

Why You’ll Love These Easy Ham and Cheese Calzones

There are plenty of reasons this recipe deserves a permanent spot in your meal rotation.

  • Quick and simple ingredients

  • Kid-friendly and adult-approved

  • Customizable with different cheeses and add-ins

  • Perfect for meal prep

  • Freezer-friendly

Easy ham and cheese calzones offer all the comfort of pizza but in a tidy, handheld package. Plus, they’re much easier to serve and store than traditional pizza slices.

Ingredients

Here’s everything you’ll need to make these easy ham and cheese calzones:

  • 1 pound pizza dough (store-bought or homemade)

  • 1 ½ cups shredded mozzarella cheese

  • 1 cup diced or thinly sliced ham

  • ½ cup ricotta cheese (optional but recommended for creaminess)

  • ¼ cup grated Parmesan cheese

  • ½ teaspoon garlic powder

  • ½ teaspoon Italian seasoning

  • 1 egg (for egg wash)

  • Marinara sauce for dipping

Ingredient Notes & Substitutions

Pizza Dough

Store-bought refrigerated pizza dough makes these easy ham and cheese calzones incredibly convenient. Just allow it to sit at room temperature for about 30 minutes before rolling.

Ham

Leftover baked ham works beautifully here. Deli ham is also a great option—just pat it dry to prevent excess moisture inside the calzones.

Cheese Choices

Mozzarella melts beautifully, but provolone, Swiss, or Monterey Jack are excellent alternatives. Mixing cheeses adds depth and flavor.

Step-by-Step Instructions

1. Preheat and Prep

Preheat your oven to 400°F. Line a baking sheet with parchment paper for easy cleanup.

2. Roll the Dough

Divide pizza dough into 3–4 equal portions. On a lightly floured surface, roll each piece into a 6–8 inch circle.

3. Add the Filling

On one half of each dough circle, layer:

  • Ricotta (if using)

  • Shredded mozzarella

  • Diced ham

  • Sprinkle of Parmesan

  • Garlic powder and Italian seasoning

Leave about a ½-inch border around the edge.

4. Fold and Seal

Fold the dough over the filling to create a half-moon shape. Press edges together and crimp with a fork to seal tightly.

Brush the tops with beaten egg for that golden finish. Cut small slits in the top to allow steam to escape.

5. Bake to Golden Perfection

Bake for 18–22 minutes or until golden brown. Let cool slightly before serving.

Image Prompt:
Freshly baked golden ham and cheese calzones cooling on baking tray, melted cheese slightly visible from vents, warm natural lighting, professional kitchen environment, shallow depth of field, 4k resolution.

Tips for Perfect Easy Ham and Cheese Calzones

  • Don’t overfill to avoid leaks.

  • Make sure edges are sealed tightly.

  • Use parchment paper to prevent sticking.

  • Let them rest for 5 minutes before cutting.

These small details make a big difference in texture and presentation.

Delicious Variations

One of the best things about easy ham and cheese calzones is how versatile they are.

Breakfast Calzones

Add scrambled eggs and cheddar for a morning twist.

Hawaiian Style

Include pineapple chunks for sweet and savory flavor.

Spinach & Ham

Mix sautéed spinach into the cheese layer.

Spicy Version

Add red pepper flakes or jalapeños for heat.

What to Serve With Ham and Cheese Calzones

These easy ham and cheese calzones pair perfectly with:

  • Garden salad with vinaigrette

  • Roasted vegetables

  • Tomato basil soup

  • Garlic bread

A simple side salad balances the richness of the cheese-filled calzones beautifully.

Storage & Reheating Tips

Easy ham and cheese calzones are excellent for meal prep.

  • Refrigerate in airtight container for up to 3 days.

  • Freeze individually wrapped calzones for up to 2 months.

  • Reheat in oven at 350°F for 10–12 minutes for best texture.

Avoid microwaving if possible, as it can make the crust soft instead of crisp.

Common Mistakes to Avoid

  • Overstuffing the filling

  • Skipping the steam vents

  • Not sealing edges properly

  • Using cold dough straight from the fridge

Pay attention to these simple details and your easy ham and cheese calzones will turn out beautifully every time.

FAQs

Can I make easy ham and cheese calzones ahead of time?

Yes! Assemble them and refrigerate until ready to bake.

Can I use crescent roll dough instead?

You can, but pizza dough gives better structure and chew.

How do I prevent soggy calzones?

Pat ham dry and avoid too much ricotta or sauce inside.

Can I freeze unbaked calzones?

Absolutely. Freeze on a baking sheet first, then wrap tightly. Bake from frozen with a few extra minutes added.

Final Thoughts

These Easy Ham and Cheese Calzones are the ultimate comfort food shortcut—simple ingredients, bold flavor, and minimal prep. Whether you’re feeding hungry kids, hosting a casual gathering, or prepping lunches for the week, this recipe delivers every single time.

Once you try these easy ham and cheese calzones, they’ll quickly become a regular in your dinner lineup. Golden crust, melty cheese, savory ham—it’s everything you love wrapped into one perfect bite.