Melt in Your Mouth Chicken: The Ultimate Easy, Creamy Baked Chicken Recipe

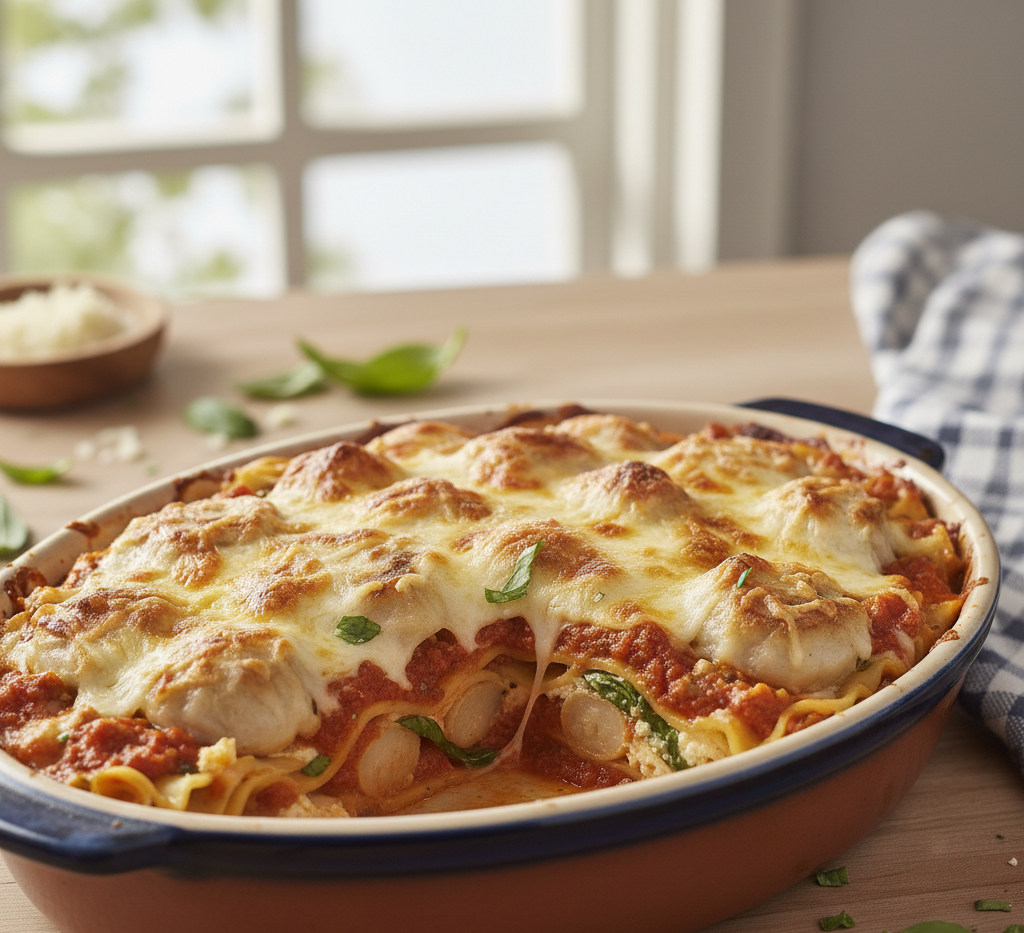
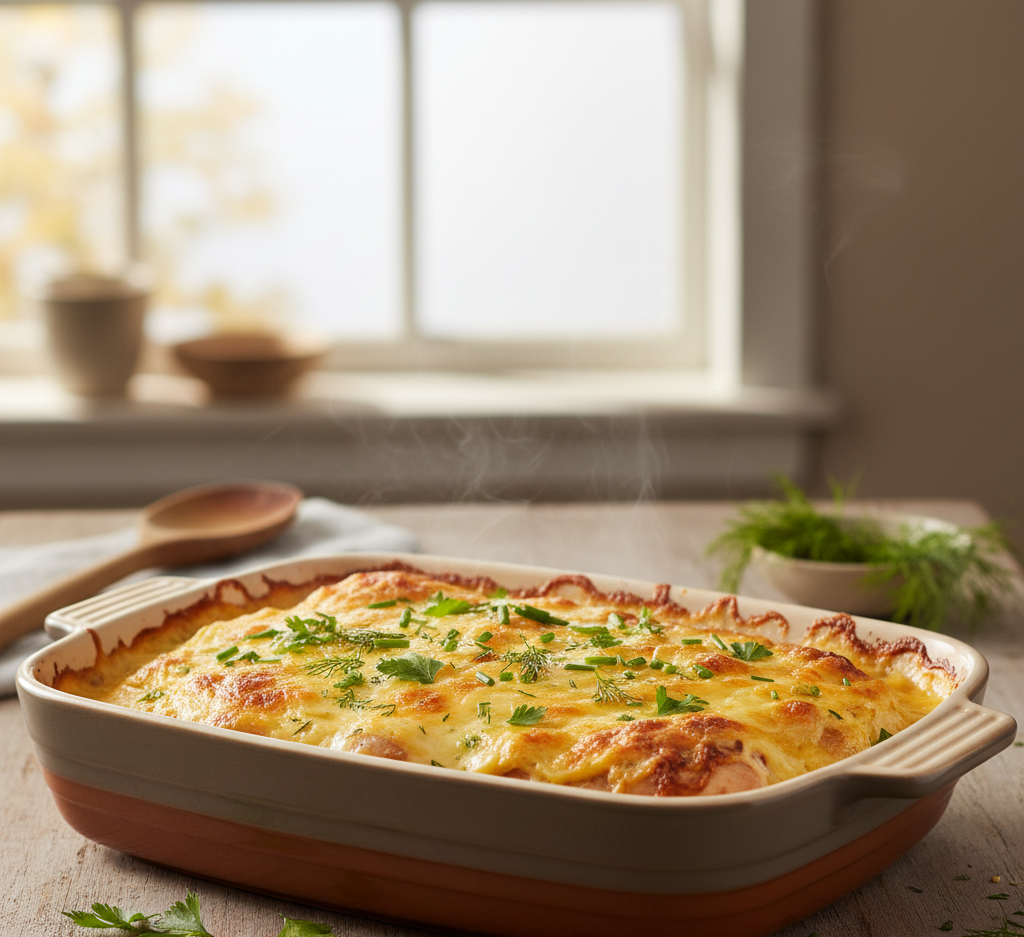
If you’re searching for a simple dinner that tastes like pure comfort, this melt in your mouth chicken recipe is exactly what you need. True to its name, this dish delivers incredibly tender, juicy chicken coated in a rich, creamy topping that bakes to golden perfection.

What makes this recipe so special is how effortlessly it comes together. With just a handful of pantry staples, you can create a meal that feels indulgent and satisfying without spending hours in the kitchen. Whether you’re cooking for your family or hosting guests, this melt in your mouth chicken is guaranteed to impress.

Why You’ll Love This Recipe

There are countless chicken recipes out there, but this melt in your mouth chicken stands out for its simplicity and flavor:

  • Incredibly Tender: The creamy topping keeps the chicken moist and juicy
  • Minimal Ingredients: Uses simple pantry staples
  • Quick Prep: Ready for the oven in just minutes
  • Family-Friendly: A hit with both kids and adults
  • Versatile: Pairs with almost any side dish

Once you try it, this recipe will quickly become part of your regular dinner rotation.
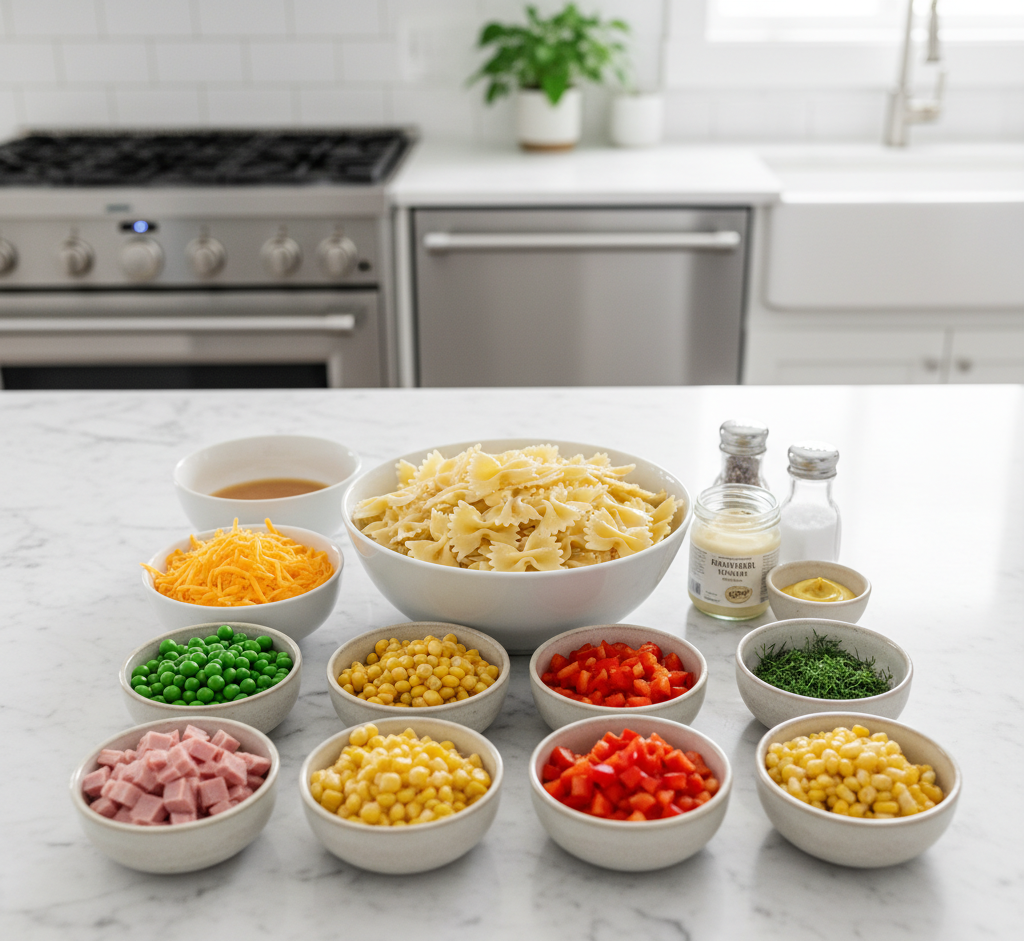
Ingredients

To make this delicious dish, you’ll need:

  • 4 boneless, skinless chicken breasts
  • 1 cup mayonnaise (or Greek yogurt for a lighter option)
  • ½ cup grated Parmesan cheese
  • 1 teaspoon garlic powder
  • 1 teaspoon onion powder
  • ½ teaspoon paprika
  • Salt and black pepper to taste
  • Optional: chopped parsley for garnish

Ingredient Notes

  • Chicken Breasts: Use evenly sized pieces for consistent cooking
  • Mayonnaise: Adds richness and helps create the signature creamy topping
  • Parmesan Cheese: Brings a savory, slightly nutty flavor
  • Spices: Simple seasonings enhance flavor without overpowering

Step-by-Step Instructions

  1. Preheat the Oven: Set your oven to 375°F (190°C) and lightly grease a baking dish.
  2. Prepare the Chicken: Place chicken breasts in the baking dish and season lightly with salt and pepper.
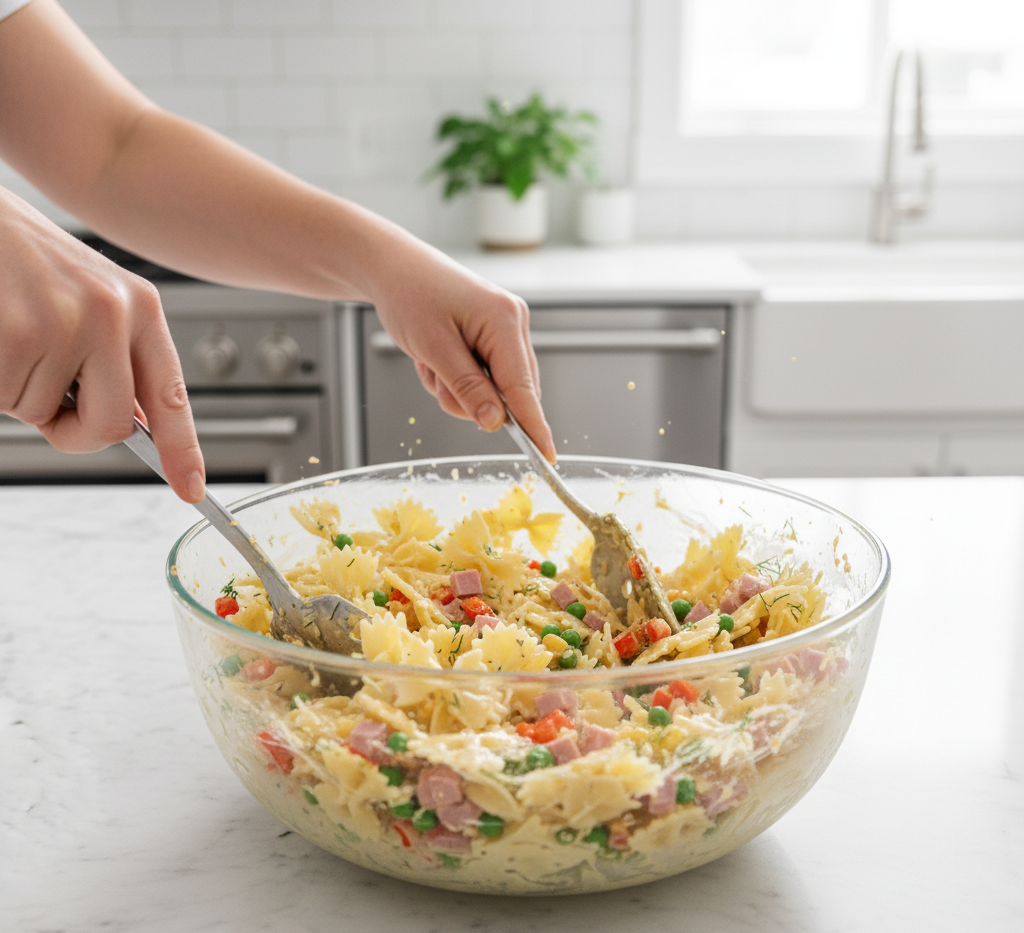
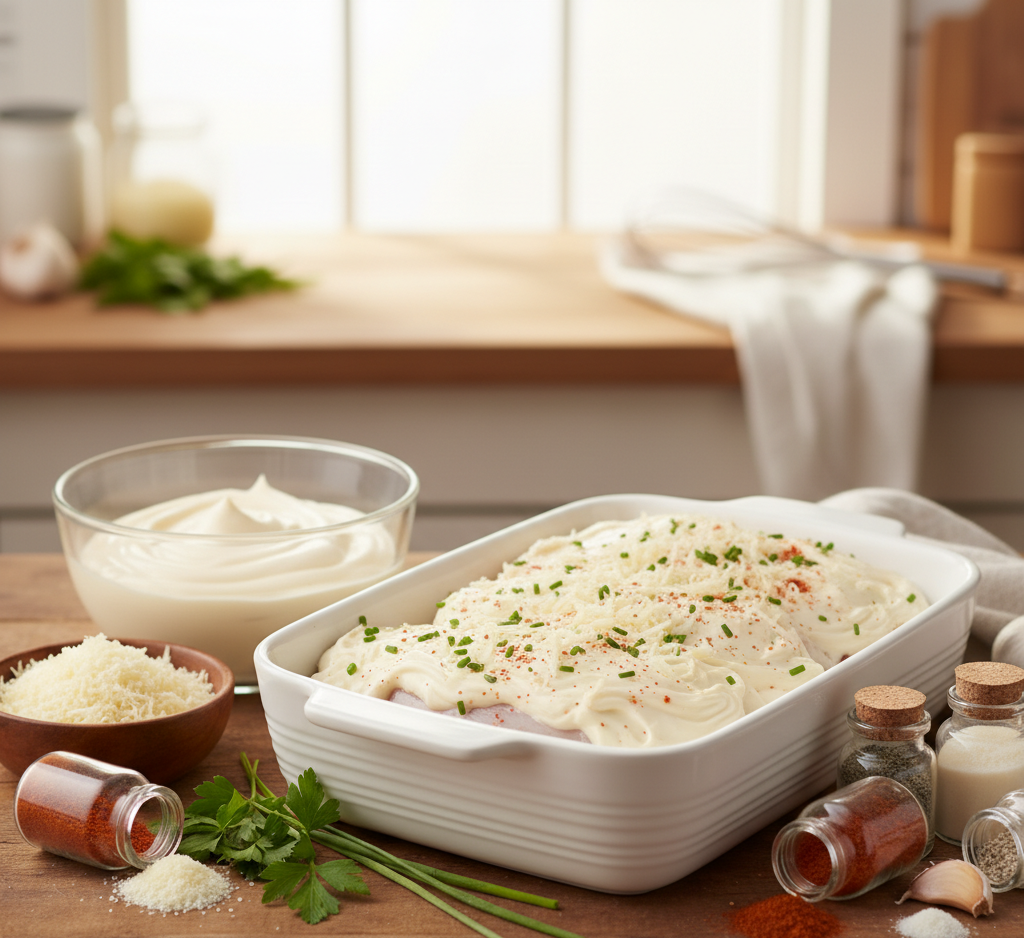
  3. Mix the Topping: In a bowl, combine mayonnaise, Parmesan cheese, garlic powder, onion powder, and paprika.
  4. Spread Evenly: Coat each chicken breast with the creamy mixture, spreading it evenly on top.
  5. Bake: Bake for 35–40 minutes, or until the chicken reaches an internal temperature of 165°F (74°C) and the top is golden.
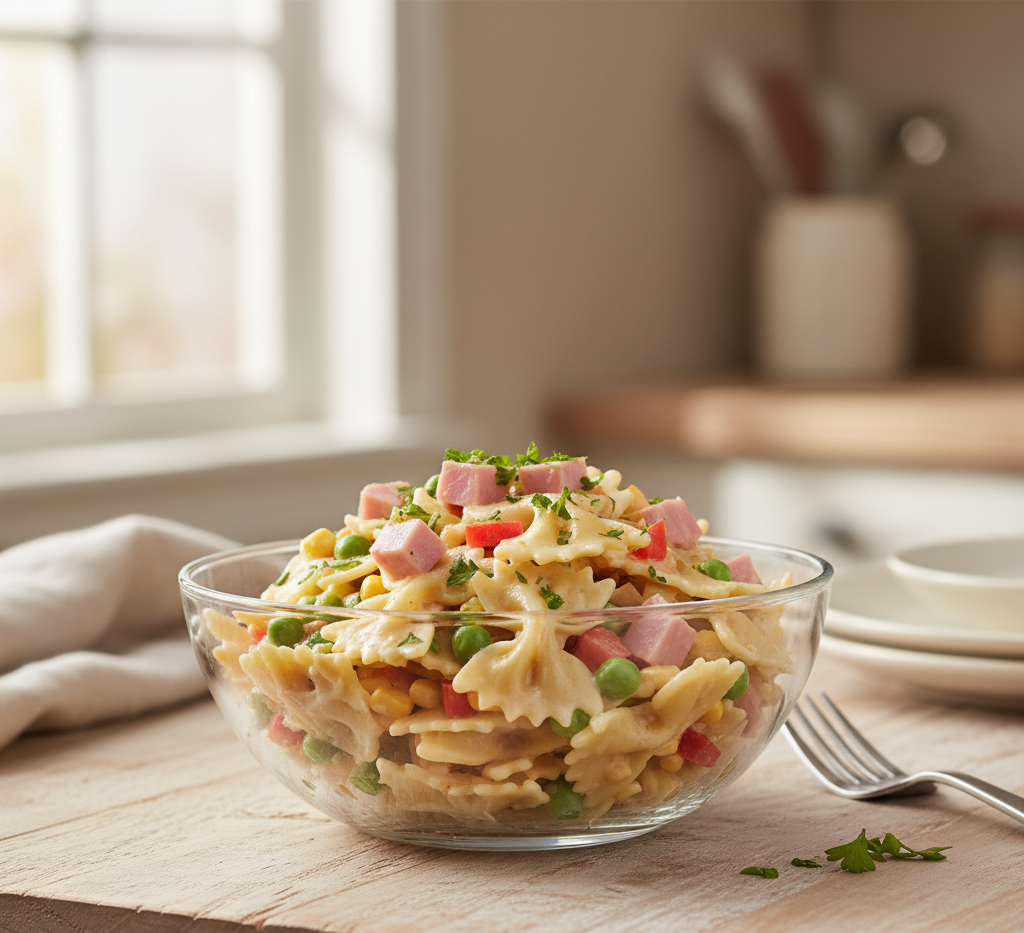
  6. Serve: Let rest for a few minutes before serving. Garnish with parsley if desired.

Tips for Perfect Results

  • Don’t Overcook: Use a meat thermometer to keep chicken juicy
  • Use Fresh Parmesan: Freshly grated cheese melts better and adds more flavor
  • Even Coating: Spread the topping evenly for consistent texture
  • Rest Before Serving: Helps lock in juices

Variations

Customize Your Melt in Your Mouth Chicken

This melt in your mouth chicken recipe is easy to adapt:

  • Healthier Version: Substitute Greek yogurt for mayonnaise
  • Cheesy Upgrade: Add shredded mozzarella or cheddar on top
  • Spicy Kick: Mix in cayenne pepper or hot sauce
  • Herb Flavor: Add Italian seasoning or fresh herbs

What to Serve With It

This dish pairs beautifully with:

  • Mashed potatoes or roasted potatoes
  • Steamed vegetables like broccoli or green beans
  • Rice or pasta
  • A fresh garden salad

Storage & Reheating

  • Refrigeration: Store leftovers in an airtight container for up to 4 days
  • Freezing: Freeze cooked chicken for up to 2 months
  • Reheating: Warm in the oven at 350°F or microwave until heated through
  • Meal Prep Tip: Prepare ahead and bake when ready

Common Mistakes

  • Overbaking: Leads to dry chicken
  • Too Much Salt: Parmesan already adds saltiness
  • Skipping Rest Time: Juices may run out if cut too soon
  • Uneven Chicken Thickness: Can cause uneven cooking

FAQs

1. Can I use chicken thighs instead of breasts?
Yes! Chicken thighs work great and are even more juicy.

2. Can I make melt in your mouth chicken ahead of time?
Absolutely. Assemble the dish and refrigerate until ready to bake.

3. Is Greek yogurt a good substitute for mayonnaise?
Yes, it creates a lighter version with a slightly tangy flavor.

4. How do I know when the chicken is done?
Use a thermometer—internal temperature should reach 165°F (74°C).

Final Thoughts

This melt in your mouth chicken recipe proves that simple ingredients can create extraordinary results. It’s creamy, flavorful, and incredibly tender—everything you want in a comforting homemade meal.

Whether you’re cooking for a busy weeknight dinner or a cozy weekend meal, this dish delivers consistent, delicious results every time. Once you try it, you’ll understand why it’s such a beloved classic.

Cheesy Baked Ziti | Easy Weeknight Pasta Bake with Ricotta & Mozzarella

There’s something undeniably comforting about a bubbling dish of cheesy baked ziti, fresh out of the oven with golden, melted mozzarella on top. This easy weeknight pasta bake with ricotta & mozzarella is everything you want in a cozy dinner—rich, hearty, and incredibly satisfying.

Perfect for busy families, meal prep lovers, or anyone craving classic Italian-American comfort food, baked ziti delivers bold flavor with minimal effort. With layers of tender pasta, creamy ricotta, savory marinara, and gooey mozzarella, this dish is a guaranteed crowd-pleaser that never goes out of style.

Why You’ll Love This Recipe

This cheesy baked ziti | easy weeknight pasta bake with ricotta & mozzarella is a staple for so many reasons:

  • Quick & Easy: Simple steps and pantry-friendly ingredients
  • Family Favorite: Loved by both kids and adults
  • Perfect for Leftovers: Tastes even better the next day
  • Make-Ahead Friendly: Ideal for meal prep or freezing
  • Ultra Cheesy: Layers of melty mozzarella and creamy ricotta

It’s the kind of meal you can rely on when you want something comforting without spending hours in the kitchen.

Ingredients

To make this delicious baked ziti, you’ll need:

  • 1 lb ziti pasta
  • 1 lb ground beef or Italian sausage
  • 3 cups marinara sauce
  • 1 cup ricotta cheese
  • 2 cups shredded mozzarella cheese
  • ½ cup grated Parmesan cheese
  • 1 egg
  • 2 teaspoons Italian seasoning
  • 2 cloves garlic, minced
  • Salt and pepper to taste
  • Optional: fresh basil or parsley for garnish

Ingredient Notes

  • Ziti Pasta: Its tubular shape holds sauce and cheese perfectly
  • Ricotta Cheese: Adds creaminess and richness to the dish
  • Mozzarella: Use low-moisture shredded mozzarella for best melting
  • Marinara Sauce: Choose a high-quality jarred sauce or homemade for deeper flavor

Step-by-Step Instructions

  1. Cook the Pasta: Boil ziti in salted water until al dente. Drain and set aside.
  2. Prepare the Sauce: In a skillet, cook ground beef or sausage with garlic until browned. Drain excess fat and stir in marinara sauce.
  3. Mix Ricotta Layer: In a bowl, combine ricotta, egg, Parmesan, Italian seasoning, salt, and pepper.
  4. Assemble the Dish: In a baking dish, spread a layer of sauce, followed by pasta, ricotta mixture, and mozzarella. Repeat layers.
  5. Top with Cheese: Finish with a generous layer of mozzarella and Parmesan.
  6. Bake: Cover with foil and bake at 375°F (190°C) for 25 minutes. Remove foil and bake another 10–15 minutes until golden and bubbly.
  7. Rest & Serve: Let rest for 10 minutes before serving.

Tips for Perfect Results

  • Cook Pasta Al Dente: Prevents it from becoming mushy during baking
  • Use Enough Sauce: Keeps the dish moist and flavorful
  • Layer Evenly: Ensures every bite has a balance of pasta, sauce, and cheese
  • Let It Rest: Helps the baked ziti hold its shape when serving

Variations

Customize Your Cheesy Baked Ziti

This easy weeknight pasta bake with ricotta & mozzarella is highly adaptable:

  • Vegetarian Version: Skip the meat and add sautéed vegetables like spinach, mushrooms, or zucchini
  • Spicy Kick: Use spicy Italian sausage or add red pepper flakes
  • Extra Cheesy: Add provolone or fontina for more depth
  • Healthier Option: Use whole wheat pasta and low-fat cheese

What to Serve With It

Pair your cheesy baked ziti with:

  • Garlic bread or breadsticks
  • Caesar salad or mixed greens
  • Roasted vegetables
  • A glass of red wine or sparkling water

Storage & Reheating

  • Refrigeration: Store in an airtight container for up to 4 days
  • Freezing: Freeze baked or unbaked for up to 3 months
  • Reheating: Warm in the oven at 350°F or microwave individual portions
  • Make-Ahead Tip: Assemble ahead and bake when ready

Common Mistakes

  • Overcooking Pasta: Leads to mushy texture
  • Too Little Sauce: Results in dry baked ziti
  • Skipping the Rest Time: Causes the dish to fall apart
  • Uneven Layers: Affects texture and flavor balance

FAQs

1. Can I make cheesy baked ziti ahead of time?
Yes! Assemble it a day in advance and refrigerate until ready to bake.

2. Can I freeze baked ziti?
Absolutely. It freezes well both before and after baking.

3. What’s the best cheese combination?
Ricotta, mozzarella, and Parmesan create the perfect creamy, melty balance.

4. Can I use a different pasta?
Yes! Penne or rigatoni work great as substitutes.

Final Thoughts

This cheesy baked ziti | easy weeknight pasta bake with ricotta & mozzarella is the ultimate comfort food that never disappoints. It’s simple, satisfying, and packed with rich, cheesy goodness that brings everyone to the table.

Whether you’re cooking for your family, hosting a casual dinner, or prepping meals for the week, this baked ziti recipe is a reliable favorite you’ll turn to again and again. Once you taste it, you’ll understand why it’s a timeless classic in American kitchens.

Savory Cheesy Baked Dumpling Lasagna: The Ultimate Comfort Food Fusion

If you love comfort food that’s rich, cheesy, and incredibly satisfying, this savory cheesy baked dumpling lasagna is about to become your new favorite recipe. This creative twist on traditional lasagna swaps out pasta sheets for tender dumplings, layering them with savory sauce and gooey melted cheese for a dish that’s both familiar and exciting.

This recipe is perfect for busy weeknights, cozy weekends, or whenever you’re craving something warm and hearty. The dumplings soak up all the flavors of the sauce while baking, creating a soft, pillowy texture that pairs beautifully with melted cheese. It’s the kind of dish that brings everyone to the table—and keeps them coming back for seconds.

Why You’ll Love This Recipe

There are so many reasons this savory cheesy baked dumpling lasagna stands out from classic comfort food recipes:

  • Unique Twist: Dumplings replace traditional lasagna noodles for a fun variation
  • Ultra Comforting: Warm, cheesy, and hearty in every bite
  • Easy to Make: Simple ingredients and minimal prep
  • Family-Friendly: A guaranteed hit with kids and adults alike
  • Customizable: Works with different proteins, sauces, and cheeses

This recipe is perfect for anyone who wants a comforting, homemade meal with a creative edge.

Ingredients

To make this delicious dumpling lasagna, you’ll need:

  • 1 bag (about 20–24) frozen dumplings (chicken, pork, or vegetable)
  • 1 lb ground beef or Italian sausage
  • 2 cups marinara sauce
  • 1 cup ricotta cheese
  • 2 cups shredded mozzarella cheese
  • ½ cup grated Parmesan cheese
  • 1 teaspoon Italian seasoning
  • ½ teaspoon garlic powder
  • Salt and pepper to taste
  • Optional: fresh basil or parsley for garnish

Ingredient Notes

  • Dumplings: Frozen dumplings work perfectly and save time—no need to thaw beforehand.
  • Meat: Ground beef adds richness, while sausage brings extra flavor. You can also use ground turkey for a lighter option.
  • Cheese: A blend of ricotta, mozzarella, and Parmesan creates the perfect creamy, melty texture.
  • Sauce: Use your favorite marinara or homemade tomato sauce for the best flavor.

Step-by-Step Instructions

  1. Preheat the Oven: Set oven to 375°F (190°C). Lightly grease a baking dish.
  2. Cook the Meat: In a skillet over medium heat, cook ground beef or sausage until browned. Drain excess fat and stir in marinara sauce.
  3. Prepare Cheese Mixture: In a bowl, mix ricotta cheese with Italian seasoning, garlic powder, salt, and pepper.
  4. Layer the Dish: Spread a thin layer of sauce on the bottom of the baking dish. Add a layer of dumplings, followed by ricotta mixture, meat sauce, and mozzarella. Repeat layers until ingredients are used.
  5. Top with Cheese: Finish with a generous layer of mozzarella and Parmesan cheese.
  6. Bake: Cover with foil and bake for 25 minutes. Remove foil and bake an additional 10–15 minutes until bubbly and golden.
  7. Rest & Serve: Let the lasagna rest for 5–10 minutes before serving. Garnish with fresh herbs if desired.

Tips for Perfect Results

  • Don’t Overcrowd Dumplings: Arrange evenly for consistent cooking
  • Use Enough Sauce: Keeps dumplings moist and tender
  • Cover While Baking: Prevents cheese from burning before the dish is fully heated
  • Let It Rest: Helps layers set for easier slicing

Variations

Creative Ways to Customize

This savory cheesy baked dumpling lasagna can easily be adapted to suit your preferences:

  • Vegetarian Version: Use veggie dumplings and skip the meat
  • Spicy Kick: Add red pepper flakes or spicy sausage
  • Alfredo Style: Replace marinara with creamy Alfredo sauce
  • Asian-Inspired Twist: Use soy-based sauce, green onions, and sesame oil for a fusion dish

What to Serve With It

Pair your dumpling lasagna with:

  • Garlic bread or crusty rolls
  • A crisp green salad with vinaigrette
  • Roasted vegetables like broccoli or carrots
  • A light soup for a complete meal

Storage & Reheating

  • Refrigeration: Store leftovers in an airtight container for up to 4 days
  • Freezing: Freeze fully cooked or assembled (unbaked) for up to 2 months
  • Reheating: Warm in the oven at 350°F until heated through, or microwave individual portions
  • Make-Ahead Tip: Assemble the dish ahead and bake when ready

Common Mistakes

  • Skipping Sauce Layers: Can lead to dry dumplings
  • Overbaking: Makes cheese too hard and dumplings tough
  • Not Draining Meat: Adds excess grease to the dish
  • Cutting Too Soon: Causes layers to fall apart

FAQs

1. Can I use fresh dumplings instead of frozen?
Yes! Fresh dumplings work well but may cook slightly faster, so adjust baking time accordingly.

2. Do I need to cook dumplings before baking?
No, they cook perfectly in the oven while absorbing the sauce.

3. Can I make this dish ahead of time?
Absolutely. Assemble it ahead and refrigerate until ready to bake.

4. What’s the best cheese combination?
Mozzarella, ricotta, and Parmesan create the perfect balance of creaminess and flavor.

Final Thoughts

This savory cheesy baked dumpling lasagna is the ultimate comfort food mashup that brings together the best of two worlds. It’s hearty, flavorful, and incredibly satisfying, making it perfect for family dinners or special occasions.

With its gooey cheese, rich sauce, and tender dumplings, this dish offers a fresh take on classic lasagna that’s both fun and delicious. Once you try it, you’ll love how easy it is to prepare and how impressive it looks when served.

Cinnamon Roll Bliss Bars Recipe: Easy Homemade Sweet Bar Treats

If you love the warm, gooey goodness of classic cinnamon rolls but don’t have the time (or patience) to work with yeast dough, these cinnamon roll bliss bars are about to change your baking game. They deliver all the sweet, buttery, cinnamon-swirled flavor you crave—without the hassle.

This cinnamon roll bliss bars recipe transforms a traditional breakfast favorite into an easy, sliceable dessert bar that’s perfect for sharing. With a soft, tender base, a rich cinnamon sugar swirl, and a creamy icing drizzle, every bite feels like pure comfort. Whether you’re baking for a weekend brunch, holiday gathering, or just a cozy night at home, these bars are guaranteed to impress.

Why You’ll Love This Recipe

There are so many reasons to fall in love with this cinnamon roll bliss bars recipe:

  • No Yeast Required: Skip the long rise times of traditional cinnamon rolls
  • Quick & Easy: Ready in under an hour from start to finish
  • Perfect Texture: Soft, buttery base with gooey cinnamon layers
  • Great for Sharing: Easy-to-cut bars make serving simple
  • Versatile: Works for breakfast, dessert, or a sweet snack

These bars capture the magic of cinnamon rolls in a much simpler, more approachable format.

Ingredients

To make these irresistible cinnamon roll bliss bars, you’ll need:

For the base:

  • 1 cup unsalted butter, melted
  • 1 cup granulated sugar
  • ½ cup brown sugar
  • 2 large eggs
  • 2 teaspoons vanilla extract
  • 2 cups all-purpose flour
  • ½ teaspoon salt

For the cinnamon swirl:

  • ½ cup unsalted butter, softened
  • ¾ cup brown sugar
  • 1 tablespoon ground cinnamon

For the icing:

  • 1 cup powdered sugar
  • 2–3 tablespoons milk
  • ½ teaspoon vanilla extract

Ingredient Notes

  • Butter: Using real butter gives these bars their rich, indulgent flavor
  • Brown Sugar: Adds moisture and a caramel-like sweetness
  • Cinnamon: Use fresh ground cinnamon for the best aroma and flavor
  • Powdered Sugar: Essential for a smooth, drizzle-worthy icing

Step-by-Step Instructions

  1. Preheat the Oven: Set your oven to 350°F (175°C) and line a 9×13-inch baking pan with parchment paper.
  2. Make the Base: In a large bowl, whisk melted butter, granulated sugar, and brown sugar. Add eggs and vanilla, mixing until smooth. Stir in flour and salt until combined.
  3. Prepare Cinnamon Swirl: In a separate bowl, mix softened butter, brown sugar, and cinnamon into a spreadable paste.
  4. Assemble the Bars: Spread half of the batter into the pan. Dollop the cinnamon mixture on top, then add the remaining batter and gently swirl with a knife.
  5. Bake: Bake for 25–30 minutes or until the edges are golden and the center is set.
  6. Make the Icing: Whisk powdered sugar, milk, and vanilla until smooth. Drizzle over cooled bars.
  7. Slice & Serve: Cut into squares and enjoy!

Tips for Perfect Results

  • Don’t Overbake: Keep the center slightly soft for that gooey texture
  • Use Parchment Paper: Makes removing and slicing the bars much easier
  • Swirl Gently: Avoid overmixing the cinnamon layer for distinct swirls
  • Cool Before Icing: Prevents the icing from melting completely

Variations

Fun Twists on Cinnamon Roll Bliss Bars

This cinnamon roll bliss bars recipe is easy to customize:

  • Cream Cheese Frosting: Swap icing for a tangy cream cheese glaze
  • Nutty Crunch: Add chopped pecans or walnuts to the cinnamon layer
  • Apple Cinnamon: Fold diced apples into the batter for a fall-inspired version
  • Chocolate Drizzle: Add a drizzle of melted chocolate for extra indulgence

What to Serve With It

These bars pair beautifully with:

  • Fresh coffee or latte
  • Hot tea or chai
  • A glass of cold milk
  • Fresh fruit for a balanced treat

Storage & Reheating

  • Room Temperature: Store in an airtight container for up to 3 days
  • Refrigeration: Keeps for up to 5 days; bring to room temp before serving
  • Freezing: Freeze bars (without icing) for up to 2 months
  • Reheating: Warm in the microwave for 10–15 seconds for a fresh-baked feel

Common Mistakes

  • Overmixing Batter: Can make bars dense instead of soft
  • Too Much Swirling: Blends layers instead of creating defined swirls
  • Skipping Lining the Pan: Makes removal difficult
  • Adding Icing Too Early: Causes it to melt and disappear

FAQs

1. Can I make cinnamon roll bliss bars ahead of time?
Yes! They store well and taste even better the next day as flavors develop.

2. Can I use store-bought cinnamon filling?
You can, but homemade gives better flavor and texture.

3. How do I know when the bars are done?
The edges should be golden and a toothpick inserted in the center should come out mostly clean.

4. Can I double this recipe?
Absolutely! Use a larger baking pan or bake in batches.

Final Thoughts

This cinnamon roll bliss bars recipe is the perfect combination of ease and indulgence. You get all the flavors of a classic cinnamon roll—sweet, buttery, and warmly spiced—without the extra time and effort.

Whether you’re baking for a special occasion or simply treating yourself, these bars deliver comfort and flavor in every bite. Once you try them, they’re sure to become a staple in your dessert rotation.

Delicious Creamy Ham Cheddar Farfalle Salad in Minutes

If you’re searching for a quick, satisfying dish that delivers big flavor with minimal effort, this delicious creamy ham cheddar farfalle salad in minutes is exactly what you need. It’s a rich, comforting pasta salad that combines tender bow-tie pasta with savory ham, sharp cheddar cheese, crisp vegetables, and a silky, tangy dressing.

Perfect for busy weeknights, meal prep, potlucks, or summer picnics, this creamy farfalle salad is one of those recipes you’ll find yourself making again and again. It’s hearty enough to stand on its own as a main dish, yet versatile enough to serve as a side. Every bite is packed with texture and flavor, making it a true crowd-pleaser.

Why You’ll Love This Recipe

This delicious creamy ham cheddar farfalle salad in minutes is more than just easy—it’s incredibly satisfying and versatile.

  • Quick to Prepare: Ready in under 30 minutes from start to finish
  • Creamy & Cheesy: A rich dressing coats every piece of pasta perfectly
  • Perfect for Leftovers: Great way to use leftover ham
  • Make-Ahead Friendly: Tastes even better after chilling
  • Family Favorite: Loved by both kids and adults

Whether you need a quick lunch or a dependable party dish, this recipe delivers every time.

Ingredients

To make this creamy pasta salad, you’ll need:

  • 12 oz farfalle (bow-tie) pasta
  • 1 cup diced cooked ham
  • 1 cup shredded sharp cheddar cheese
  • ½ cup diced celery
  • ½ cup diced red bell pepper
  • ¼ cup chopped green onions
  • ½ cup mayonnaise
  • ¼ cup sour cream
  • 1 tablespoon Dijon mustard
  • 1 tablespoon apple cider vinegar
  • ½ teaspoon garlic powder
  • Salt and black pepper to taste
  • Optional: chopped parsley for garnish

Ingredient Notes

Choosing the right ingredients ensures your creamy ham cheddar farfalle salad turns out perfect every time.

  • Farfalle Pasta: Its shape holds onto the creamy dressing beautifully
  • Ham: Leftover baked ham or deli ham works great—just dice it evenly
  • Cheddar Cheese: Sharp cheddar adds bold flavor, but mild works too
  • Vegetables: Fresh, crunchy veggies balance the richness of the dressing

Step-by-Step Instructions

  1. Cook the Pasta: Bring a large pot of salted water to a boil and cook farfalle until al dente. Drain and rinse under cold water.
  2. Make the Dressing: In a bowl, whisk together mayonnaise, sour cream, Dijon mustard, apple cider vinegar, garlic powder, salt, and pepper.
  3. Combine Ingredients: In a large bowl, add cooled pasta, ham, cheddar cheese, celery, bell pepper, and green onions.
  4. Mix Everything Together: Pour the dressing over the salad and toss gently until evenly coated.
  5. Chill Before Serving: Refrigerate for at least 15–30 minutes for the best flavor.
  6. Garnish & Serve: Sprinkle with parsley if desired and serve chilled.

Tips for Perfect Results

  • Cook Pasta Just Right: Al dente pasta keeps its shape and texture
  • Cool Pasta Completely: Prevents the dressing from becoming runny
  • Season Gradually: Taste as you go to avoid over-salting
  • Chill Before Serving: Enhances flavor and thickens the dressing

Variations

Customize Your Creamy Farfalle Salad

This delicious creamy ham cheddar farfalle salad in minutes is easy to customize:

  • Add Protein: Toss in cooked chicken or turkey
  • Switch the Cheese: Try mozzarella, gouda, or pepper jack
  • Boost the Veggies: Add peas, carrots, or cucumbers
  • Lighten It Up: Substitute Greek yogurt for part of the mayonnaise

What to Serve With It

This creamy pasta salad pairs beautifully with:

  • Grilled chicken or steak
  • Fresh green salad
  • Garlic bread or dinner rolls
  • Seasonal fruit for a refreshing contrast

Storage & Reheating

  • Refrigeration: Store in an airtight container for up to 4 days
  • Freezing: Not recommended due to creamy dressing
  • Refresh Before Serving: Add a splash of milk or extra dressing if it thickens too much
  • Serve Chilled: Best enjoyed cold or slightly cool

Common Mistakes

  • Overcooking Pasta: Leads to mushy texture
  • Skipping the Chill Time: Flavors won’t fully develop
  • Too Much Dressing: Can overpower other ingredients
  • Not Balancing Flavors: Taste and adjust seasoning before serving

FAQs

1. Can I make creamy ham cheddar farfalle salad ahead of time?
Yes! It’s actually better when made a few hours in advance, allowing flavors to blend.

2. What’s the best pasta for this recipe?
Farfalle is ideal, but rotini or penne also work well.

3. Can I make it healthier?
Use light mayo, Greek yogurt, and add more veggies for a lighter version.

4. How do I keep the salad from drying out?
Add a little extra dressing or a splash of milk before serving to refresh it.

Final Thoughts

This delicious creamy ham cheddar farfalle salad in minutes is the ultimate combination of convenience and comfort. It’s creamy, flavorful, and incredibly easy to make, making it a staple recipe for everything from casual lunches to special gatherings.

With its perfect balance of textures and flavors, this pasta salad is sure to become a regular favorite in your kitchen. Once you try it, you’ll love how quickly it comes together and how satisfying it is every single time.

Copycat Crunchwrap Supreme Recipe: Better Than Takeout at Home

If you’ve ever craved that perfectly layered, crispy, and cheesy fast-food favorite, this copycat Crunchwrap Supreme recipe is about to become your new obsession. Imagine seasoned beef, warm nacho cheese, crunchy tostada, fresh veggies, and creamy sauce—all wrapped in a golden, pan-seared tortilla. The best part? You can make it right in your own kitchen with simple, fresh ingredients.

This homemade version not only tastes just as good—if not better—than the original, but it also gives you full control over ingredients, portions, and flavors. Whether you’re cooking for a quick weeknight dinner or a fun weekend treat, this recipe delivers restaurant-quality results without leaving your home.

Why You’ll Love This Recipe

This copycat Crunchwrap Supreme recipe is a game-changer for so many reasons:

  • Better Than Fast Food: Fresh ingredients make all the difference
  • Customizable: Easily adapt for vegetarian, spicy, or low-carb versions
  • Crispy & Cheesy: The perfect texture combination in every bite
  • Budget-Friendly: Save money by making it at home
  • Fun to Make: Great for family cooking nights or casual gatherings

Once you master the folding technique, you’ll find yourself making this recipe again and again.

Ingredients

To make 4 Crunchwraps, you’ll need:

  • 1 lb ground beef
  • 1 packet taco seasoning
  • 4 large flour tortillas
  • 4 small tostada shells
  • 1 cup nacho cheese sauce
  • 1 cup shredded lettuce
  • 1 cup diced tomatoes
  • 1 cup shredded cheddar or Mexican blend cheese
  • ½ cup sour cream
  • 1 tablespoon oil or butter for cooking

Ingredient Notes

  • Ground Beef: Lean ground beef works best to avoid excess grease. You can substitute ground turkey or chicken.
  • Tostada Shells: These add the signature crunch—don’t skip them!
  • Nacho Cheese Sauce: Store-bought works great, but homemade adds extra richness.
  • Tortillas: Use large burrito-size tortillas for easy folding.

Step-by-Step Instructions

  1. Cook the Beef: In a skillet over medium heat, cook ground beef until browned. Drain excess fat and stir in taco seasoning with a little water. Simmer until thickened.
  2. Warm Tortillas: Heat tortillas briefly to make them pliable and easy to fold.
  3. Layer the Fillings: Start with a tortilla, add a layer of seasoned beef, drizzle nacho cheese, place a tostada shell on top, then add sour cream, lettuce, tomatoes, and shredded cheese.
  4. Fold the Crunchwrap: Fold the edges of the tortilla inward in sections, creating a hexagon shape.
  5. Cook Until Crispy: Place seam-side down in a skillet and cook for 3–4 minutes per side until golden brown and crispy.
  6. Serve: Slice in half and enjoy immediately while warm and crunchy.

Tips for Perfect Results

  • Don’t Overfill: Too much filling makes folding difficult and messy.
  • Use Medium Heat: Prevents burning while ensuring the inside heats through.
  • Seal Properly: Always cook seam-side down first to lock everything in place.
  • Prep Ingredients Ahead: Makes assembly quick and stress-free.

Variations

Make It Your Own

This copycat Crunchwrap Supreme recipe is incredibly versatile:

  • Vegetarian Version: Swap beef for black beans or plant-based crumbles
  • Spicy Kick: Add jalapeños or hot sauce
  • Breakfast Crunchwrap: Use scrambled eggs, bacon, and hash browns
  • Low-Carb Option: Use low-carb tortillas and skip the tostada

What to Serve With It

Pair your Crunchwrap with these tasty sides:

  • Tortilla chips and guacamole
  • Mexican rice or cilantro lime rice
  • Refried beans or black beans
  • Fresh salsa or pico de gallo

Storage & Reheating

  • Refrigeration: Store leftovers in an airtight container for up to 3 days
  • Freezing: Wrap individually and freeze for up to 2 months
  • Reheating: Reheat in a skillet or oven to maintain crispiness—avoid microwaving
  • Meal Prep Tip: Assemble ahead and cook fresh when ready to eat

Common Mistakes

  • Overstuffing: Makes folding nearly impossible
  • Skipping the Tostada: You’ll lose that signature crunch
  • High Heat Cooking: Can burn the tortilla before heating inside
  • Not Draining Beef: Excess grease makes the wrap soggy

FAQs

1. Can I make a copycat Crunchwrap Supreme recipe ahead of time?
Yes! Assemble them ahead and cook just before serving for best texture.

2. What can I use instead of tostada shells?
You can use tortilla chips or bake a small tortilla until crispy.

3. Can I make this healthier?
Use lean meat, light cheese, and whole wheat tortillas for a lighter version.

4. How do I keep the Crunchwrap crispy?
Cook it in a skillet instead of microwaving and avoid adding too much sauce.

Final Thoughts

This copycat Crunchwrap Supreme recipe proves that you don’t need a drive-thru to enjoy your favorite comfort food. With its crispy exterior, flavorful layers, and endless customization options, it’s a recipe that delivers every time.

Once you try making it at home, you’ll appreciate the freshness, quality, and flexibility even more. Whether you stick to the classic version or experiment with your own twists, this Crunchwrap is sure to become a regular in your meal rotation.

Peanut Butter Icebox Cake: A No-Bake Dream Dessert

If you’re searching for a dessert that’s effortless yet incredibly indulgent, this peanut butter icebox cake is exactly what you need. With layers of creamy peanut butter filling and soft, cake-like cookies that magically transform in the fridge, this no-bake treat is a guaranteed crowd-pleaser.

Icebox cakes have been a classic American dessert for generations, loved for their simplicity and versatility. This peanut butter version takes things to the next level with its rich, nutty flavor and velvety texture. Whether you’re hosting a summer gathering or just want a make-ahead dessert, this recipe delivers big results with minimal effort.

Why You’ll Love This Recipe

This peanut butter icebox cake checks all the boxes for an easy, delicious dessert:

  • No Baking Required: Perfect for hot days or when you don’t want to turn on the oven
  • Make-Ahead Friendly: Tastes even better after chilling overnight
  • Rich & Creamy: Smooth peanut butter filling with a melt-in-your-mouth texture
  • Simple Ingredients: Easy-to-find pantry staples
  • Crowd-Pleasing: Ideal for potlucks, parties, or family dinners

Once you try it, you’ll see why this dessert is a timeless favorite with a peanut butter twist.

Ingredients

Here’s what you’ll need to make this irresistible peanut butter icebox cake:

  • 2 cups heavy whipping cream
  • 1 cup creamy peanut butter
  • 1 cup powdered sugar
  • 1 teaspoon vanilla extract
  • 1 package chocolate wafer cookies or graham crackers
  • ½ cup milk (for dipping cookies)
  • Optional toppings: crushed peanuts, chocolate chips, peanut butter drizzle

Ingredient Notes

  • Peanut Butter: Use creamy peanut butter for a smooth filling. Natural peanut butter can work but may slightly alter the texture.
  • Cookies: Chocolate wafers create a rich contrast, while graham crackers offer a classic flavor.
  • Whipping Cream: Freshly whipped cream gives the best texture and flavor—avoid pre-made toppings if possible.

Step-by-Step Instructions

  1. Whip the Cream: In a large bowl, beat heavy cream until soft peaks form.
  2. Make the Filling: In another bowl, mix peanut butter, powdered sugar, and vanilla until smooth. Gently fold in the whipped cream until fully combined.
  3. Prepare Cookies: Lightly dip each cookie into milk for a second to soften.
  4. Layer the Cake: In a baking dish, create a layer of cookies, then spread a layer of peanut butter filling. Repeat layers until all ingredients are used, ending with cream on top.
  5. Chill: Cover and refrigerate for at least 6 hours, preferably overnight, to allow cookies to soften into a cake-like texture.
  6. Serve: Slice and top with crushed peanuts or a drizzle of peanut butter before serving.

Tips for Perfect Results

  • Don’t Skip Chilling Time: This is crucial for achieving the soft, cake-like texture.
  • Dip Cookies Quickly: Over-soaking can make them too soggy.
  • Use Offset Spatula: Helps spread layers evenly for a clean presentation.
  • Chill Overnight: The longer it sits, the better the flavor and texture.

Variations

Creative Twists on Peanut Butter Icebox Cake

  • Chocolate Lover’s Version: Add a layer of chocolate ganache between layers
  • Banana Peanut Butter: Add thin slices of banana between layers
  • Oreo Version: Substitute cookies with chocolate sandwich cookies
  • Nut-Free Option: Use sunflower seed butter instead of peanut butter

These variations make it easy to adapt the recipe to your taste or dietary needs.

What to Serve With It

This peanut butter icebox cake pairs beautifully with:

  • Fresh berries like strawberries or raspberries
  • A hot cup of coffee or espresso
  • A cold glass of milk
  • Vanilla ice cream for an extra indulgent dessert

Storage & Reheating

  • Refrigeration: Store covered in the fridge for up to 4 days
  • Freezing: Freeze for up to 2 months; thaw overnight in the refrigerator
  • Serving Tip: Serve chilled for best texture—no reheating needed

This dessert is perfect for making ahead and enjoying throughout the week.

Common Mistakes

  • Not Chilling Long Enough: Results in crunchy cookies instead of soft layers
  • Overmixing the Cream: Can deflate the whipped cream and affect texture
  • Too Much Liquid: Over-dipping cookies can make the cake soggy
  • Uneven Layers: Take time to spread evenly for the best presentation

FAQs

1. Can I make peanut butter icebox cake ahead of time?
Yes! It’s actually best made a day in advance to allow the flavors and textures to develop.

2. Can I use store-bought whipped topping?
You can, but homemade whipped cream provides better flavor and texture.

3. What type of cookies work best?
Chocolate wafers or graham crackers are ideal, but you can experiment with other cookies.

4. Is this dessert freezer-friendly?
Absolutely. It freezes well and can even be enjoyed slightly frozen for a firmer texture.

Final Thoughts

This peanut butter icebox cake is the ultimate no-bake dessert—rich, creamy, and incredibly easy to prepare. It’s the kind of recipe that looks impressive but requires minimal effort, making it perfect for both beginner and experienced home cooks.

With its luscious peanut butter filling and perfectly softened cookie layers, every bite is pure comfort. Whether you’re making it for a special occasion or just treating yourself, this dessert is guaranteed to become a staple in your recipe collection.

Southwest Chicken Wrap: A Flavor-Packed, Easy Meal You’ll Crave

If you’re looking for a quick, satisfying, and flavor-packed meal, this Southwest chicken wrap is exactly what you need. Bursting with bold Tex-Mex flavors, juicy seasoned chicken, crisp vegetables, and a creamy, zesty sauce, this wrap delivers everything you love in one convenient handheld meal.

Perfect for busy weekdays, meal prep, or even a light dinner, the Southwest chicken wrap is a versatile recipe that’s both nourishing and incredibly delicious. It’s the kind of meal that feels indulgent but is easy to customize to fit your lifestyle—whether you’re eating clean, feeding a family, or just craving something fresh and filling.

Why You’ll Love This Recipe

This Southwest chicken wrap is a go-to recipe for so many reasons:

  • Quick & Easy: Ready in under 30 minutes
  • Packed with Flavor: Smoky, zesty, and slightly spicy
  • Healthy & Balanced: Protein, veggies, and carbs all in one
  • Great for Meal Prep: Make ahead for grab-and-go meals
  • Customizable: Easily adapt ingredients to your taste

Whether you’re cooking for yourself or your family, this wrap hits the perfect balance between convenience and flavor.

Ingredients

To make 4 Southwest chicken wraps, you’ll need:

  • 2 cups cooked chicken (grilled or shredded)
  • 1 tablespoon olive oil
  • 1 teaspoon chili powder
  • 1 teaspoon cumin
  • ½ teaspoon smoked paprika
  • Salt and pepper to taste
  • 4 large flour tortillas
  • 1 cup shredded romaine lettuce
  • ½ cup cherry tomatoes, halved
  • ½ cup canned black beans, drained and rinsed
  • ½ cup corn kernels (fresh or frozen)
  • ½ cup shredded cheddar or Mexican blend cheese
  • ¼ cup red onion, finely sliced

For the Southwest sauce:

  • ½ cup mayonnaise
  • 2 tablespoons lime juice
  • 1 tablespoon chipotle or adobo sauce
  • 1 teaspoon garlic powder

Ingredient Notes

  • Chicken: Grilled chicken breast adds the best flavor, but rotisserie chicken works great for convenience.
  • Spices: The chili powder, cumin, and smoked paprika create that signature Southwest taste.
  • Tortillas: Use large, soft flour tortillas for easy wrapping; whole wheat or low-carb options work too.
  • Sauce: The creamy chipotle-lime sauce ties everything together with a tangy, slightly spicy kick.

Step-by-Step Instructions

  1. Season the Chicken: Toss cooked chicken with olive oil, chili powder, cumin, smoked paprika, salt, and pepper. Warm it in a skillet over medium heat for 3–5 minutes.
  2. Prepare the Sauce: In a small bowl, whisk together mayonnaise, lime juice, chipotle sauce, and garlic powder until smooth.
  3. Warm Tortillas: Heat tortillas in a dry skillet or microwave until soft and pliable.
  4. Assemble the Wraps: Lay each tortilla flat and layer with lettuce, chicken, tomatoes, black beans, corn, cheese, and red onion.
  5. Add Sauce & Wrap: Drizzle sauce over the filling, then fold in the sides and roll tightly into a wrap.
  6. Slice & Serve: Cut in half and serve immediately, or wrap in foil for later.

Tips for Perfect Results

  • Warm Your Tortillas: This prevents tearing and makes wrapping easier.
  • Don’t Overfill: Too much filling can make the wrap hard to roll and messy to eat.
  • Balance the Sauce: Start with a small amount and add more as needed.
  • Use Fresh Ingredients: Crisp veggies make a huge difference in texture and flavor.

Variations

Make It Your Own

One of the best things about a Southwest chicken wrap is how easy it is to customize:

  • Spicy Version: Add jalapeños or extra chipotle sauce
  • Low-Carb Option: Use lettuce wraps instead of tortillas
  • Vegetarian Swap: Replace chicken with grilled tofu or extra beans
  • Avocado Boost: Add sliced avocado or guacamole for creaminess

What to Serve With It

Pair your Southwest chicken wrap with these delicious sides:

  • Tortilla chips and salsa
  • Fresh fruit salad
  • Sweet potato fries
  • A light cucumber or avocado salad

Storage & Reheating

  • Refrigeration: Wrap tightly in foil or plastic wrap and store for up to 3 days
  • Meal Prep Tip: Store sauce separately to keep wraps from getting soggy
  • Reheating: Warm in a skillet or microwave, though fresh is best
  • Freezing: Not recommended due to fresh vegetables and sauce

Common Mistakes

  • Overstuffing the Wrap: Makes it difficult to roll and eat
  • Skipping Seasoning: Chicken needs spices to deliver bold flavor
  • Using Cold Tortillas: Can lead to cracking and tearing
  • Too Much Sauce: Can make the wrap soggy

FAQs

1. Can I make Southwest chicken wraps ahead of time?
Yes! Assemble them a few hours ahead, but keep the sauce separate until serving for best texture.

2. What type of chicken works best?
Grilled chicken breast is ideal, but rotisserie chicken is a great shortcut.

3. Is this recipe spicy?
It has a mild kick, but you can adjust the spice level by adding or reducing chipotle sauce.

4. Can I use a different sauce?
Absolutely! Ranch dressing, avocado crema, or even a yogurt-based sauce works well.

Final Thoughts

This Southwest chicken wrap is everything you want in a quick and satisfying meal—bold flavors, fresh ingredients, and endless versatility. It’s perfect for busy days when you need something delicious without spending hours in the kitchen.

With its smoky chicken, crisp veggies, and creamy sauce, every bite delivers a burst of Southwest-inspired goodness. Once you try it, this wrap is sure to become a staple in your weekly meal rotation.

Hot Honey BBQ Chicken Quesadillas: A Sweet & Spicy Delight

If you’re craving something bold, cheesy, and irresistibly flavorful, these hot honey BBQ chicken quesadillas are about to become your new favorite go-to meal. They combine tender shredded chicken tossed in smoky barbecue sauce, a drizzle of spicy-sweet hot honey, and gooey melted cheese—all tucked inside crispy golden tortillas.

This recipe hits every flavor note: sweet, spicy, smoky, and savory. It’s perfect for busy weeknights, casual get-togethers, or even as a crowd-pleasing appetizer for game day. The best part? You can whip up these quesadillas in under 30 minutes with simple, pantry-friendly ingredients.

Why You’ll Love This Recipe

These hot honey BBQ chicken quesadillas are more than just a quick meal—they’re a flavor-packed experience you’ll want to make again and again.

  • Sweet & Spicy Combo: Hot honey adds a unique kick that balances perfectly with smoky BBQ sauce.
  • Quick & Easy: Ready in about 25 minutes from start to finish.
  • Family-Friendly: Easily adjustable spice level for kids or heat lovers.
  • Perfect for Leftovers: Great way to use leftover chicken or rotisserie chicken.
  • Crispy & Cheesy: Golden tortillas with melty cheese in every bite.

Whether you’re cooking for one or feeding a crowd, this recipe delivers big flavor with minimal effort.

Ingredients

Here’s what you’ll need to make these irresistible quesadillas:

  • 2 cups cooked shredded chicken
  • ½ cup BBQ sauce (your favorite brand)
  • 2–3 tablespoons hot honey
  • 1 ½ cups shredded cheese (cheddar, Monterey Jack, or a blend)
  • 4 large flour tortillas
  • 2 tablespoons butter or oil for cooking
  • Optional: sliced red onions, jalapeños, or cilantro

Ingredient Notes

Choosing the right ingredients makes a big difference in your hot honey BBQ chicken quesadillas:

  • Chicken: Rotisserie chicken is a huge time-saver and adds extra flavor.
  • BBQ Sauce: Go for a smoky or slightly sweet variety to complement the hot honey.
  • Hot Honey: You can use store-bought or make your own by mixing honey with chili flakes.
  • Cheese: A mix of cheddar and Monterey Jack melts beautifully and adds depth.

Step-by-Step Instructions

  1. Prepare the Chicken: In a bowl, mix shredded chicken with BBQ sauce and half of the hot honey until well coated.
  2. Heat the Pan: Warm a large skillet over medium heat and add a little butter or oil.
  3. Assemble the Quesadillas: Place one tortilla in the skillet, sprinkle cheese evenly, add the BBQ chicken mixture, then top with more cheese and another tortilla.
  4. Cook Until Golden: Cook for 3–4 minutes per side until the tortilla is crispy and golden brown and the cheese is melted.
  5. Slice & Serve: Remove from heat, let cool slightly, then slice into wedges. Drizzle remaining hot honey on top for extra flavor.

Tips for Perfect Results

  • Use Medium Heat: Too high heat can burn the tortilla before the cheese melts.
  • Don’t Overfill: Keep fillings balanced so the quesadilla stays intact.
  • Press Gently: Use a spatula to press the quesadilla for even crispiness.
  • Let It Rest: Allow quesadillas to cool slightly before cutting to keep fillings from spilling out.

Variations

Switch things up with these fun twists on hot honey BBQ chicken quesadillas:

  • Spicy Lover’s Version: Add sliced jalapeños or a dash of hot sauce.
  • Veggie Boost: Include sautéed bell peppers, onions, or corn.
  • Tex-Mex Style: Add black beans and a sprinkle of taco seasoning.
  • Low-Carb Option: Use low-carb tortillas or make it into a quesadilla bowl.

What to Serve With It

These quesadillas pair perfectly with a variety of sides and dips:

  • Sour cream or Greek yogurt
  • Guacamole or sliced avocado
  • Fresh salsa or pico de gallo
  • A simple side salad with lime vinaigrette

Storage & Reheating

  • Refrigeration: Store leftover quesadillas in an airtight container for up to 3 days.
  • Freezing: Wrap tightly and freeze for up to 2 months.
  • Reheating: Reheat in a skillet or oven for best crispiness—avoid microwaving if possible.

Proper storage helps maintain the crispy texture and bold flavor of your quesadillas.

Common Mistakes

  • Overloading Fillings: Makes flipping difficult and messy.
  • Using High Heat: Can burn tortillas before cheese melts.
  • Skipping the Hot Honey Drizzle: This is what makes the dish stand out!
  • Not Preheating the Pan: Leads to uneven cooking and soggy tortillas.

FAQs

1. Can I make hot honey BBQ chicken quesadillas ahead of time?
Yes! Assemble them in advance and cook just before serving for the best texture.

2. What’s the best cheese for quesadillas?
A mix of cheddar and Monterey Jack works best for melting and flavor.

3. Can I make this recipe vegetarian?
Absolutely. Substitute chicken with grilled veggies or plant-based chicken alternatives.

4. How spicy is hot honey?
It’s mildly spicy, but you can adjust the heat by adding more or less chili.

Final Thoughts

These hot honey BBQ chicken quesadillas are the perfect blend of comfort food and bold flavor. With their crispy exterior, gooey cheese, and sweet-spicy kick, they’re guaranteed to impress whether you’re cooking for family, friends, or just yourself.

What makes this recipe truly special is its flexibility—you can customize it endlessly while still enjoying that signature hot honey BBQ flavor. Once you try it, you’ll find yourself coming back to this quick and satisfying dish again and again.