Savory Baked Chicken Chimichangas with a Golden Crunch

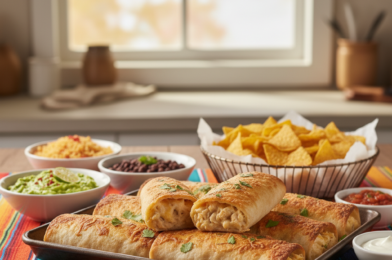
If you’re craving a crispy, satisfying meal without the heaviness of deep frying, these Savory Baked Chicken Chimichangas with a Golden Crunch are exactly what you need. Packed with seasoned chicken, melty cheese, and bold Tex-Mex flavors, these oven-baked chimichangas deliver all the indulgence you love—without the extra oil.

This recipe is perfect for busy weeknights, family dinners, or meal prep. The best part? You get that irresistible golden crunch straight from the oven. Once you try these baked chicken chimichangas, you may never go back to frying again.

Why You’ll Love This Recipe

These Savory Baked Chicken Chimichangas with a Golden Crunch are more than just delicious—they’re practical, healthier, and incredibly satisfying.

  • Healthier option: No deep frying required
  • Crispy texture: Oven-baked to golden perfection
  • Easy to make: Simple ingredients and straightforward steps
  • Family-friendly: Loved by kids and adults alike
  • Perfect for leftovers: Reheat beautifully

They strike the perfect balance between comfort food and a lighter, modern approach to classic Mexican-inspired dishes.

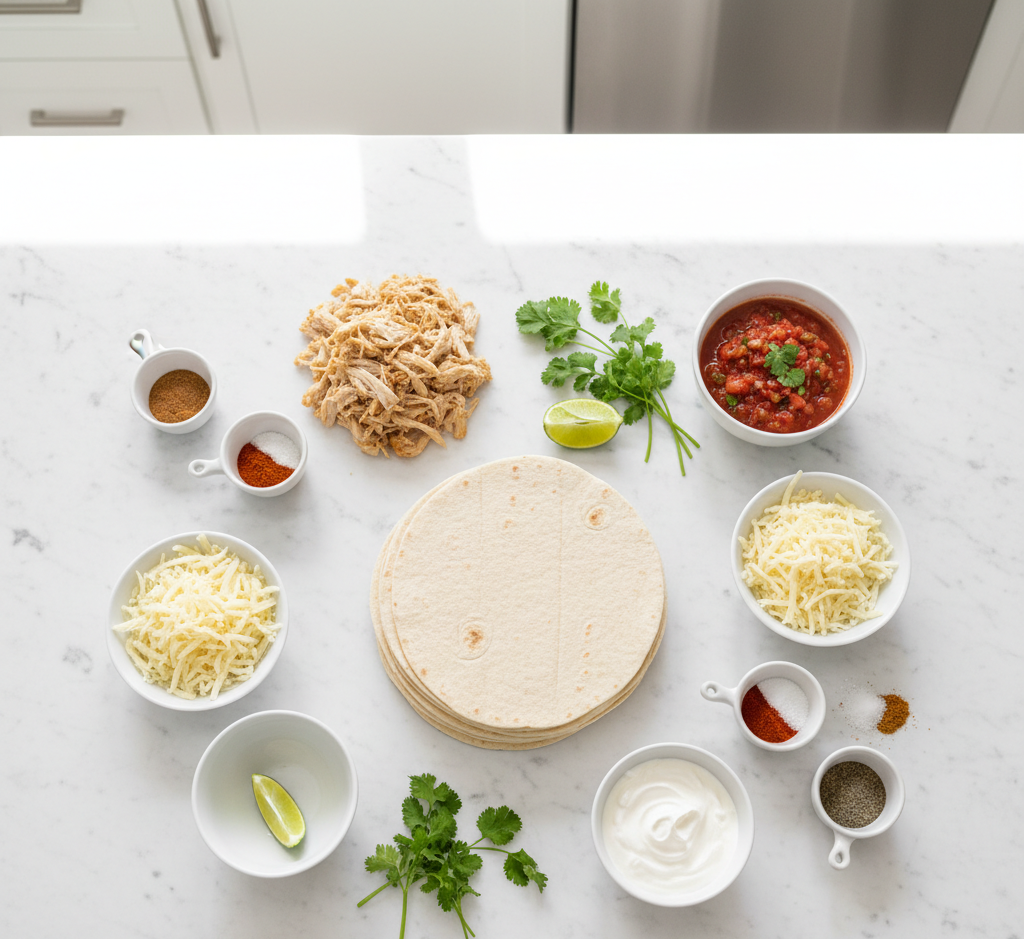
Ingredients for Baked Chicken Chimichangas

To make these flavorful baked chicken chimichangas, you’ll need:

  • 2 cups cooked shredded chicken
  • 1 cup shredded cheddar or Mexican blend cheese
  • ½ cup salsa
  • ¼ cup sour cream
  • 1 teaspoon cumin
  • 1 teaspoon chili powder
  • ½ teaspoon garlic powder
  • 6 large flour tortillas
  • 2 tablespoons melted butter or olive oil
  • Salt and pepper to taste

Ingredient Notes and Substitutions

When making Savory Baked Chicken Chimichangas with a Golden Crunch, a few ingredient swaps can tailor the recipe to your preferences.

Chicken Options

Rotisserie chicken is a huge time-saver and adds extra flavor, but any cooked shredded chicken works well.

Cheese Choices

A Mexican blend melts beautifully, but you can also use Monterey Jack, pepper jack, or cheddar for different flavor profiles.

Tortillas

Large flour tortillas are ideal for wrapping and crisping. Whole wheat tortillas can be used for a healthier twist.

Spice Level

Adjust chili powder or add jalapeños if you prefer more heat.

Step-by-Step Instructions

1. Prepare the Filling

In a large bowl, mix shredded chicken, cheese, salsa, sour cream, and spices until well combined.

2. Assemble the Chimichangas

Place the filling in the center of each tortilla. Fold in the sides, then roll tightly like a burrito.

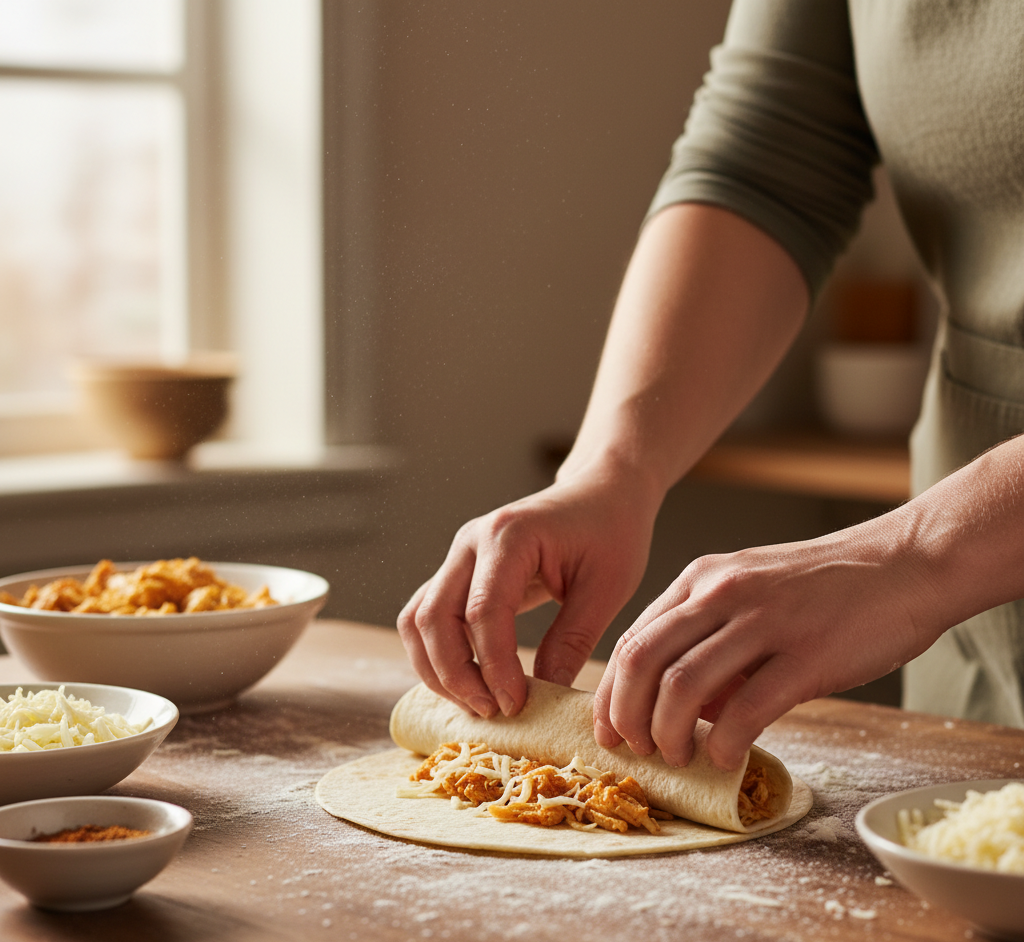
3. Brush and Arrange

Place the chimichangas seam-side down on a baking sheet. Brush the tops with melted butter or olive oil for that golden finish.

4. Bake Until Golden

Bake at 400°F for 20–25 minutes, flipping halfway through, until crispy and golden brown.
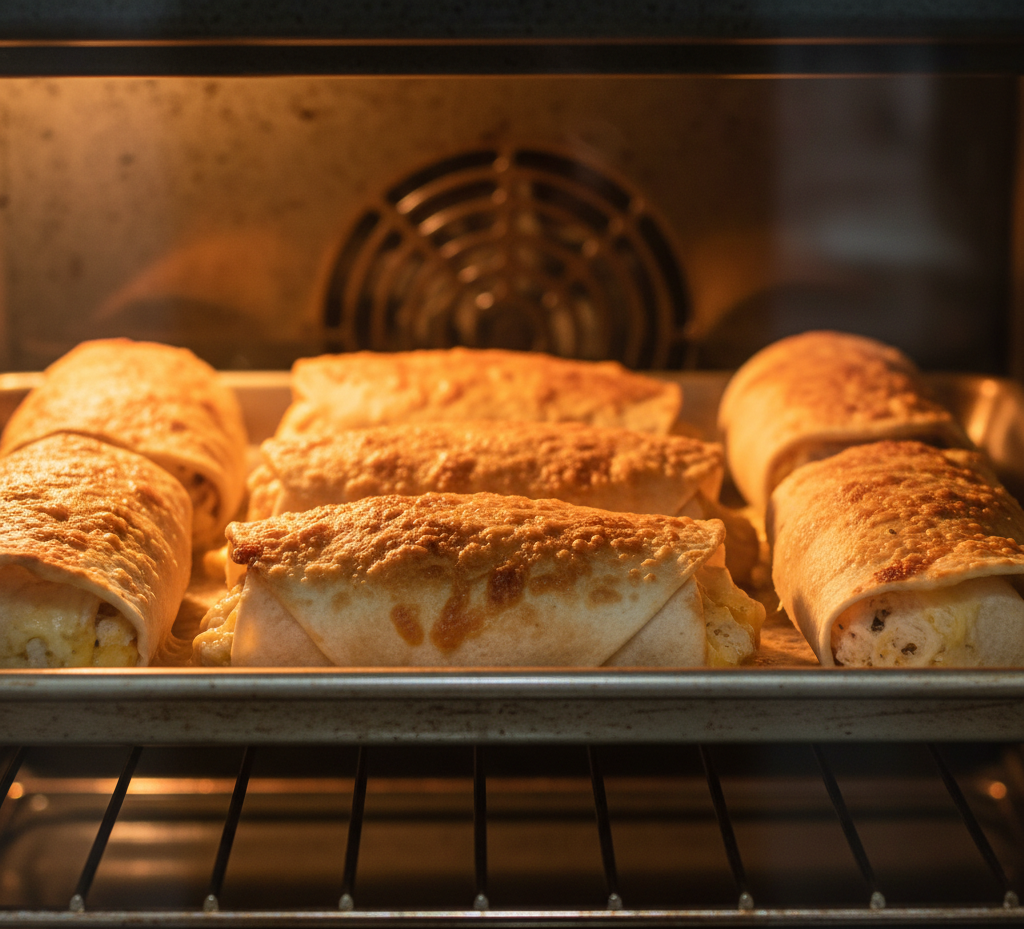
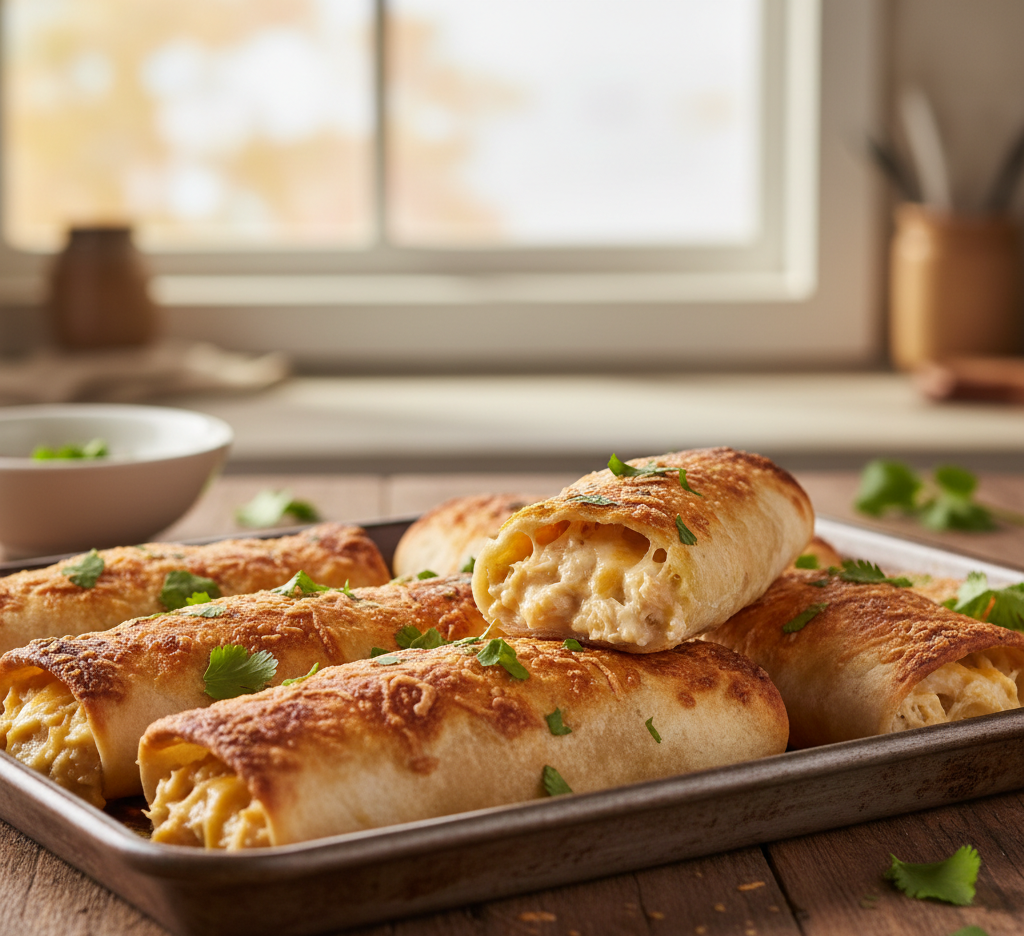
5. Serve and Enjoy

Remove from the oven and let cool slightly before serving. Garnish with your favorite toppings.

Tips for Perfect Results

To get that signature crunch in your baked chicken chimichangas, keep these tips in mind:

  • Don’t overfill: Prevents tearing and uneven cooking
  • Brush generously: Helps achieve a crispy, golden exterior
  • Flip halfway: Ensures even browning on all sides
  • Use a wire rack: Allows heat to circulate for extra crispiness

Small adjustments like these can make a big difference in texture and flavor.

Delicious Variations to Try

These Savory Baked Chicken Chimichangas with a Golden Crunch are incredibly versatile.

Beef Chimichangas

Swap chicken for seasoned ground beef.

Vegetarian Version

Use black beans, rice, sautéed peppers, and corn.

Spicy Chipotle Style

Add chipotle sauce or smoked paprika for a smoky kick.

Breakfast Chimichangas

Fill with scrambled eggs, cheese, and breakfast sausage.

What to Serve With Chimichangas

Make your meal complete by pairing these baked chicken chimichangas with delicious sides:

  • Spanish rice or cilantro lime rice
  • Refried beans or black beans
  • Fresh guacamole and chips
  • Corn salad or street corn
  • Margaritas or iced tea

Storage & Reheating Tips

These Savory Baked Chicken Chimichangas with a Golden Crunch store beautifully, making them ideal for meal prep.

  • Refrigerate: Store in an airtight container for up to 4 days
  • Freeze: Wrap individually and freeze up to 2 months
  • Reheat: Bake at 375°F until heated through for best texture

Avoid microwaving if you want to keep that crispy exterior intact.

Common Mistakes to Avoid

Even simple recipes can have pitfalls. Avoid these when making baked chicken chimichangas:

  • Skipping the oil or butter (leads to dry tortillas)
  • Overfilling the tortillas (causes bursting)
  • Not sealing properly (filling may leak)
  • Baking at too low a temperature (won’t crisp up)

Keeping these in mind will ensure your chimichangas turn out perfectly every time.

Frequently Asked Questions

1. Can I make baked chicken chimichangas ahead of time?

Yes! Assemble them in advance and refrigerate until ready to bake.

2. How do I keep chimichangas crispy?

Brush with oil and bake at a high temperature. Reheat in the oven instead of the microwave.

3. Can I air fry these instead?

Absolutely! Air fry at 375°F for about 10–12 minutes, flipping halfway.

4. What toppings go best with chimichangas?

Sour cream, guacamole, salsa, shredded lettuce, and fresh cilantro are all great options.

Final Thoughts

These Savory Baked Chicken Chimichangas with a Golden Crunch prove that you don’t need a deep fryer to enjoy crispy, satisfying comfort food. With bold flavors, a golden exterior, and endless customization options, this recipe is a must-try for anyone who loves easy, delicious meals.

Whether you’re cooking for your family or prepping meals for the week, these baked chimichangas are sure to become a staple in your kitchen. Once you taste that crunchy, cheesy goodness, you’ll be hooked for good.

Chicken Caesar Smash Tacos (Crispy, Juicy & Flavor-Packed!)

If you love bold flavors and creative comfort food, these Chicken Caesar Smash Tacos are about to become your new obsession. This viral-inspired recipe combines everything you love about a classic Caesar salad—savory chicken, creamy dressing, crisp lettuce, and Parmesan—with the irresistible texture of crispy smashed tacos. The result? A handheld meal that’s crunchy, juicy, and bursting with flavor in every bite.

Perfect for weeknight dinners, casual gatherings, or even game day spreads, these tacos are surprisingly easy to make and incredibly satisfying. Once you try them, you’ll understand why Chicken Caesar Smash Tacos are quickly becoming a must-make recipe across kitchens in the U.S.

Why You’ll Love This Recipe

These Chicken Caesar Smash Tacos check all the boxes when it comes to flavor, texture, and ease. They’re not just trendy—they’re genuinely delicious and practical.

  • Crispy and juicy: The smashed chicken cooks directly onto the tortilla for maximum flavor
  • Quick to make: Ready in under 30 minutes
  • Family-friendly: Familiar Caesar flavors in a fun format
  • Customizable: Easy to tweak with different toppings or sauces
  • Perfect fusion dish: Combines salad and tacos in one bite

If you’re tired of the same old chicken dinners, this recipe brings something exciting to the table without requiring complicated steps.

Ingredients for Chicken Caesar Smash Tacos

Here’s everything you need to make these irresistible Chicken Caesar Smash Tacos:

  • 1 lb ground chicken
  • 6 small flour tortillas
  • 1 cup shredded romaine lettuce
  • ½ cup Caesar dressing
  • ½ cup grated Parmesan cheese
  • 1 teaspoon garlic powder
  • 1 teaspoon onion powder
  • Salt and black pepper to taste
  • 1 tablespoon olive oil

Ingredient Notes and Substitutions

The beauty of Chicken Caesar Smash Tacos lies in their simplicity, but a few smart choices can elevate the dish even further.

Chicken Options

Ground chicken works best for smashing onto tortillas, but you can also finely chop chicken breast if needed.

Caesar Dressing

Use a high-quality store-bought dressing or make your own for a fresher, more robust flavor.

Tortillas

Flour tortillas crisp up beautifully, but corn tortillas can be used for a gluten-free option (just handle them gently).

Cheese Variations

Freshly grated Parmesan melts better and offers a richer taste than pre-packaged options.

Step-by-Step Instructions

1. Prep the Chicken Mixture

In a bowl, combine ground chicken with garlic powder, onion powder, salt, and pepper. Mix until just combined.

2. Smash Onto Tortillas

Take a portion of the chicken mixture and press it evenly onto one side of each tortilla.

3. Cook Until Crispy

Heat a skillet over medium-high heat with olive oil. Place the tortilla chicken-side down and cook until the chicken is fully cooked and crispy. Flip to lightly toast the tortilla side.

4. Add Caesar Toppings

Remove from heat and top with shredded romaine, Caesar dressing, and grated Parmesan.

5. Fold and Serve

Fold the tacos in half and serve immediately while hot and crispy.

Tips for Perfect Chicken Caesar Smash Tacos

Getting the perfect texture and flavor is easy with a few expert tips:

  • Press thin and even: Helps the chicken cook quickly and evenly
  • Use a hot skillet: Ensures a crispy, golden crust
  • Don’t overcrowd the pan: Cook in batches if needed
  • Add toppings last: Keeps lettuce crisp and fresh

These small details make a big difference in achieving restaurant-quality results at home.

Delicious Variations to Try

Once you master the classic Chicken Caesar Smash Tacos, try switching things up:

Spicy Caesar Tacos

Add chili flakes or hot sauce to the chicken mixture for heat.

Bacon Caesar Smash Tacos

Top with crispy bacon bits for extra indulgence.

Low-Carb Option

Use low-carb tortillas or lettuce wraps.

Grilled Chicken Version

Swap ground chicken for grilled chicken slices for a different texture.

What to Serve With Chicken Caesar Smash Tacos

These tacos are satisfying on their own, but pairing them with the right sides takes your meal to the next level.

  • Sweet potato fries
  • Classic coleslaw
  • Roasted vegetables
  • Chips and guacamole
  • Sparkling lemonade or iced tea

Storage & Reheating Tips

While Chicken Caesar Smash Tacos are best enjoyed fresh, you can still store leftovers:

  • Refrigerate: Store cooked tacos (without toppings) for up to 3 days
  • Reheat: Warm in a skillet or oven to maintain crispiness
  • Store toppings separately: Keeps lettuce from wilting

Avoid microwaving if possible, as it can make the tortillas soggy.

Common Mistakes to Avoid

Even a simple recipe like Chicken Caesar Smash Tacos can go wrong if you’re not careful.

  • Using too much chicken (makes tacos bulky and uneven)
  • Cooking on low heat (prevents crisping)
  • Adding toppings too early (leads to sogginess)
  • Skipping seasoning (results in bland flavor)

Keeping these in mind ensures consistent, delicious results every time.

Frequently Asked Questions

1. Can I make Chicken Caesar Smash Tacos ahead of time?

You can prep the chicken mixture ahead, but cook the tacos fresh for the best texture.

2. Are these tacos healthy?

They can be! Use light Caesar dressing and whole wheat tortillas for a healthier version.

3. Can I use rotisserie chicken instead?

Not for smashing, but you can use it as a topping alternative.

4. What’s the best pan to use?

A cast iron skillet works best for achieving a crispy, golden crust.

Final Thoughts

These Chicken Caesar Smash Tacos are the perfect example of how simple ingredients can turn into something truly exciting. With their crispy texture, creamy toppings, and bold Caesar flavor, they’re guaranteed to impress anyone who tries them.

Whether you’re cooking for your family or just looking to shake up your weekly dinner routine, this recipe delivers big flavor with minimal effort. Once you make them, don’t be surprised if they become a regular request at your table.

Irresistibly Easy BBQ Hawaiian Pizza for Family Fun Nights

If you’re looking for a crowd-pleasing dinner that’s equal parts fun, flavorful, and incredibly easy to make, this BBQ Hawaiian pizza is about to become your new go-to recipe. Combining the smoky richness of barbecue sauce with the sweet, juicy burst of pineapple and savory toppings, this pizza delivers a perfect balance that keeps everyone coming back for more.

Whether you’re hosting a family pizza night, planning a casual get-together, or just craving something comforting yet exciting, this recipe checks every box. Even better? It’s simple enough for beginners but delicious enough to rival your favorite pizzeria.

Why You’ll Love This BBQ Hawaiian Pizza

This BBQ Hawaiian pizza isn’t just delicious—it’s a total game-changer for busy households and fun nights in. Here’s why:

  • Quick and easy: Ready in under 30 minutes with minimal prep
  • Family-friendly: Sweet and savory flavors appeal to kids and adults alike
  • Customizable: Easily adjust toppings to suit your taste
  • Budget-friendly: Uses simple, accessible ingredients
  • Perfect for gatherings: Great for sharing and entertaining

The contrast of tangy BBQ sauce with caramelized pineapple creates an unforgettable flavor experience that feels both indulgent and comforting.

Ingredients for BBQ Hawaiian Pizza

To make this easy BBQ Hawaiian pizza, you’ll need:

  • 1 pre-made pizza dough (or homemade if preferred)
  • ½ cup BBQ sauce
  • 1½ cups shredded mozzarella cheese
  • 1 cup cooked ham or Canadian bacon, diced
  • 1 cup pineapple chunks (fresh or canned, drained)
  • ¼ cup red onion, thinly sliced
  • 2 tablespoons chopped fresh cilantro (optional)
  • 1 tablespoon olive oil

3. Add the Sauce

Spread BBQ sauce evenly over the dough, leaving a small border around the edges.

4. Layer the Toppings

Sprinkle mozzarella cheese evenly, then add ham, pineapple chunks, and red onion slices.

5. Bake to Perfection

Bake for 12–15 minutes, or until the crust is golden and the cheese is bubbly.

Remove from the oven, sprinkle with fresh cilantro, slice, and serve immediately.

Tips for Perfect BBQ Hawaiian Pizza

  • Don’t overload toppings: Too many can make the pizza soggy
  • Pre-cook watery ingredients: Helps avoid excess moisture
  • Use high heat: Ensures a crispy crust
  • Drain pineapple well: Prevents sogginess

These small tweaks make a big difference in achieving that perfect balance of crispy, cheesy, and juicy.

Delicious Variations to Try

One of the best things about this BBQ Hawaiian pizza is how versatile it is. Try these variations:

BBQ Chicken Hawaiian Pizza

Swap ham for grilled chicken for a smoky protein upgrade.

Spicy Hawaiian Pizza

Add jalapeños or red pepper flakes for heat.

Vegetarian Version

Skip the meat and add bell peppers, mushrooms, or spinach.

Flatbread Style

Use naan or flatbread for a quicker, thinner crust option.

What to Serve With BBQ Hawaiian Pizza

Round out your meal with these tasty sides:

  • Fresh garden salad with vinaigrette
  • Garlic bread or cheesy breadsticks
  • Coleslaw for a crunchy contrast
  • Lemonade or iced tea for a refreshing drink

Storage & Reheating Tips

Got leftovers? No problem.

  • Refrigerate: Store slices in an airtight container for up to 3 days
  • Freeze: Wrap tightly and freeze for up to 2 months
  • Reheat: Use an oven or skillet for best texture (avoid microwave if possible)

Reheating in the oven at 375°F keeps the crust crisp and the cheese perfectly melty.

Common Mistakes to Avoid

Even simple recipes can go wrong if you’re not careful. Watch out for these:

  • Using too much sauce (can make pizza soggy)
  • Not preheating the oven fully
  • Skipping the draining step for pineapple
  • Overbaking (dries out toppings)

Avoiding these pitfalls ensures your BBQ Hawaiian pizza turns out perfect every time.

Frequently Asked Questions

1. Can I use fresh pineapple instead of canned?

Absolutely! Fresh pineapple adds a brighter flavor and works beautifully in this recipe.

2. What’s the best cheese for BBQ Hawaiian pizza?

Mozzarella is the classic choice, but adding smoked gouda or cheddar enhances the flavor.

3. Can I make this pizza ahead of time?

Yes, you can assemble it ahead and refrigerate for a few hours before baking.

4. Is BBQ Hawaiian pizza kid-friendly?

Definitely! The sweet and savory combo is usually a big hit with kids.

Final Thoughts

This irresistibly easy BBQ Hawaiian pizza is more than just a recipe—it’s an experience. From the sweet tang of pineapple to the smoky richness of BBQ sauce, every bite brings comfort and excitement to the table. It’s the kind of dish that turns ordinary evenings into memorable family moments.

Whether you stick to the classic version or experiment with creative variations, this pizza is guaranteed to impress. So roll up your sleeves, preheat that oven, and get ready to enjoy one of the most delicious homemade pizzas you’ve ever made.