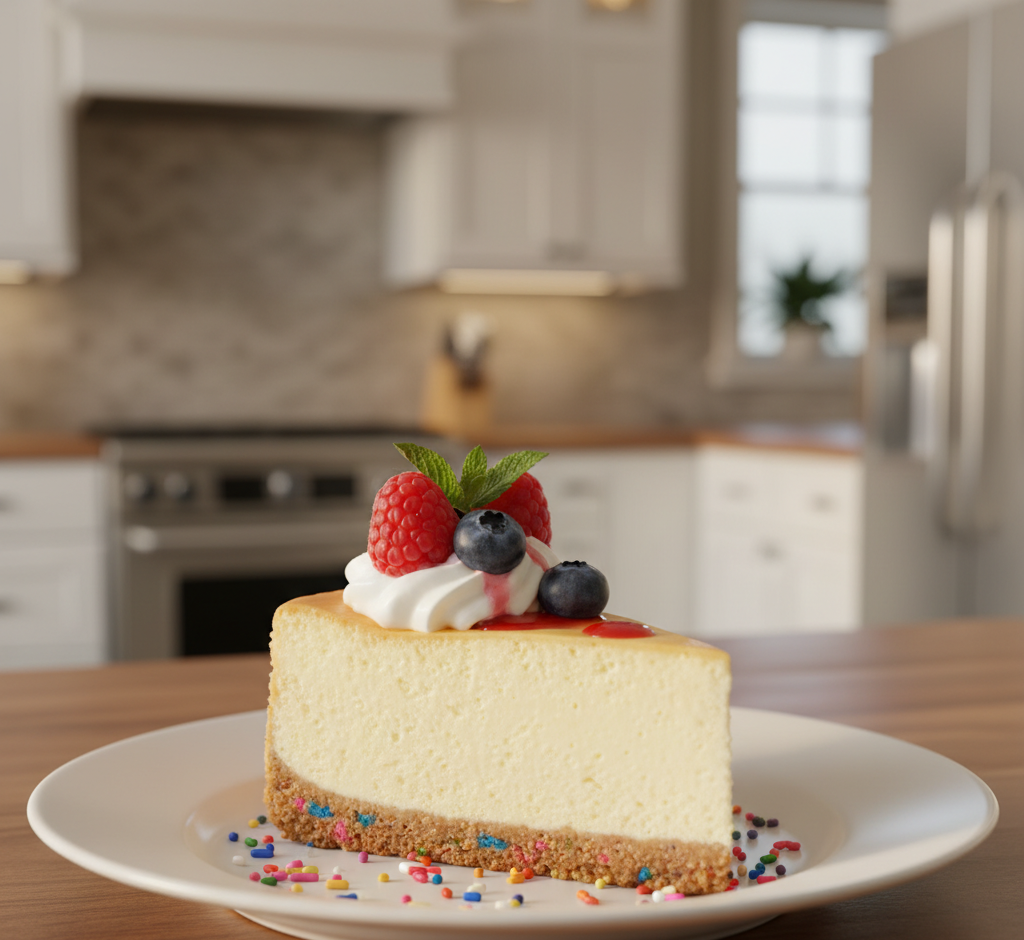
If you’ve ever dreamed of combining two classic desserts into one unforgettable treat, this Amazing Sugar Cookie Cheesecake is exactly what you need. It’s rich, creamy, buttery, and perfectly sweet—everything you love about sugar cookies and cheesecake in one irresistible bite. This dessert is ideal for holidays, birthdays, or simply when you want something extra special.
The magic of this recipe lies in its balance. The soft, slightly chewy sugar cookie base pairs beautifully with the smooth, velvety cheesecake filling, creating a texture and flavor combination that’s hard to beat. Whether you’re baking for guests or treating yourself, this sugar cookie cheesecake is guaranteed to impress.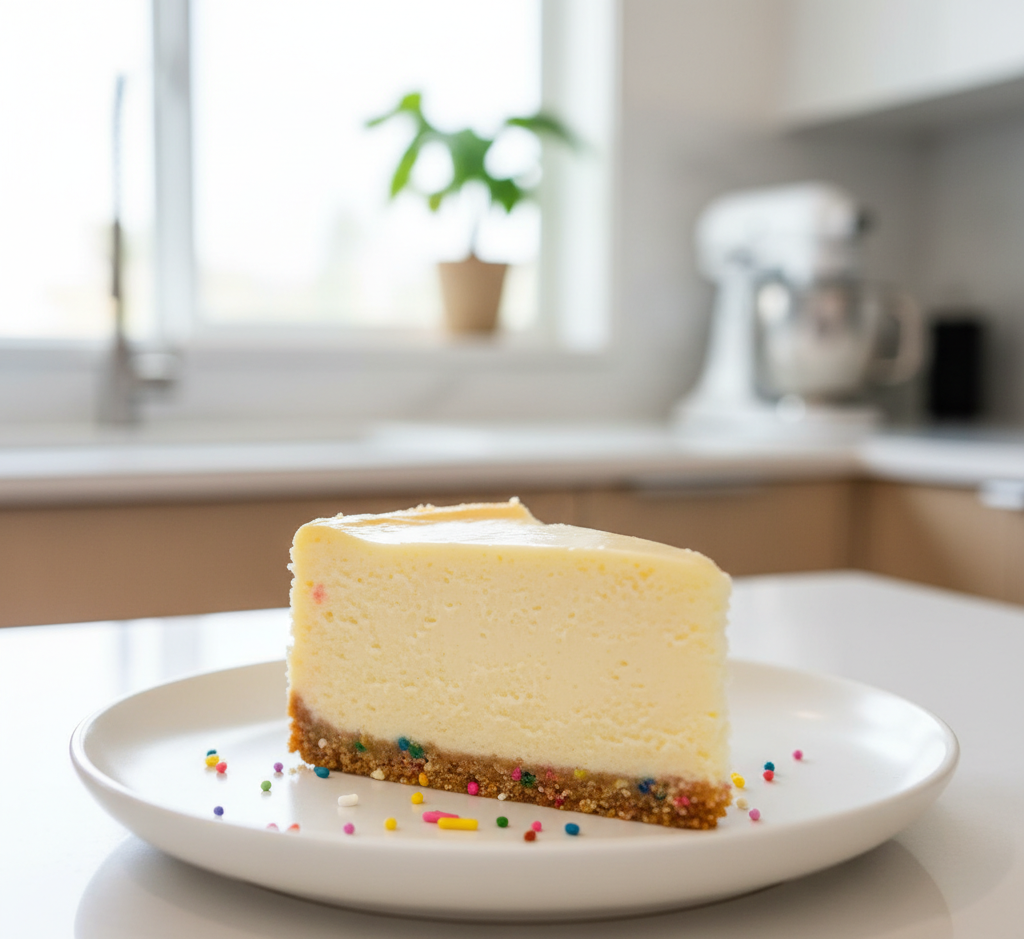
Why You’ll Love This Recipe
This Amazing Sugar Cookie Cheesecake stands out for so many reasons, especially if you’re looking for a dessert that’s both easy and show-stopping.
- Combines two favorite desserts in one
- Simple ingredients you likely already have
- Perfect for make-ahead entertaining
- Crowd-pleasing flavor for all ages
- Customizable with toppings and mix-ins
The best part? You don’t need to be a professional baker to achieve bakery-quality results. This recipe is approachable, reliable, and incredibly rewarding.
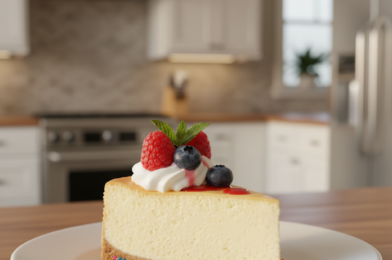
Image Prompt: A beautifully styled dessert table featuring a whole sugar cookie cheesecake topped with whipped cream and sprinkles, soft daylight, elegant kitchen setup, shallow depth of field, 4k resolution.
Ingredients
For the Sugar Cookie Base:
- 1 roll refrigerated sugar cookie dough (or homemade)
- 1/2 teaspoon vanilla extract (optional enhancement)
For the Cheesecake Filling:
- 16 oz cream cheese, softened
- 1/2 cup granulated sugar
- 2 large eggs
- 1 teaspoon vanilla extract
- 1/4 cup sour cream
Optional Toppings:
- Whipped cream
- Fresh berries
- Sprinkles
- Chocolate drizzle
Each ingredient plays an important role in creating that signature creamy, sweet, and slightly tangy flavor profile.
Image Prompt: Ingredients neatly arranged on a marble countertop—cream cheese, sugar, eggs, cookie dough, vanilla, sour cream, small bowls, natural light, clean kitchen aesthetic, shallow depth of field, 4k.
Ingredient Notes
Choosing high-quality ingredients makes a noticeable difference in your Amazing Sugar Cookie Cheesecake. Full-fat cream cheese is key for that rich, smooth texture, while sour cream adds a subtle tang that balances the sweetness.
If you’re using store-bought cookie dough, opt for a premium brand for better flavor. Homemade dough works beautifully too and gives you full control over sweetness and texture.
Let all refrigerated ingredients come to room temperature before mixing—this ensures a silky, lump-free filling.
Step-by-Step Instructions
Step 1: Prepare the Base
Preheat your oven to 325°F. Press the sugar cookie dough evenly into the bottom of a greased springform pan, forming a smooth crust.
Step 2: Make the Filling
In a large bowl, beat the cream cheese and sugar until smooth. Add eggs one at a time, mixing gently. Stir in vanilla and sour cream until fully combined.
Step 3: Assemble
Pour the cheesecake filling over the cookie base and smooth the top.
Step 4: Bake
Bake for 35–40 minutes, or until the center is slightly set but still jiggly.
Step 5: Cool & Chill
Let it cool at room temperature, then refrigerate for at least 4 hours (overnight is best).
This process ensures your cheesecake sets properly and develops its signature creamy texture.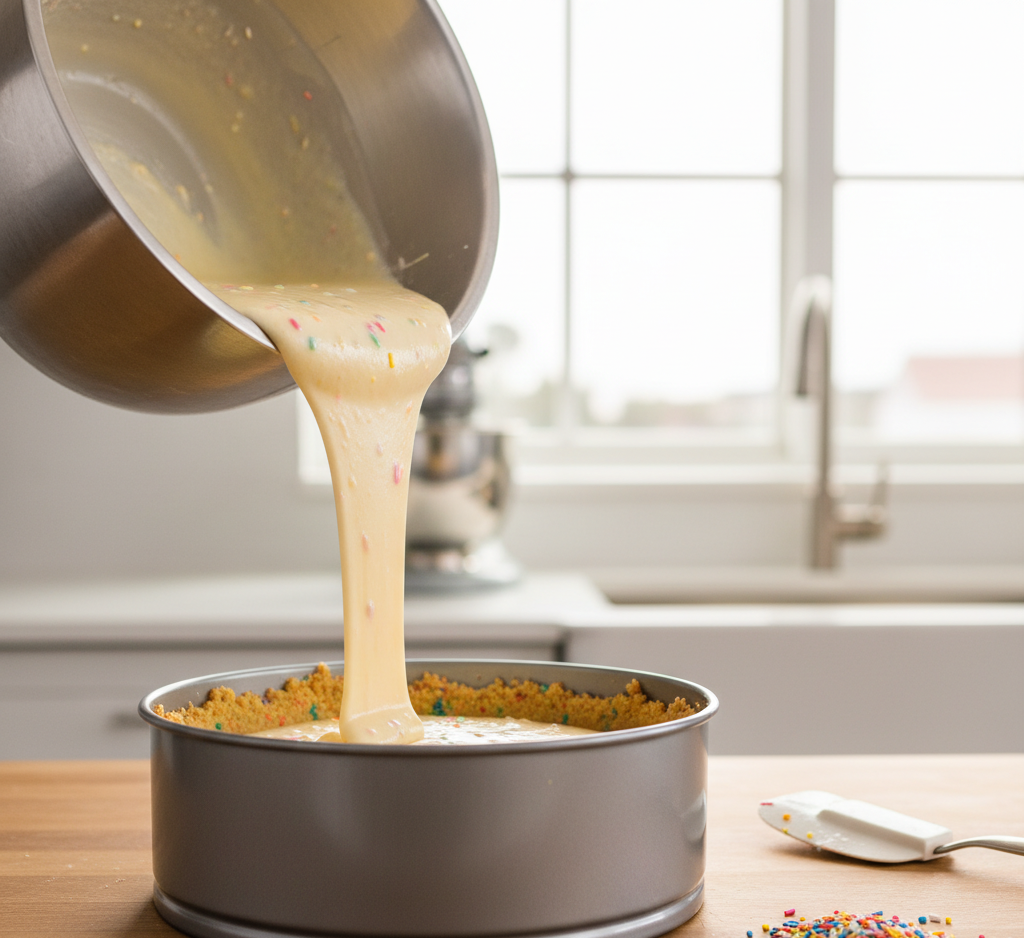
Tips for Perfect Results
Getting the perfect Amazing Sugar Cookie Cheesecake is all about technique:
- Don’t overmix the batter—this prevents cracks
- Use a water bath for ultra-smooth texture (optional)
- Avoid overbaking—the center should slightly jiggle
- Chill thoroughly before slicing
A warm knife (run under hot water) helps create clean, professional slices.
Variations
One of the best things about this recipe is how versatile it is.
Flavor Twists:
- Add chocolate chips for a cookie dough vibe
- Swirl in strawberry or raspberry jam
- Use lemon zest for a bright citrus flavor
Seasonal Ideas:
- Add pumpkin spice in fall
- Top with crushed peppermint during the holidays
- Use pastel sprinkles for spring celebrations
These variations keep your sugar cookie cheesecake exciting all year long.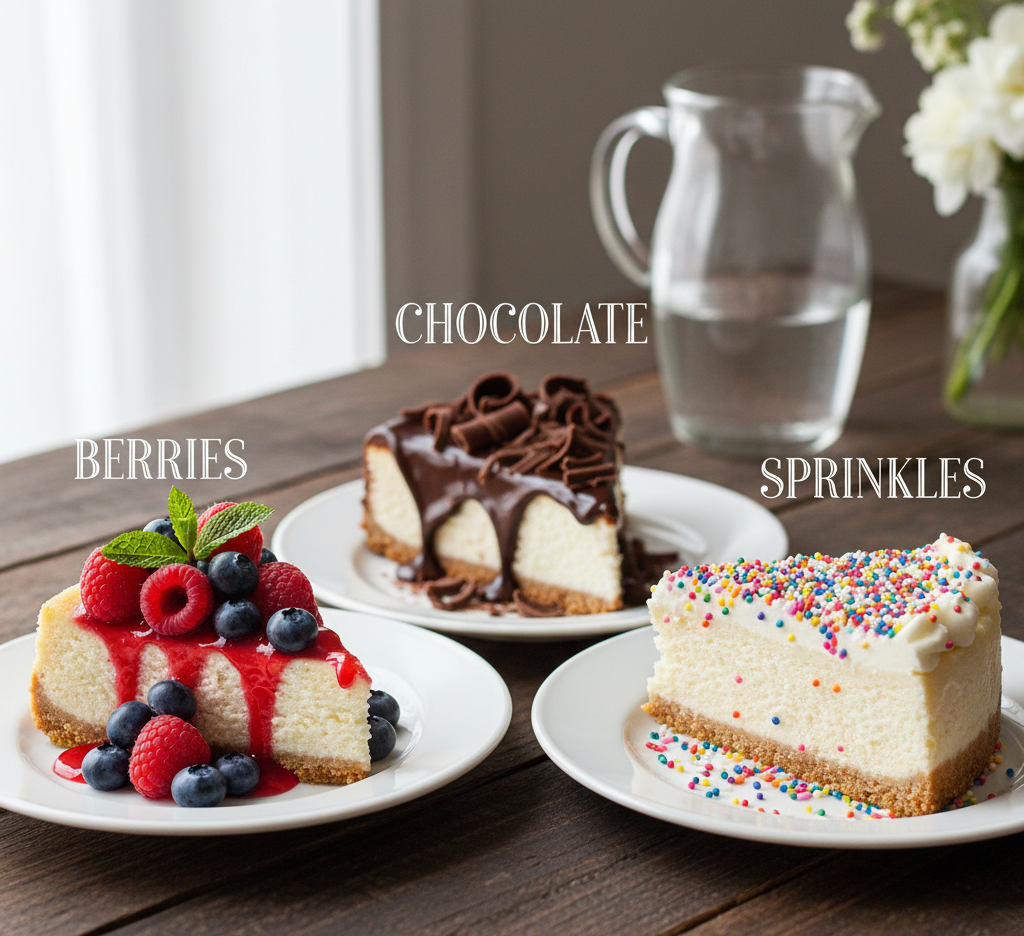
What to Serve With It
This Amazing Sugar Cookie Cheesecake pairs beautifully with:
- Fresh fruit like strawberries or blueberries
- A hot cup of coffee or espresso
- Vanilla ice cream for extra indulgence
- Light whipped cream for balance
Serving it slightly chilled enhances the texture and flavor.
Storage & Reheating
Proper storage keeps your cheesecake fresh and delicious:
- Refrigerate in an airtight container for up to 5 days
- Freeze slices individually for up to 2 months
- Thaw overnight in the fridge before serving
No reheating needed—this dessert is best served cold or slightly chilled.
Common Mistakes to Avoid
Even simple recipes can go wrong without a few precautions:
- Using cold ingredients (leads to lumps)
- Overbaking (causes dryness)
- Skipping chill time (affects texture)
- Overmixing (introduces too much air)
Avoiding these mistakes ensures your cheesecake turns out perfectly every time.
FAQs
1. Can I make this sugar cookie cheesecake ahead of time?
Absolutely! It’s actually better when made a day in advance since it needs time to chill and set.
2. Can I use homemade sugar cookie dough?
Yes, homemade dough works wonderfully and adds a personal touch to your cheesecake.
3. How do I prevent cracks in my cheesecake?
Avoid overmixing and overbaking. You can also use a water bath for extra insurance.
4. Can I freeze sugar cookie cheesecake?
Yes! Wrap slices tightly and freeze for up to 2 months. Thaw in the refrigerator before serving.
Final Thoughts
This Amazing Sugar Cookie Cheesecake – Joyful One-Bite Dessert Perfection truly lives up to its name. It’s rich yet balanced, simple yet impressive, and versatile enough for any occasion. Whether you’re baking for a celebration or just satisfying a sweet craving, this dessert delivers every single time.
Once you try it, don’t be surprised if it becomes your go-to cheesecake recipe. It’s the kind of treat that brings smiles with every bite—and honestly, that’s what great baking is all about.