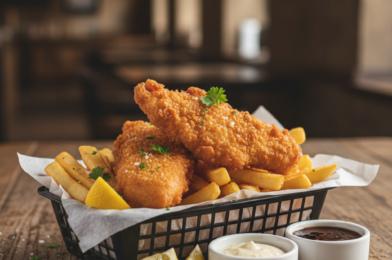
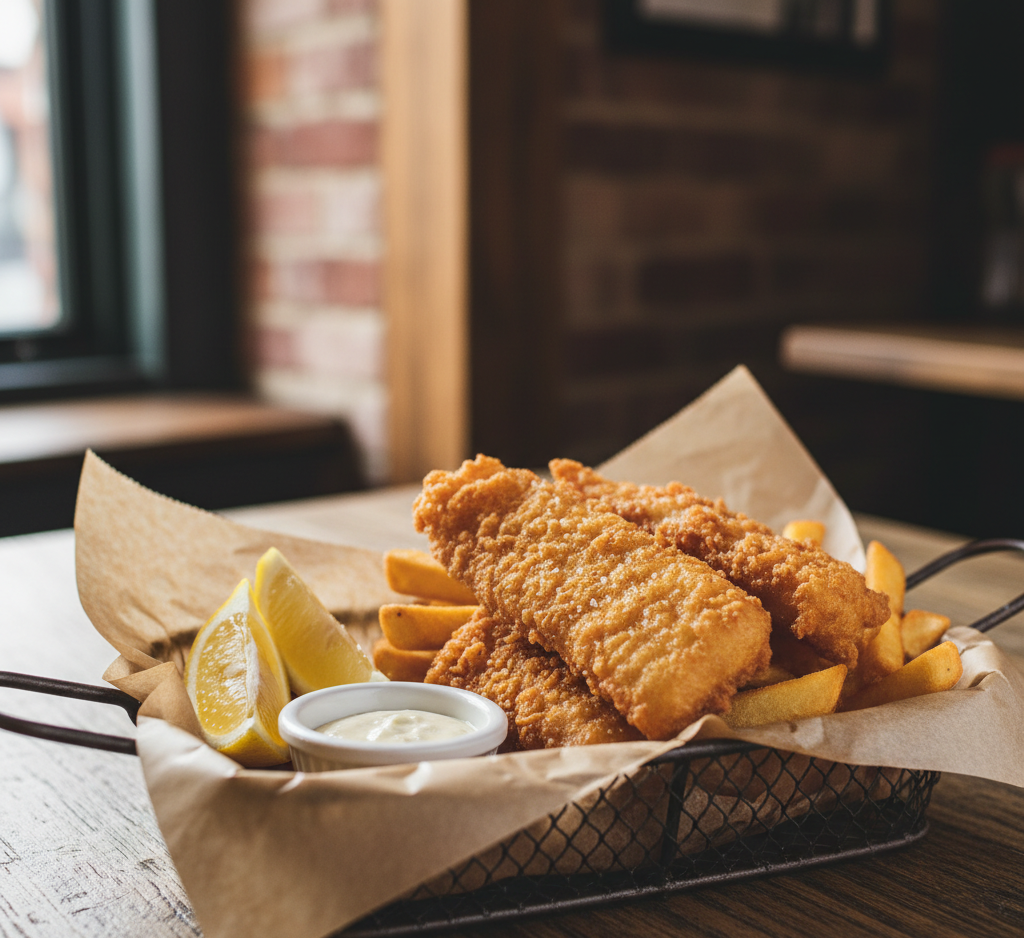
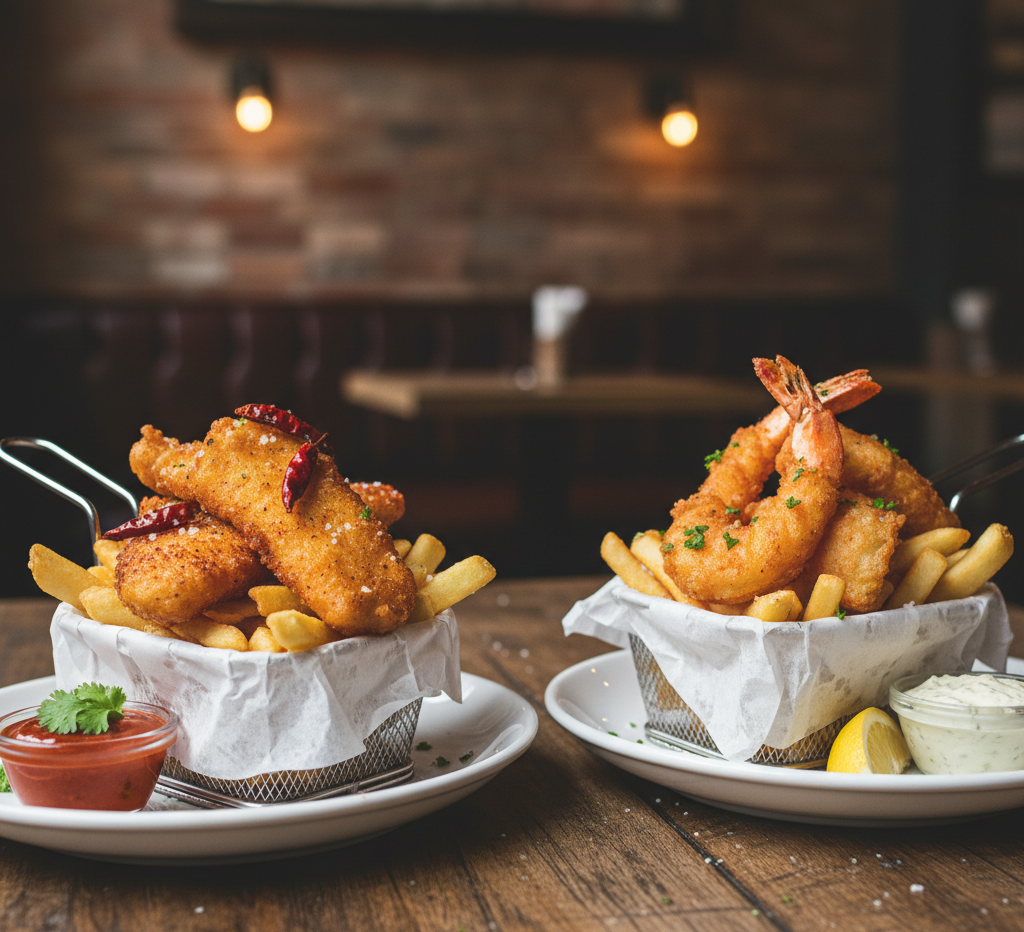
There’s nothing quite like biting into perfectly crispy beer battered fish and chips—that golden, crunchy coating giving way to tender, flaky fish inside. It’s the kind of comfort food you’d expect at your favorite pub, but the good news is you can recreate that same magic right in your own kitchen.
This pub-style recipe brings together light, airy beer batter with perfectly fried fish and classic thick-cut fries. Whether you’re planning a casual family dinner, game day meal, or just craving something indulgent, this recipe delivers authentic flavor and texture every single time.
Why You’ll Love This Recipe
This crispy beer battered fish and chips recipe is everything you want in a homemade version of this classic dish. It’s crunchy, flavorful, and surprisingly easy once you know a few key techniques.
The beer batter creates a light, airy crust that crisps up beautifully without feeling heavy or greasy. Paired with perfectly cooked fries, it’s a complete meal that feels both nostalgic and satisfying.
- Authentic pub-style flavor at home
- Light, crispy batter باستخدام beer
- Flaky, tender fish inside
- Perfectly golden fries
- Great for gatherings or comfort meals
Ingredients
To make the best crispy beer battered fish and chips, you’ll need:
For the Fish:
- 1 1/2 lbs white fish (cod, haddock, or pollock)
- 1 cup all-purpose flour
- 1 cup cold beer (lager works best)
- 1 teaspoon baking powder
- 1/2 teaspoon paprika
- Salt and pepper to taste
- Oil for frying
For the Chips:
- 4 large russet potatoes
- Oil for frying
- Salt to taste
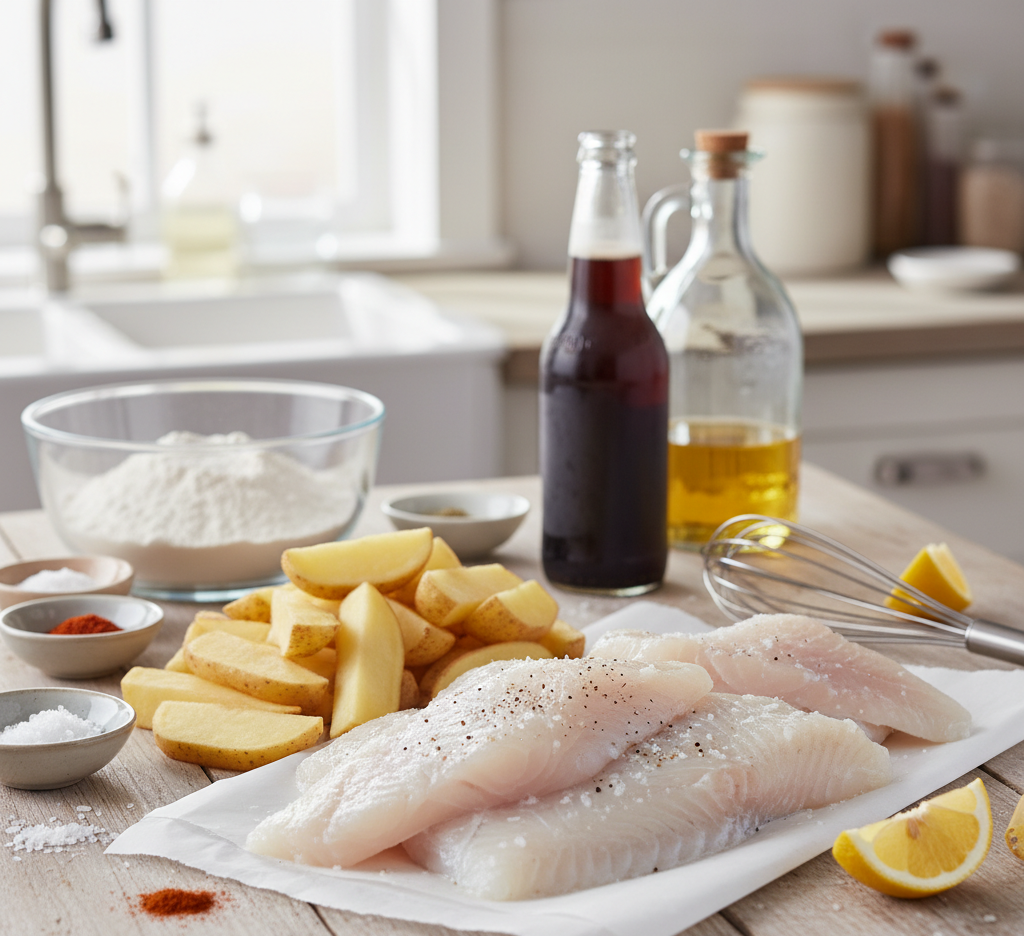
Ingredient Notes
Choosing the right ingredients is key to achieving restaurant-quality crispy beer battered fish and chips.
White fish like cod or haddock is ideal because it’s mild, flaky, and holds up well during frying. The beer is just as important—it adds carbonation, which helps create that light, crispy texture in the batter. A cold lager or pale ale works best.
Russet potatoes are perfect for fries because of their high starch content, which helps them crisp up on the outside while staying fluffy inside.
Step-by-Step Instructions
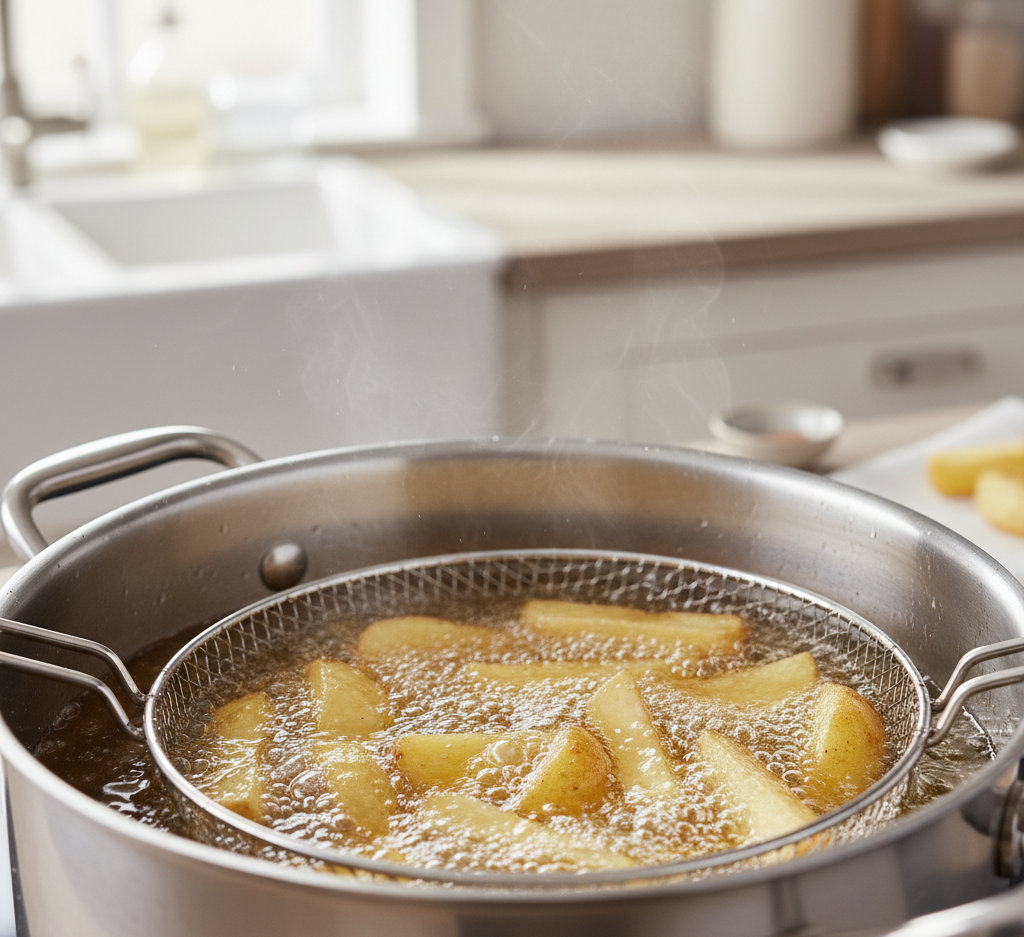
1. Prepare the Potatoes
Peel and cut the potatoes into thick fries. Rinse them in cold water to remove excess starch, then pat dry thoroughly.
2. First Fry (Blanching)
Heat oil to 325°F and fry the potatoes for 3–4 minutes until soft but not browned. Remove and set aside.
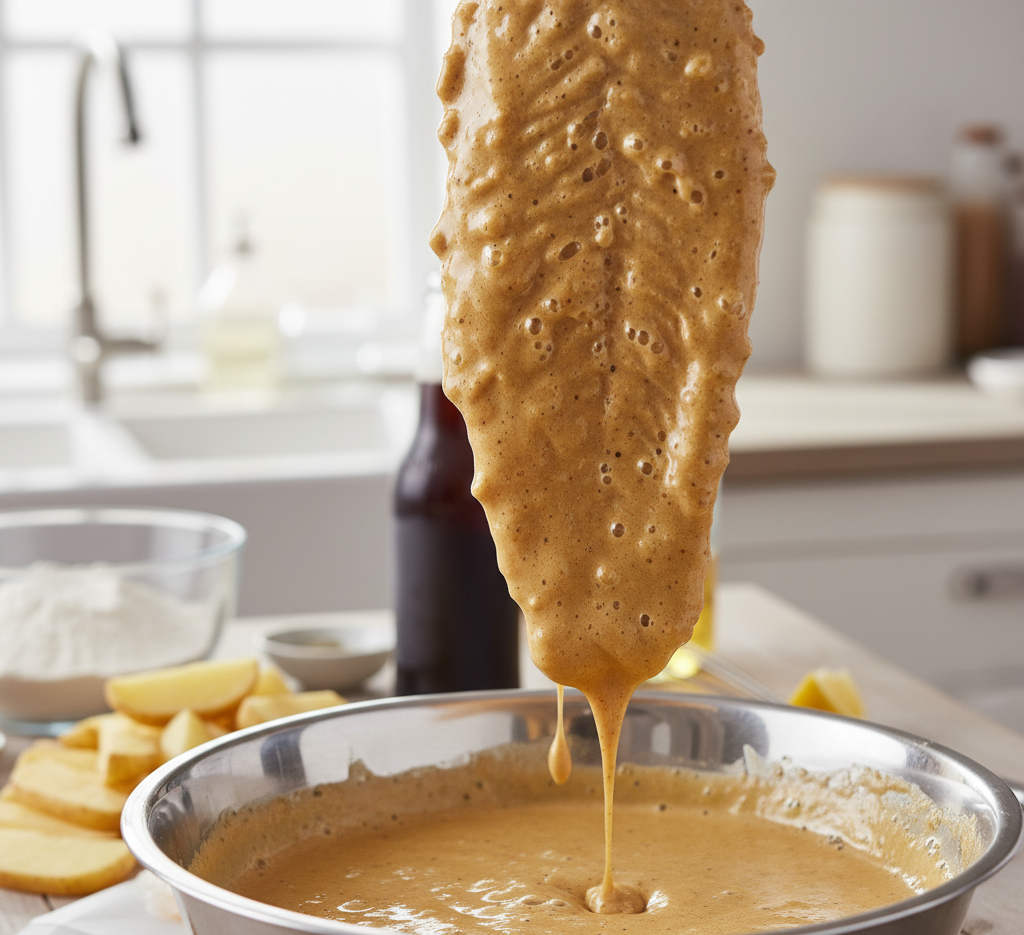
3. Make the Beer Batter
In a bowl, whisk together flour, baking powder, paprika, salt, and pepper. Gradually whisk in cold beer until smooth.
4. Prepare the Fish
Pat the fish dry and lightly coat it in flour. This helps the batter stick better.
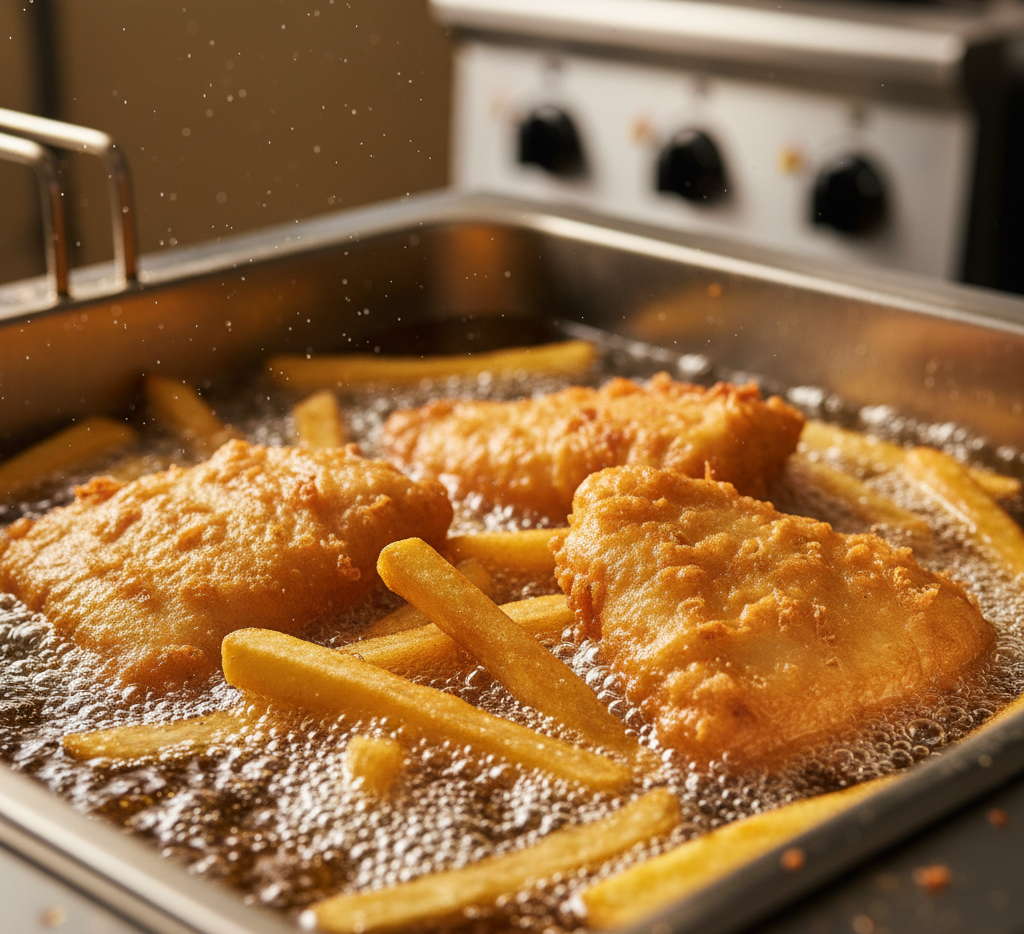
5. Fry the Fish
Heat oil to 350°F. Dip the fish into the batter, then carefully place it into the hot oil. Fry for 4–6 minutes until golden brown and crispy.
6. Second Fry for Chips
Increase oil temperature to 375°F and fry the potatoes again until golden and crispy.
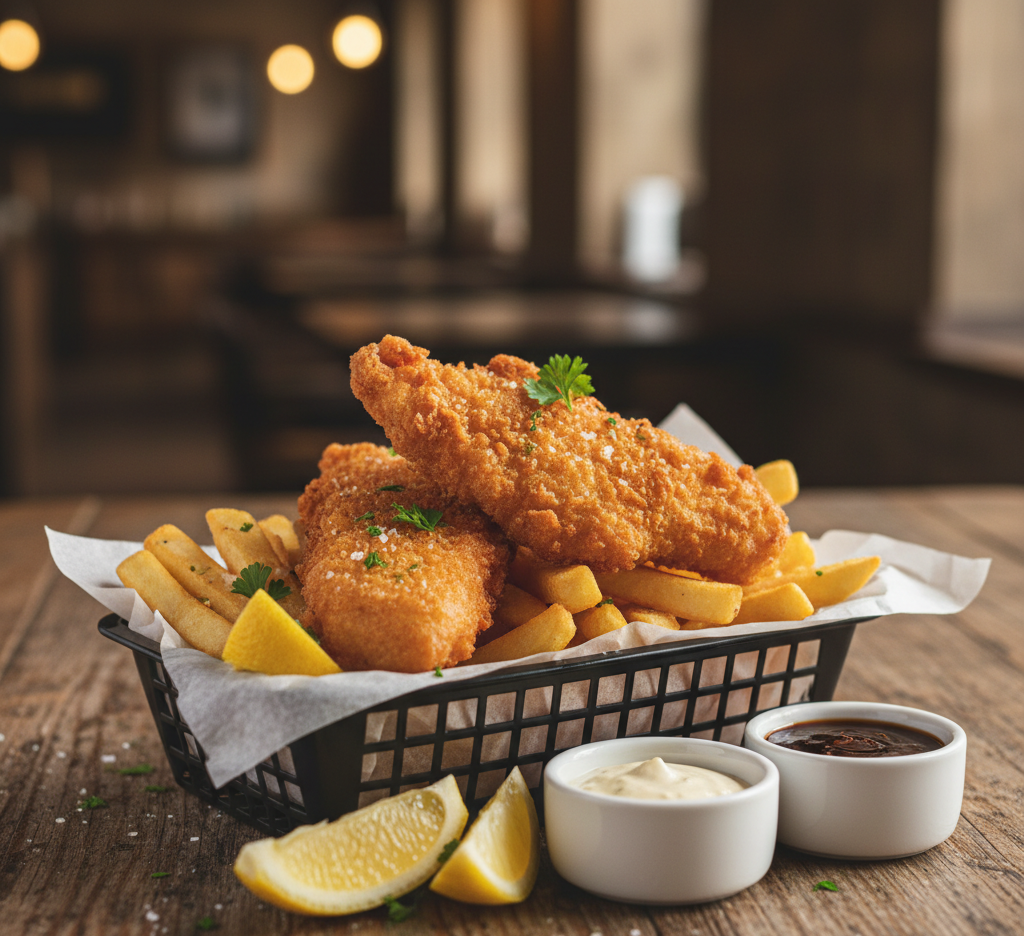
7. Drain and Serve
Remove fish and chips from oil and place on paper towels. Season with salt immediately and serve hot with lemon wedges.
Tips for Perfect Results
To master crispy beer battered fish and chips, keep these expert tips in mind:
- Keep the batter cold: Cold batter creates a crispier coating
- Dry the fish היט: Moisture prevents proper crisping
- Use a thermometer: Maintain consistent oil temperature
- Don’t overcrowd the fryer: Fry in batches for best results
Variations
This crispy beer battered fish and chips recipe is easy to customize.
You can swap beer for sparkling water if you prefer a non-alcoholic version. For a spicier twist, add cayenne pepper or hot sauce to the batter. You can also experiment with different fish varieties or even shrimp.
For a healthier option, try baking the fries or using an air fryer, though the texture will differ slightly from traditional frying.
What to Serve With It
Classic beer battered fish and chips are best served with simple, traditional sides.
- Tartar sauce
- Malt vinegar
- Coleslaw
- Pickles
- Lemon wedges
These accompaniments enhance the flavor without overpowering the crispy fish.
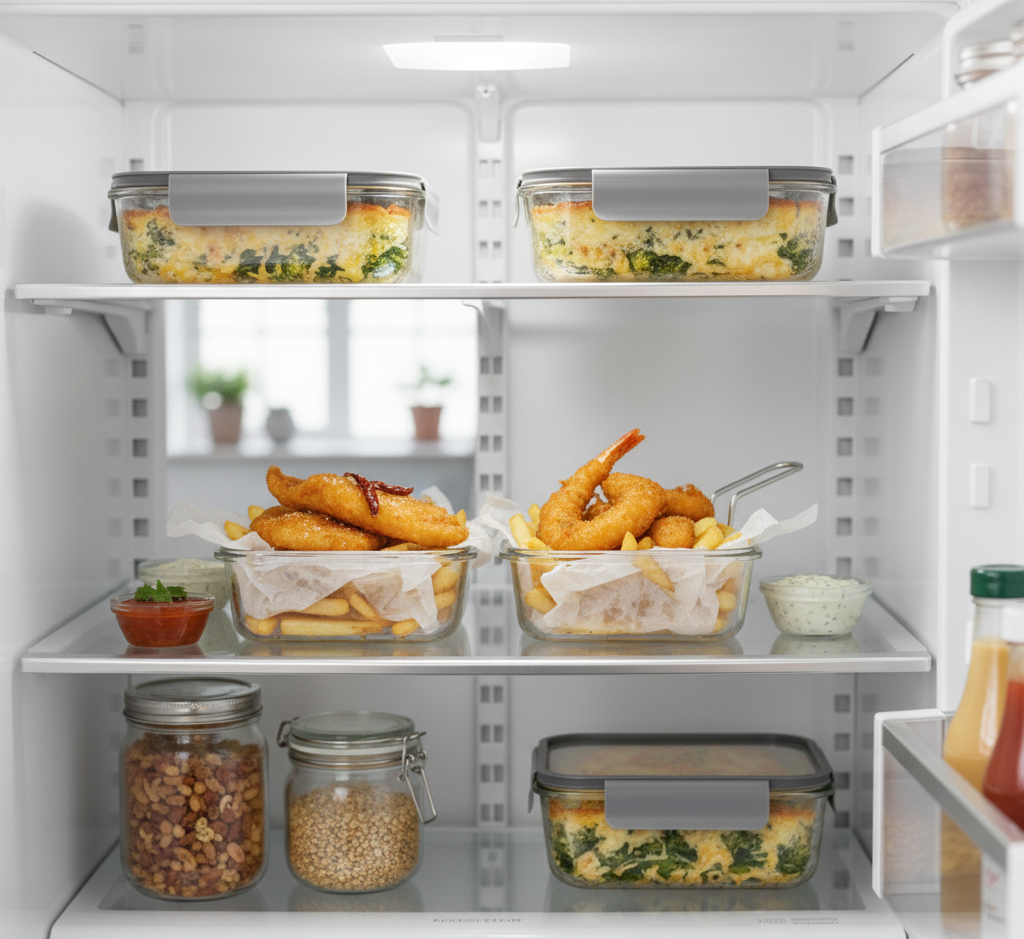
Storage & Reheating
While crispy beer battered fish and chips are best enjoyed fresh, leftovers can still be saved.
Store in an airtight container in the refrigerator for up to 2 days. Reheat in the oven at 375°F to restore crispiness. Avoid microwaving, as it can make the batter soggy.
Common Mistakes to Avoid
Even simple frying recipes can go wrong without proper technique.
Avoid using warm batter, as it won’t crisp properly. Don’t skip drying the fish, and make sure your oil is hot enough before frying. Also, resist the urge to flip the fish too early—let it develop that golden crust first.
FAQs
What’s the best fish for beer battered fish and chips?
Cod and haddock are the most popular choices due to their mild flavor and flaky texture.
Can I make this without beer?
Yes, you can substitute sparkling water or club soda for similar results.
Why isn’t my batter crispy?
This usually happens if the batter isn’t cold or the oil temperature is too low.
Can I bake instead of fry?
You can, but the texture won’t be as crispy as traditional frying.
Final Thoughts
This Crispy Beer Battered Fish and Chips (Pub-Style Recipe) brings all the charm of your favorite pub straight into your kitchen. With its crunchy golden coating, tender fish, and perfectly crisp fries, it’s a dish that never goes out of style.
Once you master this recipe, you’ll find yourself coming back to it whenever you want a comforting, crowd-pleasing meal. Serve it hot, add your favorite sides, and enjoy a true classic done right.