Easy Berry Cream Cheese Stuffed Crescent Rolls

If you’re craving a quick, bakery-style treat without spending hours in the kitchen, these Easy Berry Cream Cheese Stuffed Crescent Rolls are exactly what you need. Flaky, golden crescent dough wraps around a luscious cream cheese filling and bursts of sweet, juicy berries—creating a dessert (or breakfast!) that feels both indulgent and effortless.

This recipe is perfect for busy mornings, last-minute guests, or when you just want something sweet without the hassle. Using refrigerated crescent roll dough cuts down prep time dramatically, while the creamy berry filling adds a homemade touch that tastes truly special. Whether you’re serving these at brunch or enjoying them with your morning coffee, they’re guaranteed to impress.

Why You’ll Love This Recipe

These easy berry cream cheese stuffed crescent rolls are a dream come true for anyone who loves simple yet delicious recipes. They strike the perfect balance between convenience and flavor, making them a staple you’ll return to again and again.

The combination of tangy cream cheese and sweet berries creates a rich, satisfying filling that pairs beautifully with the buttery, flaky crescent dough. Plus, they’re incredibly versatile—you can customize the filling based on what you have on hand.

  • Ready in under 30 minutes
  • Uses minimal, easy-to-find ingredients
  • Perfect for breakfast, brunch, or dessert
  • Kid-friendly and crowd-pleasing
  • Easily customizable with different fruits

Ingredients

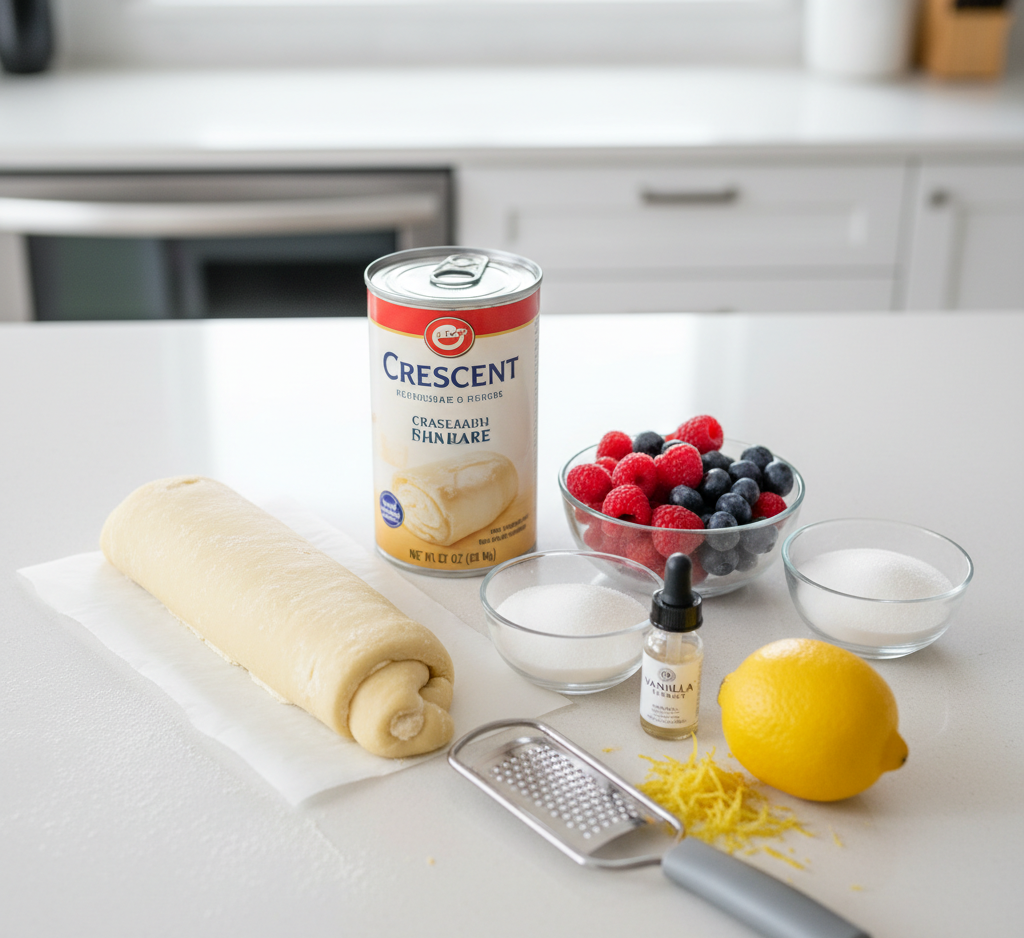
To make these easy berry cream cheese stuffed crescent rolls, you’ll need:

  • 1 can refrigerated crescent roll dough
  • 4 oz cream cheese, softened
  • 2–3 tablespoons granulated sugar
  • 1/2 teaspoon vanilla extract
  • 1/2 cup mixed berries (strawberries, blueberries, raspberries)
  • 1 tablespoon powdered sugar (for garnish)
  • Optional: lemon zest for extra flavor

Ingredient Notes

The simplicity of these easy berry cream cheese stuffed crescent rolls means each ingredient plays an important role.

Crescent roll dough provides that signature flaky texture without the need for homemade pastry. Cream cheese should be softened to ensure a smooth, creamy filling that spreads easily. Fresh berries are ideal for the best flavor and texture, but frozen berries can work in a pinch—just be sure to thaw and drain them היט to avoid excess moisture.

Adding a touch of vanilla enhances the sweetness, while optional lemon zest brightens the entire filling with a subtle citrus note.

Step-by-Step Instructions

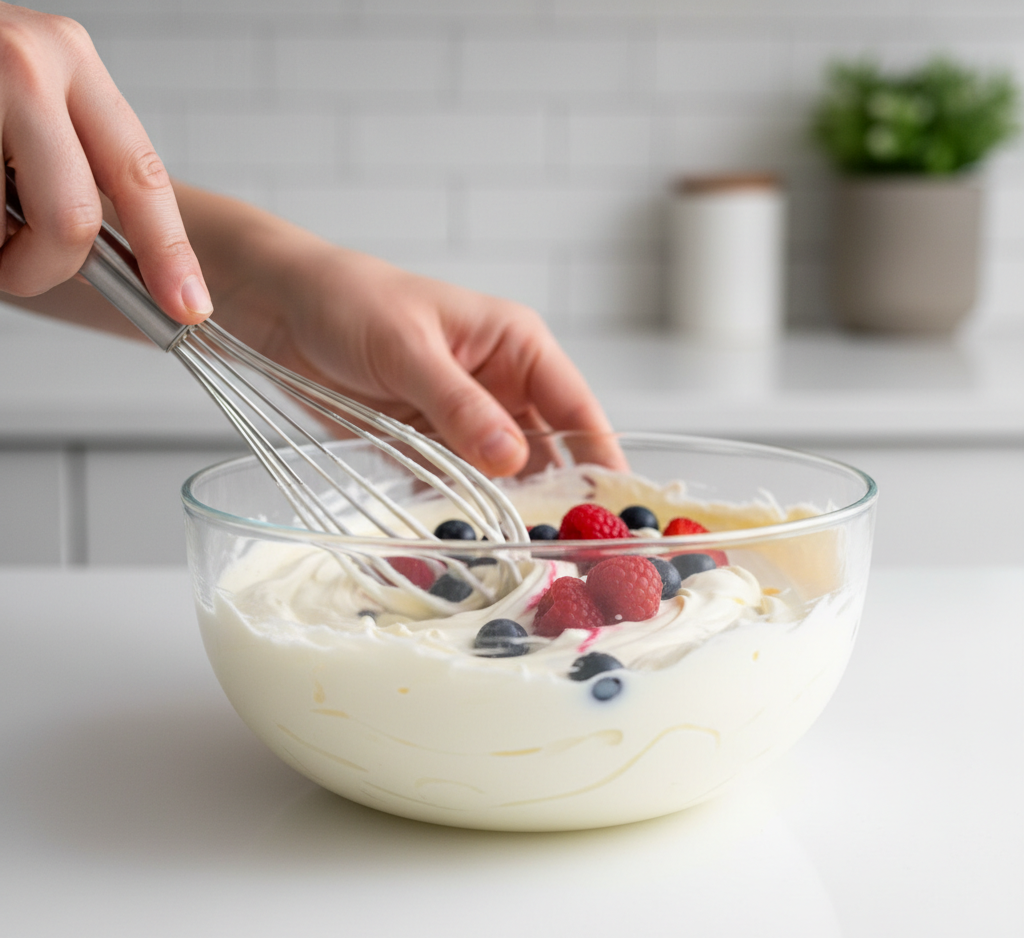
1. Prepare the Filling

In a medium bowl, mix the softened cream cheese, sugar, and vanilla extract until smooth and creamy.

2. Add the Berries

Gently fold in the berries, being careful not to crush them too much. You want small bursts of fruit in every bite.

3. Roll Out the Dough

Unroll the crescent dough and separate it into individual triangles along the perforated lines.

4. Fill the Crescent Rolls

Place a spoonful of the cream cheese berry mixture onto the wide end of each triangle.

5. Roll and Seal

Carefully roll each triangle from the wide end to the tip, enclosing the filling. Place them on a lined baking sheet.

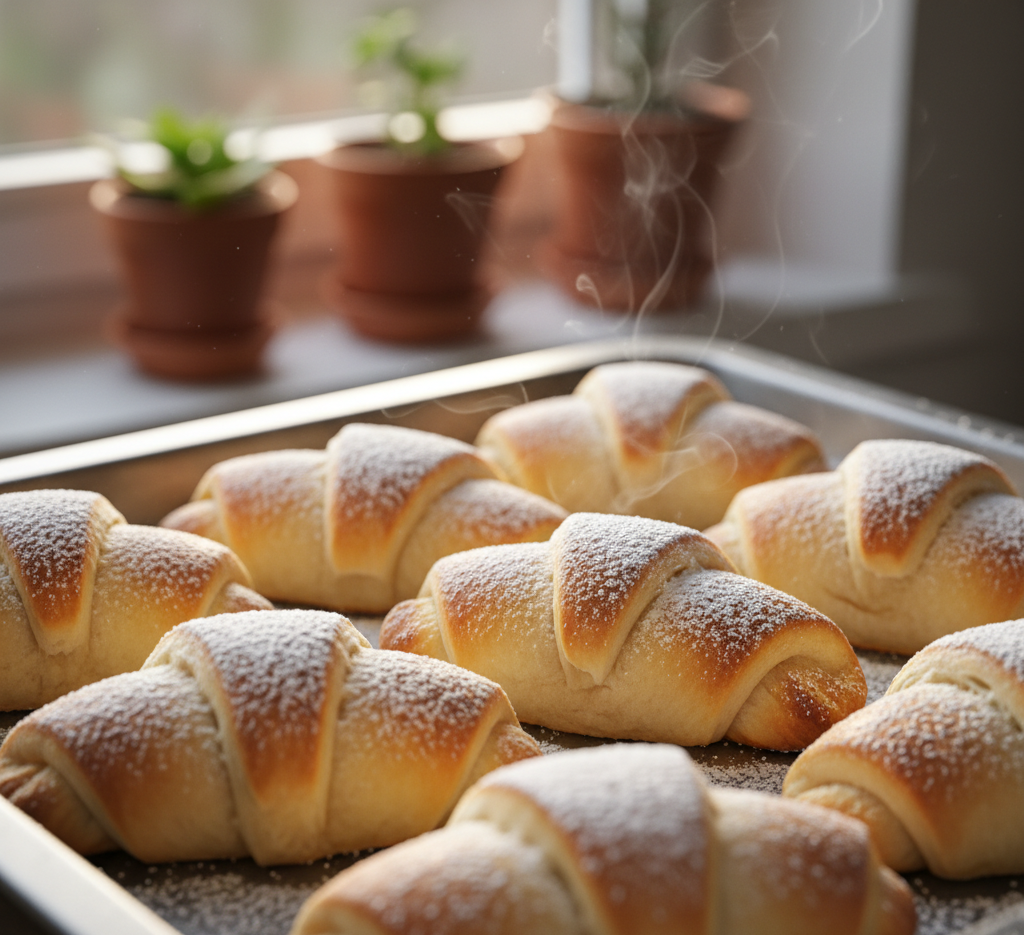
6. Bake to Perfection

Bake in a preheated oven at 375°F for 10–13 minutes, or until golden brown and flaky.

7. Finish and Serve

Let them cool slightly, then dust with powdered sugar before serving.

Tips for Perfect Results

To get the best results from your easy berry cream cheese stuffed crescent rolls, keep these tips in mind:

  • Don’t overfill: Too much filling can cause leaks أثناء baking
  • Seal edges היט: Prevents the filling from escaping
  • Use parchment paper: Makes cleanup easy and prevents sticking
  • Chill slightly before baking: Helps maintain shape

These small steps can make a big difference in the final presentation and texture.

Variations

One of the best things about this recipe is how easy it is to customize.

You can switch up the berries depending on the season—try blackberries, cherries, or even diced peaches. For a richer dessert, add chocolate chips to the filling. Want a tangier flavor? Mix in a little Greek yogurt with the cream cheese.

For a more indulgent twist, drizzle the baked rolls with a simple glaze made from powdered sugar and milk.

What to Serve With It

These easy berry cream cheese stuffed crescent rolls are incredibly versatile and pair well with many dishes.

Serve them alongside:

  • Fresh fruit salad
  • Scrambled eggs or omelets
  • Coffee or tea
  • Yogurt parfaits
  • Smoothies

They work beautifully as part of a brunch spread or as a sweet snack any time of day.

Storage & Reheating

If you have leftovers (which isn’t always likely!), these easy berry cream cheese stuffed crescent rolls store well.

Keep them in an airtight container in the refrigerator for up to 3 days. To reheat, warm them in the oven at 300°F for a few minutes or microwave briefly.

For longer storage, you can freeze them after baking. Just thaw and reheat when ready to enjoy.

Common Mistakes to Avoid

Even simple recipes can have a few pitfalls.

Avoid using overly juicy berries without draining them, as excess moisture can make the rolls soggy. Don’t skip softening the cream cheese—it’s essential for a smooth filling. And be careful not to overbake, as this can dry out the pastry.

Paying attention to these details will ensure your crescent rolls come out perfect every time.

FAQs

Can I use frozen berries?

Yes, but make sure to thaw and drain them well before using.

Can I make these ahead of time?

You can assemble them ahead and refrigerate until ready to bake.

Can I use low-fat cream cheese?

Yes, though the filling may be slightly less rich and creamy.

How do I prevent the filling from leaking?

Avoid overfilling and make sure to roll the dough tightly.

Final Thoughts

These Easy Berry Cream Cheese Stuffed Crescent Rolls are proof that simple ingredients can create something truly special. With their flaky exterior, creamy filling, and bursts of sweet berries, they’re the kind of treat that feels both comforting and indulgent.

Whether you’re making them for a weekend brunch, a quick dessert, or just because you’re craving something sweet, this recipe delivers every time. Once you try them, they’re sure to become a favorite in your kitchen rotation.

Easy Honey Garlic Pork Chops Recipe (Oven Baked / Grilled Pork Chops)

If you’re searching for a quick, flavorful dinner that feels both comforting and impressive, this Easy Honey Garlic Pork Chops Recipe is exactly what you need. Whether you choose to make oven baked pork chops or fire up the grill, this recipe delivers juicy, tender meat coated in a sticky, sweet-and-savory honey garlic glaze that’s absolutely irresistible.

Perfect for busy weeknights or weekend cookouts, these honey garlic pork chops come together with simple pantry ingredients and minimal prep time. The balance of rich garlic, sweet honey, and savory seasoning creates a bold flavor profile that works beautifully whether baked in the oven or grilled outdoors.

Why You’ll Love This Recipe

This easy honey garlic pork chops recipe is one of those meals you’ll find yourself making again and again. It’s approachable, versatile, and packed with flavor that tastes like it came from a restaurant kitchen.

One of the biggest advantages is flexibility. You can bake the pork chops in the oven for a hands-off approach or grill them for a smoky, charred finish. Either way, the results are consistently delicious.

  • Ready in under 30 minutes
  • Uses simple pantry staples
  • Works for oven baked or grilled pork chops
  • Perfect balance of sweet and savory flavors
  • Great for family dinners or entertaining

Ingredients

To make these easy honey garlic pork chops, you’ll need:

  • 4 pork chops (bone-in or boneless)
  • 1/3 cup honey
  • 4 cloves garlic, minced
  • 2 tablespoons olive oil
  • 1/4 cup soy sauce
  • 1 tablespoon Dijon mustard
  • 1 teaspoon paprika
  • 1/2 teaspoon black pepper
  • 1/2 teaspoon salt
  • Fresh parsley (optional, for garnish)

Ingredient Notes

When making the best oven baked or grilled pork chops, ingredient quality makes a difference.

Thicker pork chops (about 1 inch thick) are ideal because they stay juicy during cooking. Bone-in pork chops tend to have more flavor, while boneless chops cook a bit faster and are easier to serve.

Honey acts as both a sweetener and a glaze base, helping the pork chops caramelize beautifully. Fresh garlic is essential for that bold, aromatic flavor that defines this dish. Soy sauce adds umami depth, while Dijon mustard gives a subtle tang that balances the sweetness.

Step-by-Step Instructions

How to Make Honey Garlic Pork Chops

1. Prepare the Marinade

In a bowl, whisk together honey, garlic, olive oil, soy sauce, Dijon mustard, paprika, salt, and pepper until fully combined.

2. Marinate the Pork Chops

Place the pork chops in a shallow dish or zip-top bag and pour the marinade over them. Let them marinate for at least 30 minutes, or up to 4 hours for deeper flavor.

Oven Baked Method

3. Preheat and Prepare

Preheat your oven to 400°F. Place the marinated pork chops on a lined baking sheet or in a baking dish.

4. Bake

Bake for 20–25 minutes, depending on thickness, until the internal temperature reaches 145°F. Spoon extra sauce over the chops halfway through cooking.

Making perfect easy honey garlic pork chops is simple, but these expert tips will take them to the next level.

  • Don’t skip marinating: Even 30 minutes adds incredible flavor
  • Use a meat thermometer: Ensures perfectly cooked, juicy pork
  • Avoid high heat too long: Honey can burn quickly
  • Let the meat rest: Rest for 5 minutes before serving to retain juices

Variations

This honey garlic pork chops recipe is easy to customize based on your preferences.

For a spicy version, add chili flakes or sriracha to the marinade. If you want a citrus twist, squeeze in fresh lemon or orange juice. You can also swap honey for maple syrup for a slightly different sweetness.

For a more herb-forward version, add fresh thyme, rosemary, or oregano to the marinade.

What to Serve With It

These oven baked or grilled pork chops pair beautifully with a variety of side dishes.

  • Garlic mashed potatoes
  • Steamed rice or quinoa
  • Roasted vegetables (broccoli, carrots, asparagus)
  • Fresh green salad
  • Buttered corn on the cob

The rich glaze makes these pork chops especially delicious when paired with sides that can soak up the sauce.

Storage & Reheating

Leftover easy honey garlic pork chops store well and make great next-day meals.

Store in an airtight container in the refrigerator for up to 4 days. To freeze, place in a freezer-safe container for up to 2 months.

Reheat gently in the microwave or on the stovetop with a splash of water or broth to keep the sauce from drying out.

Common Mistakes to Avoid

Even with a simple recipe like this, a few mistakes can affect your results.

Overcooking is the most common issue, leading to dry pork chops. Another mistake is not monitoring the glaze—because of the honey, it can burn quickly, especially on the grill.

Also, avoid skipping the resting step after cooking. This helps the juices redistribute, keeping the pork tender and juicy.

FAQs

Can I use boneless pork chops?

Yes, boneless pork chops work great and cook slightly faster than bone-in.

How long should I marinate the pork chops?

At least 30 minutes, but up to 4 hours for maximum flavor.

Can I cook these pork chops in advance?

Yes, you can cook them ahead and reheat gently when ready to serve.

How do I know when pork chops are done?

Use a meat thermometer—145°F is the safe internal temperature.

Final Thoughts

This Easy Honey Garlic Pork Chops Recipe (Oven Baked / Grilled Pork Chops) is the perfect combination of convenience and flavor. Whether you’re cooking indoors or grilling outside, you’ll end up with juicy, tender pork chops coated in a rich, caramelized glaze that’s impossible to resist.

With simple ingredients, flexible cooking methods, and bold flavor, this recipe is a must-have in your weekly rotation. Once you try it, it’s sure to become a favorite for both quick dinners and special occasions alike.

Slow Cooker Honey Garlic Butter Pork Chops

If you’re looking for a dinner that feels indulgent yet requires minimal effort, these Slow Cooker Honey Garlic Butter Pork Chops are about to become your new go-to recipe. This dish combines the rich, savory flavor of pork chops with the sweet and sticky goodness of honey, garlic, and butter—creating a mouthwatering meal that practically cooks itself.

There’s something magical about letting your slow cooker do all the heavy lifting. As the pork chops simmer gently for hours, they absorb every bit of that luscious honey garlic butter sauce, turning incredibly tender and juicy. Whether you’re feeding your family on a busy weeknight or preparing a cozy Sunday dinner, this recipe delivers comfort and flavor in every bite.

Why You’ll Love This Recipe

This slow cooker pork chop recipe checks all the boxes for a perfect home-cooked meal. It’s simple, satisfying, and packed with flavor.

  • Effortless cooking: Just set it and forget it
  • Incredibly tender pork: Falls apart with a fork
  • Sweet and savory balance: Honey and garlic create depth
  • Family-friendly: Loved by both kids and adults
  • Minimal cleanup: One pot, easy win

You’ll also love how versatile this recipe is. It pairs beautifully with a variety of side dishes, making it easy to adapt based on what you have on hand.


Ingredients

To make these slow cooker honey garlic butter pork chops, you’ll need:

  • 4 boneless or bone-in pork chops
  • 1/3 cup honey
  • 4 cloves garlic, minced
  • 1/4 cup unsalted butter, melted
  • 1/4 cup soy sauce
  • 1 teaspoon black pepper
  • 1 teaspoon paprika
  • 1/2 teaspoon salt (adjust to taste)
  • 1 tablespoon cornstarch (optional, for thickening)
  • 2 tablespoons water (optional, for slurry)
  • Fresh parsley for garnish

Ingredient Notes

Choosing the right ingredients can make a big difference in flavor and texture.

Pork chops:
Bone-in pork chops tend to stay juicier during slow cooking, but boneless works just as well if that’s what you have.

Honey:
Use a good-quality honey for the best flavor. It brings sweetness and helps create that sticky glaze.

Garlic:
Fresh garlic is key here. It adds bold, aromatic depth that powdered garlic just can’t match.

Butter:
Unsalted butter allows you to control the saltiness of the dish while adding richness.

Step-by-Step Instructions

1. Prepare the Sauce

In a medium bowl, whisk together the honey, melted butter, soy sauce, minced garlic, paprika, salt, and pepper until fully combined.

2. Arrange the Pork Chops

Place the pork chops in the bottom of your slow cooker in a single layer if possible.

3. Add the Sauce

Pour the honey garlic butter mixture evenly over the pork chops, making sure each piece is well coated.

4. Cook Low and Slow

Cover and cook on low for 5–6 hours or high for 3–4 hours, until the pork chops are tender and fully cooked.

5. Optional: Thicken the Sauce

If you prefer a thicker sauce, mix cornstarch with water and stir it into the slow cooker during the last 30 minutes of cooking.

6. Garnish and Serve

Sprinkle with freshly chopped parsley before serving for a pop of color and freshness.

Tips for Perfect Results

Getting the most out of your slow cooker honey garlic butter pork chops is easy with these tips:

  • Sear first (optional): For added flavor, quickly sear the pork chops in a skillet before adding them to the slow cooker.
  • Don’t overcook: Pork chops can become dry if cooked too long, even in a slow cooker.
  • Use a meat thermometer: Aim for an internal temperature of 145°F.
  • Layer properly: Avoid stacking pork chops too tightly to ensure even cooking.

Variations

This recipe is wonderfully adaptable depending on your taste preferences.

Spicy Honey Garlic Pork Chops
Add red pepper flakes or a dash of hot sauce for a kick.

Creamy Version
Stir in a splash of heavy cream at the end for a richer sauce.

Herb-Infused
Add thyme or rosemary for an earthy flavor twist.

Low-Sodium Option
Use low-sodium soy sauce to control salt levels without sacrificing taste.

What to Serve With It

These slow cooker honey garlic butter pork chops pair beautifully with a variety of sides:

  • Creamy mashed potatoes
  • Steamed rice or jasmine rice
  • Roasted vegetables (carrots, broccoli, Brussels sprouts)
  • Buttered noodles
  • Fresh green salad

The sauce is so good you’ll want something to soak it up—trust me on that!


Storage & Reheating

Storage:
Store leftover pork chops in an airtight container in the refrigerator for up to 3–4 days.

Freezing:
You can freeze the cooked pork chops and sauce for up to 2 months. Let them thaw overnight in the fridge before reheating.

Reheating:

  • Microwave: Heat in short intervals, stirring sauce occasionally
  • Stovetop: Reheat gently over low heat with a splash of water or broth

Common Mistakes to Avoid

Even simple recipes can go wrong without a few precautions.

  • Using too little liquid: The sauce is essential for moisture and flavor
  • Skipping seasoning: Pork benefits from well-balanced seasoning
  • Overcrowding the slow cooker: Leads to uneven cooking
  • Overcooking: Results in dry or tough meat

FAQs

Can I use frozen pork chops?

Yes, but it’s best to thaw them first for even cooking and better texture.

Can I make this recipe ahead of time?

Absolutely. You can prep the sauce and pork chops the night before and store them in the fridge until ready to cook.

What’s the best cut of pork for this recipe?

Both bone-in and boneless pork chops work well, but thicker cuts tend to stay juicier.

How do I know when the pork chops are done?

Use a meat thermometer—145°F is the safe internal temperature for pork.

Final Thoughts

These Slow Cooker Honey Garlic Butter Pork Chops are everything you want in a comforting, home-cooked meal: easy, flavorful, and incredibly satisfying. With minimal prep and maximum flavor, this recipe proves that you don’t need complicated techniques to create something truly delicious.

Whether you’re cooking for your family or just want leftovers that actually taste better the next day, this dish delivers every single time. Once you try it, don’t be surprised if it becomes a permanent part of your dinner rotation.