Easy Cajun Smoked Sausage Pasta Recipe – A Flavor-Packed Weeknight Dinner

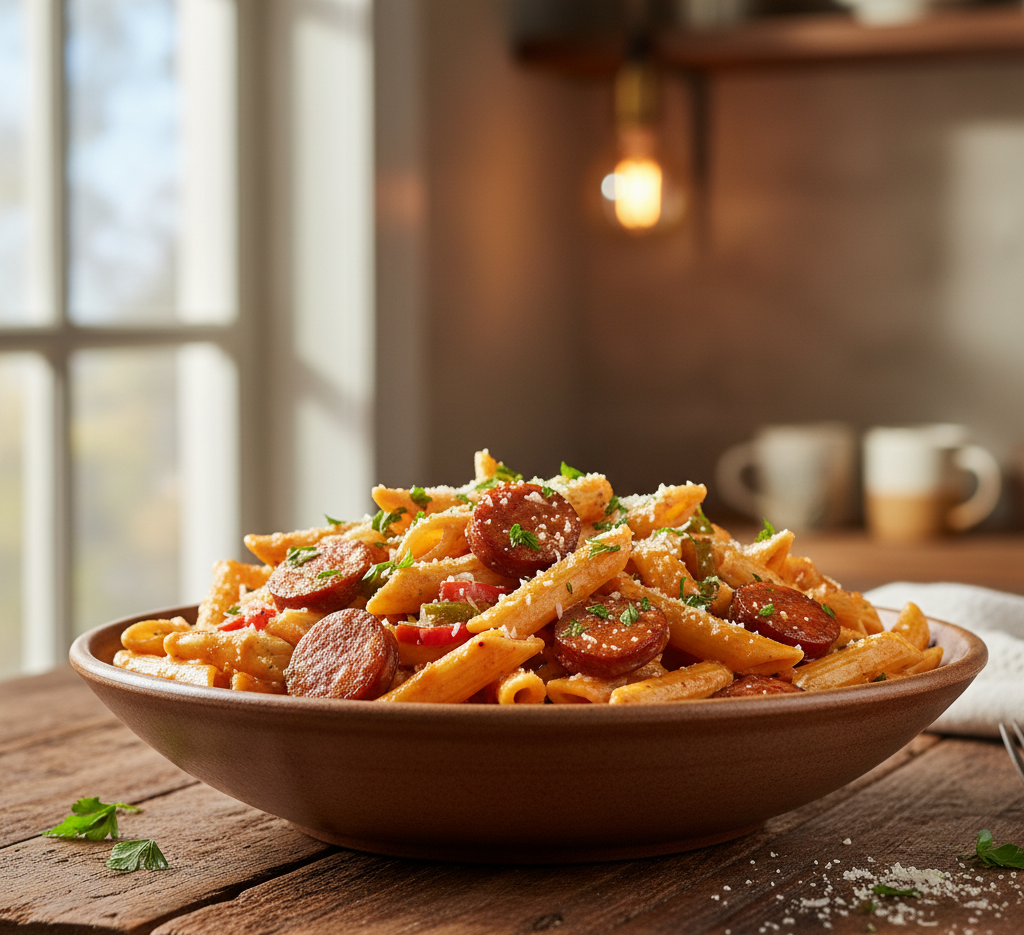
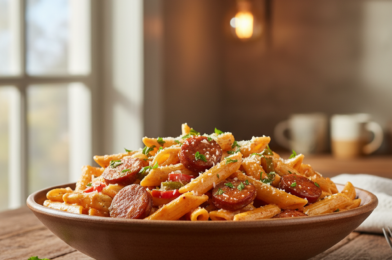
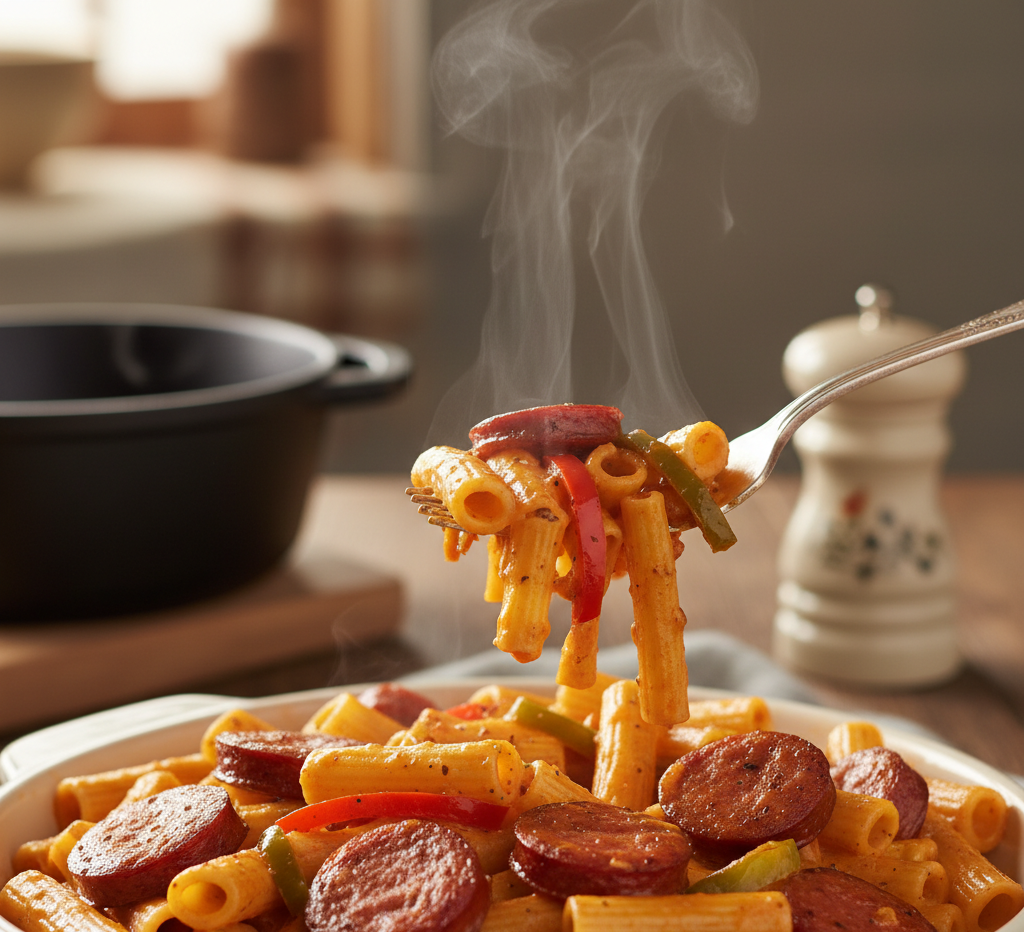
If you’re craving a bold, comforting meal that comes together quickly, this Cajun smoked sausage pasta recipe is exactly what you need. Packed with smoky sausage, creamy sauce, tender pasta, and vibrant Cajun spices, this dish brings the warm flavors of Louisiana straight to your kitchen.

What makes this easy Cajun smoked sausage pasta so popular is its perfect balance of smoky, creamy, and slightly spicy flavors. The sausage adds depth, the Cajun seasoning delivers a gentle kick, and the creamy sauce ties everything together into a rich and satisfying dinner.

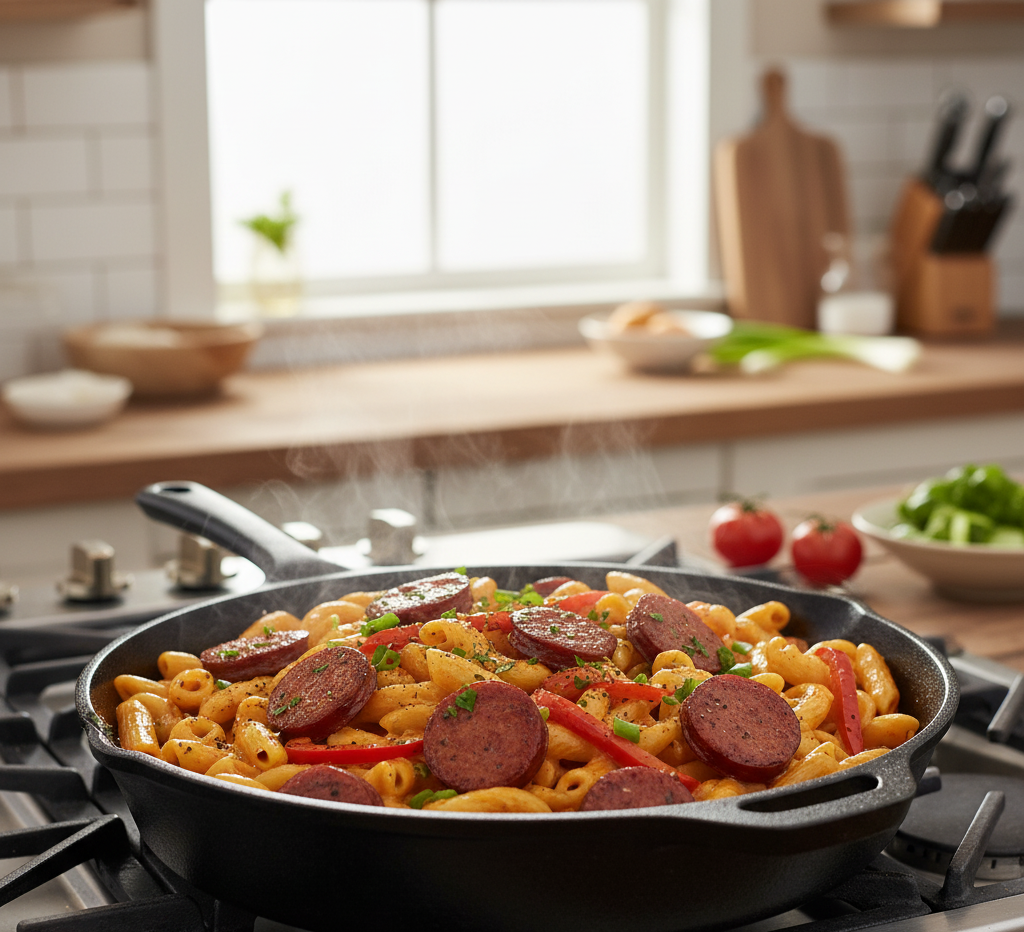
Even better, this recipe is ideal for busy weeknights because it’s simple, quick, and requires minimal cleanup. Most of the cooking happens in one pan, which means less time washing dishes and more time enjoying a delicious homemade meal with family or friends.

Why You’ll Love This Cajun Smoked Sausage Pasta Recipe

There are plenty of reasons this Cajun smoked sausage pasta recipe has become a favorite comfort food dinner for many home cooks.

Here’s why it deserves a place in your weekly meal rotation:

  • Ready in about 30 minutes

  • Made in one skillet

  • Bold Cajun-inspired flavors

  • Perfect for family dinners

  • Budget-friendly ingredients

  • Easy to customize with vegetables or different proteins

Whether you’re cooking for a busy weeknight dinner or looking for a comforting pasta dish with big flavor, this easy Cajun smoked sausage pasta is guaranteed to satisfy.

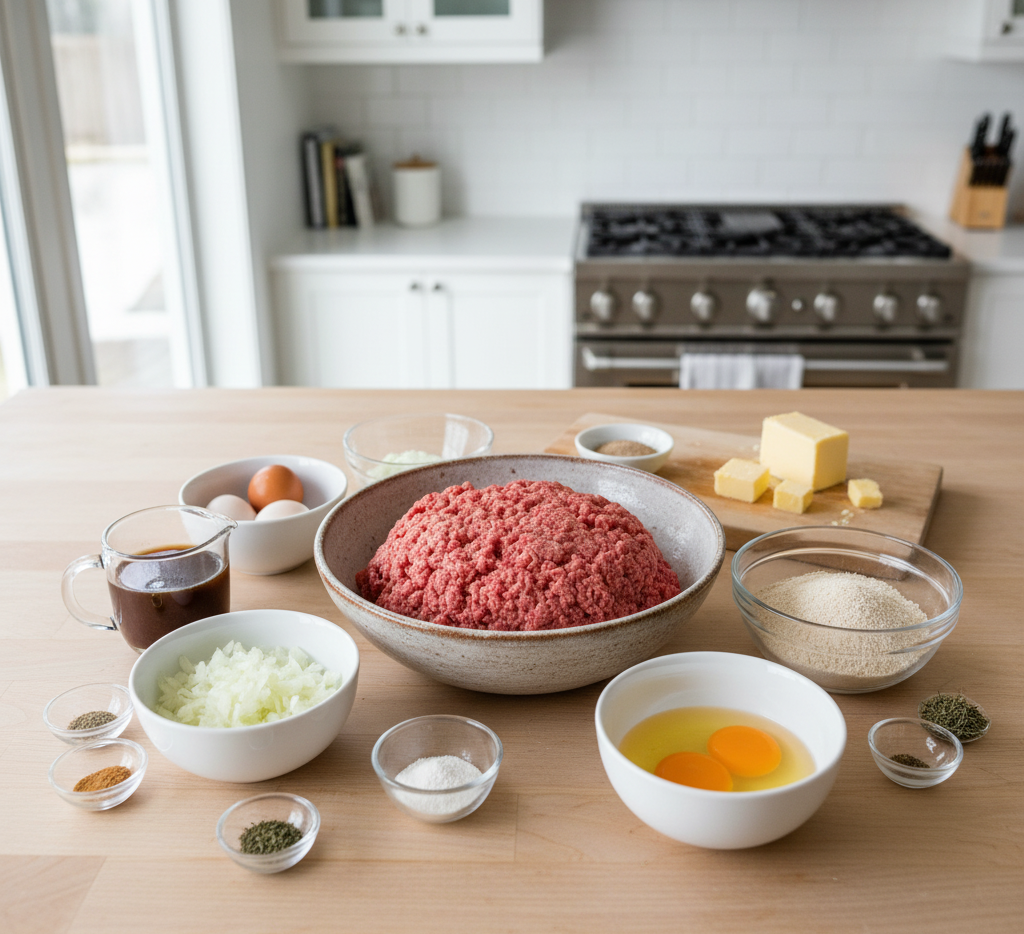
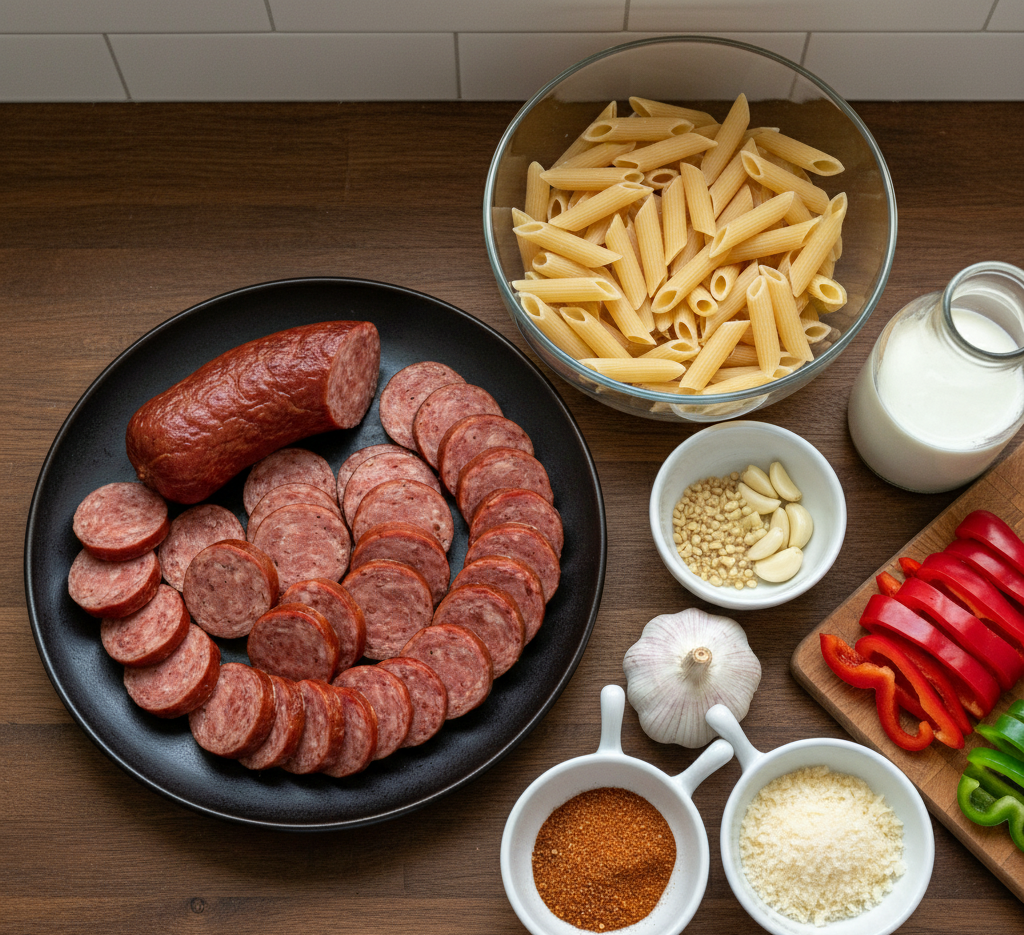
Ingredients for Cajun Smoked Sausage Pasta

This Cajun smoked sausage pasta recipe uses simple pantry ingredients combined with bold seasoning for maximum flavor.

Main Ingredients

  • 12 ounces penne pasta (or similar pasta)

  • 14 ounces smoked sausage, sliced

  • 1 tablespoon olive oil

  • 1 small onion, diced

  • 3 cloves garlic, minced

  • 1 red bell pepper, sliced

  • 2 teaspoons Cajun seasoning

  • 1 cup heavy cream

  • 1 cup chicken broth

  • 1 cup shredded Parmesan cheese

  • Salt and black pepper to taste

  • Fresh parsley for garnish

Ingredient Notes

Using the right ingredients ensures your Cajun smoked sausage pasta turns out rich, flavorful, and perfectly balanced.

Here are a few helpful tips:

  • Smoked sausage like andouille works best for authentic Cajun flavor.

  • Heavy cream creates the silky texture in the sauce.

  • Cajun seasoning delivers the signature spice and smoky flavor.

  • Parmesan cheese adds depth and helps thicken the sauce.

If you enjoy spicy food, you can also add a pinch of red pepper flakes to enhance the Cajun heat.


Step-by-Step Instructions

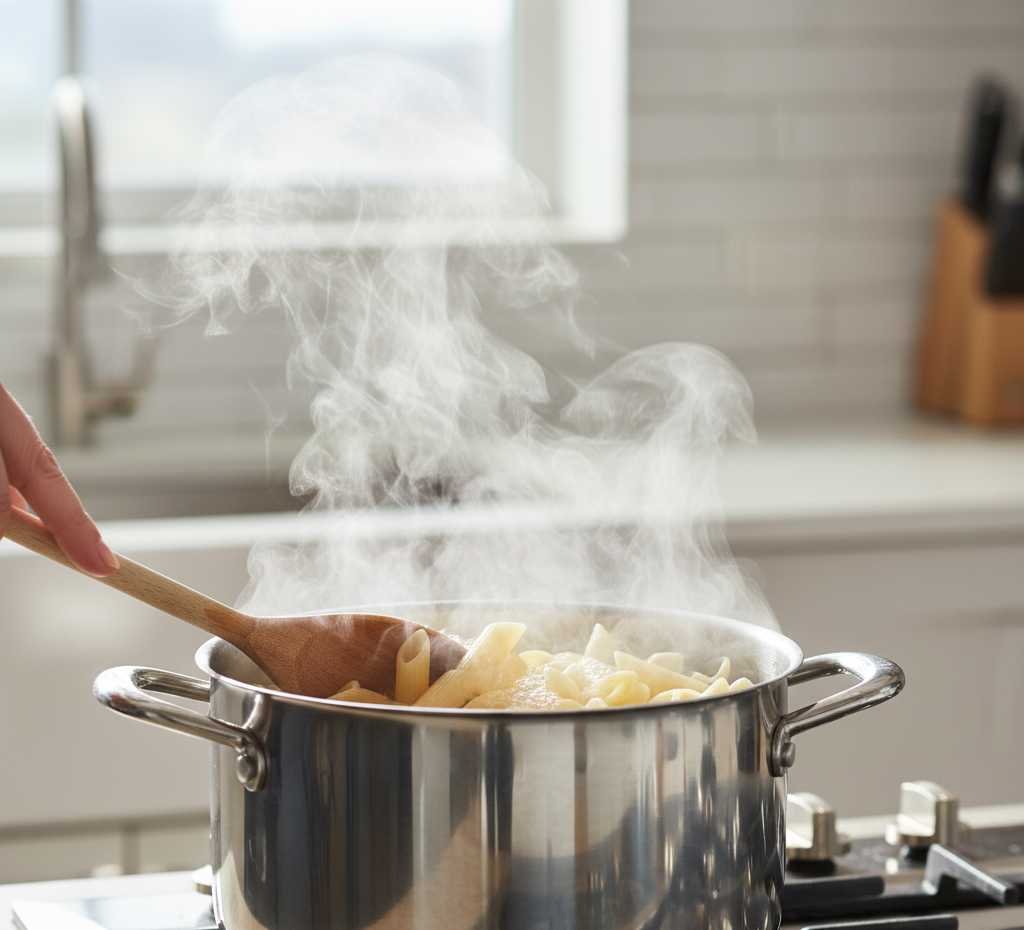
Step 1: Cook the Pasta

Bring a large pot of salted water to a boil and cook the pasta according to the package instructions. Drain and set aside.

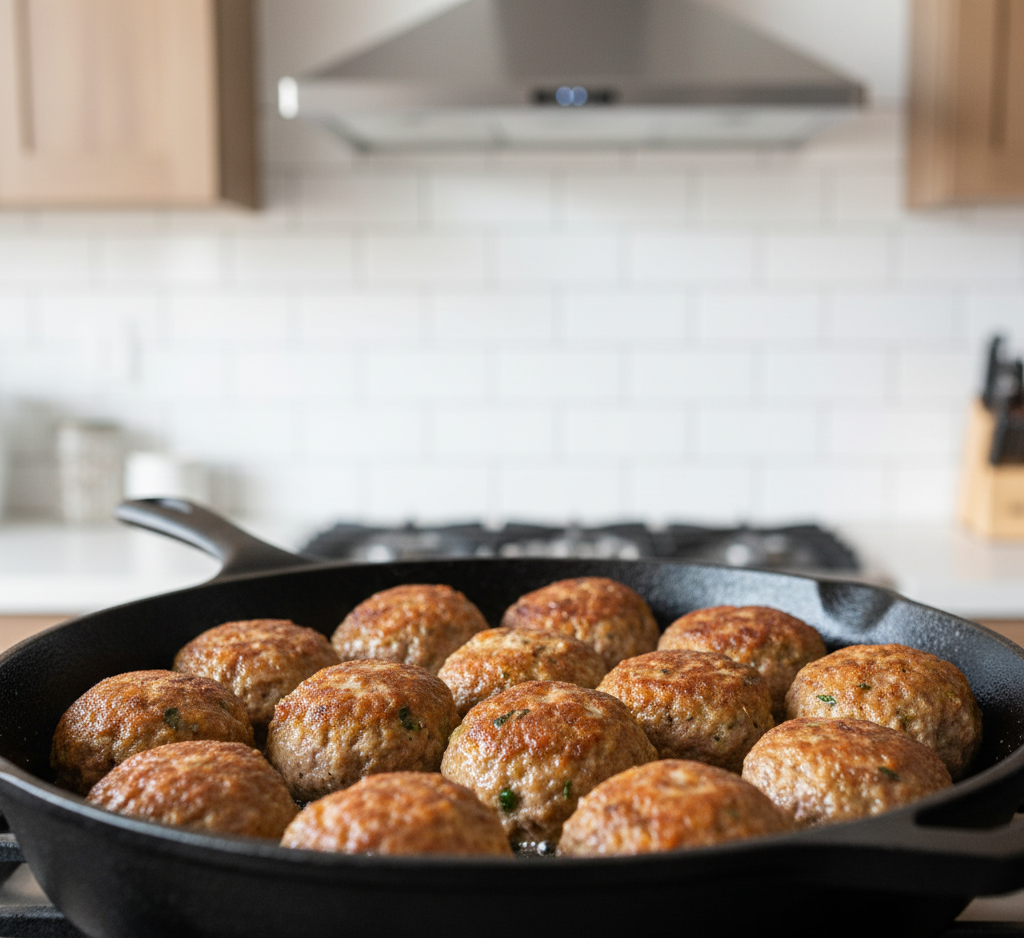
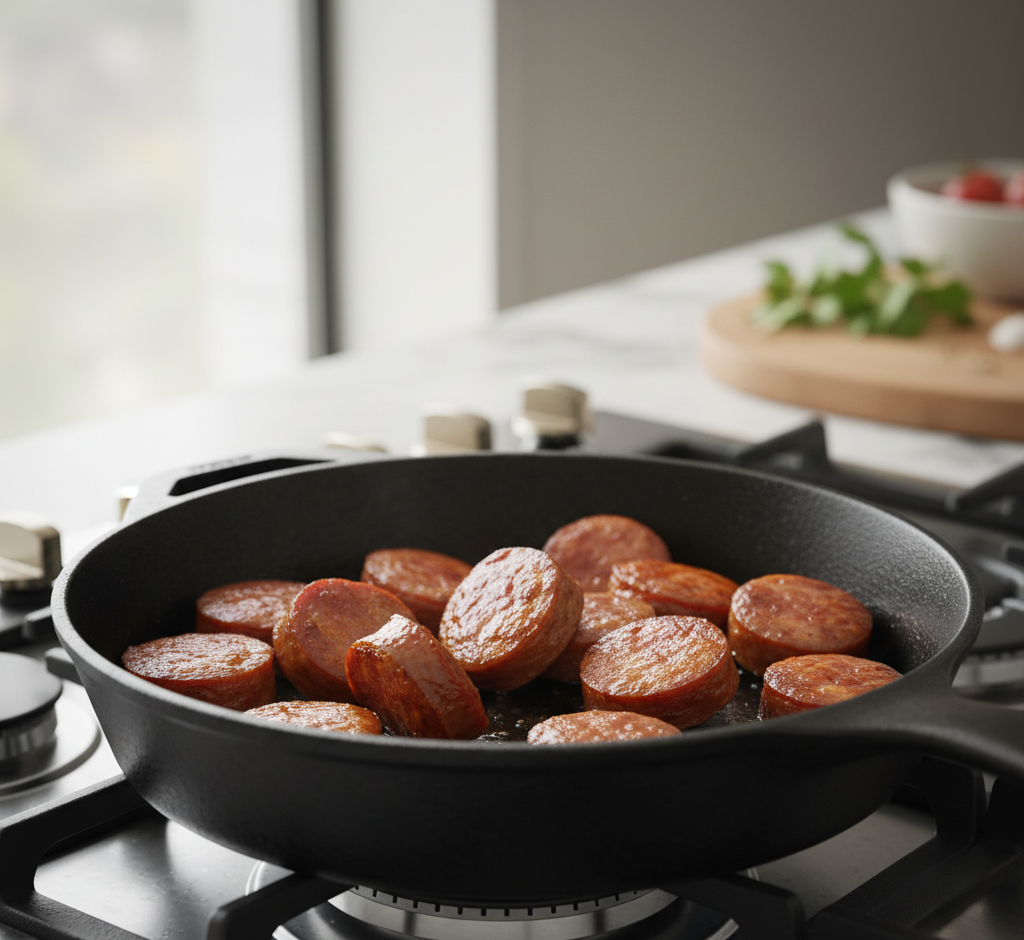
Step 2: Brown the Smoked Sausage

Heat olive oil in a large skillet over medium heat. Add the sliced smoked sausage and cook for 4–5 minutes until lightly browned.

Browning the sausage enhances its smoky flavor and adds depth to the dish.

Step 3: Cook the Vegetables

Add the diced onion and sliced bell pepper to the skillet. Cook for about 4 minutes until softened.

Then stir in the minced garlic and cook for another 30 seconds until fragrant.

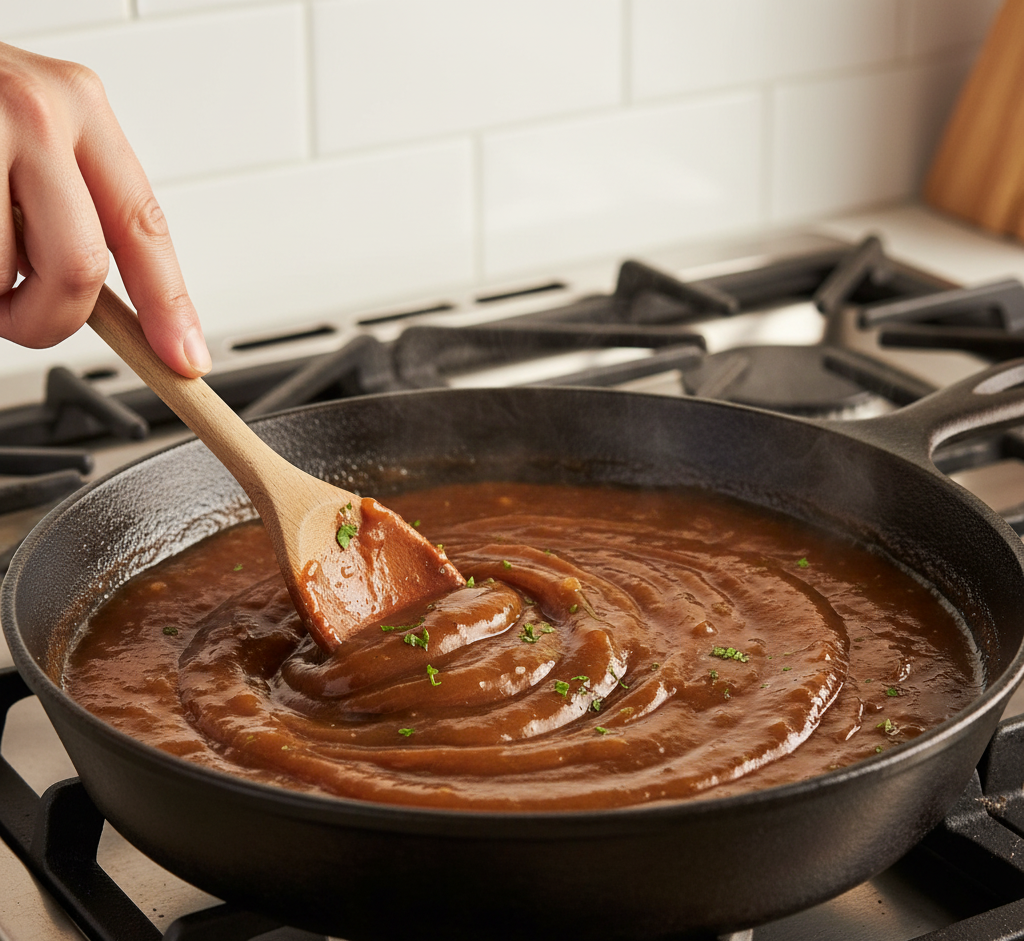
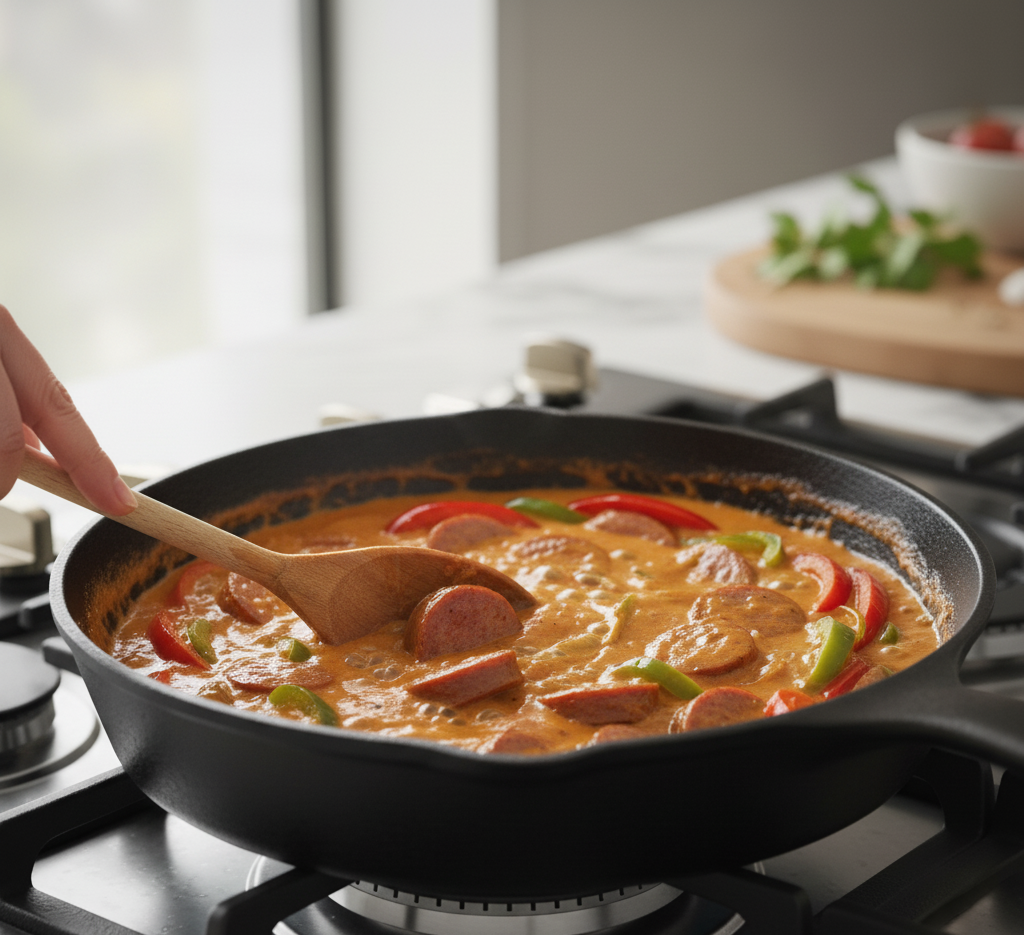
Step 4: Build the Cajun Sauce

Sprinkle the Cajun seasoning over the sausage and vegetables. Pour in the chicken broth and heavy cream.

Let the mixture simmer for about 5 minutes so the flavors can combine and the sauce begins to thicken.

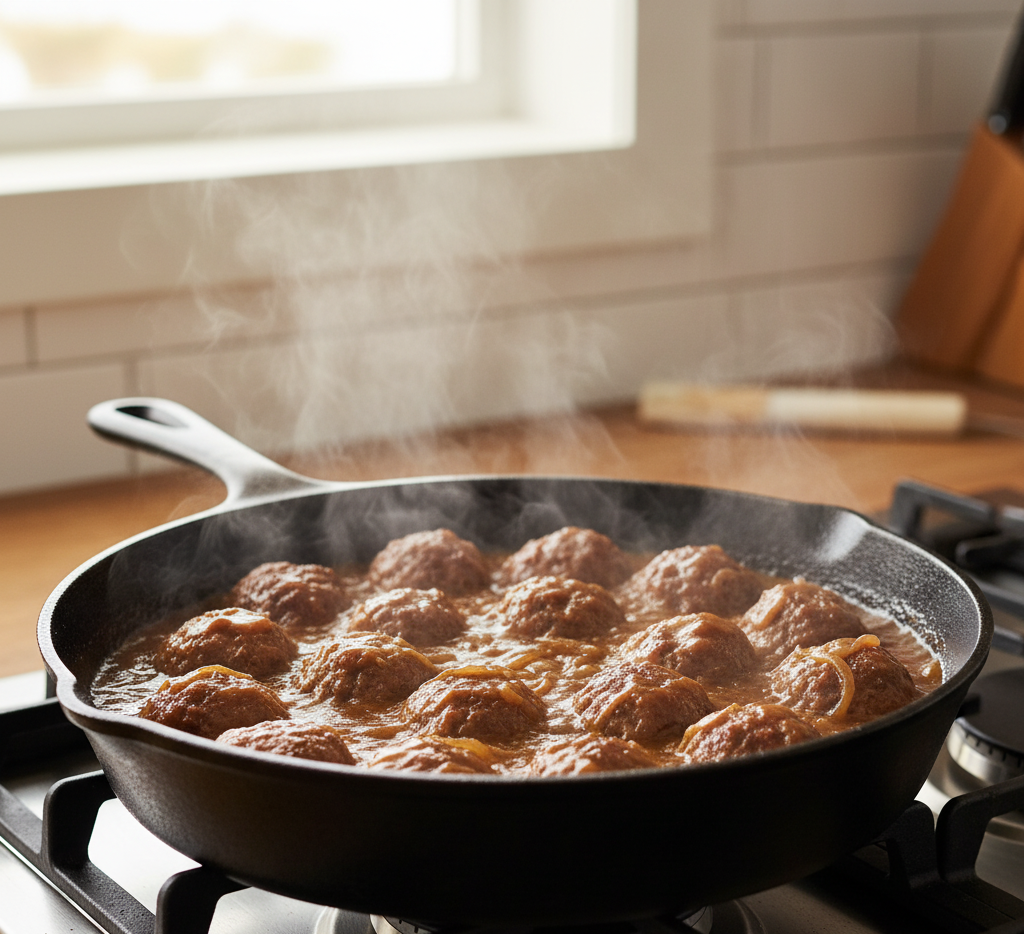
Step 5: Combine Pasta and Sauce

Add the cooked pasta to the skillet and toss everything together until the pasta is fully coated in the creamy Cajun sauce.

Stir in the Parmesan cheese and let it melt into the sauce.

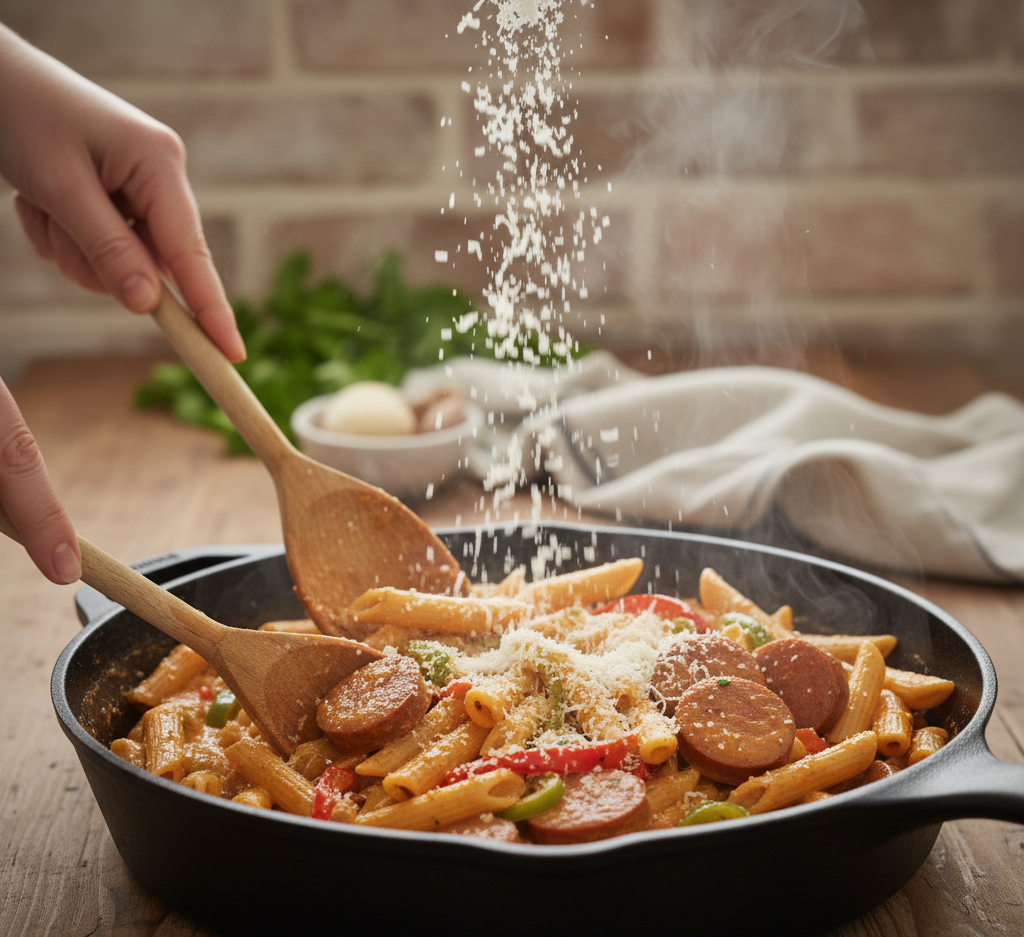
Tips for Perfect Cajun Smoked Sausage Pasta

Follow these simple tips to make the best Cajun smoked sausage pasta recipe every time:

  • Brown the sausage first to enhance flavor

  • Use freshly grated Parmesan cheese for the best texture

  • Don’t overcook the pasta

  • Adjust Cajun seasoning depending on your spice preference

  • Add a splash of pasta water if the sauce becomes too thick

These small adjustments can make your pasta dish taste restaurant-quality.

Delicious Variations

One of the great things about easy Cajun smoked sausage pasta is how easy it is to customize.

Cajun Chicken Sausage Pasta

Swap smoked sausage for sliced Cajun-seasoned chicken.

Shrimp Cajun Pasta

Add shrimp during the last few minutes of cooking.

Vegetable Cajun Pasta

Add mushrooms, zucchini, or spinach for extra nutrition.

Extra Creamy Cajun Pasta

Stir in a few ounces of cream cheese for a richer sauce.

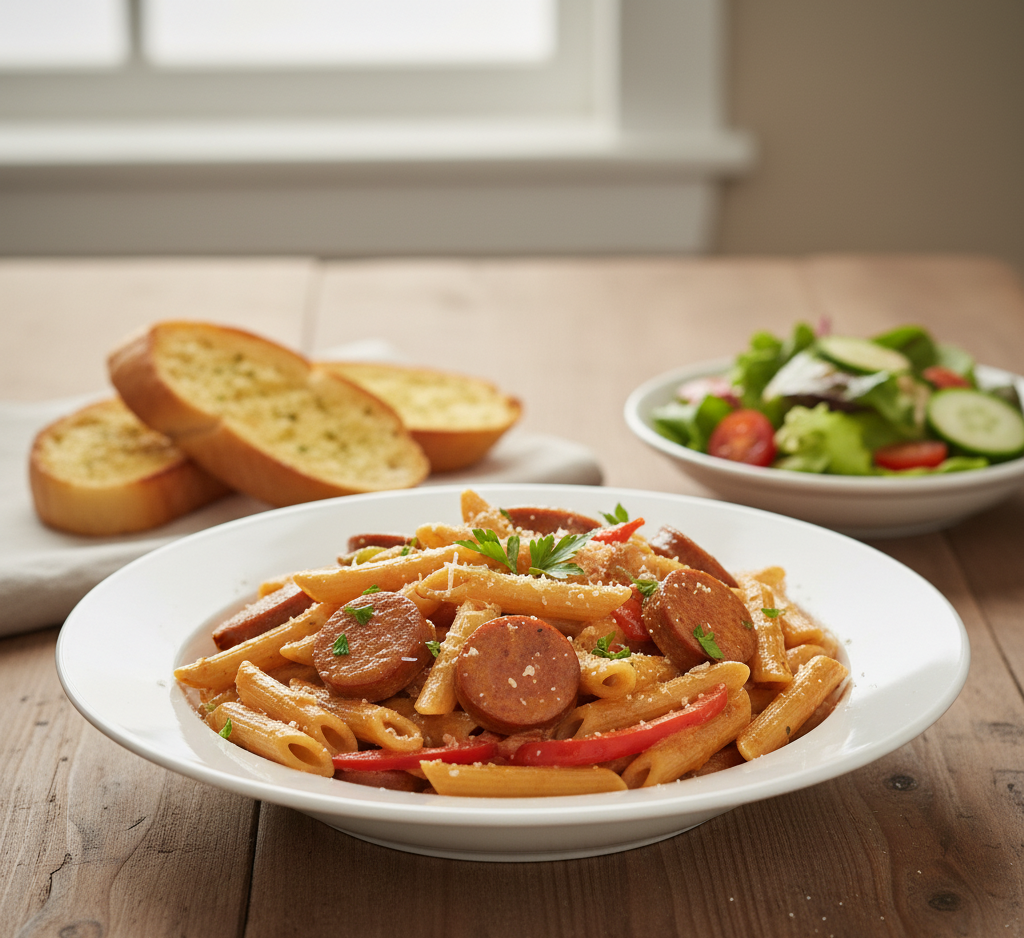
What to Serve With Cajun Smoked Sausage Pasta

This Cajun smoked sausage pasta recipe pairs wonderfully with simple side dishes.

Try serving it with:

  • Garlic bread

  • Caesar salad

  • Roasted broccoli

  • Cornbread

  • Fresh garden salad

These sides balance the richness of the pasta and create a complete meal.

Storage & Reheating Tips

Leftover Cajun smoked sausage pasta stores well and tastes even better the next day.

Refrigeration

Store leftovers in an airtight container for up to 4 days.

Freezing

Freeze the pasta in a freezer-safe container for up to 2 months.

Reheating

Reheat gently in a skillet or microwave with a splash of cream or broth to loosen the sauce.

Common Mistakes to Avoid

Avoid these common mistakes when making Cajun smoked sausage pasta:

  • Overcooking the pasta

  • Using low-quality sausage

  • Adding too much Cajun seasoning

  • Skipping the browning step for the sausage

Paying attention to these details will greatly improve the flavor and texture of the dish.

FAQs About Cajun Smoked Sausage Pasta

What sausage works best for Cajun pasta?

Andouille sausage is the most traditional option because it has a smoky and spicy flavor.

Is Cajun smoked sausage pasta spicy?

It has a mild to moderate spice level, but you can easily adjust the heat by adding more or less Cajun seasoning.

Can I make this pasta ahead of time?

Yes, you can cook it ahead and reheat it later with a little cream or broth to refresh the sauce.

Can I use a different pasta shape?

Absolutely. Penne, rigatoni, or rotini all work well with this creamy Cajun sauce.

Final Thoughts

This Cajun smoked sausage pasta recipe is a perfect example of how simple ingredients can create bold, comforting flavors. With smoky sausage, creamy sauce, and just the right amount of Cajun spice, it’s a dish that feels both satisfying and exciting.

Best of all, it’s quick enough for weeknight dinners but flavorful enough to serve when entertaining guests. Once you try this easy Cajun smoked sausage pasta, it will likely become one of your favorite go-to pasta recipes.

Salisbury Steak Meatballs Recipe – Easy Comfort Food Dinner

If you’re looking for a cozy, satisfying dinner that the whole family will love, this Salisbury steak meatballs recipe is exactly what you need. Inspired by the classic American comfort dish, these juicy beef meatballs are simmered in a rich, savory onion gravy that tastes like it came straight from grandma’s kitchen.

Traditional Salisbury steak is usually served as a large beef patty, but transforming it into tender Salisbury steak meatballs makes the dish even more versatile and fun to serve. The meatballs soak up the flavorful gravy beautifully, making every bite incredibly delicious.

This recipe is perfect for busy weeknights because it uses simple ingredients and comes together in about 40 minutes. Whether you serve it over creamy mashed potatoes, buttered noodles, or fluffy rice, this dish delivers classic comfort food flavor that feels both nostalgic and satisfying.

Why You’ll Love This Salisbury Steak Meatballs Recipe

There are plenty of reasons this Salisbury steak meatballs recipe has become a favorite comfort food meal for home cooks across America.

Here’s why you’ll want to make it again and again:

  • Easy one-pan dinner recipe

  • Juicy, flavorful beef meatballs

  • Rich homemade onion gravy

  • Ready in under 45 minutes

  • Perfect for family dinners or meal prep

Unlike many complicated comfort food dishes, these Salisbury steak meatballs deliver deep, savory flavor with minimal effort.

Ingredients for Salisbury Steak Meatballs

This Salisbury steak meatballs recipe uses pantry staples that create classic comfort food flavor.

For the Meatballs

  • 1 pound ground beef

  • ½ cup breadcrumbs

  • 1 large egg

  • ¼ cup milk

  • 1 teaspoon garlic powder

  • 1 teaspoon onion powder

  • ½ teaspoon salt

  • ½ teaspoon black pepper

  • 1 tablespoon Worcestershire sauce

  • 2 tablespoons finely chopped parsley (optional)

For the Onion Gravy

  • 2 tablespoons butter

  • 1 medium onion, thinly sliced

  • 2 tablespoons all-purpose flour

  • 2 cups beef broth

  • 1 tablespoon Worcestershire sauce

  • ½ teaspoon salt

  • ½ teaspoon black pepper

Ingredient Notes

Using the right ingredients helps elevate your Salisbury steak meatballs from ordinary to truly memorable.

Here are a few tips:

  • Ground beef (80/20) works best for juicy meatballs.

  • Worcestershire sauce adds deep savory flavor to both the meatballs and gravy.

  • Beef broth creates a rich, classic Salisbury steak taste.

  • Breadcrumbs and milk keep the meatballs soft and tender.

Fresh onions are also essential because they caramelize slightly and create the signature gravy flavor that makes Salisbury steak so comforting.

Step-by-Step Instructions

Step 1: Prepare the Meatball Mixture

In a large mixing bowl, combine the ground beef, breadcrumbs, egg, milk, garlic powder, onion powder, salt, pepper, Worcestershire sauce, and parsley.

Mix gently until just combined. Avoid overmixing, which can make the meatballs tough.

Step 2: Form the Meatballs

Shape the mixture into medium-sized meatballs, about 1½ inches in diameter. This recipe typically makes 16–18 meatballs.

Place them on a plate or baking sheet while you prepare the skillet.

Step 3: Brown the Meatballs

Heat a large skillet over medium heat and add a tablespoon of oil. Brown the meatballs on all sides for about 6–8 minutes.

They do not need to be fully cooked yet since they will finish cooking in the gravy.

Step 4: Cook the Onions

Remove the meatballs and set them aside. In the same skillet, melt the butter and add the sliced onions.

Cook for 5–6 minutes until the onions become soft and lightly caramelized.

Step 5: Make the Gravy

Sprinkle the flour over the onions and stir for about one minute. Slowly whisk in the beef broth and Worcestershire sauce.

Let the mixture simmer until the gravy thickens.

Step 6: Finish the Dish

Return the meatballs to the skillet and simmer in the gravy for about 10 minutes until fully cooked.

The meatballs will absorb the delicious savory sauce, making them incredibly flavorful.

Tips for Perfect Salisbury Steak Meatballs

Follow these simple tips to ensure your Salisbury steak meatballs recipe turns out perfect every time:

  • Use fresh ground beef for the best flavor

  • Don’t overmix the meatball mixture

  • Brown the meatballs before adding them to the gravy

  • Let the gravy simmer long enough to thicken properly

  • Taste and adjust seasoning at the end

These small steps make a big difference in achieving restaurant-quality comfort food.

Delicious Variations

Once you master the classic Salisbury steak meatballs recipe, you can easily customize it.

Mushroom Gravy Version

Add sliced mushrooms to the onions while making the gravy.

Turkey Salisbury Meatballs

Substitute ground turkey for a lighter version.

Creamy Salisbury Meatballs

Add a splash of heavy cream to the gravy for extra richness.

Slow Cooker Version

Brown the meatballs first, then cook everything in a slow cooker on low for 4 hours.

What to Serve With Salisbury Steak Meatballs

These Salisbury steak meatballs pair beautifully with many classic side dishes.

Popular serving ideas include:

  • Creamy mashed potatoes

  • Buttered egg noodles

  • Steamed white rice

  • Roasted vegetables

  • Homemade dinner rolls

The gravy makes these sides even more delicious.

Storage & Reheating Tips

One of the best things about this Salisbury steak meatballs recipe is that it stores and reheats wonderfully.

Refrigeration

Store leftovers in an airtight container for up to 4 days.

Freezing

Freeze cooked meatballs and gravy for up to 3 months.

Reheating

Reheat gently in a skillet or microwave until warmed through. Add a splash of beef broth if the gravy thickens too much.

Common Mistakes to Avoid

Avoid these common mistakes when making Salisbury steak meatballs:

  • Overmixing the meatball mixture

  • Using very lean beef

  • Skipping the browning step

  • Not thickening the gravy properly

Taking the time to follow each step ensures rich flavor and perfectly tender meatballs.

FAQs About Salisbury Steak Meatballs

What is Salisbury steak made of?

Traditional Salisbury steak is made from seasoned ground beef mixed with breadcrumbs and spices, served with brown onion gravy.

Can I make Salisbury steak meatballs ahead of time?

Yes! You can prepare the meatballs a day ahead and store them in the refrigerator until ready to cook.

Can I freeze Salisbury steak meatballs?

Absolutely. Both the meatballs and gravy freeze well for up to three months.

How do I make the gravy thicker?

Simmer the gravy longer or add a small slurry of cornstarch and water.


Final Thoughts

This Salisbury steak meatballs recipe is the perfect example of classic American comfort food made simple. Juicy beef meatballs simmered in a rich onion gravy create a warm, hearty meal that’s perfect for weeknight dinners or cozy family gatherings.

With simple ingredients, easy preparation, and incredible flavor, this dish is guaranteed to become a regular favorite in your kitchen.

Once you try these homemade Salisbury steak meatballs, you’ll understand why they’re such a beloved comfort food classic.

Bakery-Style Ultra Thick Chocolate Chip Cookies

There’s something magical about biting into a bakery-style ultra thick chocolate chip cookie. The crisp golden edges, the soft and gooey center, and the rich pockets of melted chocolate create a cookie experience that feels indulgent and unforgettable. If you’ve ever wondered how bakeries achieve those perfectly thick cookies that look as good as they taste, this recipe will show you exactly how.

This bakery-style ultra thick chocolate chip cookies recipe is designed to deliver that same bakery-quality texture at home. Each cookie is generously sized, beautifully thick, and loaded with chocolate chips in every bite. Unlike thin or overly crispy cookies, these stay soft in the middle with just the right amount of chewiness.

Whether you’re baking for a family gathering, holiday cookie tray, or simply satisfying a sweet craving, this recipe guarantees cookies that look and taste like they came straight from a professional bakery.

Why You’ll Love These Bakery-Style Chocolate Chip Cookies

These bakery-style ultra thick chocolate chip cookies stand out from ordinary cookie recipes because of their incredible texture and flavor. They’re rich, buttery, and perfectly balanced between soft and chewy.

Here are a few reasons why home bakers love this recipe:

  • Thick, bakery-style cookies with soft centers

  • Loaded with rich chocolate chips

  • Crisp edges with a gooey interior

  • Easy-to-follow recipe with consistent results

  • Perfect for freezing or make-ahead baking

Once you try these ultra thick chocolate chip cookies, they’ll likely become your go-to cookie recipe for years to come.

Ingredients for Bakery-Style Ultra Thick Chocolate Chip Cookies

This bakery-style chocolate chip cookie recipe uses classic ingredients that create a rich, flavorful dough.

Cookie Dough Ingredients

  • 3 cups all-purpose flour

  • 1 teaspoon baking soda

  • 1 teaspoon baking powder

  • 1 teaspoon salt

  • 1 cup unsalted butter, cold and cubed

  • 1 cup brown sugar

  • ½ cup granulated sugar

  • 2 large eggs

  • 2 teaspoons vanilla extract

  • 2 cups semi-sweet chocolate chips

  • Optional: ½ cup chocolate chunks for extra richness

Ingredient Notes

Choosing the right ingredients is key to achieving perfect bakery-style ultra thick chocolate chip cookies.

A few important tips:

  • Cold butter helps create thicker cookies that don’t spread too much.

  • Brown sugar adds moisture and chewiness.

  • High-quality chocolate chips or chunks improve flavor dramatically.

  • Extra flour contributes to the thick bakery-style structure.

Using these ingredient techniques ensures your cookies bake tall, soft, and beautifully golden.

Step-by-Step Instructions

Step 1: Mix the Dry Ingredients

In a medium bowl, whisk together the flour, baking soda, baking powder, and salt. Set the mixture aside.

Step 2: Cream the Butter and Sugars

In a large mixing bowl, beat the cold butter, brown sugar, and granulated sugar until the mixture becomes light and fluffy.

Step 3: Add Eggs and Vanilla

Mix in the eggs one at a time, then add the vanilla extract. Beat until smooth and well combined.

Step 4: Combine the Ingredients

Gradually add the dry ingredients to the wet mixture. Mix until a thick cookie dough forms.

Fold in the chocolate chips and optional chocolate chunks.

Step 5: Shape the Cookies

Form large dough balls—about 3 tablespoons each—to create thick bakery-style cookies.

Place them on a parchment-lined baking sheet with plenty of space between them.

Step 6: Chill the Dough

Refrigerate the dough balls for 30–60 minutes. This step helps the cookies stay thick during baking.

Step 7: Bake the Cookies

Bake at 400°F (200°C) for 10–12 minutes until the edges are golden but the centers remain soft.

Tips for Perfect Bakery-Style Cookies

To achieve perfect bakery-style ultra thick chocolate chip cookies, keep these baking tips in mind:

  • Chill the dough before baking

  • Use large dough balls for thicker cookies

  • Slightly underbake for soft centers

  • Use parchment paper to prevent sticking

  • Sprinkle a pinch of sea salt on top for extra flavor

These small tricks make a huge difference in texture and taste.

Delicious Variations

One of the best things about bakery-style chocolate chip cookies is how easy they are to customize.

Double Chocolate Cookies

Add cocoa powder to the dough and mix in dark chocolate chips.

Nutty Chocolate Chip Cookies

Add chopped walnuts or pecans for crunch.

Caramel Chocolate Cookies

Add caramel bits for a gooey surprise center.

Dark Chocolate Lovers

Use dark chocolate chunks instead of semi-sweet chips.

These variations help keep this recipe exciting every time you bake.

What to Serve With These Cookies

These bakery-style ultra thick chocolate chip cookies pair wonderfully with classic dessert beverages.

Try serving them with:

  • Cold milk

  • Hot coffee

  • Vanilla ice cream

  • Hot chocolate

  • A homemade milkshake

Together they create the ultimate comforting dessert experience.

Storage & Reheating Tips

If you somehow have leftover bakery-style chocolate chip cookies, they store very well.

Storage

  • Room temperature: up to 4 days in an airtight container

  • Refrigerator: up to 1 week

Freezing

Freeze baked cookies or raw dough balls for up to 3 months.

Reheating

Warm cookies in the microwave for 10–15 seconds to restore their gooey center.

Common Mistakes to Avoid

Even simple cookie recipes can go wrong without the right technique.

Avoid these common baking mistakes:

  • Skipping the dough chilling step

  • Overmixing the dough

  • Using warm butter instead of cold

  • Overbaking the cookies

Following the recipe carefully ensures your cookies stay thick, soft, and bakery-quality.


FAQs About Bakery-Style Chocolate Chip Cookies

Why are my chocolate chip cookies flat?

This usually happens if the butter is too warm or the dough wasn’t chilled before baking.

Can I freeze the cookie dough?

Yes! Freeze the dough balls and bake directly from frozen—just add 1–2 extra minutes of baking time.

How do I make cookies extra thick?

Use large dough balls, chill the dough, and bake at a slightly higher temperature.

What chocolate works best?

High-quality semi-sweet or dark chocolate chips create the best flavor and texture.

Final Thoughts

These bakery-style ultra thick chocolate chip cookies are the ultimate homemade cookie experience. With crisp edges, soft centers, and rich melted chocolate in every bite, they bring bakery-quality results straight to your kitchen.

Whether you’re baking for family, friends, or simply satisfying your sweet tooth, this recipe delivers cookies that look impressive and taste even better.

Once you try this recipe, you’ll understand why it’s considered one of the best bakery-style chocolate chip cookie recipes you can make at home.

Nachos With Beer Cheese Sauce Recipe (Ultimate Game Day Snack)

Few snacks are as crowd-pleasing and satisfying as a big plate of nachos with beer cheese sauce. Crispy tortilla chips piled high and smothered in creamy, rich beer cheese create the perfect combination of crunch, flavor, and indulgence. Whether you’re hosting a game-day party, preparing a casual family snack, or looking for a quick appetizer, this nachos with beer cheese sauce recipe delivers bold flavor in every bite.

The star of the dish is the velvety beer cheese sauce. Made with sharp cheddar, smooth butter, and your favorite beer, it adds a deep savory flavor that pairs perfectly with crunchy tortilla chips and classic nacho toppings. The result is a dish that tastes like something you’d order at your favorite sports bar—only better because it’s homemade.

Why You’ll Love This Nachos With Beer Cheese Sauce Recipe

This nachos with beer cheese sauce recipe stands out because it balances simplicity with incredible flavor. The homemade beer cheese sauce is smooth, rich, and incredibly easy to make in just a few minutes.

Here are a few reasons you’ll love this recipe:

  • Quick and easy appetizer ready in under 30 minutes

  • Creamy homemade beer cheese sauce

  • Perfect for game day, parties, or movie nights

  • Customizable with your favorite toppings

  • Restaurant-quality flavor made at home

Once you make these nachos with beer cheese sauce, they’ll quickly become one of your go-to snacks for entertaining or casual gatherings.

Ingredients for Nachos With Beer Cheese Sauce

This nachos with beer cheese sauce recipe uses simple ingredients that come together for bold flavor.

For the Nachos

  • 1 large bag tortilla chips

  • 1 cup diced tomatoes

  • ½ cup sliced jalapeños

  • ½ cup sliced green onions

  • ½ cup sour cream (optional)

  • ½ cup cooked ground beef or shredded chicken (optional)

For the Beer Cheese Sauce

  • 2 tablespoons butter

  • 2 tablespoons all-purpose flour

  • 1 cup beer (lager or pale ale works well)

  • 1 cup whole milk

  • 2 cups shredded sharp cheddar cheese

  • ½ teaspoon garlic powder

  • ½ teaspoon paprika

  • Salt and pepper to taste

Ingredient Notes

The quality of your ingredients plays a big role in how flavorful your nachos with beer cheese sauce will be.

A few helpful tips:

  • Sharp cheddar cheese provides the best flavor and melts beautifully.

  • Lager or pale ale adds depth without overpowering the sauce.

  • Freshly shredded cheese melts smoother than pre-shredded varieties.

  • Sturdy tortilla chips hold up better under the rich cheese sauce.

Using fresh ingredients ensures your nachos stay crispy while the beer cheese sauce remains silky and smooth.

Step-by-Step Instructions

Step 1: Prepare the Beer Cheese Sauce

In a medium saucepan, melt the butter over medium heat. Add the flour and whisk continuously for about 1 minute to create a roux.

Slowly pour in the beer while whisking to prevent lumps. Then add the milk and continue whisking until the mixture thickens slightly.

Step 2: Add the Cheese

Lower the heat and gradually add the shredded cheddar cheese, stirring until melted and smooth. Stir in garlic powder, paprika, salt, and pepper.

Step 3: Assemble the Nachos

Spread tortilla chips evenly on a large serving platter or baking sheet. Top with diced tomatoes, jalapeños, and any optional toppings like ground beef or chicken.

Step 4: Pour the Beer Cheese Sauce

Drizzle the warm beer cheese sauce generously over the chips and toppings.

Step 5: Garnish and Serve

Finish the nachos with green onions and a dollop of sour cream. Serve immediately while the cheese sauce is warm and creamy.

Tips for Perfect Nachos With Beer Cheese Sauce

Follow these tips to make the best nachos with beer cheese sauce recipe every time:

  • Use freshly shredded cheese for smoother sauce

  • Keep heat low when melting cheese to avoid grainy texture

  • Serve immediately so chips stay crispy

  • Layer toppings evenly for balanced flavor

  • Warm the serving dish slightly to keep nachos hot longer

These small tricks help create nachos that taste just like your favorite restaurant appetizer.

Delicious Variations

One of the best parts of making nachos with beer cheese sauce is how easy they are to customize.

BBQ Chicken Nachos

Top with shredded BBQ chicken and red onions.

Spicy Jalapeño Nachos

Add extra jalapeños and hot sauce to the beer cheese sauce.

Loaded Steak Nachos

Add grilled steak slices and caramelized onions.

Vegetarian Nachos

Use black beans, corn, avocado, and fresh salsa.

These variations make it easy to turn this recipe into a new flavor experience every time.

What to Serve With Nachos

Although nachos with beer cheese sauce are satisfying on their own, they pair wonderfully with other party foods.

Try serving them with:

  • Fresh guacamole

  • Salsa or pico de gallo

  • Chicken wings

  • Fresh lime margaritas

  • Cold craft beer

Together, these dishes create the perfect game-day snack spread.

Storage & Reheating Tips

If you have leftovers from this nachos with beer cheese sauce recipe, store components separately for best results.

Storage

  • Beer cheese sauce: refrigerate up to 4 days

  • Nacho toppings: store in airtight containers

Reheating

Reheat the beer cheese sauce gently on the stovetop or microwave while stirring to maintain a smooth texture.

Add a splash of milk if the sauce becomes too thick.

Common Mistakes to Avoid

Even simple nacho recipes can go wrong without the right technique.

Avoid these common mistakes:

  • Overheating cheese sauce (causes grainy texture)

  • Using thin chips that break easily

  • Pouring sauce too early before serving

  • Adding too many toppings that weigh down chips

Keeping these tips in mind ensures your nachos with beer cheese sauce stay crispy and flavorful.

FAQs About Nachos With Beer Cheese Sauce

What kind of beer is best for beer cheese sauce?

Lagers and pale ales work best because they add flavor without overwhelming the cheese.

Can I make beer cheese sauce without alcohol?

Yes. Substitute the beer with chicken broth or milk for a similar creamy consistency.

How do I keep nachos from getting soggy?

Add the beer cheese sauce right before serving and use thick tortilla chips.

Can I make beer cheese sauce ahead of time?

Absolutely. Store it in the refrigerator and gently reheat when ready to use.


Final Thoughts

This nachos with beer cheese sauce recipe is everything you want in the ultimate snack—crispy, cheesy, bold, and incredibly satisfying. The homemade beer cheese sauce adds rich flavor that turns simple tortilla chips into an unforgettable appetizer.

Whether you’re preparing for game day, movie night, or a casual party, these nachos are guaranteed to be a hit. With endless topping possibilities and easy preparation, this recipe is one you’ll want to make again and again.

Soft & Gooey Apple Cider Cinnamon Rolls (Irresistibly Fluffy Fall Breakfast)

If you’re looking for the ultimate cozy breakfast treat, these Soft & Gooey Apple Cider Cinnamon Rolls are about to become your new favorite recipe. Imagine classic homemade cinnamon rolls—but with a rich apple cider flavor baked right into the dough and filling. The result? A warm, fluffy roll with deep fall flavor, perfectly swirled cinnamon sugar, and a soft melt-in-your-mouth texture.

These rolls are everything you love about traditional cinnamon rolls but with a seasonal twist. The apple cider adds natural sweetness, subtle fruitiness, and an irresistible aroma that fills the kitchen while they bake. Whether you’re preparing them for a weekend brunch, holiday breakfast, or cozy fall morning, this recipe delivers bakery-style results right at home.

Why You’ll Love This Recipe

These Soft & Gooey Apple Cider Cinnamon Rolls stand out from ordinary cinnamon rolls for several delicious reasons.

First, the apple cider flavor infuses both the dough and filling, creating a warm seasonal taste that perfectly complements the cinnamon. Second, the dough bakes up incredibly soft and fluffy thanks to a carefully balanced ratio of butter, milk, and yeast.

Here are a few reasons this recipe works so well:

  • Rich apple cider flavor baked into the dough

  • Ultra soft, fluffy bakery-style texture

  • Perfect balance of cinnamon spice and sweetness

  • Great for fall breakfasts, brunch, or holidays

  • Make-ahead friendly for easy mornings

If you love homemade cinnamon rolls but want something a little more special, this recipe delivers a comforting upgrade that feels both nostalgic and unique.

Ingredients for Apple Cider Cinnamon Rolls

Making Soft & Gooey Apple Cider Cinnamon Rolls requires simple pantry ingredients plus fresh apple cider to create that signature flavor.

Dough

  • 3 ½ cups all-purpose flour

  • 1 cup warm apple cider

  • 2 ¼ teaspoons active dry yeast (1 packet)

  • ¼ cup granulated sugar

  • ¼ cup unsalted butter, melted

  • 1 large egg

  • ½ teaspoon salt

Cinnamon Filling

  • ½ cup brown sugar

  • 2 tablespoons ground cinnamon

  • 4 tablespoons softened butter

Cream Cheese Glaze

  • 4 oz cream cheese, softened

  • 1 cup powdered sugar

  • 2 tablespoons milk

  • ½ teaspoon vanilla extract

Ingredient Notes

The key ingredient in these Soft & Gooey Apple Cider Cinnamon Rolls is, of course, the apple cider. Use fresh, unfiltered apple cider for the best flavor—it adds a subtle tangy sweetness that enhances the cinnamon filling.

A few additional tips:

  • Room temperature ingredients help the dough mix evenly

  • Brown sugar gives the filling a deeper caramel flavor

  • Real butter creates rich, soft layers in the rolls

  • Cream cheese glaze balances the sweetness with a slight tang

Small ingredient choices can make a big difference in the final flavor and texture.

Step-by-Step Instructions

1. Activate the Yeast

Warm the apple cider slightly (about 105–110°F). Stir in the yeast and sugar and let it sit for about 5 minutes until foamy.

2. Make the Dough

In a large mixing bowl, combine the yeast mixture, melted butter, egg, and salt. Gradually add flour and mix until a soft dough forms.

Knead the dough for about 8–10 minutes until smooth and elastic.

Image Prompt: Hands kneading soft cinnamon roll dough on a lightly floured wooden countertop, flour dust scattered, warm natural kitchen lighting, cozy home baking environment, realistic food photography, shallow depth of field, 4k resolution.

3. Let the Dough Rise

Place the dough in a greased bowl, cover with a clean towel, and allow it to rise for about 1 hour, or until doubled in size.

4. Roll and Fill

Roll the dough into a large rectangle about ¼-inch thick. Spread softened butter over the surface, then sprinkle evenly with brown sugar and cinnamon.

5. Shape the Rolls

Roll the dough tightly into a log and cut into 12 equal rolls. Place them in a greased baking dish.

6. Bake

Bake at 350°F (175°C) for 22–25 minutes until golden brown and fluffy.

Tips for Perfect Apple Cider Cinnamon Rolls

To get bakery-quality Soft & Gooey Apple Cider Cinnamon Rolls, keep these tips in mind:

  • Don’t overheat the cider or it may kill the yeast

  • Knead the dough until smooth for the softest texture

  • Allow the rolls to rise fully for maximum fluffiness

  • Bake until lightly golden—not dark brown

  • Spread glaze while rolls are still slightly warm

These simple tricks ensure your cinnamon rolls turn out perfectly every time.

Variations

One of the best things about Soft & Gooey Apple Cider Cinnamon Rolls is how customizable they are.

Try these delicious variations:

Caramel Apple Rolls

Add small diced apples and drizzle caramel sauce before serving.

Maple Glazed Rolls

Replace the glaze milk with maple syrup for a fall flavor twist.

Apple Spice Rolls

Add nutmeg and cloves to the cinnamon filling.

Each variation adds a new layer of flavor while keeping the soft, gooey texture intact.

What to Serve With Apple Cider Cinnamon Rolls

These cinnamon rolls are rich and comforting, so they pair beautifully with lighter breakfast sides.

Great serving ideas include:

  • Fresh fruit salad

  • Scrambled eggs

  • Greek yogurt parfait

  • Hot coffee or chai latte

Together, they create a balanced and satisfying brunch spread.

Storage & Reheating Tips

If you somehow have leftovers of these Soft & Gooey Apple Cider Cinnamon Rolls, they store surprisingly well.

Storage

  • Keep at room temperature in an airtight container for 2 days

  • Refrigerate for up to 5 days

Freezing

Wrap tightly and freeze for up to 2 months.

Reheating

Warm in the microwave for 20–30 seconds to restore softness.

Adding a fresh drizzle of glaze after reheating makes them taste freshly baked again.

Common Mistakes to Avoid

Even experienced bakers can make a few mistakes when baking cinnamon rolls.

Avoid these common issues:

  • Using cider that is too hot

  • Adding too much flour, which makes rolls dense

  • Not letting the dough rise long enough

  • Overbaking the rolls

When done correctly, the rolls should be light, fluffy, and wonderfully gooey in the center.

FAQs About Apple Cider Cinnamon Rolls

Can I make apple cider cinnamon rolls overnight?

Yes! After shaping the rolls, cover and refrigerate overnight. Let them sit at room temperature for 30 minutes before baking.

Can I use apple juice instead of apple cider?

You can, but apple cider provides a richer, deeper flavor that makes these cinnamon rolls extra special.

Why are my cinnamon rolls not fluffy?

This usually happens if the dough didn’t rise long enough or if too much flour was added.

Can I freeze unbaked cinnamon rolls?

Absolutely. Freeze them after shaping, then thaw overnight and allow them to rise before baking.

Final Thoughts

These Soft & Gooey Apple Cider Cinnamon Rolls are the perfect homemade treat for cozy mornings, holiday brunches, or whenever you want something warm and comforting from the oven. The apple cider adds a unique fall flavor that pairs beautifully with classic cinnamon sugar filling and creamy glaze.

Once you try this recipe, it may quickly become your go-to fall cinnamon roll recipe. Soft, fluffy, sweet, and slightly gooey—every bite tastes like autumn comfort.

Roasted Sweet Potato Black Bean Salad (Fresh, Healthy & Flavor-Packed)

If you’re searching for a satisfying, healthy, and colorful dish, this Roasted Sweet Potato Black Bean Salad is a recipe you’ll want to make again and again. It combines tender roasted sweet potatoes, hearty black beans, fresh vegetables, and a bright zesty dressing to create a salad that’s both nourishing and incredibly flavorful.

This salad has everything you want in a balanced meal—complex carbohydrates from sweet potatoes, plant-based protein from black beans, and vibrant fresh ingredients that bring texture and freshness. It’s naturally gluten-free, vegetarian, and easy to adapt for vegan diets as well.

Whether you’re preparing a healthy weekday lunch, a vibrant potluck dish, or a nutritious dinner side, this roasted sweet potato black bean salad is both comforting and refreshing. Plus, it stores beautifully, making it perfect for meal prep throughout the week.

Why You’ll Love This Roasted Sweet Potato Black Bean Salad

This roasted sweet potato black bean salad recipe has become a favorite among healthy home cooks for several reasons. It’s packed with bold flavors, vibrant colors, and wholesome ingredients.

Here’s why it stands out:

  • Naturally nutritious and filling

  • Perfect balance of sweet, savory, and tangy flavors

  • Plant-based protein from black beans

  • Great for meal prep and leftovers

  • Easy to customize with additional toppings

The roasted sweet potatoes add warmth and sweetness, while the black beans provide hearty texture and protein that keeps you satisfied.

Ingredients

This roasted sweet potato black bean salad uses simple, wholesome ingredients that come together beautifully.

Salad Ingredients

  • 2 medium sweet potatoes, peeled and cubed

  • 1 tablespoon olive oil

  • 1 teaspoon chili powder

  • ½ teaspoon smoked paprika

  • Salt and pepper to taste

  • 1 (15 oz) can black beans, drained and rinsed

  • ½ cup diced red onion

  • 1 avocado, diced

  • ¼ cup chopped fresh cilantro

  • 1 cup cherry tomatoes, halved

Lime Dressing

  • 3 tablespoons fresh lime juice

  • 2 tablespoons olive oil

  • 1 teaspoon honey or maple syrup

  • ½ teaspoon cumin

  • Salt and pepper to taste

Ingredient Notes

Using high-quality ingredients will enhance your Roasted Sweet Potato Black Bean Salad.

  • Sweet potatoes: Roasting brings out their natural sweetness and creates caramelized edges.

  • Black beans: Provide protein and make the salad hearty enough for a full meal.

  • Lime juice: Fresh lime juice adds a bright, citrusy flavor that balances the sweetness of the potatoes.

  • Cilantro: Adds a fresh herbal note that ties everything together.

For extra texture and flavor, you can also add roasted corn or pumpkin seeds.

Step-by-Step Instructions

1. Roast the Sweet Potatoes

Preheat your oven to 400°F (200°C). Toss the cubed sweet potatoes with olive oil, chili powder, smoked paprika, salt, and pepper. Spread them evenly on a baking sheet.

Roast for 25–30 minutes, flipping halfway through, until tender and slightly caramelized.

2. Prepare the Dressing

In a small bowl, whisk together the lime juice, olive oil, honey (or maple syrup), cumin, salt, and pepper until well combined.

This dressing adds a refreshing citrusy brightness to the salad.

3. Assemble the Salad

In a large bowl, combine the roasted sweet potatoes, black beans, cherry tomatoes, red onion, and chopped cilantro.

Pour the dressing over the mixture and gently toss until everything is evenly coated.

4. Add Avocado and Serve

Just before serving, gently fold in the diced avocado to maintain its creamy texture.

Taste and adjust seasoning with additional lime juice, salt, or pepper if needed.

Tips for Perfect Results

To make the best roasted sweet potato black bean salad, keep these tips in mind:

  • Spread sweet potatoes in a single layer for even roasting.

  • Roast until caramelized for maximum flavor.

  • Add avocado last to prevent it from becoming mushy.

  • Use fresh lime juice instead of bottled for brighter flavor.

These simple techniques elevate the dish and bring out the best flavors.

Delicious Variations

This Roasted Sweet Potato Black Bean Salad is very versatile and easy to customize.

Add Protein

Make it a heartier meal by adding:

  • Grilled chicken

  • Shrimp

  • Quinoa

  • Tofu

Add More Vegetables

  • Roasted corn

  • Bell peppers

  • Cucumbers

  • Shredded carrots

Add Crunch

  • Pumpkin seeds

  • Sunflower seeds

  • Tortilla strips

  • Crushed tortilla chips

What to Serve With Roasted Sweet Potato Black Bean Salad

This roasted sweet potato black bean salad can be served as a main dish or a side.

It pairs wonderfully with:

  • Grilled chicken or steak

  • Fish tacos

  • Burrito bowls

  • Grilled vegetables

  • Fresh corn on the cob

Its bold flavors complement many Southwestern and Mexican-inspired meals.

Storage Tips

This Roasted Sweet Potato Black Bean Salad is ideal for meal prep.

Refrigerator:
Store in an airtight container for up to 4 days.

Tip:
If preparing ahead, store the avocado separately and add it just before serving to keep it fresh.

The flavors often become even better after sitting for a few hours.

Common Mistakes to Avoid

Avoid these mistakes when making roasted sweet potato black bean salad:

  • Overcrowding the roasting pan (prevents caramelization)

  • Adding avocado too early

  • Skipping seasoning on sweet potatoes

  • Using bottled lime juice

Paying attention to these details ensures a flavorful and balanced salad.

Frequently Asked Questions

Can I make roasted sweet potato black bean salad ahead of time?

Yes! This salad is perfect for meal prep. Prepare it in advance and add avocado just before serving.

Is this salad served warm or cold?

It can be served either way. Many people enjoy it slightly warm right after the sweet potatoes are roasted.

Can I make this salad vegan?

Yes. Simply use maple syrup instead of honey in the dressing.

What other beans can I use?

You can substitute black beans with pinto beans, kidney beans, or chickpeas.

Final Thoughts

This Roasted Sweet Potato Black Bean Salad is a perfect blend of wholesome ingredients, bold flavors, and satisfying textures. The caramelized sweetness of roasted sweet potatoes, combined with hearty black beans and a zesty lime dressing, creates a dish that is both comforting and refreshing.

Whether you’re looking for a healthy lunch, a vibrant dinner side, or a meal-prep recipe for the week, this roasted sweet potato black bean salad is guaranteed to become a favorite in your kitchen.