Cattle Drive Casserole – A Hearty, Crowd-Pleasing Comfort Food Classic

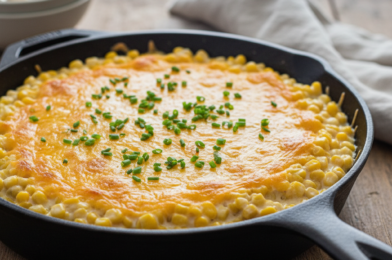
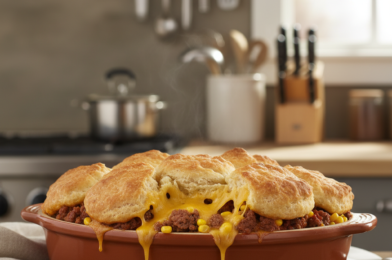
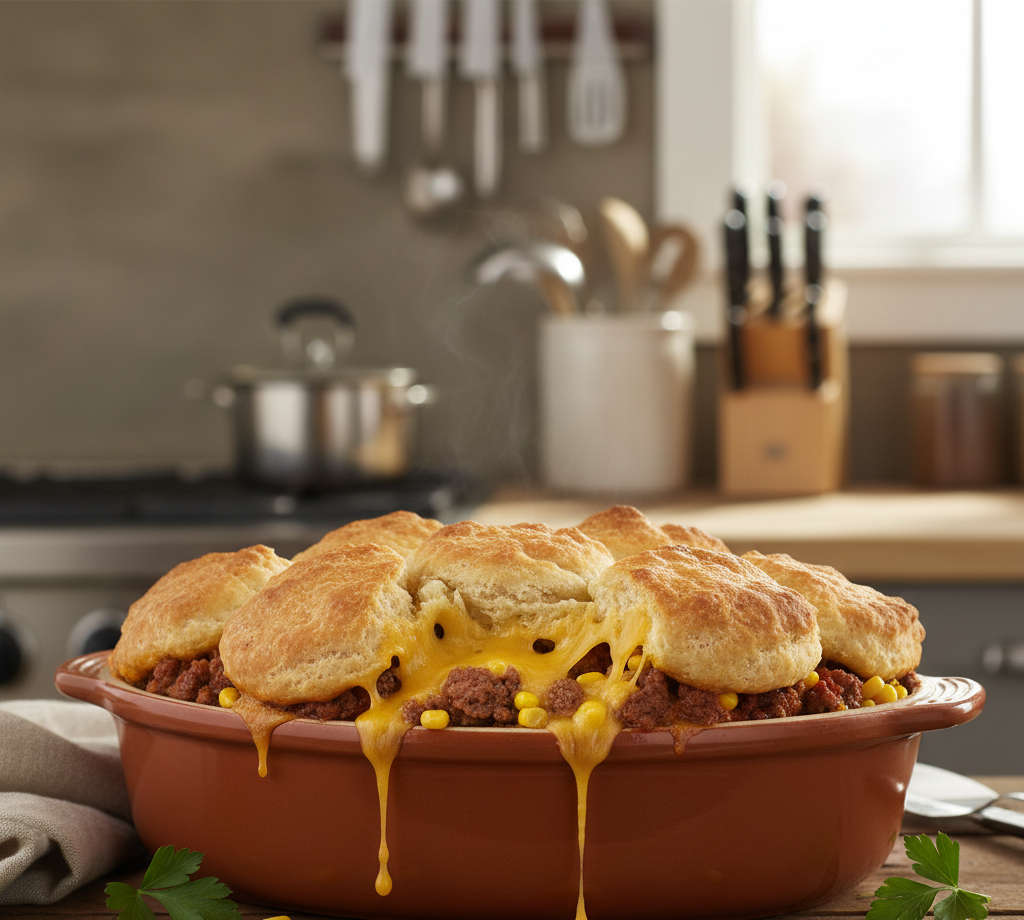
If you’re craving a stick-to-your-ribs dinner that feels like it came straight from a ranch kitchen, this Cattle Drive Casserole is exactly what you need. Packed with seasoned ground beef, creamy sauce, sweet corn, and topped with fluffy golden biscuits, this comforting casserole is a family favorite that never disappoints.

As a food blogger who loves sharing hearty, practical recipes for busy American families, I can tell you this Cattle Drive Casserole checks all the boxes. It’s budget-friendly, easy to assemble, and delivers bold, satisfying flavors in every bite. Whether you’re feeding a hungry crew on a weeknight or bringing a dish to a potluck, this casserole brings big flavor with minimal fuss.

Why You’ll Love This Cattle Drive Casserole

There’s something timeless about a baked beef casserole, and this one stands out for good reason.

  • Hearty and filling – Perfect for feeding a crowd

  • Simple ingredients – Pantry staples and affordable ground beef

  • Layered textures – Creamy, cheesy, and fluffy all in one bite

  • Kid-friendly and customizable

  • Great for leftovers and meal prep

The combination of savory beef, creamy filling, and golden biscuit topping gives this Cattle Drive Casserole its signature appeal. It’s comfort food at its finest.

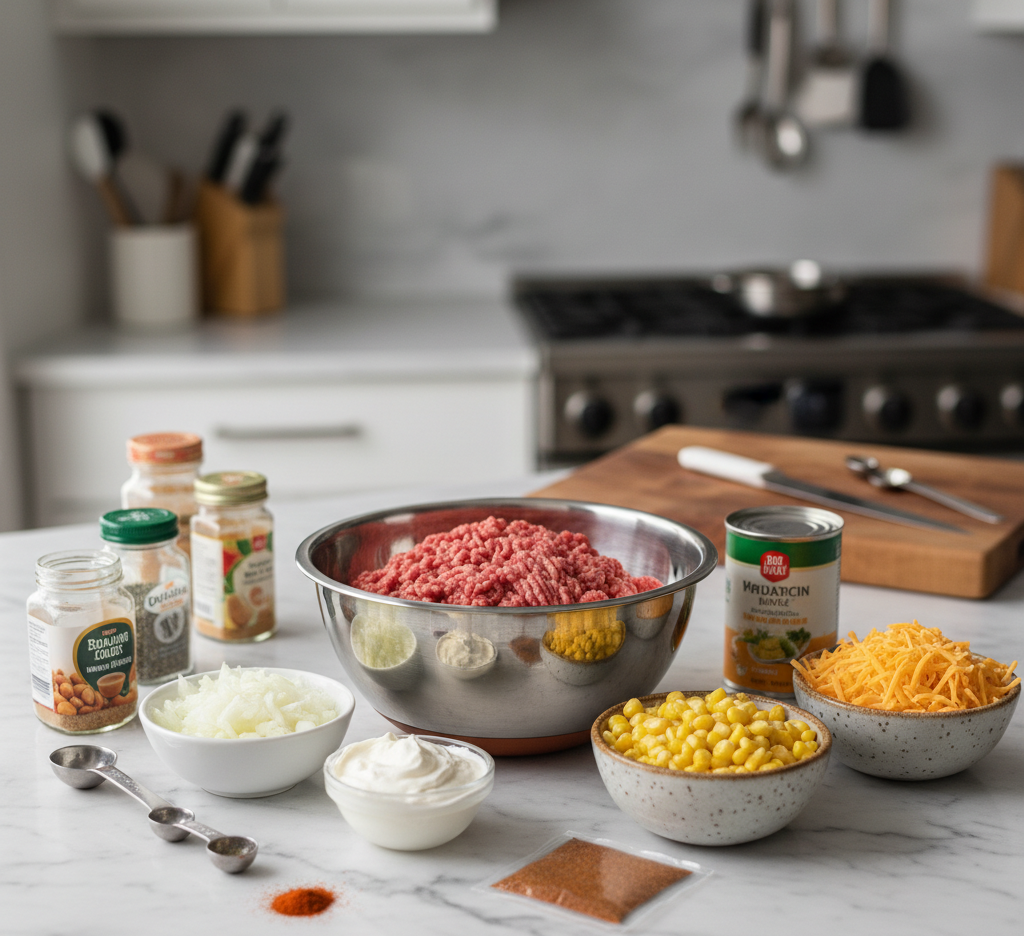
Ingredients for Cattle Drive Casserole

To make this satisfying casserole, you’ll need:

  • 1 ½ pounds ground beef

  • 1 small onion, diced

  • 2 cloves garlic, minced

  • 1 packet taco seasoning (or 2 tablespoons homemade)

  • 1 cup canned corn, drained

  • 1 can (10.5 oz) cream of mushroom soup

  • ½ cup sour cream

  • 1 cup shredded cheddar cheese

  • 1 cup shredded Monterey Jack cheese

  • 1 tube refrigerated biscuit dough (8-count)

  • Salt and pepper to taste

  • 1 tablespoon olive oil

These ingredients create the rich, layered flavor that makes Cattle Drive Casserole so irresistible.

Step-by-Step Instructions

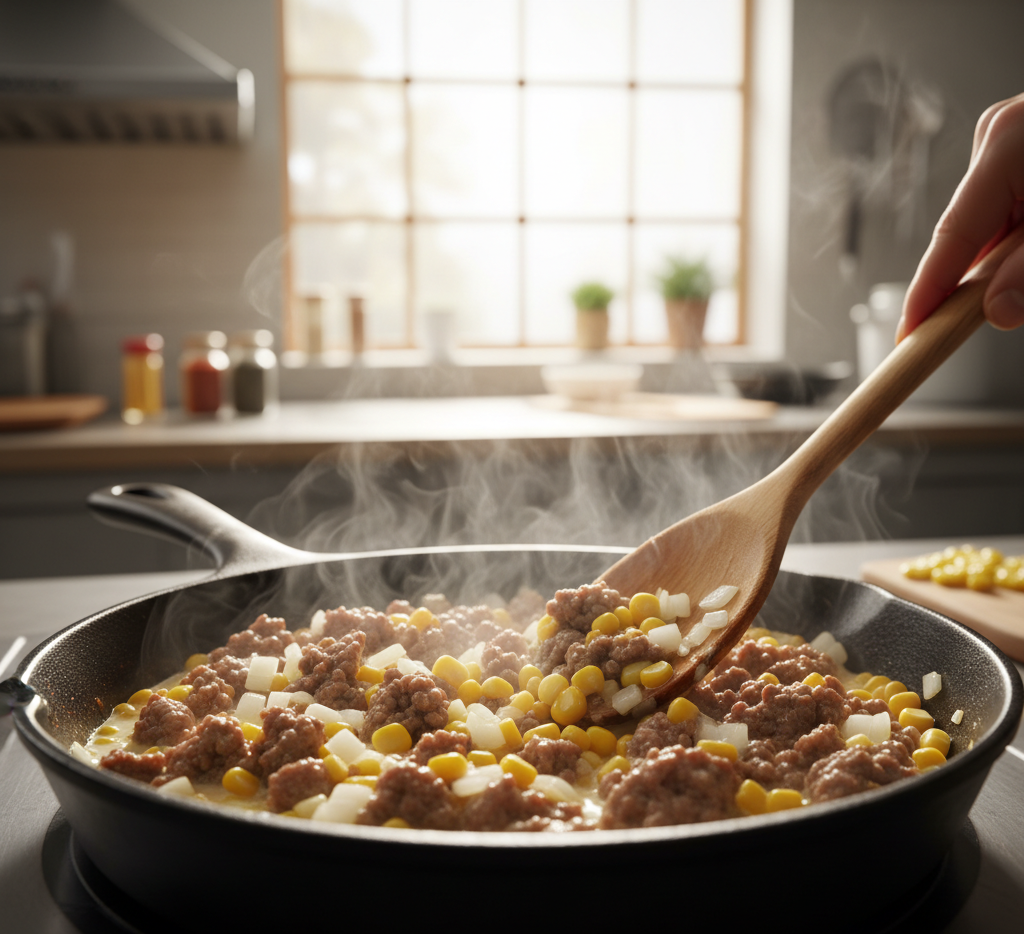
1. Cook the Beef Mixture

Preheat your oven to 375°F. In a large skillet over medium heat, add olive oil and sauté diced onion until softened. Add garlic and cook for 30 seconds.

Add ground beef and cook until browned. Drain excess grease. Stir in taco seasoning, corn, cream of mushroom soup, and sour cream. Mix until well combined and creamy.

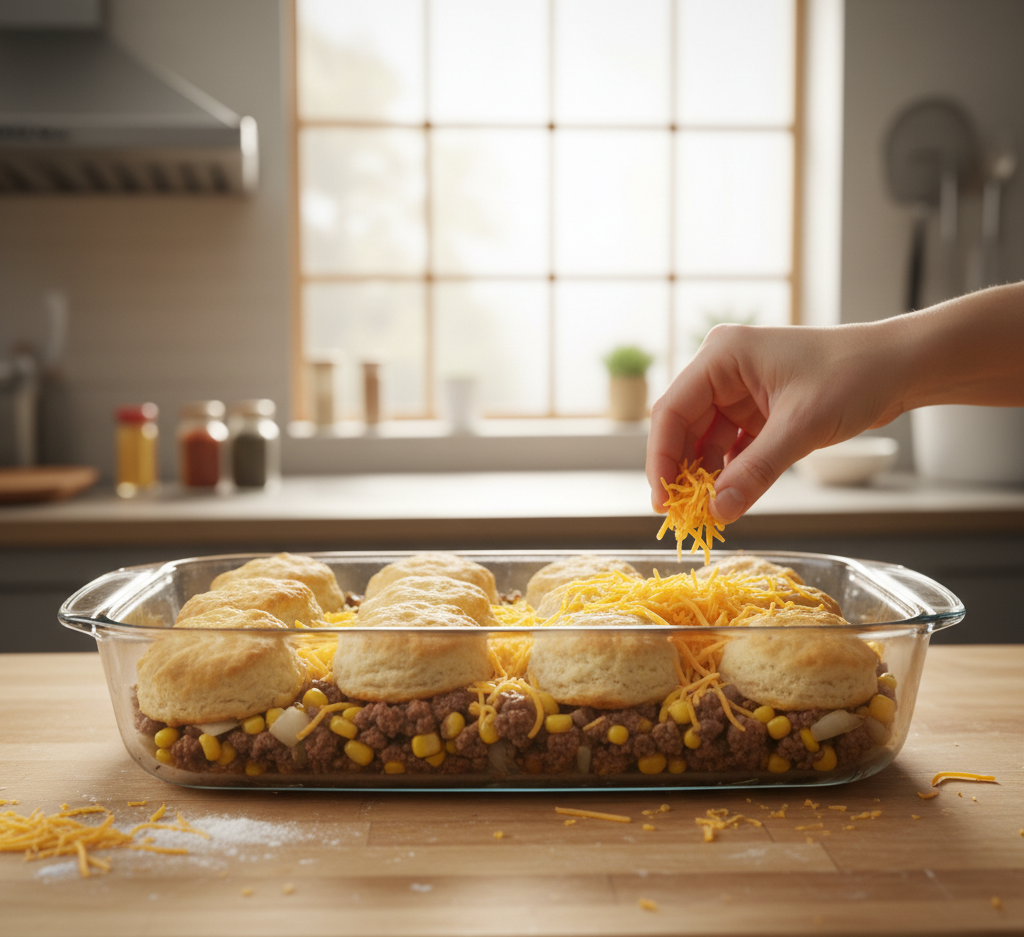
2. Assemble the Casserole

Spread the beef mixture evenly into a greased 9×13-inch baking dish. Sprinkle shredded cheddar and Monterey Jack over the top.

Cut biscuit dough into quarters and arrange evenly across the surface.

3. Bake to Golden Perfection

Bake uncovered for 25–30 minutes, or until the biscuits are golden brown and cooked through. The cheese should be melted and bubbling around the edges.

Let rest for 5–10 minutes before serving.

Tips for Perfect Cattle Drive Casserole

  • Don’t overcrowd the biscuits – Leave space for even browning.

  • Pre-cook vegetables fully to avoid excess moisture.

  • Shred cheese fresh for smoother melting.

  • Let it rest before slicing to allow layers to set.

These small details elevate your Cattle Drive Casserole from good to unforgettable.

Delicious Variations

This recipe is incredibly adaptable.

Tex-Mex Style

Add black beans, diced green chilies, or jalapeños for extra flavor.

BBQ Ranch Twist

Swap taco seasoning for BBQ seasoning and stir in a tablespoon of ranch dressing.

Veggie-Loaded

Add bell peppers, zucchini, or mushrooms for extra nutrients.

Spicy Kick

Use Pepper Jack cheese and a dash of hot sauce.

What to Serve with Cattle Drive Casserole

While this dish is hearty enough to stand alone, it pairs beautifully with:

  • Simple green salad

  • Coleslaw

  • Steamed green beans

  • Roasted vegetables

  • Cornbread

The freshness of a crisp salad balances the richness of the casserole perfectly.

Storage & Reheating Tips

Store leftover Cattle Drive Casserole in an airtight container in the refrigerator for up to 4 days.

To reheat:

  • Warm in a 350°F oven for 15–20 minutes.

  • Cover loosely with foil to prevent over-browning.

  • Individual portions can be microwaved, though the biscuits may soften slightly.

You can also freeze the assembled (unbaked) casserole for up to 2 months. Thaw overnight before baking.

Common Mistakes to Avoid

  • Not draining the beef properly – Can lead to greasy casserole.

  • Using too much liquid – Makes the dish soggy.

  • Overbaking – Can dry out the biscuits.

  • Skipping seasoning adjustments – Always taste before baking.

Attention to these details ensures a perfectly balanced Cattle Drive Casserole every time.

Frequently Asked Questions

1. Can I make Cattle Drive Casserole ahead of time?

Yes! Assemble it up to 24 hours in advance and refrigerate. Bake just before serving.

2. Can I use homemade biscuit dough?

Absolutely. Homemade biscuits add an extra touch of comfort.

3. Is this casserole spicy?

Not by default. The spice level depends on your seasoning and cheese choices.

4. Can I substitute ground turkey?

Yes, ground turkey works well for a lighter option.

5. How do I know when it’s done?

The biscuits should be golden brown and fully cooked in the center.

Final Thoughts

This Cattle Drive Casserole is everything comfort food should be—hearty, flavorful, easy to make, and deeply satisfying. With seasoned beef, creamy layers, and fluffy biscuit topping, it delivers bold, nostalgic flavor in every bite.

Whether you’re feeding your family on a busy weeknight or serving guests at a casual gathering, this casserole is guaranteed to impress. Keep this recipe in your regular rotation—it’s one of those dependable dishes that never goes out of style.

Happy cooking!

Creamed Corn Recipe – The Ultimate Comfort Food Side Dish

There’s something undeniably comforting about a warm bowl of creamed corn. Sweet, buttery kernels wrapped in a rich, velvety sauce—it’s the kind of side dish that instantly brings back memories of family dinners, holiday gatherings, and backyard barbecues. While many people grow up eating the canned version, homemade creamed corn is on an entirely different level.

As a food blogger who believes classic recipes deserve a fresh spotlight, I can confidently say that making creamed corn from scratch is one of the easiest upgrades you can bring to your table. With just a handful of simple ingredients and about 20 minutes on the stovetop, you’ll have a creamy corn side dish that tastes rich, balanced, and incredibly satisfying.

Why You’ll Love This Creamed Corn Recipe

This creamed corn recipe checks every box for flavor, texture, and ease. Here’s why it stands out:

  • Quick and easy – Ready in about 20 minutes

  • Rich and creamy without being heavy

  • Perfect for holidays or weeknights

  • Made with simple pantry staples

  • Family-friendly and crowd-pleasing

Unlike store-bought versions, homemade creamed corn lets you control the sweetness, saltiness, and thickness. The result is a side dish that complements everything from roasted turkey to grilled steak.

Ingredients for Homemade Creamed Corn

To make the best creamed corn, you’ll need:

  • 4 cups corn kernels (fresh, frozen, or canned and drained)

  • 2 tablespoons unsalted butter

  • 1 cup heavy cream (or half-and-half)

  • 1/2 cup whole milk

  • 1 tablespoon granulated sugar (optional, adjust to taste)

  • 1 tablespoon all-purpose flour

  • 1/2 teaspoon salt

  • 1/4 teaspoon black pepper

  • Pinch of paprika (optional)

These ingredients combine to create a rich and silky cream sauce that perfectly coats each sweet corn kernel.

Ingredient Notes and Substitutions

Fresh vs. Frozen Corn

Fresh summer corn delivers unbeatable sweetness and texture. Simply slice the kernels off the cob. However, frozen corn works beautifully year-round and is incredibly convenient. If using canned corn, drain thoroughly to avoid excess liquid.

Making It Lighter

You can substitute half-and-half for heavy cream to reduce richness. For an even lighter option, use whole milk—but expect a thinner sauce.

Adding Depth of Flavor

A small pinch of sugar enhances the corn’s natural sweetness, especially if your corn isn’t peak-season fresh. A touch of paprika or white pepper adds subtle warmth.

Step-by-Step Instructions

1. Sauté the Corn

In a large skillet over medium heat, melt the butter. Add the corn kernels and sauté for about 5 minutes until heated through and slightly tender.

2. Create the Cream Sauce

Sprinkle the flour over the corn and stir well to coat evenly. Slowly pour in the cream and milk while stirring continuously to prevent lumps. Add salt, pepper, and sugar if using.

Let the mixture simmer gently for 8–10 minutes until thickened.

3. Adjust Texture

For a creamier texture, carefully blend about 1 cup of the mixture and stir it back into the skillet. This creates that classic creamed corn consistency—smooth yet still textured.

Tips for Perfect Creamed Corn

  • Don’t boil aggressively—gentle simmering prevents curdling.

  • Stir frequently to avoid scorching the bottom.

  • Taste and adjust seasoning before serving.

  • Blend partially for ideal texture without losing whole kernels.

These small details make a big difference in achieving restaurant-quality creamed corn at home.

Delicious Variations

This creamed corn recipe is versatile and easy to customize.

Southern-Style Creamed Corn

Add a tablespoon of cream cheese for extra richness.

Cheesy Creamed Corn

Stir in shredded cheddar or Parmesan for a savory twist.

Spicy Version

Add diced jalapeños or a pinch of cayenne pepper.

Herb-Infused

Mix in fresh thyme, chives, or parsley before serving.

What to Serve with Creamed Corn

Creamed corn pairs beautifully with a variety of main dishes:

  • Roast turkey

  • Baked ham

  • Grilled chicken

  • BBQ ribs

  • Meatloaf

  • Pan-seared salmon

It’s especially popular during Thanksgiving and holiday meals, but it’s simple enough for everyday dinners.

Storage & Reheating Tips

Store leftover creamed corn in an airtight container in the refrigerator for up to 4 days.

To reheat:

  • Warm gently on the stovetop over low heat.

  • Add a splash of milk or cream to loosen the sauce.

  • Stir frequently to maintain smooth texture.

Creamed corn can also be frozen for up to 2 months, though the texture may soften slightly upon thawing.

Common Mistakes to Avoid

  • Using too much flour – Leads to pasty texture.

  • Cooking on high heat – Can cause curdling.

  • Not stirring enough – May result in scorching.

  • Over-thickening – The sauce will continue to thicken as it cools.

Avoiding these pitfalls ensures perfectly creamy results every time.

Frequently Asked Questions

1. Can I make creamed corn ahead of time?

Yes! Prepare it up to two days in advance and reheat gently before serving.

2. Is creamed corn gluten-free?

Not traditionally, due to flour. However, you can substitute cornstarch for a gluten-free version.

3. Can I use dairy-free milk?

Yes, but the flavor and richness will change. Full-fat coconut milk works well as a substitute.

4. How do I thicken creamed corn?

Simmer longer or add a small cornstarch slurry if needed.

5. Can I use canned creamed corn as a base?

You can, but homemade creamed corn offers far superior flavor and texture.

Final Thoughts

This homemade creamed corn recipe proves that simple ingredients can create unforgettable comfort food. Sweet, creamy, and perfectly seasoned, it’s a side dish that never goes out of style.

Whether you’re serving it at a holiday feast or alongside a casual weeknight dinner, creamed corn brings warmth and nostalgia to the table. Once you try making it from scratch, you may never reach for the canned version again.

Happy cooking!