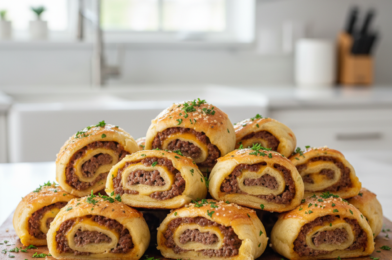
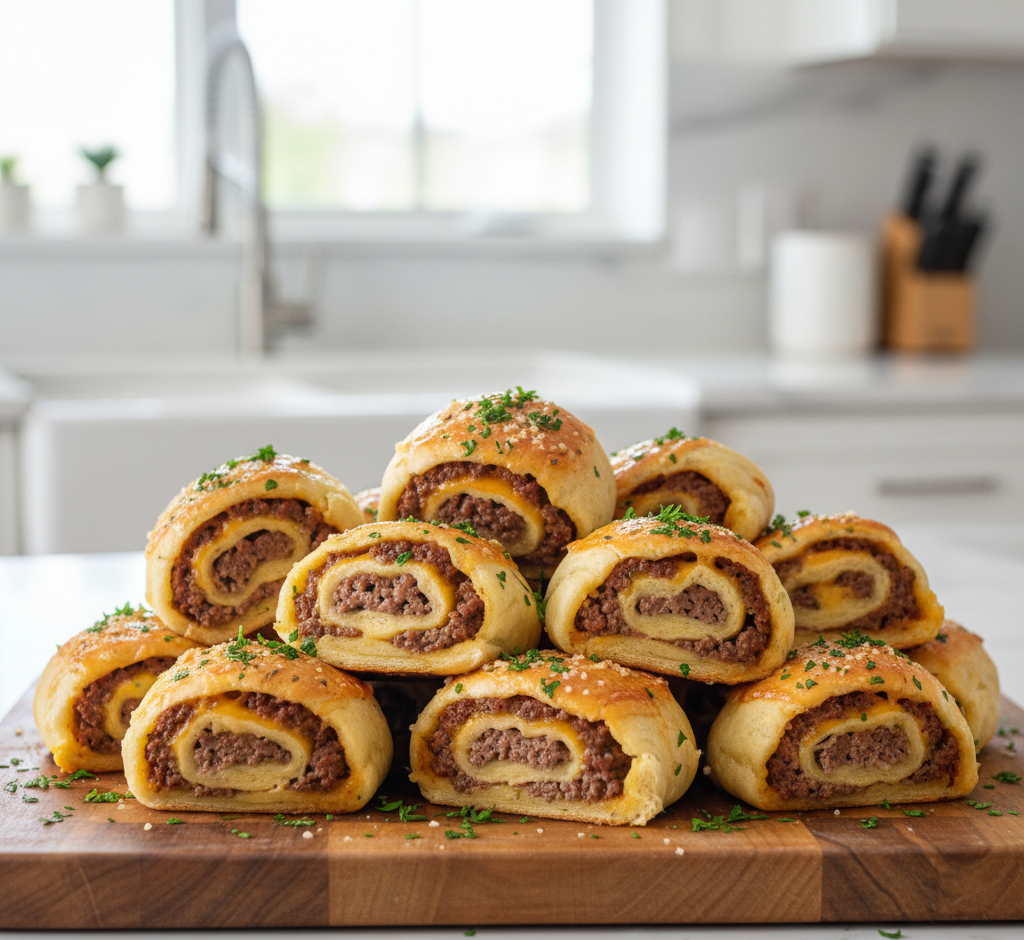
If you love juicy cheeseburgers and crave easy comfort food, these Garlic Butter Cheeseburger Rollups are about to become your new obsession. Imagine seasoned ground beef, melted cheese, and classic burger flavors all wrapped up in soft dough, brushed with rich garlic butter, and baked until golden brown. They’re handheld, dippable, and completely irresistible.
Garlic butter cheeseburger rollups are perfect for busy weeknights, game day spreads, after-school snacks, or even party appetizers. They combine everything we love about a classic American cheeseburger with the convenience of a rollup. Plus, they’re customizable, freezer-friendly, and guaranteed to disappear fast.
Why You’ll Love These Garlic Butter Cheeseburger Rollups
There are plenty of creative dinner ideas out there, but garlic butter cheeseburger rollups hit that sweet spot between comfort food and convenience.
-
Quick and easy to prepare
-
Kid-approved and family-friendly
-
Perfect for meal prep or parties
-
Loaded with cheesy, garlicky flavor
-
Less messy than traditional burgers
Unlike standard burgers, these rollups don’t require grilling or assembling multiple toppings. Everything bakes together in one delicious, flavor-packed spiral.
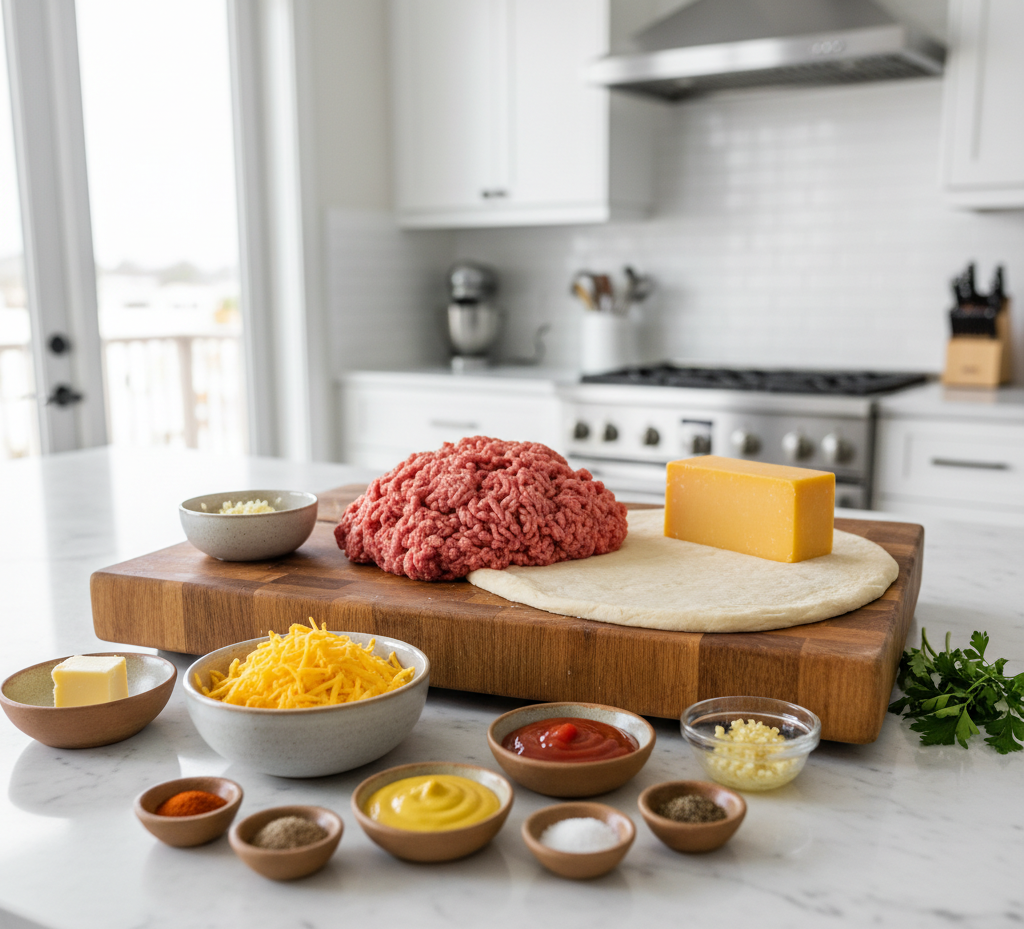
Ingredients for Garlic Butter Cheeseburger Rollups
Here’s what you’ll need to make these cheesy rollups:
-
1 pound ground beef
-
1 teaspoon salt
-
½ teaspoon black pepper
-
1 teaspoon garlic powder
-
½ teaspoon onion powder
-
1 tablespoon ketchup
-
1 teaspoon yellow mustard
-
1 cup shredded cheddar cheese
-
1 can refrigerated pizza dough (or crescent roll dough)
-
3 tablespoons butter, melted
-
2 cloves garlic, minced
-
1 tablespoon chopped fresh parsley
Ingredient Notes & Smart Substitutions
Ground beef with an 80/20 ratio gives the best balance of flavor and juiciness. If you prefer leaner meat, 90/10 works too—just be careful not to overcook.
Cheddar cheese delivers that classic cheeseburger flavor, but mozzarella, Colby Jack, or even pepper jack work beautifully. For a lighter version, try ground turkey or chicken.
Pizza dough creates a soft, slightly chewy rollup, while crescent dough gives a flakier texture. Both are delicious options for garlic butter cheeseburger rollups.
Step-by-Step Instructions
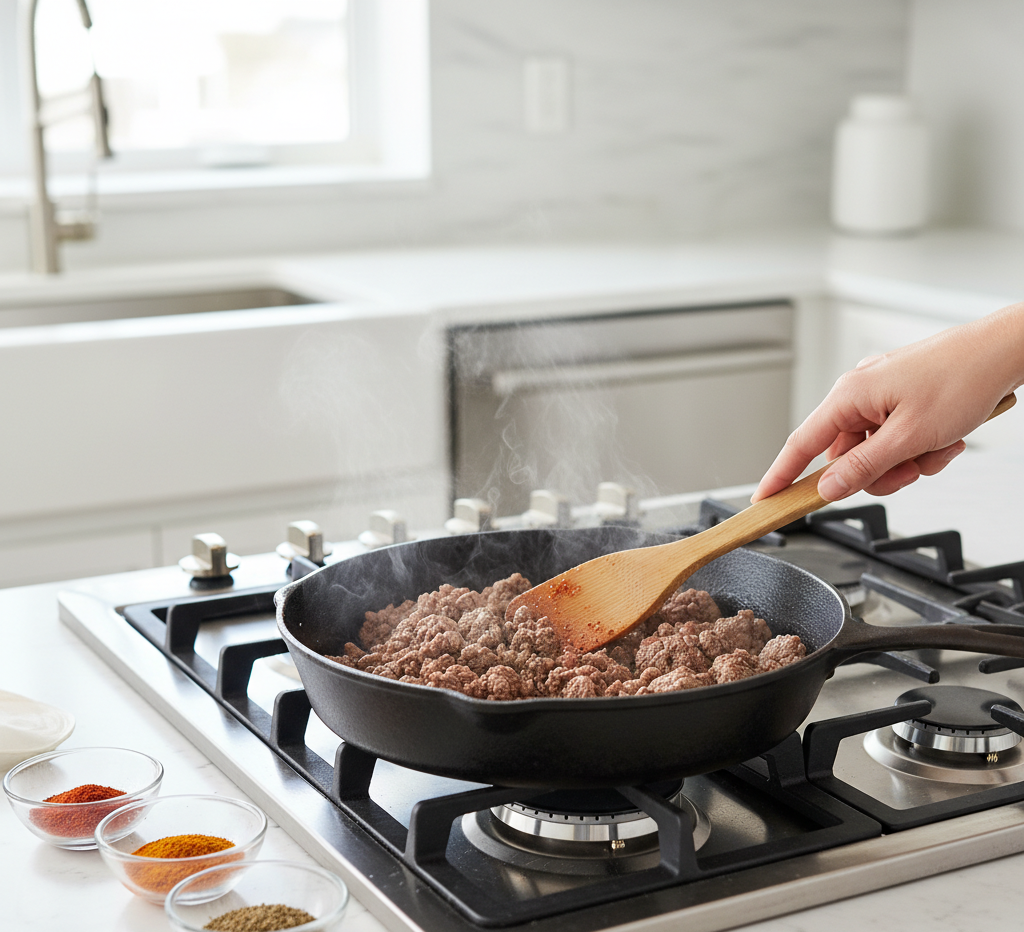
1. Cook the Beef
Preheat your oven to 375°F. In a skillet over medium heat, cook the ground beef until browned. Drain excess grease, then stir in salt, pepper, garlic powder, onion powder, ketchup, and mustard. Let the mixture cool slightly.
2. Roll Out the Dough
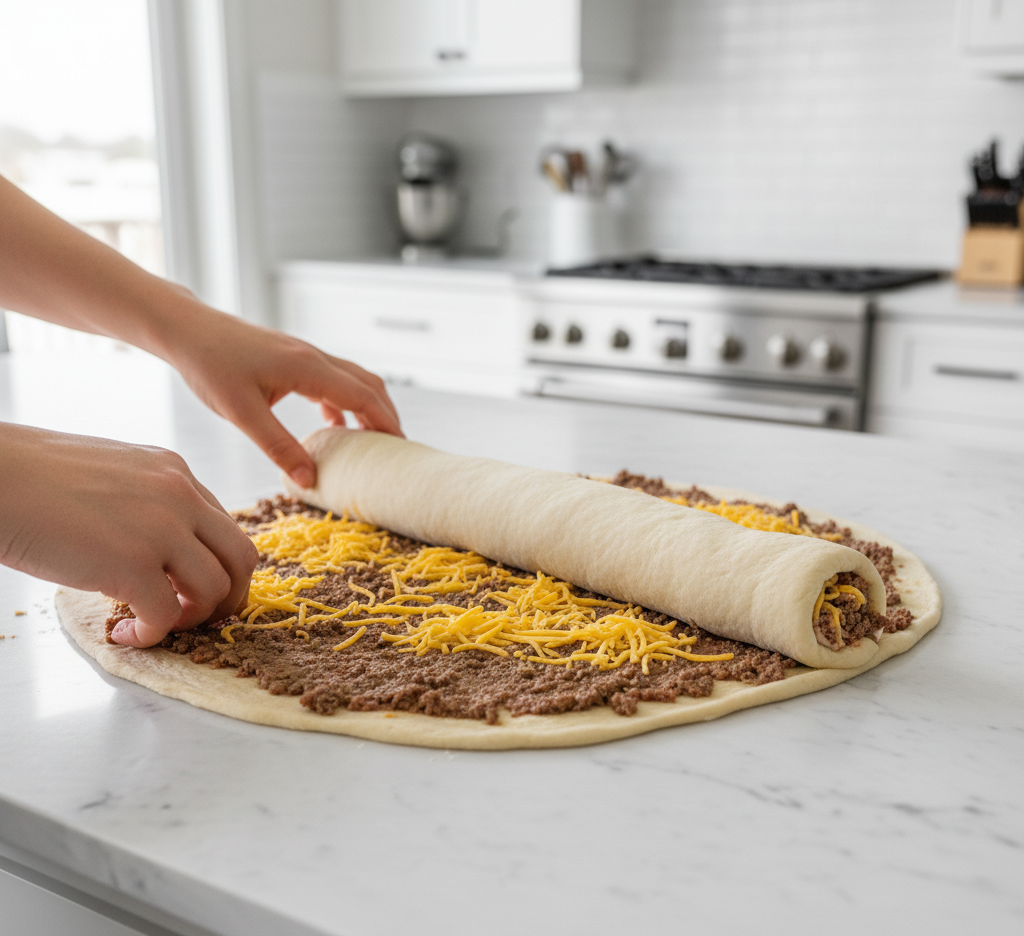
On a lightly floured surface, roll out the pizza dough into a rectangle. Spread the cooked beef mixture evenly across the surface, leaving a small border around the edges.
3. Add Cheese and Roll
Sprinkle shredded cheddar cheese evenly over the beef. Starting from one long edge, tightly roll the dough into a log.
4. Slice and Arrange
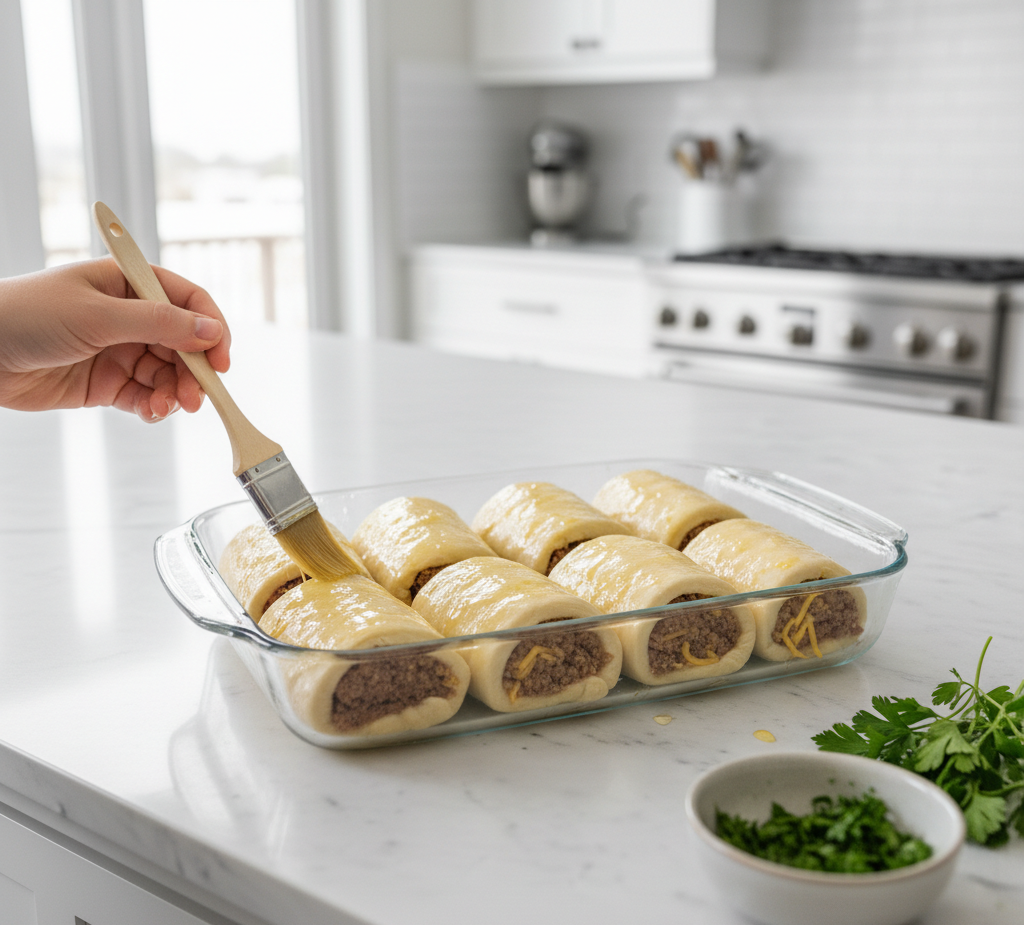
Slice the roll into 1-inch pieces and place them cut-side up in a greased baking dish.
5. Brush with Garlic Butter
Mix melted butter with minced garlic and brush generously over each rollup. Bake for 18–22 minutes, or until golden brown and cooked through.
Tips for Perfect Garlic Butter Cheeseburger Rollups
-
Cool the beef slightly before rolling to prevent soggy dough.
-
Roll tightly to keep the filling secure.
-
Don’t overfill or the rollups may burst open.
-
Use freshly grated cheese for the best melt.
-
Let them rest 5 minutes before serving for cleaner slices.
Small details make a big difference in achieving bakery-style rollups.
Delicious Variations
Garlic butter cheeseburger rollups are easy to customize.
Bacon Cheeseburger Rollups
Add cooked, crumbled bacon to the beef mixture.
Pickle Lover’s Version
Sprinkle finely chopped dill pickles inside before rolling.
Spicy Jalapeño Rollups
Mix diced jalapeños into the filling for a kick.
BBQ Cheeseburger Rollups
Swap ketchup and mustard for barbecue sauce.
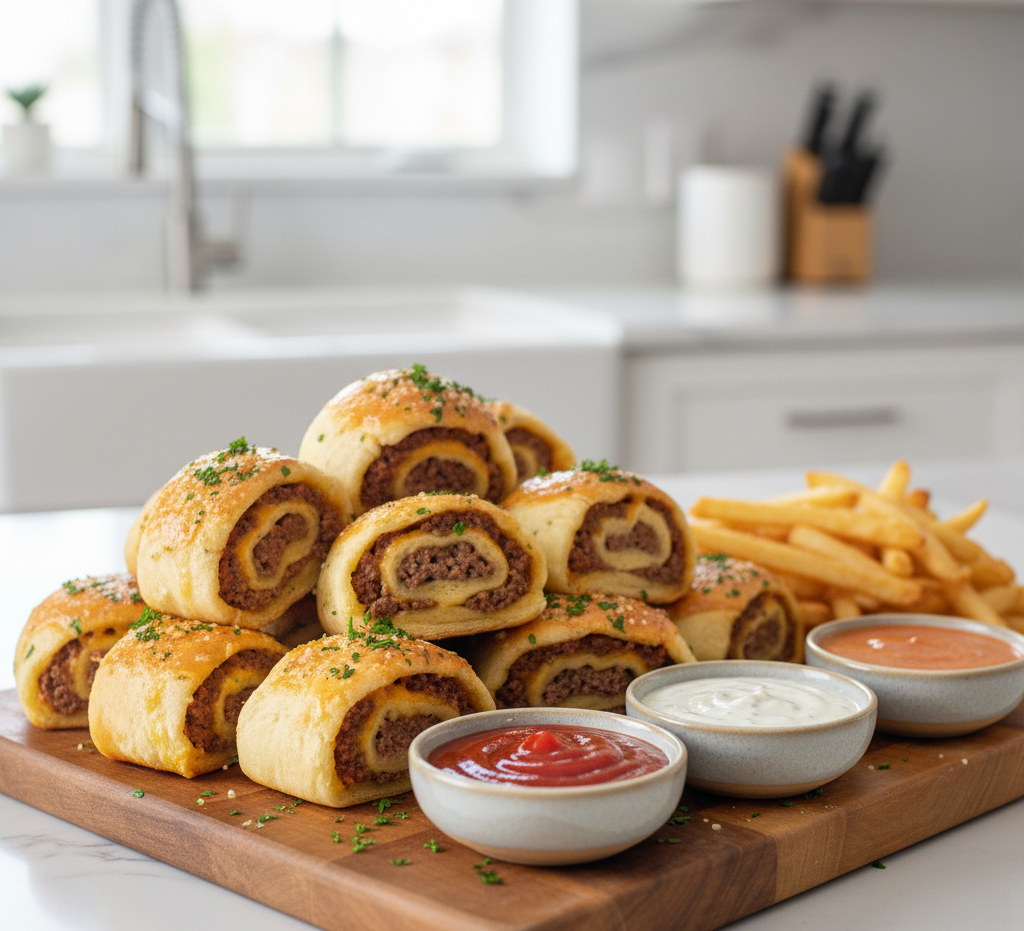
What to Serve with Garlic Butter Cheeseburger Rollups
These rollups pair perfectly with classic sides:
-
French fries or sweet potato fries
-
Coleslaw
-
Garden salad
-
Potato wedges
-
Dipping sauces like ranch, burger sauce, or spicy mayo
Storage & Reheating Tips
Store leftover garlic butter cheeseburger rollups in an airtight container in the refrigerator for up to 3 days.
To reheat:
-
Warm in a 350°F oven for 8–10 minutes.
-
Air fry at 350°F for 4–5 minutes for crisp edges.
-
Microwave for 30–45 seconds (softens slightly).
They also freeze well—wrap individually and freeze for up to 2 months.
Common Mistakes to Avoid
-
Overcooking the beef before baking
-
Using too much filling
-
Skipping the garlic butter topping
-
Not draining grease from the beef
-
Cutting slices too thin
Avoiding these simple mistakes ensures perfectly baked garlic butter cheeseburger rollups every time.
Frequently Asked Questions
1. Can I make garlic butter cheeseburger rollups ahead of time?
Yes! Assemble them, cover, and refrigerate up to 24 hours before baking.
2. Can I freeze them before baking?
Absolutely. Freeze sliced rollups on a tray, then transfer to a freezer bag. Bake from frozen, adding a few extra minutes.
3. What cheese works best?
Sharp cheddar provides classic flavor, but Colby Jack and mozzarella melt beautifully too.
4. Can I use ground turkey?
Yes, ground turkey or chicken works well—just add a little extra seasoning.
5. Are these good for parties?
They’re perfect for parties! Slice smaller for bite-sized appetizers.
Final Thoughts
These Garlic Butter Cheeseburger Rollups combine everything we love about burgers—savory beef, melted cheese, and bold flavor—into a convenient, crowd-pleasing dish. They’re easy enough for a weeknight dinner yet impressive enough for gatherings.
If you’re craving comfort food with a creative twist, garlic butter cheeseburger rollups deserve a spot in your recipe rotation. One bite of that buttery, cheesy spiral, and you’ll understand why this recipe is such a hit every single time.