Making Queso Chicken Enchiladas For Fast Weeknight Meals

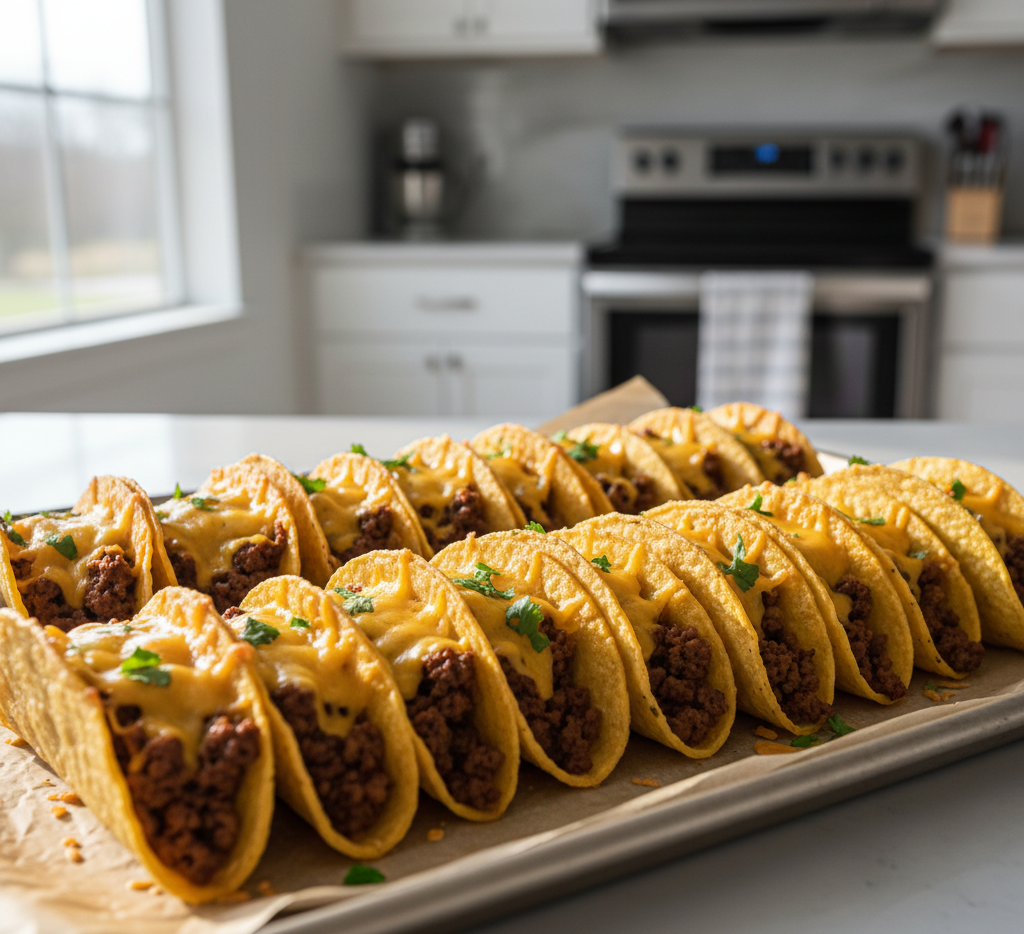
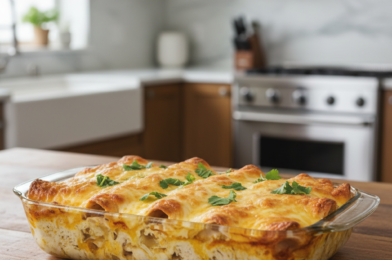
If you’re constantly searching for a dinner that’s quick, comforting, and guaranteed to please the whole family, making queso chicken enchiladas for fast weeknight meals might just be your new go-to solution. These enchiladas are loaded with tender shredded chicken, wrapped in soft tortillas, and smothered in a rich, creamy queso sauce that bakes into bubbly perfection.

Weeknights can feel chaotic, but this recipe keeps things simple without sacrificing flavor. With minimal prep and pantry-friendly ingredients, queso chicken enchiladas deliver bold Tex-Mex flavor in under 45 minutes. Whether you’re feeding picky eaters or hosting casual dinner guests, this dish always gets rave reviews.

Why You’ll Love These Queso Chicken Enchiladas

There are countless enchilada recipes out there, but making queso chicken enchiladas for fast weeknight meals stands out for several reasons:

  • Quick preparation – perfect for busy evenings

  • Ultra creamy queso sauce – rich and indulgent

  • Family-friendly flavors – mild but customizable

  • Great for meal prep – leftovers reheat beautifully

  • Crowd-pleasing comfort food

Unlike traditional red sauce enchiladas, this version leans into creamy, cheesy goodness. It’s hearty, satisfying, and feels like something you’d order at your favorite Mexican-inspired restaurant.

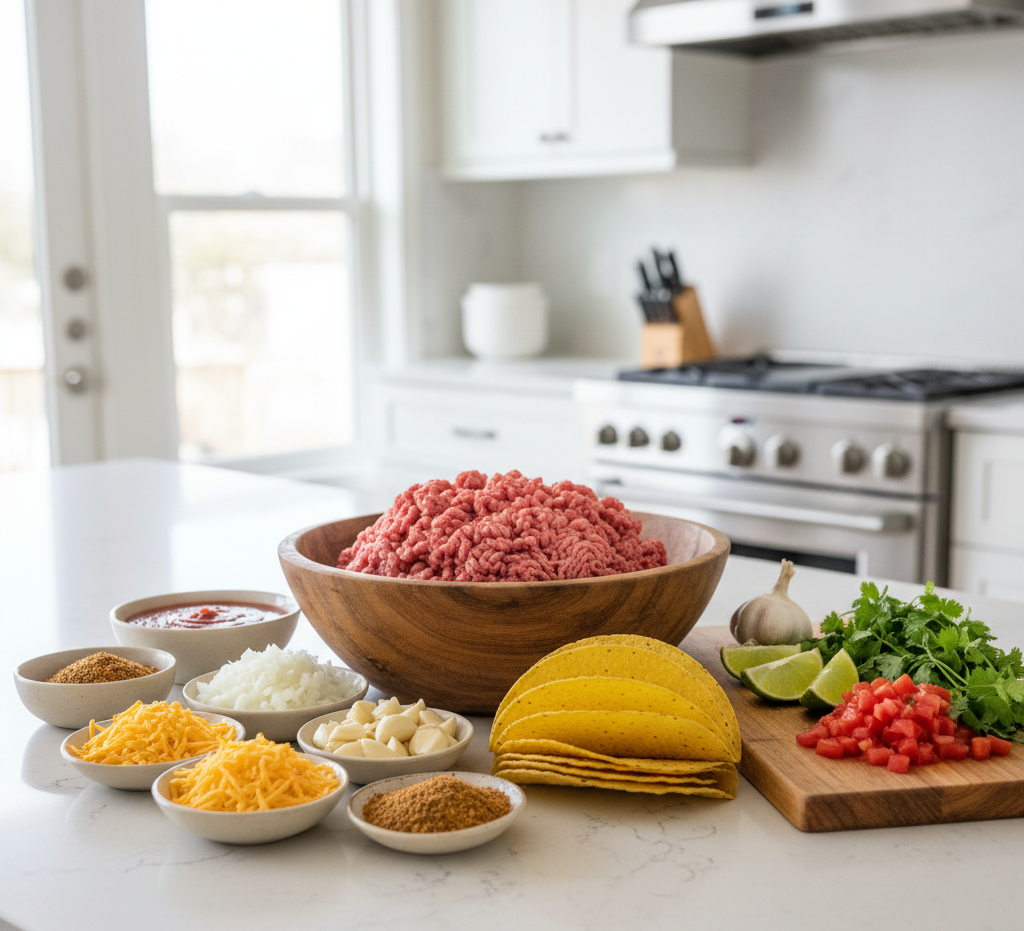
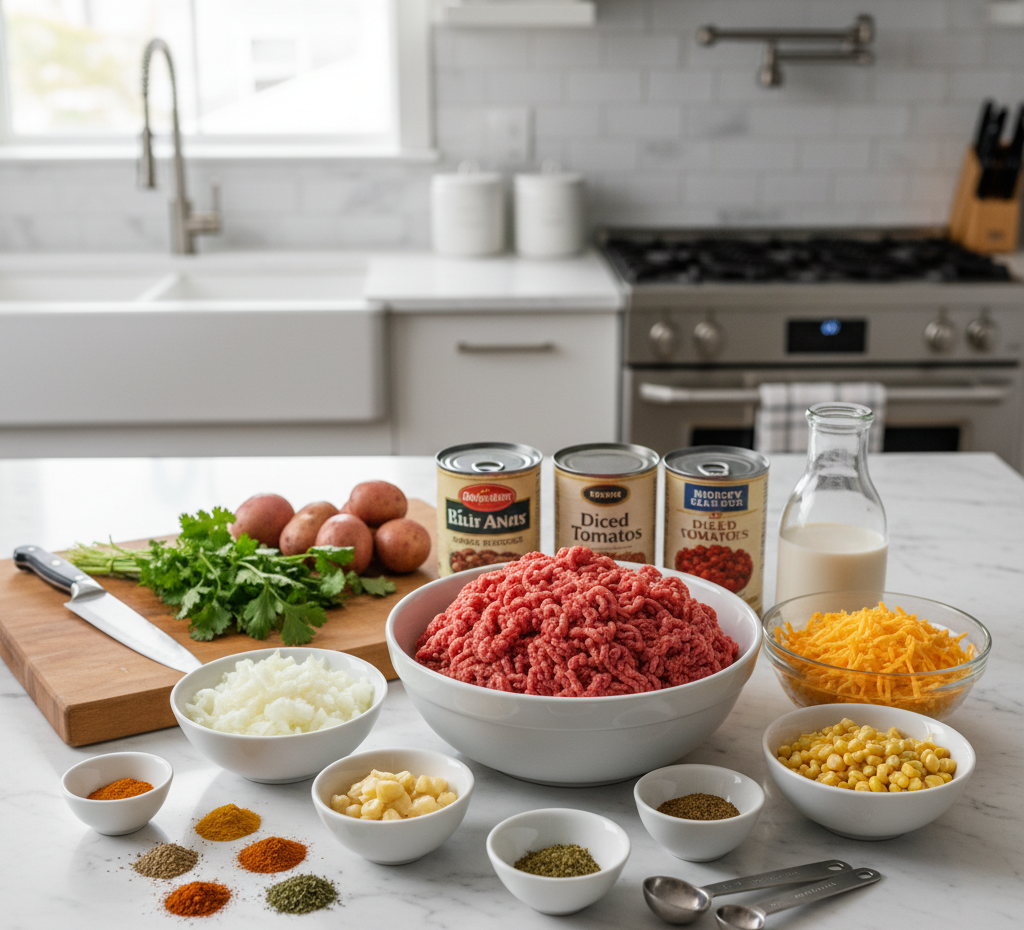
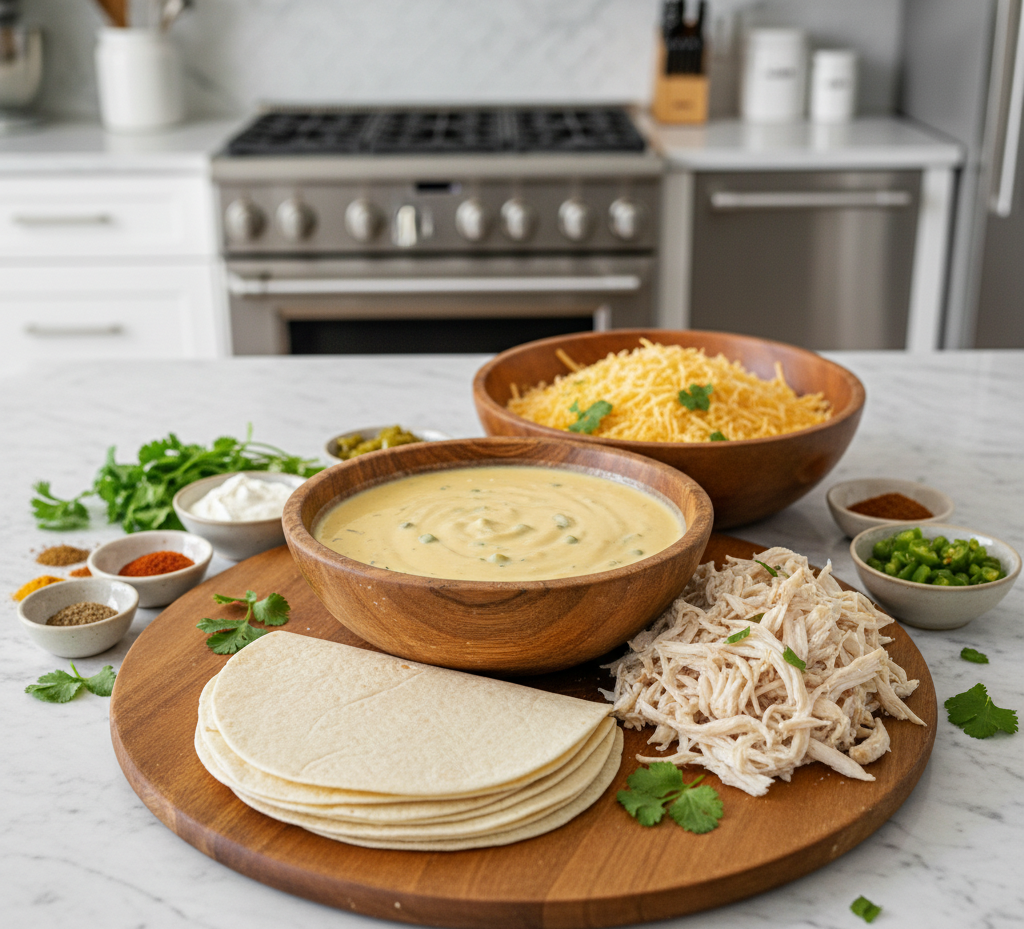
Ingredients for Queso Chicken Enchiladas

Here’s what you’ll need to make these creamy enchiladas:

  • 3 cups cooked shredded chicken (rotisserie works great)

  • 8–10 flour tortillas (medium size)

  • 2 cups queso cheese sauce (store-bought or homemade)

  • 1 cup shredded Monterey Jack or cheddar cheese

  • 1 can (10 oz) diced green chilies, drained

  • 1 teaspoon chili powder

  • ½ teaspoon cumin

  • Salt and black pepper to taste

  • ½ cup sour cream (optional for extra creaminess)

  • Fresh cilantro for garnish

Ingredient Notes & Smart Substitutions

Shredded rotisserie chicken is a lifesaver when making queso chicken enchiladas for fast weeknight meals. It saves time while adding incredible flavor. If you prefer, you can use leftover grilled or baked chicken breast.

Flour tortillas are soft and easy to roll, but corn tortillas work if you prefer a more traditional texture—just warm them first to prevent cracking. For the queso sauce, you can use a high-quality store-bought version or make your own with melted cheese, milk, and a touch of butter.

Want to lighten things up? Use Greek yogurt instead of sour cream and reduced-fat cheese.

Step-by-Step Instructions

1. Preheat and Prepare

Preheat your oven to 375°F. Lightly grease a 9×13-inch baking dish to prevent sticking.
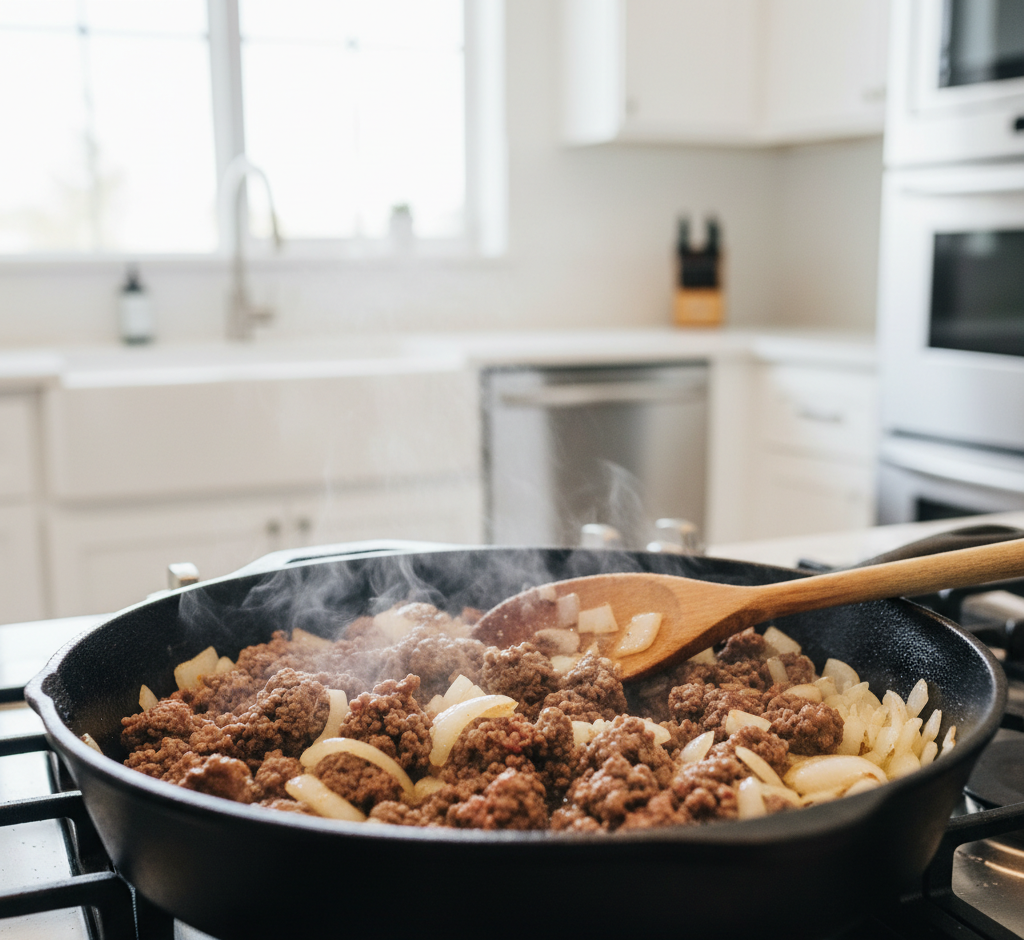
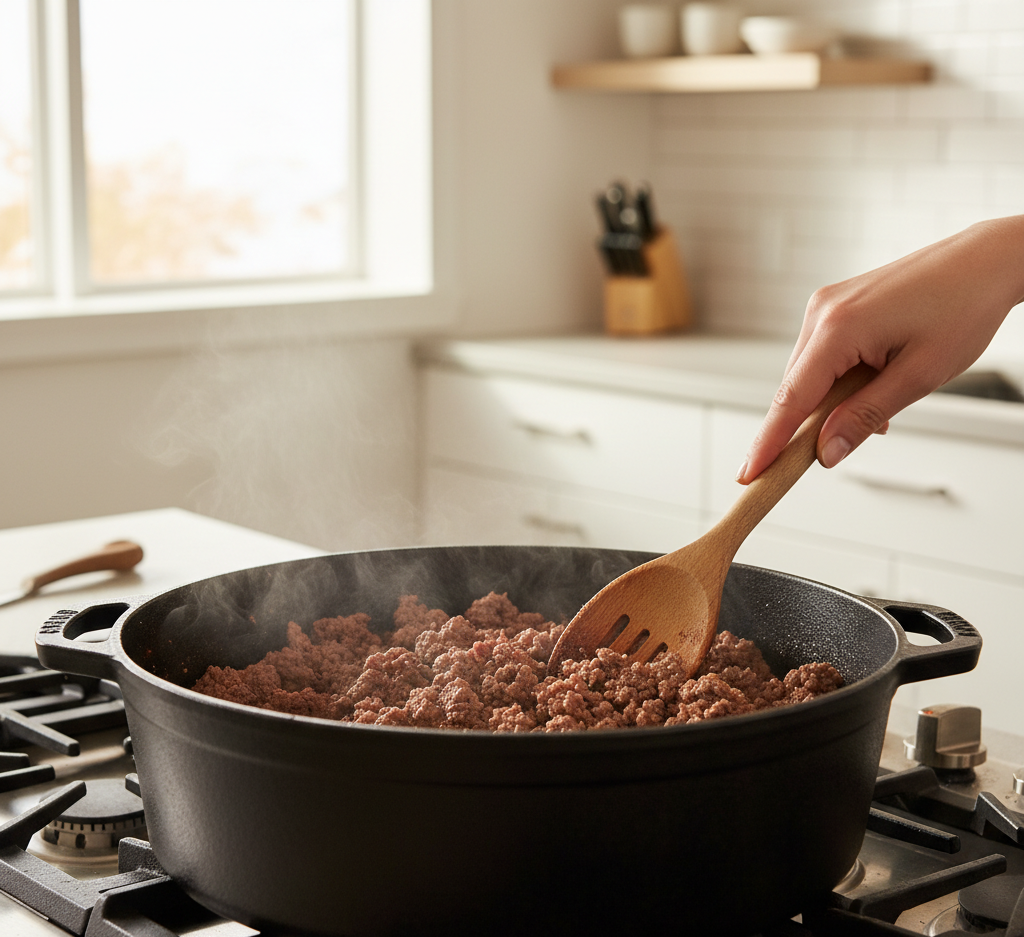
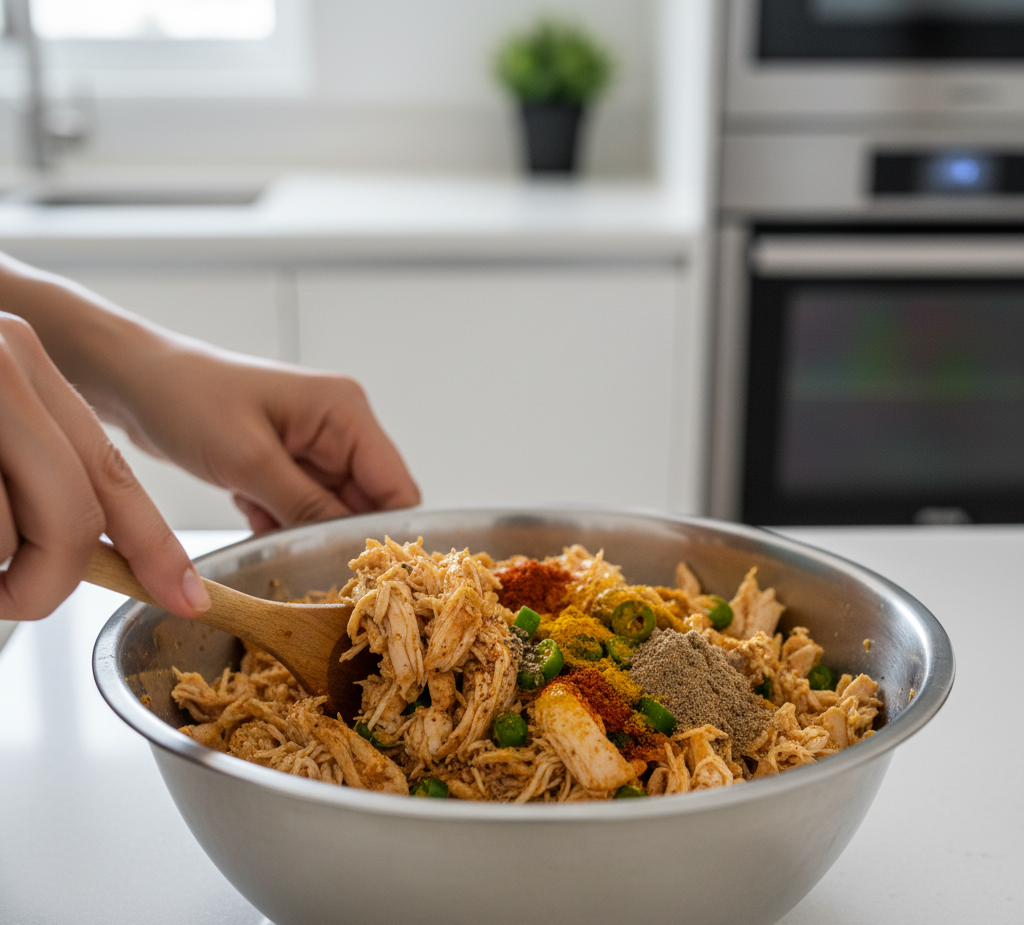
2. Make the Filling

In a large bowl, combine shredded chicken, green chilies, chili powder, cumin, salt, pepper, and sour cream (if using). Stir until evenly mixed.

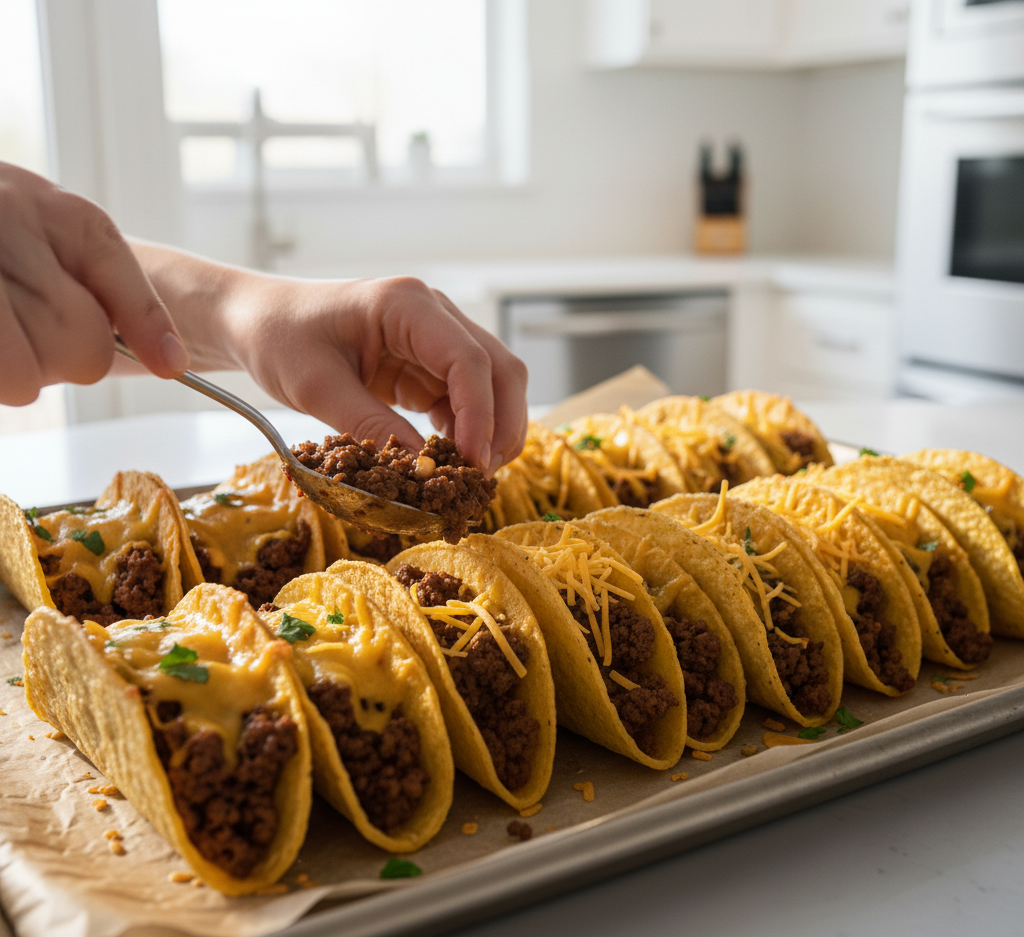
3. Fill and Roll the Tortillas

Spoon about ⅓ cup of the chicken mixture into each tortilla. Roll tightly and place seam-side down in the prepared baking dish.

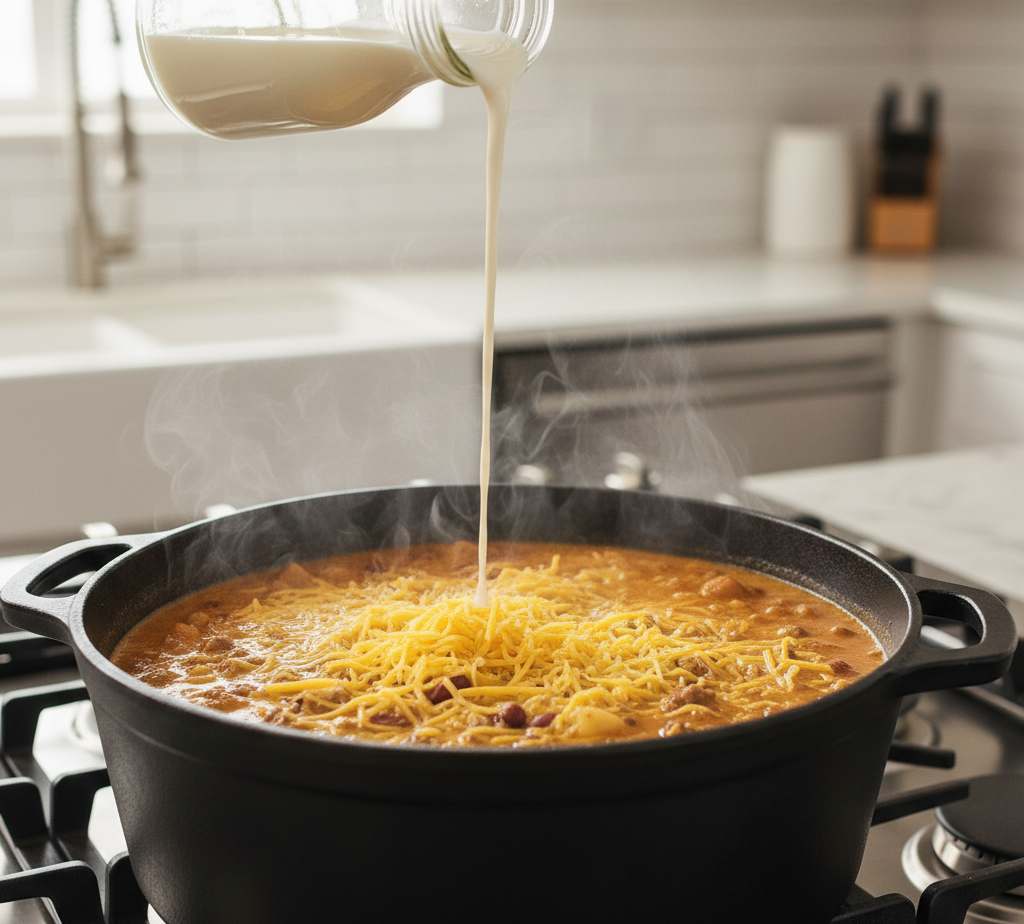
4. Add the Queso Sauce

Pour queso sauce evenly over the rolled enchiladas, making sure they’re fully coated. Sprinkle shredded Monterey Jack or cheddar cheese on top.

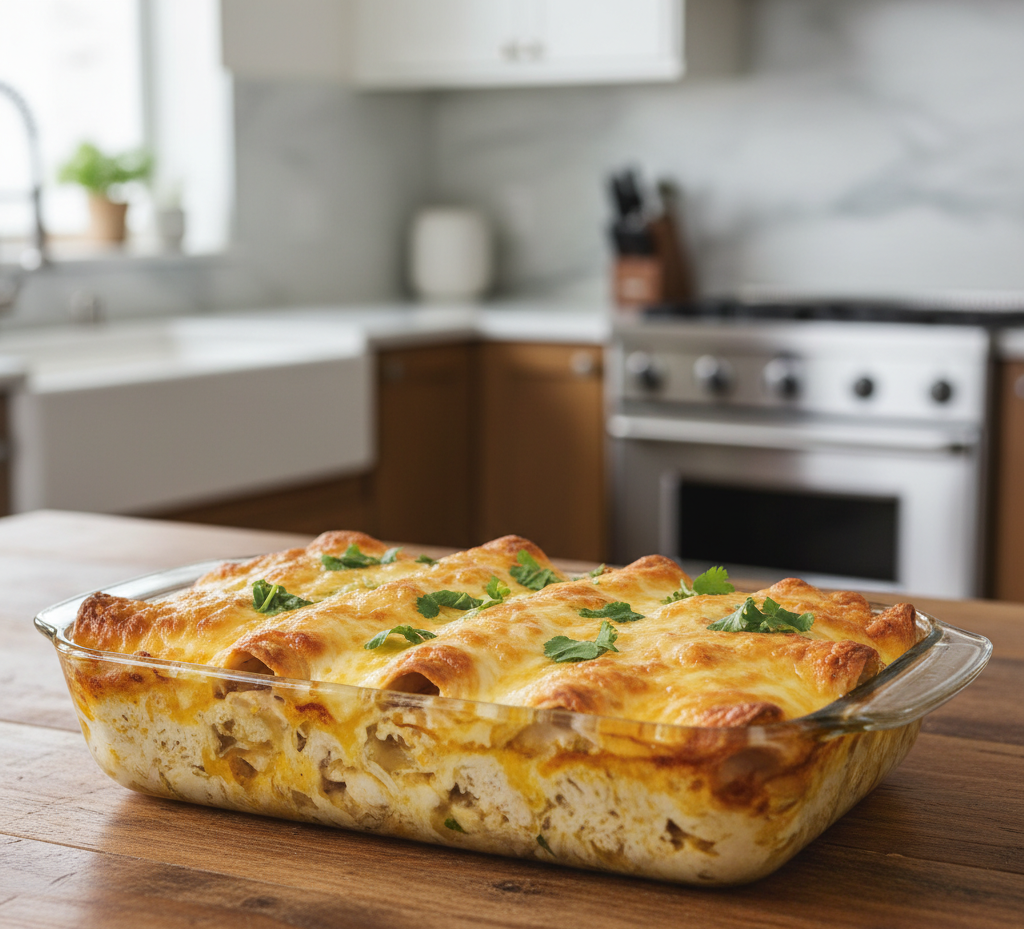
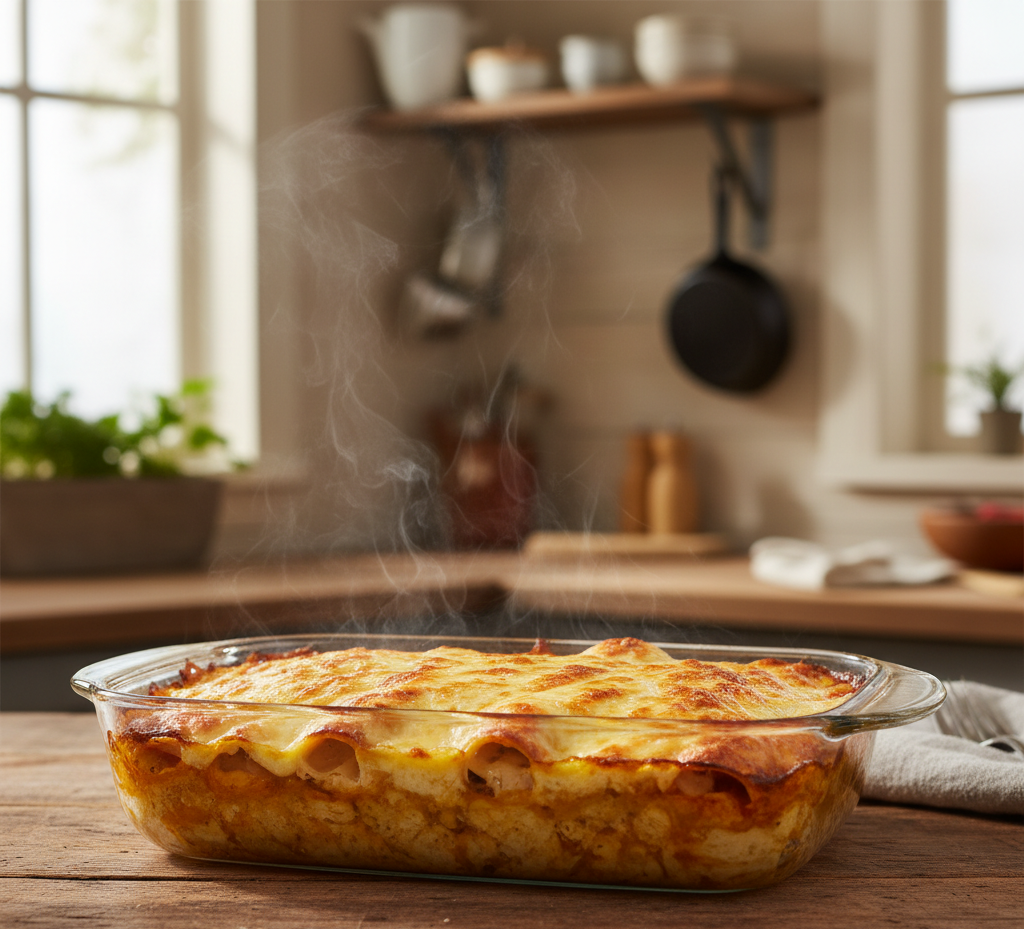
5. Bake to Perfection

Bake uncovered for 20–25 minutes, or until the cheese is melted and bubbly. For a golden finish, broil for 1–2 minutes at the end.

Tips for Perfect Queso Chicken Enchiladas

To ensure success every time:

  • Warm tortillas before rolling to prevent tearing.

  • Don’t overfill—this makes rolling difficult.

  • Spread a thin layer of queso sauce on the bottom of the dish first for extra moisture.

  • Let enchiladas rest 5 minutes before serving for easier slicing.

Tasty Variations

Making queso chicken enchiladas for fast weeknight meals doesn’t mean you can’t get creative.

Spicy Version

Add diced jalapeños or a splash of hot sauce to the filling.

Veggie-Loaded Enchiladas

Mix in sautéed bell peppers, onions, or spinach.

Beef Queso Enchiladas

Swap shredded chicken for seasoned ground beef.

Low-Carb Option

Use low-carb tortillas or serve the filling as a casserole without tortillas.

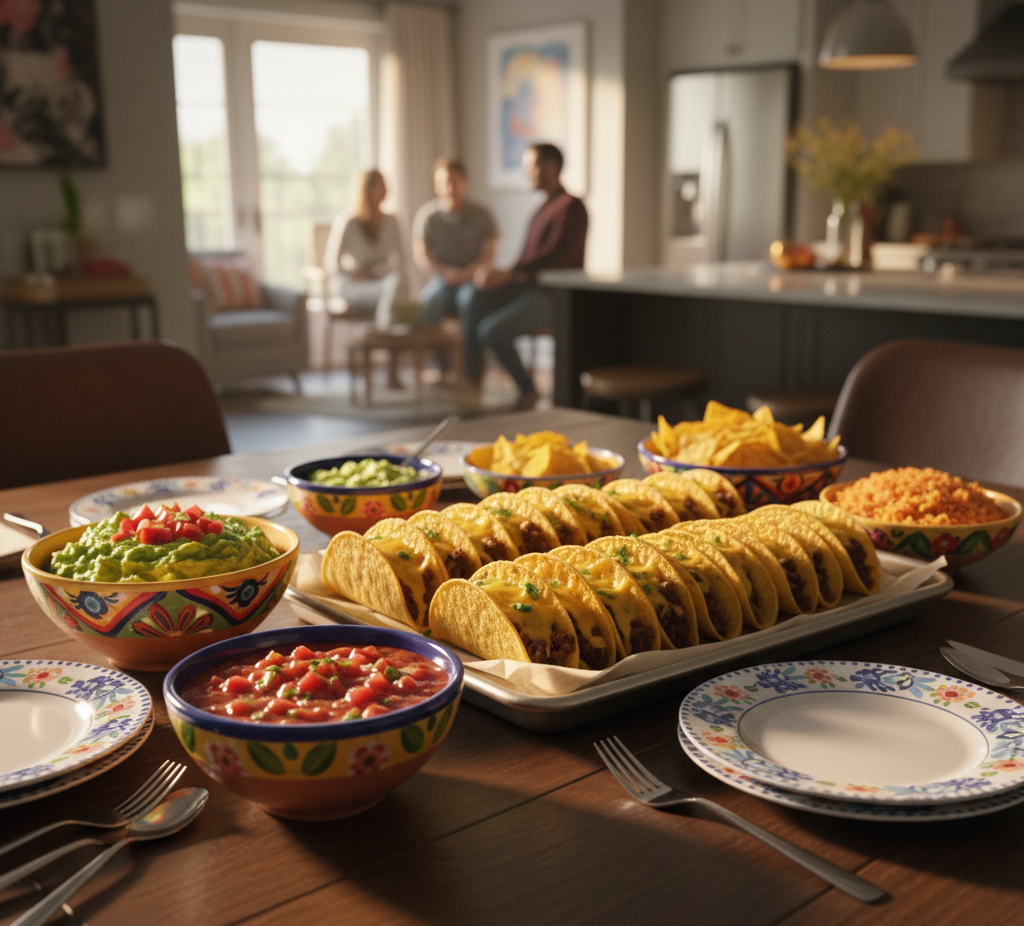
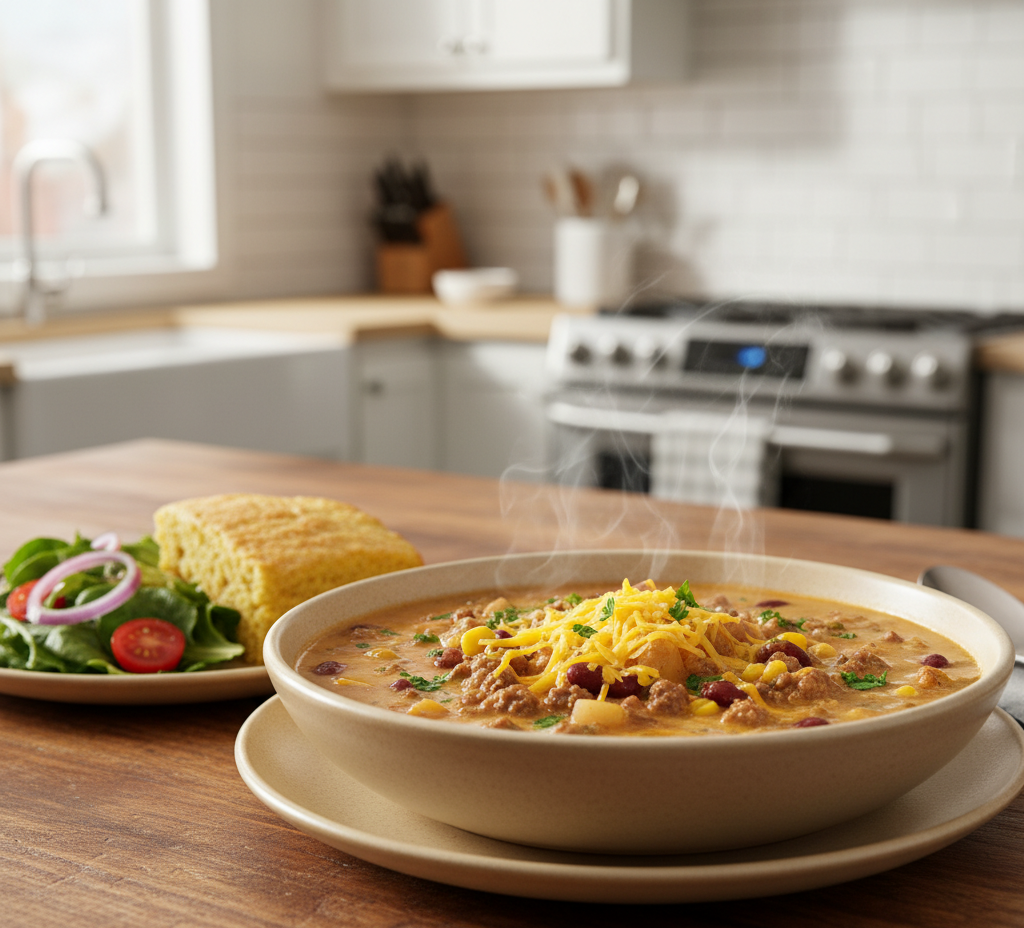
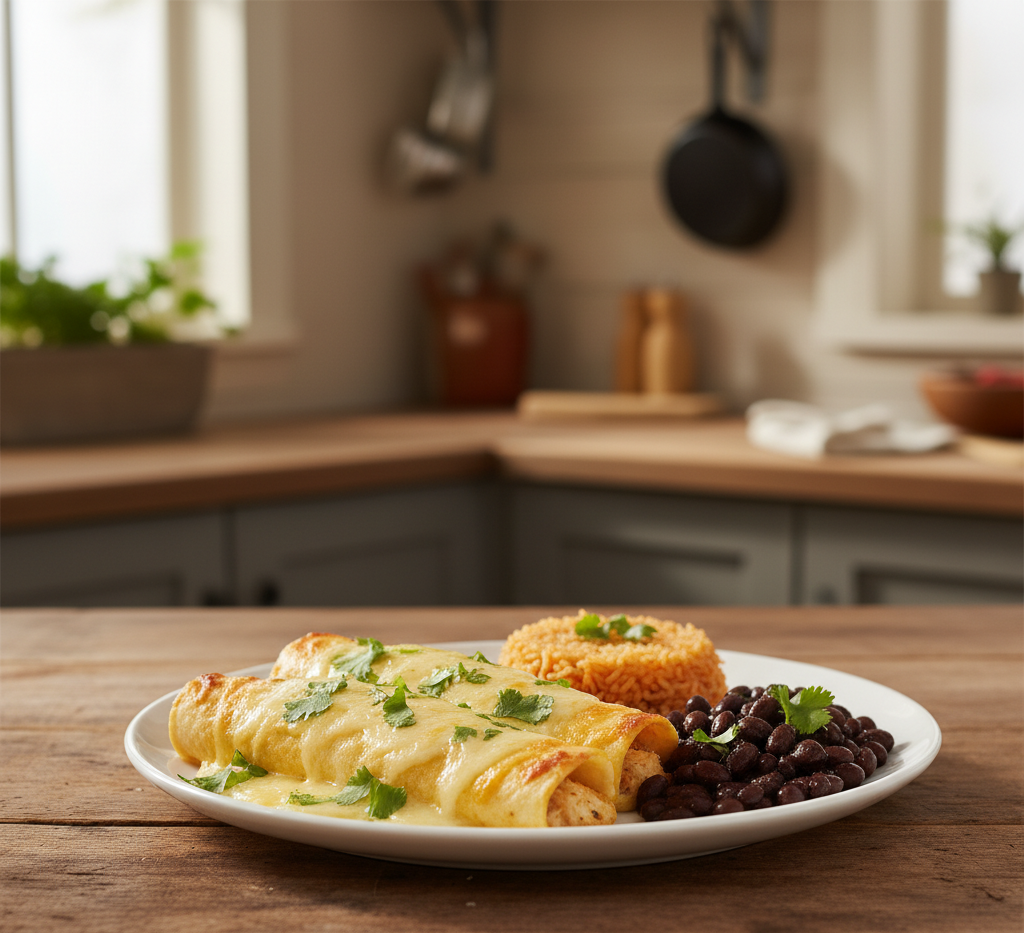
What to Serve with Queso Chicken Enchiladas

Complete your meal with these delicious sides:

  • Mexican rice

  • Refried or black beans

  • Fresh avocado slices or guacamole

  • Simple green salad with lime vinaigrette

  • Chips and salsa

Storage & Reheating Tips

Leftover queso chicken enchiladas store beautifully in the refrigerator for up to 4 days in an airtight container.

To reheat:

  • Microwave individual portions for 1–2 minutes.

  • Reheat in the oven at 350°F covered with foil until warmed through.

You can also freeze enchiladas before baking. Wrap tightly and freeze for up to 2 months. Thaw overnight before baking.

Common Mistakes to Avoid

Even simple recipes have pitfalls. Avoid these common issues:

  • Using cold tortillas (they crack easily)

  • Overbaking, which can dry out the chicken

  • Not seasoning the filling enough

  • Skipping the resting time after baking

Paying attention to these details ensures creamy, flavorful queso chicken enchiladas every time.

Frequently Asked Questions

1. Can I make queso chicken enchiladas ahead of time?

Yes! Assemble them earlier in the day, cover, and refrigerate until ready to bake.

2. Can I use canned chicken?

You can, but freshly shredded chicken provides better texture and flavor.

3. Are queso chicken enchiladas spicy?

Not typically. They’re mild and creamy, but you can add heat if desired.

4. Can I freeze baked enchiladas?

Yes. Let them cool completely, wrap tightly, and freeze for up to 2 months.

5. What cheese works best for enchiladas?

Monterey Jack melts beautifully, but cheddar or a Mexican cheese blend also works well.

Final Thoughts

Making queso chicken enchiladas for fast weeknight meals is one of the easiest ways to bring comfort and bold flavor to your dinner table without spending hours in the kitchen. The creamy queso sauce, tender chicken, and perfectly baked tortillas create a dish that feels indulgent yet incredibly approachable.

If you’re looking for a dependable, family-approved dinner that delivers every time, these queso chicken enchiladas deserve a permanent spot in your weekly rotation. Once you make them, don’t be surprised if they become your most requested weeknight meal!

Delicious Chicken & Broccoli Stir-Fry in 30 Minutes or Less

If you’re searching for a fast, flavorful, and healthy dinner, look no further than this Delicious Chicken & Broccoli Stir-Fry in 30 Minutes or Less. Tender pieces of chicken, crisp-tender broccoli, and a savory garlic-ginger sauce come together in one pan for a weeknight-friendly meal that tastes like it came from your favorite Asian restaurant—but with none of the hassle.

The best part? This stir-fry is ready in under 30 minutes, uses simple pantry ingredients, and is incredibly adaptable. You can serve it over rice, noodles, or even cauliflower rice for a low-carb option. Whether you’re cooking for your family or meal prepping for the week, this chicken & broccoli stir-fry hits all the right notes.

Why You’ll Love This Chicken & Broccoli Stir-Fry

This recipe has all the hallmarks of a weeknight winner:

  • Quick and easy – ready in under 30 minutes

  • Healthy and balanced – lean protein plus vegetables

  • Bold flavor – savory garlic-ginger soy sauce

  • Versatile – serve over rice, noodles, or grains

  • Family-friendly – flavorful but not overpowering

Unlike takeout, this chicken & broccoli stir-fry lets you control the ingredients and sodium levels while still delivering rich, satisfying flavor. Plus, cooking it at home means you can customize it with your favorite veggies or add a little extra heat.

Ingredients for Chicken & Broccoli Stir-Fry

You’ll need a handful of fresh and pantry staples to make this stir-fry:

  • 1 lb boneless, skinless chicken breast or thighs, sliced thin

  • 3 cups broccoli florets

  • 2 tablespoons vegetable oil or sesame oil

  • 3 cloves garlic, minced

  • 1 tablespoon fresh ginger, minced

  • ¼ cup soy sauce (low-sodium optional)

  • 2 tablespoons oyster sauce

  • 1 tablespoon hoisin sauce (optional for sweetness)

  • 1 teaspoon cornstarch mixed with 2 tablespoons water

  • ½ teaspoon crushed red pepper flakes (optional)

  • Cooked rice or noodles for serving

Ingredient Notes & Substitutions

  • Chicken: Boneless, skinless chicken breasts are lean, but thighs stay juicier. Slice thin for fast cooking.

  • Broccoli: Fresh is best for crisp-tender results, but frozen works in a pinch—just don’t thaw completely.

  • Sauce: Soy sauce, oyster sauce, and hoisin create a balanced savory-sweet umami flavor. Adjust to taste or swap with tamari for gluten-free.

  • Oil: Sesame oil adds a nutty flavor, but vegetable or canola oil works perfectly if you prefer a neutral base.


Step-by-Step Instructions

1. Prep the Chicken and Broccoli

Slice the chicken into thin strips for fast, even cooking. Wash and cut broccoli into small florets. Pat chicken dry to ensure proper browning.

2. Make the Stir-Fry Sauce

In a small bowl, whisk together soy sauce, oyster sauce, hoisin sauce, ginger, garlic, and cornstarch slurry. Set aside. This sauce will thicken quickly in the hot wok to coat the chicken and broccoli perfectly.

3. Cook the Chicken

Heat a wok or large skillet over medium-high heat with oil. Add chicken in a single layer and cook 3–4 minutes per side until golden brown and nearly cooked through. Remove and set aside.

4. Cook the Broccoli

Add a little more oil if needed and toss in broccoli florets. Stir-fry 3–4 minutes until bright green and crisp-tender. For extra flavor, sprinkle with crushed red pepper flakes.

5. Combine and Finish

Return chicken to the wok and pour in the prepared sauce. Toss everything together for 1–2 minutes until the sauce thickens and coats the chicken and broccoli evenly. Serve immediately over steamed rice or noodles.

Tips for Perfect Chicken & Broccoli Stir-Fry

  • High heat: Cook quickly over medium-high to high heat to preserve texture and color.

  • Do not overcrowd: Cook chicken in batches if necessary to avoid steaming.

  • Prep first: Have all sauce and ingredients ready; stir-frying is fast.

  • Sauce thickening: Add cornstarch slurry gradually for perfect consistency.

Variations to Try

  • Spicy Garlic Chicken & Broccoli: Add more crushed red pepper or sriracha.

  • Cashew Chicken Stir-Fry: Toss in roasted cashews for crunch.

  • Ginger-Sesame Twist: Add 1 teaspoon toasted sesame seeds and drizzle extra sesame oil at the end.

  • Vegetable Boost: Include bell peppers, snap peas, or carrots for more color and nutrition.

What to Serve with Chicken & Broccoli Stir-Fry

While this stir-fry is excellent on its own, serving it with complementary sides makes the meal even better:

  • Steamed jasmine or basmati rice

  • Egg fried rice for extra indulgence

  • Lo mein noodles

  • Light Asian-style salad with sesame dressing

Storage & Reheating Tips

Leftovers can be stored in an airtight container in the refrigerator for up to 3 days.

  • Reheat on stovetop: Warm in a skillet over medium heat, adding a splash of water or broth.

  • Microwave: Cover with a damp paper towel to prevent drying.

Avoid reheating for too long to maintain chicken tenderness and broccoli crunch.

Common Mistakes to Avoid

  • Overcrowding the pan – leads to steaming instead of stir-frying.

  • Overcooking broccoli – keep it crisp-tender.

  • Using too low heat – stir-fry requires high heat for flavor and texture.

  • Adding sauce too early – thickens too fast and can clump.

Frequently Asked Questions

1. Can I use frozen broccoli for this stir-fry?

Yes, but cook it straight from frozen and increase stir-fry time slightly to avoid sogginess.

2. Can I use thighs instead of chicken breast?

Absolutely. Thighs stay juicy and add extra flavor, perfect for quick stir-fry.

3. Is this recipe gluten-free?

Use tamari or a gluten-free soy sauce and oyster sauce substitute to make it gluten-free.

4. Can I make this ahead of time?

You can prep vegetables and chicken ahead, but stir-fry fresh for best texture and flavor.

5. What can I serve it with besides rice?

Lo mein noodles, quinoa, cauliflower rice, or steamed soba noodles all pair wonderfully.

Final Thoughts

This Delicious Chicken & Broccoli Stir-Fry in 30 Minutes or Less is a game-changer for busy weeknights. It’s fast, nutritious, and bursting with flavor—all while keeping cleanup minimal.

With tender chicken, crisp-tender broccoli, and a savory sauce that clings to every bite, this stir-fry proves that healthy, homemade dinner doesn’t have to be complicated. Once you try it, it’s guaranteed to become a regular in your weekly meal rotation.

Garlic Parmesan Rice Recipe

If you’re looking for a simple side dish that feels elevated yet takes minimal effort, this Garlic Parmesan Rice Recipe is about to become your new favorite. It’s buttery, infused with savory garlic, and finished with freshly grated parmesan cheese that melts into every fluffy grain. The result? A creamy, flavorful rice dish that pairs beautifully with almost anything.

What makes this Garlic Parmesan Rice recipe truly special is its balance. The garlic adds warmth and depth, the butter creates richness, and the parmesan brings that salty, nutty finish that keeps you coming back for another bite. Whether you’re serving grilled chicken, roasted vegetables, or a perfectly seared steak, this rice ties the whole meal together effortlessly.

Why You’ll Love This Garlic Parmesan Rice Recipe

There are plenty of rice side dishes out there, but this Garlic Parmesan Rice recipe stands out for so many reasons:

  • One-pot simplicity – easy cooking and cleanup

  • Rich, buttery flavor

  • Perfectly fluffy texture

  • Pairs with nearly any protein

  • Family-friendly and customizable

It’s the kind of dependable side dish that works for weeknight dinners but is elegant enough for holidays or entertaining. Plus, the ingredients are pantry staples you probably already have on hand.

Ingredients for Garlic Parmesan Rice

Here’s what you’ll need to make this flavorful rice side dish:

  • 1 cup long-grain white rice

  • 2 tablespoons butter

  • 3 cloves garlic, minced

  • 2 cups chicken broth (or vegetable broth)

  • ½ teaspoon salt (adjust to taste)

  • ¼ teaspoon black pepper

  • ½ cup freshly grated parmesan cheese

  • 1 tablespoon chopped fresh parsley (optional garnish)

Ingredient Notes & Substitutions

Long-grain white rice works best in this Garlic Parmesan Rice recipe because it stays fluffy and separate. Jasmine rice is a great alternative if you prefer a slightly fragrant twist. Avoid short-grain rice, which can become sticky.

Fresh garlic is essential here—garlic powder won’t deliver the same depth of flavor. As for parmesan, always opt for freshly grated cheese. Pre-shredded versions contain anti-caking agents that can prevent smooth melting.

If you want to make this vegetarian, simply swap chicken broth for vegetable broth. You can even use low-sodium broth to better control salt levels.

Step-by-Step Instructions

1. Sauté the Garlic

In a medium saucepan over medium heat, melt the butter. Add minced garlic and sauté for about 30–60 seconds until fragrant. Be careful not to brown it—burned garlic can turn bitter.

2. Toast the Rice

Add the uncooked rice directly to the saucepan. Stir for 1–2 minutes to lightly toast the grains. This step enhances flavor and helps keep the rice fluffy.

3. Simmer Until Tender

Pour in the broth, salt, and pepper. Bring to a gentle boil, then reduce heat to low. Cover and simmer for 15–18 minutes, or until the liquid is fully absorbed and the rice is tender.

4. Stir in Parmesan

Remove the pot from heat and let it sit covered for 5 minutes. Fluff the rice with a fork, then stir in freshly grated parmesan cheese until melted and creamy. Garnish with parsley if desired.

Tips for Perfect Garlic Parmesan Rice

To get the best results every time:

  • Use the correct rice-to-liquid ratio.

  • Keep the lid on while simmering to trap steam.

  • Let the rice rest before fluffing.

  • Add parmesan off heat for smooth melting.

If the rice seems slightly dry, stir in a tablespoon of warm broth or butter before serving.

Delicious Variations

This Garlic Parmesan Rice recipe is incredibly adaptable. Try these flavorful twists:

Creamy Garlic Parmesan Rice

Stir in 2 tablespoons of heavy cream for extra richness.

Lemon Garlic Rice

Add lemon zest and a squeeze of fresh lemon juice for brightness.

Herb-Infused Version

Mix in fresh thyme, basil, or rosemary.

Garlic Parmesan Brown Rice

Swap white rice for brown rice (adjust cooking time accordingly).

Each variation keeps the base recipe exciting while maintaining that signature garlic parmesan flavor.

What to Serve with Garlic Parmesan Rice

This side dish pairs beautifully with a wide variety of main courses:

  • Grilled chicken breast

  • Pan-seared salmon

  • Garlic butter shrimp

  • Roast beef or steak

  • Baked pork chops

  • Roasted vegetables

Storage & Reheating

Leftover Garlic Parmesan Rice stores well in an airtight container in the refrigerator for up to 4 days.

To reheat:

  • Microwave with a splash of broth or water, covered.

  • Warm gently on the stovetop with a tablespoon of butter or broth.

Rice can dry out when chilled, so adding moisture during reheating helps restore its creamy texture.

Common Mistakes to Avoid

Even a simple rice recipe can go wrong. Avoid these pitfalls:

  • Lifting the lid too often while cooking

  • Using too much liquid

  • Overcooking until mushy

  • Adding parmesan while the rice is still boiling

Paying attention to these details ensures fluffy, flavorful Garlic Parmesan Rice every single time.

Frequently Asked Questions

1. Can I make Garlic Parmesan Rice ahead of time?

Yes! Prepare it earlier in the day and reheat with a splash of broth before serving.

2. Can I use instant rice?

It’s possible, but the texture won’t be as fluffy. Adjust liquid and cook time accordingly.

3. Is this recipe gluten-free?

Yes, this Garlic Parmesan Rice recipe is naturally gluten-free.

4. Can I freeze garlic parmesan rice?

Yes, freeze in airtight containers for up to 2 months. Thaw overnight before reheating.

5. How do I prevent sticky rice?

Rinse the rice before cooking and avoid over-stirring while simmering.

Final Thoughts

This Garlic Parmesan Rice Recipe proves that a simple side dish can truly steal the show. With buttery garlic flavor and creamy parmesan goodness, it transforms everyday meals into something special.

Whether you’re cooking for your family on a busy weeknight or preparing a holiday feast, Garlic Parmesan Rice is a reliable, crowd-pleasing choice. Once you make it, don’t be surprised if it becomes your go-to rice recipe for years to come.

Why is This One-Pot Pasta a Must-Try? The Ultimate Creamy Garlic Parmesan Recipe

If you’ve ever stared at a sink full of dishes after making dinner and thought, “There has to be an easier way,” this recipe answers that question. Why is this One-Pot Pasta a must-try? Because it delivers bold flavor, creamy texture, and weeknight simplicity—all in a single pot.

This One-Pot Pasta recipe is rich, garlicky, and coated in a silky parmesan cream sauce that tastes like it simmered for hours. In reality, it comes together in about 30 minutes with minimal prep and almost no cleanup. It’s the kind of practical, flavor-packed meal every busy household needs in its rotation.

Why is This One-Pot Pasta a Must-Try?

Let’s break it down. Why is this One-Pot Pasta a must-try for home cooks across America?

  • One pot = easy cleanup

  • Ready in 30 minutes

  • Creamy, restaurant-quality flavor

  • Budget-friendly ingredients

  • Endlessly customizable

Unlike traditional pasta recipes where you boil noodles separately, this one-pot pasta cooks everything together. The starch released from the pasta helps thicken the sauce naturally, creating a luxuriously creamy texture without complicated techniques.

Ingredients for This Must-Try One-Pot Pasta

Here’s everything you’ll need for this creamy garlic parmesan one-pot pasta:

  • 12 ounces fettuccine or linguine

  • 2 tablespoons butter

  • 4 cloves garlic, minced

  • 2 cups chicken broth

  • 1 cup heavy cream

  • 1 cup freshly grated parmesan cheese

  • 1 teaspoon Italian seasoning

  • Salt and black pepper to taste

  • 1 cup cooked shredded chicken (optional)

  • Fresh parsley for garnish

Ingredient Notes & Smart Substitutions

The beauty of this One-Pot Pasta is how flexible it is. Fettuccine creates a creamy, clingy texture, but penne or spaghetti works just as well. Freshly grated parmesan melts more smoothly than pre-shredded cheese, giving you that silky finish.

If you prefer a lighter version, you can substitute half-and-half for heavy cream, though the sauce will be slightly thinner. Vegetable broth can replace chicken broth for a vegetarian option.

Adding shredded chicken turns this must-try one-pot pasta into a full protein-packed dinner. You could also use sautéed shrimp or mushrooms for variation.

Step-by-Step Instructions

1. Sauté the Garlic

In a large Dutch oven or deep skillet, melt butter over medium heat. Add minced garlic and sauté for 30 seconds until fragrant. Be careful not to brown it—burned garlic can turn bitter.

2. Add Liquid and Pasta

Pour in chicken broth and heavy cream. Stir to combine, then add uncooked pasta directly into the pot. Press it down gently so it’s mostly submerged in liquid.

Bring to a gentle boil, then reduce heat and simmer uncovered for 10–12 minutes, stirring occasionally to prevent sticking.

3. Finish with Cheese

Once pasta is tender and most of the liquid has absorbed, stir in parmesan cheese and Italian seasoning. Add cooked chicken if using. Simmer for another 2–3 minutes until the sauce thickens and coats the pasta beautifully.

Tips for Perfect One-Pot Pasta

If you’re wondering again, why is this One-Pot Pasta a must-try? Because it’s nearly foolproof when you follow these tips:

  • Stir occasionally to prevent sticking.

  • Don’t overcook—pasta should be al dente.

  • Add cheese off heat for smooth melting.

  • Taste and adjust seasoning before serving.

If the sauce thickens too much, simply add a splash of broth or milk to loosen it.

Delicious Variations

This One-Pot Pasta adapts easily to your preferences:

Spicy Version

Add red pepper flakes or a splash of hot sauce.

Veggie Boost

Stir in spinach, cherry tomatoes, or steamed broccoli.

Lemon Garlic Twist

Add lemon zest and a squeeze of fresh lemon juice for brightness.

Bacon Parmesan

Cook chopped bacon first, then build the sauce in the drippings for smoky depth.

The versatility is exactly why this one-pot pasta is a must-try.

What to Serve with This Must-Try One-Pot Pasta

While this dish stands on its own, pairing it with simple sides makes it even better:

  • Garlic bread

  • Caesar salad

  • Roasted asparagus

  • Caprese salad

  • Steamed green beans

Storage & Reheating Tips

This One-Pot Pasta stores well in an airtight container in the refrigerator for up to 4 days. The sauce may thicken as it cools, which is completely normal.

To reheat:

  • Warm gently on the stovetop with a splash of milk or broth.

  • Microwave individual portions in 30-second intervals, stirring between each.

Freezing isn’t ideal due to the cream-based sauce, but leftovers make excellent next-day lunches.

Common Mistakes to Avoid

Even simple recipes can go sideways. Avoid these pitfalls:

  • Using high heat (can scorch the sauce)

  • Not stirring enough

  • Adding cheese while boiling

  • Over-reducing the liquid

Being mindful of these details ensures your must-try one-pot pasta turns out creamy and smooth every time.

Frequently Asked Questions

1. Why is this One-Pot Pasta a must-try for busy families?

Because it’s quick, uses one pot, and delivers comforting, crowd-pleasing flavor.

2. Can I make this recipe vegetarian?

Absolutely. Use vegetable broth and skip the chicken.

3. What pasta works best?

Long pasta like fettuccine works beautifully, but short shapes like penne are great too.

4. Can I use milk instead of heavy cream?

Yes, though the sauce will be thinner. Add a little extra parmesan to thicken.

5. How do I prevent sticky pasta?

Stir occasionally and ensure enough liquid covers the noodles during cooking.

Final Thoughts

So, why is this One-Pot Pasta a must-try? Because it combines everything we love about home cooking: simplicity, rich flavor, and comfort in every bite. It’s practical enough for a busy Tuesday night yet delicious enough to serve to guests.

With minimal cleanup, pantry-friendly ingredients, and endless customization options, this creamy garlic parmesan one-pot pasta truly earns its place in your regular dinner rotation. Once you try it, you’ll understand exactly why this one-pot pasta is a must-try.

Crispy Beer Battered Fish and Chips (Pub-Style Recipe)

There’s nothing quite like a basket of Crispy Beer Battered Fish and Chips (Pub-Style Recipe) served hot and fresh with a squeeze of lemon and a side of tartar sauce. That crackly golden coating, the tender flaky fish inside, and a pile of perfectly crisp fries—it’s comfort food at its absolute best.

While fish and chips might feel like something you only order at a restaurant, this crispy beer battered fish and chips recipe proves you can recreate authentic pub-style flavor right in your own kitchen. With the right techniques and a few simple ingredients, you’ll achieve that light, airy batter and shatteringly crisp crust that rivals your favorite seaside pub.

Why You’ll Love This Crispy Beer Battered Fish and Chips Recipe

This homemade version delivers everything you love about classic pub fare—without leaving the house.

  • Ultra crispy, airy beer batter

  • Flaky, tender white fish inside

  • Golden, crunchy fries

  • Authentic pub-style flavor

  • Simple pantry ingredients

The secret to great crispy beer battered fish and chips is balance. The batter must be light yet sturdy, the oil hot but controlled, and the fish fresh and properly dried before frying. When done right, every bite is crunchy on the outside and delicate inside.

Ingredients for Crispy Beer Battered Fish and Chips

For the Fish:

  • 1 ½ pounds cod, haddock, or pollock (cut into large fillets)

  • 1 cup all-purpose flour (plus extra for dredging)

  • 1 cup cold beer (lager works best)

  • 1 teaspoon baking powder

  • 1 teaspoon paprika

  • ½ teaspoon garlic powder

  • Salt and black pepper to taste

  • Oil for frying (vegetable, canola, or peanut oil)

For the Chips:

  • 3–4 large russet potatoes

  • Salt to taste

  • Oil for frying

Ingredient Notes & Best Fish Choices

For truly crispy beer battered fish and chips, choose a firm white fish like cod or haddock. These varieties hold up well during frying and deliver that classic flaky texture. Make sure to pat the fish completely dry before dredging—moisture can prevent the batter from sticking properly.

Cold beer is essential. The carbonation creates bubbles in the batter, resulting in a light, airy crust. A mild lager works best because it won’t overpower the fish flavor.

Russet potatoes are ideal for chips thanks to their high starch content, which helps create crispy exteriors and fluffy interiors.

Step-by-Step Instructions

1. Prepare the Chips

Peel and cut potatoes into thick strips. Soak them in cold water for at least 30 minutes to remove excess starch. Drain and pat dry thoroughly.

Heat oil to 325°F and fry the potatoes in batches for 3–4 minutes (they should be pale and soft, not browned). Remove and drain on a rack.

2. Make the Beer Batter

In a large bowl, whisk together flour, baking powder, paprika, garlic powder, salt, and pepper. Slowly whisk in cold beer until smooth. The batter should be thick enough to coat the back of a spoon.

3. Fry the Fish

Increase oil temperature to 350°F. Lightly dredge each fish fillet in flour, shaking off excess. Dip into batter, ensuring full coverage, then carefully lower into hot oil.

Fry for 4–6 minutes until deep golden brown and crispy. Transfer to a wire rack to drain.

4. Finish the Chips

Increase oil temperature to 375°F and fry the pre-cooked fries again for 2–3 minutes until golden and crispy. Season immediately with salt.

Tips for Perfect Crispy Beer Battered Fish and Chips

Achieving restaurant-quality results at home is easier with these expert tips:

  • Keep the beer ice-cold for the lightest batter.

  • Use a thermometer to maintain oil temperature.

  • Fry in batches to prevent overcrowding.

  • Let fried fish rest on a wire rack, not paper towels.

  • Serve immediately for maximum crispness.

These small adjustments make a major difference in your crispy beer battered fish and chips.

Delicious Variations

Spicy Pub-Style Version

Add cayenne pepper or hot sauce to the batter.

Gluten-Free Option

Use a gluten-free flour blend and gluten-free beer.

Oven-Finished Method

After frying, place fish on a rack in a 200°F oven to keep warm while finishing batches.

Air Fryer Chips

Skip double-frying and cook fries in an air fryer at 400°F for a lighter option.

This crispy beer battered fish and chips recipe adapts beautifully to different preferences.

What to Serve with Beer Battered Fish and Chips

Complete your pub-style meal with:

  • Homemade tartar sauce

  • Malt vinegar

  • Coleslaw

  • Mushy peas

  • Lemon wedges

Storage & Reheating Tips

While crispy beer battered fish and chips are best served fresh, leftovers can be stored in an airtight container in the refrigerator for up to 2 days.

To reheat:

  • Oven at 375°F for 8–10 minutes

  • Air fryer at 350°F for 4–6 minutes

Avoid microwaving—it softens the batter and ruins that crispy texture.

Common Mistakes to Avoid

Even simple fried recipes have pitfalls:

  • Oil not hot enough (leads to greasy coating)

  • Warm beer (reduces crispiness)

  • Skipping the flour dredge

  • Overcrowding the fryer

  • Not drying the fish thoroughly

Avoiding these mistakes ensures perfectly crispy beer battered fish and chips every time.

Frequently Asked Questions

1. What’s the best fish for beer battered fish and chips?

Cod and haddock are the top choices because they’re firm, mild, and flaky.

2. Can I make the batter ahead of time?

It’s best to prepare the batter right before frying to keep the carbonation active.

3. Why is my batter not crispy?

Oil temperature may be too low, or the beer may not have been cold enough.

4. Can I bake instead of fry?

Traditional crispy beer battered fish and chips require frying for authentic texture, though you can air fry for a lighter version.

5. What oil is best for frying?

Neutral oils like vegetable, canola, or peanut oil work best.

Final Thoughts

This Crispy Beer Battered Fish and Chips (Pub-Style Recipe) brings authentic pub flavor straight to your kitchen. With its golden, crunchy coating and tender flaky fish, it’s the kind of meal that feels special yet approachable.

Whether you’re planning a cozy Friday night dinner, hosting friends, or simply craving classic comfort food, this crispy beer battered fish and chips recipe delivers every single time. Master the technique once, and you’ll never need takeout again.

Ground Beef Baked Tacos

If you’re looking for a dinner that’s easy, crowd-pleasing, and guaranteed to disappear fast, these Ground Beef Baked Tacos are exactly what you need. They’re crispy on the outside, loaded with seasoned ground beef and melty cheese on the inside, and baked to golden perfection in the oven. No messy stovetop frying, no standing over a skillet flipping shells—just assemble, bake, and enjoy.

Ground Beef Baked Tacos have quickly become a staple in my kitchen because they combine the bold, comforting flavors of classic tacos with the convenience of oven baking. They’re perfect for busy weeknights, casual get-togethers, or even meal prep. Plus, the oven method ensures every taco comes out evenly crispy and delicious.

Why You’ll Love These Ground Beef Baked Tacos

There’s a lot to love about this recipe, especially if you’re feeding a family or hosting taco night.

  • Crispy shells without frying

  • Evenly melted cheese in every bite

  • Hands-off oven cooking

  • Perfect for feeding a crowd

  • Easy to customize with toppings

Unlike traditional tacos that can fall apart or get soggy, Ground Beef Baked Tacos hold their shape beautifully. The cheese melts into the seasoned beef, helping bind everything together while the shells crisp up in the oven.

Ingredients for Ground Beef Baked Tacos

Here’s what you’ll need to make this easy baked taco recipe:

  • 1 pound ground beef (80/20 recommended)

  • 1 small yellow onion, finely diced

  • 2 cloves garlic, minced

  • 1 packet taco seasoning (or 2 tablespoons homemade)

  • ½ cup tomato sauce or salsa

  • 8–10 hard taco shells

  • 2 cups shredded Mexican blend cheese (or cheddar)

  • Optional toppings: shredded lettuce, diced tomatoes, sour cream, jalapeños, cilantro

Ingredient Notes & Substitutions

Choosing the right ground beef makes a difference. I recommend 80/20 because it delivers flavor without being overly greasy. If you prefer leaner meat, 90/10 works too—just consider adding a splash of olive oil while cooking.

Shredding your own cheese is worth the extra step. Pre-shredded cheese contains anti-caking agents that can prevent smooth melting. For extra flavor, try pepper jack or a sharp cheddar.

You can also swap ground beef for ground turkey, ground chicken, or even plant-based crumbles for a vegetarian-friendly version. Ground Beef Baked Tacos are incredibly versatile.

Step-by-Step Instructions

1. Cook the Ground Beef

Preheat your oven to 400°F. In a large skillet over medium heat, cook the ground beef and diced onion until the beef is browned and fully cooked. Drain excess grease if necessary.

2. Add Seasoning

Stir in minced garlic and cook for 30 seconds. Add taco seasoning and tomato sauce (or salsa), stirring until fully combined. Let the mixture simmer for 3–5 minutes until slightly thickened.

This step ensures the beef is flavorful and not watery, which helps keep your Ground Beef Baked Tacos crisp in the oven.

3. Assemble the Tacos

Place taco shells upright in a baking dish. Add a small layer of shredded cheese to the bottom of each shell (this prevents sogginess), then spoon in the seasoned beef mixture. Top with more cheese.

4. Bake to Crispy Perfection

Bake for 10–12 minutes, or until the cheese is melted and the shells are golden and crispy. Keep an eye on them to prevent over-browning.

Tips for Perfect Ground Beef Baked Tacos

Want restaurant-quality results? Keep these tips in mind:

  • Don’t overfill the shells—this helps them stay upright.

  • Add cheese to the bottom of the shell first to create a moisture barrier.

  • Use a baking dish that holds shells snugly to prevent tipping.

  • Serve immediately for maximum crispiness.

Small details like these make a big difference in the final texture of your Ground Beef Baked Tacos.

Delicious Variations

Cheesy Queso Baked Tacos

Drizzle queso over the beef before adding the final cheese layer.

Spicy Baked Tacos

Add diced jalapeños or a pinch of cayenne to the beef mixture.

Black Bean & Beef Tacos

Mix in ½ cup black beans for extra protein and texture.

Low-Carb Option

Use low-carb taco shells or serve the baked filling in lettuce cups.

Ground Beef Baked Tacos can easily be tailored to your family’s preferences.

What to Serve with Ground Beef Baked Tacos

Complete your taco night with delicious sides:

  • Mexican rice

  • Refried beans

  • Street corn (elote-style)

  • Guacamole and chips

  • Fresh salsa and pico de gallo

Storage & Reheating

If you have leftovers, store Ground Beef Baked Tacos in an airtight container in the refrigerator for up to 3 days.

To reheat:

  • Oven at 350°F for 8–10 minutes

  • Air fryer at 350°F for 3–5 minutes

Avoid microwaving if possible—it softens the shells. Reheating in the oven helps restore crispiness.

For meal prep, store the beef mixture separately and assemble fresh before baking.

Common Mistakes to Avoid

Even simple recipes can have pitfalls:

  • Overfilling taco shells

  • Using watery salsa without reducing it

  • Skipping the bottom cheese layer

  • Overbaking until shells burn

Being mindful of these details ensures perfectly crispy Ground Beef Baked Tacos every time.

Frequently Asked Questions

1. Can I make Ground Beef Baked Tacos ahead of time?

Yes. Prepare the beef mixture in advance and store it separately. Assemble and bake when ready to serve.

2. Can I freeze baked tacos?

It’s best to freeze the beef filling only. Taco shells may lose crispness after freezing.

3. How do I keep tacos from tipping over?

Use a snug baking dish that holds shells upright and close together.

4. Can I use soft tortillas instead?

Yes! Fold soft tortillas around the filling and bake slightly longer for crispy edges.

5. What cheese melts best?

Freshly shredded cheddar or a Mexican blend melts beautifully in Ground Beef Baked Tacos.

Final Thoughts

These Ground Beef Baked Tacos are everything taco night should be—crispy, cheesy, flavorful, and incredibly easy. Baking them in the oven simplifies the process while delivering perfectly melted cheese and crunchy shells every single time.

Whether you’re feeding picky eaters, hosting friends, or simply craving a comforting dinner, this recipe checks all the boxes. Once you try these Ground Beef Baked Tacos, they’ll quickly earn a permanent spot in your weekly meal rotation. 🌮

Creamy Cowboy Soup – Easy Cheesy One-Pot Recipe

If you’re searching for the ultimate comfort food dinner that’s hearty, cheesy, and incredibly easy to make, this Creamy Cowboy Soup – Easy Cheesy One-Pot Recipe checks every box. Packed with seasoned ground beef, tender potatoes, sweet corn, hearty beans, and a luxuriously creamy, cheesy broth, this soup is bold, filling, and guaranteed to satisfy even the hungriest crowd.

What makes this Creamy Cowboy Soup truly special is its balance of rustic flavors and creamy richness. It has that classic “cowboy-style” heartiness—protein-packed and stick-to-your-ribs satisfying—but the addition of cream and melted cheese takes it to a whole new level. Best of all? It comes together in just one pot, making cleanup a breeze.

Why You’ll Love This Creamy Cowboy Soup

This easy cheesy one-pot recipe is more than just another soup—it’s a full meal in a bowl. Here’s why it deserves a spot in your weekly dinner rotation:

  • One-pot convenience – less mess, less cleanup

  • Family-friendly flavors – creamy, cheesy, and comforting

  • Budget-conscious ingredients – pantry staples shine

  • Perfect for meal prep – reheats beautifully

  • Customizable heat level – mild or spicy, your choice

Creamy Cowboy Soup is the kind of recipe you’ll turn to again and again when you want something dependable, cozy, and guaranteed to please.

Ingredient Notes & Helpful Substitutions

Ground beef gives Creamy Cowboy Soup its classic cowboy flavor, but you can easily swap in ground turkey or even ground sausage for a flavor twist. If you prefer a slightly smoky note, try using half beef and half chorizo.

Russet potatoes work best because they soften and naturally thicken the soup. Yukon Gold potatoes are another excellent choice if you want a creamier texture. For a lighter version, substitute half-and-half for heavy cream, though the broth won’t be quite as rich.

Cheddar cheese is the star of the creamy base. I recommend shredding your own cheese for the smoothest melt—pre-shredded cheese often contains anti-caking agents that affect texture.

Step-by-Step Instructions

1. Brown the Beef

In a large Dutch oven or heavy soup pot, cook the ground beef over medium heat until fully browned. Break it up with a wooden spoon as it cooks. Drain excess grease if necessary.

2. Build the Flavor Base

Add diced onion to the pot and sauté for 3–4 minutes until softened. Stir in garlic and cook for 30 seconds until fragrant. These aromatics create the deep, savory base that makes Creamy Cowboy Soup so irresistible.

3. Add the Hearty Ingredients

Stir in potatoes, corn, kidney beans, diced tomatoes, beef broth, chili powder, smoked paprika, salt, and pepper. Bring everything to a gentle boil, then reduce heat and simmer for 15–20 minutes, or until potatoes are fork-tender.

4. Make It Creamy & Cheesy

Reduce heat to low and stir in heavy cream. Slowly add shredded cheddar cheese, stirring constantly until melted and smooth. Let the soup simmer for another 5 minutes until slightly thickened.

Tips for Perfect Creamy Cowboy Soup

To make sure your Creamy Cowboy Soup turns out perfectly every time, keep these expert tips in mind:

  • Cut potatoes evenly for consistent cooking.

  • Don’t boil after adding cream—gentle heat prevents curdling.

  • Add cheese gradually to avoid clumps.

  • Taste before serving and adjust seasoning as needed.

For an even thicker consistency, mash a few potato pieces directly into the broth before adding cream and cheese.

Delicious Variations

One of the best things about this easy cheesy one-pot recipe is how adaptable it is.

Spicy Cowboy Soup

Add diced jalapeños, red pepper flakes, or extra chili powder for a kick.

Bacon Cheeseburger Version

Cook chopped bacon first, then brown the beef in the bacon drippings for extra smoky flavor.

Slow Cooker Method

Brown beef and onions first, then add all ingredients except cream and cheese to a slow cooker. Cook on low for 6–7 hours. Stir in dairy during the final 30 minutes.

Tex-Mex Twist

Swap kidney beans for black beans and garnish with tortilla strips, sour cream, and avocado.

These variations keep Creamy Cowboy Soup exciting and customizable.

What to Serve with Creamy Cowboy Soup

While this soup is hearty enough to stand alone, pairing it with the right sides makes it even more comforting:

  • Warm cornbread with honey butter

  • Crusty artisan bread

  • Side salad with ranch dressing

  • Buttermilk biscuits

  • Grilled cheese sandwiches

Storage & Reheating

Creamy Cowboy Soup stores beautifully, making it ideal for leftovers and meal prep. Allow it to cool completely before transferring to airtight containers. Refrigerate for up to 4 days.

To reheat:

  • Warm gently on the stovetop over medium-low heat.

  • Add a splash of milk or broth if it thickens too much.

You can freeze this soup for up to 2 months. For best results, freeze before adding cream and cheese, then stir them in fresh when reheating.

Common Mistakes to Avoid

Even simple recipes can go wrong. Here’s what to watch out for:

  • Adding dairy at high heat

  • Overcooking potatoes

  • Forgetting to drain beans

  • Under-seasoning

Attention to these small details ensures your Creamy Cowboy Soup comes out rich, smooth, and perfectly balanced.

Frequently Asked Questions

1. Can I make Creamy Cowboy Soup ahead of time?

Yes! In fact, the flavors deepen overnight, making it even more delicious the next day.

2. Can I freeze Creamy Cowboy Soup?

Absolutely. Freeze without dairy for best texture, then add cream and cheese when reheating.

3. How do I make it lighter?

Use ground turkey and substitute half-and-half for heavy cream.

4. Is this recipe gluten-free?

Yes, this Creamy Cowboy Soup contains no flour. Just double-check canned ingredients to be safe.

5. Can I use different beans?

Definitely. Pinto beans or black beans work beautifully in this recipe.

Final Thoughts

This Creamy Cowboy Soup – Easy Cheesy One-Pot Recipe is everything comfort food should be: hearty, creamy, cheesy, and incredibly satisfying. It’s the kind of dinner that fills your kitchen with amazing aromas and brings everyone to the table without hesitation.

Whether you’re cooking for your family, meal prepping for the week, or looking for a cozy cold-weather favorite, Creamy Cowboy Soup delivers every single time. Simple ingredients, bold flavor, and one pot—that’s a recipe worth keeping on repeat.

Creamy Cowboy Soup

If you’re craving a bowl of pure comfort that sticks to your ribs and warms you from the inside out, this Creamy Cowboy Soup is exactly what you need. Packed with seasoned ground beef, tender potatoes, sweet corn, hearty beans, and a luxuriously creamy broth, this soup is bold, filling, and completely satisfying. It’s the kind of meal that feels like it came straight from a ranch kitchen—rustic, generous, and full of flavor.

Creamy Cowboy Soup has become one of my favorite one-pot dinners for busy weeknights. It’s simple to prepare, budget-friendly, and feeds a crowd without much fuss. Plus, the creamy base takes traditional cowboy soup to a whole new level, giving it that velvety richness that makes every spoonful irresistible.

Why You’ll Love This Creamy Cowboy Soup

There are plenty of hearty soup recipes out there, but Creamy Cowboy Soup stands out for so many reasons:

  • Hearty and filling – loaded with protein, vegetables, and creamy broth

  • One-pot convenience – easy cleanup and simple prep

  • Family-friendly flavors – mild, comforting, and customizable

  • Perfect for meal prep – tastes even better the next day

  • Budget-conscious ingredients – pantry staples come together beautifully

This creamy cowboy soup is comfort food at its finest. The combination of beef, beans, potatoes, and cream creates a balanced, satisfying dish that works year-round—but it’s especially perfect during fall and winter.

Ingredients for Creamy Cowboy Soup

Here’s everything you’ll need to make this rich and hearty creamy cowboy soup:

  • 1 pound ground beef

  • 1 small yellow onion, diced

  • 3 cloves garlic, minced

  • 3 medium russet potatoes, peeled and diced

  • 1 (15-ounce) can corn, drained

  • 1 (15-ounce) can kidney beans, drained and rinsed

  • 1 (15-ounce) can diced tomatoes (with juices)

  • 3 cups beef broth

  • 1 cup heavy cream

  • 1 cup shredded cheddar cheese

  • 1 teaspoon chili powder

  • ½ teaspoon smoked paprika

  • Salt and black pepper to taste

  • 1 tablespoon olive oil

Ingredient Notes & Smart Substitutions

The beauty of Creamy Cowboy Soup is how flexible it is. Ground beef provides classic cowboy flavor, but ground turkey works if you want something lighter. Russet potatoes are ideal because they soften beautifully and help thicken the broth slightly.

Heavy cream gives this creamy cowboy soup its signature richness. If you prefer something lighter, half-and-half or even whole milk can work—though the texture will be slightly thinner. For extra depth, sharp cheddar cheese adds bold flavor, while mild cheddar keeps it kid-friendly.

Want to boost nutrition? Add diced carrots, celery, or even bell peppers. This recipe is forgiving and adapts well to what you have on hand.

Step-by-Step Instructions

1. Brown the Beef

In a large Dutch oven or heavy-bottomed pot, heat olive oil over medium heat. Add ground beef and cook until browned, breaking it apart as it cooks. Drain excess grease if necessary.

2. Sauté Aromatics

Add diced onion and cook for 3–4 minutes until softened. Stir in garlic and cook for another 30 seconds until fragrant. This step builds the foundational flavor for your creamy cowboy soup.

3. Add Vegetables & Broth

Stir in diced potatoes, corn, kidney beans, diced tomatoes, beef broth, chili powder, smoked paprika, salt, and pepper. Bring to a gentle boil, then reduce heat and simmer for 15–20 minutes, or until potatoes are fork-tender.

4. Make It Creamy

Lower the heat and stir in heavy cream and shredded cheddar cheese. Allow the cheese to melt completely, creating a smooth, creamy texture. Simmer for another 5 minutes until slightly thickened.

Tips for Perfect Creamy Cowboy Soup

To ensure your creamy cowboy soup turns out perfectly every time, keep these tips in mind:

  • Cut potatoes into uniform pieces for even cooking.

  • Simmer gently—boiling too hard can cause dairy to separate.

  • Add cheese gradually and stir continuously to prevent clumping.

  • Taste and adjust seasoning at the end for balanced flavor.

For even thicker soup, mash a few potatoes directly in the pot before adding the cream. This adds body without extra flour or cornstarch.

Delicious Variations

Spicy Cowboy Soup

Add diced jalapeños or extra chili powder for a bold kick.

Bacon Lover’s Version

Cook chopped bacon first, then brown beef in the bacon drippings for smoky richness.

Slow Cooker Method

Brown beef and onions first, then transfer everything except cream and cheese to a slow cooker. Cook on low for 6–7 hours. Stir in dairy during the last 30 minutes.

Tex-Mex Twist

Add taco seasoning and top with tortilla strips, sour cream, and avocado slices.

These variations keep creamy cowboy soup exciting and adaptable for different tastes.

What to Serve with Creamy Cowboy Soup

Creamy Cowboy Soup is hearty on its own, but pairing it with the right sides makes it even better:

  • Warm cornbread with honey butter

  • Crusty artisan bread

  • Side salad with ranch dressing

  • Buttermilk biscuits

  • Grilled cheese sandwiches

Storage & Reheating

Store leftover creamy cowboy soup in an airtight container in the refrigerator for up to 4 days. The flavors deepen overnight, making leftovers even better.

To reheat:

  • Warm gently on the stovetop over medium-low heat.

  • Add a splash of broth or milk if it thickens too much.

This soup also freezes well for up to 2 months. For best results, freeze before adding cream and cheese, then stir them in when reheating.

Common Mistakes to Avoid

Even a simple creamy cowboy soup recipe can go wrong if you’re not careful:

  • Adding cream at high heat (can cause curdling)

  • Overcooking potatoes until mushy

  • Not draining beans (can affect flavor and texture)

  • Under-seasoning

Taking your time with seasoning and temperature control ensures a smooth, flavorful result.

Frequently Asked Questions

1. Can I make Creamy Cowboy Soup ahead of time?

Yes! It tastes even better the next day as the flavors meld together.

2. Can I freeze Creamy Cowboy Soup?

Absolutely. Freeze before adding dairy for best texture, then add cream and cheese when reheating.

3. How can I make it lighter?

Use ground turkey and substitute half-and-half or whole milk for heavy cream.

4. Is Creamy Cowboy Soup gluten-free?

Yes, as written, it contains no flour. Just double-check canned ingredients for hidden gluten.

5. Can I use different beans?

Definitely. Pinto beans or black beans work beautifully in this recipe.

Final Thoughts

There’s something undeniably comforting about a big pot of Creamy Cowboy Soup simmering on the stove. It’s hearty, flavorful, creamy, and deeply satisfying—the kind of meal that brings everyone to the table.

Whether you’re cooking for your family, meal prepping for the week, or looking for the ultimate cozy dinner idea, this creamy cowboy soup delivers every single time. It’s rustic comfort food with a creamy twist—and once you try it, it just might become a permanent staple in your recipe rotation.

Crispy Bang Bang Chicken with Spicy Peanut Sauce Magic

If you’re craving something crispy, saucy, sweet, spicy, and completely addictive, this Crispy Bang Bang Chicken with Spicy Peanut Sauce Magic is about to become your new go-to dinner. Imagine golden, crunchy chicken bites coated in a creamy, sweet-heat sauce with a rich peanut twist that takes it over the top. It’s the kind of dish that tastes like it came from your favorite restaurant—but it’s surprisingly simple to make at home.

This Crispy Bang Bang Chicken with Spicy Peanut Sauce Magic is perfect for weeknight dinners, game-day gatherings, or whenever you want to impress family and friends with bold flavors. The combination of crispy coating and velvety spicy peanut sauce creates a flavor explosion in every bite.

Why You’ll Love This Crispy Bang Bang Chicken with Spicy Peanut Sauce Magic

There are countless chicken recipes out there, but this one truly stands out. Here’s why:

  • Ultra crispy texture thanks to a perfectly seasoned coating

  • Creamy, sweet, and spicy peanut sauce with balanced heat

  • Easy ingredients you can find at any grocery store

  • Perfect as an appetizer or main dish

  • Family-friendly with customizable spice levels

The magic lies in the contrast—crunchy exterior, juicy interior, and silky sauce. Every bite delivers layers of flavor that keep you coming back for more.

Ingredients for Crispy Bang Bang Chicken with Spicy Peanut Sauce Magic

For the Chicken:

  • 1 ½ pounds boneless, skinless chicken breasts (cut into bite-sized pieces)

  • 1 cup buttermilk

  • 1 cup all-purpose flour

  • ½ cup cornstarch

  • 1 teaspoon garlic powder

  • 1 teaspoon paprika

  • ½ teaspoon cayenne pepper

  • Salt and black pepper to taste

  • Oil for frying (vegetable or canola)

For the Spicy Peanut Sauce:

  • ½ cup mayonnaise

  • ¼ cup creamy peanut butter

  • 2 tablespoons sweet chili sauce

  • 1–2 tablespoons sriracha (adjust to taste)

  • 1 tablespoon honey

  • 1 teaspoon rice vinegar

  • 1 teaspoon soy sauce

Ingredient Notes & Substitutions

Using buttermilk helps tenderize the chicken and ensures juicy results. If you don’t have buttermilk, simply mix one cup of milk with one tablespoon of lemon juice or vinegar and let it sit for five minutes.

The combination of flour and cornstarch is key for extra crispiness. Cornstarch lightens the coating and creates that irresistible crunch when fried.

For the spicy peanut sauce magic, creamy peanut butter works best. Natural peanut butter can separate and affect the texture, so stir thoroughly if using it. Adjust the sriracha depending on your heat preference—this recipe is flexible and forgiving.

Step-by-Step Instructions

1. Marinate the Chicken

Place the chicken pieces in a bowl with buttermilk, salt, and pepper. Let them marinate for at least 30 minutes (or up to 4 hours in the refrigerator).

2. Prepare the Coating

In a separate bowl, mix flour, cornstarch, garlic powder, paprika, cayenne, salt, and pepper.

3. Heat the Oil

Heat oil in a deep skillet or Dutch oven to 350°F. Maintaining the correct temperature is crucial for crispy bang bang chicken with spicy peanut sauce magic.

4. Dredge and Fry

Remove chicken from buttermilk, dredge in the flour mixture, and press firmly to coat. Fry in batches for 4–5 minutes until golden brown and cooked through (internal temp 165°F).

5. Make the Sauce

Whisk together mayonnaise, peanut butter, sweet chili sauce, sriracha, honey, rice vinegar, and soy sauce until smooth and creamy.

6. Toss and Serve

Toss the hot crispy chicken in the spicy peanut sauce or drizzle it generously on top for maximum crunch retention.

Tips for Perfect Crispy Bang Bang Chicken

To achieve restaurant-quality results at home, keep these tips in mind:

  • Don’t overcrowd the pan — fry in batches to keep oil temperature stable.

  • Use a thermometer to maintain 350°F.

  • Let fried chicken rest on a wire rack instead of paper towels to preserve crispiness.

  • Toss in sauce right before serving for best texture.

These small details make a big difference in your final dish.

Delicious Variations

Want to switch things up? Try these creative twists:

Air Fryer Version

Spray coated chicken with cooking spray and air fry at 400°F for 12–15 minutes, flipping halfway.

Baked Version

Bake at 425°F on a wire rack for 20–25 minutes until crispy and cooked through.

Extra Spicy Version

Add crushed red pepper flakes or a dash of hot sauce to the spicy peanut sauce magic.

Lighter Version

Use Greek yogurt in place of some mayonnaise for a protein boost.

What to Serve with Crispy Bang Bang Chicken with Spicy Peanut Sauce Magic

This dish pairs beautifully with:

  • Steamed jasmine rice

  • Coconut rice

  • Asian slaw

  • Garlic noodles

  • Roasted broccoli

  • Lettuce wraps for a low-carb option

Storage & Reheating Tips

If you have leftovers (which is rare!), store the chicken and sauce separately in airtight containers in the refrigerator for up to 3 days.

To reheat:

  • Oven at 375°F for 8–10 minutes

  • Air fryer at 350°F for 4–5 minutes

Avoid microwaving if possible—it softens the crispy coating. Reheat the sauce gently and toss just before serving.

Common Mistakes to Avoid

Even simple recipes can go wrong. Here’s what to watch out for:

  • Oil not hot enough (leads to greasy chicken)

  • Skipping cornstarch (less crispy texture)

  • Overcrowding the pan

  • Tossing too early in sauce

Paying attention to these details ensures your Crispy Bang Bang Chicken with Spicy Peanut Sauce Magic turns out perfect every time.

Frequently Asked Questions

1. Can I make Crispy Bang Bang Chicken with Spicy Peanut Sauce Magic ahead of time?

Yes, you can fry the chicken ahead and store it separately. Reheat in the oven or air fryer before tossing in sauce.

2. Is this recipe very spicy?

It has a mild-to-medium heat level. Adjust the sriracha to control spiciness.

3. Can I use chicken thighs instead of breasts?

Absolutely! Boneless, skinless thighs are juicier and work beautifully.

4. Can I make the sauce dairy-free?

Yes. The sauce contains no dairy unless your mayo does. Choose a dairy-free mayo if needed.

5. What oil is best for frying?

Use neutral oils like vegetable, canola, or peanut oil for best results.

Final Thoughts

This Crispy Bang Bang Chicken with Spicy Peanut Sauce Magic truly lives up to its name. It’s crispy, creamy, sweet, spicy, and completely crave-worthy. Whether you’re serving it as an appetizer, main course, or party snack, this dish delivers bold flavor and satisfying crunch every single time.

Once you make this at home, you may never order it out again. The balance of textures and the rich, spicy peanut sauce magic make it unforgettable—and surprisingly easy to master in your own kitchen.

Give it a try tonight and watch it disappear from the table in minutes!